
Originally posted by rzerob
View Post
-
Gotcha, yea its good for me since I'll need them to put AC in the e36, but bad for you since I never did the mod. Oh well. -
I have everything to do the mod. So just a little more work on my end.How to remove, install or convert to pop out windows
http://www.r3vlimited.com/board/showthread.php?t=297611
Could be better, could be worse.Comment
-
Good luck!Originally posted by rzerob View Post
Added a ground point next to the power block that'll be hidden by the wire covers since I got rid of both original ground points. I also added ground points on the outside of each front fender wall since I got rid of those too.

Nicked some power wires while I was doing some grinding at some point. Not sure when it happened. Oh well. I guess I'll have to make some new ones.

Finally totally finished welding, grinding, and stripping seam sealer.

Had a shandy showdown. They both tasted very similar but I think the shock top slightly edged out the leinenkugel. This is my preferred cold drink on a hot afternoon. Hefeweizen/beer with lemonade is very popular in western Europe in the summer. In Germany, where I first enjoyed it, it's know as "alster" or "radler".

Applied the first patches of filler. This is my first time using body filler on a car. I used to work construction over the summers in highschool and college and the contractor I worked for would have us use bondo to fill gaps in woodwork where we spliced in good wood instead of replacing a whole board because he was cheap. Eye opening experience.

How I left it last night. Seems like a combination of the orbital sander, and the foam flexible sanding block will be the best tools to use for sanding. Any other suggestions?

Comment
-
Cant wait to see how this engine bay will look when you're all done! SoCal Vintage is in October, and August is another big month for BMW this year with the Monterey Historics. Clocks ticking!Simon
Current Cars:
-1999 996.1 911 4/98 3.8L 6-Speed, 21st Century Beetle

Make R3V Great Again -2020Comment
-
My German mate said the same thing. When he was here I had him try a porter and he couldn't understand why there was coffee in the beer. He preferred a nice coors light. Maybe he was broken.Originally posted by Sh3rpak!ng View Post
Engine bay is looking sharp! I like the new grounding posts. Good thinking.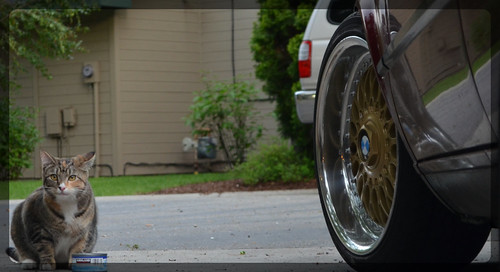
Comment
-
Am I crazy to believe that I'll have it somewhat presentable for bimmerfest? It'll definitely be finished for the other events.Originally posted by 2mAn View Post
Your German friend is definitely broken. While I do kinda agree with his comment on a porter, I don't know a single one of my German friends who wouldn't spit a coors light on the ground (myself included). There is a huge difference between the shandy/alster/radler and a coors light!Originally posted by ST1G View Post
Thanks man! I't been a little nerve-racking trying to think ahead enough to foresee the need for any brackets, or other welded/fabbed add-ons for the bay so I don't have to ruin the new paint job to add stuff afterwards.Comment
-
Nice job! ! Your bronzit will sure help this color to be accepted haha!E30 now S52
2008 Suburban LTZ (Family and TT hauler)
325xiT (Sold)
sigpicComment
-
I might be stealing that new ground idea.Originally posted by priapismOriginally posted by shamesonComment
-
Comment
-
Doesn't look like much but I think I am starting to see things take shape which is exciting. Also started to get a much better feel for the body filler mixing, application, sanding which is improving the experience quite a bit. I think at first I was mixing way to much hardner because the filler was curing before I could even use a fraction of what I mixed. Felt like it was setting in like 3-4 minutes.

Can't wait to spray some paint on here to see the shape!

Comment
-
-
haha "finished"Originally posted by jpod999 View Post but yea me too.
Attacked the body filler full force last night. A good buddy of mine with some substantial past body shop experience came and gave me a hand doing as much work as I would've done in a night which effectively puts me a day ahead! Thanks again Gabe! Passenger side is done save for 3 small touch ups. Driver side was smeared last night and hopefully I'll finish tonight. There is rain on the forecast for the next few days so I'll likely have to delay any painting since it'll be too humid. Instead, I'll change gears (pun intended) and finish transmission detents, install brakes, install clutch, change oil pan gasket, pull the AC compressor, form brake lines and a couple other odds and ends.
Also chose a color for the bay. No sneak peaks until its painted :PComment
-
Put the engine on the stand so I can take care of the oil pan gasket for the 4th? time. Got an oem BMW gasket this time, we'll see if it makes a difference. Also pulled the AC compressor and bracket.

I hate posting these photos because it doesn't really look like I've done much. But I spent 2 hours straight just sanding down the first pass of filler on the driver side, and another hour applying more to little spots here and there. It's really close. The feeling is like when you're 8 and it's Christmas eve, except x10.

Double checking crank bolt torque I stuck a bolt in the flywheel side to keep it from turning. Brain dead moment there. I'll make a jig to hold it. Luckily the crank is much harder than the bolt. The bolt spun back out easily.

And lastly I had a visitor.

Comment
-
Finally an update I can be proud of. Boring stuff first.
I was going to use a cheap HF gun to spray primer, and a slightly more expensive "cheap" husky gun to do base and clear, but then I stopped myself. After all the obsessively detailed work I've done here, I was going to cheap out on possibly the most important step and risk ruining my hard work?? No way. So I got myself the devilbiss starting line kit. Not terribly expensive, and probably not an "amazing" set, but definitely way above HF or husky. Furthermore, I've got quite a bit more painting to do between the exterior parts and my e36 so I think this was probably a smart move.

Some brake line clamps

Knocked out a stud from the exhaust manifold before I forgot. This is the only stud I can't bolt from below. I'll use a nut and bolt to tighten it from above.

Finished the filler. What a pita. If I'd know how much work this was going to involve, I don't think I would've take it this far. In hindsight, I should've just stripped the seam sealer, used the filler sparingly to hide the welds and called it a day. But it sure looks good now.

Primed

Dusted with some black spray to check my wetsanding before color.


Tarped my whole garage to protect all my tools and stuff from overspray. I hate it and can't wait to tear it all down. Feels suffocating and claustrophobic.

After wetsanding primer for days and making a mess all over the floor


Purists cover your eyes. There's some chrysler in my engine bay now. Sarsaparilla sage. It's a really beautiful color though in my opinion. After spending 2 hours looking at color chips debating over different shades of dark metallic colors, I kinda saw this one by accident and then could't un-see it.


Base coat

And clear coat. The lighting does not do it justice at all. I can't wait to see this in sunlight. It has a fantastic color shift from straight on to an angle. It goes very light when you look at it straight, and then looks quite dark from an angle. I love it. Started giggling when I saw it after the clear coat overspray cloud cleared.


Comment
-

 -
-
Comment