If this is your first visit, be sure to
check out the FAQ by clicking the
link above. You may have to register
before you can post: click the register link above to proceed. To start viewing messages,
select the forum that you want to visit from the selection below.
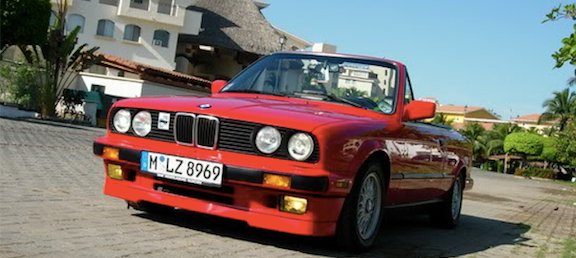
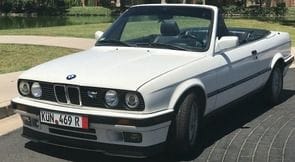
*!Build of the year candidate!* Strange PNW Build: E30+Volvo
Seen this thing in person. It's complete junk. Adam isnt doing any of the work himself.
JK JK JK
I love this thing, dude. Hurry up and finish this bishhhh!
LOL, my hands beg to differ.
Got the gauge in today. Info from the drive home (small sample set):
-When the right side of the needle touches the mid line my gauge reads 195°F
-When the left side of the needle is crossing the far edge of the mid line my gauge reads 205°F
-The hottest it read at any point on the way home (sitting at a light after chugging up Juanita Dr in an intentionally high gear) was 210°F. This is close to halfway between 12:00 mark and the next one up
-The lowest it read while coasting down the far side of Juanita Dr was 192°F
-It seems to like to live around 204°F
I’m going to just monitor it and see where it goes. I’ve got a bazillion Other things to try and get done before next Friday. I don’t feel like 204°-208° is too hot. I could be really wrong though.
Here’s a couple things I’ve gotten done while still trying to troubleshoot this temp issue.
My own home-brew, budget big brake kit:
Stock rotor/caliper
This pic is important because with this offset wheel on this particular car, I can’t run a spacer any thicker than 5mm
So, I measured the distance between the ball joint and the back of the rotor and started searching for something in the diameter I wanted (330mm) with a center bore larger than the E30’s (so I can use centering rings instead of machining our the rotors) and had a deep enough “hat” to push the rotor back towards the tie rod end.
Turns out 2014 Jeep Cherokee Sport rotors fit the bill. Available from AutoZone for +/-$75 each.
I used four piston Wilwood calipers bought from JEGS for $125 a piece (pads were an additional $50 and they have WAYYYYY too many compound options). Then I made some aluminum adapters on my CNC router and bolted them on. I bought Empi adapters to convert the 1/8” NPT opening on the calipers to M10 bubble flare ($28 a pair) and used some Volvo stainless brake lines I had around from a C30 (you might be able to use the stock E30 lines since they are M10 bubble flare, but the length is iffy)
Notes/disclaimers:
-Yes, I’m aware that it will upset the brake bias of the car. I’m ok with that. I don’t track it, but I LOVE big brakes (and I cannot lie)
-The pad surface is about 25% bigger than an E30’s, but it still only uses the outer 2/3 of the rotor. I’m ok with that too. I’m on a budget and clearances were tight. Plus, if you’re only gonna catch 2/3, it’s best to be the outer 2/3
-I need to put a bigger bore master cylinder in. There’s more travel in the pedal than I’d like. I’ve read there’s a 25mm upgrade that came OE on another BMW. I’m gonna look into that
-I don’t think brake fluid is supposed to look like this
That came out while bleeding the rears.
Next is something annoying, but simple. Defrost ducts:
You don’t think about stuff like that until only the center of your windshield defogs from air just passing up through holes in the dash. I still have to make the part that connects the heater box to this diverter, but it’s a start.
My hand built “hot work” station. This was the oven out of my house when we remodeled. I use an Eastwood powdercoat gun and a made a vacuu-forming jig
I basically have a wood frame to clamp the plastic in that fits in the shelf spots in the oven. Then I wired up a receptacle to a push button that turns on the shop vac when you push down on the frame.
Your water temps are on the high side. Are you using the stock 80*C thermostat? There are two colder versions than that which might help.
The brakes looks silly to me, especially with such little pad sweep.
I replaced the thermostat about three months ago with an 80*C. My stock one was broken in two and the car never got warm. Alas, it does appear to be a thermostat issue. I noticed a few other things that seemed weird, so I pulled the thermostat altogether and it doesn't budge over 150*. That seems like it means the rest of the cooling system is functioning fine.
*!Build of the year candidate!* Strange PNW Build: E30+Volvo
Spoiler time:
I’ve always wanted to build a hatch spoiler for this car. The first thing I did was make a template of the contour of the top of the hatch out of 1/4” MDF. Then, when I had it shaped the way I wanted, I made several copies with the table router to create a mold to do the top part of the spoiler.
Easiest way to make a part off this is to glue down some foil and spray it with PVA mold release.
Then I vacuum bagged a layup of two layers carbon and two CSM fiberglass layers.
Then I figured out about how much I wanted it to stick out and trimmed it to match the contour of the hatch opening. Adding holes to access the hatch mounts.
Next I masked off the top of the hatch. The tip here is to plan ahead. Lay down some double backed tape and mask over that. That will create space for adhesive later.
Next I laid down three layers of CSM fiberglass and while it was still wet I added the top layer.
Once dry, trim and check fit.
Next, tape off all the outside surfaces and add two part expanding foam. Then shape with razor knife and sandpaper (shapes easy)
Then I brushed on a layer or two of fiberglass resin to create a skin then bondo smooth
Next, mask off (again) all the outer surfaces and add multiple layers of masking tape around the edges. Then I gently (so it doesn’t crush the foam) vacuum bag two layers of carbon to the bottom.
The reason for multiple layers around the edge is so that you can grind the new carbon back around the perimeter until you get to the tape and the other surfaces will be safe.
Next comes a couple layers of clear gel coat. Interesting note: fiberglass resin is air inhibited. Meaning that it stays tacky when exposed to air so that you can add layers and have them stick to each other. In my experience, if you want a surface cure on your gel coat, you can spray PVA over the gel coat and it’ll seal the surface. Then when you sand the PVA will peel off.
Once it’s sanded flat, I clear coat with automotive clear to add UV protection.
Then it’s time to install. I use a combo of 3M tape (now stick) and urethane adhesive (long term stick).
Rinse, dry, repeat. The whole process took about a week of mornings and evenings in between trying to troubleshoot my cooling issues. It’s not perfect, but it sure is good good enough.
The breadth of your skillset seems limitless. I was proud of myself today for managing to remove my front valence without hurting myself.
Amazingly well done with the spoiler!
Thank you! Apparently the limit of my skillset is at E30 cooling systems. I may have it narrowed down, but I’m biting my tongue so I don’t jinx myself. I suppose by the time I’m done, I can add it to my repertoire.


Comment