Restoring the 2nd produced E30 318is !

Collapse
X
 
  • Time
  • Show
Clear All
new posts

  • kenshin86
    replied
    Originally posted by E30SPDFRK
    I think you somehow found the second produced 318is ever. They made one car in 2/89 (VIN AD00000), and 6 in 3/89 (AD00001-AD00006).

    Pretty awesome that you're fixing it up and keeping it on the road!
    Well thank you E30SPDFRK for your note !
    Below is the reply I got from BMW Group Classic confirming this, my car is the 2nd produced 318is !
    What a nice surprise after all those years :D
    I am going to modify the title of this thread to reflect this.
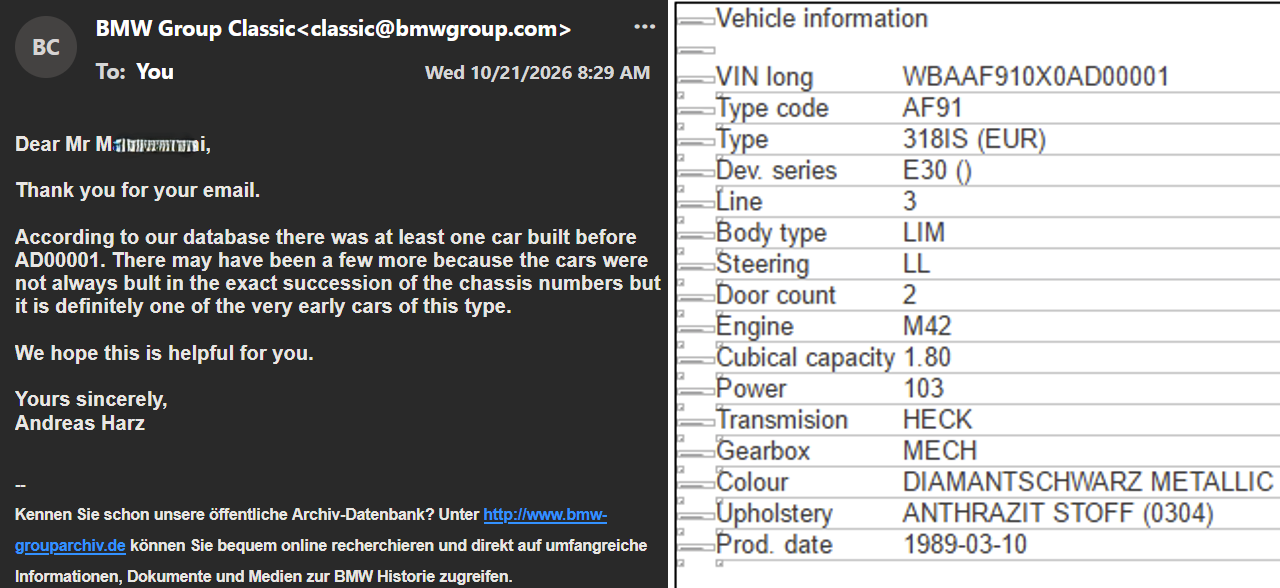


    And below is a nice database I found on realoem.com confirming the above:
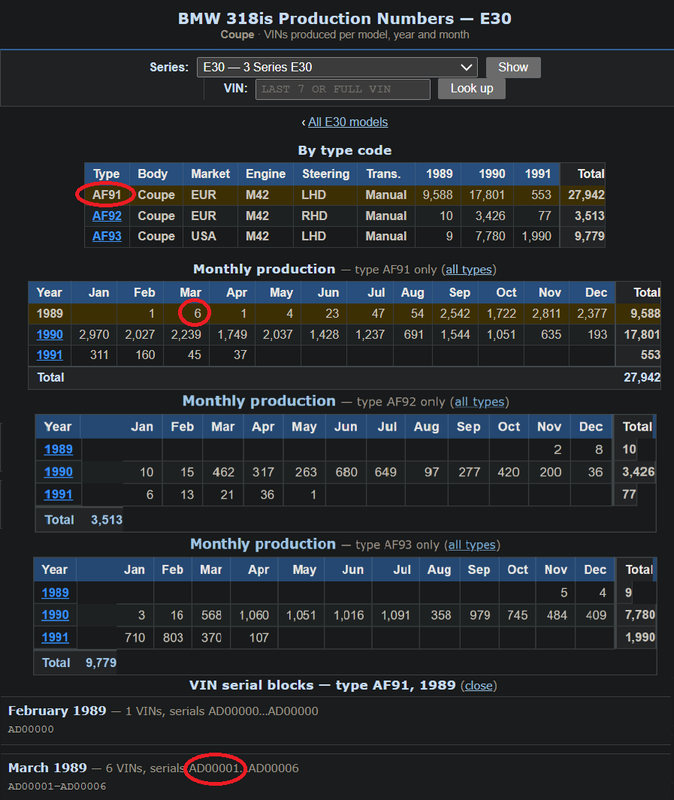
    Last edited by kenshin86; 10-28-2026, 11:00 AM.

    Leave a comment:


  • kenshin86
    replied
    Originally posted by E30SPDFRK
    I think you somehow found the second produced 318is ever. They made one car in 2/89 (VIN AD00000), and 6 in 3/89 (AD00001-AD00006).

    Pretty awesome that you're fixing it up and keeping it on the road!
    Oh my God I never thought of that !
    That's pretty interesting, I will try contacting BMW Group Classic to confirm this.
    Thank you for your note :D

    Leave a comment:


  • AWDBOB
    replied
    Just read this thread from the beginning- you've done a great job refreshing and enjoying the car over the years!

    Leave a comment:


  • E30SPDFRK
    replied
    I think you somehow found the second produced 318is ever. They made one car in 2/89 (VIN AD00000), and 6 in 3/89 (AD00001-AD00006).

    Pretty awesome that you're fixing it up and keeping it on the road!

    Leave a comment:


  • kenshin86
    replied
    Originally posted by Panici
    Did you use submersible rated hose for the in-tank fuel pump connection?
    I tried it with regular fuel injection hose and the outside was soft within a month.

    I ended up replacing it with submersible-rated Gates 27097 (3/8" ID)
    That's new to me, I will definitely look it up.
    Thanks Panici !

    Leave a comment:


  • Panici
    replied
    Did you use submersible rated hose for the in-tank fuel pump connection?
    I tried it with regular fuel injection hose and the outside was soft within a month.

    I ended up replacing it with submersible-rated Gates 27097 (3/8" ID)

    Leave a comment:


  • kenshin86
    replied
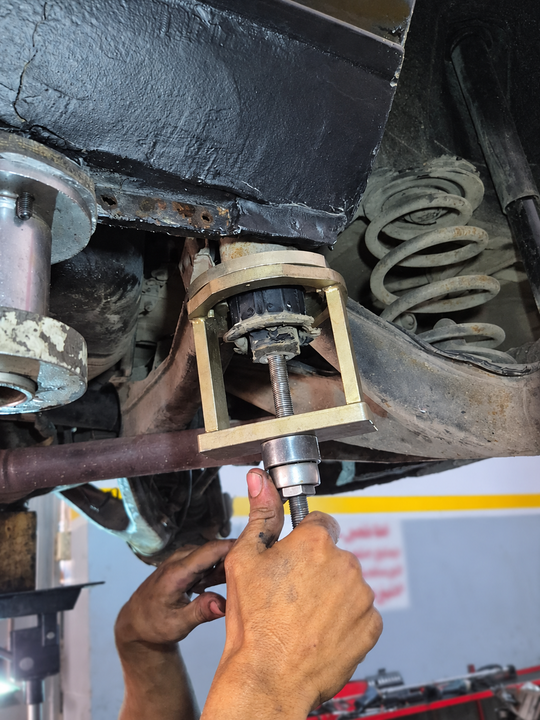
    - During my home country visit this summer, I got help from my sister's father-in-law to replace the subframe bushings, a job I always feared to tackle. He repairs BMWs since the 1970s and have a special press designed specifically for this job:


    In a matter of minutes, the old bushing was out and the new one was in while the car was on post lift.
    Without this tool, I was planning to use the below linked method, using a 5/8" bolt:
    Remove a stuck, seized rear subframe bushing on a BMW E30 - technique for oxidized bushings that will not budge.

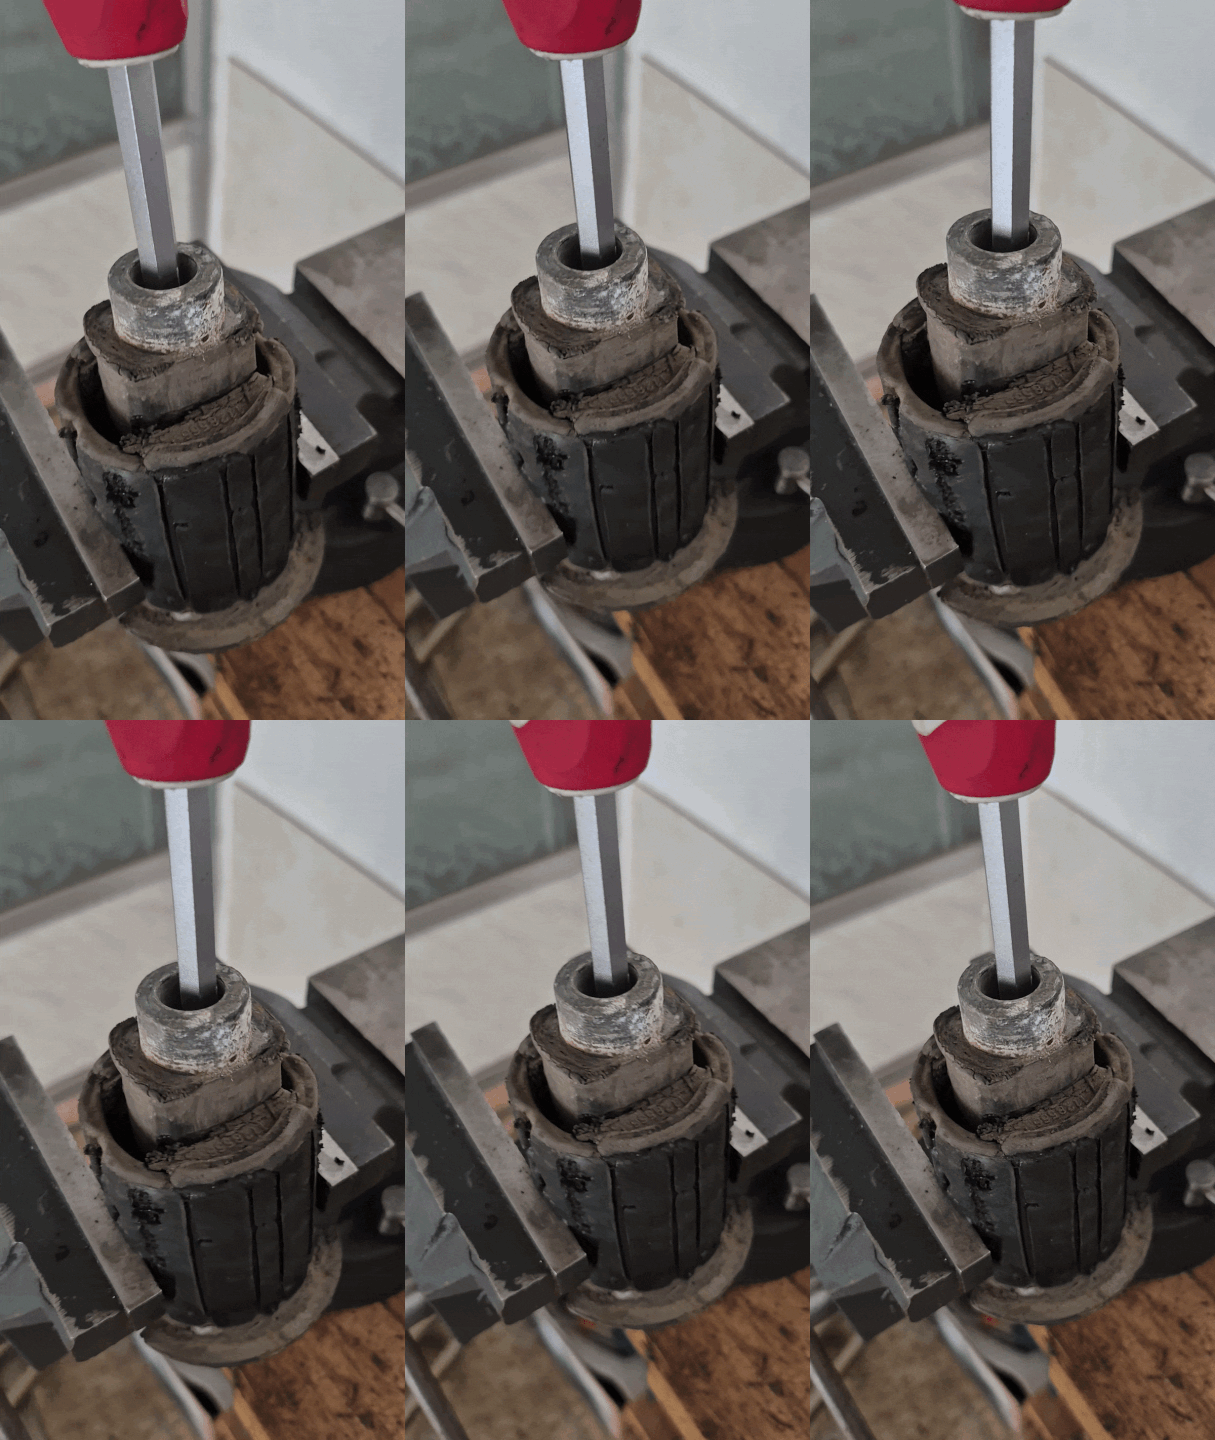
    In the below gif you can see the condition of the old ones:


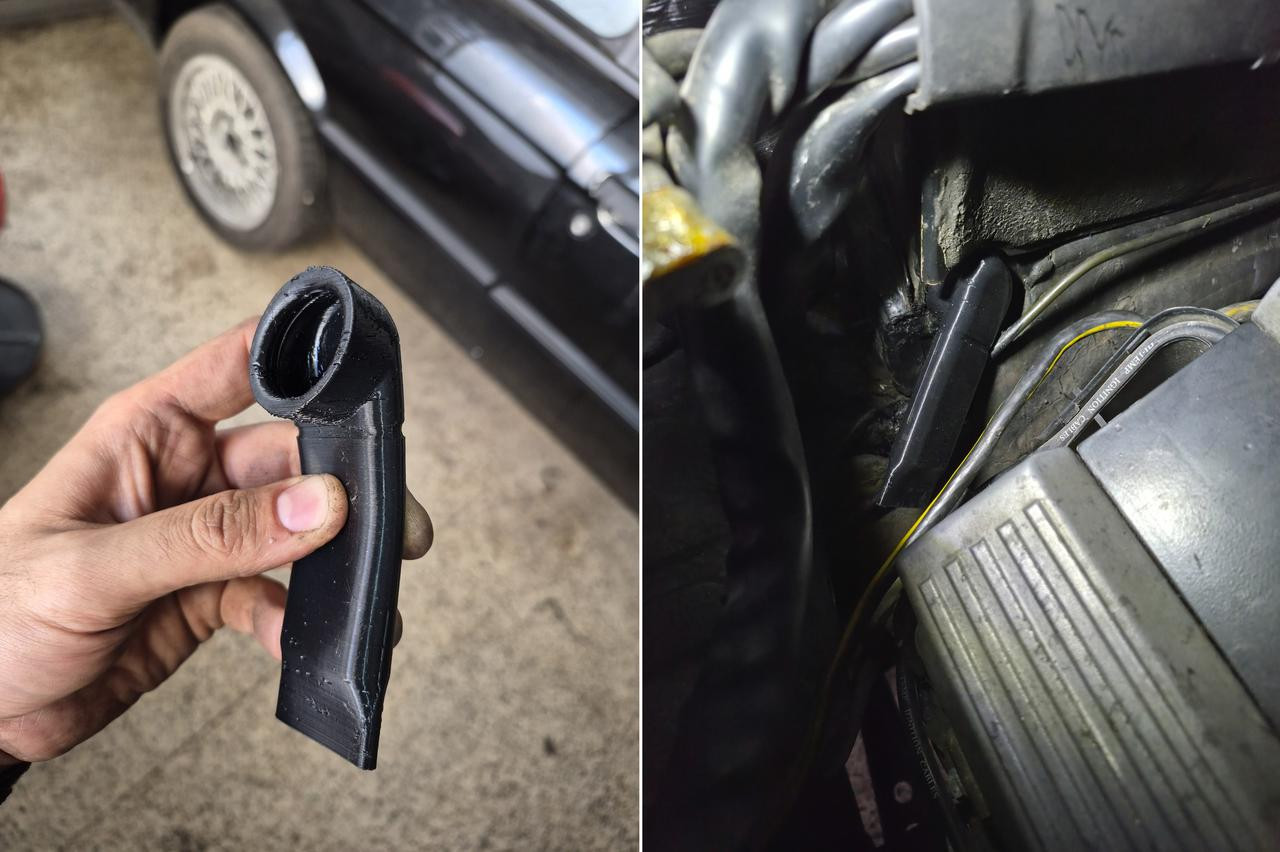
    - The elephant trunk rubber drain hose 51731911369 below the front windshield was hard as a rock.
    Considering the replacement from BMW is around $ 50 (51731911369), I printed one myself from TPU (flexible rubber material).
    I installed it and it fit well ! The 3d model was downloaded from cults3d.com for around 3 Euros.


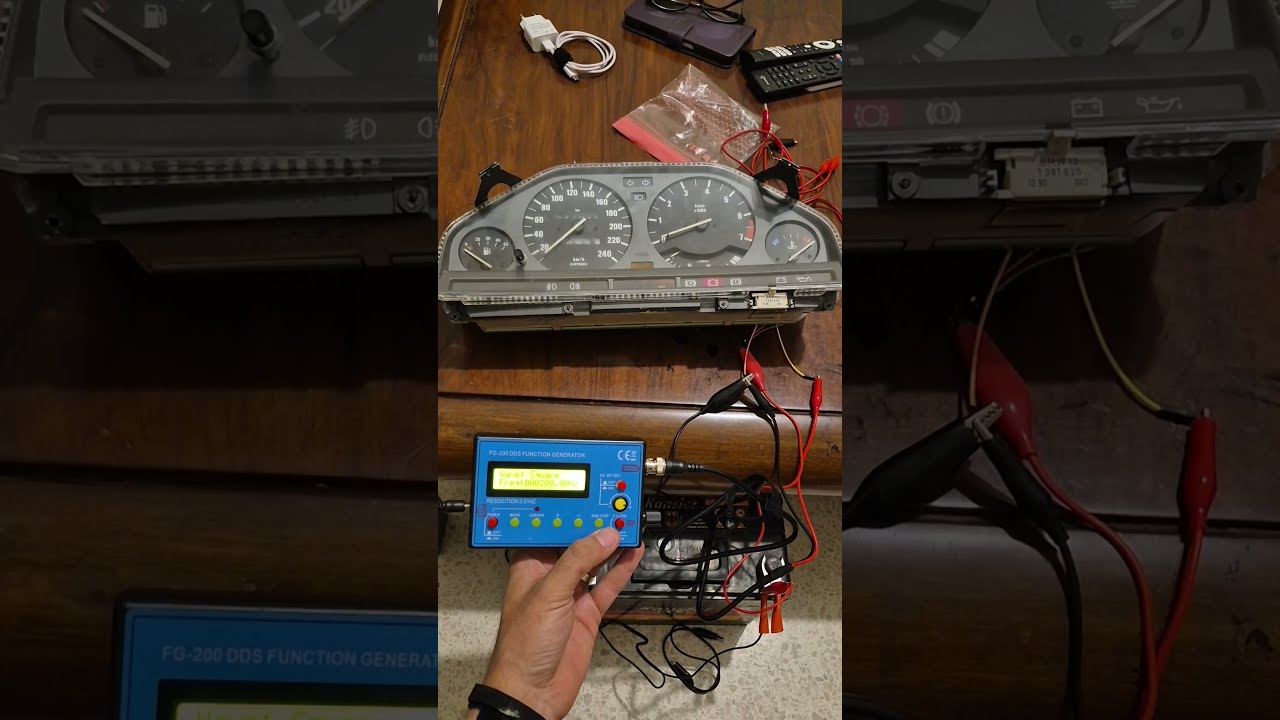
    - The Tachometer in my cluster was not working since I bought the car.
    I replaced the batteries and bought another cluster and tried it without success.

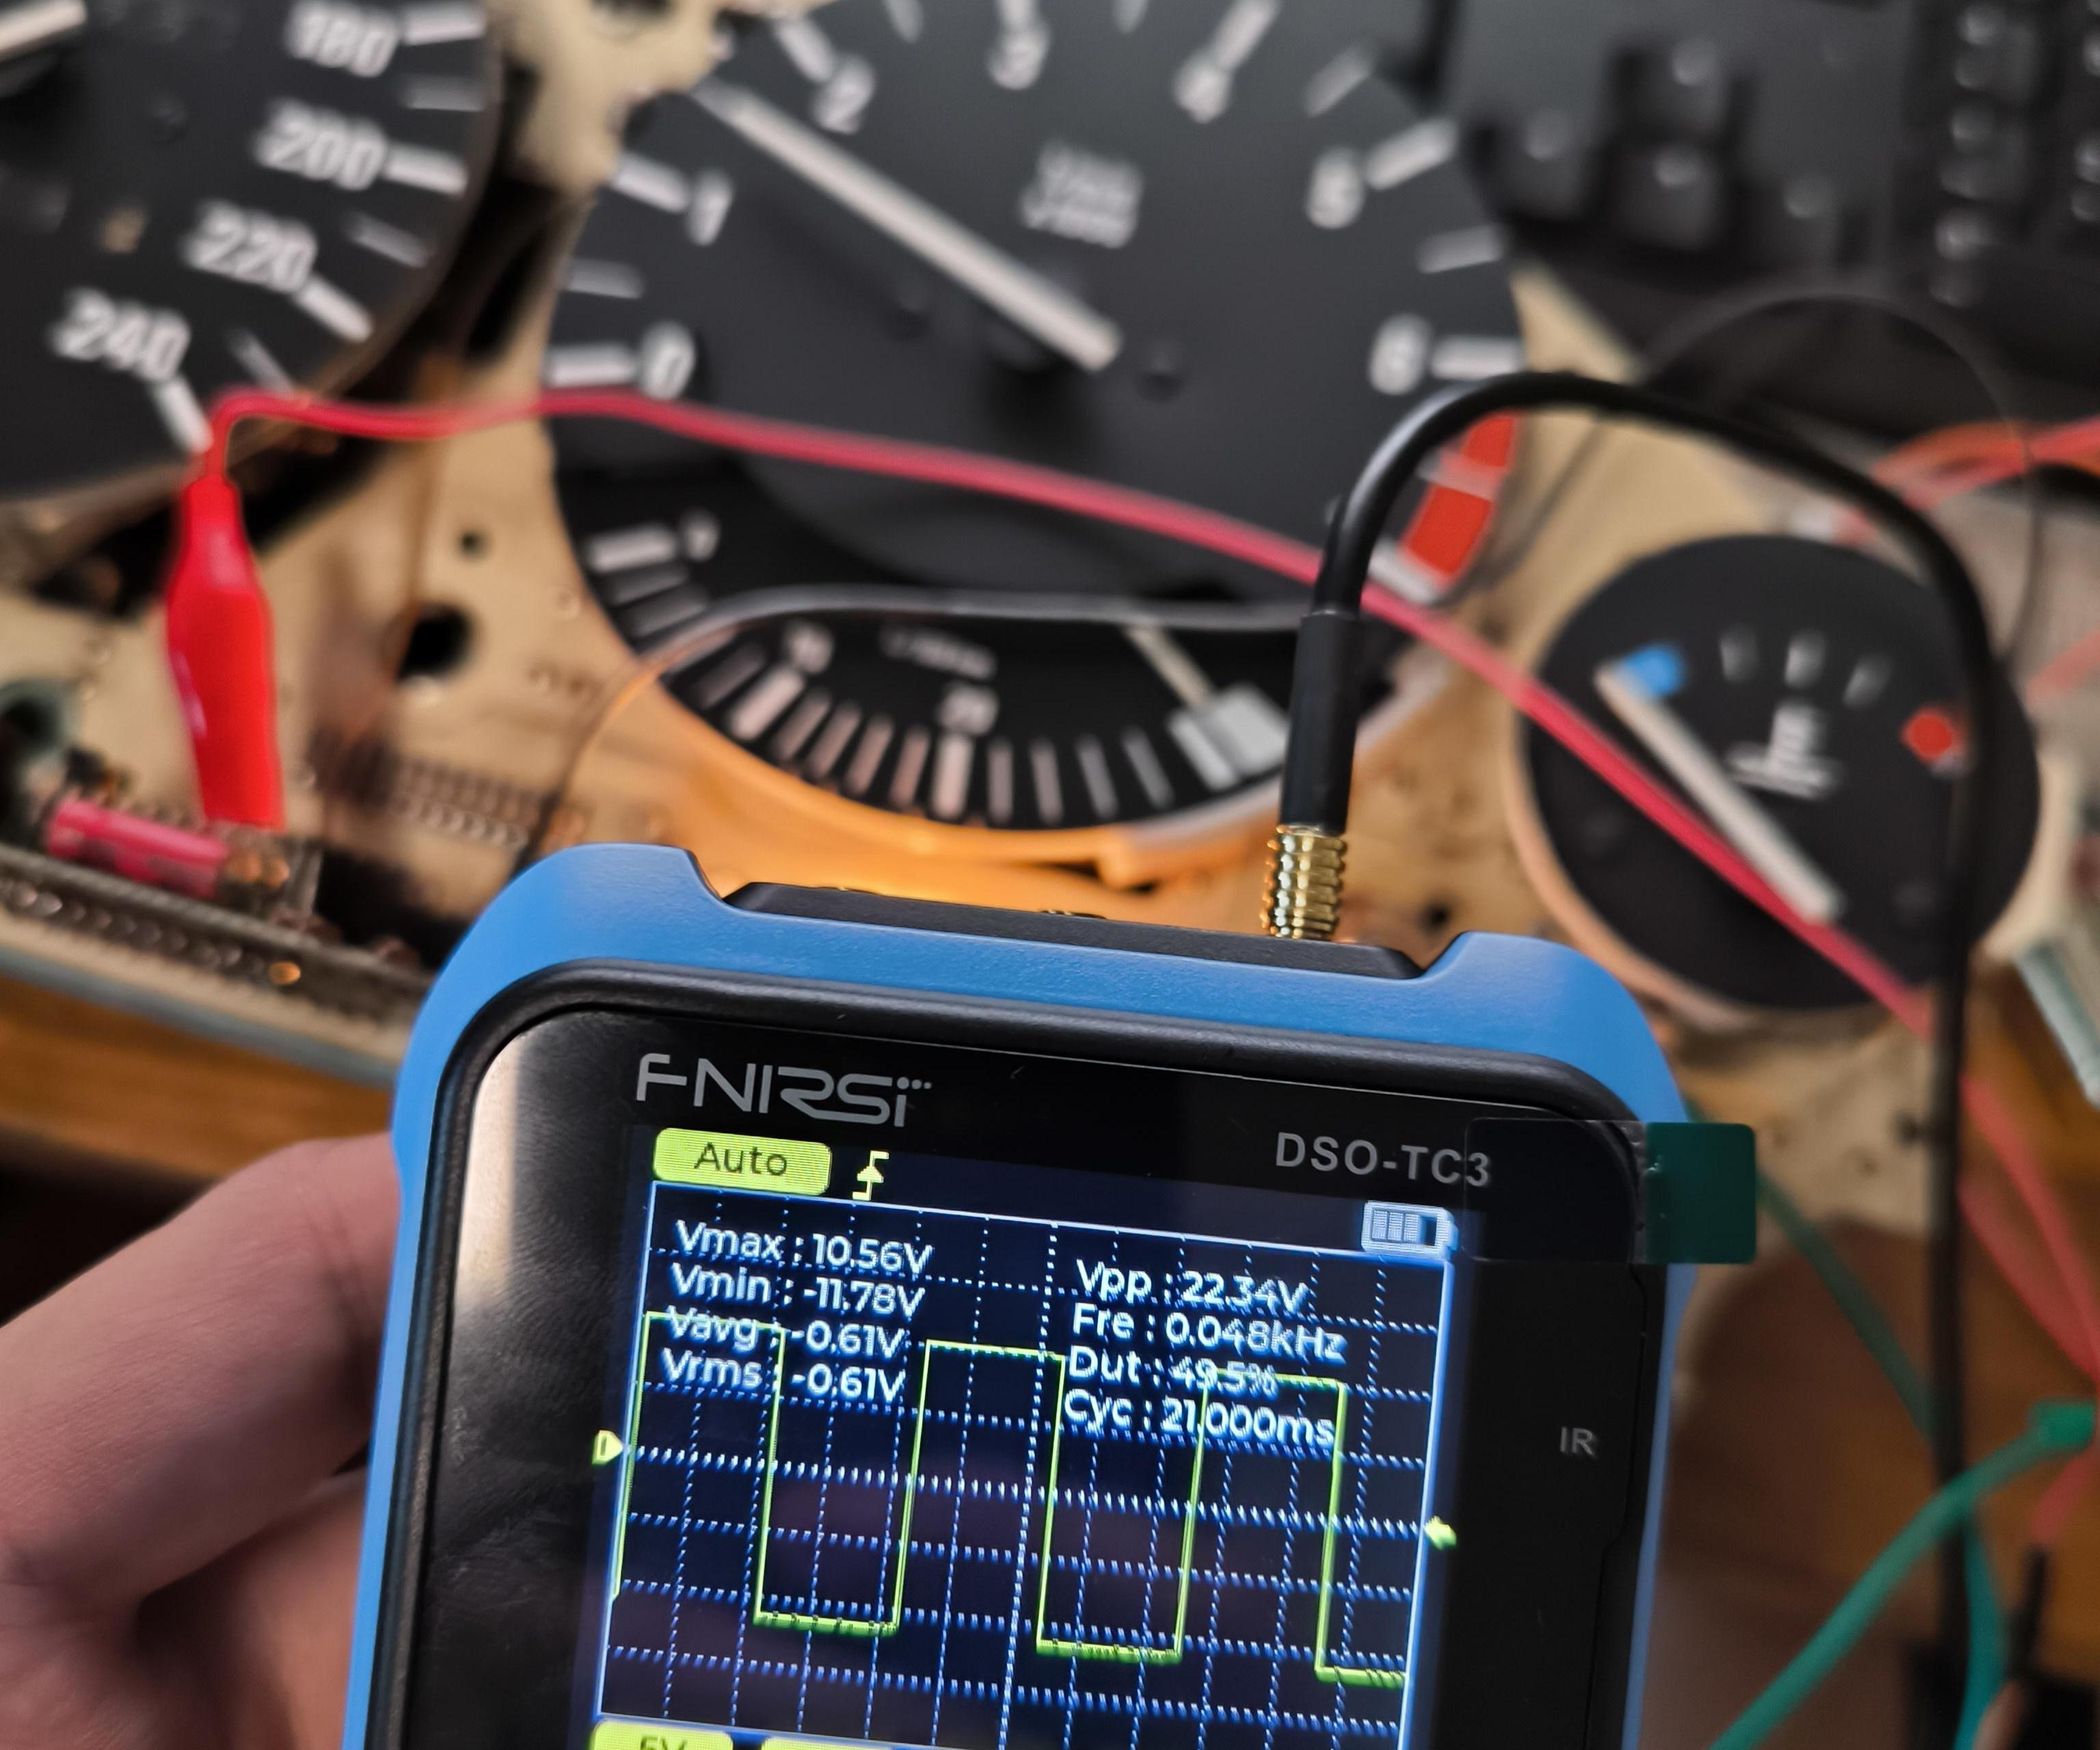
    Finally I found a way to bench test the tachometer to check if the problem is from the board or in the wiring.
    This was done using a 12V battery, some wires and a signal generator.
    The excellent guide can be found at:
    Bench Testing BMW E30's Tachometer: In this article, I am going to show you how to bench test your E30's tachometer using a signal generator. Also, I will give you the specification for the tachometer signal to use.


    To my surprise, I found that there is no problem in the cluster / board.
    The RPM needle is moving and the issue is in the wiring !
    I suspect the signal wire coming from the ECU is the problem since all other wires checked OK.


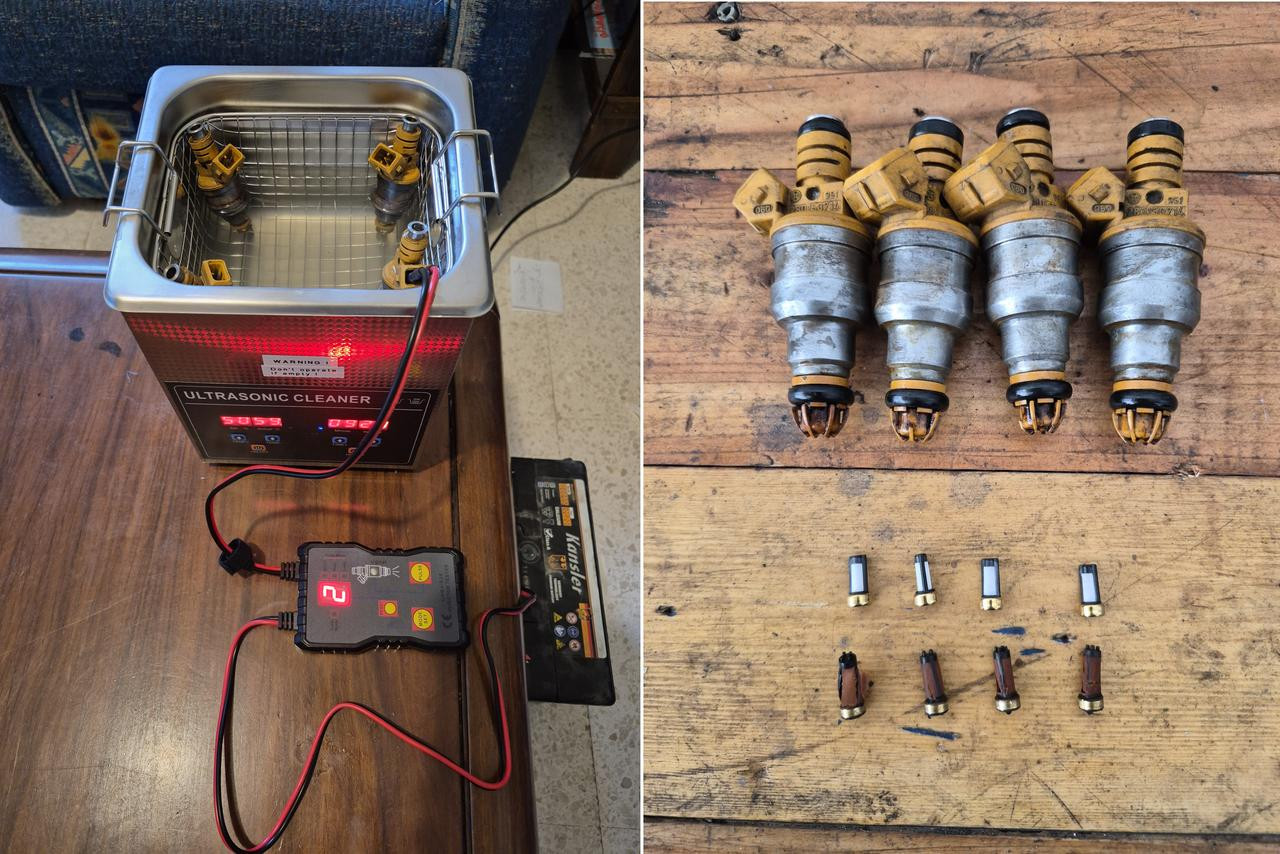
    - Ultrasonic cleaning for the fuel injectors and filters change:


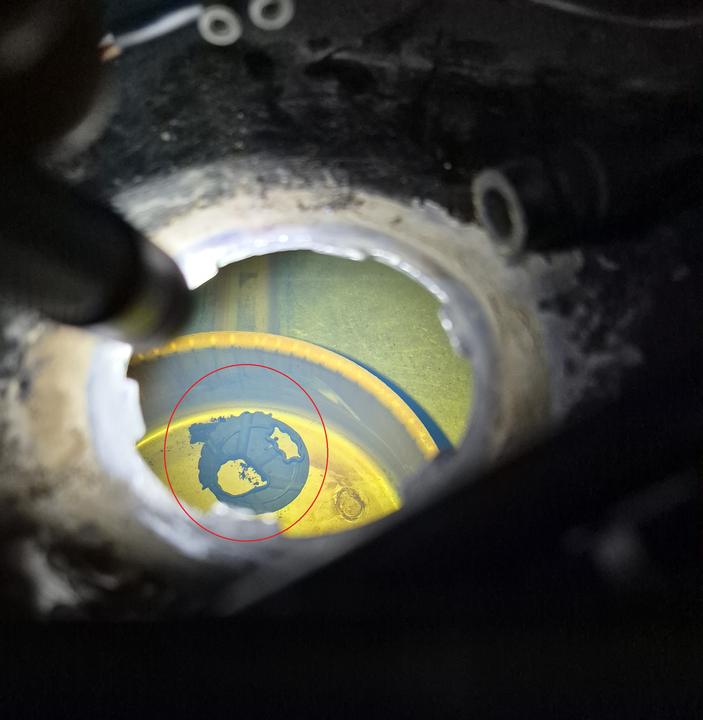
    - I opened the fuel tank to the condition from inside.
    It was clean and rust free, but found a rubber gasket laying in the bottom so I removed it:


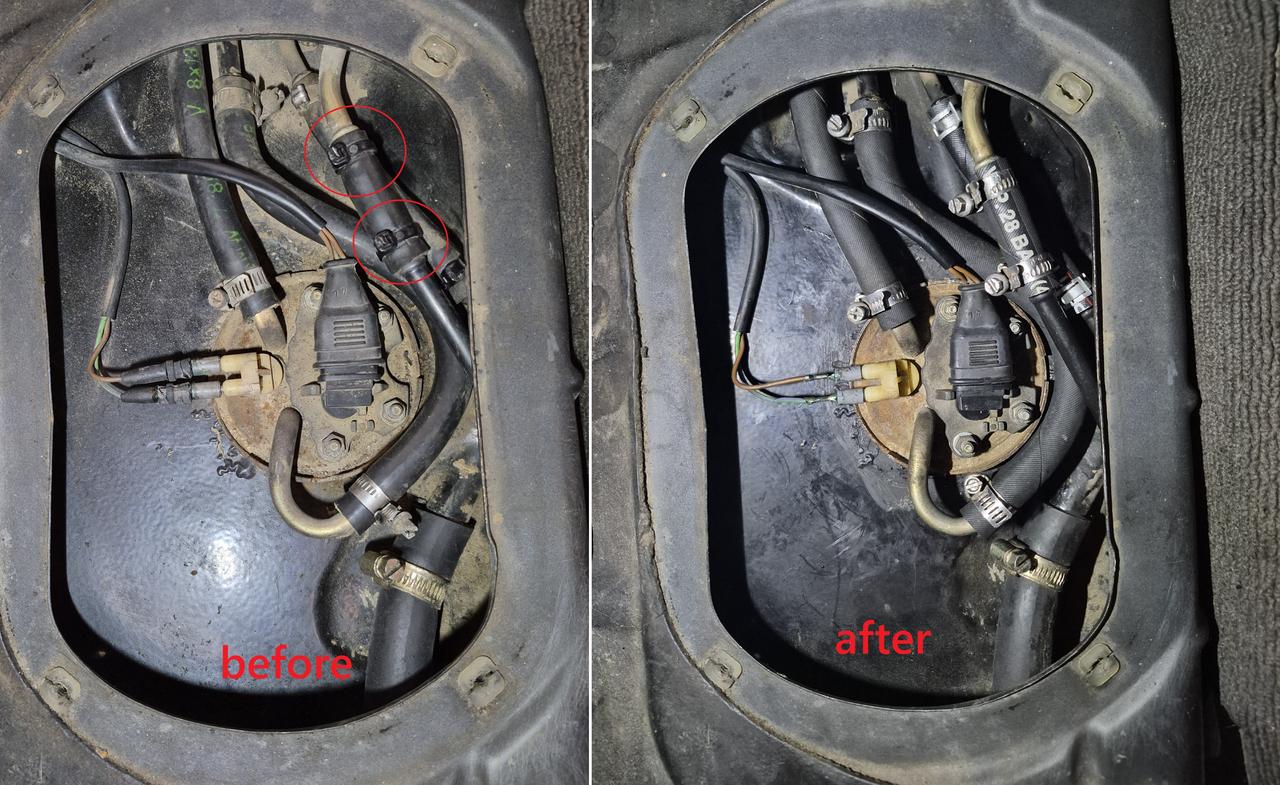
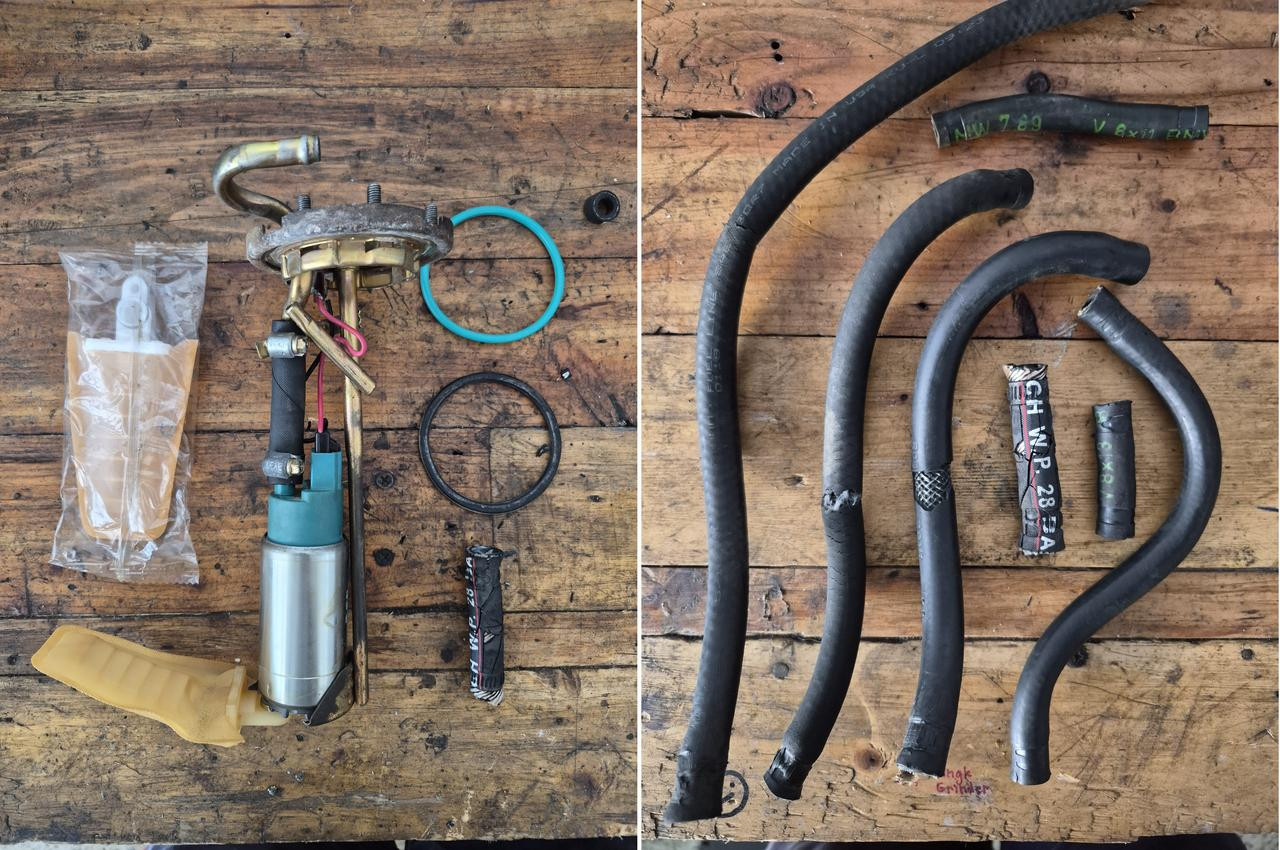
    - Replaced all the fuel hoses on top of fuel tank, which one of them was held by zip ties !
    Also changed the fuel pump filter and oring.


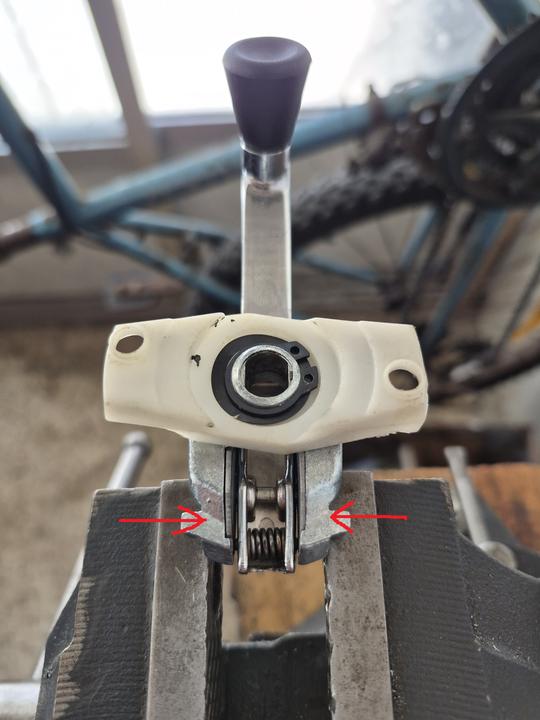
    - The sunroof handle was sagging and falling down, so I put it in a vise to press in the tabs holding the handle, problem solved:


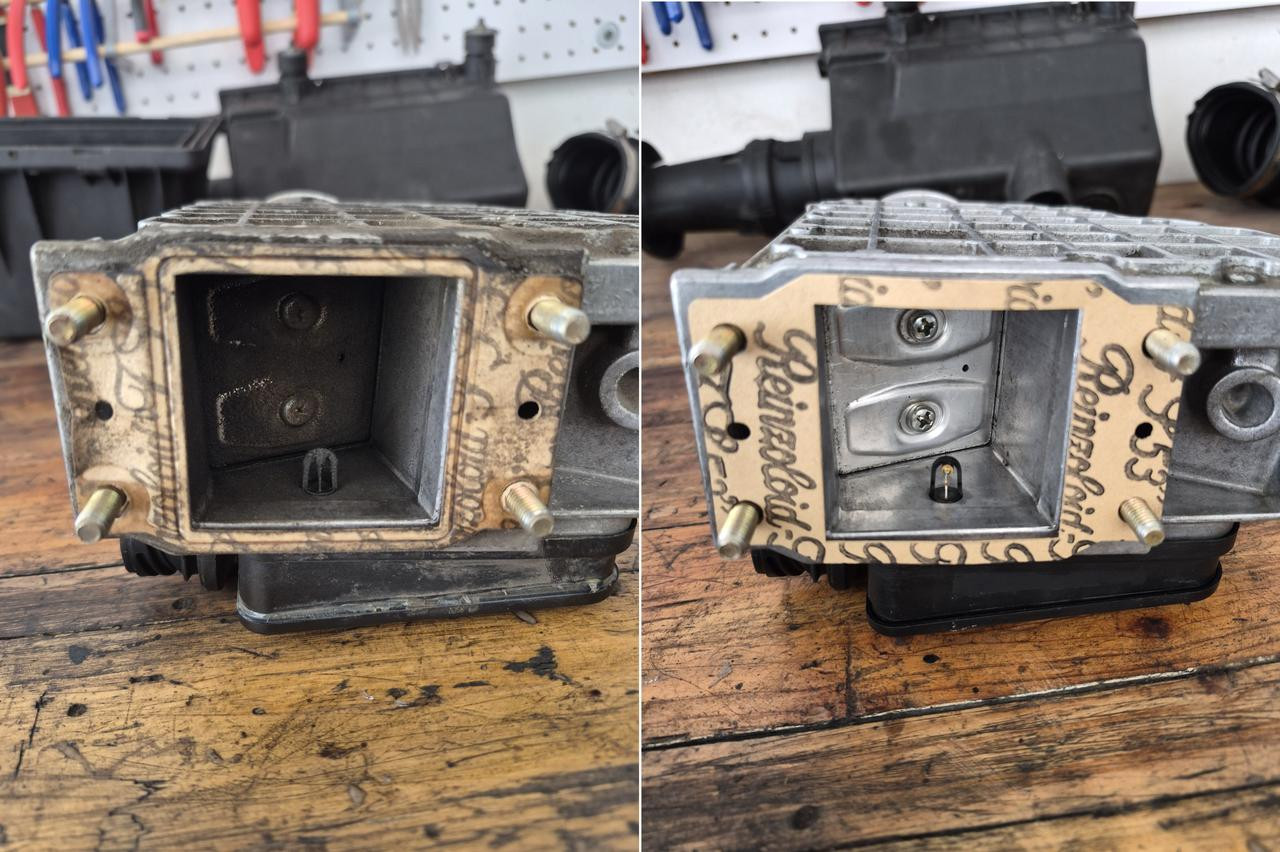
    - Cleaned the AFM and changed its gasket:


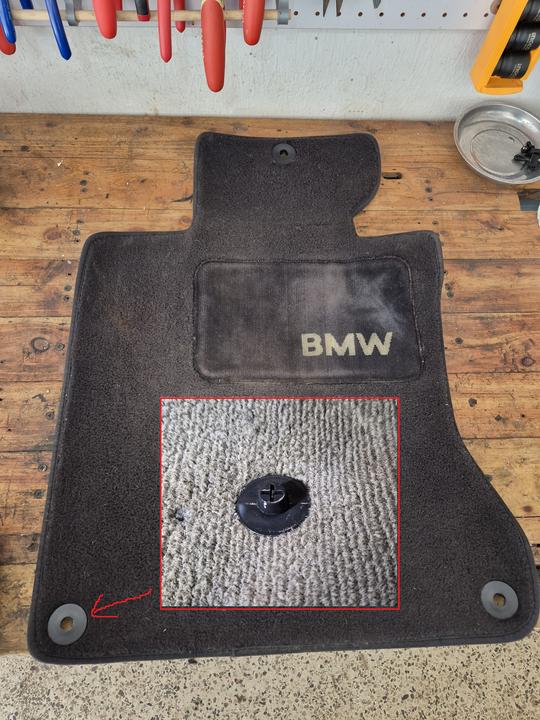
    - The floor mat was not staying in its place under my feet and moved all around, so I added plastic holders and screwed their counter part in the carpet:


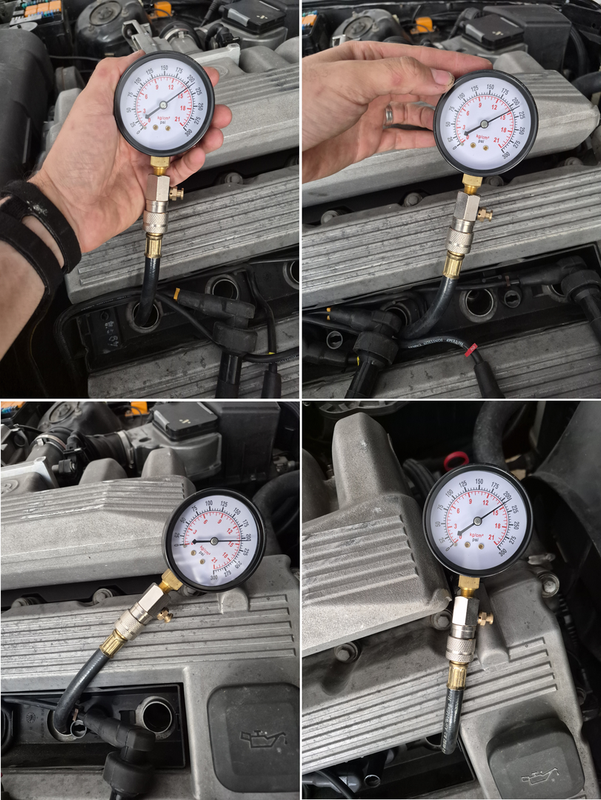
    - Finally did a compression test after all these years and found that all the cylinders are in very healthy condition with pressure ranging from 205 to 210 psi for all:


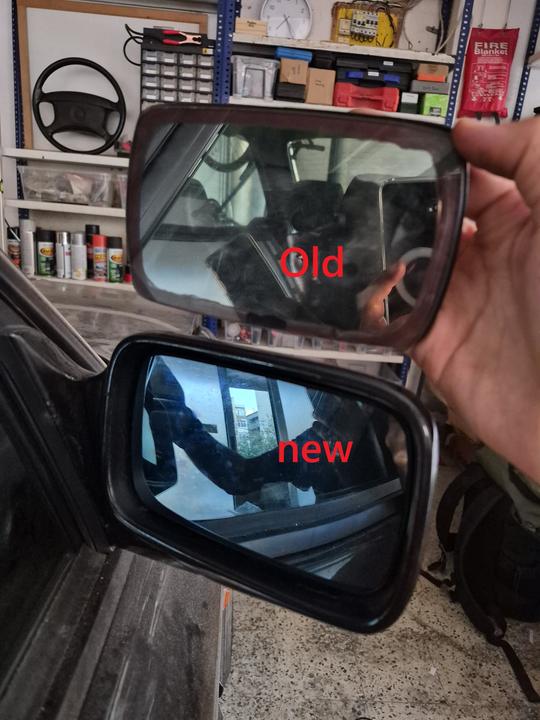
    - Replaced the side mirrors glasses with new ones from China:


    - Until next time !


    Last edited by kenshin86; 10-17-2026, 11:57 AM.

    Leave a comment:


  • Panici
    replied
    Z3 Rack and 370mm rack is a great combination. That's what I run in mine.

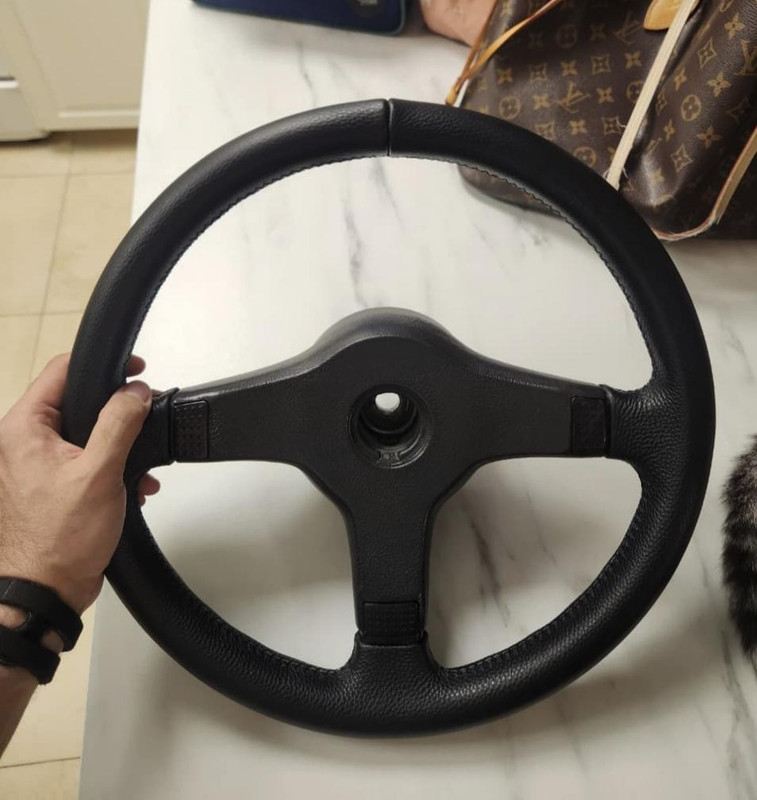
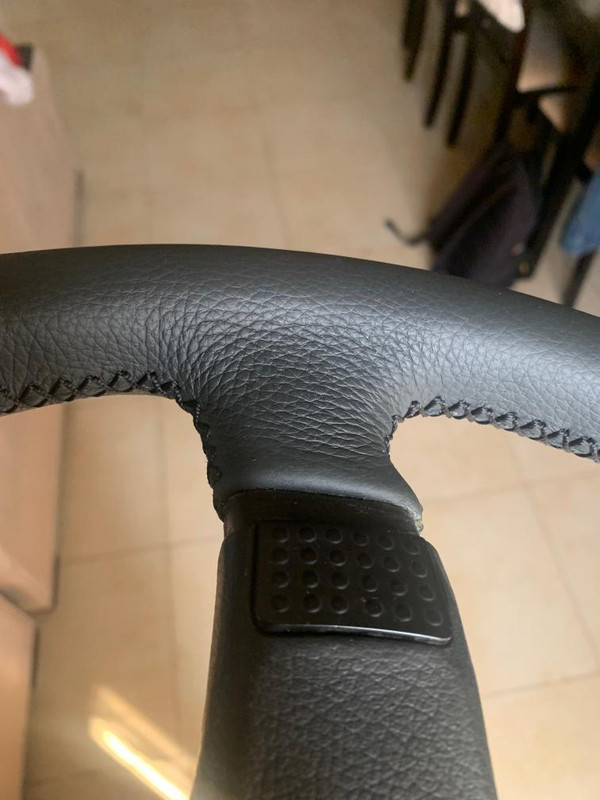
    Steering wheel looks okay, but having that top stitch line uncentered would drive me nuts!

    Leave a comment:


  • kenshin86
    replied
    Summer 2025 update:

    During my vacation, I have assembled back all the interior and sorted out the electrical issues I was facing before:

    - All of the center console / dashboard lighting was not working, it turned out to be a broken headlight switch rheostat, I used this nice guide to fix it:
    Discover the magic of the internet at Imgur, a community powered entertainment destination. Lift your spirits with funny jokes, trending memes, entertaining gifs, inspiring stories, viral videos, and so much more from users.

    - The wiper arm was not activating the washer water pump when pulled in, the problem was a dirty contact inside the switch itself: there is cutout where you can spray contact cleaner and use a tiny file/sandpaper to clean it.

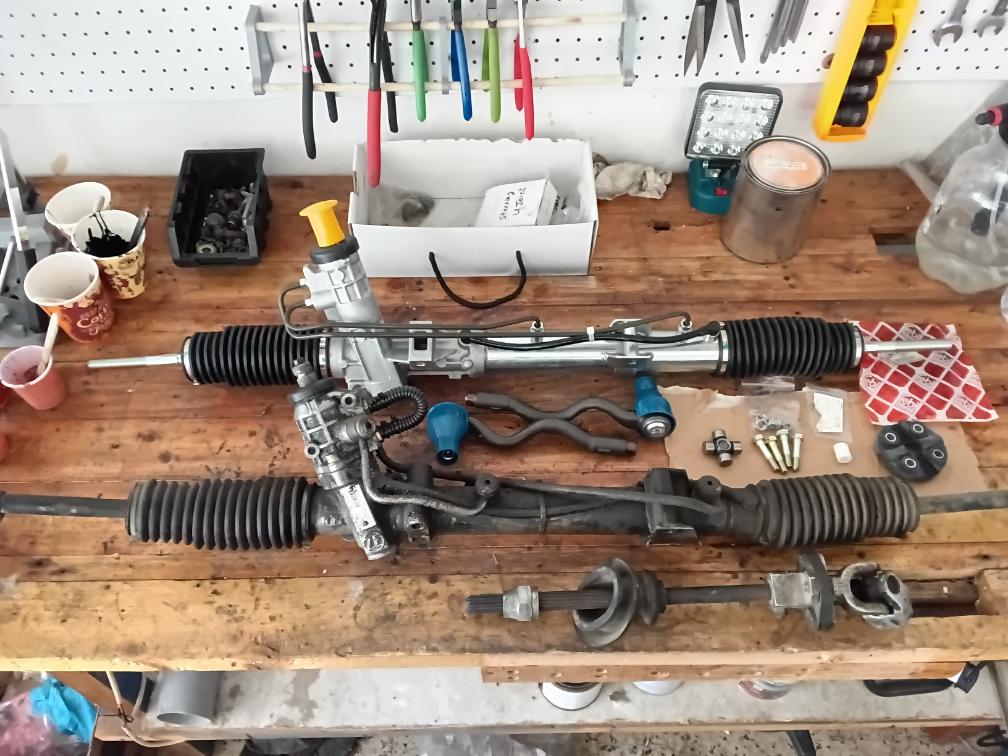
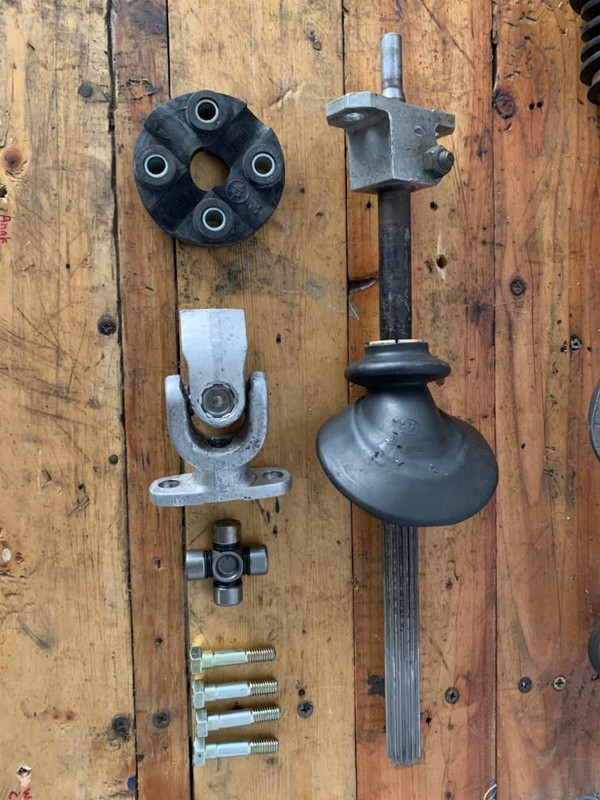
    Finally it was the time to do the steering rack upgrade: 5 years ago I got a new Z3 rack from China for around $ 300 shipped from AliExpress (https://a.aliexpress.com/_c3QiKjTV), I believe it's the same unit sold in the US under the AAE company name model 3111N.


    The conversion was the hardest job I've done so far, with me under the car pushing the new rack up in while dad was inside the car to mate the male splines of the steering linkage to the female splines of the steering shaft coming from the steering wheel.

    The steering knuckle u-joint cross bearing was also replaced with a new one (model # ST1540), with new rubber guibo and plastic guide pin as I was having lots of bumps and vibrations in the steering wheel whenever I go over a bump on the road.


    The steering was installed without the hydraulic assist, and after driving the car I felt it was a little heavy at slow speeds, so maybe will consider putting it back the hydraulic part in the future.

    The below video shows the amount of play that was present in the knuckle before:


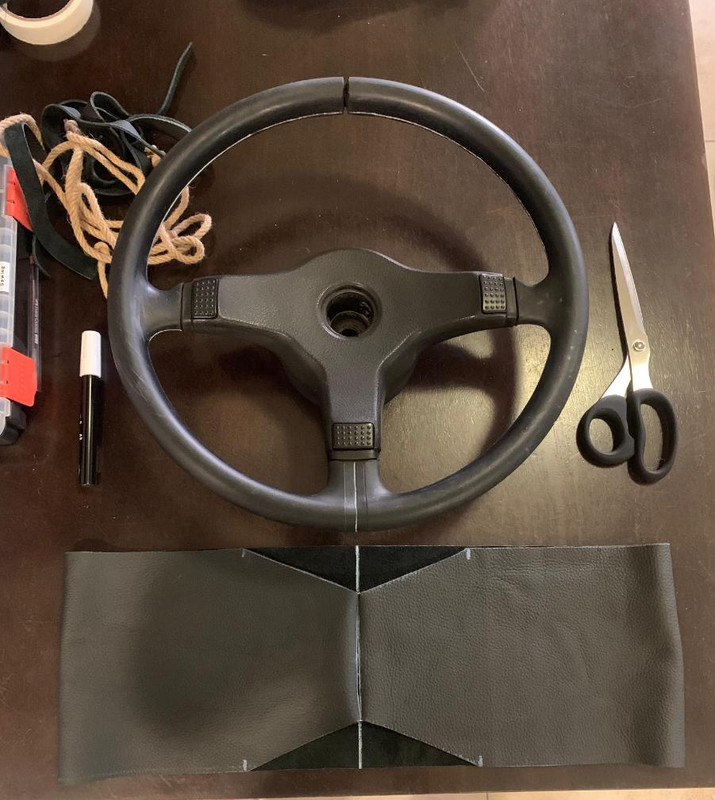
    And the conversion is not complete without a newly re-upholstered 370mm small steering wheel that I did myself using this guide as reference:
    https://forums.pelicanparts.com/pors...-tutorial.html


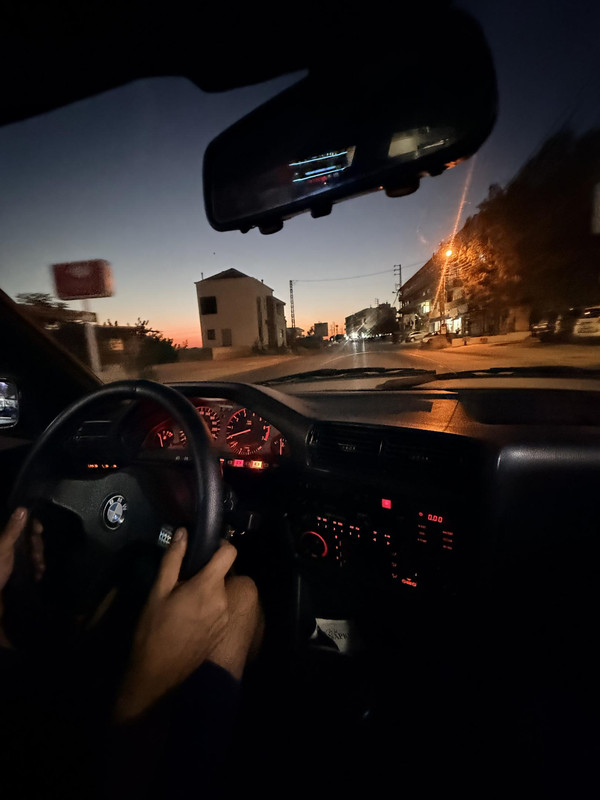
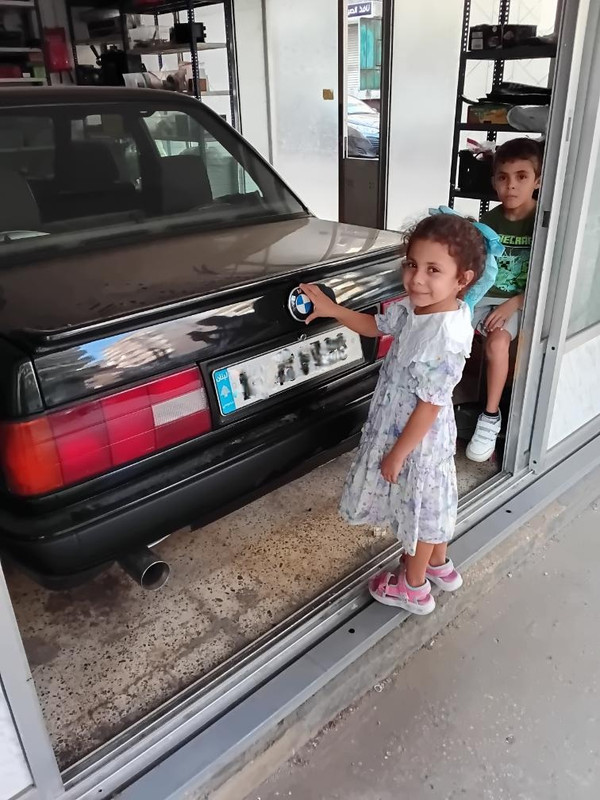
    Here are my kids adding the rear emblem as the final step in the assembly before driving the car:


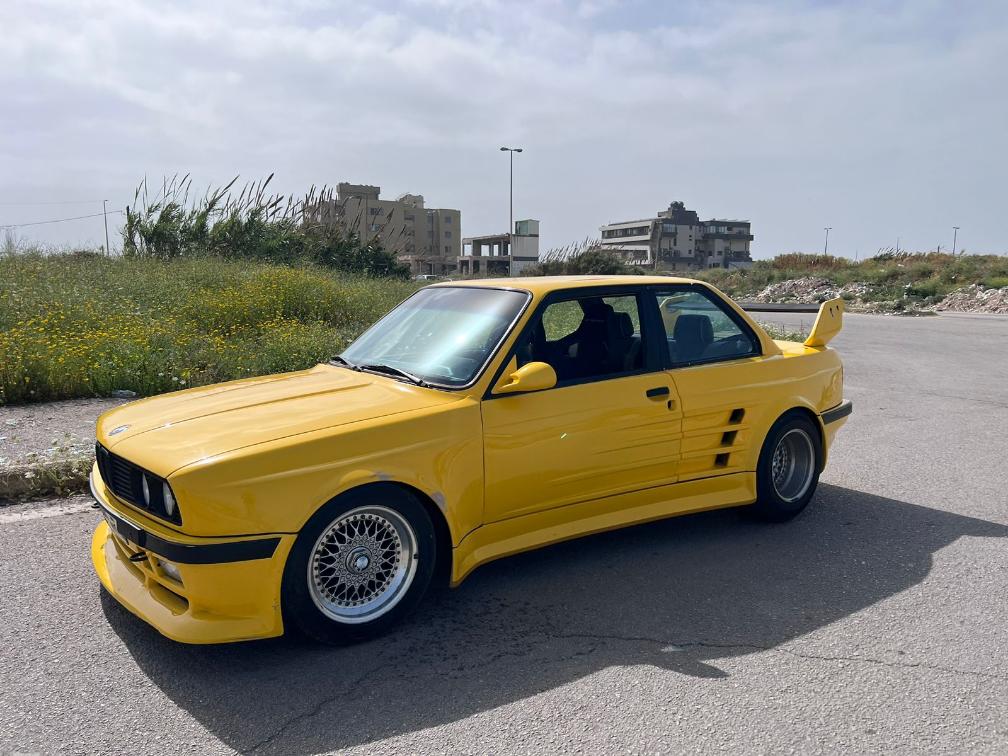
    Bonus content: my brother-in-law's E30 with the rare Folger wide body kit


    Thanks !
    Last edited by kenshin86; 11-03-2025, 10:51 AM.

    Leave a comment:


  • zwill23
    replied
    Love comeback stories like this. You're running out of things to replace / restore so I guess that means it's time to enjoy it

    Leave a comment:


  • Panici
    replied
    Originally posted by kenshin86
    Thanks ! the reassembly sure takes more than expected when you have to sort all the wiring and clean all the parts.
    Painting took around 4 weeks to finish and costs around $ 500 in Lebanon believe it or not.
    $500!? That is absolutely amazing!
    Even the cheapest paint jobs around here cost 10x as much. 😵

    Leave a comment:


  • kenshin86
    replied
    Originally posted by Panici
    Paint work looks good. Now for the long reassembly/rebuild!
    Thanks ! the reassembly sure takes more than expected when you have to sort all the wiring and clean all the parts.
    Painting took around 4 weeks to finish and costs around $ 500 in Lebanon believe it or not.

    Leave a comment:


  • kenshin86
    replied
    Originally posted by Northern
    Paint turned out great!
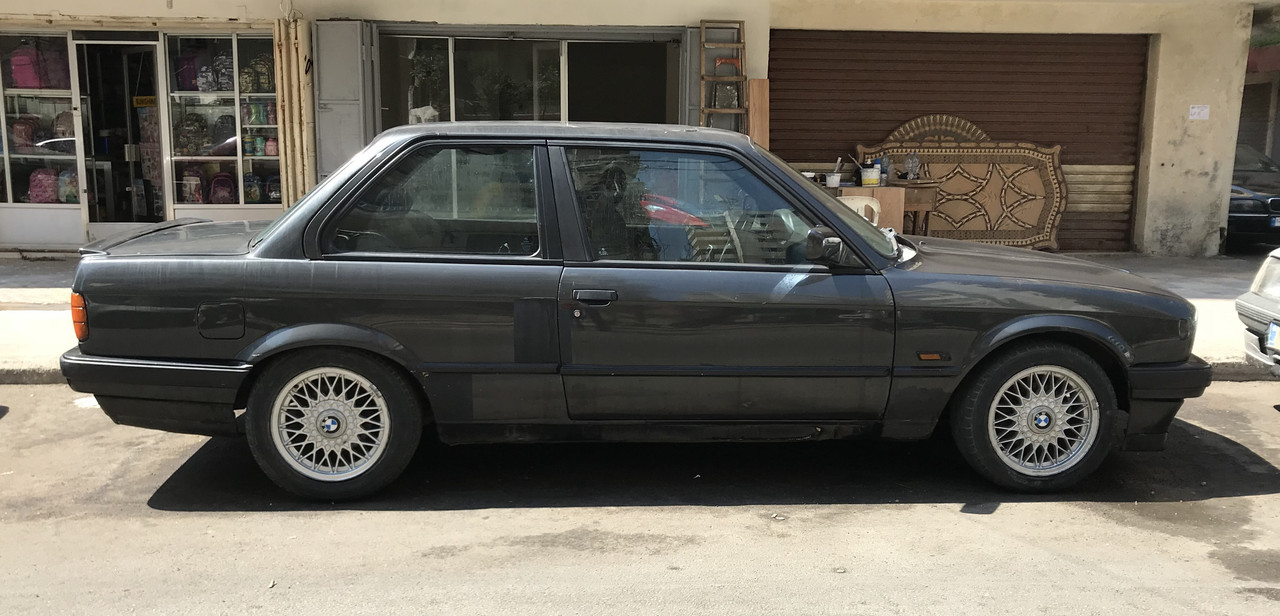
    Thanks ! Honestly I was not expecting this degree of black although it is the correct original color Diamantschwarz metallic.
    Maybe the previous paint was faded away due to age and I was perceiving it more as dark grey when the sun was shining as you can see in this old photo:

    ​
    Last edited by kenshin86; 04-23-2024, 03:42 AM.

    Leave a comment:


  • Northern
    replied
    Paint turned out great!

    Leave a comment:


  • Panici
    replied
    Paint work looks good. Now for the long reassembly/rebuild!

    Leave a comment:

Working...