I started out by rebuilding the compressor. It's a Bosch/Behr "wingcell" type compressor. I know I talked about doing this awhile ago but there were some issues as you'll see. Figured I'd post up the process in case anyone else is thinking of doing this themselves. I did use one DIY that I found (there isn't much out there) but otherwise I didn't find much in the way of how these things work:
https://www.bimmerforums.com/forum/s...ressor-Rebuild

Needless to say it was full of gunk from sitting idle for so long:

I first cleaned up as much of the exterior as I could to prevent it from getting into the compressor. Then I started to break it down.
First, remove the center nut, I used an impact gun. Otherwise the pulley wants to spin:
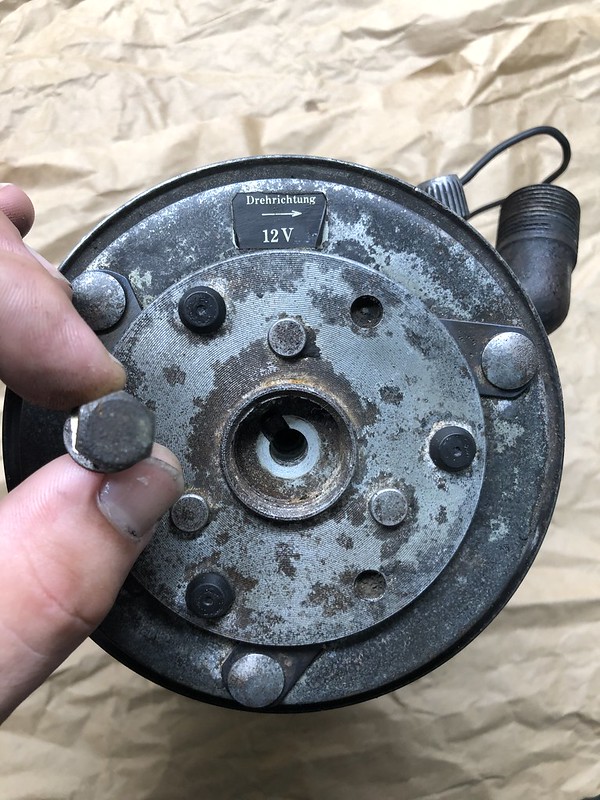
Next you'll have to pry the clutch plate off using two thin flathead screw drivers. There will be some metal spacers in there when it comes out, don't lose these:


Next, use a flathead screwdriver to knock the center nut loose to remove the pulley. There's a washer underneath that has little lock tabs on it, bend the tab down first to loosen the nut. I forgot to and broke one off.


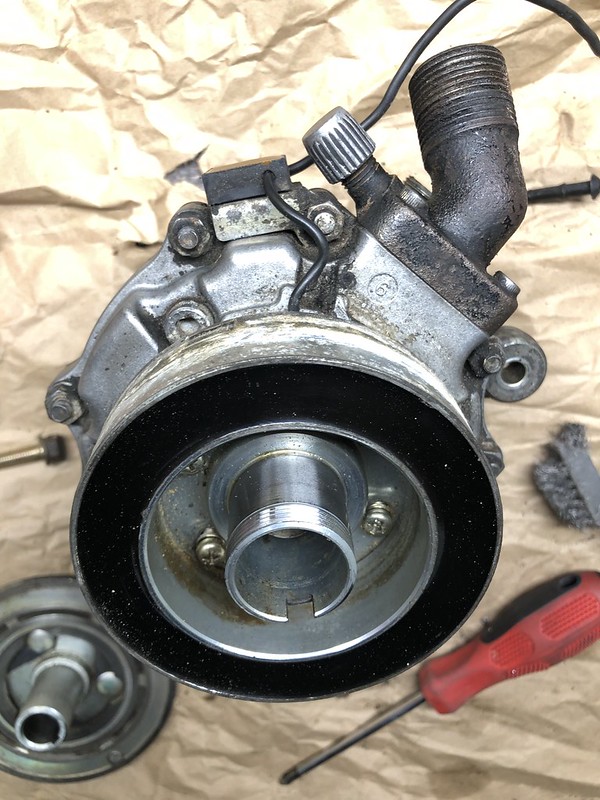
Then just wiggle the pulley off, you'll be left with the clutch magnet underneath (black donut thing):

The magnet is held on by 6 Phillips head screws. Also note the location of the compressor wire and resistor, it will have to line back up in the same position later on:

Not sure what this little felt piece is but it just sits in that little groove on the faceplate, don't lose it:
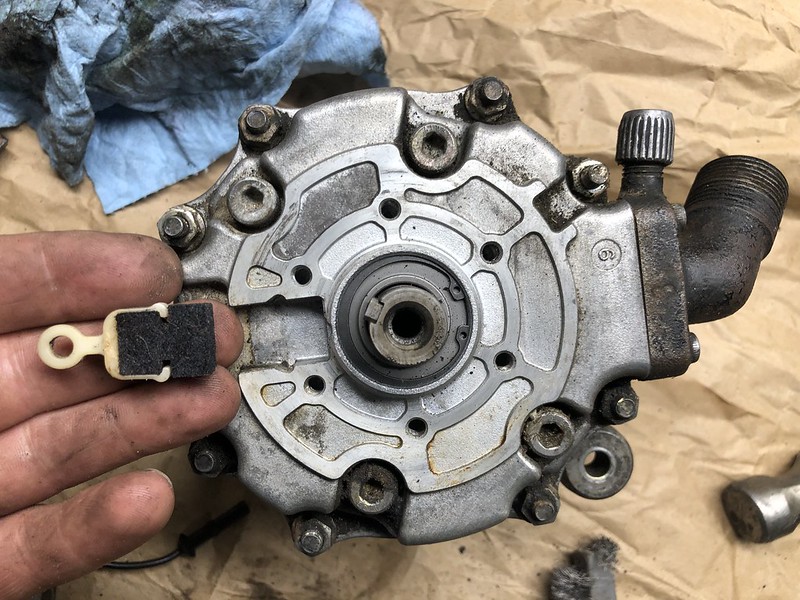
To remove the faceplace, there are 8 outer 10mm bolts, as well as 4 allen head bolts on the inside. As you'll see, these align with the holes on the inner compressor mechanism:

Take note of that little arrow on the inner mechanism and mark it's orientation, it has to point in the same spot otherwise your allen head bolts won't line up with the inner 4 holes when you put everything back together.
With the faceplate off, I screwed the center nut in a few turns and pulled everything out, yuck:


Backside of the innards:

Got everything cleaned up:

And used the "proper" kit to replace all the seals.

Make sure you lube the seals with A/C oil prior to install, and I also coated all components with some while reassembling. Depending on the refrigerant you plan on using, you'll need to find out the proper oil to use. I went with PAO oil as it's compatible with both R12 and R134a.


One correction in the below photo, the central green O-ring on the right should instead be placed into the center divot in the faceplate on the left rather than on the shaft for installment.

Much better:

Orientation of the arrow to the body of the compressor, basically points towards the high side inlet:

Don't forget to remove the low-side inlet plate, there's another O-ring there. I missed it the first time and had a leak at this location:

Reassemble, and you're done (or so I thought):

I ended up getting the compressor filled with oil (200mL in my case) and U/V dye, and vaccing down. It held -30mmHg vacuum for a few hours so figured I was good. I started to refill with refrigerant and the compressor kicked on, nice! However as the compressor heated up, I started losing pressure and it eventually kicked off before the system was full. WTF. I was pissed. I was about THIS close to just saying fuck it, no A/C for me when the next day a guy posted an ad on the R3V FB page advertising that he rebuilds A/C compressors and a bunch of other components. I'll include a link to his ad. Jay was excellent to work with, even sent me pics/vids of him testing the A/C clutch etc.
He told me that he's now repaired several compressors that have recently been rebuilt (by Omega and a few other companies, not just DIYers) where the rebuild seal kits have undersized O-rings in a few spots. In my case, I think that as the compressor warmed up, the undersized seal allowed the gas to leak out and kept the compressor running, eventually burning out a needle bearing.
Here's Jay's ad:
https://www.facebook.com/groups/R3VL...8924346917627/
I got the compressor installed:

And after installing ANOTHER receiver/drier (my 3rd by this point), I got the system vacced out:

I left the vacuum on for 2 days to makes sure this time it was completely sealed, and it was.

Refilled, and am FINALLY blowing cold air. I will say the air is cool, not as cold as I remember it being for this car. I may have overfilled the system by a few ounces so I may take it in to have some of the refrigerant vacced out as my low side pressures are a bit high (~50PSI when it should be ~30)
Here's a really good link for the refilling process:
http://www.rtsauto.com/how-to-rechar...d-pull-vacuum/
I kept the system R12 but have retrofitted everything to be compatible with R134a as well (R134a expansion valve, O-rings, parallel-flow condenser, and PAO oil in the compressor). If I ever have more issues with this system and need to evacuate it again, I'm just going to convert it fully to R134a as the R12 was very expensive.
Sorry for the long-winded post, but Phase 2 of Big Al is in the books! The next thing will be paint, euro bumpers and MTech 1 conversion, which I need to save up for. I'm hoping to get it done sometime over the winter or early spring. In the meantime, I have a few other smaller projects/upgrades to complete which I'll get to here and there.










Leave a comment: