Big Al's Revenge: an OEM+, MTech1 325e restoration

Collapse
X
 
  • Time
  • Show
Clear All
new posts

  • Albie325
    replied
    Then, I FINALLY got the oil pan off:


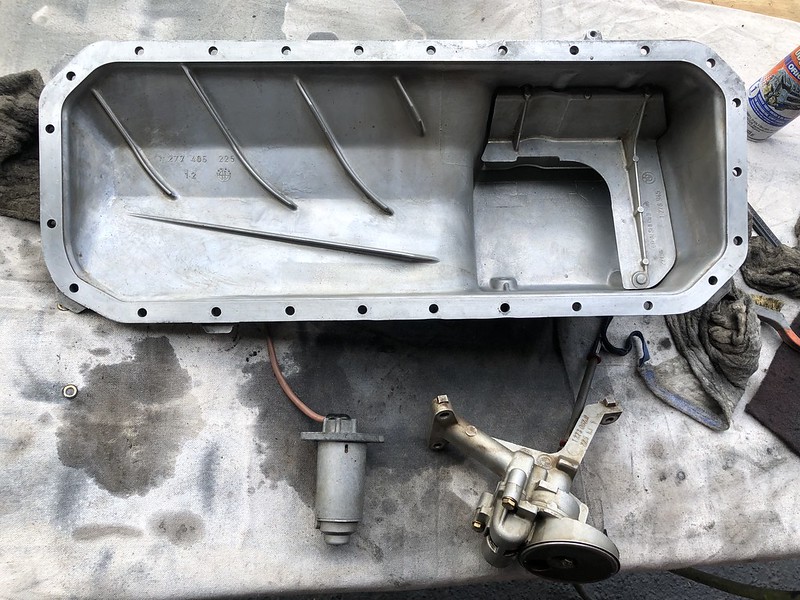
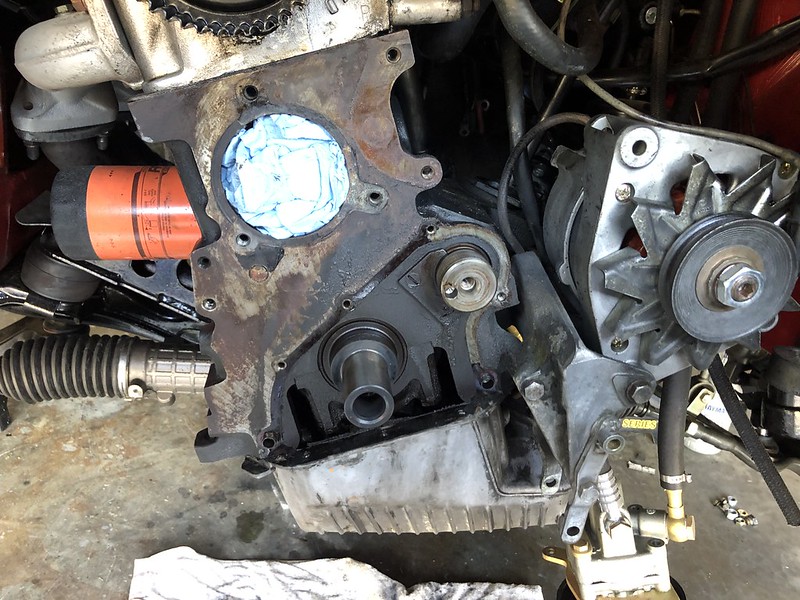
    In order to get it off, I ended up loosening the engine mount bolts and jacking the engine up as much as I could, loosened but did not fully remove the steering rack, and removed the oil pump. Not as bad as I was anticipating. It was a tight fit but easily slid the oil pain out:


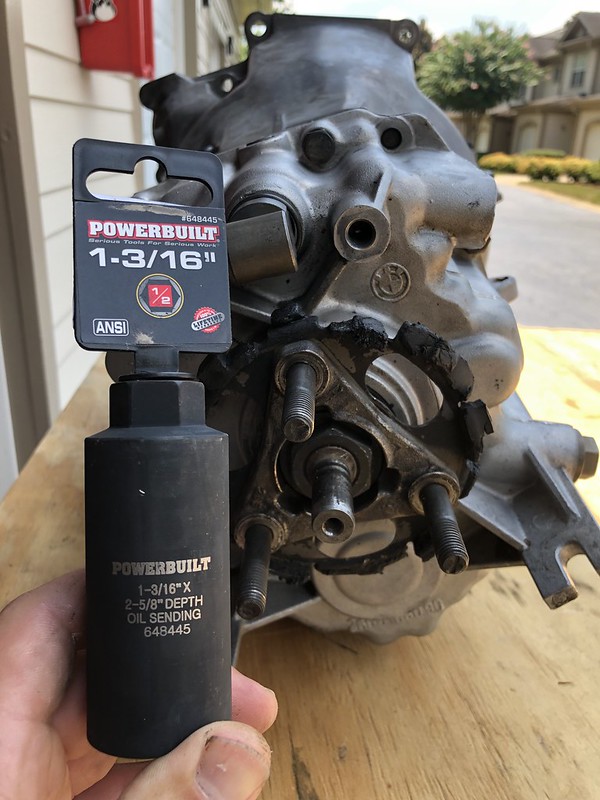
    Cleaned up the pan, pump, oil level sending unit, and the underside of the block. The old gasket was basically plastic and flaked off:


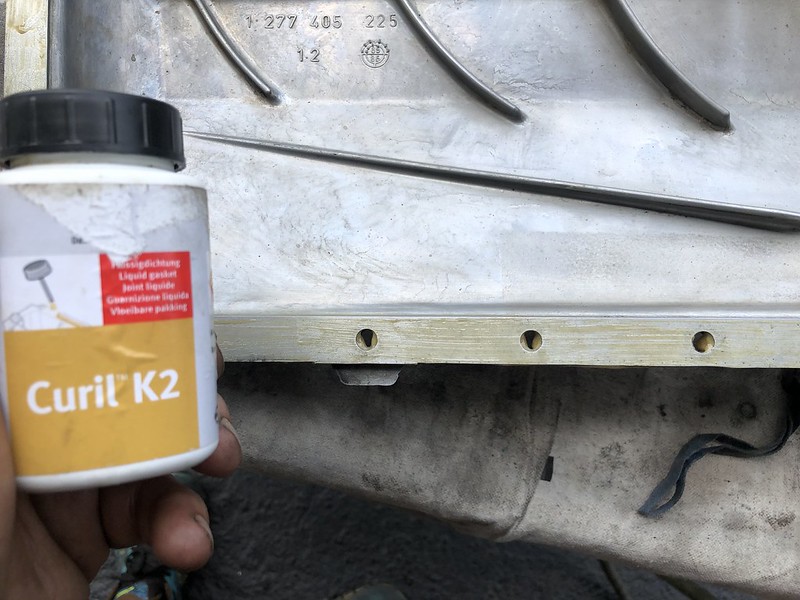
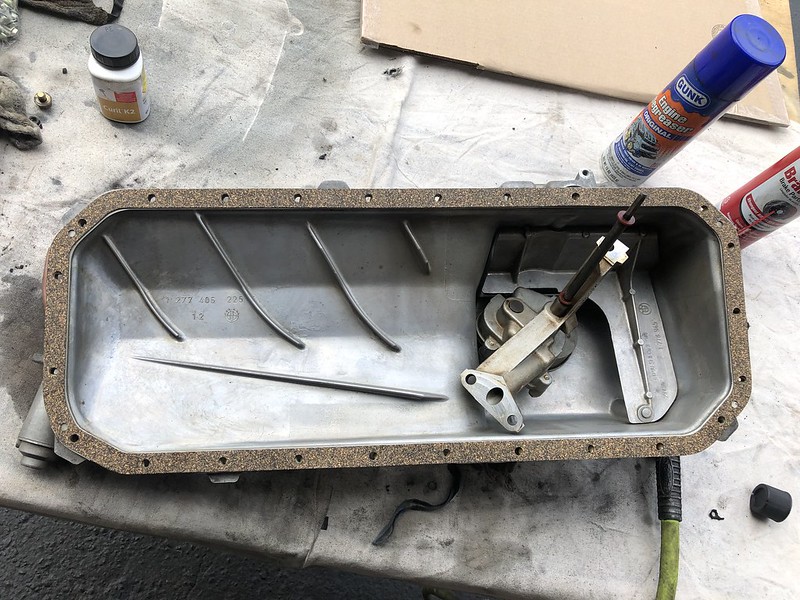
    Used a light layer of Curil K2 to seal the new gasket to the pan so that it wouldn't move around on reassembly:


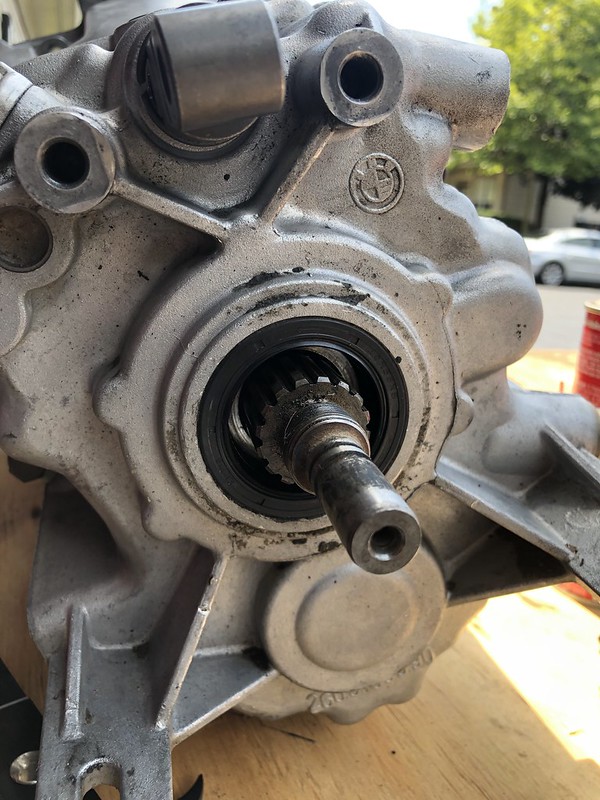
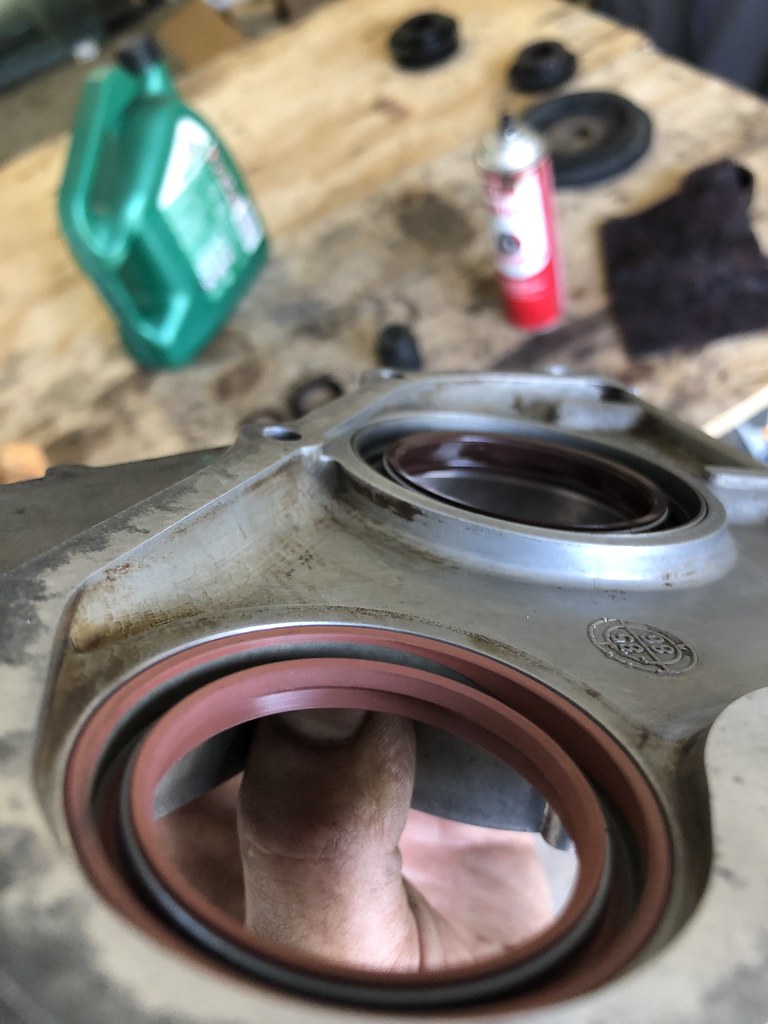
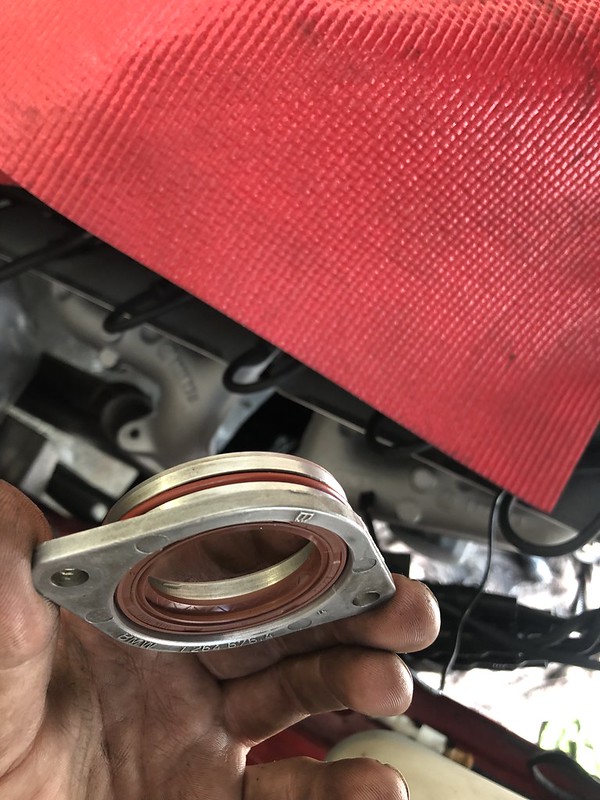
    Also use a little dab where the rear main seal carrier as well as the crankshaft seal carrier mates to the block:


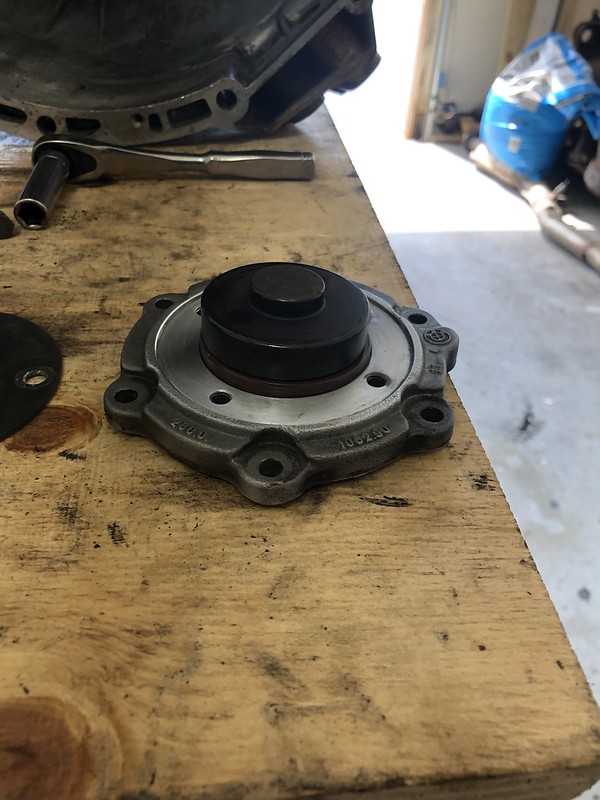
    Slid the pan under the block and got the oil pump back in place. Not many pictures as it was quite the balancing act. Toughest part is getting the oil pump drive shaft back in place, it's just hard to see where it inserts into the block while balancing the pump with only a couple inches between the block and the pan. Got the pan back on and snugged up the new bolts in a star pattern, inside-out.

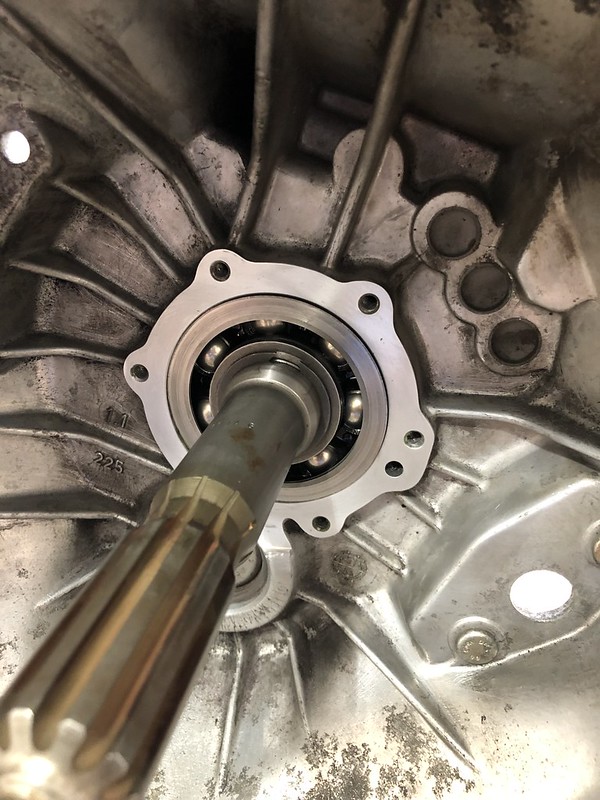
    Making good progress, I decided to get the trans back in. Obligatory resurfaced flywheel shot:
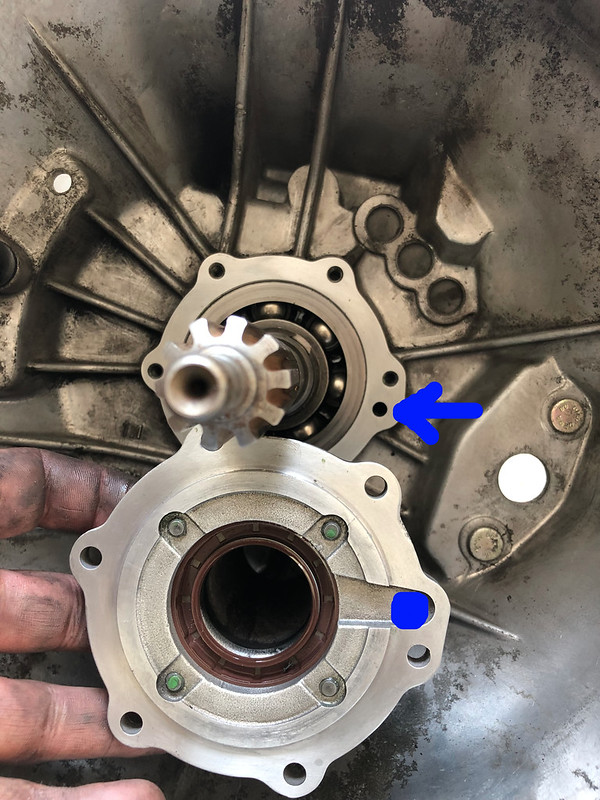
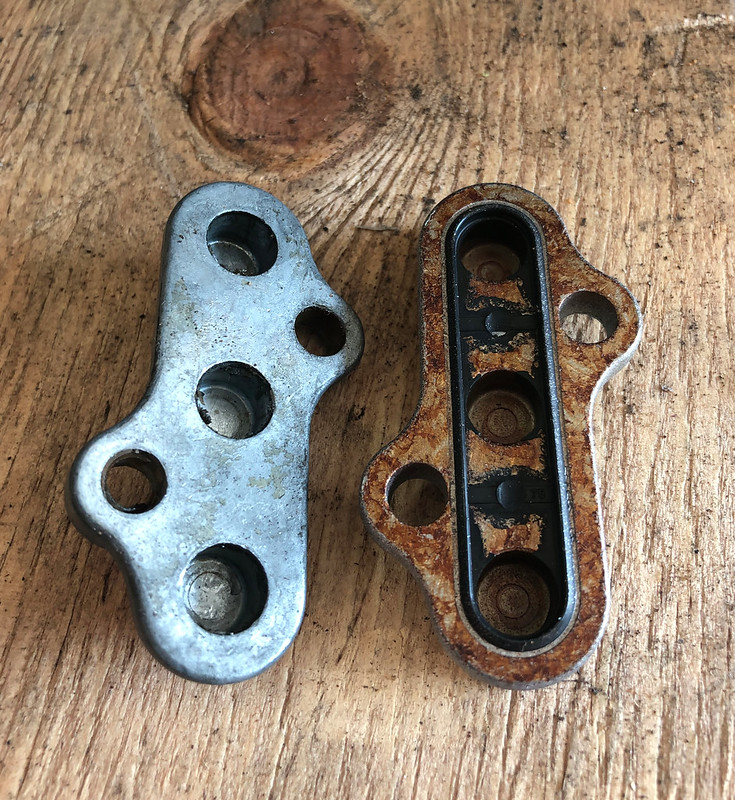


    New pilot bearing:


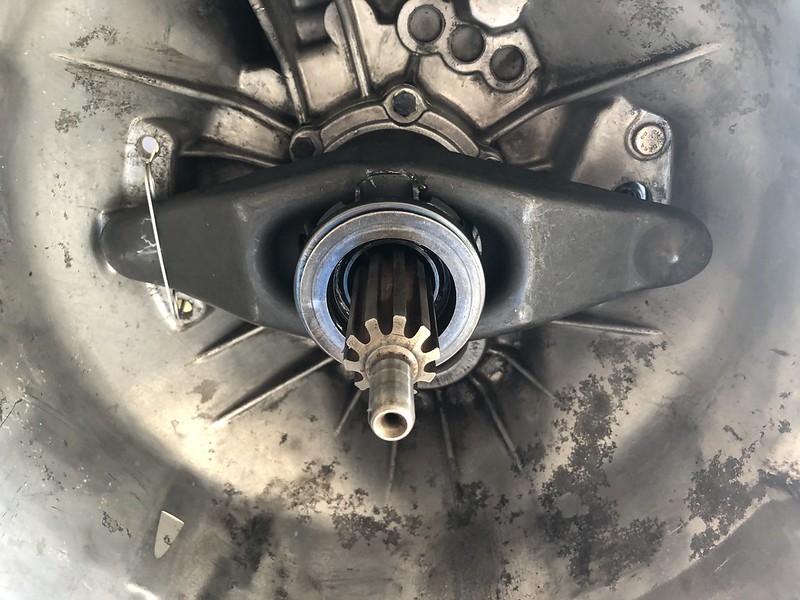
    Got the flywheel 3/4's of the way on before I remembered to put the starter alignment plate back on (D'oh), and got the clutch and pressure plate on. After a bit of wrestling around under the car on the jack, voilà:


    We offically have a manual e30! I've made some more good progress, but I think this is more than enough pics for one post, and #200 for me no less! I hope to have the car running within the week, waiting on one or two odds and ends to ship.
    Last edited by Albie325; 09-14-2020, 08:45 PM.

    Leave a comment:


  • Sh3rpak!ng
    replied
    Originally posted by Albie325
    Not sure what's going on, been having a hard time with the new software. Will work on getting it fixed
    All good now. Nice work! Sent from my SM-G960U using Tapatalk

    Leave a comment:


  • mike.bmw
    replied
    Awesome work and incredible detail!

    Leave a comment:


  • Albie325
    replied
    Not sure what's going on, been having a hard time with the new software. Will work on getting it fixed

    Leave a comment:


  • Sh3rpak!ng
    replied
    Originally posted by ATL_E30
    Pics broken? or is it just my PC?
    I can't see them either on mobile app Sent from my SM-G960U using Tapatalk

    Leave a comment:


  • ATL_E30
    replied
    Pics broken? or is it just my PC?

    Leave a comment:


  • Albie325
    replied
    Been waiting on the software update to post some progress. Still getting used to the new layout but it's starting to grow on me.

    Anyway, after getting all the timing belt work done I started working on refreshing the Getrag 260:


    Just a few of the new goodies going into it. I ended up replacing the input, output, and selector rod seals, new reverse switch and wiring, new shift plate mount bushings and bolts, upgraded to a UUC DSSR and Z3 1.9 short shifter, all new shift lever bushings and hardware, new clutch fork and pin, new slave cylinder and lines, new giubo, and new foam pad/rubber boot. Essentially eveything but the internals.

    I started by doing the input shaft seal. I finally found the manufacture stamp:


    An EARLY early model.

    A few of the lubricants/sealants needed per the Bentley, quite pricey and rather difficult to find:


    I started by draining the trans, definitely some metal shavings in there:


    The remainder of the fluid aside from the drain plug was pretty clean so hopefully I'm still in good shape.

    The Getrag 260's came with a two-piece guide sleeve, start by removing the outer 6 bolts:


    The Bentley states NOT to separate the two-piece sleeve, however if you try and drive the new seal in from the front side with them together you'll ruin the seal as there's a lip on the outside. Ask me how I know...

    Therefore, separate the inner sleeve from the outer plate, there's 4 bolts:


    Here's the lip:


    Here's the seal:


    Tap it in from the back (hey now )


    Now you'll need to reseal the two halves back together using the Loctite 573:


    Next, you need to align the lubrication detent tab on the guide sleeve with the oil circulation hole on the bellhousing and seal the sleeve to the housing:


    Lightly lube the input shaft collar and slide the sleeve over making sure the input shaft seal goes on smoothly without folding under and torque down the bolts:


    Molybdenum disulfide grease on the shift fork and throwout bearing:


    Moving on to the back, the old shifter plate bushings were shot:


    I replaced the detent spring cover as BMW updated the cover for later models. Note the orientation of the 2 longer and 1 shorter spring. I was going to replace these as they can break however the longer springs are NLA, and while I bought a new shorter spring mine were in good shape so I left them alone:


    Old cover on the left, new on the right, the difference is how it seals to the housing:


    Old cover is sealed using liquid sealer, the newer cover has a built-in rubber gasket. Not sure why the underside was so tarnished but don't think it will matter:


    If you plan to upgrade to a DSSR, you'll need to switch to the E36 style shifter rod joint (Part # 25117503525) as it's centered and narrower to accept the DSSR. The old-style, single shear joint is offset and wider:


    After doing the selector rod seal I finished up with the output shaft seal. To get the collar nut off, you'll need either a thin-walled 30mm impact socket (expensive and tough to find) or you can purchase this 1 3/16" example (about $10 and delivered next day via Amazon) instead. My regular 30mm impact was too thick to fit between the nut and flange:


    Pop the old seal out, tap the new seal in until it's flush with the housing (It's possible to drive it in too far past the edge and into the housing), then put the flange back on and seal the collar nut on using Curil K2:


    Torque the nut down in 2 stages: first torque to 125 ft/lbs, loosen it up, then retorque to 89 ft/lbs. Add a new lockplate and you're done sealing the trans:


    Ended up finally tracking down the plate-style shifter mounting bracket, on the right:


    That piece to the left, listed as a "bow" on RealOEM is actually not needed for the early model shift carrier despite being listed in the pictures as well as in the Bentley. It is used for the newer, rod style shift carrier.

    New shift carrier with upper and lower bushings, spring, and circlip. In order to get the upper shift lever bushing to slide over the ball on the end of the shifter, I had to make a slice in it with a razor blade so that I could stretch it over the ball. I then glued it back together. Some have felt that this ruins the integrity of the bushing, but it sits within the shift carrier pretty snugly and is held in place by the spring and circlip. Along with gluing it, I feel there is no way the bushing could fail and it feels very smooth and solid shifting through the gears. I apparently didn't take pictures of this, however I have the old bushing and shifter and could post pictures up if anyone needs a better explanation.


    Refilled with Redline MTL, all reassembled:


    Now enjoy your freshly sealed 5-speed, and clean garage floor!

    Last edited by Albie325; 09-14-2020, 08:25 PM.

    Leave a comment:


  • brutus
    replied
    good stuff,,, well done,

    Leave a comment:


  • Albie325
    replied
    So got a lot of the big maintenance items out of the way over the last few days.

    With the trans out, I did the rear main seal, was a pretty easy job:


    As the Bentley states with essentially all the engine oil seals, the original seals are installed flush with their retaining brackets. When replacing them, be sure to drive them in 1-2mm deeper so that the new seal doesn't ride in any grooves in the metal shaft left by the old seals leading to a leak:


    There wasn't a groove in the ouput shaft, however there was in the crank shaft which you'll see later. If you are not going to be doing the oil pan gasket, you'll need to seal the rear main seal carrier to the oil pain using a silicone sealant.

    While I was back there, I decided to replace the heater hose coolant connector on the back of the head, I couldn't quite get to it when I had the intake manifold off:


    It was pretty crusty but seemed to come off ok until:


    One of the bolts sheared off flush with the head. Ugh. A 10 minute job turned into a bout a 4 hour ordeal.

    I ended up having to drill out the old screw and re-tap the hole (it's an M6 x 1.0 for those interested), but I had to drop the subframe in order to get enough tilt on the engine to get a drill in there. Ended up working out great though:


    Sorry for the lack of pics. It was a rough day, I was cranky as hell, and it was tight under there.

    I ended up removing the engine coolant plug and flushed the whole system through the rear hole until the water was mostly clear, got a bunch of gunk out. Replaced the old plug as well, don't forget your crush washer:


    Tightened up no problem:


    Next I wanted to get the waterpump/timing belt done, along with the cam shaft, crank shaft, and intermediary shaft seals:

    After removing all the necessary pulleys/cap/rotor:


    This was AFTER some degreasing. The front of the engine was caked to the point I couldn't even tell where the TDC marks were.

    The waterpump/timing belt change is very well documented so I'll spare you. As for the crank shaft/intermediary shaft seals, I didn't find much in the way of DIY's so I'll go into more detail about that part of it.

    Remove the crank pulley and vibration dampener, there's 6 13mm bolts holding the pulley in place. There's a tab on the crank timing belt gear that only allows them to go back on one way. They're just held in place by friction at this point, mine popped off with relative ease but you may need to tap them off with a rubber hammer.

    You'll need some type of holder tool to hold the crank steady while you break the front crank bolt loose, it's torqued to 350ft/lbs so it's on there damn good.

    I ended up just buying this, it wasn't too bad price wise and made the job very easy:


    Using the crank shaft pulley bolts, get the holding tool attached to the crank belt gear:


    Don't worry about aligning the TDC marks yet. Stabilize the end of the holder tool against something rigid, mine ended up resting on the power steering bracket. If you are planning to do the camshaft seal, break that bolt loose but don't remove it. Next you can break the intermediary shaft bolt loose (again, don't remove, just loosen it so that you can remove it once the timing belt is off). Last, I went for the big boy:

    First I tried to just use an impact gun, the bolt just laughed at it.

    I ended up getting it off using a big breaker bar as well as a full jack handle (and all of my super-human strength):


    Once the bolt was loose, I then snugged it up just so that I could turn the crank to align my TDC marks:


    Now you can remove the bolt:


    At this point you can remove the tensioner as well as the belt. Point of no return...


    Obviously from here on out you have to be very careful not to allow the camshaft or crank to rotate or your timing will be fubar'ed. The intermediary shaft doesn't matter.

    The old belt was actually in very good shape:


    Next remove the crank belt gear, it is aligned with a woodruff key in the crank and will only go back on one way, mine slid out pretty easily:


    Remove the woodruff key, it was a little hard to tap out but I used a small flat head and eventually got it:


    Last, remove the intermediary sprocket:


    You're now ready to remove the lower crankshaft cover, it's held on by 2 13mm and 4 10mm bolts. You'll also need to remove the 3 oil pan bolts that screw into it.


    Remove your water pump and clean everything up. If you aren't planning on removing the oil pan and replacing the gasket like I am, make sure you stuff some rags in the gap to prevent anything from falling in.


    All clean:


    Our replacement parts:


    Clean up the cover and tap out the old seals, a 36mm and 46mm socket were perfect:


    As with the rear main seal, the old seals were flush with the front of the cover with about 1mm of space towards the back:


    I tapped the new seals in so that they were 1mm deeper and flush with the back:


    Here's why:


    The old seal causes a groove in the crankshaft, if you reinstall the new seal at the same depth as the old one it will ride in that groove and cause a leak. You have to install it deeper to get it past that groove so that it can seal to a fresh part of the crank shaft, nice and snug.

    I got the gasket in place against the block, there's two dowls at the bottom where the 13mm bolts go that help hold it in place while you get the cover put back on. Coat the crank and intermediary shafts with a light coat of oil and guide the seals over the shafts, first the intermediary as it sticks out farther, followed by the crank. I used a small, flat non-marring pry tool to (gently) help make sure the seals went on without binding. If you are not going to be doing the oil pan gasket, you'll need to seal the crank/intermediary shaft seal carrier to the oil pain using a silicone sealant. I'm removing mine so didn't have to worry about it.


    Reinstall and torque down the bolts, and this part's done (10 newton/meters for the 10mm, 22 newton/meters for the 13mm bolts)

    Tap in a new woodruff key, lightly oil the crank shaft, and slide the crank belt gear back on. I was relieved when it still lined up perfectly:


    Next I did the camshaft seal. Remove the camshaft pulley mounting bolt that you broke loose earlier, followed by the distributor rotor mount and the pulley. I was cruising along on a hot-as-balls day and forgot to take pics here, sorry. There's 2 10mm bolts that hold the camshaft seal carrier in place, remove those and you'll have to use a thin flat tool to pry/wiggle the camshaft seal carrier off. Once it's out, remove the old inner seal and reinstall as before, and don't forget to change the outer O-ring as well:


    Clean off the camshaft and lightly lube with oil along with the camshaft seal O-ring and tap back into place. Reinstall the 10mm bolts for the carrier. Reinstall the pulley and distributor rotor mount and screw in the bolt but don't tighten. Ensure that your TDC mark is still aligned.

    Since I didn't take many pics of the camshaft seal replacement, here's a good DIY that I used:

    E30 camshaft seal removal and replacement from Classic Bimmer Bits, your go-to source for E30 How-to and DIY


    There's also a lot of other really good DIY's on that site including a full write up of the timing belt/water pump.

    At this point, install your new water pump and belt tensioner, making sure the tension spring is compressed. The rest is the usual timing belt replacement.

    Once the belt was installed, I turned the crank through 2 full revolutions and...my marks thankfully still lined up dead on. Went about cleaning up and repainting some crusty bits and got everything reinstalled:


    I also got a special delivery over the weekend:


    My refurbed AFM from BavRest, now I can actually start the car once all this shenanigans is done. Still waiting on my cluster which will be a few more weeks, I have a few spares I can use for now.

    All that's left now is the oil pan gasket (god I've talked about it so much I just want it done already) and the trans install, followed reassembly of the driveshaft and exhaust. I've already started refreshing the Getrag 260 as well as the shift carrier, when I get that all finished up and mounted I'll post it up as well. Hoping to have this thing running in the next 2 weeks... famous last words
    Last edited by Albie325; 07-31-2019, 04:09 PM.

    Leave a comment:


  • Albie325
    replied
    AWDBOB I swapped in a rebuilt 3.25 lsd, a lot of people recommended it for the eta engine. It really did make a big difference with the auto trans in, excited to see what it does with the manual

    Leave a comment:


  • AWDBOB
    replied
    Fantastic updates! You're going to love the car with a manual trans- what diff is in the car?

    Leave a comment:


  • Albie325
    replied
    Originally posted by jeenyus
    OOoooO i've been looking at cocomats for a loooong time now trying to decide on a color.
    Yeah man I've been back and forth about 10 times on a few different options. I finally decided on the darker sisal swatch (just really felt like the other would shed like crazy), however when I went to place my order I found out it's backordered until October and they told me that the newer batch is unlikely to be identical in color due to they dying process. I didn't want to wait that long, so decided to go with a sisal mat that's a bit lighter, I actually think it will contrast well. Hope to have them in 3 weeks or so, stay tuned.

    Originally posted by Stanley Rockafella
    Hate that the Conti head unit extends the antenna regardless of the source your using.
    Yah I was surprised when I fired up the head unit that the antenna stayed up on BT mode. I was intending to do the mod either way so nice to have it regardless.

    Originally posted by 15Michaeljoseph
    id a similar thing a couple months back so I could listen to cassette tapes (don't judge!)
    Ha!, if I could find all of my old cassettes I might have reconsidered ditching the OEM radio, I'm shocked you can still find them. No judgement here, sounds like you made a nice little setup with the hidden switch.

    Got a TON of important projects done today, will plan to post it up in the next day or so

    Leave a comment:


  • Melon
    replied
    Good choice on the seatbelts, it's one of the things that I get the most compliments on in my car.

    Also farewell auto sloosh box!

    I like this one:

    Leave a comment:


  • 15Michaeljoseph
    replied
    Love the radio antenna mod... Did a similar thing a couple months back so I could listen to cassette tapes (don't judge!) and bluetooth without the antenna always being up. I used a universal rocker switch and made a custom board for it to sit hidden away inside the front ashtray.

    Sent from my moto g(6) using Tapatalk

    Leave a comment:


  • Stanley Rockafella
    replied
    That antenna switch mod is the next thing I've been meaning to get to.
    So handy and useful. Hate that the Conti head unit extends the antenna regardless of the source your using.

    Leave a comment:

Working...