-
Nice work, I did the same with the Sways, Vert front, and M3 rear. Its a nice upgrade without going really big with aftermarket. -
Great write up about the zhp rack and front subframe. I'm about to tackle that soon and your level of detail will help immensely.Leave a comment:
-
Getting close! That's a ton of great work.
Regarding torquing the top nut on the front struts I've done this a couple of ways on various cars:
1. Do the final torque with the weight of the car on the suspension. The weight of the car will usually prevent the strut from spinning.
2. Use a "pass through" ratchet/socket set. I bought a GearWrench set for about $30 a number of years ago that has proved useful. This will allow you to ratchet while using the allen key to prevent the strut from spinning.Leave a comment:
-
So it's been pissing rain here in NC for basically two weeks straight. Has been a pretty miserable view from the garage:
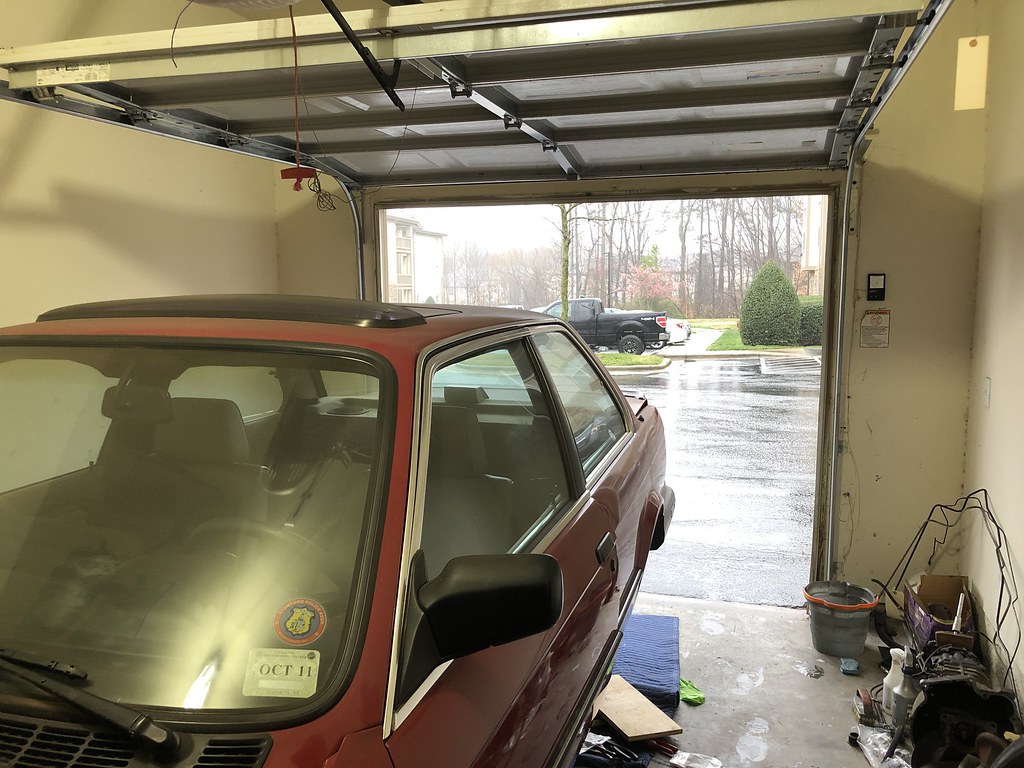
Luckily my fiancée was busy studying (she's in the midst of grad school) so I was free to have as much garage time as I wanted.
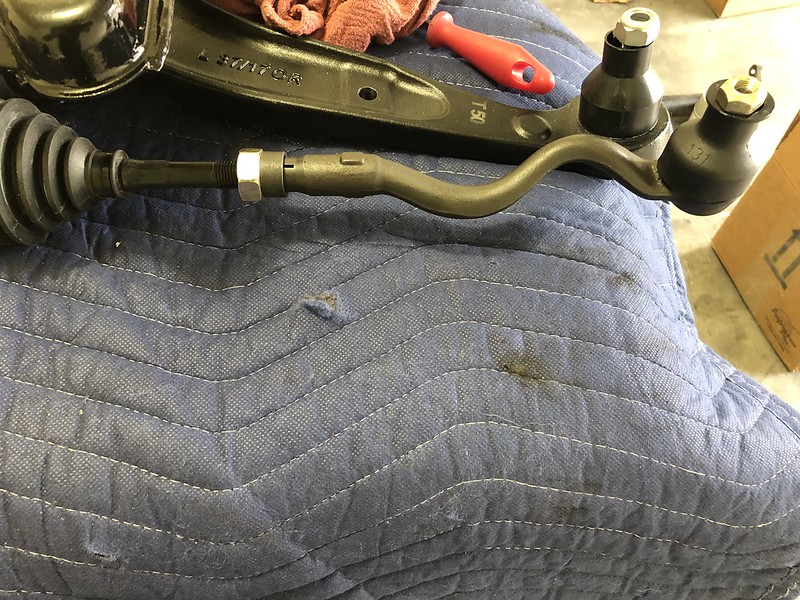
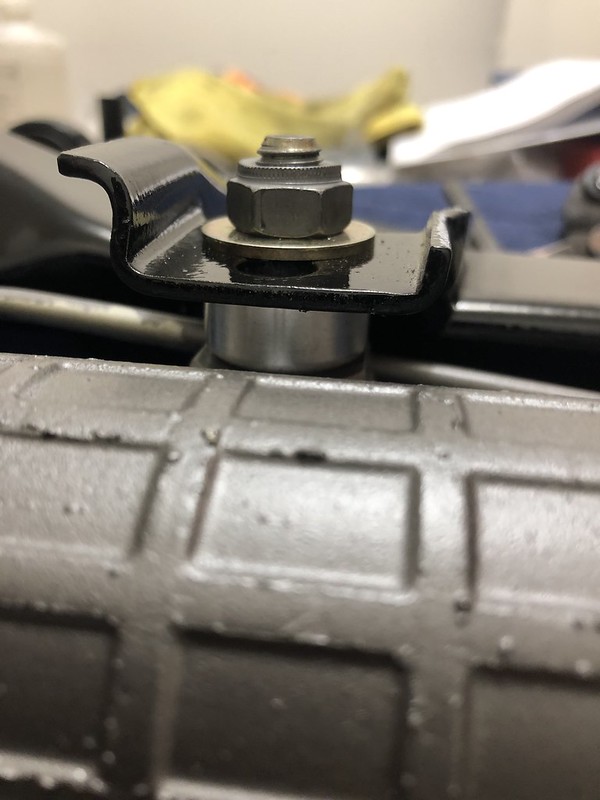
I started by finishing up the steering rack with the correct tie rod securing ring/nut:
I also realized I had mounted my lollipops on backwards. Was quite fun removing and reinstalling them...
Finally ready to rock:

All mounted and torqued
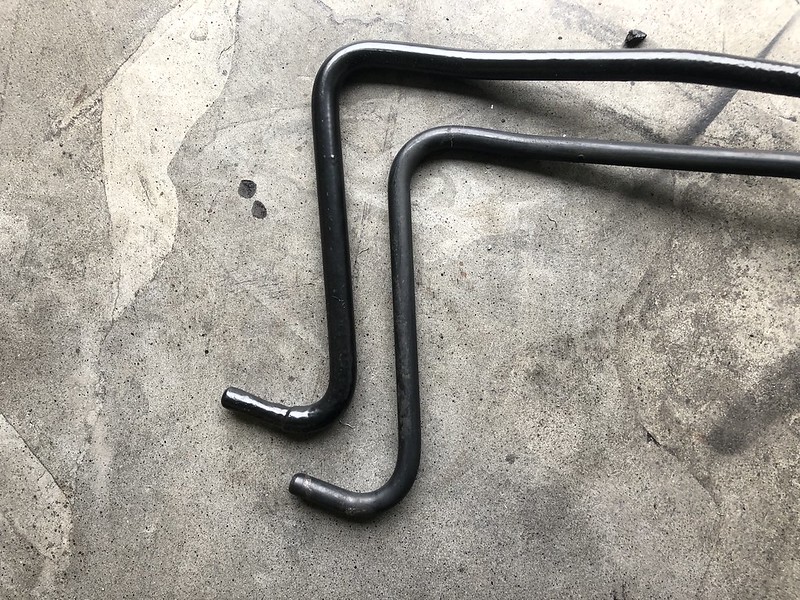
I know I showed a pic in an earlier post of the steering knuckle I filed down that showed the lower knuckle only. It's actually the top knuckle that will bind, I filed it down prior to install after doing some more reading.
I also recommend getting the knuckle seated on the steering column shaft before lifting the subframe up. I had the subframe all bolted in before I realized I didn't have enough play to get the knuckle hooked up. Just more practice at dropping the subframe for when I can finally replace my oil pan gasket I guess...
After install everything turned smoothly and felt great, no binding or anything. Very pleased with this mod and I'm not even close to driving the car yet.
Next, I ended up buying another strut tube to replace the bent one. Never heard back from the original ebayer... Oddly enough, I bought the new strut from the same guy I bought the rear subframe and trailing arms from over a year ago. First thing I did was check to make sure the strut went in (it did thankfully).
It was in almost mint enough shape to skip painting, but the finish was more matte than the rest of the undercarriage so I scuffed it and just did the top black coat:
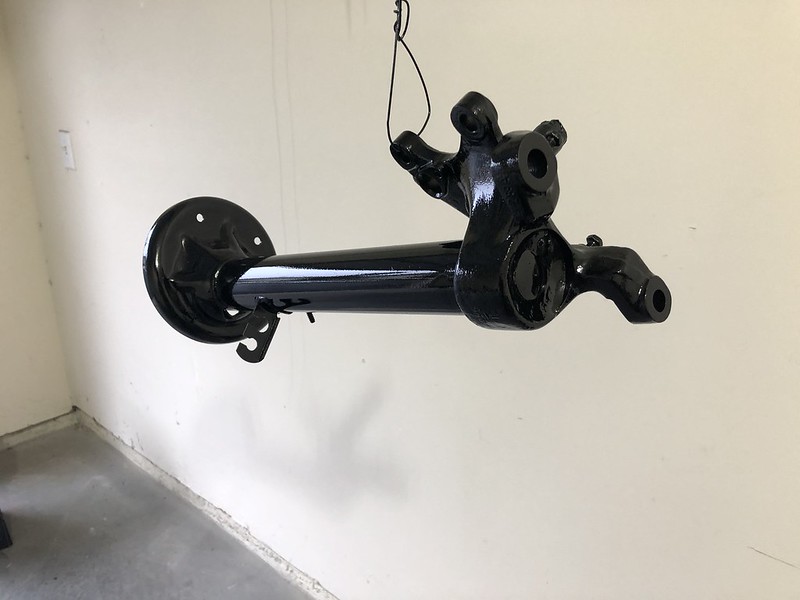
Came out the best of all paint jobs I've done so far:
I had to get creative when torquing down the gland nuts, just under 100 ft/lbs to torque down without much to hold onto:
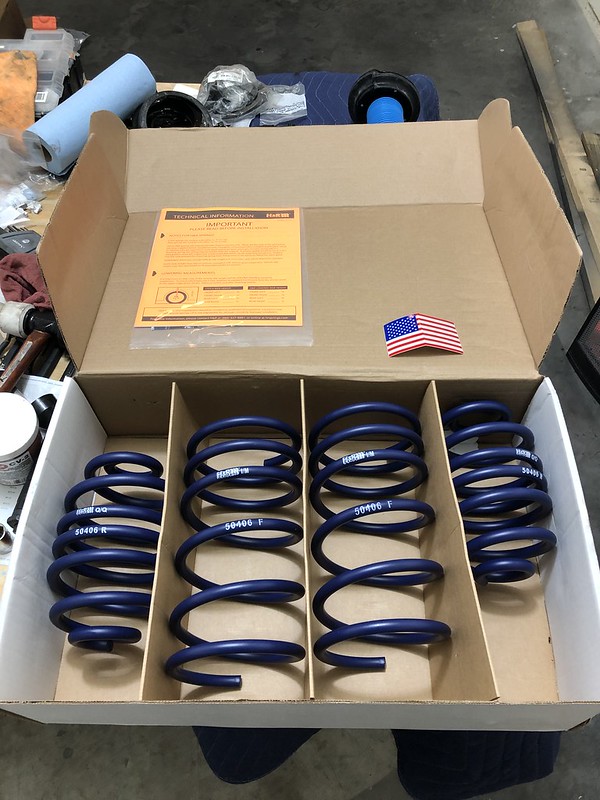
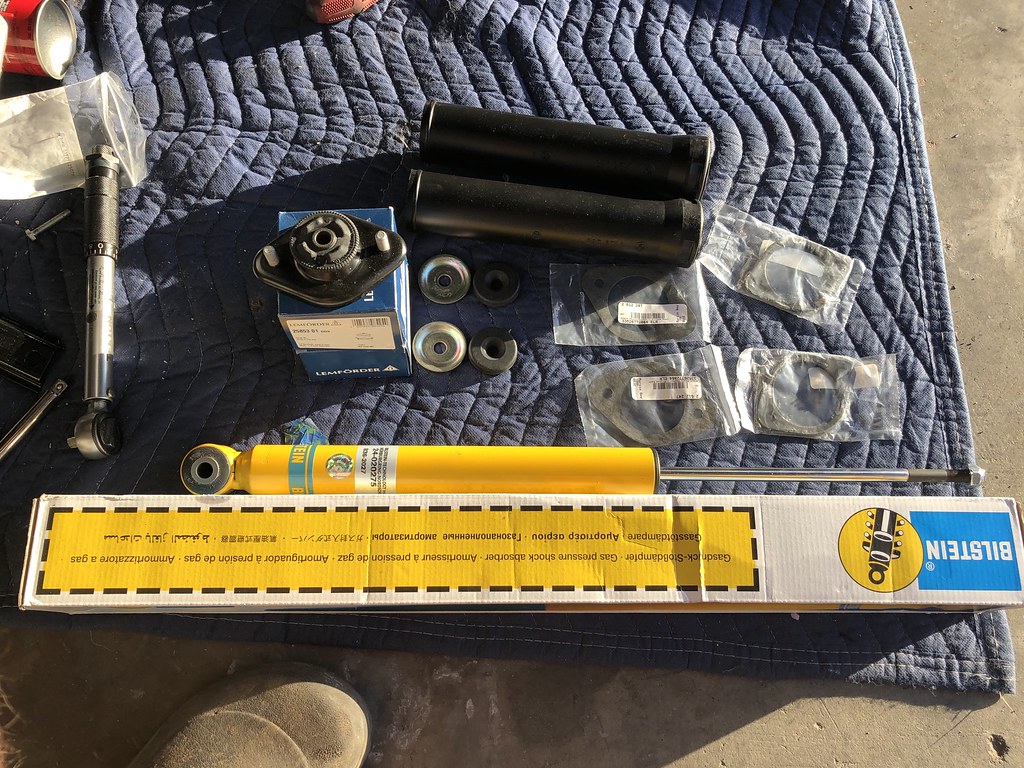
Been patiently waiting to open up this box. 'Murica, fuck ya...
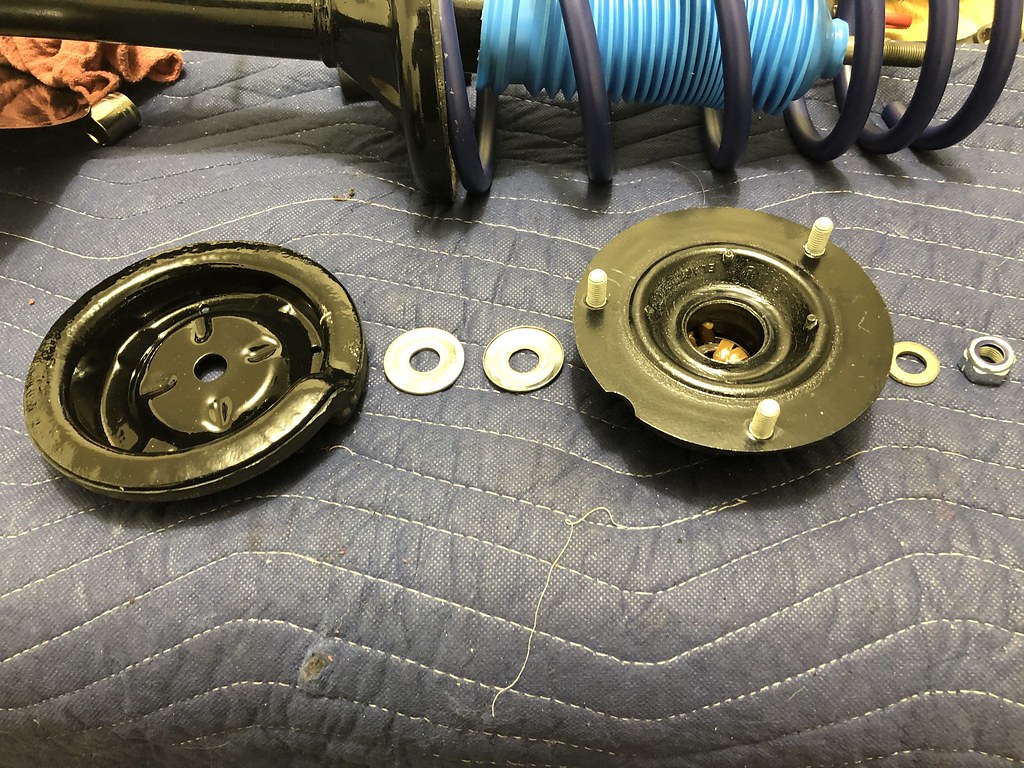
Order of operations for the drophats/mounts and associated hardware (the spring pad is already on the drophat):
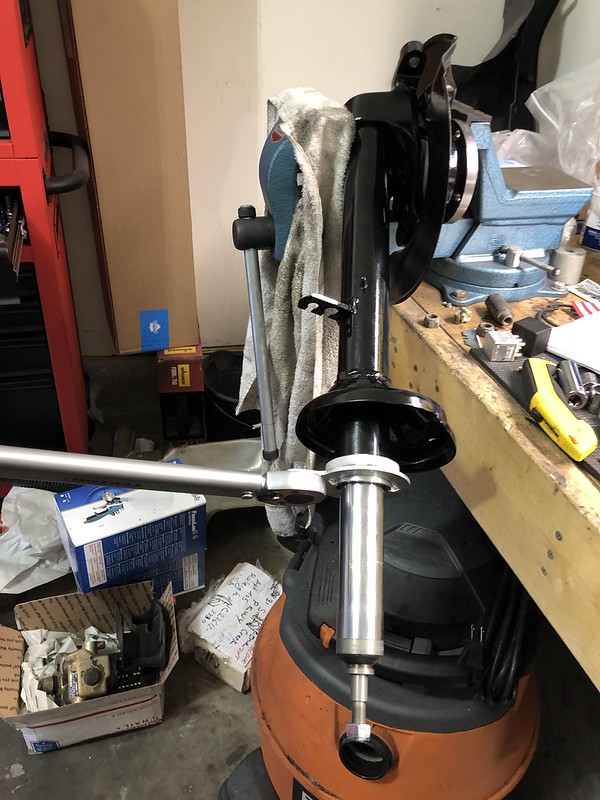
So when I went to go tighten the top nut for the strut tube, I realized I needed to insert an allen key into the middle of the strut rod to keep it from spinning, and I didn't have any pass through sockets. None of the local stores had the correct size (19mm) in stock. There's a specific tool for this job (Scwaben makes it for about $17). In any case, I wanted to get it done without having to wait for shipping. I took a look at my impact sockets and they all have a sizeable hole in the side:
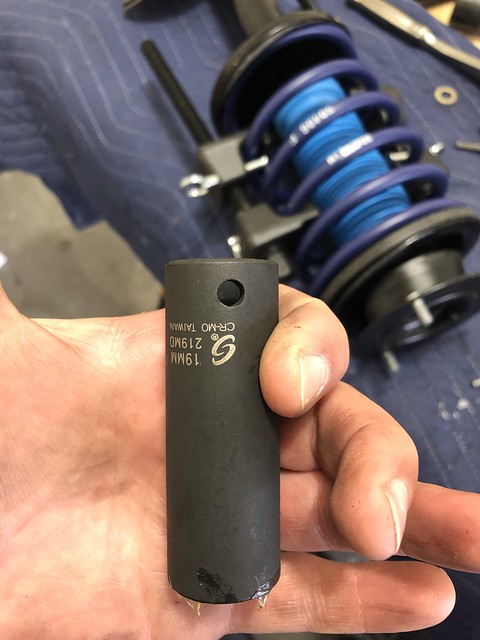
I used a punch through the hole as well as the allen key to tighten down. I wasn't able to torque it to spec, but at 30 ft/lbs I just tightened it nice and snug.

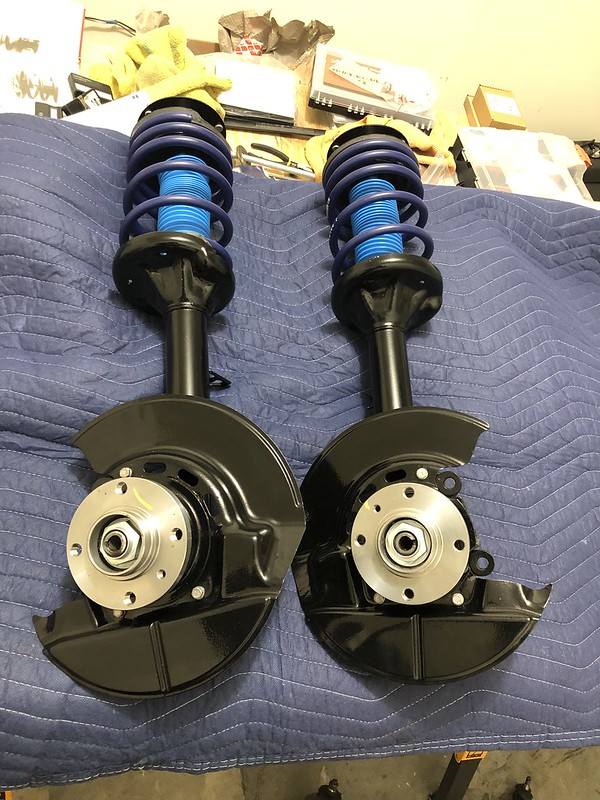
All good:
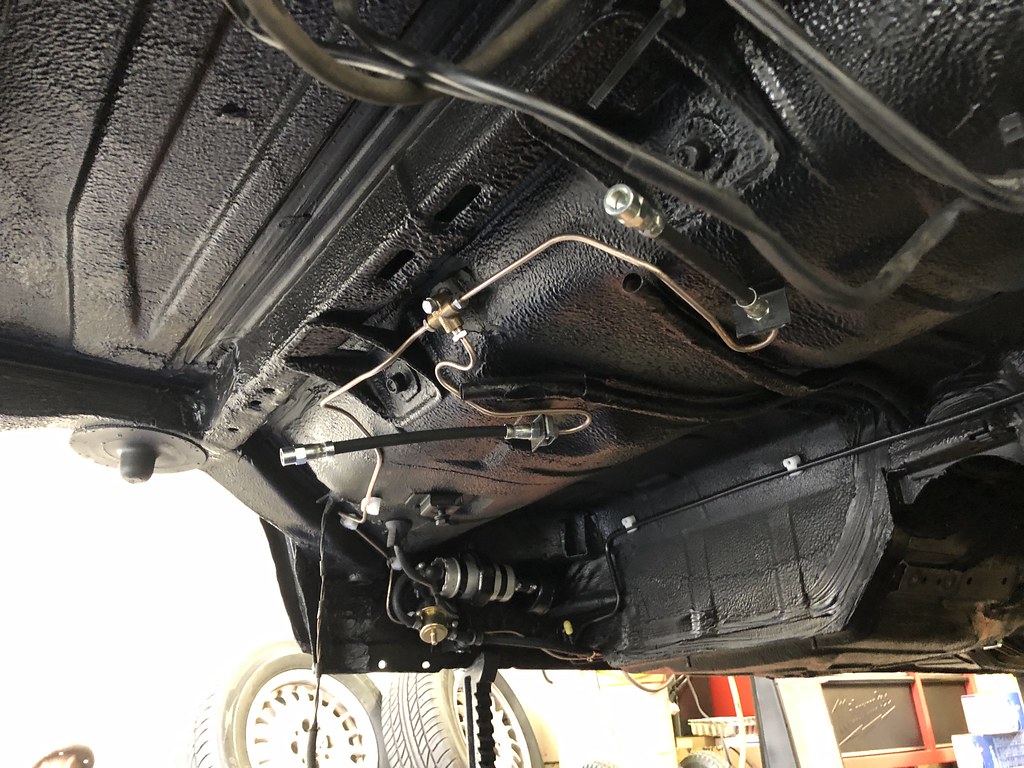
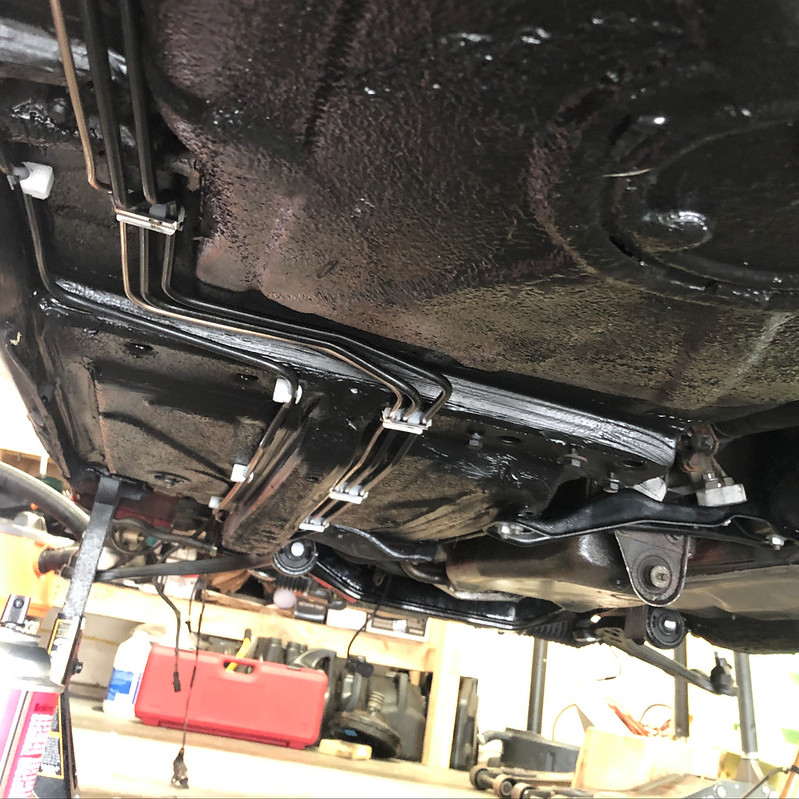
Got all the new brake lines, high-speed fuel pump and bracket with new rubber bushings, and all new hard fuel lines mounted up. Also repainted the trans mount bracket and installed the new mounts:
Found acetate cloth adhesive tape on Amazon that was pretty much identical to the original tape for securing the gas expansion tank breather hoses:
Compared to the old breather hose:
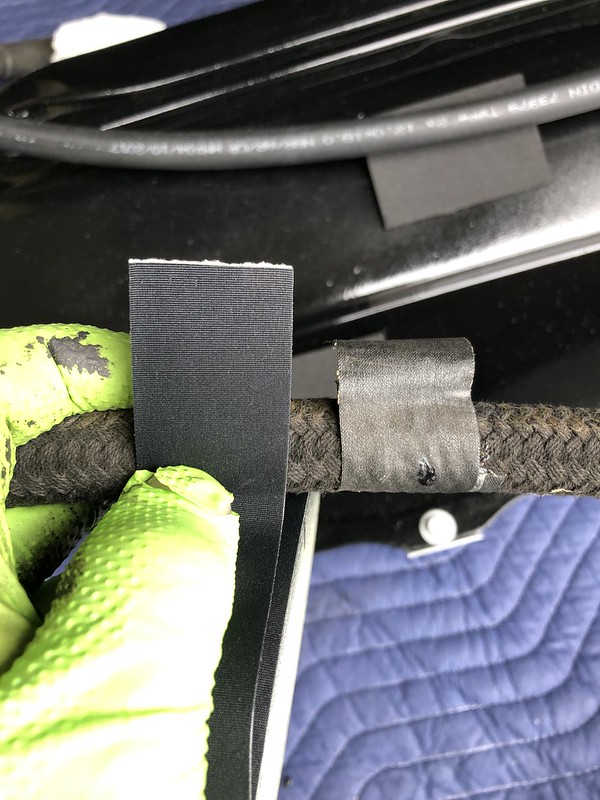
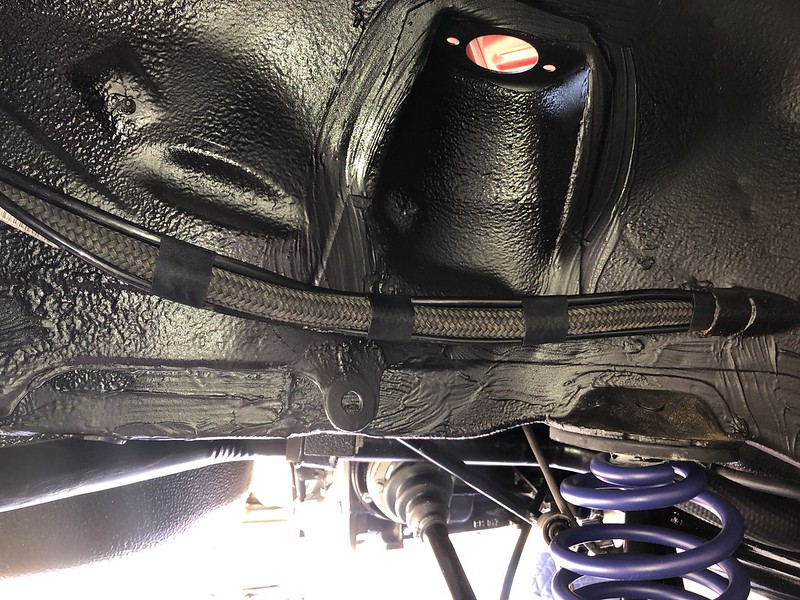
New breather hose:
Now it was time to tackle this beast, I had been excited but dreading it for some time:
I propped it up on a jack and got it lined up. Contrary to some other reviews I've read, the Spectra Premium aligned pretty well with the original bolt holes. The hardest part was connecting the two fuel lines on the driver's side of the tank to the high speed pump and hard fuel line with the tank balanced on the jack. Also, you'll need to thread the expansion tank breather hoses through the pipe leading into the rear passenger wheel well before mounting up.
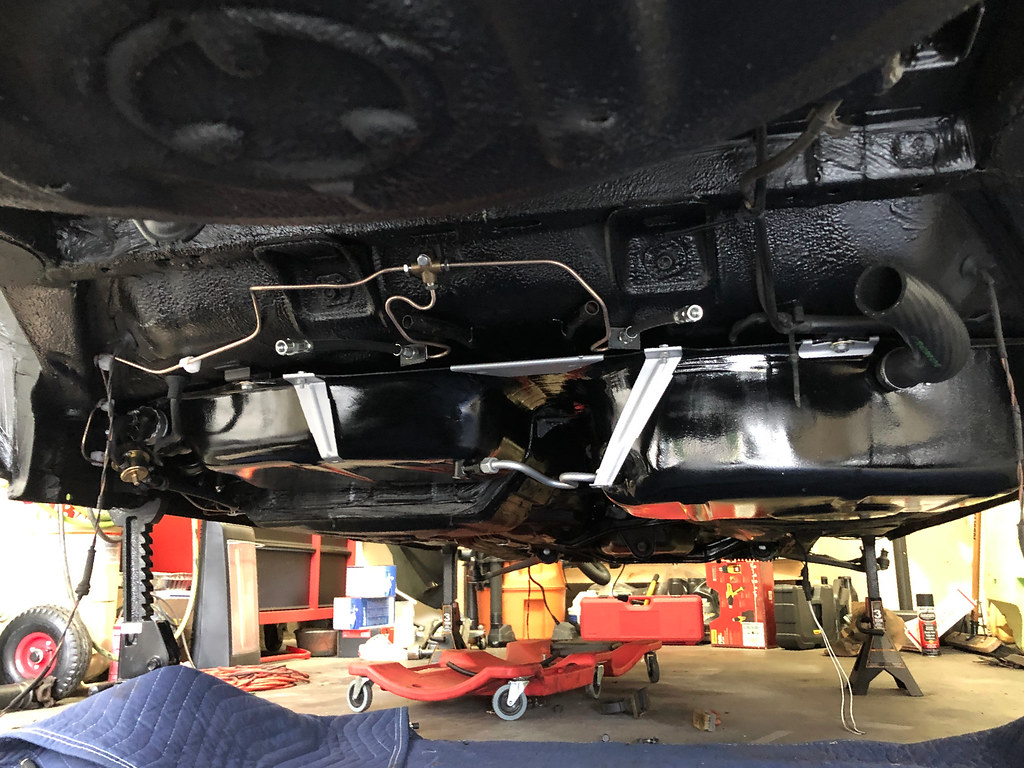
Looking good... of course this is after I realized I forget to thread the in-tank pump wiring up under the tank from the harness. Had to drop the tank, thread the wires through, and do it all again. Do-overs, noticing a trend here?
I figured it'd be easier to get the rear swaybar in place prior to the subframe. For those that asked earlier on, here are the differences between the stock ETA swaybars and the 325ic front/M3 rear bars:
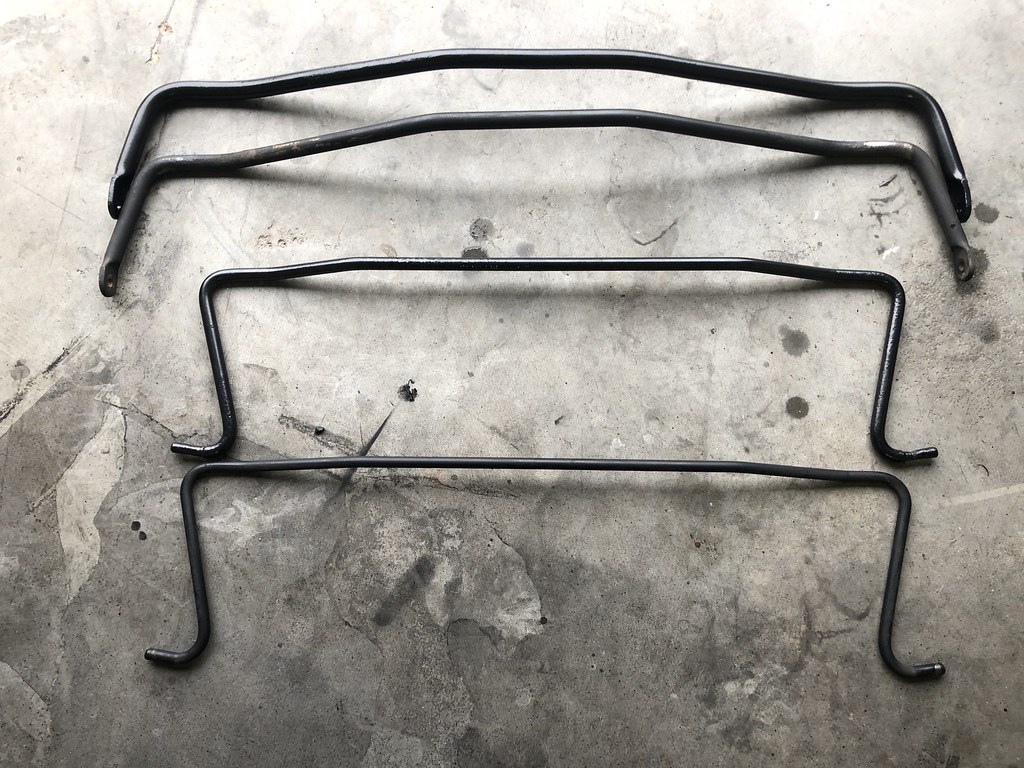
Front:
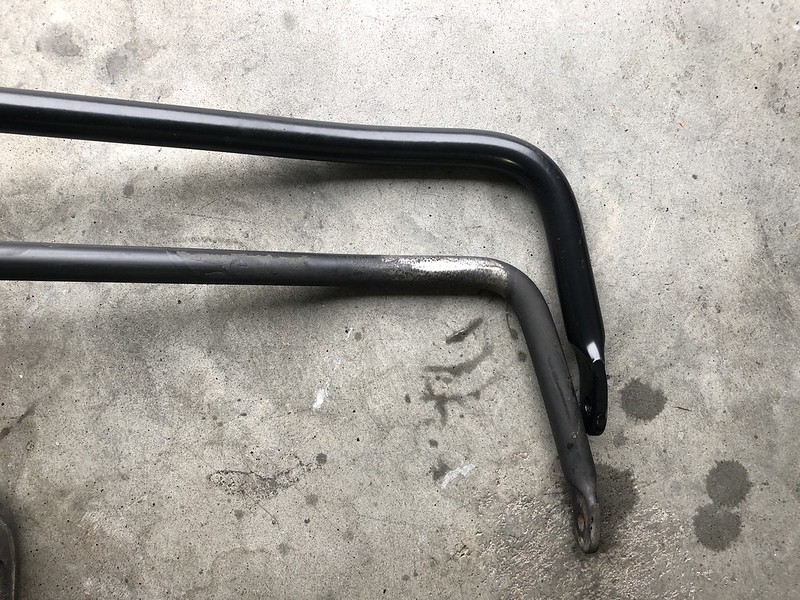
Rear:
Subtle, but definitely noticeable. Got the rear mounted up. The bushing was super tight in the bracket and I had to use a vice grips to lock the bolt side down enough to get the bolt through. Then I remembered I didn't use any lithium grease on the inside of the bushing... redo time. Goddammit.
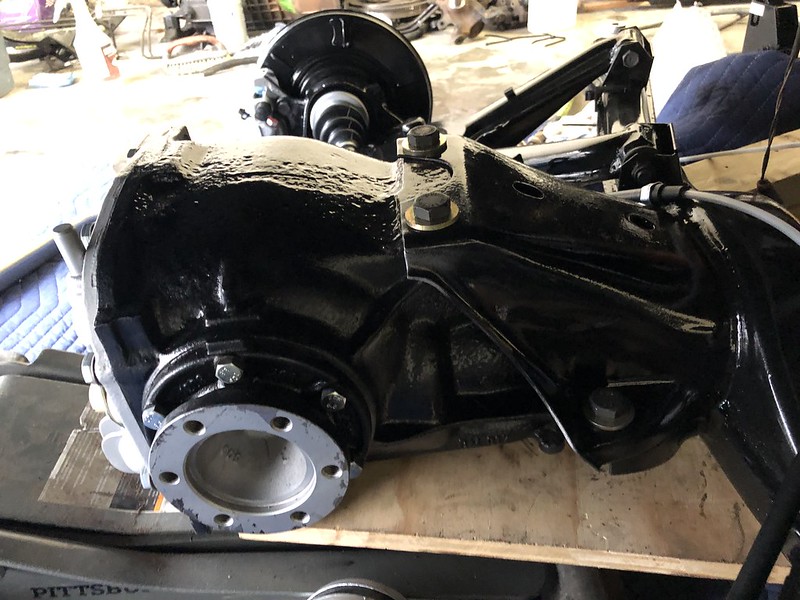
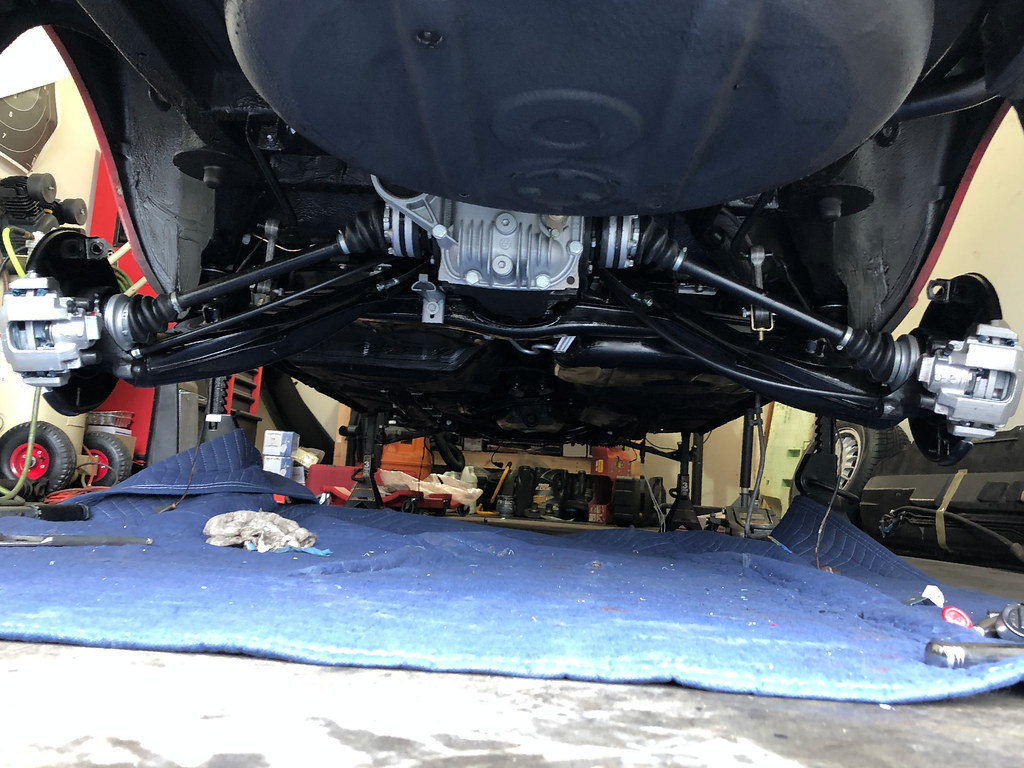
Time for the diff and subframe:
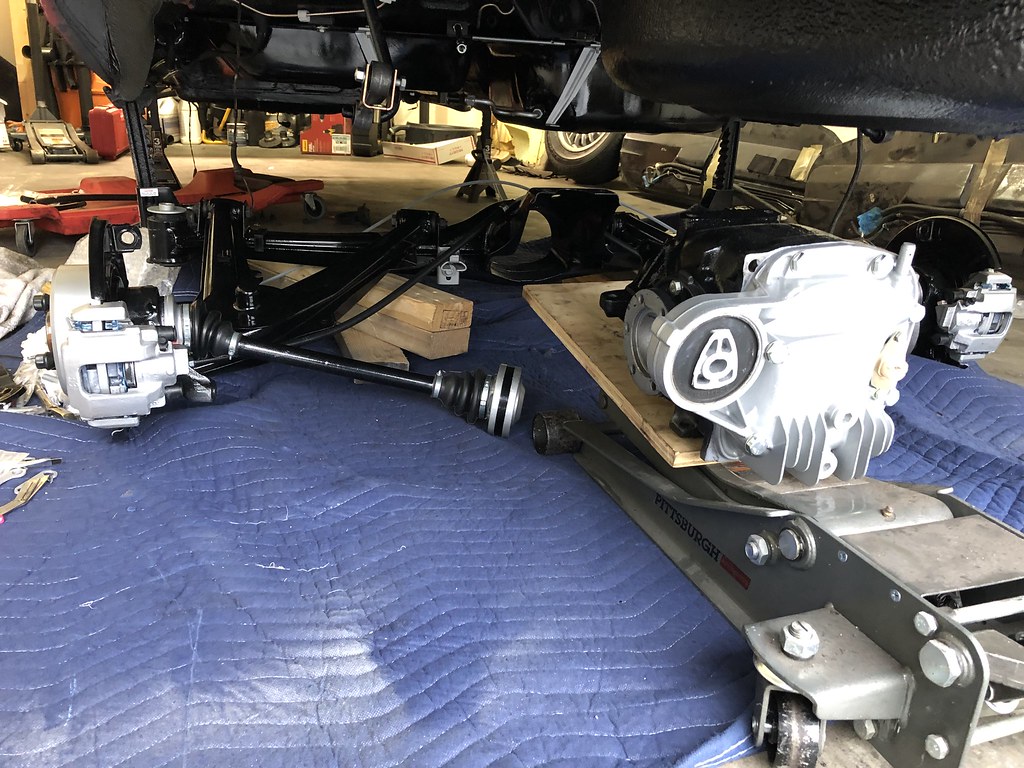
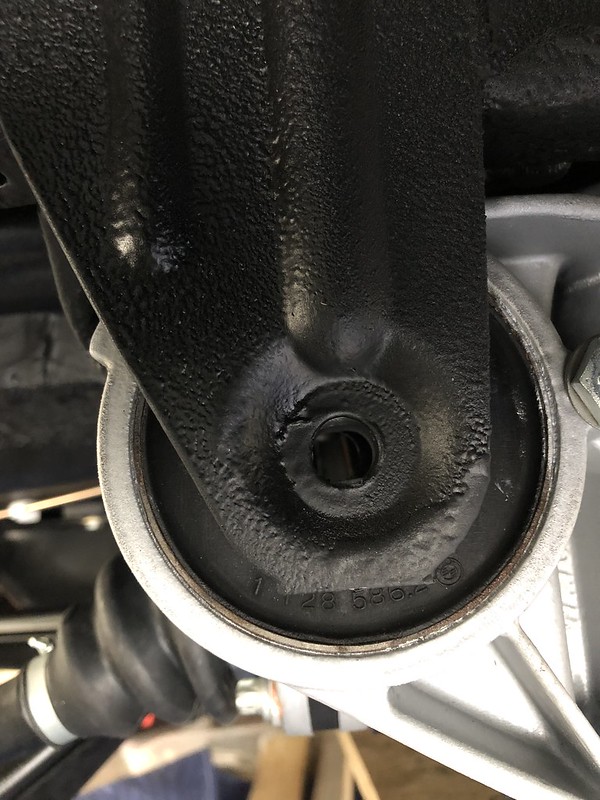
Finally mated to it's new home, can't wait to see how much of a difference the S3.25 gearing makes:
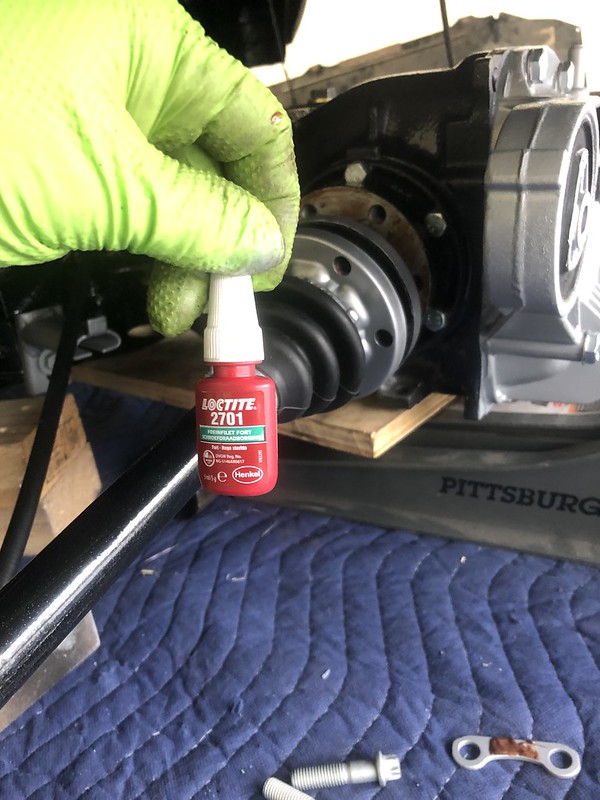
Got the half shafts mounted and torqued, DON'T FORGET TO USE LOCTITE ON THE BOLTS.
It was quite the balancing act but it actually ended up lining up well. I left all the old ABS sensors in place just so I'd remember where to put the new ones later on:
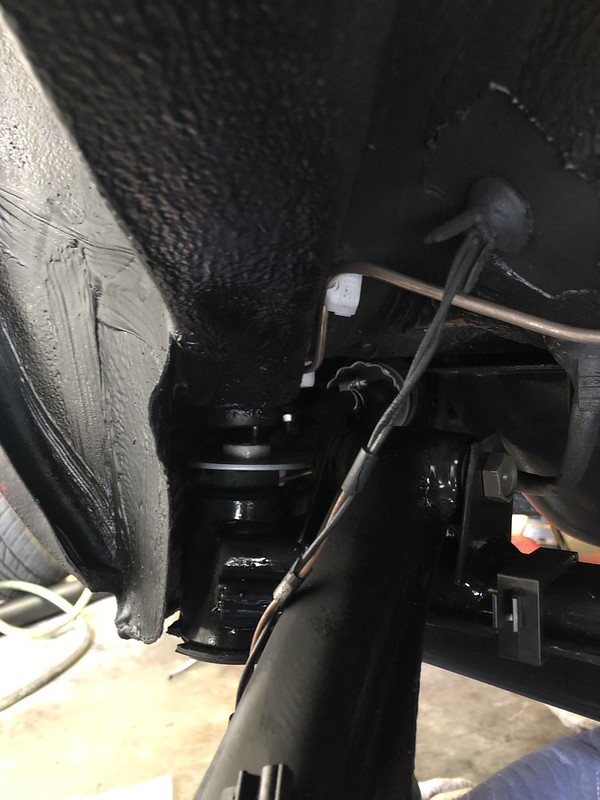
All bolted up:
I'll have to do something about the black rocker panel paint, now that the freshly painted brackets are on there it stands out like crazy.
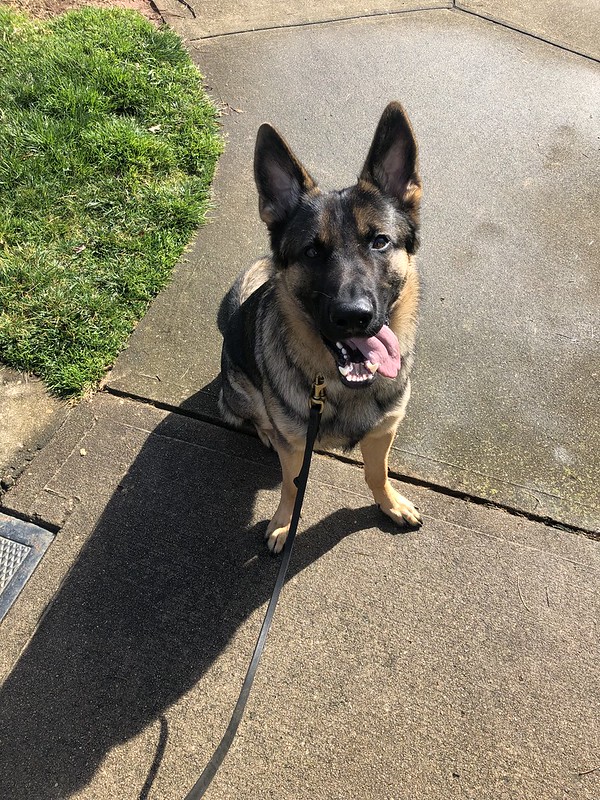
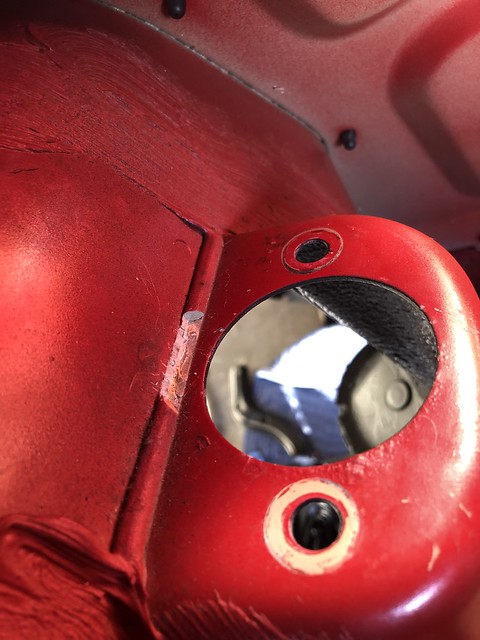
And just like that, the skies parted and the sun shone down upon me...
The pup wasn't too upset about it, he's been going crazy inside:
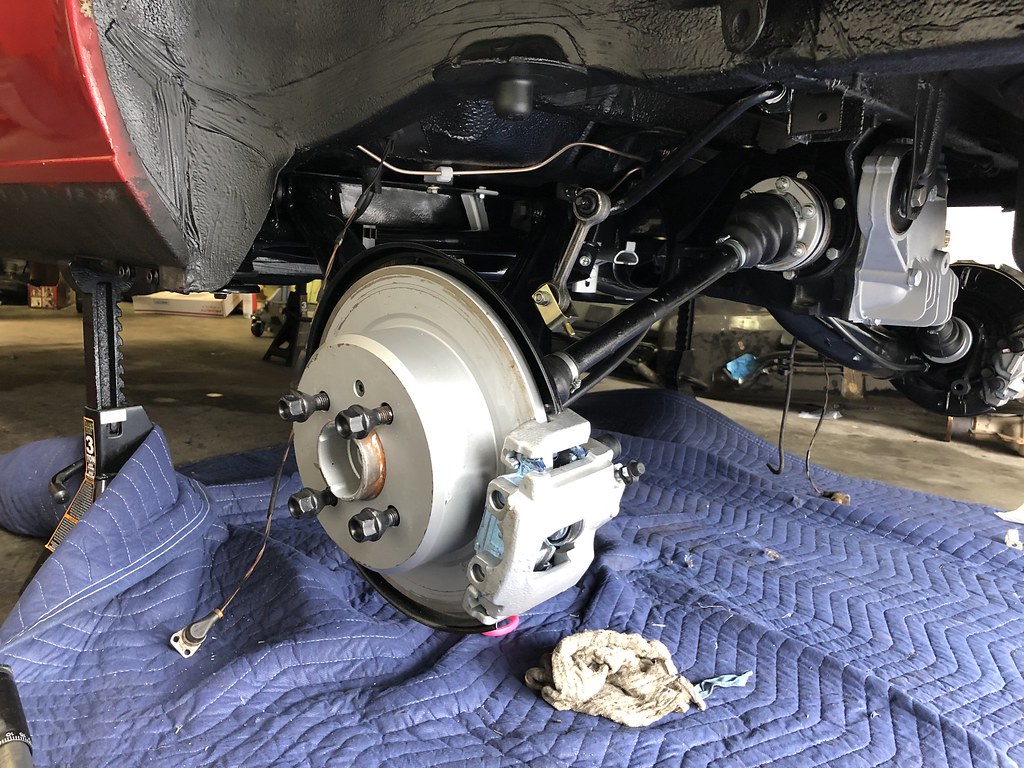
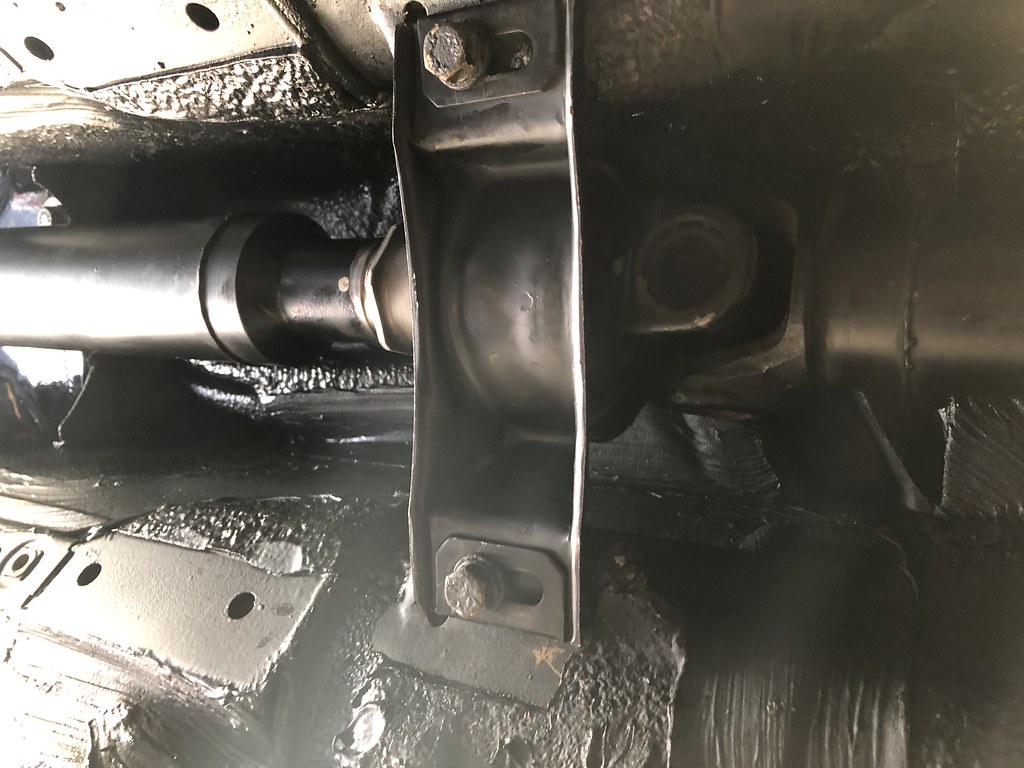
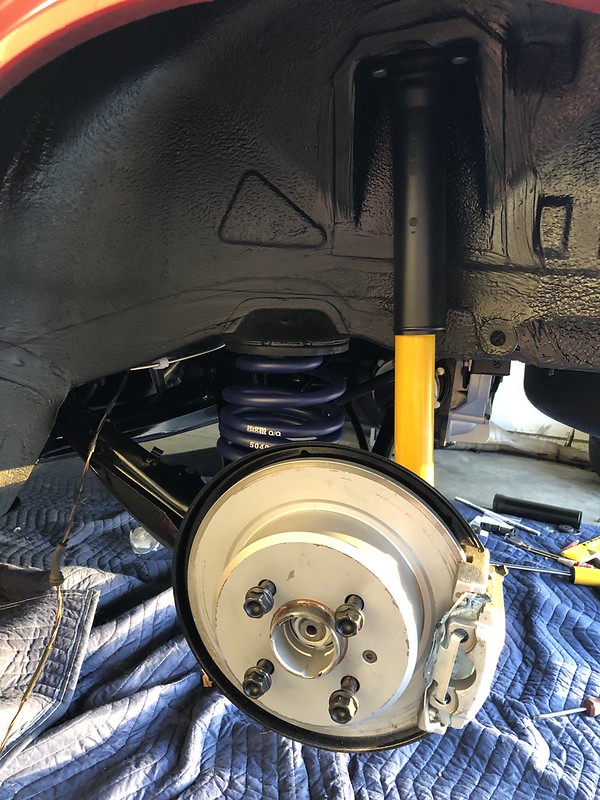
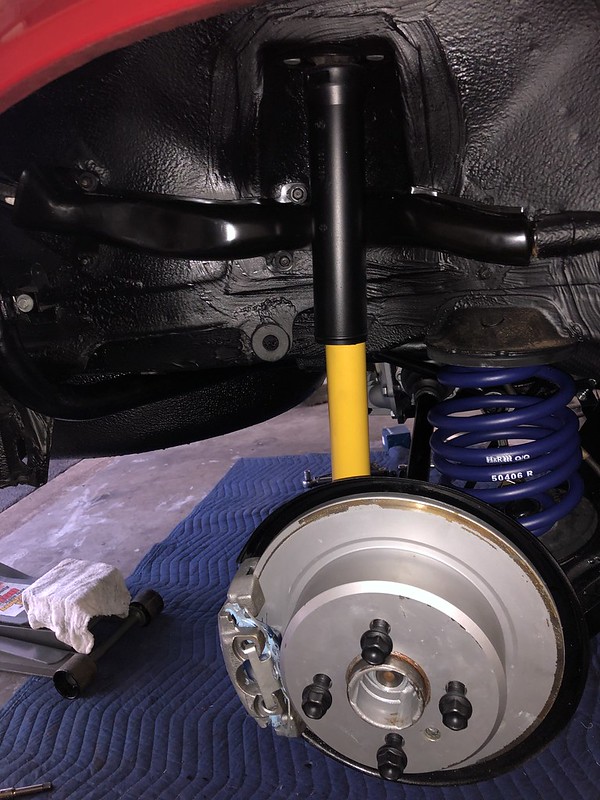
Now I was on a roll, still had a few hours of sunlight left so I decided to get the dirveshaft back in and the rear suspension bolted up.
It was at this point I realized that when I took the driveshaft apart, the diff was out of the car. Now, I didn't have enough room to put it back together. Should have connected it before I put the subframe up (d'oh). I had to disconnect it from the trans to have enough play. A half hour (and a dozen times flipping back and forth to neutral) later:
New CSB (just loosely in place to hold it up):
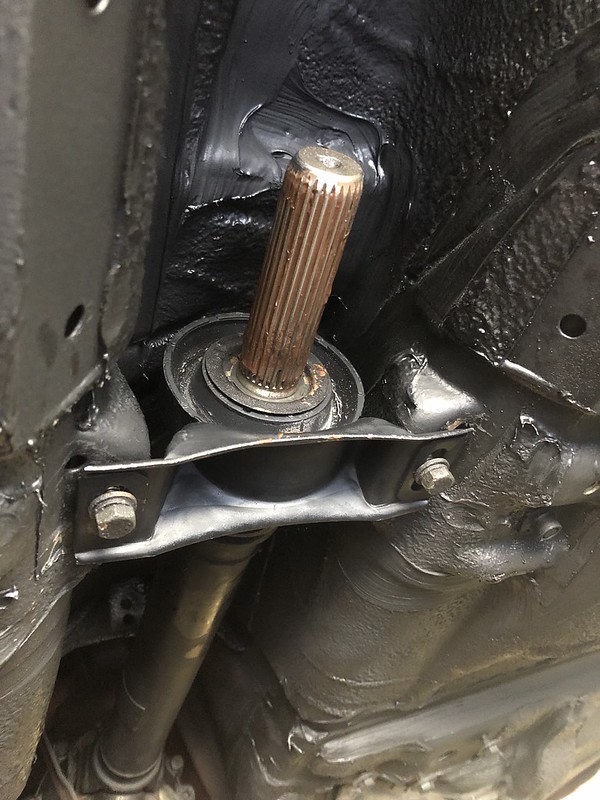
Got my white dots aligned as best I could and preloaded the CSB before tightening. It wouldn't align dead on, was always one spline off to either side. Doubt it will matter much and it won't be in the car for long anyway:
More pretty stuff:
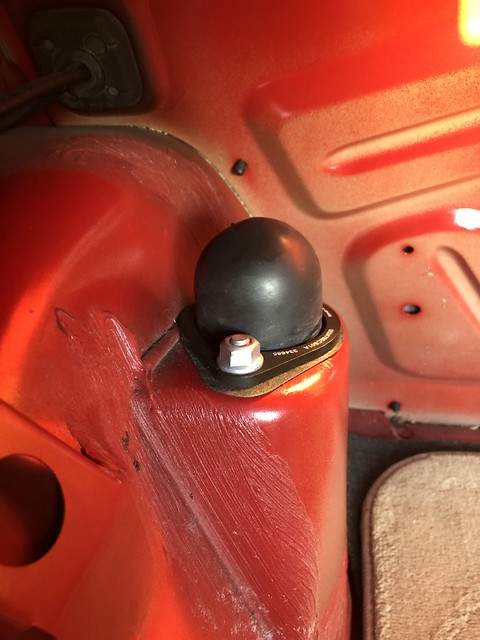
I refinished the rear shock tube covers with Eastwood plastic resurfacer, highly recommend.
Order of operation for the shock mounts:
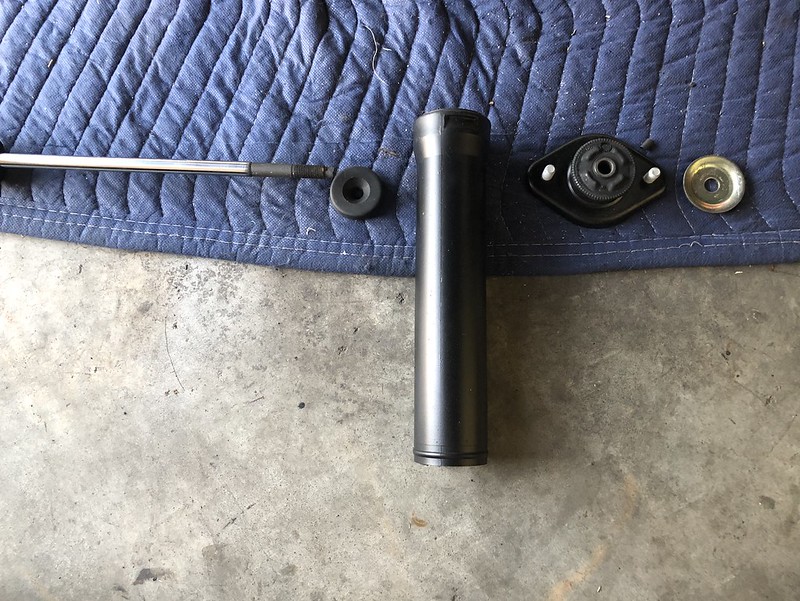
I bought the ECS mount reinforcements, however they wouldn't align correctly as there was some sort of sealant strip in the way:

I cut a notch out of it with a scalpel and it fit no problem:
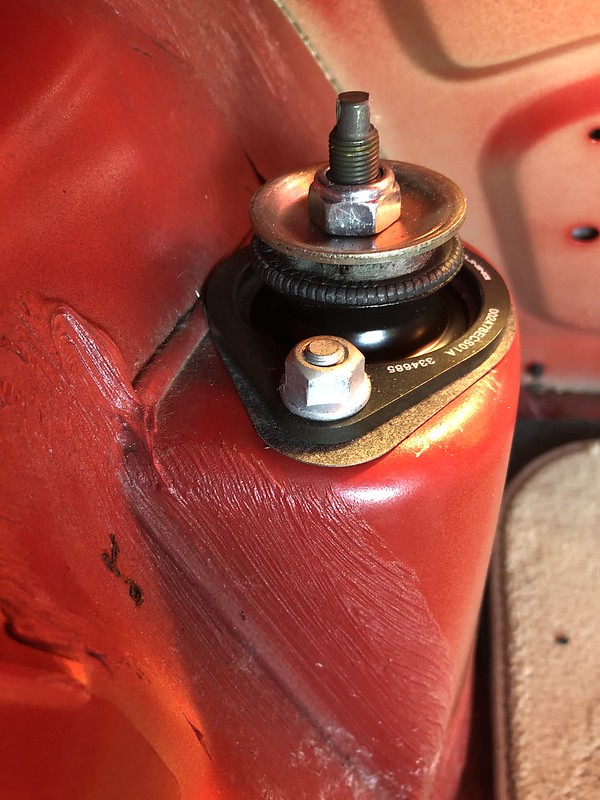
Remember guys, always use protection...
Awww yeahhhh:
Ran out of daylight, but pumped with how much I got done. Getting really close to driving this thing...
Hoping to have the front struts, the rest of the brake lines, the power steering lines/pump, and maybe the brake booster in place by the end of next weekend. Stay tuned...Last edited by Albie325; 02-25-2019, 05:45 AM.Leave a comment:
-
No problem! Not sure my ABS was working as my brakes were one of the biggest issues I had (pedal was hard as a rock). Hopefully this, new booster/master cylinder, and some new sensors all around will fix it.Originally posted by Melon
Hope they help! Figured I'd try and save people a few hours worth of reading. I'm already doing all this, might as well take a few pics along the way.Originally posted by econtiLeave a comment:
-
Great thread full of mint DIYs, thank you so much for posting it all. I'll definitely be referring to them for my buildLeave a comment:
-
Oh man, wish I had seen this write up before I put mine together.. Thanks for taking the time to put that together!
My ABS isn't activating, and I installed good condition used sensors, with new pigtail connectors for the front, so I know the wiring is good. No ABS light on the dash.
I haven't replaced the relay, I'll try that first.Leave a comment:
-
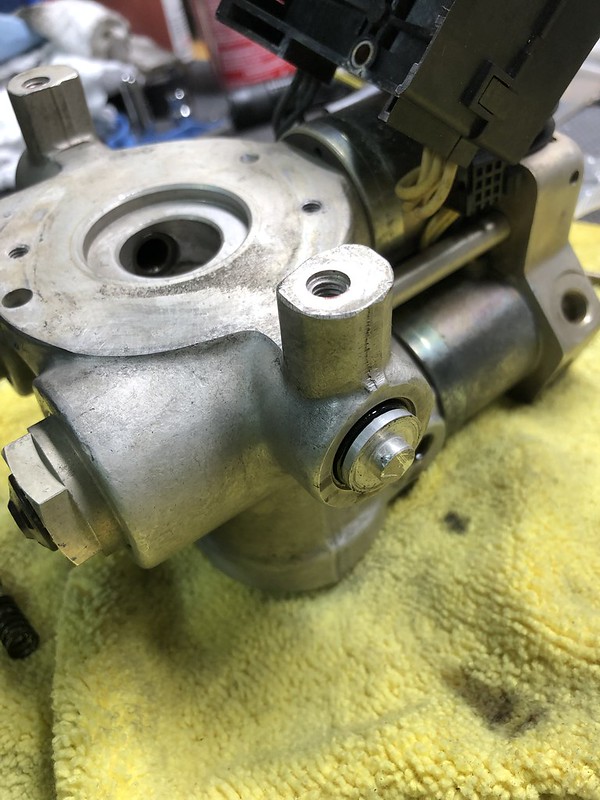
After seeing Jordan's post in his current build thread about cleaning/flushing the ABS module, I decided to do the same since my brake system is already completely apart and full of air anyway.

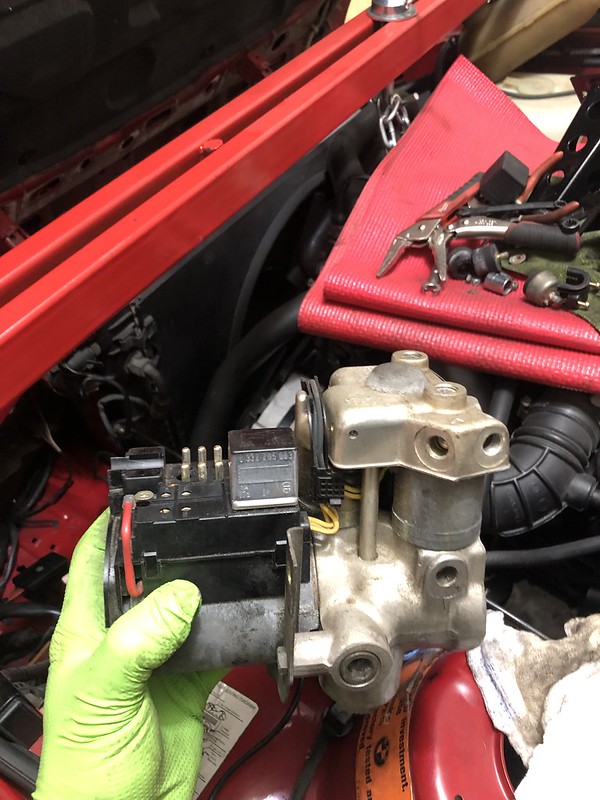
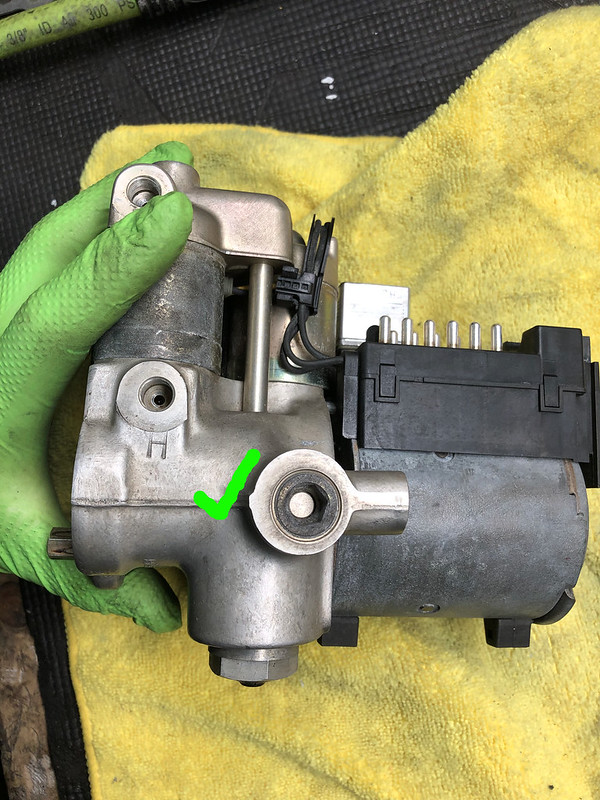
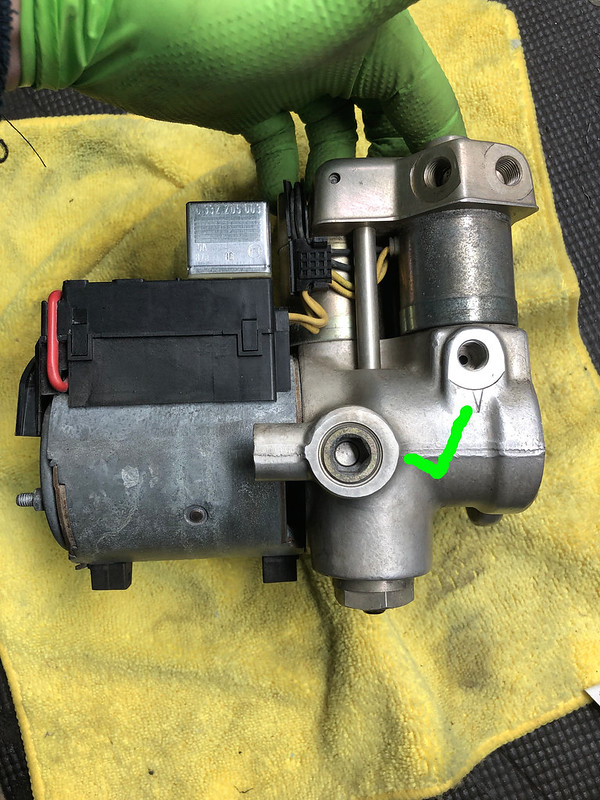
Removal was pretty self-explanatory. Remove the 5 brake lines to the module as well as the nuts for the 3 mounting bushings. Remove the screw on the black plastic cover and remove the cover to expose the relays and plug. The main plug/cable has a bridge bracket holding it in place with 2 small (I think torx head) screws, then just remove the plug. Wiggle the whole thing out. I also removed the metal mounting bracket from the body of the unit to repaint and for ease of working.
As Jordan mentions, Bosch didn't want anyone messing with this thing. All of the bolts are tightly sealed in there with LocTite and were a little stiff to remove.
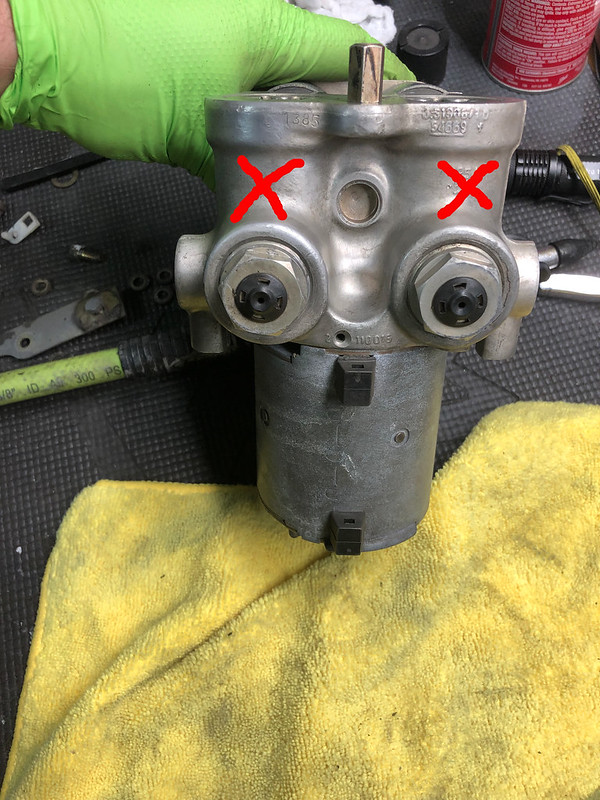
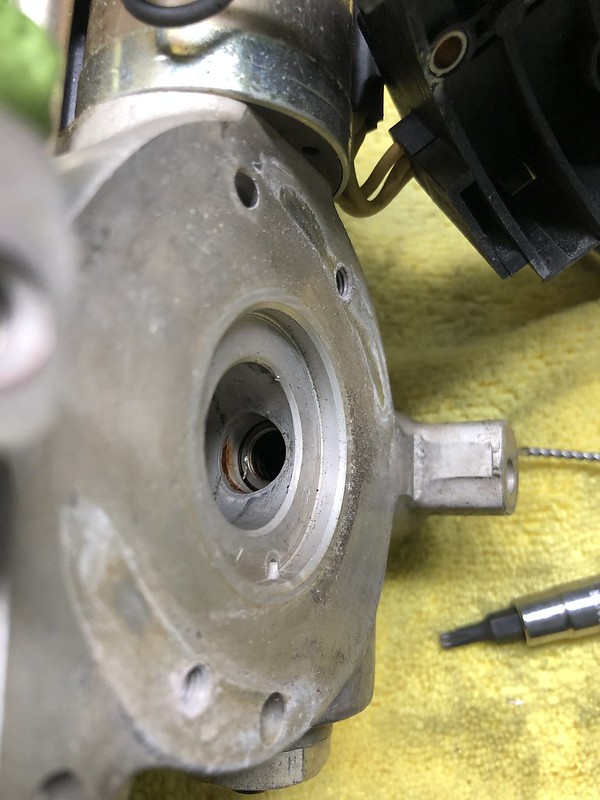
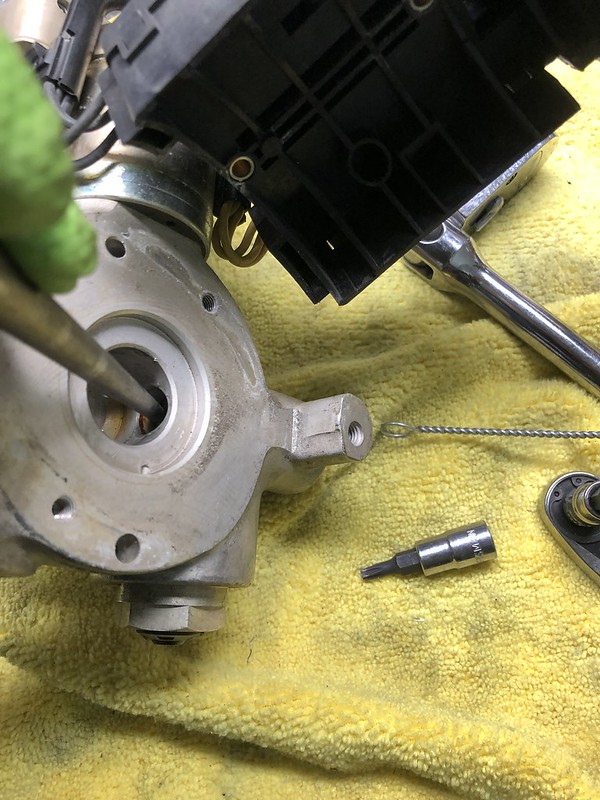
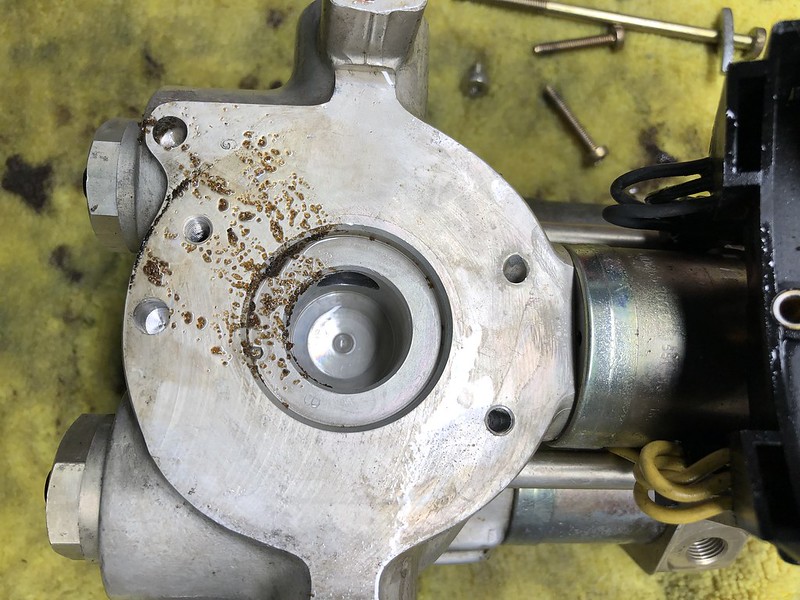
To access the pistons/seals/filters for cleaning, there are two 10mm allen head bolts on the sides of the module.
Leave these alone (front of module):
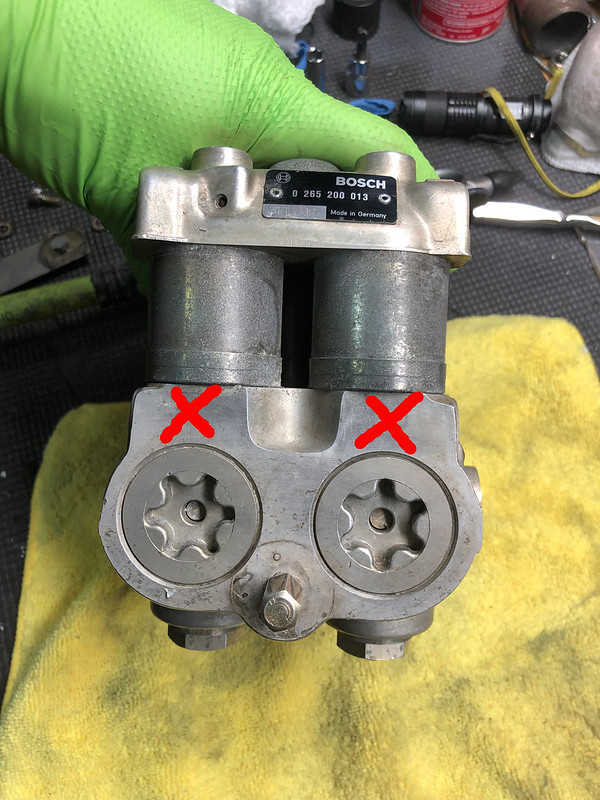
Also leave these alone (Underside of module):
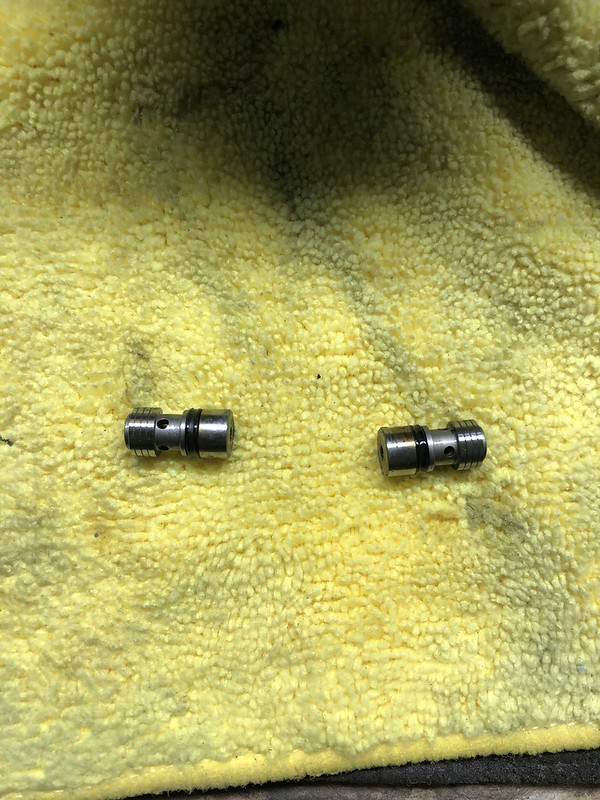
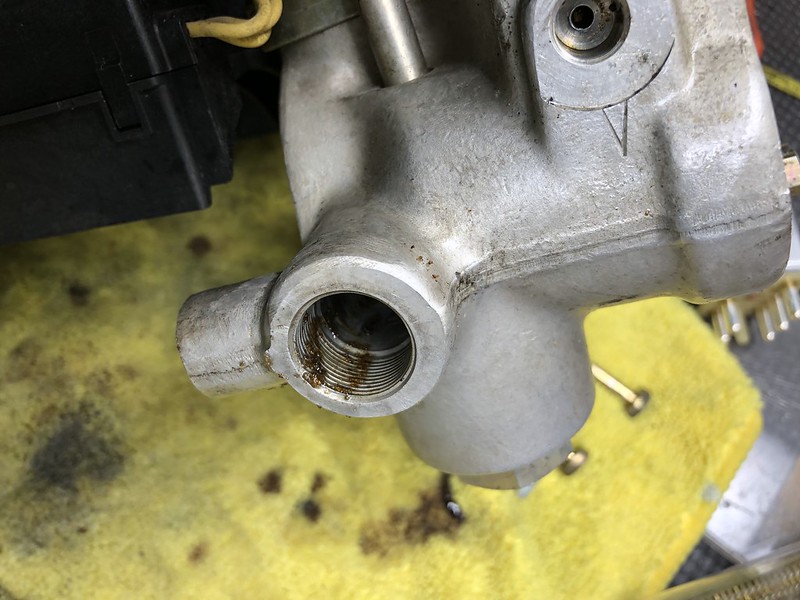
Here's what you're after (On either side of the module):
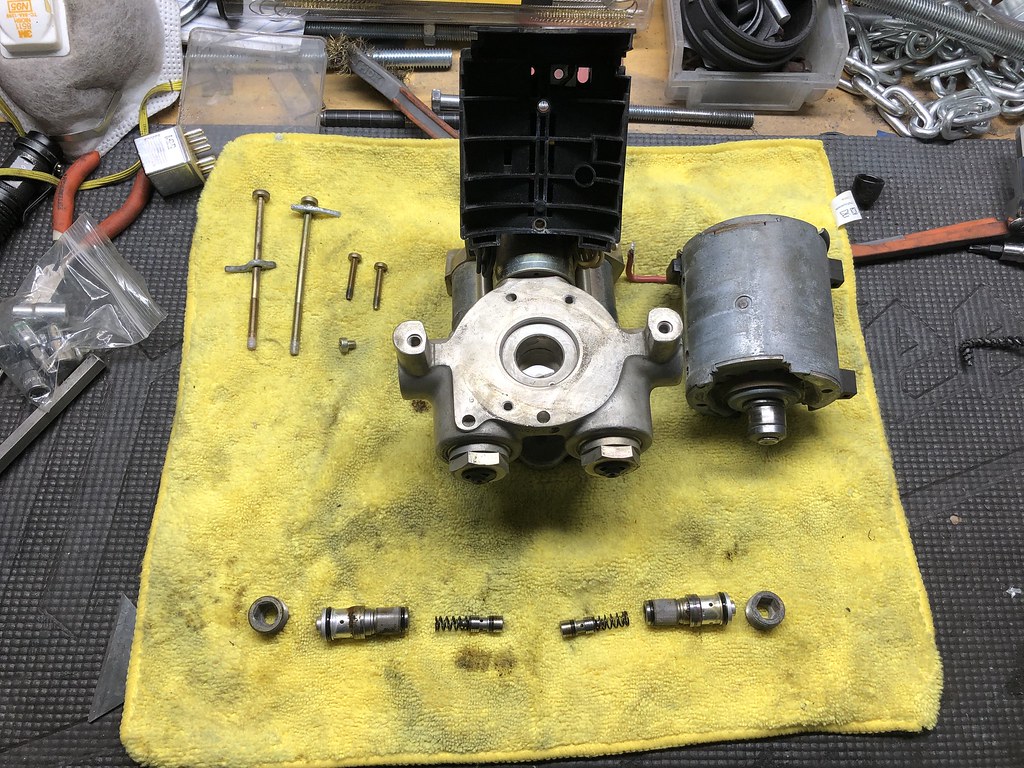
The two allen head bolts are on there pretty tight, I had to put the module in a soft-jawed vice to hold it steady. Once out, you are left with this on either side:
Once you remove these bolts, you'll need to remove the black plug connector and the abs pump cylinder to access the pistons for removal:
There's 2 torx head screws for the connector, and another slightly larger one for the pump ground:
Then on the back of the pump there's two long torx head bolts, these were on there tight with thread locker so be carefull not to strip them like I tried to:
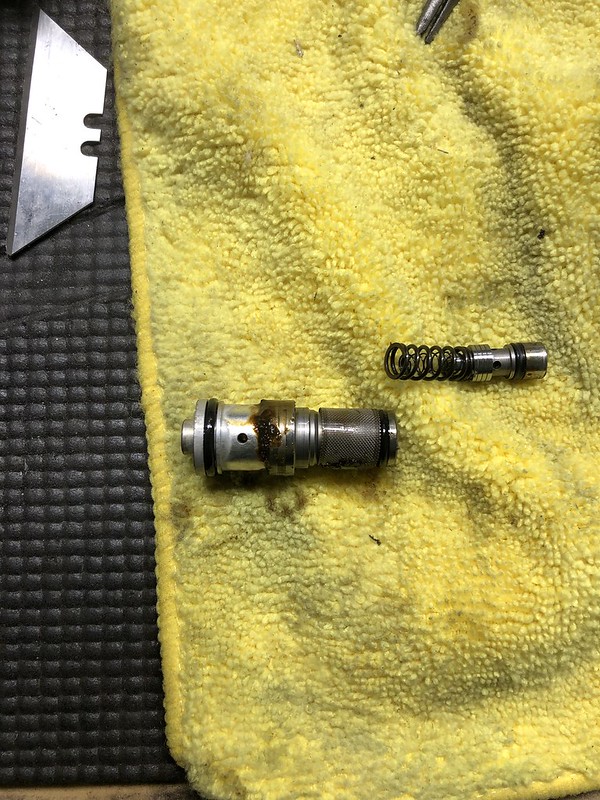
Once the pump cylinder is out, the inner pistons, which are spring loaded, pop out into the center hole:
Use small needle nose pliers to remove and be careful not to damage the rubber seals.
BE CAREFUL: behind these two little pistons are two small springs (one inside the other) and a ball bearing. Simply tilting the module slightly one way or the other allowed them to fall out into that central hole. DO NOT flip the module upside down as it would be very difficult to find these components should they fall on the floor.
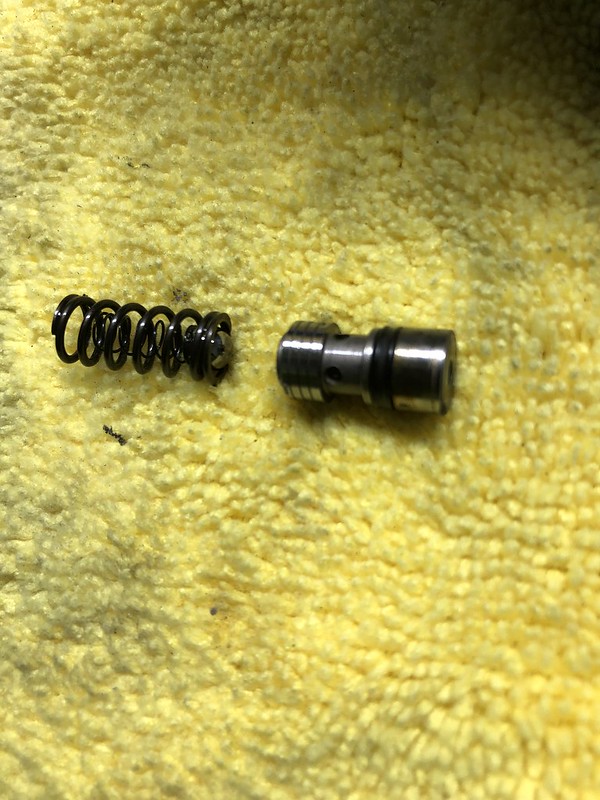
Once the springs and ball bearing are out, here's what you have:
To get the piston out, I GENTLY tapped on the edge of the piston with a punch and hammer, it came out pretty easily:
The piston should pop out enough to grab it and pull it out:
All the components out:
Definitely in need of a cleaning:
To get the little cage filter off, you have to remove the inner O-ring. Do not try and slide the cage over the O ring as you will stretch the filter and then it will bind in the cylinder bore upon re-installation. Clean on the left, not so much on the right:
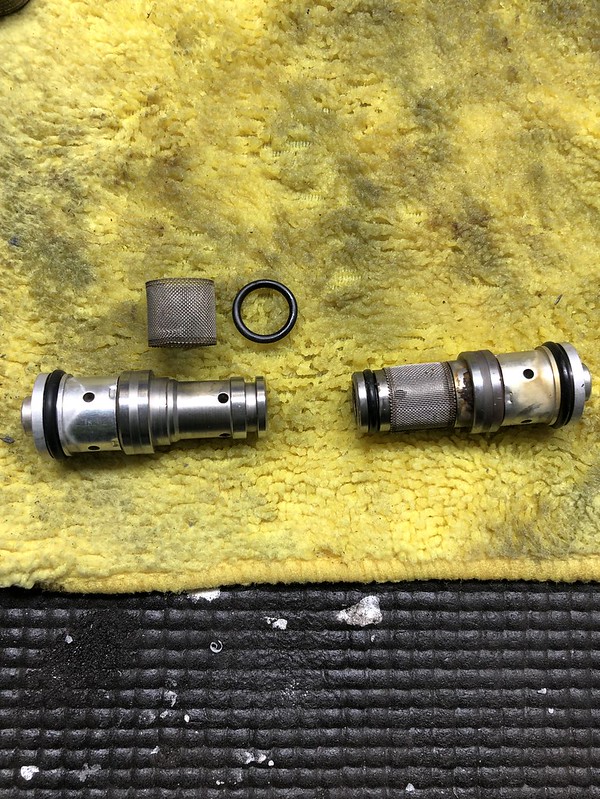
I cleaned everything with brake parts cleaner and a brass wire brush, then put all the cylinder components safely aside to start cleaning the actual ABS module.
If you look inside the cylinder bores, there are several small holes where fluid from the brake lines enters the cylinder. I used the little straw and brake cleaner to flush fluid through the brake line inlets and out the cylinder bore. I also blew some compressed air in there and got a TON of gunk out. I know compressed air isn't the best idea, and you may want to forego this, however i got so much more mess out of there as a result:
I flushed the unit until no more of this gunk came out.
"Reassembly is the reverse of disassembly," but a few words of caution:
- I found it easiest to re-attach the large pump cylinder before reinserting the piston cylinders. Otherwise the inner pistons will shoot out into the center hole and you won't be able to push them back in and insert the pump.
- If your rubber seals have stretched, reassemble the cylinders and put them in the freezer to shrink the rubber so they don't bind in the cylinder bore. When reinstalling, the O-rings should slide in VERY easily, you shouldn't have to push very hard at all.
- The small inner pistons should be able to fully seat inside the cylinders otherwise the cylinder won't go back in all the way. When putting the cylinders back together, put the two small springs in first (one inside the other), then the ball bearing, then the small inner piston.
- Make sure the cage filters are properly seated and not stretched. If they have been stretched, the filter will get between the cylinder and bore, and when you reinstall the cylinder the cage with crumple up and bind the cylinder. Again, you should not have to force the cylinder back in, any resistance and you should pull it back out and make sure nothing is binding.
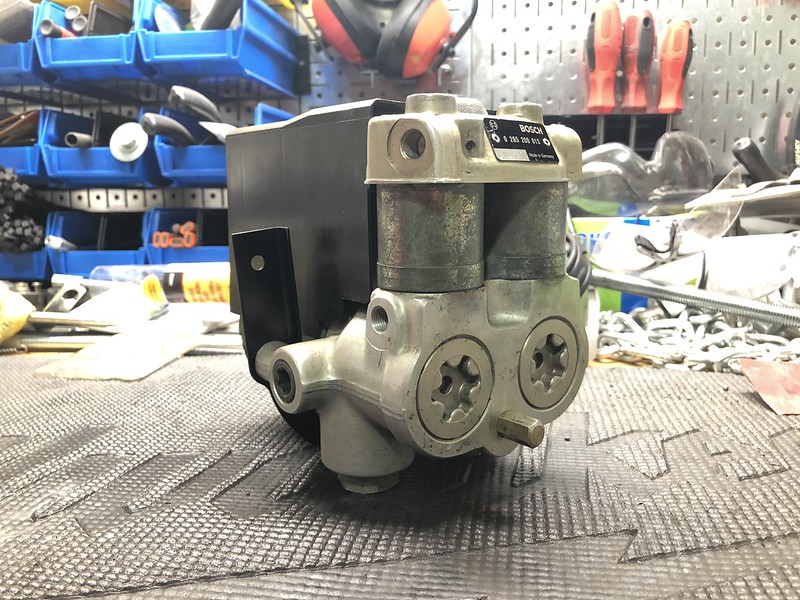
Tighten down your allen bolts, screw the plug back on top, and you're done:
I applied red LocTite to the screws that previously had it on there, it's pretty easy to tell which did when disassembling.
This wasn't as bad as I planned. I was always afraid to touch this mystical contraption but honestly just go slow and take a ton of pictures, and if anything isn't going back together easily just stop and make sure everything is aligned correctly.
I will have to bleed the shyte of this thing now that I pumped a bunch of air into it. I have found a couple of really helpful write ups for this and will post that up once I get to bleeding the brake system.
Enough jack-jawing, time to get out to the garage and get some stuff done, got some long-awaited goodies in this morning!Leave a comment:
-
Originally posted by MT325isThanks guys!Originally posted by ChubbyChowder
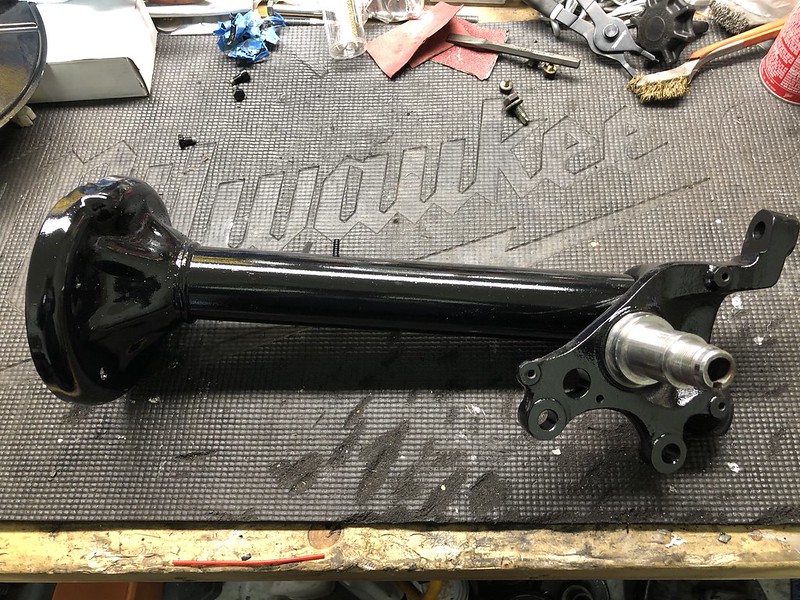
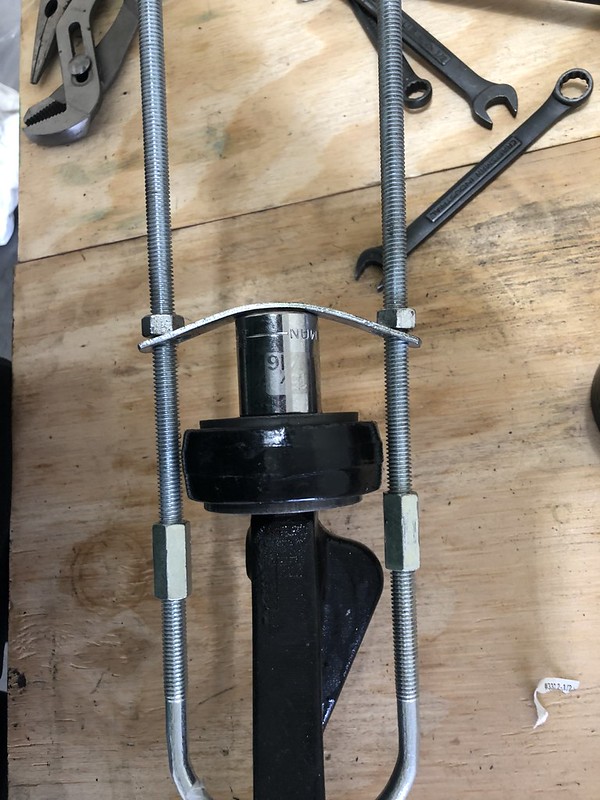
So while I wait for my other strut tube I figured I'd get to work on the front subframe. I got started by pulling on the lollipops, I used the e36 M3 solid bushings.
I used some 3/8 threaded rod with some connectors to an elbow, then used some nuts and a plate to press it on:

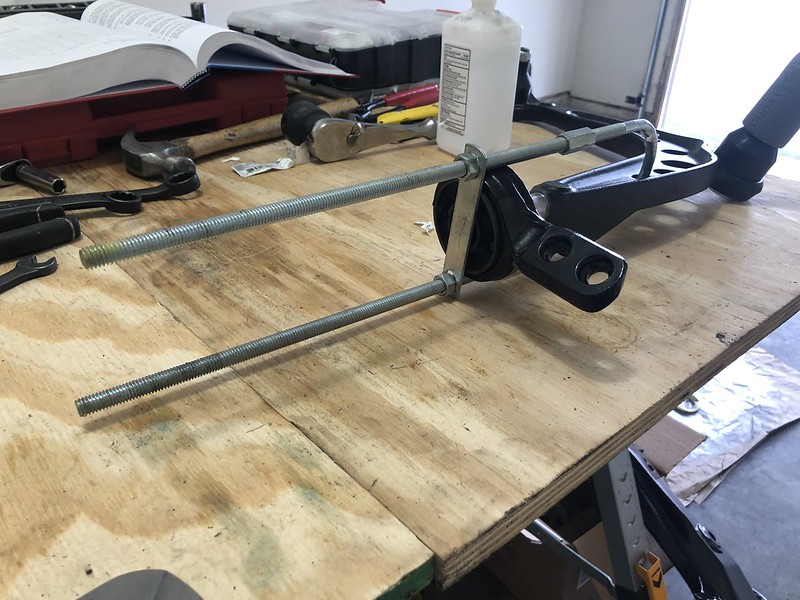
I lubed the rubber and control arm end with some isopropyl alcohol but it dried too quickly so I ended up using some silicone spray, these sumbitches fit tight.
Once I got down to the end of the control arm, I used a 15/16 socket to get it pressed the rest of the way on. As you can see I should have used a thicker plate or at least doubled up:
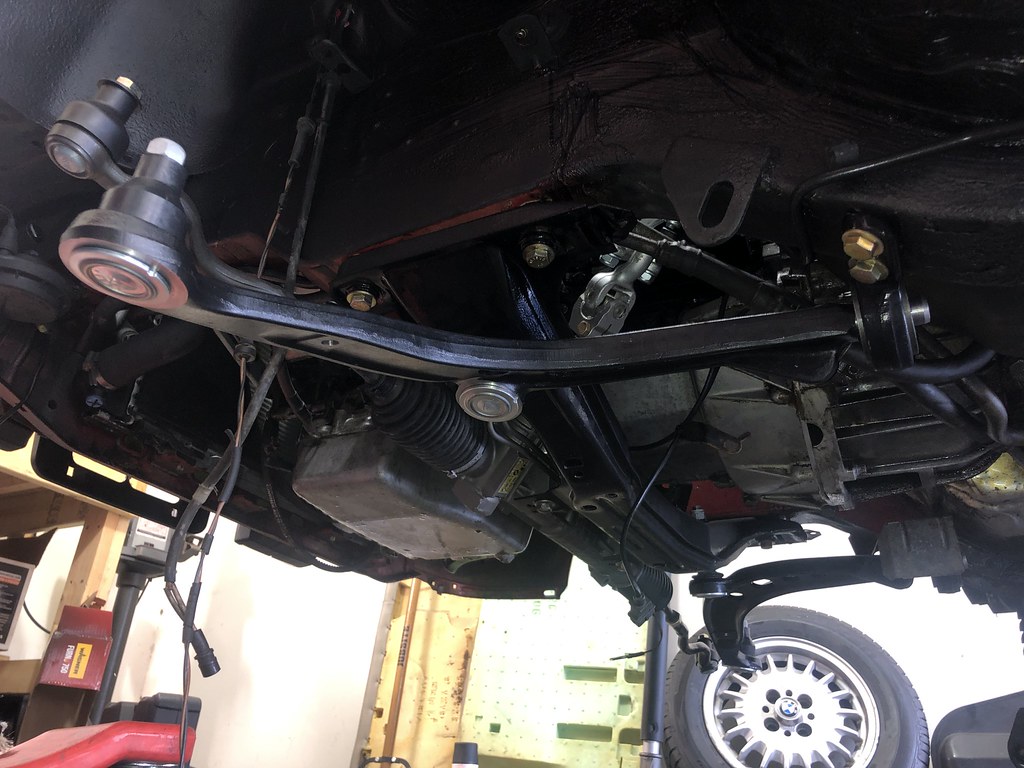
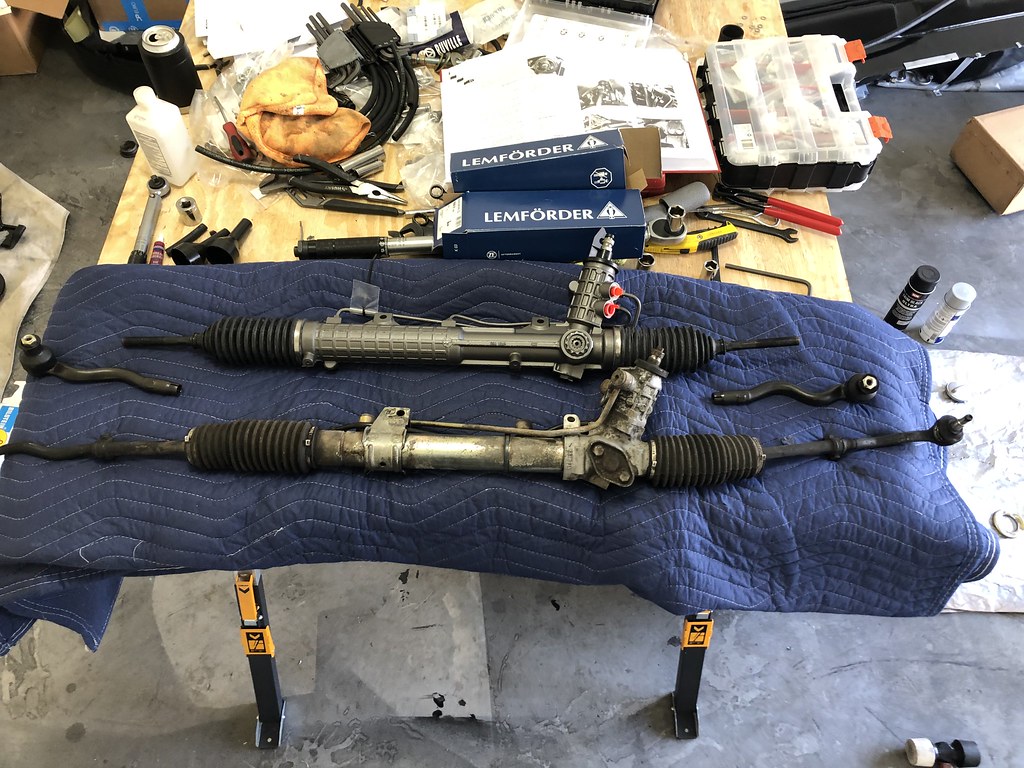
I bolted the control arms to the subframe and then got started on the steering rack:
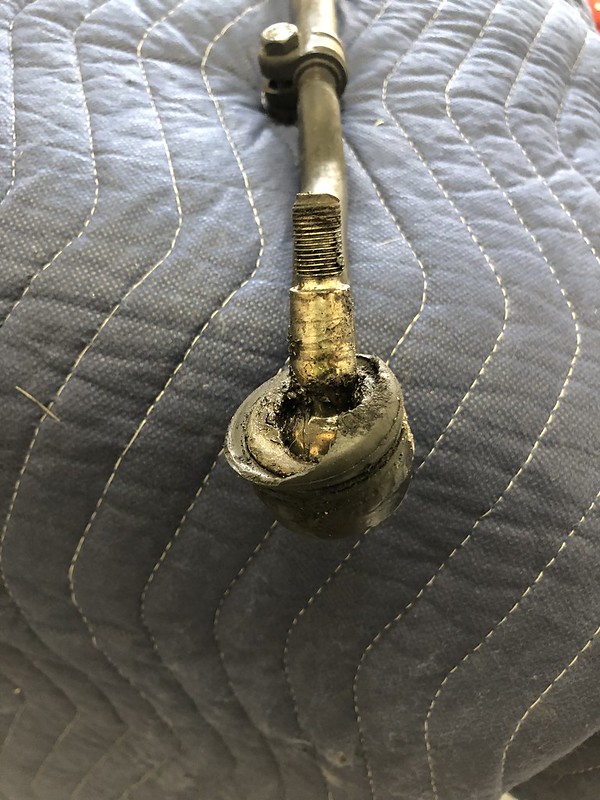
Safe to say my old tie rod ends had seen better days:
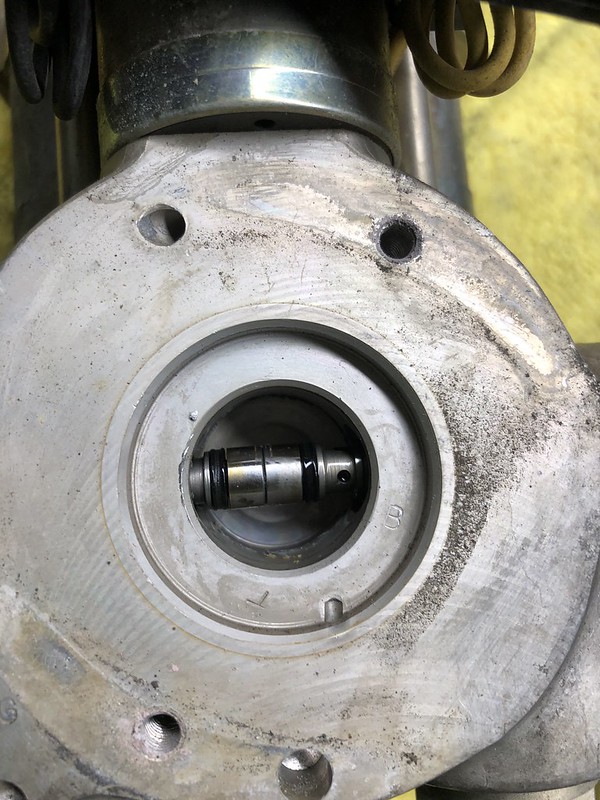
Some of the differences between the e46 ZHP and the e30 rack:
The steering fluid connectors are located on different sides of the steering column inlet, and the steering column inlet is a bit taller:
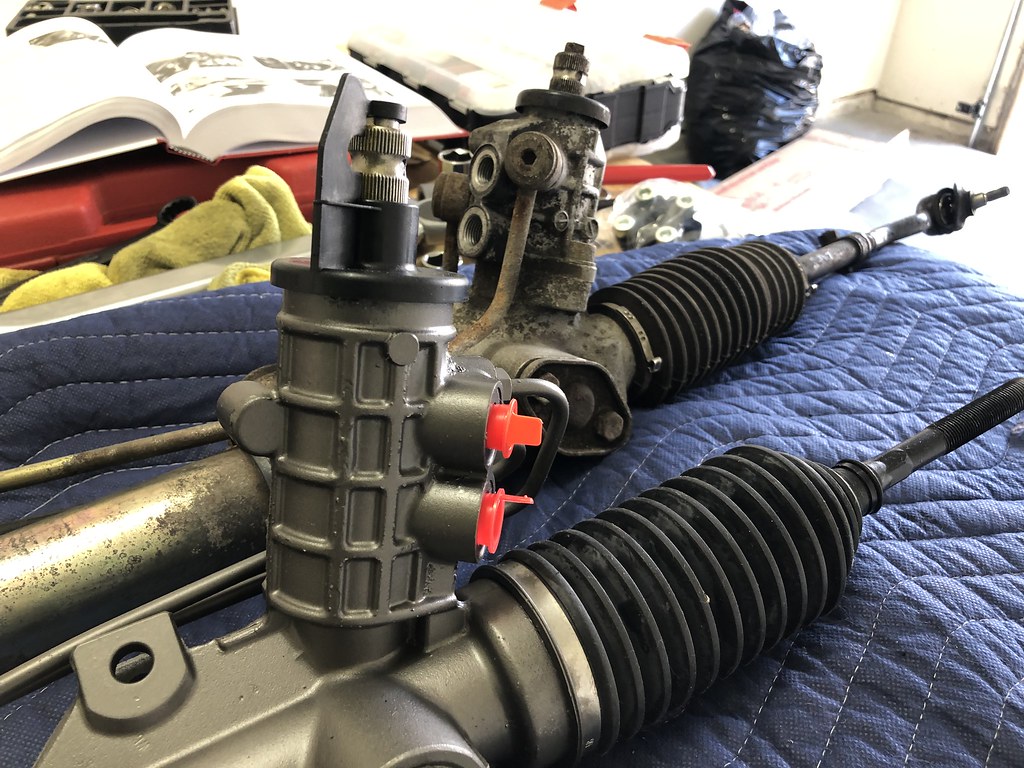
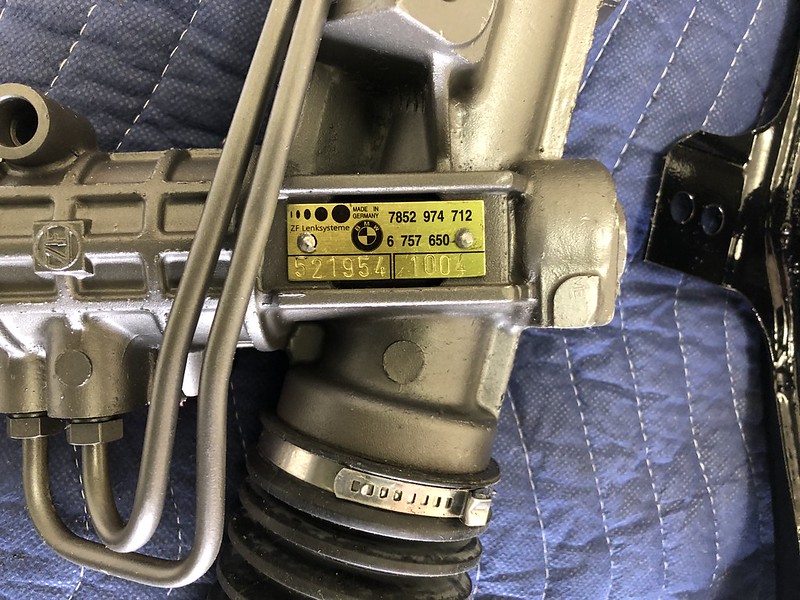
The width of the rack mounting point is narrower on the ZHP rack, hence the need for a spacer. I used the Garagistic kit:
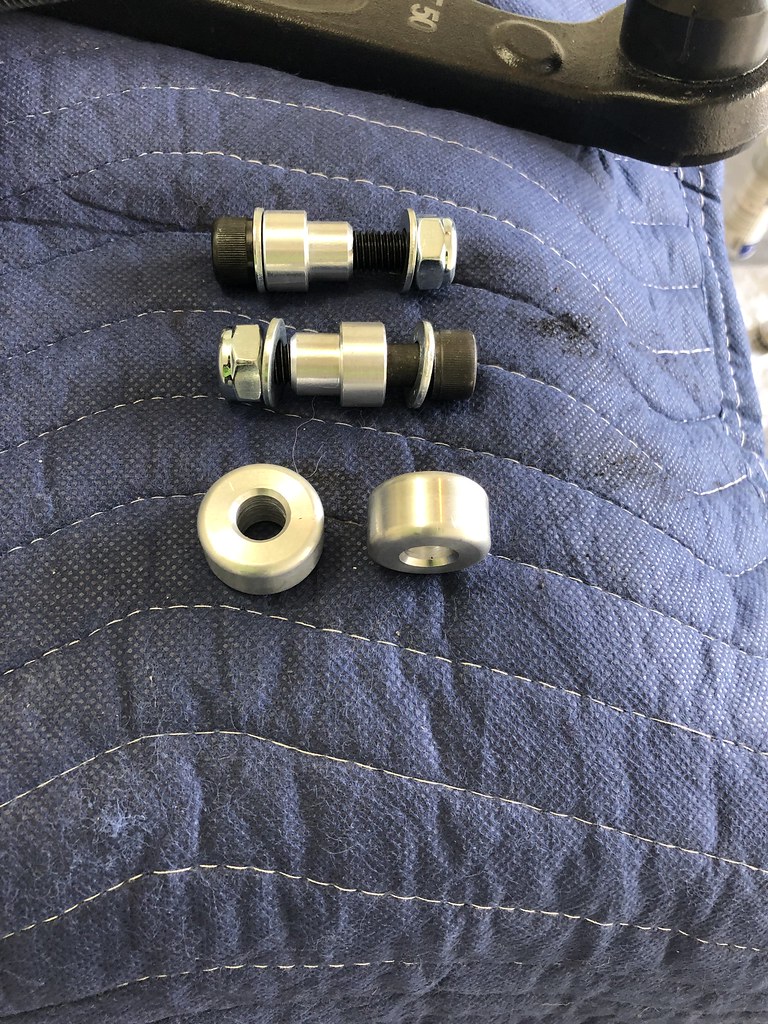
Their site recommends putting the spacer on the top of the rack, but it can be placed top or bottom. I put it on top as I figured it would give me a little more space for the knuckle to fit. There's 2 sets of holes for mounting to the subframe, looking back at my pics of breakdown the rack was originally mounted to the inner set of holes so that's where I mounted the new one as well:
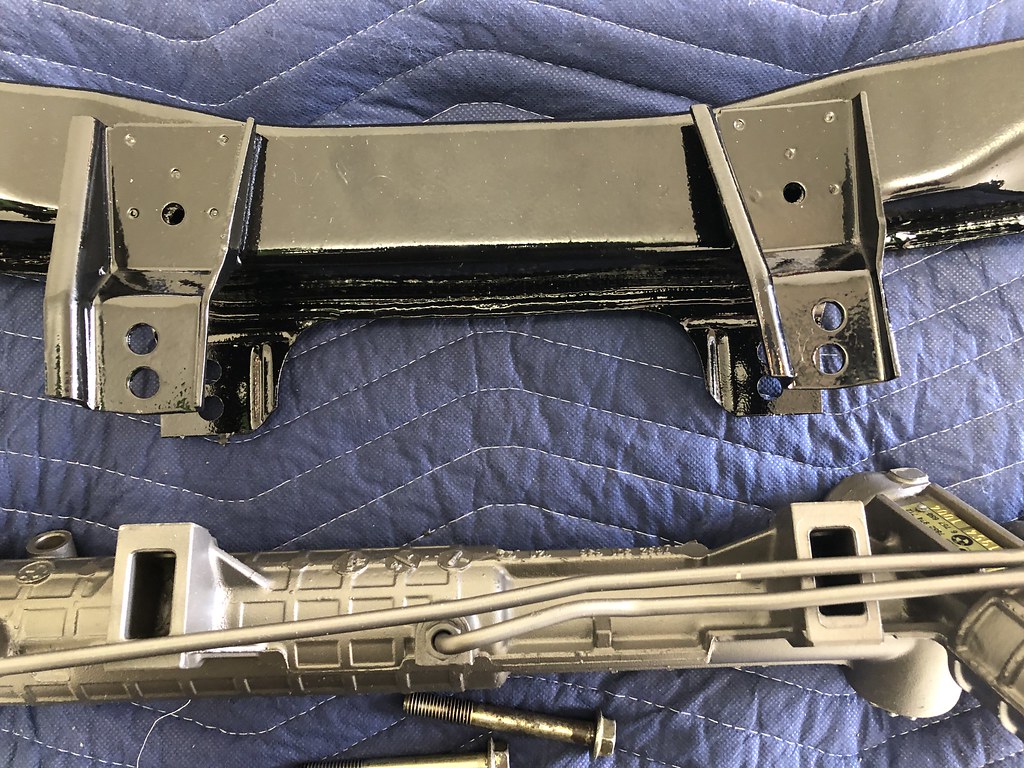
All mounted:

For the outer tie rods, you can use either e46 or e36 ends, I went with the e36 ends. The reason you can't use e30 ends is that the e30 inner tie rod is female, the outer tie rod is male. On the e46 rack, the inner tie rod is male, so you need a FEMALE outer tie rod end. Come to find out, the tie rod end clamps are different for the e36 and e30:
e30 has a clamp and screw style:
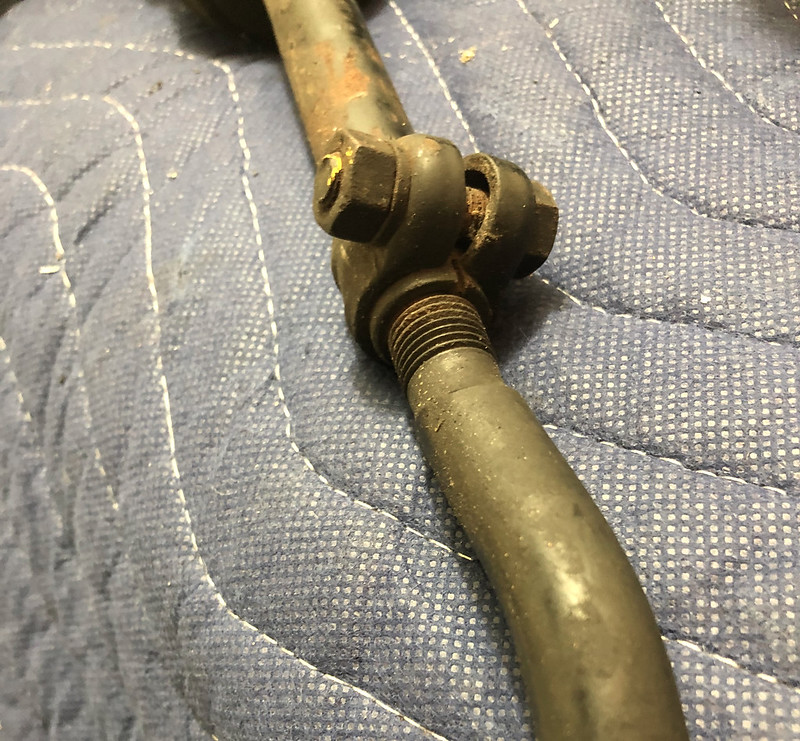
e36 has a clamp ring and nut:
Clamp ring part# 32111136179
Nut part # 32111136494
The end of the e36 tie rod is too narrow for the e30 clamp to fit, so looks like I'll be waiting on some more parts...
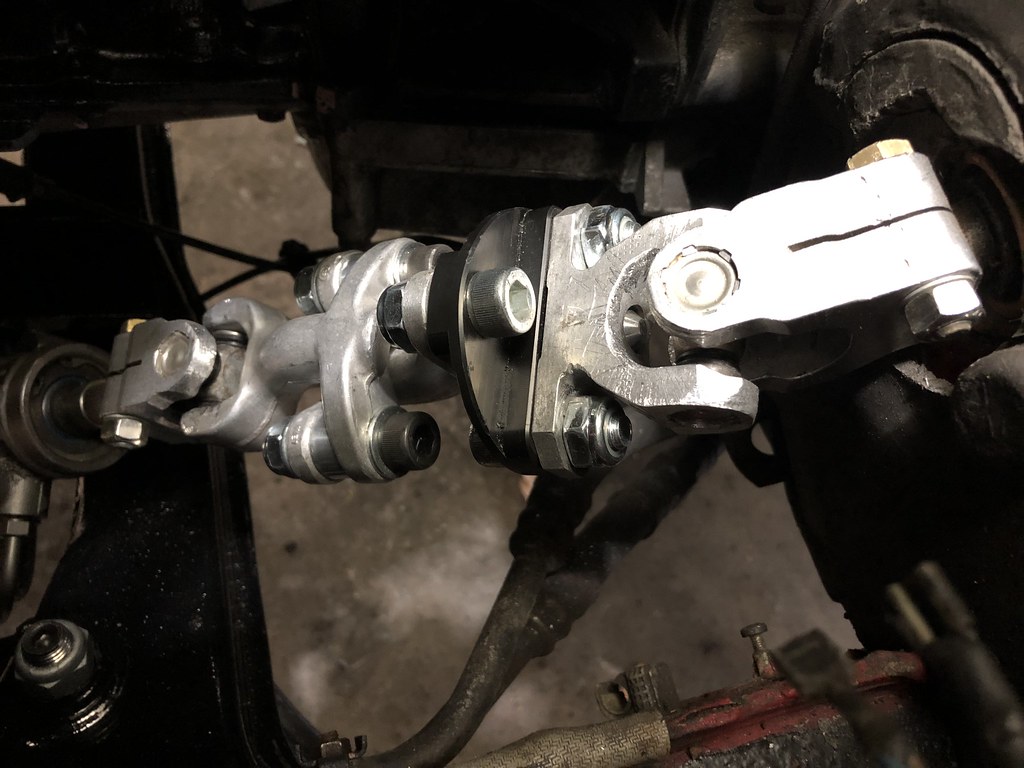
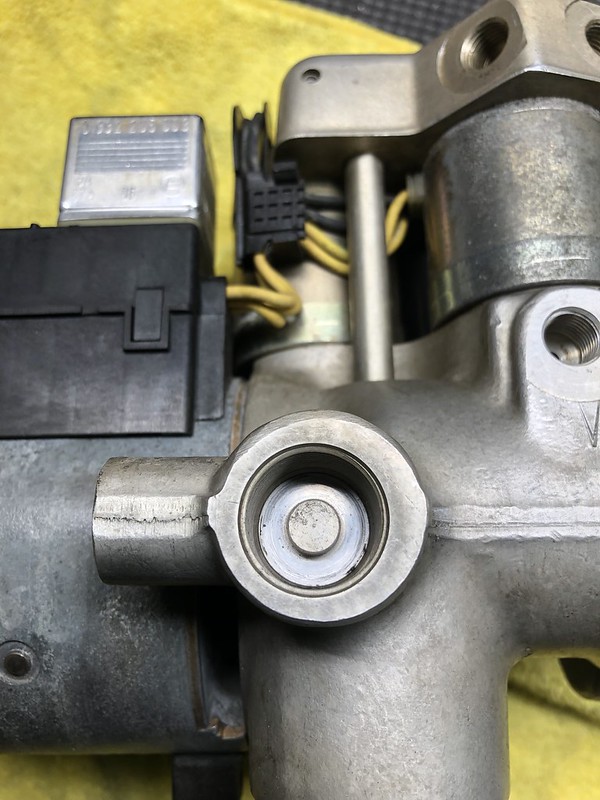
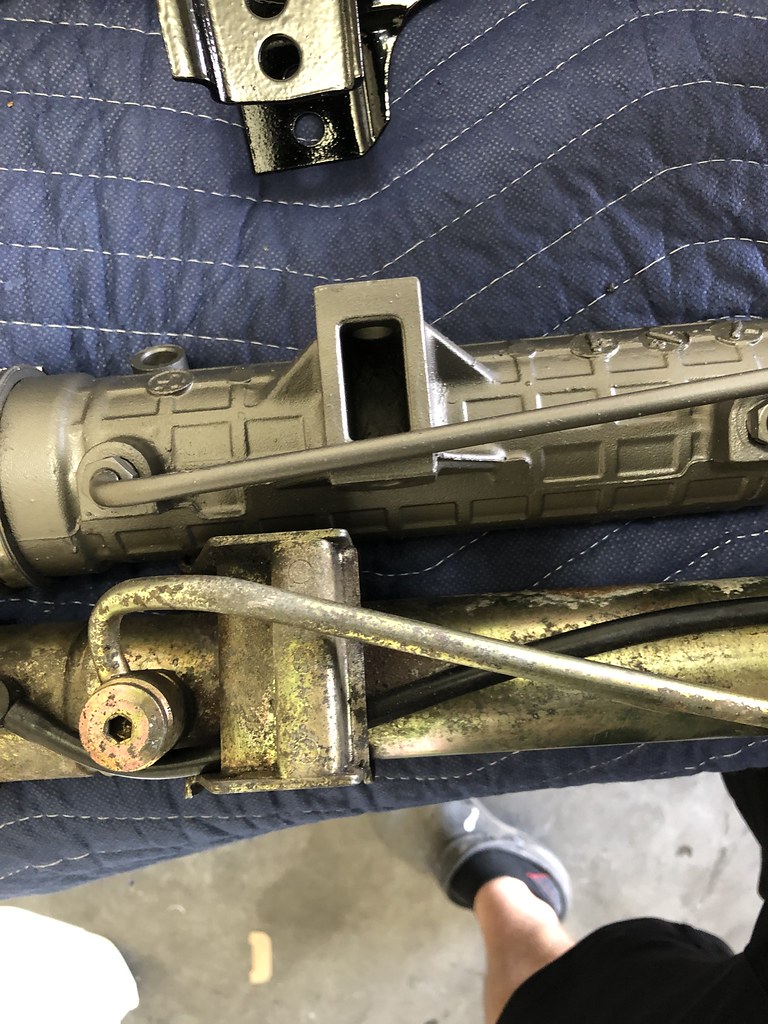
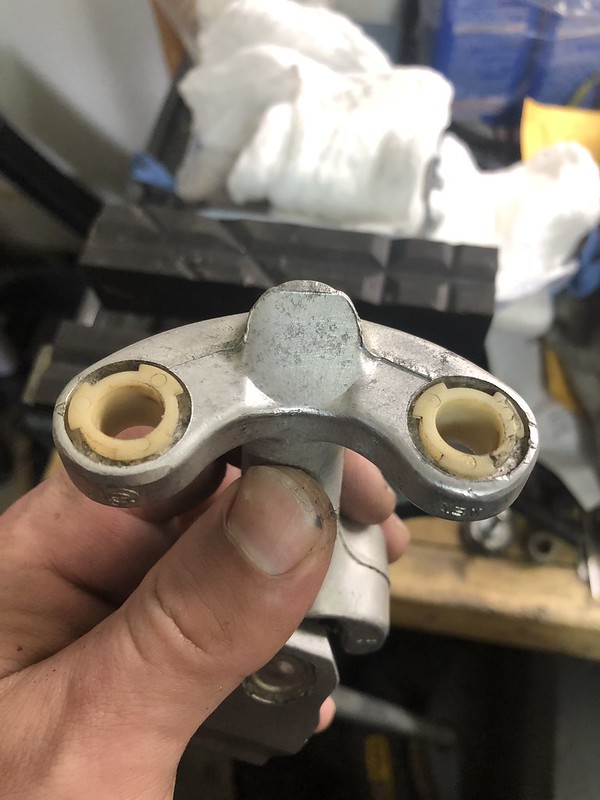
Then I got to work separating the steering knuckle, you need to put spacers to allow the steering knuckle to fit on the longer ZHP input shaft.
I used a dremmel to cut off the ends of the pins then used a punch to knock the pins out. Sorry I didn't take a ton of pictures of this put it's pretty self explanatory.
Cut here, flush with the knuckle:
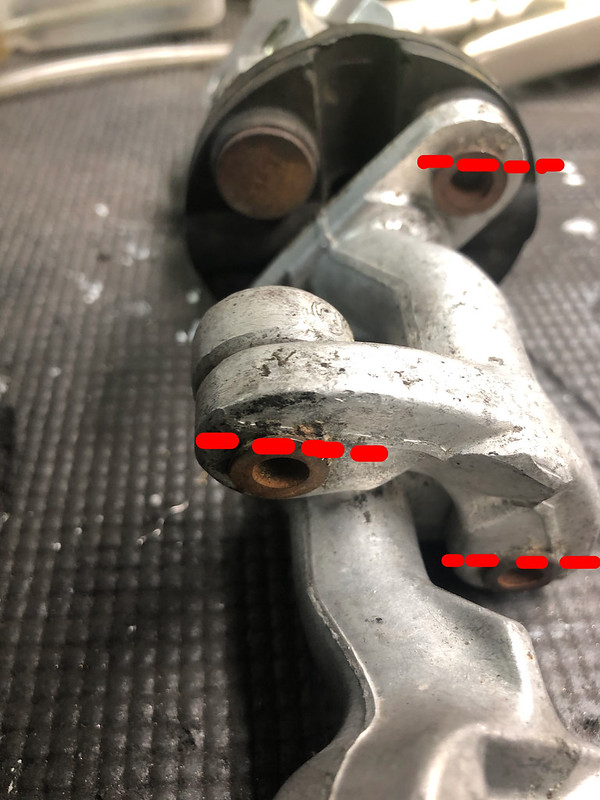
Flip the knuckle around and do the same to the other two pins connected to the flex disk.
You'll have to drill out the holes to allow the larger diameter bolts in the Garagistic kit to fit.
Use a punch to knock these plastic sleeves out:
I also bought the Garagistic solid flex disk, supposed to give you a stiffer and more responsive steering feel. Judging by the old disk, I'll bet:
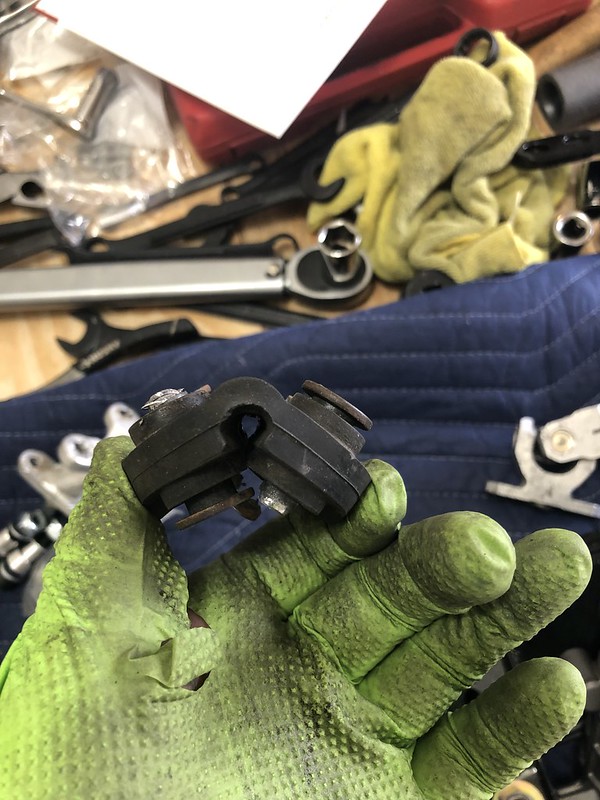
Didn't take a pic of the Garagistic one, but it's essentially a solid plastic version of the same thing.
All put together:

I tapped it onto the rack, you can see in the above pics that there's a little groove in the input shaft spines that should align with where the set screw goes in. I also ground down a bit of the knuckle as the new, harsher angle will cause it to bind. Hopefully I did enough grinding.
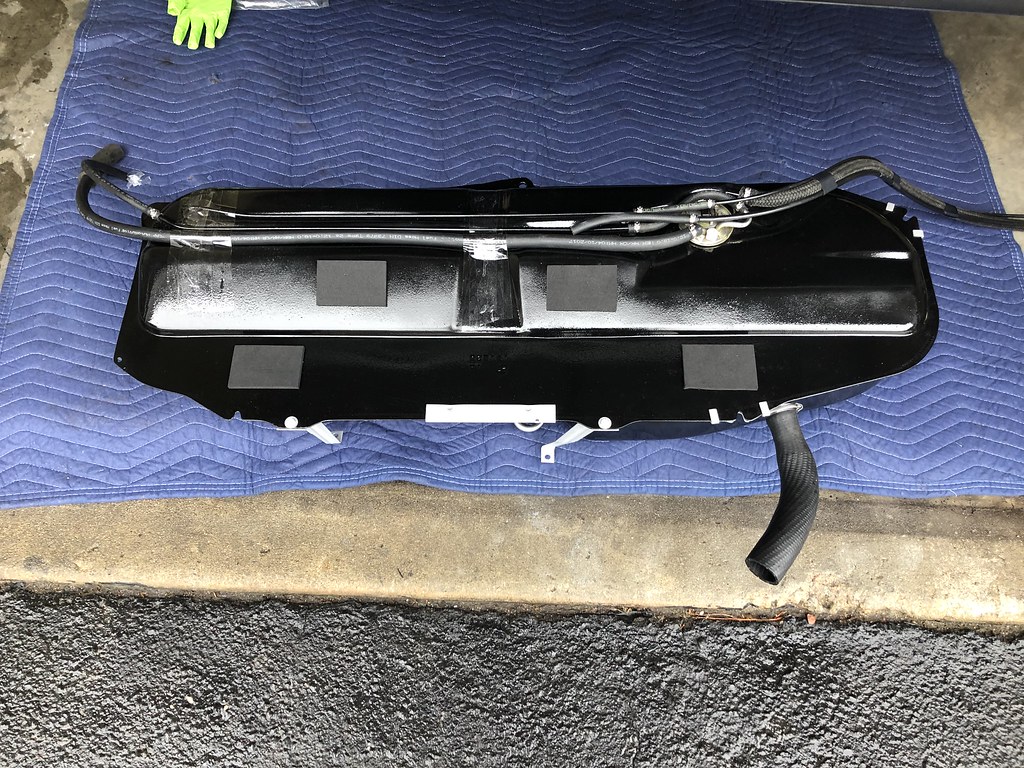
Got the gas tank all put back together:
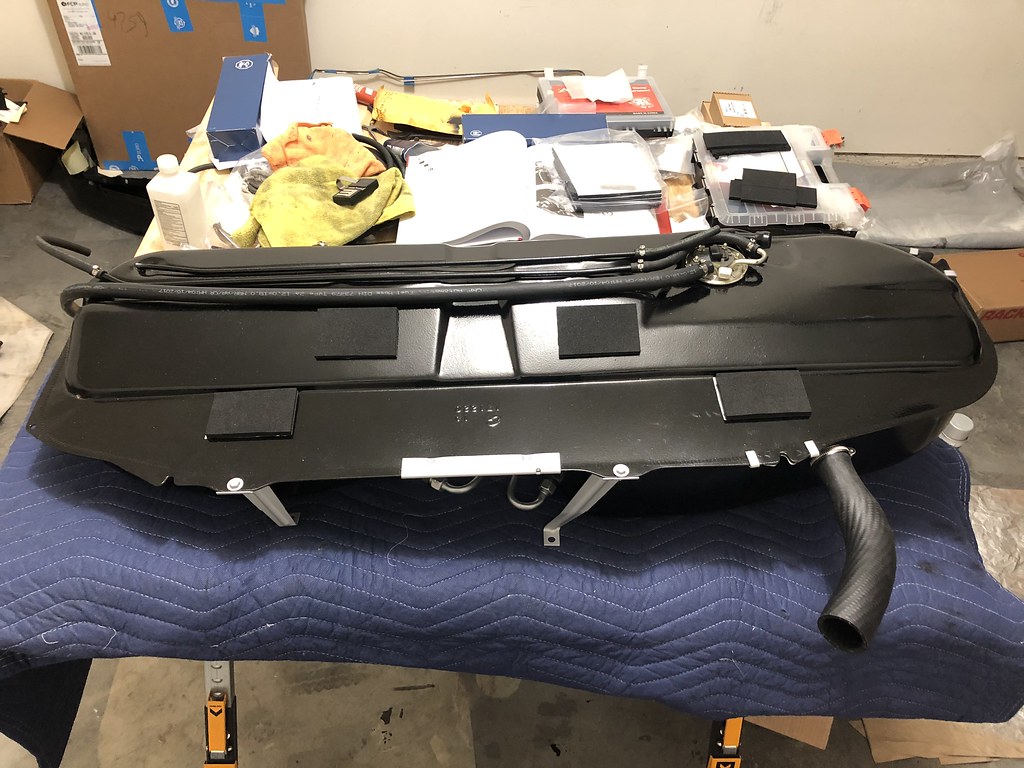
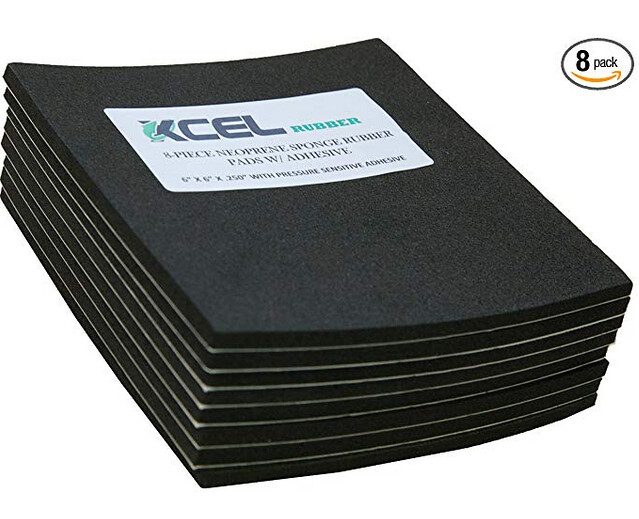
For the foam pads, I found these on Amazon and cut them to size. They come in 6in x 6in x 1/4in squares:
I didn't stick them on yet, will get the tank up under the car first and see where they'll need to go.
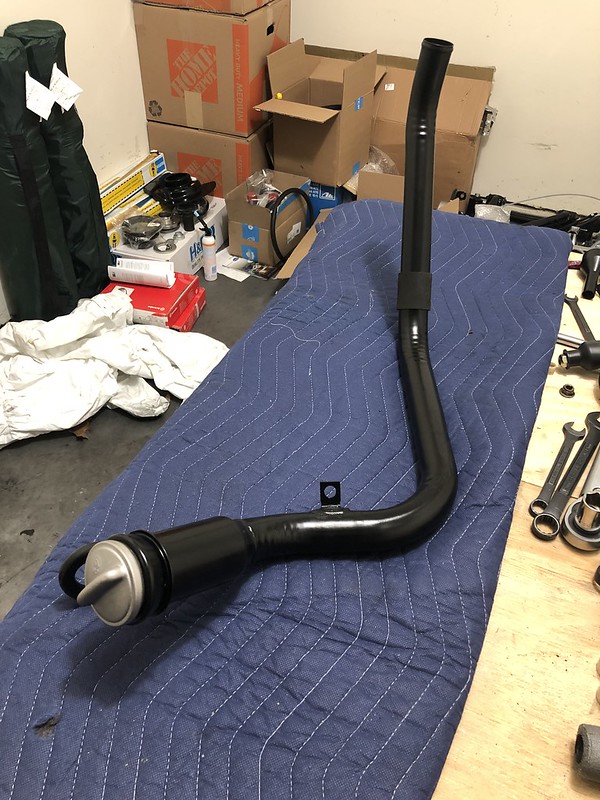
Also painted the gas cap and filler tube:
That was all for today, hoping to get the new fuel lines and brake lines mounted up on Friday along with a few other odds and ends.Leave a comment:
-
-
For as rusty as all the hardware was I got really lucky with removing the half shafts. One I pulled out by hand and the other took a few light taps with a hammer and a punch. The tool made re-installation about a 30 second job, if you have a hard time I think its worth the $45-50.Originally posted by MelonLeave a comment:
-
That sucks about the tube!
I don't think there's any issue about reusing the hub, man I looked over my car last night the passenger side doesn't have the dust shield for the hub, oh well, I'm not too worried about it.
Good to know the axles on these cars are just as fun to install as they were to remove. I had one that was completely stuck, had to take it to a machine shop.Leave a comment:


Leave a comment: