-
OOoooO i've been looking at cocomats for a loooong time now trying to decide on a color. I think the original material will last a good amount of time tbh. I do agree the other material is nice, but i wonder if the cocomat material will soften up a little bit over time and work better over time? I have a hard time deciding as well. love those mats though. -
Today was a success:
Going to do the rear main seal while it's out. Also need to freshen up the manual trans with new input/output shaft seals as well as a selector shaft seal among some other new parts before reassembly. Once I have the trans back in, it's timing belt/water pump time as well as camshaft and crankshaft seal, and oil pan gasket replacement. Then all should be good to go!Leave a comment:
-
I promise I haven't been sleeping on the job. Been knocking out a few things here and there.
Got the front windows removed, the driver's side had these hideous scratches from the PO removing a parking sticker with a razor blade:

Always drove me crazy. I started by trying to buff it out with cerium oxide powder, but they were too deep. I then tried sanding as a last resort followed by cerium oxide.


The finish was very nice and crystal clear. Unfortunately the sanding wasn't 100% even and the glass looked like a funhouse mirror by the end, oh well. I had a spare that I'll use for now, it too has some scratches so I'll be on the lookout for a nicer one.
Next I had to replace the driver's side window regulator, it would always click at the bottom of the window travel if you held the button down.


Turns out the snake drive gear was flattened out at the bottom and the motor would slip causing the clicking:

I bought a spare awhile back and cleaned all the old grease out of it. I then cleaned the passenger side (which worked well) as well as both motors and re-lubed everything:

I used silicone/PTFE grease as it's supposed to be plastic-safe:
Got the sound deadener installed while I had the windows out:

Reinstalled everything and put new weather seal on the doors:


Got everything reinstalled and all worked great, no more clicking either!
Now that I have the bluetooth head unit I don't expect to listen to the radio all that often so wanted to limit the amount of times the antenna goes up and down to save some wear and tear on the antenna motor. I read on another thread (by bradnic if I remember correctly) about installing a switch between the antenna power and the head unit so that you can control when the antenna goes up and down.
Here's how I did it:
First, pull the the white antenna power wire through a blank slot in the control panel (previously my fader switch) and cut it:


Then crimp on 2 spade connectors:

Next, attach the ends to an on-off switch of some sort. If you have the spare spot on the control panel like I do, a fog light switch works perfectly. If your control panel is full, you can use one of these smaller switches and mount it elsewhere. The key is just that it has an on/off function:


Now the antenna only goes up if I press the button. If I'm listening to BT, it stays down. If I decide two turn the radio on, it will still stay down until I manually hit the button for the antenna to go up. Pretty clean and easy mod, took less than 10 mins.
Last, I started getting the interior ready. Started by painting some houndstooth door cards I picked up somewhere along the way:


They came out great.
Last, I had been waiting to install my seats until I got my seatbelts back from re-webbing. I decided to go with black webbing with a red border since the car is red. I think it adds a nice little accent and really happy I went with it:

Also got the front seats installed, was a pain tracking down all the bolt covers. I had a few but was missing some. Ended up finding a few on Ebay to complete the look, devil's in the details:

Hard to get great pics of the interior in the garage, lighting isn't the best and it's a little tight in there. I'll get some better ones when I'm driving again.
Also, the front door tweeters are still available new and are about the same price as the used ones I saw on Ebay. Seeing as I'd bought 3 of them used and 2/3 were no good, I figured I'd just buy new and be done with it.

I hooked the battery up, turned the sound on and sat in my "new" sport seats while blasting some tunes. Man, what a difference the sport seats make, so much more comfortable and the sound was excellent with the sound deadening and upgraded speakers. Very happy with this part of the project!
Last I need to buy some mats, I'm having a hard time deciding between these two from Coco Mats:


I like to color of the bottom swatch but not necessarily the material (original CocoMat). The top swatch is more monotone but looks really nice, and I love the material way better (Sisal). I'll open it up to a vote I guess?
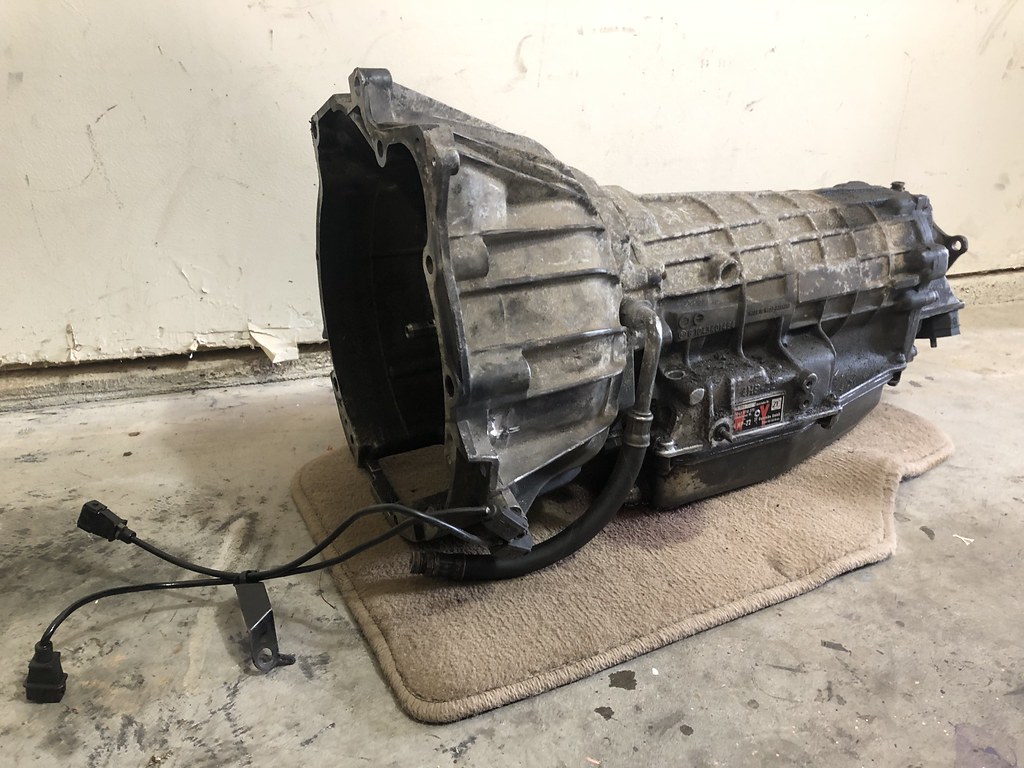
With the interior about 95% done, I started on getting the trans out. I got this beast done today:

I was dreading this job as everyone laments how difficult it is. I started by removing the front mounting bracket. I then got the outer, more accessible mounting nut off no problem but couldn't feel the inner, "bitch" bolt to save my life. To my surprise, the starter wiggled a bit, and then I just wiggled it out! Whoever did the auto swap when the original autotragic overheated must not have ever installed it. I may consider doing the same as it never caused me or Big Al any problems in the time we've had the car.
I then got all the bellhousing bolts out except for the top two, I need to pick up a longer extension to reach them. Hoping to have that done tomorrow. Also dropping the F82 off tomorrow to get fixed as well as the flywheel for a resurfacing. Hoping for a happy Monday!Last edited by Albie325; 07-23-2019, 01:48 AM.Leave a comment:
-
I'm not that worried about it matching, at least I wasn't until I saw that. That's amazing. I never did get my OBC lighting to work. It seems as if the lighting power goes through the door chime and interior lighting system, which mine is all Hodge podge. I was planning on running a 12v hot to it, but it got lost in the shuffle.
How much was it? PM me plz.Leave a comment:
-
Melon check out this thread:
Found it very helpful when trying to decide between the Continental and Clarion headunits.
At post #152 I saw earthwormjim post a pic of his Continental that he swapped the diodes on. Basically changed the button diodes and backlight to diodes with the correct amber wavelength to match what is on the OEM backlight. It matches perfectly to the BMW items. I contacted him about it thinking maybe I’d buy the diodes and do it myself. Apparently they’re SUPER small and someone like myself with minimal electronics experience would have a tough time with it. He offers it as a service for a fee, parts and shipping included. He was awesome to deal with and I highly recommend it, pricing was very reasonable as well.Leave a comment:
-
rzerob So the whole car has clear bra on it and a lot of that would peel off with the clear bra. The scrape went through the bra in some spots and left a nice wave in the bumper which wouldn’t bother me too much cuz I could get that out with some heat, however there’s a small but very noticeable dent in the metal of the quarter panel that definitely went through the paint. This car is essentially my dream car (aside from a Ferrari which ain’t happening) and I plan on keeping it forever so I’d rather just get it repaired and have it looking 100% again. This is why we can’t have nice things I guess...Last edited by Albie325; 07-05-2019, 04:33 PM.Leave a comment:
-
I am not saying that the bumper doesn't have any damage but the picture looks like mainly just paint transfer. Have you tried to buff it out? If there is paint transfer it would look a lot less noticeable.Leave a comment:
-
Sucks about the stuff man!
No bueno.
Ugh, that one fucking bolt.
A Craftsman universal wrench fits on the torx bolts, made it a little easier to get access, since getting to it with a socket is a major PITA.
I love having Bluetooth music, makes the whole car feel modern. Deets on Amber backlight. I bought the Amber version, it matches well, so I'm wondering what extra steps were done in yours.Leave a comment:
-
So some good news and bad news.
First, the bad. I was washing the F82 the other day and when backing it into the garage, my mirrors were off a bit and I scraped the side of the garage. Really pissed at myself, gonna cost about $2k between the paint, body, and new clear bra and that's gonna set me back on a few things I've been trying to purchase for the E30:

UGHHHHHHHHHHHHHH WTF.
Ok, onto some better news. Nothing major, just a little more progress.
I finished up the pedal assembly by replacing the accelerator pedal bushings, all the bungs for the tension springs, as well as a new accelerator cable:

Old vs. new:

New bungs:
And new cable, with autotragic kickdown cable removed (for good!):

New felt sound deadener, tried cleaning the old one but it still looked pretty gross:

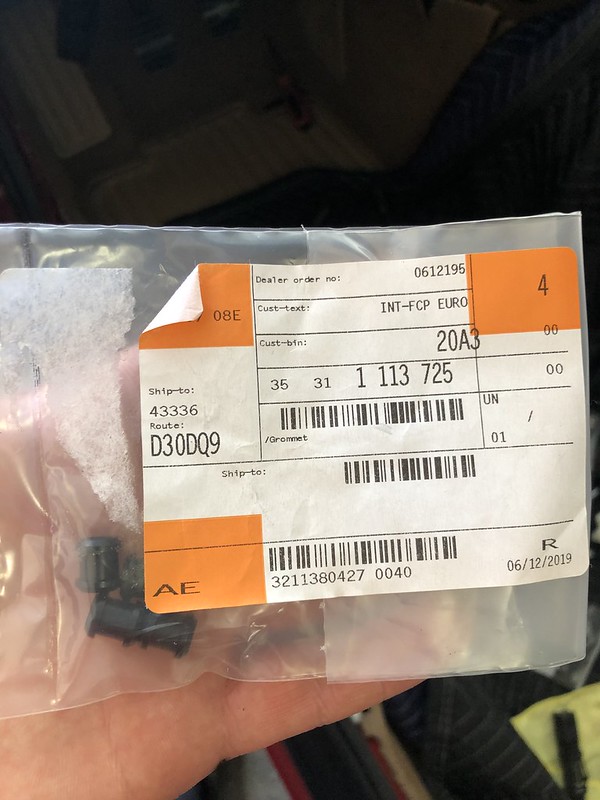
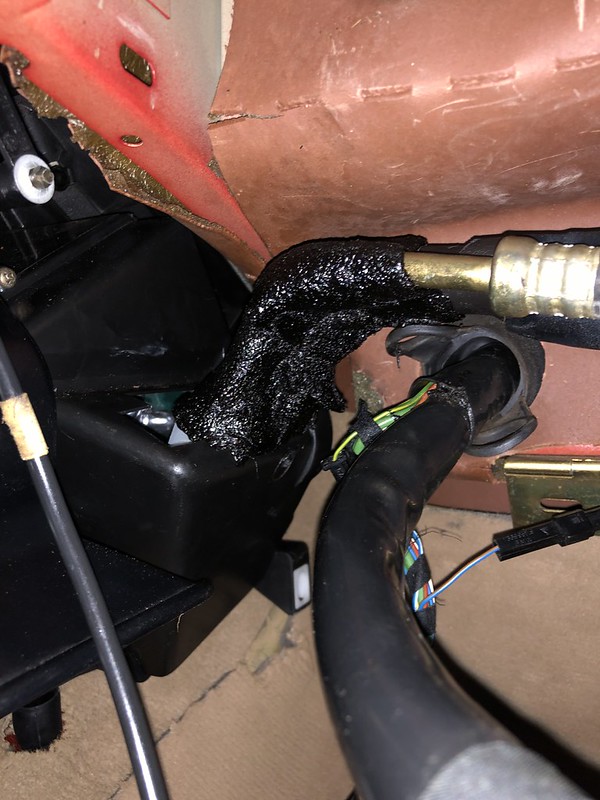
Got the A/C lines behind the glovebox flushed out with A/C solvent and put new O-rings in, snugged them up, and wrapped with butyl/cork tape:
Got the glovebox and all the passenger trim back in place, it was actually a bigger pain than expected to get the glovebox aligned properly so that it opened and closed smoothly.
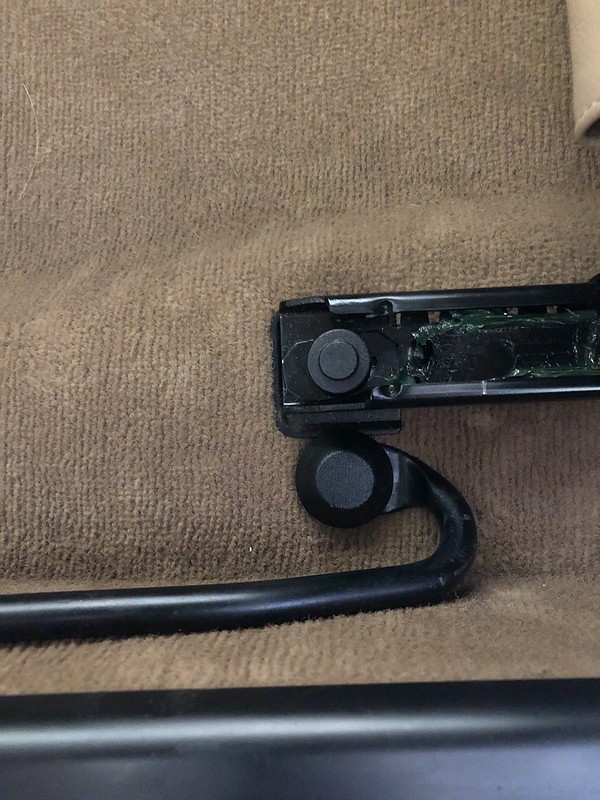
I decided to refinish the buttons on the seatbelt release carriers. One of them had been buried beneath the seat for some time and was still nice and red, the others were all chalky:

After reading a thread on how to bring mine back to life, the easiest way to do it was just to paint them. I wanted to get this done prior to shipping them out for a refurb so as not to get any paint on the new webbing:
Thread: http://bigcoupe.com/phpBB2/viewtopic.php?t=11882
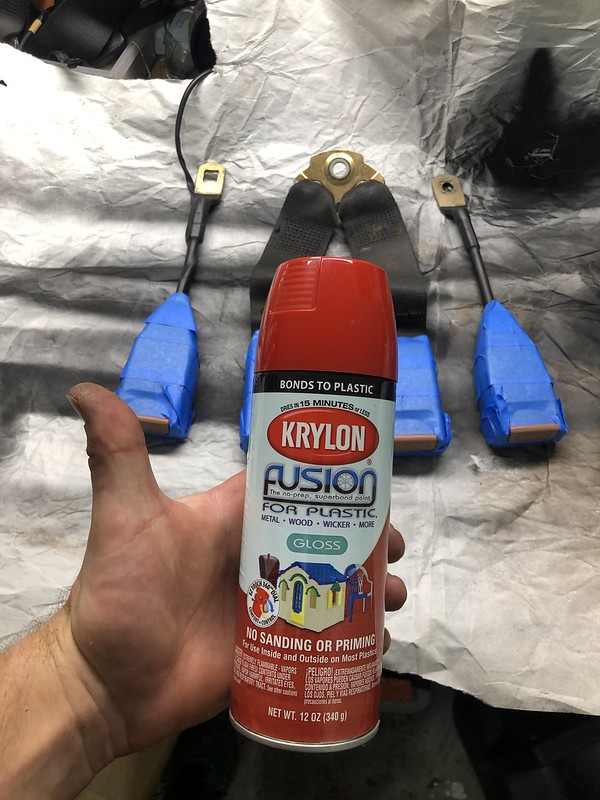
All done, the original good one is on top, the two on the bottom are painted. Came out super close:

Also repainted the kickpanel with black vinyl paint, it too was pretty chalky looking, almost gray:

Next I decided to reconnect the battery so I could roll my windows up and get to work taking out the glass and window regulators as well as to get the sound deadener installed in the doors. I used the opportunity to test my electrical work. This was a good initial sign:

Thanks to earthwormjim for installing the proper amber diodes for the buttons and backlight, looks really good and matches the OEM backlights perfectly!
I was very pleased that everything worked as intended. The speakers sounded AWESOME compared to the old setup. Only setback was that I found out the driver front tweeter was dead so will have to order a new one. I used the good passenger side tweeter to check the wiring on the driver side to make sure I didn't screw something up. It worked so the problem is definitely the tweeter itself. Very relieved that things worked out considering I'd never done any wiring or audio sound work before. Also very happy with the Continental head unit, very easy to use and the bluetooth was nice and clear when streaming music. Soooooo nice to have some modern amenities with a very stock look.
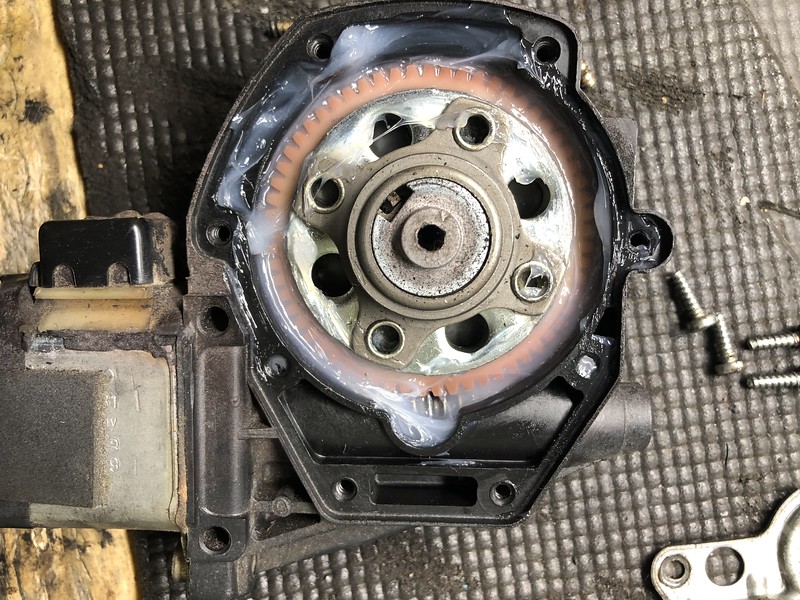
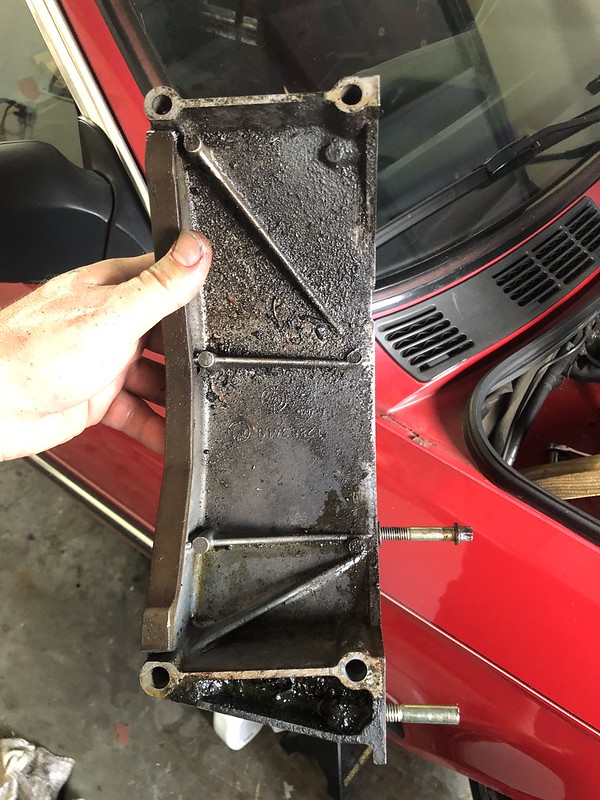
Last I started taking the rest of the coolant system, fan, radiator, hoses, etc. out of the car. I kept picking tasks seemingly to avoid the elephant in the room: at some point I'd have to get the stripped torx bolt removed prior to realistically making any more progress on the manual swap (my epic and unsuccessful 5-day battle was mentioned in a previous post). It was the last of the 8 bolts holding the trans reinforcement plate in place and prevented me from doing the oil pan gasket when I had the front subframe out of the car.
My old foe:

I got the auto coolant lines and auto dipstick tube removed and had easier access. Using a Dremmel with a grinding wheel attachment, I ground the head of the bolt off to the point that the bolt would slide out with the trans reinforcement plate from the opposite side.
And this, boys and girls, is the look of sweet victory:

As hard as it was to try and remove the bolt with the plate still on the car, I figured I'd need a vice or something crazy to unscrew it. To my shock (and annoyance) I was able to unscrew it by hand :finger:

Now I can officially get to work removing the trans and replacing the oil pan gasket. I'm headed to the mountains for a nice Fourth weekend with the fiancée and pup so the rest will have to wait until next week. Happy Fourth guys, don't blow off any fingers! 'Murica.Last edited by Albie325; 07-03-2019, 06:44 PM.Leave a comment:
-
Thanks all, I hope to keep it coming!
Got my AFM and cluster sent off to Bavarian Restoration so will be a while before I'm driving. I also decided to have my seat belts re-webbed, once I get those sent out and returned I can complete the interior and turn all my attention to the mechanicals (finally).Leave a comment:
-
Subbed and bookmarked. Awesome details and OEM+ restore. Love all of the reconditioning tricks and elbow grease vs buying a slew of new/nos parts. Should make for a super classy E30 when you're finished.Leave a comment:
-
Its been said again and again on here, but your attention to detail is extraordinary. Definitely watching this one and probably using this thread as a reference when I redo my seats.Leave a comment:
-
Man, coming along great.
I have the feels on doing work over and over.
Also, thanks for the info on the vents.
And, I usually buy fuel line locally, most of the SAE measurements have close metric equivalents, and can use Gates top quality hose.
The Continental head unit is great, love having modern features like BT and HD radio in a classic car.Leave a comment:


Leave a comment: