
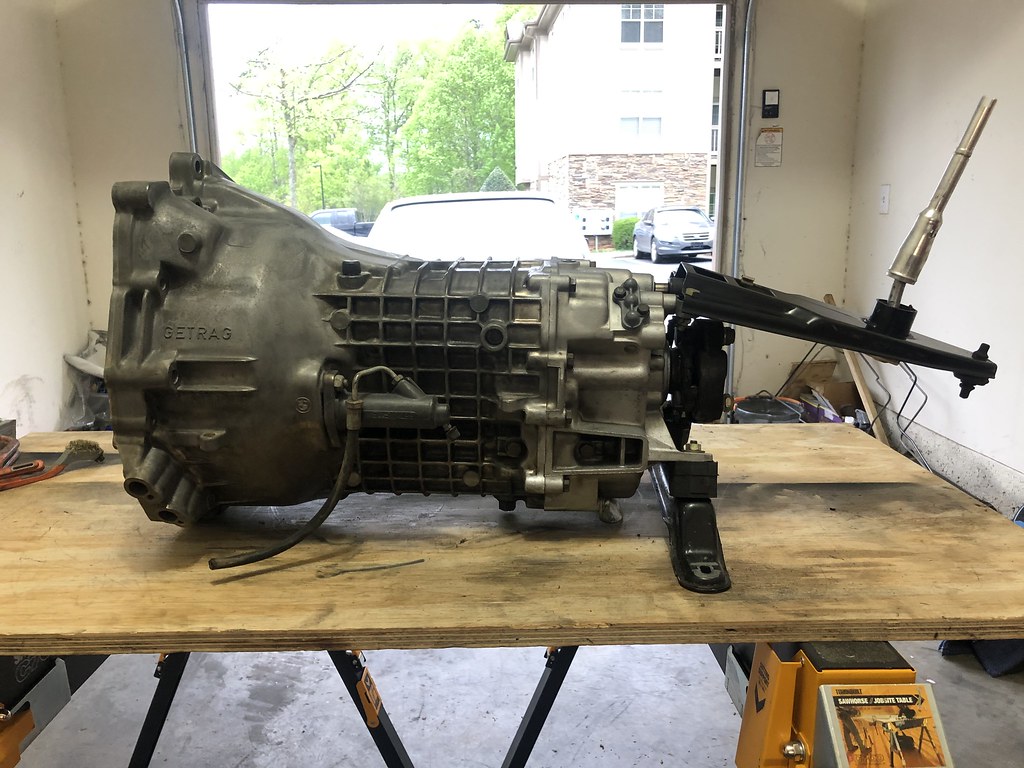
You're all set for virus protection.......just need goggles.
-
-
Got some things knocked out today:
Have been meaning to get an alignment done on the car, after all the suspension work I figured it was off a bit but felt great driving so I've been putting it off. I've put almost 1000 miles on the car since the manual swap and started to notice the front tires wearing unevenly, the numbers don't lie:

Took it to Bimmer Performance Center in Raleigh, was really happy with their service. Their rep Jason seemed really impressed with the car, it was definitely the most senior example of BMW on the lot. Haven't seen quite that variety of ///M cars in one place probably ever so I think I went to the right place. As good as the car felt before, it felt so much better afterwards, glad I got it done.
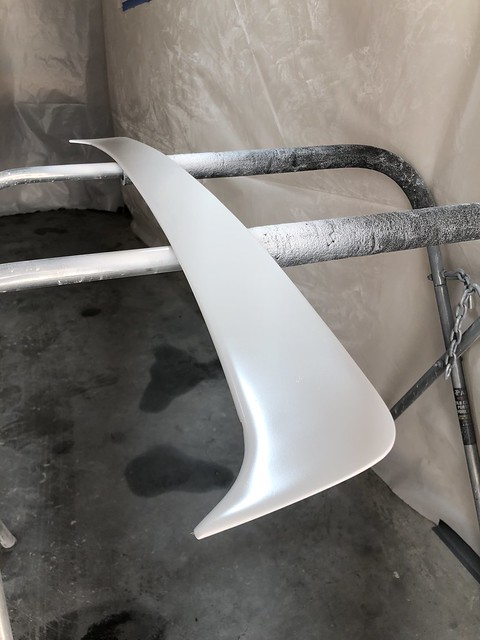
Also got the first batch of MTech parts in paint! Figured I'd start with the sideskirts and spoiler insert since they were relatively small and flat and I could hone in my gun settings.
My makeshift paint booth:

Got the whole garage wrapped in plastic and installed some 10000 lumen flood lights, ended up working as well as could be expected for garage painting.
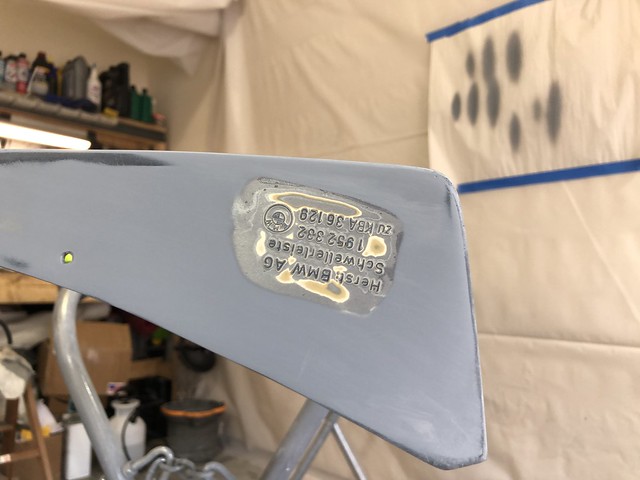
Wet sanded down to expose the badging as best I could:

Sprayed in sealer:

First coat of base:

Ended up fucking up the spoiler insert by trying to tack rag a piece of dust out too soon, will have to sand it again and respray. Live and learn, I chose these parts because if I messed up early on they would be easy enough to redo.
Continued on with the sideskirts, first coat of clear:

All done:

Definitely some dust nibs in there but overall came out pretty good. Was able to get used to the different paints and gun settings for the larger, more detailed parts. Depending on how things look tomorrow morning after curing overnight, I may wet sand and spray another coat of clear, or just wet sand and buff. Other than dust nibs I didn't see any runs or fish eyes so fingers crossed!
I hope to get the front and rear valance done over the next few days, then I'll (finally) start breaking down the car.Last edited by Albie325; 04-08-2020, 06:38 PM.'86 325e Zinnoberrot /// '02 325ci Schwarz II /// '18 M4 Azurite Black Metallic ///
Albie325 Build Thread | Albie325 COTM Jan 2021Comment
-
Look at this guy learning from my mistakes!I do things.Comment
-
Ha trying to anyway, only the tip of the iceberg so far'86 325e Zinnoberrot /// '02 325ci Schwarz II /// '18 M4 Azurite Black Metallic ///
Albie325 Build Thread | Albie325 COTM Jan 2021Comment
-
Looks impressive to me!
Good work, excited to see the car painted by yourselfComment
-
Wow, this is awesome. Can't wait to see it all done! And now that The Vintage is rescheduled until later in the year, you'll have it completed by then! :)Comment
-
Thanks, me too! It will certainly be a long, interesting process. Learning new things as I go, as you'll see...Originally posted by gnmzl
I know, was bummed to see it pushed back but may be a blessing in disguise, no way I'd have been ready for May.Originally posted by mike.bmw
Got off work early yesterday and knocked out a few more parts:
Fabbed up a painting rack for the front air dam:
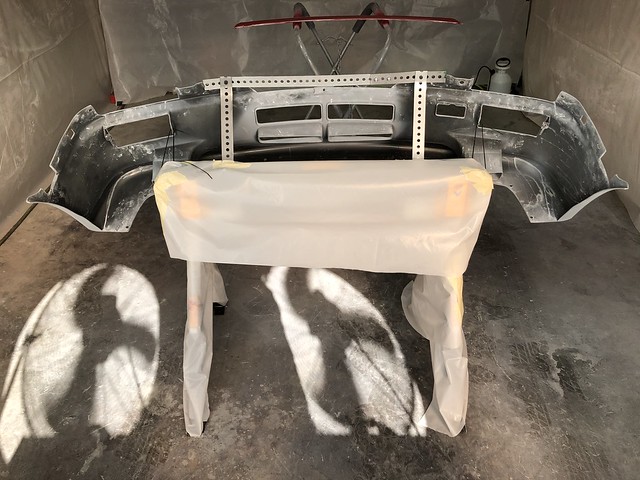

Ended up working out pretty well!
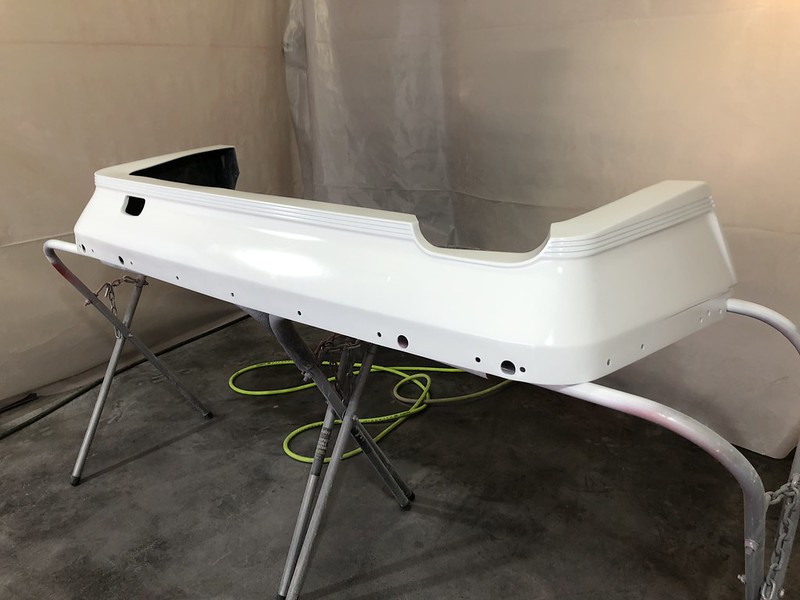
Got the spoiler insert resealed:

Along with the front:
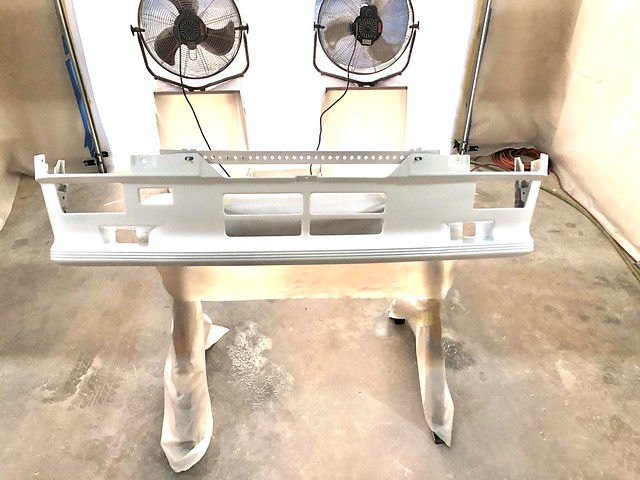

Base:

All done in clear:


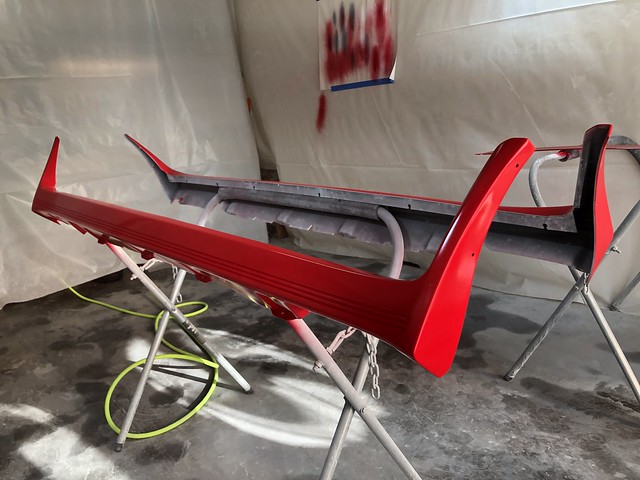
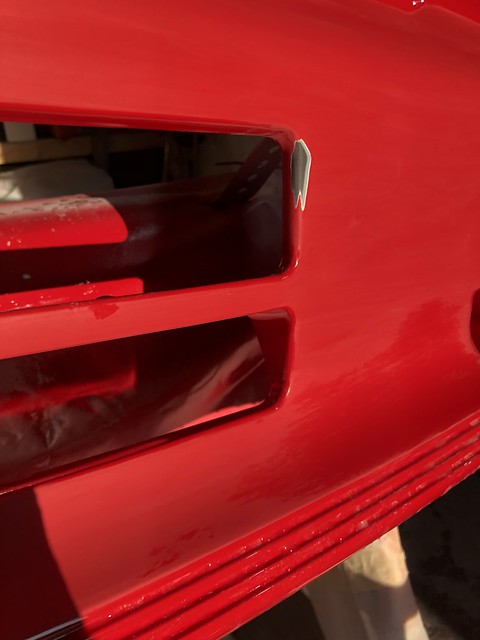
The front came out AWESOME except for a couple small runs:


Was absolutely pumped with how everything came out.
Building on last night's success, today I (of course) got a little overzealous and tried sanding out the 1-2 runs I had in the front before I got ready to paint the rear. I should have given the paint more time to cure beforehand but I was on a mission get things done, made an OOPS:
I tried using a razor to shave down the run but the clear was still a little too soft. The razor hung up in the run and pulled the paint up, ugh. This is a learning process after all, and it's not the end of the world.. Spent the next few hours wet sanding the whole thing down in 1000 grit and feathering my mistake into it. Plan to recolor the spot and reclear the whole thing, should come out looking great. Will do that along with the rear apron tomorrow, updates to followLast edited by Albie325; 04-11-2020, 07:42 PM.'86 325e Zinnoberrot /// '02 325ci Schwarz II /// '18 M4 Azurite Black Metallic ///
Albie325 Build Thread | Albie325 COTM Jan 2021Comment
-
Looking good, that's a small spot and should be easy to cover up.
A tip : don't do my mistake and install the fog lights onto the apron while it's off the car.. Take out the retaining clip for the adjustment screw and take your time installing the fog light with the screw unscrewed to the point the thread isn't showing. Then screw it into it's location on the apron itself. Should be easy doing it off car, I did it with the apron installed and hate myself for scratching it up because of that.Comment
-
gnmzl good point, thanks for the advice!
Ended up fixing my boo boo yesterday. I think it actually came out better the second time around as I'm starting to get the hang of using the spray gun.
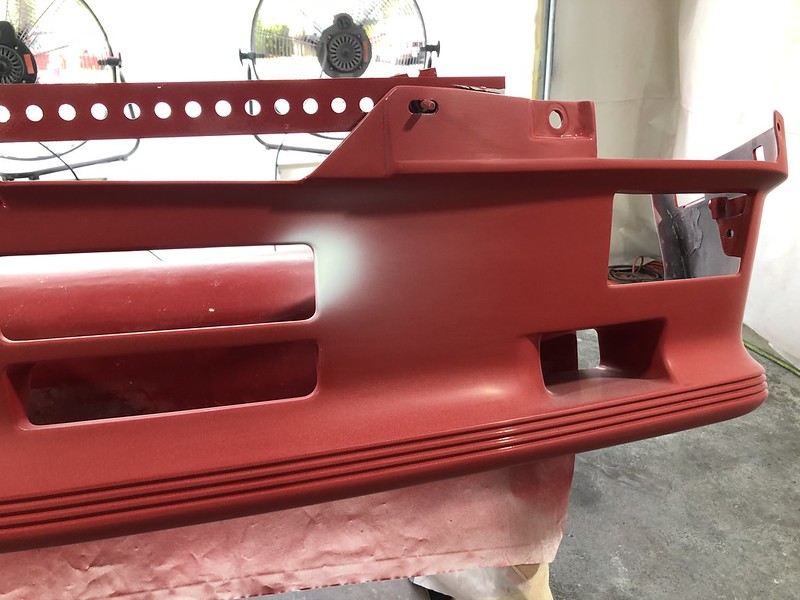

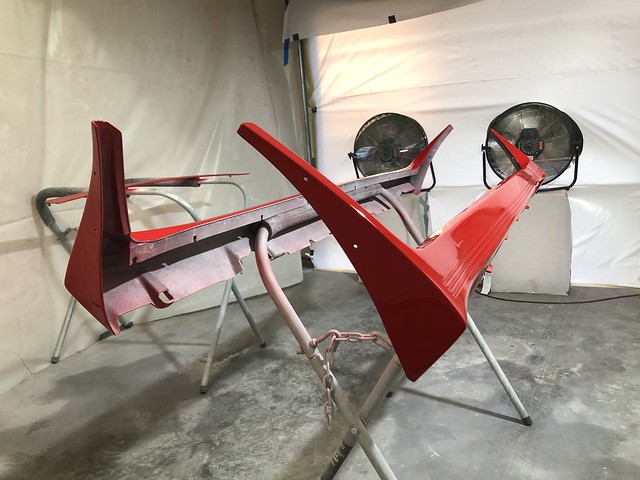
And got the rear done too:
All in base:

And done:


I'll let everything cure for a bit (WON'T be making that mistake again) then start the work of polishing out the dust nibs. Now I need to wash the car down well and start breaking it down, wish me luck!'86 325e Zinnoberrot /// '02 325ci Schwarz II /// '18 M4 Azurite Black Metallic ///
Albie325 Build Thread | Albie325 COTM Jan 2021Comment
-
Best thread on r3v right now!Simon
Current Cars:
-1966 Lotus Elan
-1986 German Car
-2006 Volkswagen Jetta TDI

Make R3V Great Again -2020Comment
-
gonna look so meanComment
-
Thanks guys,hope to keep the updates coming. Got the car washed today and will be tearing it down once I have a free minute'86 325e Zinnoberrot /// '02 325ci Schwarz II /// '18 M4 Azurite Black Metallic ///
Albie325 Build Thread | Albie325 COTM Jan 2021Comment
-
Paint is looking excellent! Well done sir!I do things.Comment
-
Thanks brother, long way to go...Originally posted by Melon
Anyway, I got the car all nice and clean, probably the last time for a while it will be a complete car. Over the weekend I went from this:

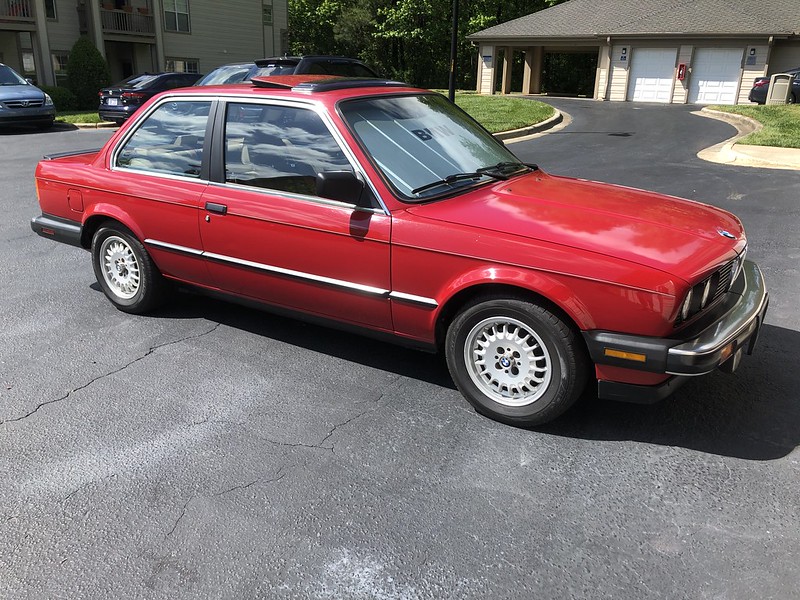
To this:


Went over the car and took some pics of the more glaring issues with the current paint:
The hood, which was hit by a baseball at one point in its life and was repainted, wasn't prepped well and aside from being a shade or two off from the rest of the car was starting to chip:

Took the hideous bubble off the sunroof for the first time, well, ever:

Underneath, the sunroof panel has a few small spots of (hopefully) surface rust:

The roof, sunroof panel, and the tail panel are the only sections with original paint left on the car. The remainder was blended in and the clear is starting to peel on the C-pillar:
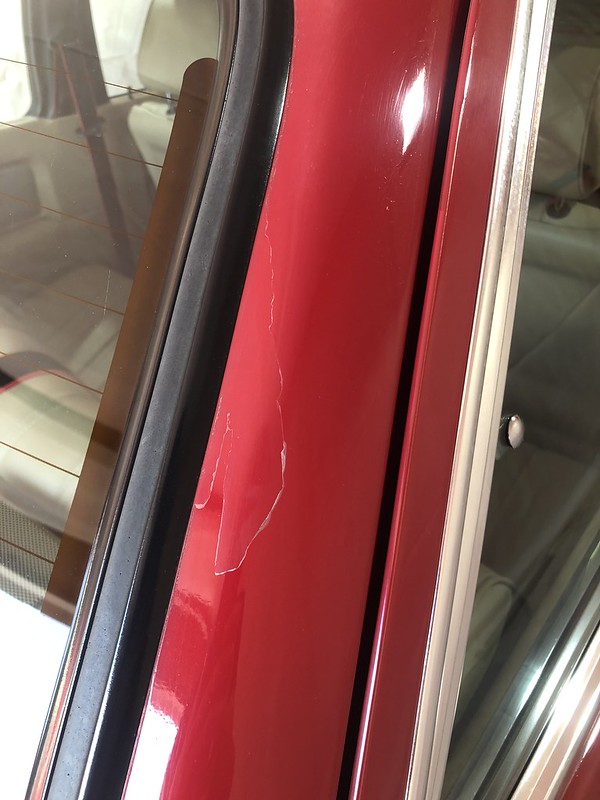
And unfortunately, the poorly prepped paint theme continues throughout the rest of the car, should make sanding it off a little easier at least.
Under the side mouldings:


All along the door jambs (ran the whole length of the side and bottom):
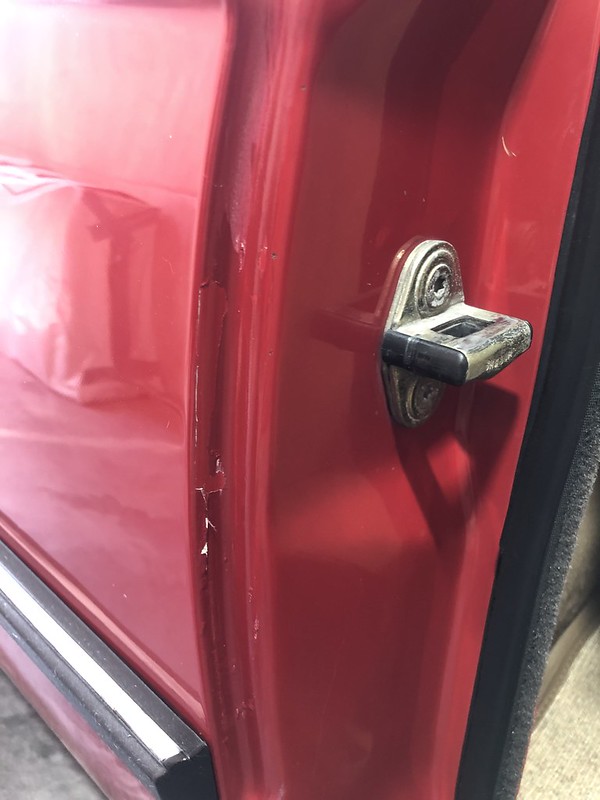
Looks like they basically just painted base/clear right over the original single stage without sanding it, it just chips right off and is still glossy underneath.
Realized that when they painted the trunk, they never removed the spoiler and basically painted up to the spoiler and left the rear section where the emblem is original:

Rust spot under the diver fender:
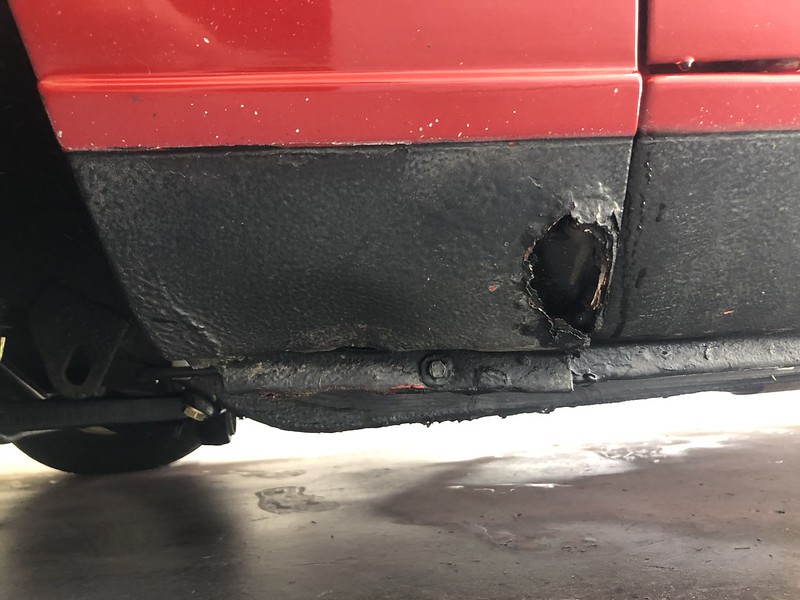
And a crushed pinch weld:

The good news is that aside from some small dings/dents here and there the body panels are very straight and overall devoid of rust. I'll need to look someone up to weld a patch in the driver fender, if anyone knows anyone local to Raleigh let me know, I have no idea what type of shop would waste their time on such a small piece.
Ended up also getting all the chrome trim off (thankfully) without destroying anything:

And test fit the 772 euro valance, wanted to make sure I didn't need to bend/tweak anything before getting it painted. It ended up fitting perfectly, no adjustment needed:

The only bummer of the whole weekend was getting under the car and seeing this:
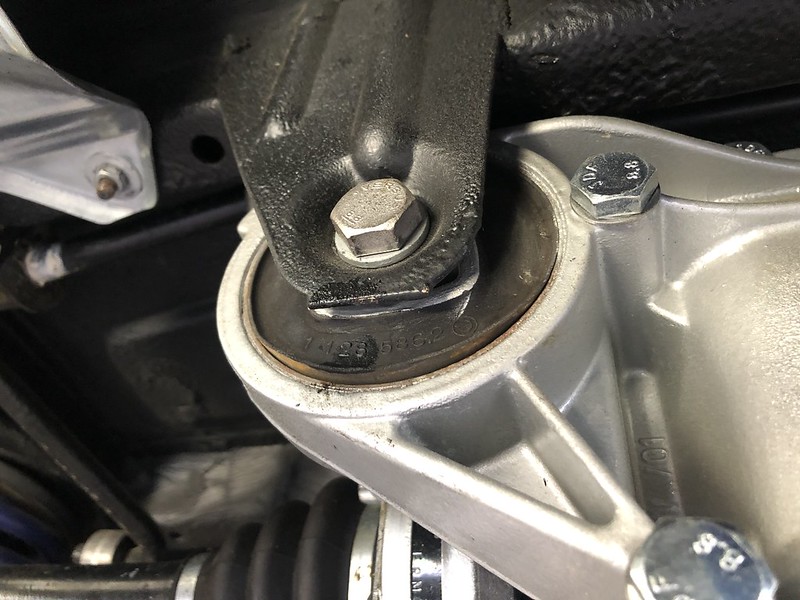
The diff bushing was starting to separate. Ugh, I had foregone this when I did the suspension overhaul because it looked to be in great shape. Now I'll have to drain the diff and remove the cover again. At least I have a new bushing and paper gasket on hand, I sealed it with RTV high-temp and I'm not 100% happy with it, it leaks albeit very slowly. Will get to that this week hopefully as I want this done before the car is prepped and there's sanding dust everywhere
'86 325e Zinnoberrot /// '02 325ci Schwarz II /// '18 M4 Azurite Black Metallic ///
Albie325 Build Thread | Albie325 COTM Jan 2021Comment


Comment