Announcement

Collapse
No announcement yet.

Big Al's Revenge: an OEM+, MTech1 325e restoration

Collapse
X
 
  • Filter
  • Time
  • Show
Clear All
new posts

    Originally posted by mjweimer
    Stunning. The quality of the paint work is really evident in that shot of the car with the hood open. I'm happy for you and can't wait to see this come together.
    Originally posted by paynemw
    VERY well done my friend. Super impressed by your work. The car looks stunning. Do you plan on keeping the M20b27 or do you think you'd ever go to an M20b25?
    Thanks guys!

    paynemw I don't have any plans for an engine swap. The Eta engine, while relatively slow, is rock solid reliable and once this is done I really want to enjoy driving the car. I've probably only put about 2000 miles on it in the last 2-3 years because, projects. Some of the things I've done to the car (3.25 lsd, manual swap, Conforti chip) have livened it up enough that it's still a blast to drive without sacrificing reliability. The last thing I want to do is scratch the paint trying to hoist an engine in/out just for a few more HP. If for whatever reason I need to pull the head (I'm still worried about my head gasket after it overheated a few months ago), I'd consider doing an 885 head "stroker" build, but I highly doubt it, at least not in the near future and only if something went wrong with the current, sub-100k mile engine.

    Last weekend was kindof gross out so I didn't want to pull the car out of the garage too much. I ended up just getting a bunch of smaller, annoying things done. First, I pulled the HVAC panel out and looked into my recirc flap issue. Turns out I just jammed the flap door motor when I disconnected the flap to pull the IHKS cover off when removing the windshield wiper mechanism. I unplugged the motor, removed it, and tested it. Once the arm wasn't jammed against the IHKS, it began to work again, I just re-installed it, plugged it in, and was good to go.

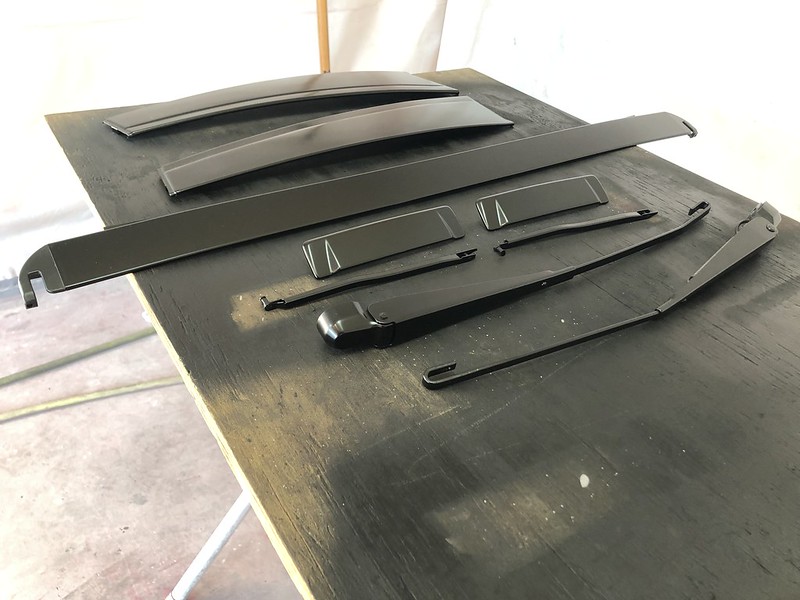
    Next, I got the remaining trim refinished:


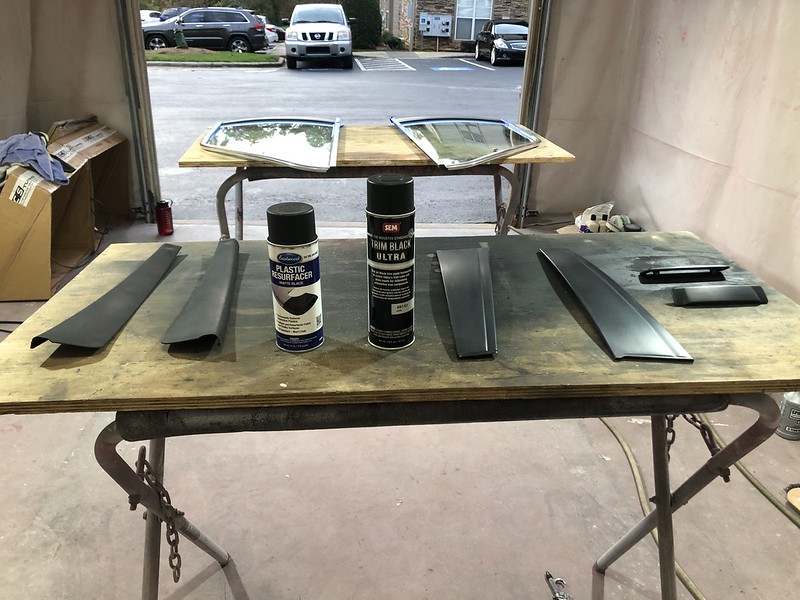
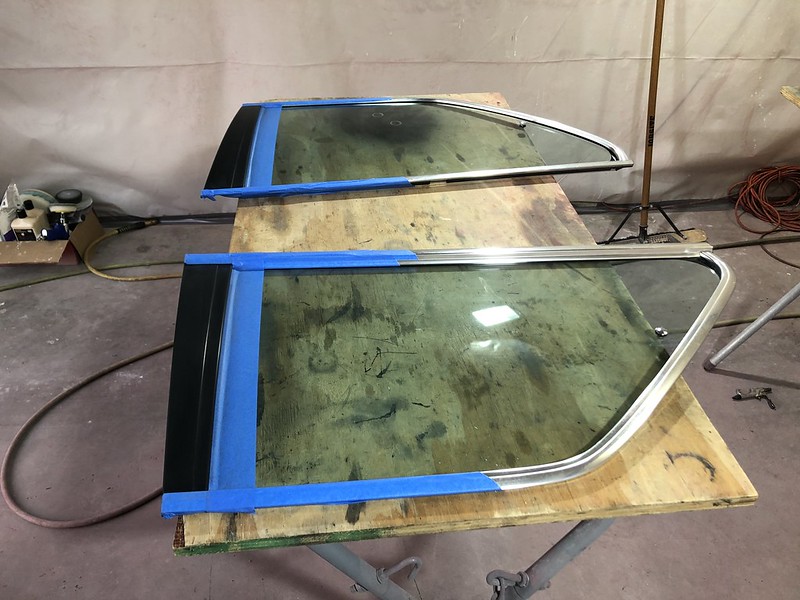
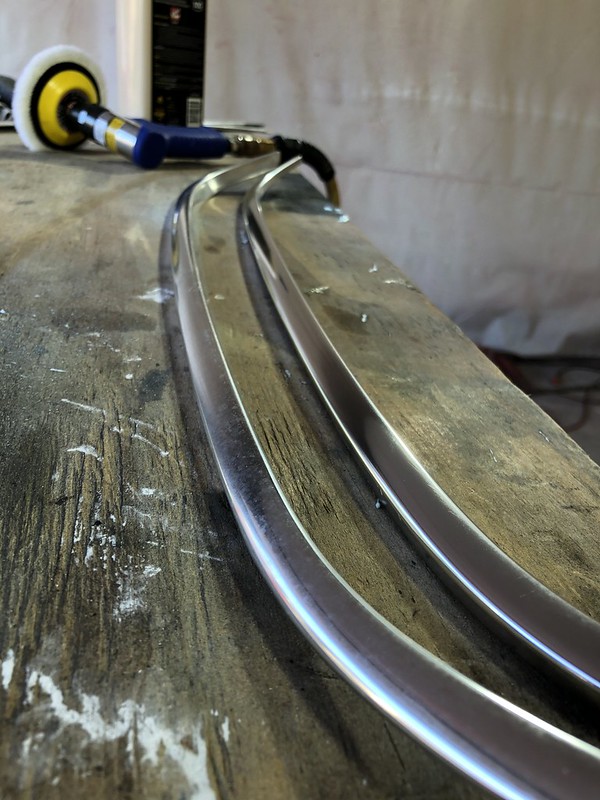
    Then got to work polishing all the chrome trim (even though its really just aluminum):


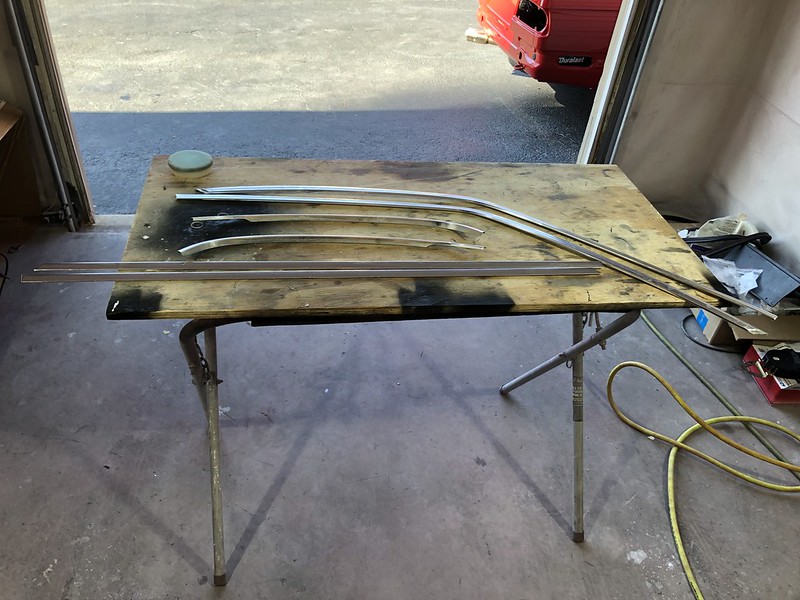
    There were water spots all over the place. I ended up just using some fine buffing compound and a wool pad on my small detail buffer. Came out really good, didn't get all the scratches out but definitely much shinier.

    Before on the left, after on the right:


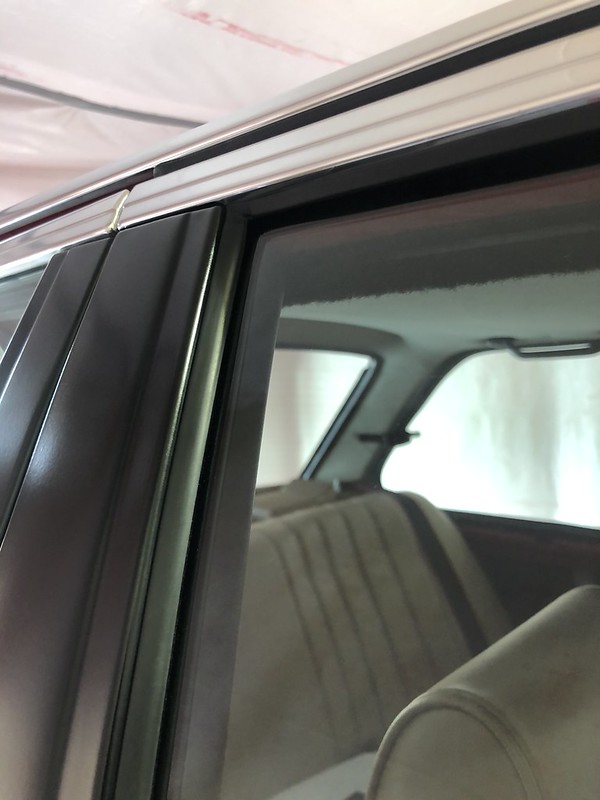
    Then I buffed the vent window trim, looking fresh:


    Next, got them all put back together with new hardware:


    There are 5 of these little plastic clips per vent trim piece, you just pop them into the holes on the painted part:


    Push the tabs down (this was actually a huge bitch, the tabs are plastic and super tight and they were difficult to pop in without bending the palstic):


    Then the chrome insert just snaps in:


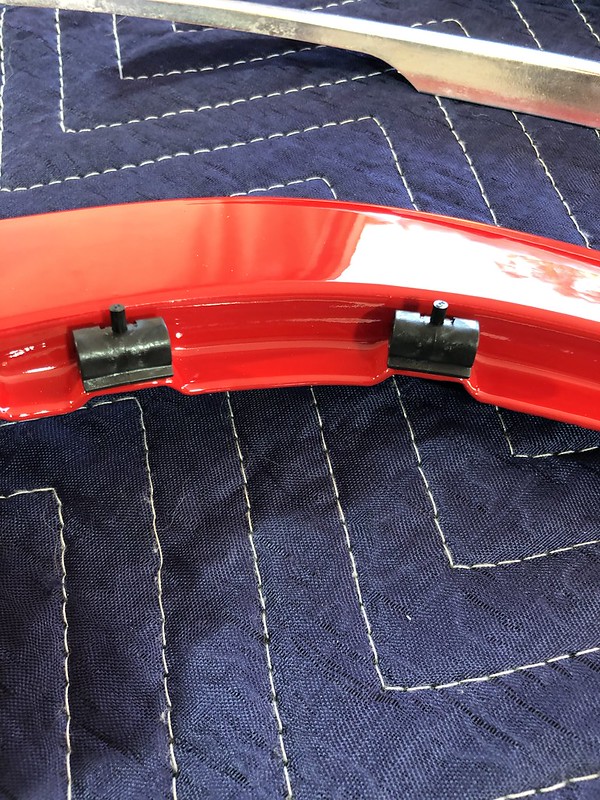
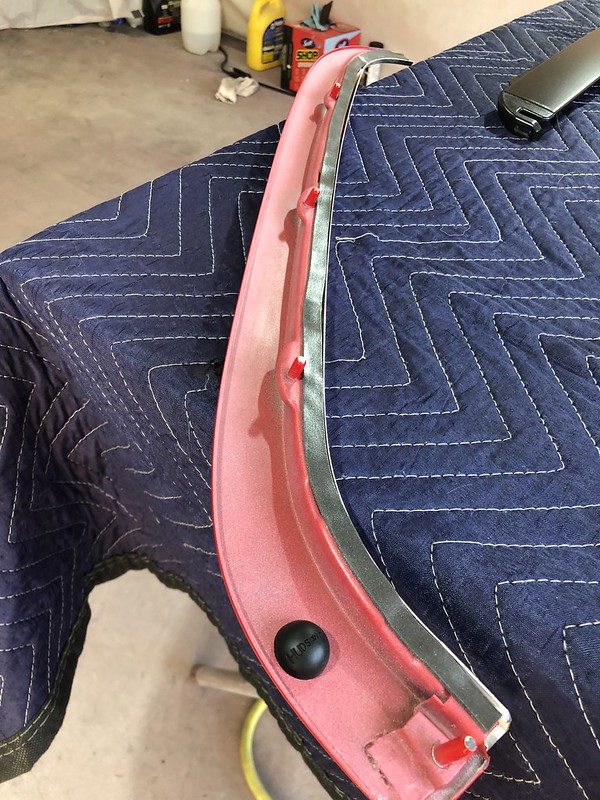
    Added the little rubber buffers and neoprene strip to the back to prevent them from rubbing up against the paint:


    Then started getting all the chrome trim reinstalled with new clips:


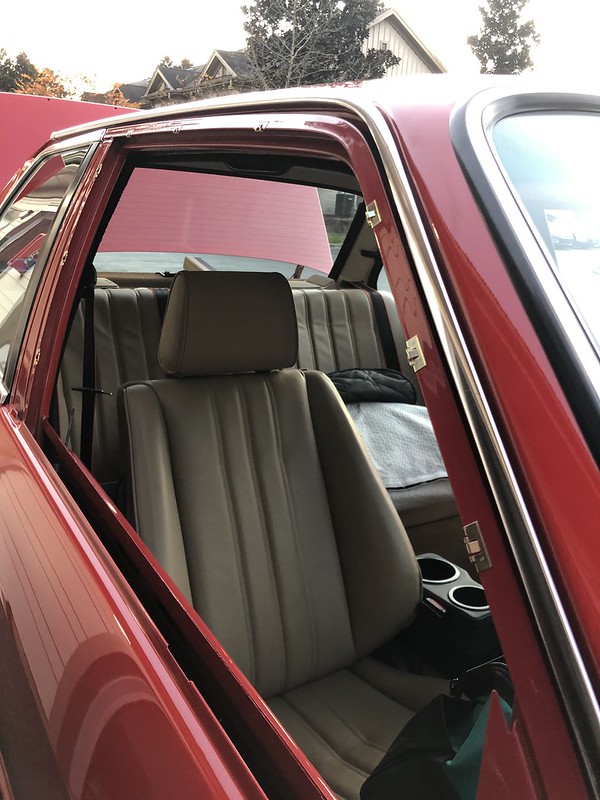
    Was a helluva lot easier getting the trip put back on then it was taking it off.


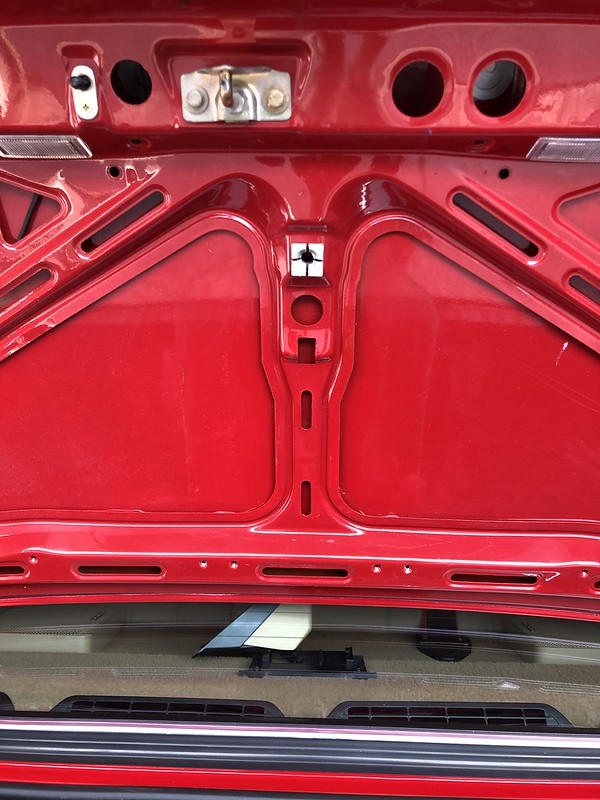
    Next got a few trim items put back on the trunk.

    Started with new license plate lights and mounting brackets:


    Forgive the orange peel on the license plate section, it will be covered so I didn't go too crazy buffing there as I didn't want to risk burning through any of the many edges in that area.

    Old vs new:


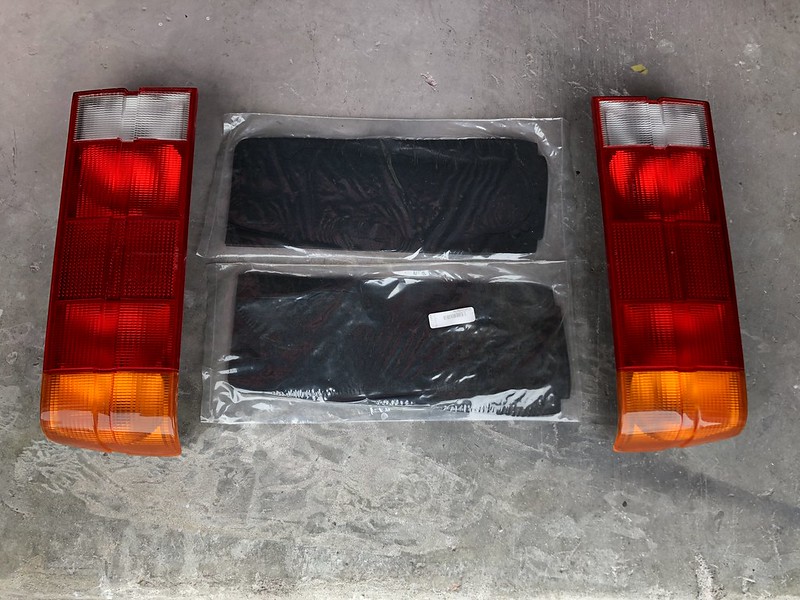
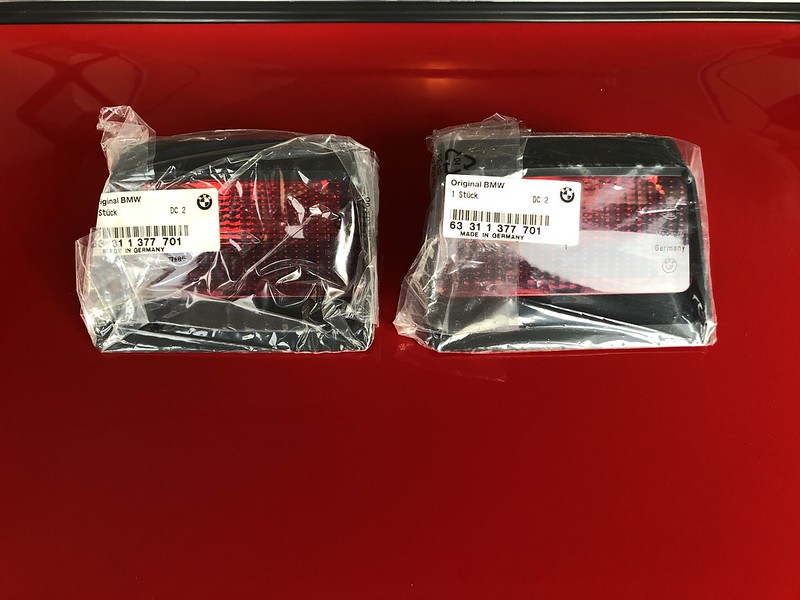
    Then got the tail lights buffed and installed with new gaskets:


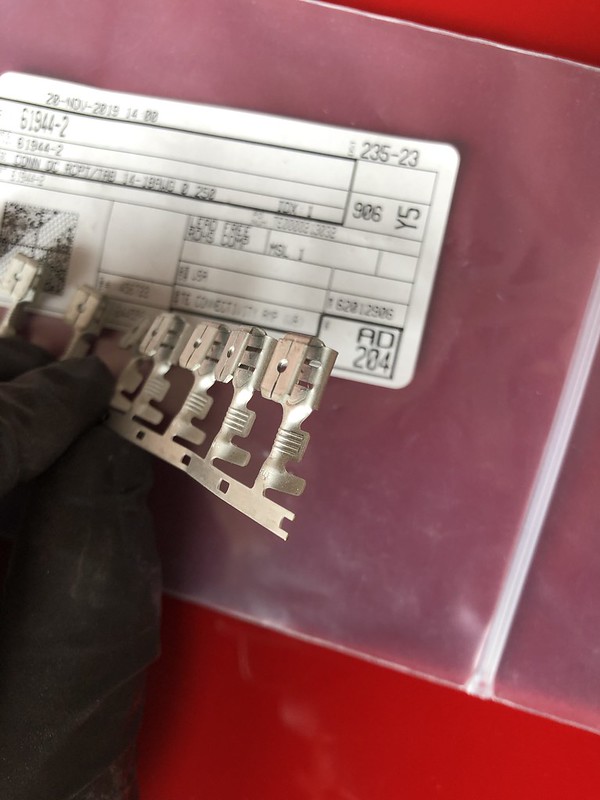
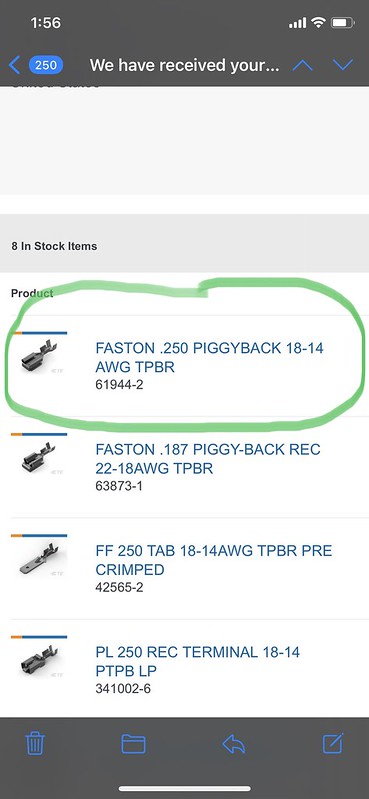
    Last thing I did in the trunk was to wire in a second trunk light:


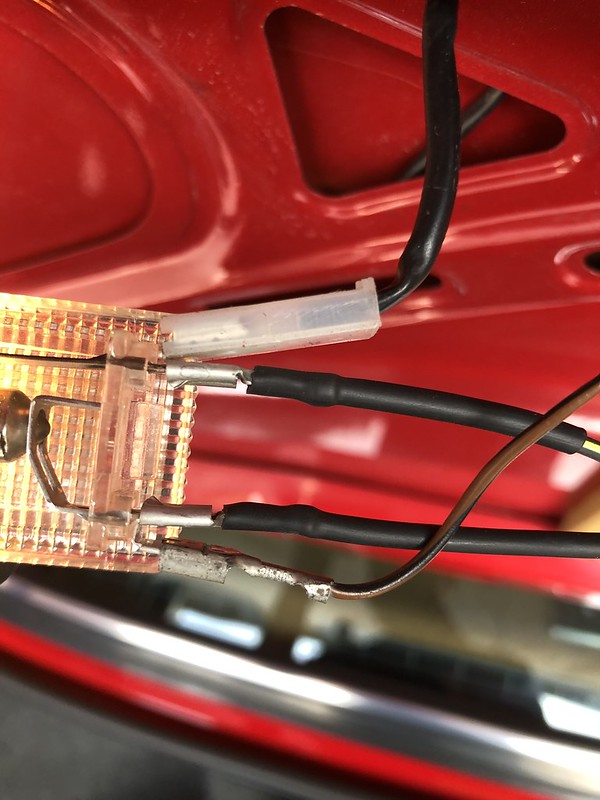
    I made 2 lengths of wire, each attached to a "piggyback" connector. The end has both a female end with an attached male spade:


    Plug the female end of the piggyback into the original light, connect the male spade to power/ground, and then run across to your new light and plug in normally:


    Then I removed the old tool box foam that was all rusty, there will be a nice upgrade going in its place soon:


    Rounding out the tail lights, my check panel "brake" light has been on since Big Al still had the car. I've done everything, made sure all bulbs were the correct OEM ones, cleaned all the contact surfaces, replaced the brake pedal switch, etc. Only thing left as a possible culprit is the chip in the back of the 3rd brake light, the connections tend to go bad over time:


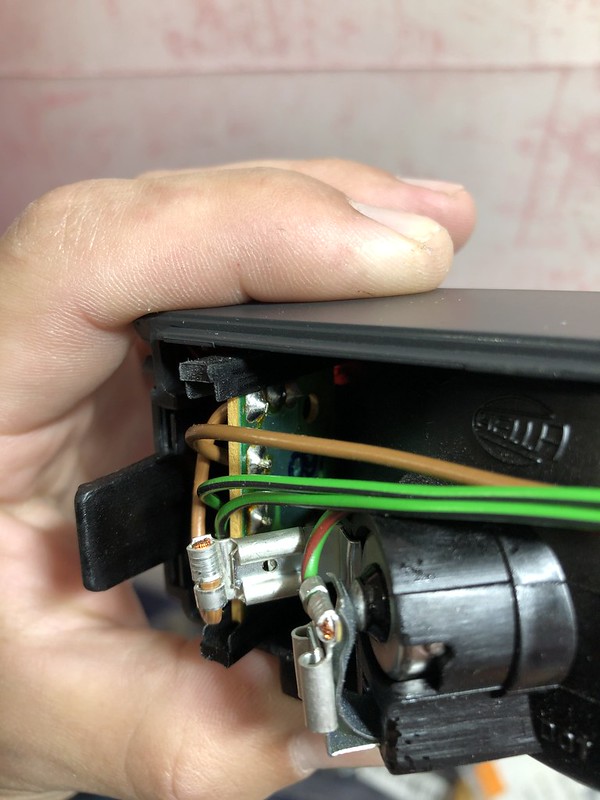
    I ordered a new one awhile back that had just been sitting in a box of all my new parts. To my surprise there were TWO new ones in the box when I finally opened it! Score:


    Plugged it in, and sure enough the "brake" light is off for the first time since I've owned the car!!!


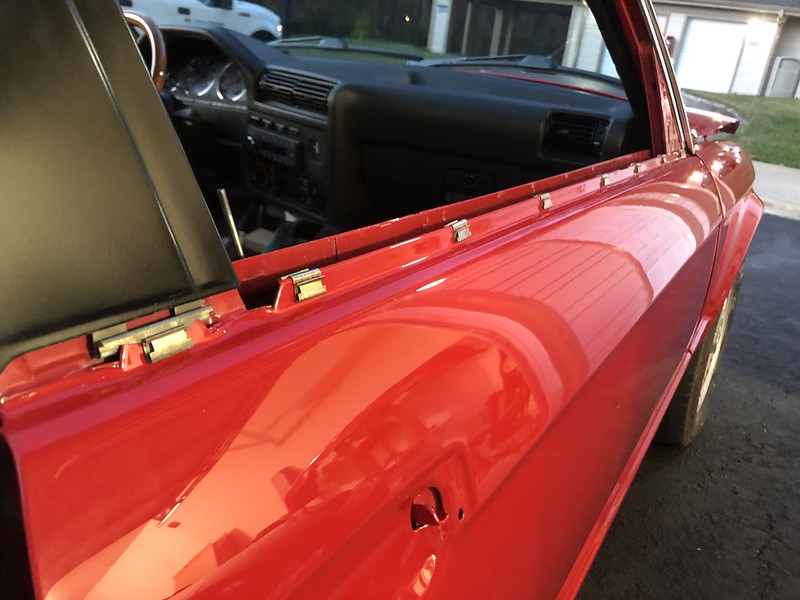
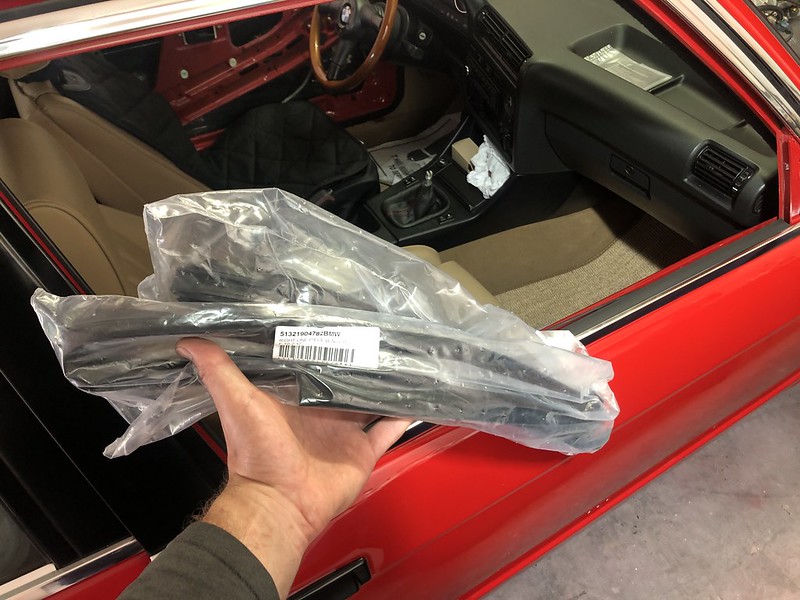
    Got the door locks and handles installed with new rubber buffers:


    Then got a new window guide installed. Unfortunately only the passenger side is available at the moment, I had to reuse the old one on the driver's side. If the Driver's ever comes available again I'll replace it with a fresh one:


    Also unfortunately, when reinstalling the driver's door glass I found that the window regulator was really struggling to come up and was grinding a bit no matter how I adjusted the glass. Had hoped to get the doors totally buttoned up and the door cards reinstalled, have ordered a replacement regulator that I'll get to this weekend.

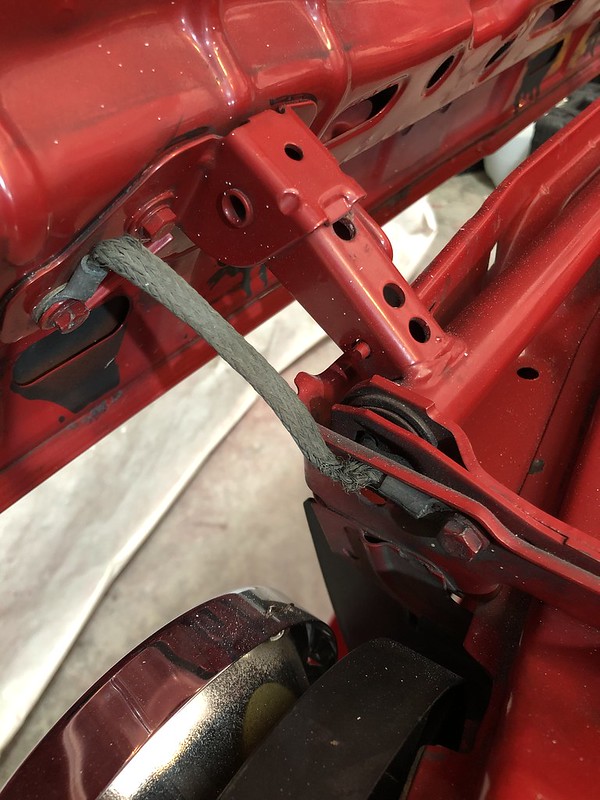
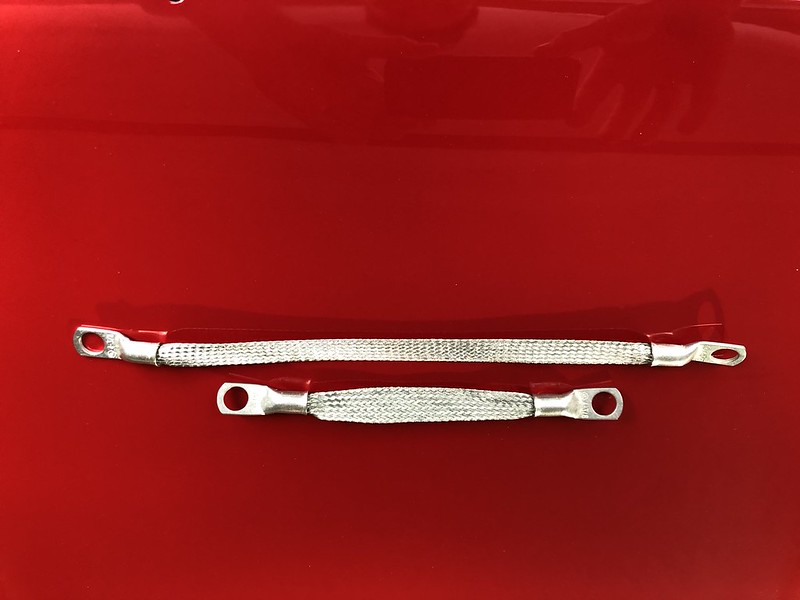
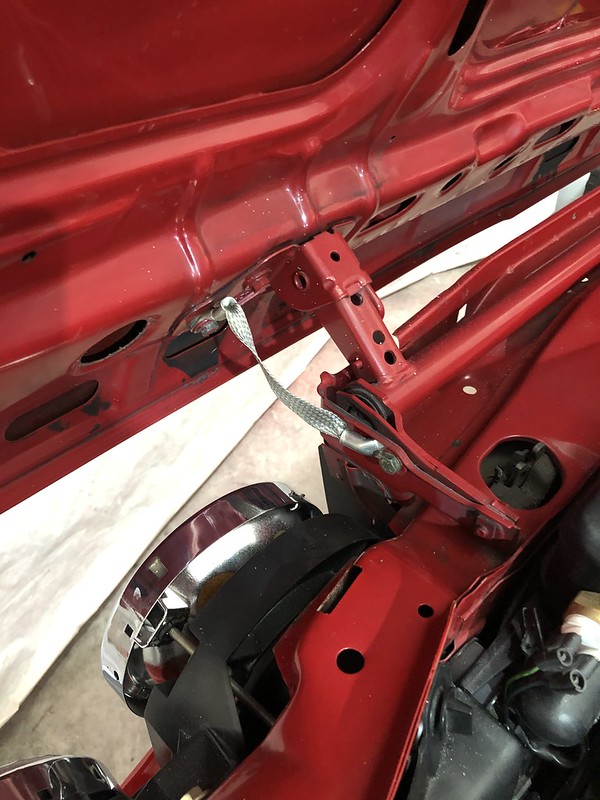
    Replaced the hood and valve cover ground straps with BavRest upgrades, the originals were falling apart:


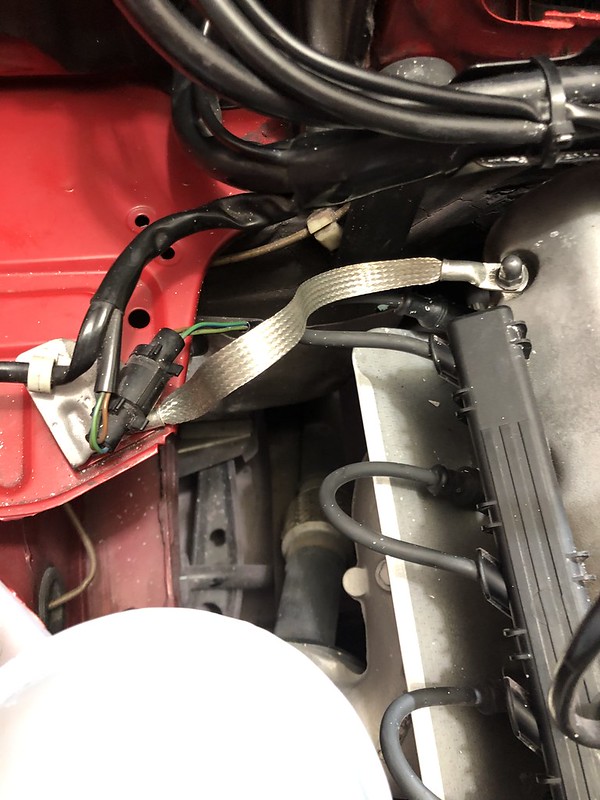
    Still need to give the engine bay a proper washdown of all the compound flakes everywhere.

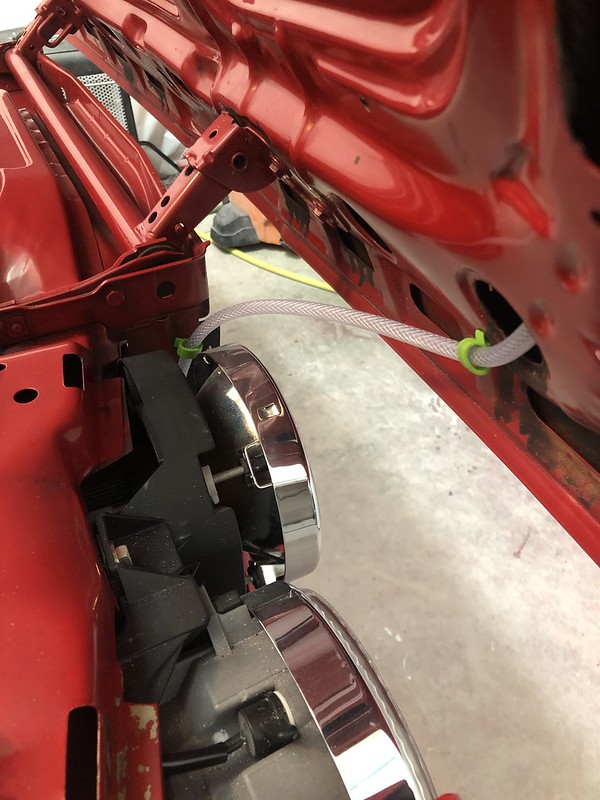
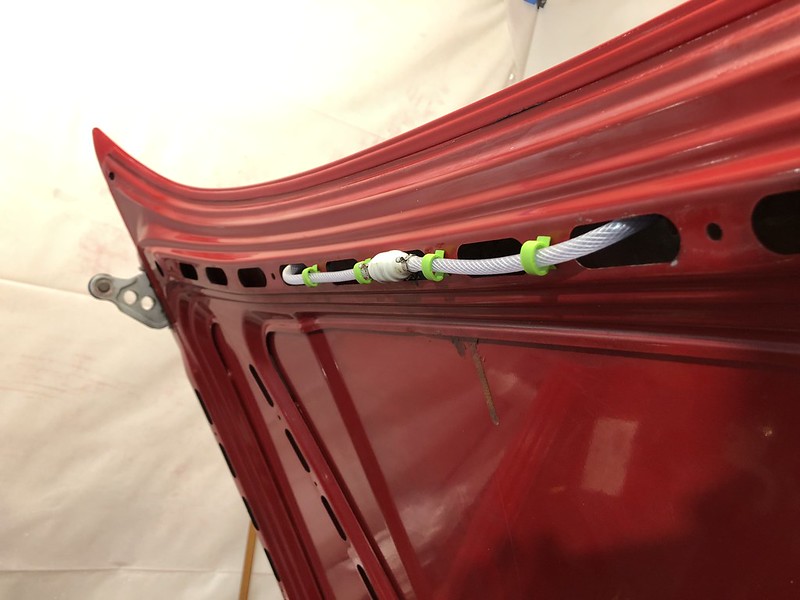
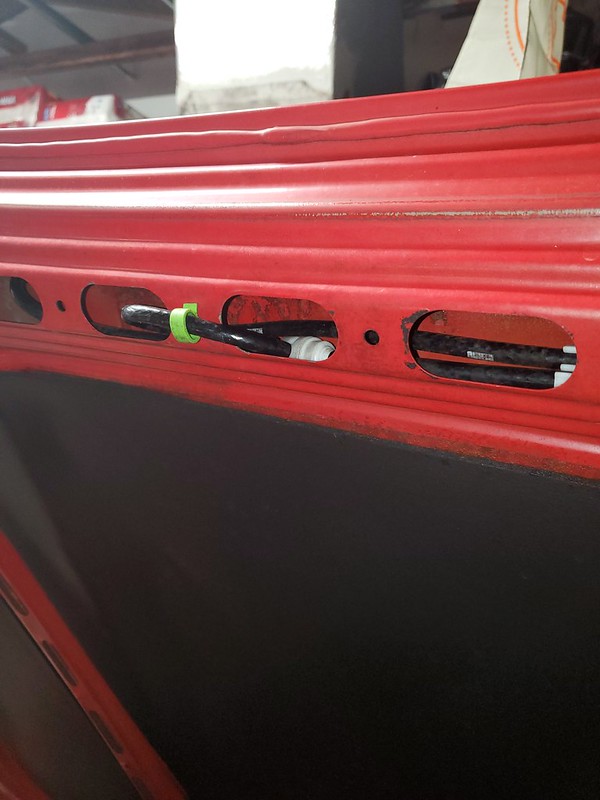
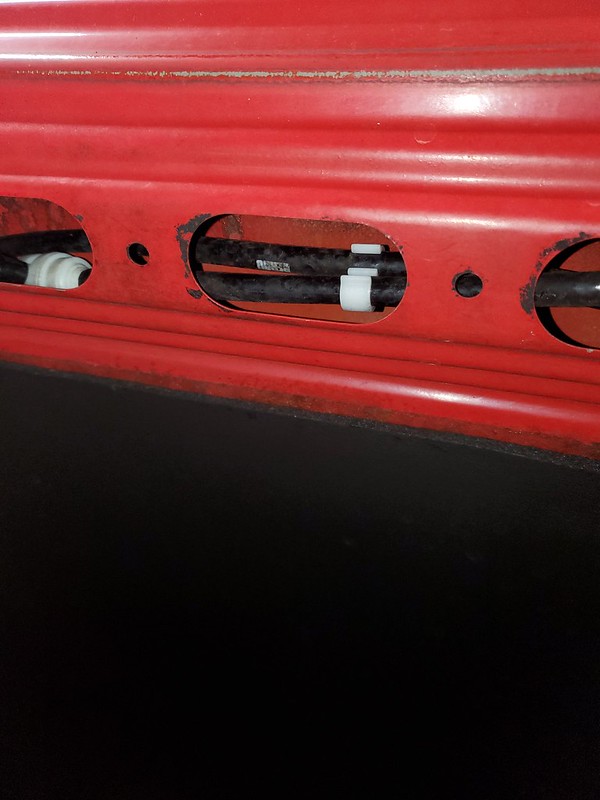
    Last but not least, I replaced all the windshield washer components:


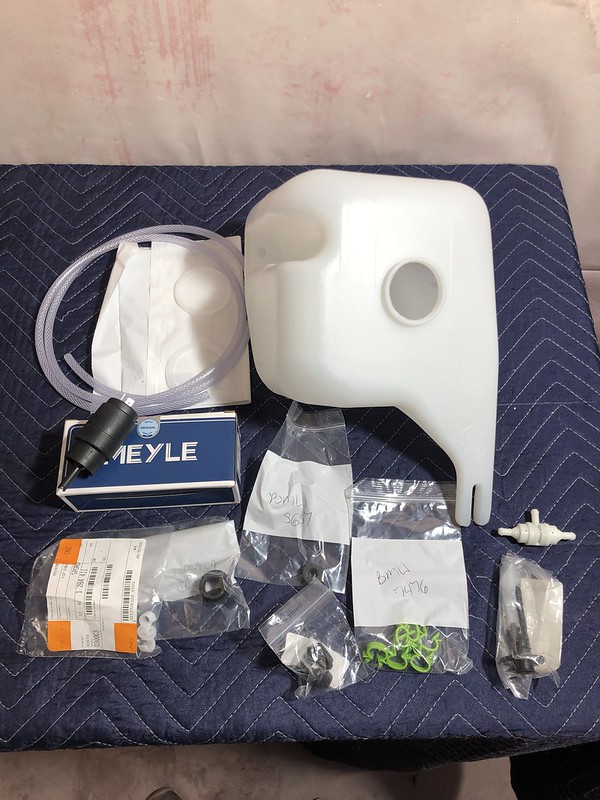
    Not exactly sure why the new clips are slime green instead of white, but I guess it adds a nice modern "pop" of color to the engine bay:


    New nozzles:


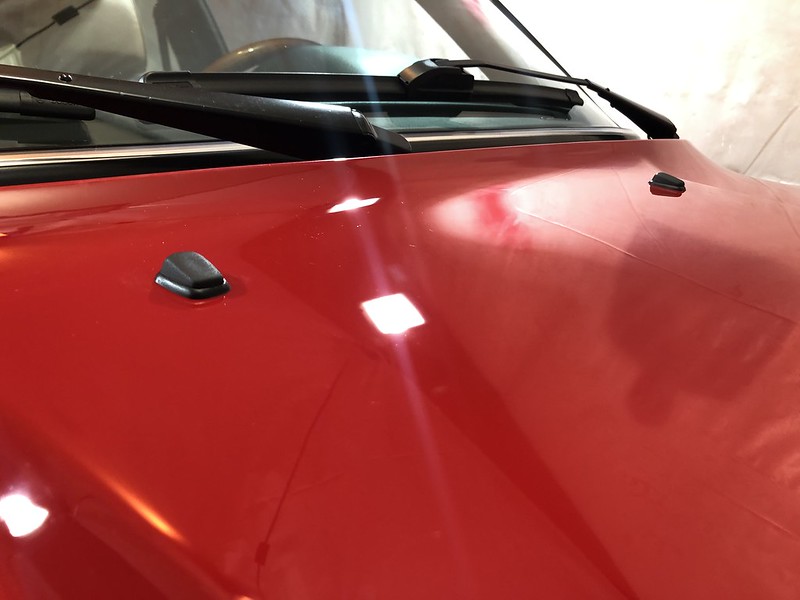
    Installed some new vent grilles while I was in there:


    The last bit of yellowed plastic is now gone, the engine bay is finally all sparkly and new:


    The cap is actually the Mercedes part that Jordan has recommended in the past, P/N 1638690508


    I know this post was a ton of small, insignificant "victories" but am hoping to have something much more profound this weekend!
    '86 325e Zinnoberrot /// '02 325ci Schwarz II /// '18 M4 Azurite Black Metallic ///

    Albie325 Build Thread | Albie325 COTM Jan 2021

    Comment


      Originally posted by Albie325 View Post
      I know this post was a ton of small, insignificant "victories" but am hoping to have something much more profound this weekend!
      Love these updates and I would hardly call this insignificant because these great little details are needed to make a comprehensive restoration.


      Since we are talking details, there are rubber stoppers that fit into the upper hole on the back of the lower hood hinge. They simply prevent "metal to metal" contact at the back of the hinge pivot when the hood is fully open....usually crumbled away on most cars at this age but I thought to share in case you were interested - pn 51 23 1 916 567

      Click image for larger version

Name:	51231916567.jpg
Views:	570
Size:	55.5 KB
ID:	9963484


      May I ask where you sourced those piggyback connectors? I am also planning on adding a second trunk light and that is a much cleaner solution than what I cooked up.


      MJ

      Comment


        Stellar work. The detailed updates are what I love most about this project/thread. Looks like you're in the home stretch!

        Comment


          Originally posted by mjweimer
          May I ask where you sourced those piggyback connectors? I am also planning on adding a second trunk light and that is a much cleaner solution than what I cooked up.
          Google TE Connectivity, they are awesome. They have any type of electrical connector or plastic housing you can think of, all high quality and very affordable. I've had to do a few wiring mods to make things fit, and they have a lot of pin connectors and plastic housings that actually fit the OEM BMW plugs perfectly. It’s almost overwhelming to search for things they have so much. The oem BMW connectors are usually $2-6 each, when I order through TE I can get 10 for the same price because you inevitably ruin a few trying to make a good crimp. Their shipping is incredibly fast too, I've ordered as little as $5 worth of stuff from them and gotten it in 2 days. The piggyback I used is circled:


          Also, thanks for the heads up on the rubber hood stoppers, I ordered them today! They have never been there since I've had the car so didn't even know it was a part to replace.

          Originally posted by mike.bmw
          Stellar work. The detailed updates are what I love most about this project/thread. Looks like you're in the home stretch!
          Thanks Mike! I'll keep the details coming
          '86 325e Zinnoberrot /// '02 325ci Schwarz II /// '18 M4 Azurite Black Metallic ///

          Albie325 Build Thread | Albie325 COTM Jan 2021

          Comment


            Originally posted by Albie325 View Post

            Google TE Connectivity, they are awesome. They have any type of electrical connector or plastic housing you can think of, all high quality and very affordable. I've had to do a few wiring mods to make things fit, and they have a lot of pin connectors and plastic housings that actually fit the OEM BMW plugs perfectly. It’s almost overwhelming to search for things they have so much. The oem BMW connectors are usually $2-6 each, when I order through TE I can get 10 for the same price because you inevitably ruin a few trying to make a good crimp. Their shipping is incredibly fast too, I've ordered as little as $5 worth of stuff from them and gotten it in 2 days. The piggyback I used is circled:


            Also, thanks for the heads up on the rubber hood stoppers, I ordered them today! They have never been there since I've had the car so didn't even know it was a part to replace.

            Perfect! Thanks for the info on the connectors and the pointer to TE Connectivity....this will be a great resource.

            Comment


              I must say, great work so far. Everything is in the little details. Have been a fan since I saw this thread and have subscribed and follow.

              It has been a few years since I did the overhaul on my washer system. In regards to the green clips, I know the ETK states 4 and I used them with 3 at the bottom where the hose comes from the car to the hood and then one at the top include the 2 double c clamps. I searched and searched for pictures of the OE look but never found anything concrete of how the t-valve was positioned at the top of the hood (when opened). I tried to follow what was there originally but I am sure it was changed through the years before I took possession of the car. Did you mimic the original installation or did you improvise? Also, the hose was black from BMW when I ordered it a few years ago, not sure what happened to the clear version back then but really like the old school look. I do wish the clips were not green, and as you stated, gives it a modern look.
              Alex 88 m5 | 91 318is | 19 Subaru Ascent
              BMW Tool Rentals & Fender Roller

              Comment


                FYI - you can get the clear washer hose from several sources if you prefer the look. I purchased a couple of meters from Bel-Metric:

                Bel-Metric sells metric hardware & specialty automotive supplies nationwide. Visit our website to purchase metric fasteners, nuts, bolts, Time-Sert kits & more.


                My current '90 325iS has the 'T' mounted like Albie's but uses only 2 clips and slightly different routing to the nozzles. I have also seen the 'T' mounted inside the hood reinforcement and the clips pushed in the opposite direction.

                Comment


                  Originally posted by mjweimer View Post
                  FYI - you can get the clear washer hose from several sources if you prefer the look. I purchased a couple of meters from Bel-Metric:

                  Bel-Metric sells metric hardware & specialty automotive supplies nationwide. Visit our website to purchase metric fasteners, nuts, bolts, Time-Sert kits & more.


                  My current '90 325iS has the 'T' mounted like Albie's but uses only 2 clips and slightly different routing to the nozzles. I have also seen the 'T' mounted inside the hood reinforcement and the clips pushed in the opposite direction.
                  Thanks. I will use this next time I have to redo the hoses. The black version hides better for sure, just doesn't look classic enough. I have everything in the channels of the hood but the clips are on the outside. I think I can redo it to use to green clips at the top and only use 2 instead of three at the bottom. Looking at some very low mileage examples of e30s (mostly m3's), looks like only 2 are used at the bottom. I have a 318is, so the hood trim cover is not the complete one as the m20 cars so nothing is hidden.
                  Alex 88 m5 | 91 318is | 19 Subaru Ascent
                  BMW Tool Rentals & Fender Roller

                  Comment


                    monty23psk the hoses had never been changed, so should have been in the OE configuration. I just put the new items back in the same way the old ones came out. Looking back at the pics I took before removal, there were actually only 2 of the green clips for the T-connector at the hood. I must have ordered extra and just used them all since there's extra holes there anyway. I did buy those 2 c-clams you mentioned, however there were none on the original setup and I can't figure out where they would go, there's nowhere where 2 hoses are next to each other that would require the clamp. If you have any insight lemme know!

                    Also, I think I bought my clear hose from the same seller as mjweimer mentioned. it worked great and was identical to the old. I didn't use the black hose (I ordered some and instead of one long section, they sent me 3-4 short sections that would have needed a splice) as I didn't like the look either.

                    Here's how I routed the hose from the tank, gets incorporated with the wiring straps for the headlights/A/C system:


                    Then through the opening for the headlights where there are 2 more clips before getting routed inside the hood:


                    Then the hose gets routed up the right side of the inner hood and out through the middle slot at the top, where it connects to the T-connector:


                    That's how it was when I removed it, but with 2 clips instead of 4 as I mentioned. Maybe there's different setups for different models/years? Not sure but it's back how it was, works, and looks nice so I'll leave it alone. Also, that's not all dirt and grime on the underside of the hood, it's all the cosmoline that I couldn't scrape off without taking paint with it. It's kept the hood rust-free for over 30 years so I think I'll just let it be.


                    Also, was watching TV the other night and a Banana Republic holiday commercial came on, and there was a quick shot of an early model E30 vert in the commercial! I guess we're just so mainstream now:


                    I'll post up last weekend's work probably tomorrow night
                    Last edited by Albie325; 12-09-2020, 04:29 PM.
                    '86 325e Zinnoberrot /// '02 325ci Schwarz II /// '18 M4 Azurite Black Metallic ///

                    Albie325 Build Thread | Albie325 COTM Jan 2021

                    Comment


                      Thanks. I will take pics and show you my setup. I used 3 of the clips where the line goes from the body up to the hood, where I see 2 should go. I need to move that extra up to the top. I will show you how I used the c-clamps.
                      Alex 88 m5 | 91 318is | 19 Subaru Ascent
                      BMW Tool Rentals & Fender Roller

                      Comment


                        So satisfying!
                        88 325is. S54, CSL airbox, Motec M800, Motec C127, Motec PDM15, Stoptech STR, MCS 2 way coilovers, Forgeline wheels, Recaro SPA, Eisenmann, Personal, lots of custom.

                        90 318is. As new OEM+, BBS LM, AST 4210 2 way coilovers, Wilwood SL6R/SL4R, Dynaudio, Recaro Experts

                        Comment


                          So here are my pics.

                          Here you can see how I routed it up. Looking at your and some other low mileage cars, I need to remove the highest green clip and route the hose through the round opening after the first green clip on the hood.


                          Here is how I routed the hose and kept the t-valve inside the hood.You can barely make out one of the double c clamps on the right.


                          Here is one of the double c clamps, clamping it to the hose that runs up the hood to the t-valve and then with one of the nozzles. I did the same for the other side.


                          I know plan to flip the t-valve to match yours, then only using 2 green clips, one for each side, run the hose through the first hole to get to the nozzle. I will use the double clamp in the same way. On the left/driver side, I will do what I did which is run the hose long to then curve into the t-valve and the extra slack will provide me a way to use the double clamp for that side.

                          Alex 88 m5 | 91 318is | 19 Subaru Ascent
                          BMW Tool Rentals & Fender Roller

                          Comment


                            Originally posted by monty23psk View Post
                            So here are my pics.

                            Here you can see how I routed it up. Looking at your and some other low mileage cars, I need to remove the highest green clip and route the hose through the round opening after the first green clip on the hood.


                            Here is how I routed the hose and kept the t-valve inside the hood.You can barely make out one of the double c clamps on the right.


                            Here is one of the double c clamps, clamping it to the hose that runs up the hood to the t-valve and then with one of the nozzles. I did the same for the other side.


                            I know plan to flip the t-valve to match yours, then only using 2 green clips, one for each side, run the hose through the first hole to get to the nozzle. I will use the double clamp in the same way. On the left/driver side, I will do what I did which is run the hose long to then curve into the t-valve and the extra slack will provide me a way to use the double clamp for that side.
                            Interesting that your hoses are black, maybe they changed them mine are a clearish color.
                            Euro Delivery Thread///E30 Project Klaus///COTM August 2021

                            Comment


                              Originally posted by Staszek View Post

                              Interesting that your hoses are black, maybe they changed them mine are a clearish color.
                              I know BMW sold it clear back in the day. I got this about 8 years ago from the dealer. Maybe it changed back to clear after 2012.
                              Alex 88 m5 | 91 318is | 19 Subaru Ascent
                              BMW Tool Rentals & Fender Roller

                              Comment


                                I just checked the PN against ECS for a picture and wow, still black.

                                Alex 88 m5 | 91 318is | 19 Subaru Ascent
                                BMW Tool Rentals & Fender Roller

                                Comment

                                Working...
                                X