Announcement

Collapse
No announcement yet.

Big Al's Revenge: an OEM+, MTech1 325e restoration

Collapse
X
 
  • Filter
  • Time
  • Show
Clear All
new posts

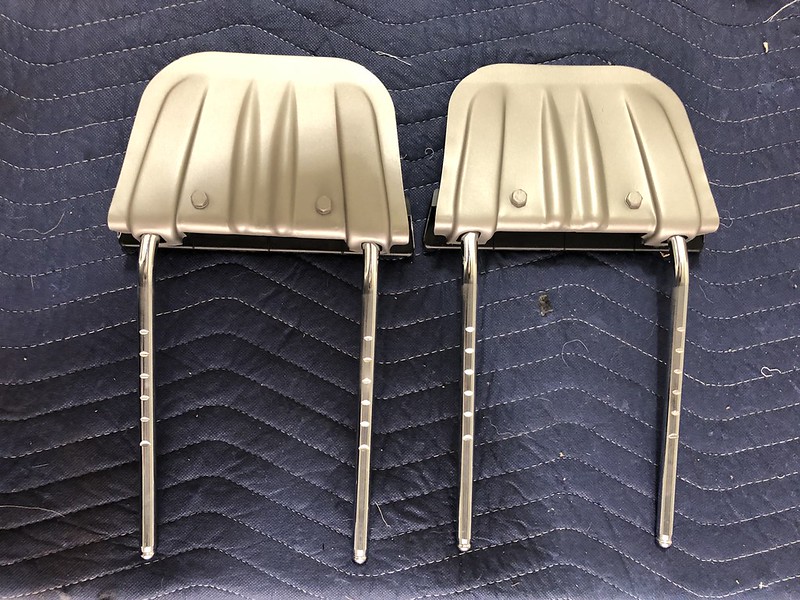
    Not much progress, still waiting on my seat covers to come in. We've had a nice run of weather here lately so I've been driving the car a bunch and stopped for some nice photo ops, I hope mike.bmw approves!

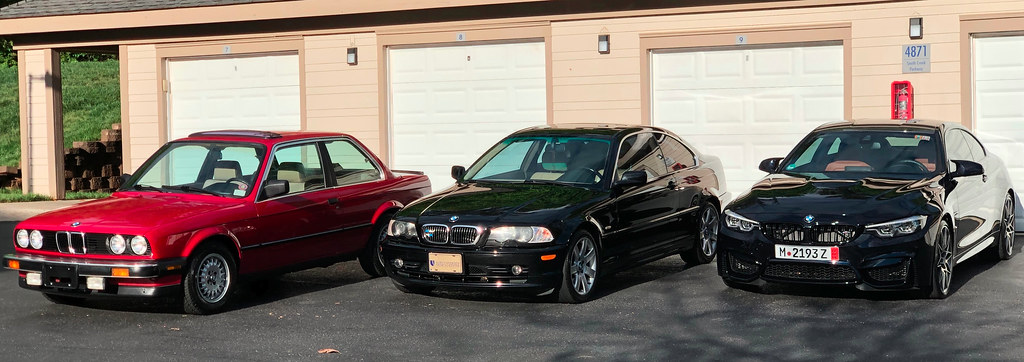
    It's not too often that I have all the boys clean at the same time, so decided to take them all out for a little shoot. My neighbors probably think I'm a huge tool but it was kinda cool to see the progression of the models side by side.


    Yesterday I had a nice day for Schutzhund training with the pup and there's some nice backroad twisties on the way up to the farm where we train so took the red car with me. Got there early and had a couple minutes to take a few pics:


    On the way there, there's also a military shooting range and there's a few heavy artillery vehicles and machine guns sitting out along the road. I just had to get a few next to one of the larger guns:


    My fiancee forced me to go for a run this morning so brought the car and the dog with us to the park, found a fellow e30'er. There was a sticker in the back window that said "Hoonigan." I waited around a bit to see if anyone came out but they never did. YOHB?


    The only real progress I made was finally getting around to painting the rocker panels, what a huge difference:


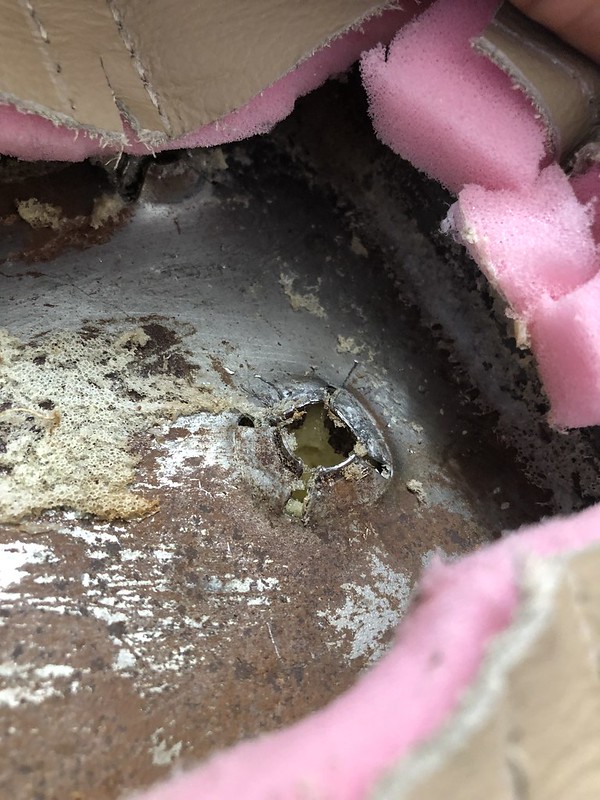
    The only spot of rust I've found so far, will have it properly repaired when the car gets repainted:


    Couple shots at a local lunch spot we frequent:


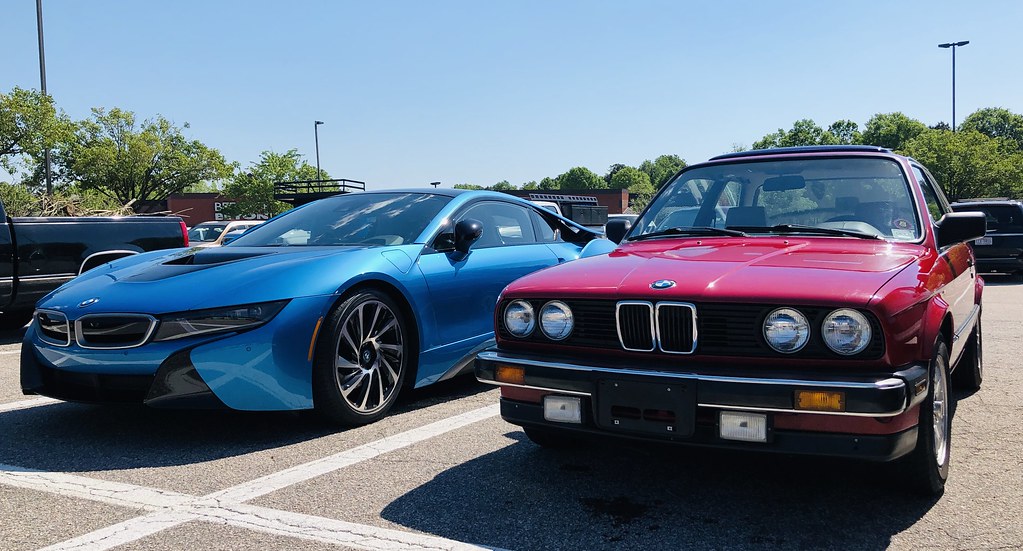
    Had to pick up a few things at Home Depot today and saw this beauty in the parking lot, of course I had to stop for a photo op:


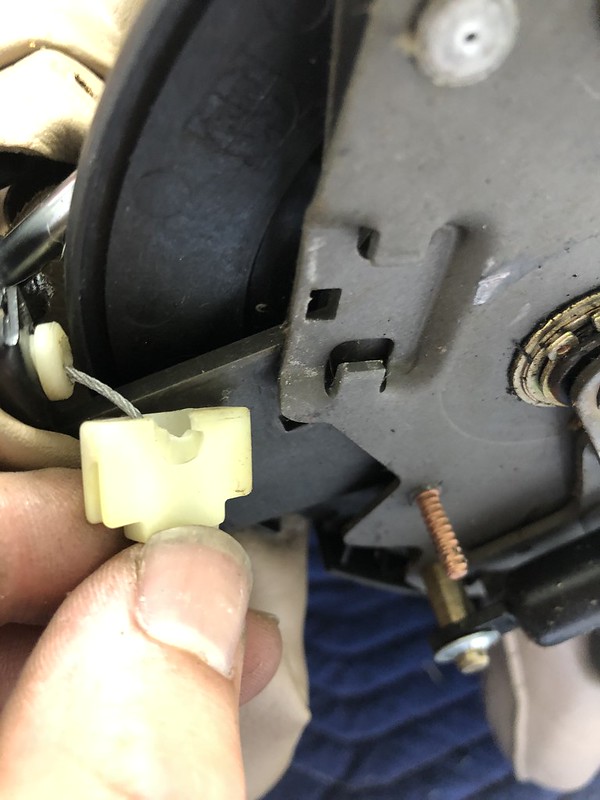
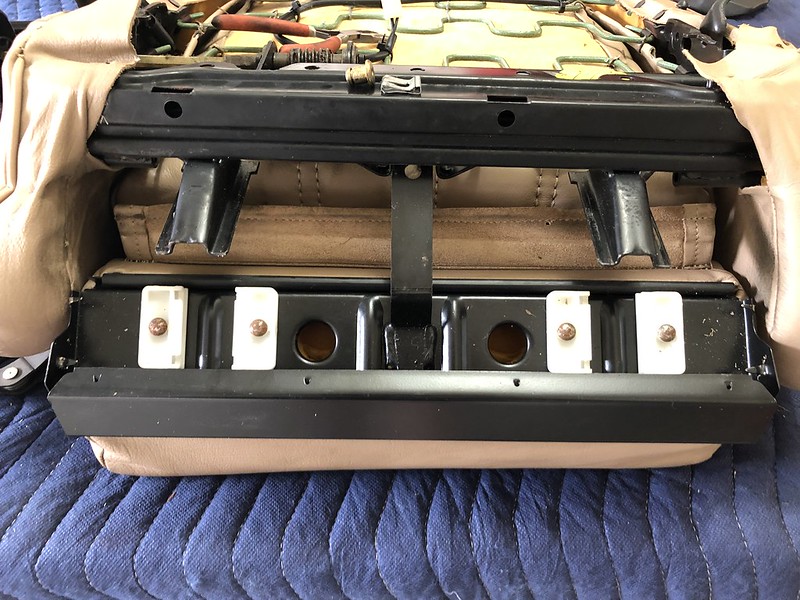
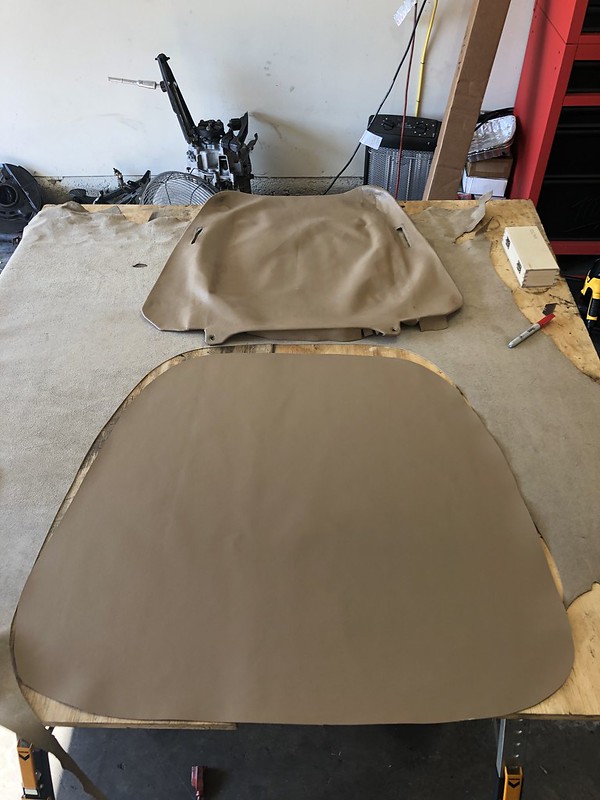
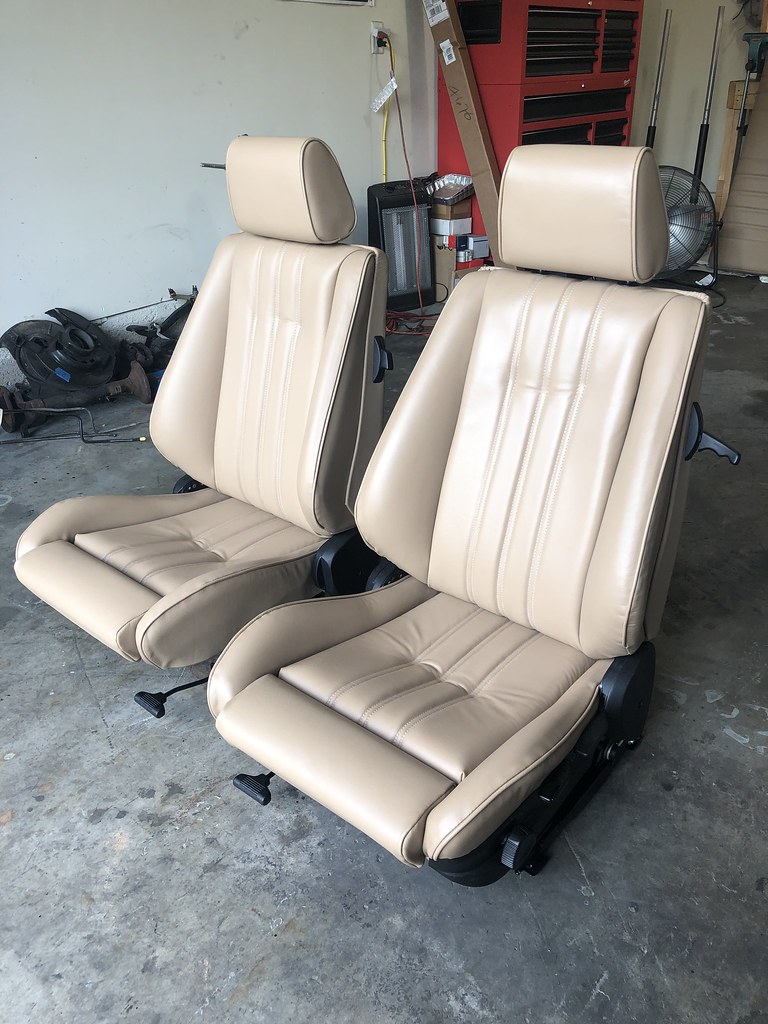
    That's all for now. Once I get the upholstery kit in I'll get to work on the sport seats. Once the interior is out, I'll work on manual trans and while I'm at it, new radiator and remaining hoses, timing belt/water pump, and heater core while the coolant is drained.
    '86 325e Zinnoberrot /// '02 325ci Schwarz II /// '18 M4 Azurite Black Metallic ///

    Albie325 Build Thread | Albie325 COTM Jan 2021

    Comment


      Car looks great and I'm glad you're enjoying it!
      BEERTECH

      Comment


        Originally posted by Albie325 View Post
        We've had a nice run of weather here lately so I've been driving the car a bunch and stopped for some nice photo ops, I hope mike.bmw approves!
        Nicely done. Great photos!

        Comment


          This car is so nice! IMHO it doesn't need a respray. It looks just right - used, but taken extremely good care of. It's your car though.
          I love it
          '85 Alpine Weiß 2-door with m20b30 ground up build

          Comment


            Thanks guys!

            Originally posted by gnmzl
            This car is so nice! IMHO it doesn't need a respray. It looks just right - used, but taken extremely good care of. It's your car though.
            I love it
            Thanks, much appreciated. The pictures make the paint look a lot better than it actually is. The fenders, doors, and rear quarters were repainted when my dad first acquired the car but have a their share of nicks/dings. The hood and roof have not been repainted and it shows. The hood has some cracked/peeling paint around the roundel that needs to be addressed and the clear coat is peeling in a few places around the car, most notably the passenger C-pillar. When I took all the door/fender mouldings off to repaint last week I found a fair amount of bubbling/chipping paint underneath as well. I can probably get away with only painting a few panels, but with the need to paint the MTech kit and the amount of work going into the car I want the paint to match.

            Seat reupholstery kit came in yesterday. Haven't had a chance to tear into it yet but I hope to get to work on the seats a bit this weekend.
            '86 325e Zinnoberrot /// '02 325ci Schwarz II /// '18 M4 Azurite Black Metallic ///

            Albie325 Build Thread | Albie325 COTM Jan 2021

            Comment


              Over the last couple weeks, I've been working on getting my sport seats torn down and refinished. I acquired these seats about a year and a half ago from a guy who converted his late model 325is into a track car so they'd been out of the car for awhile. All the mechanism worked and he just wanted them out of his garage and I was happy to take them (for $125 if I remember correctly).


              Honestly the seats were in pretty nice shape to begin with, with some TLC they could have been serviceable particularly the rear and passenger seat. I will list the covers for sale (for cheap) for anyone looking for a nice upgrade or to repair any tears in their bolsters etc.

              I also received my Autoberry seat covers and am really happy with the quality. The leather appears identical in color to the older set but without the 30 years of fading and wear on them. The color code is BM0830, apparently there's several actual versions of "Natural" tan. Autoberry sent me several swatches prior to shipping and this was the closest match to what I already had. The stitching and fit/finish all appears top notch, even the batting is very similar to what is on the OEM covers aside from the fact that it's pink.


              I was a little surprised to find out that covers for the rear seat backs were not included so I had to order a cowhide worth of leather in addition, waiting on that to come in.

              As for the tear-down, there's some really good seat reupholstery DIY's out there which I'll post the links for below. I'll add in a few things I found helpful during disassembly but these do a really nice job of detailing the necessary steps. The YouTube link is to a video of a complete M3 seat reupholstery job that I'm sure many of you have seen, I only included the link to episode 1 of 5 total.

              https://www.r3vlimited.com/board/sho...d.php?t=391756

              https://www.r3vlimited.com/board/sho...d.php?t=347892

              https://www.youtube.com/watch?v=VrdwCoTy1i0

              I started with the fronts, this was not nearly as difficult as I imagined. I've also taken apart a set of comfort seats before and this wasn't all that different aside from the thigh rest.


              Remove the seat latch handle (pull straight off), followed by the latch cover, pull out the bottom push rivet and the top part slides out. The bottom of the cover is held in by 2 phillips head screws. Push up to release the two clips at the top of the cover.

              For the passenger seat, you need to remove the accessory latch otherwise the seat back won't come off. There's one phillips head screw holding it on, the other side just hooks in:


              Next remove the headrest (I just tapped the metal supports up from inside the seat back with a hammer until is was free) and remove the tilt mechanism covers. Note the location of the two copper colored bolts. The lower one attaches to the black plastic securing nut. If the cover is stubborn (as mine were) the top screw is what holds the cover on. Pry here rather than just pulling all over the place so you don't snap the cover in half.


              Bend the tab back on the release cable grommet and remove the release cable. I broke almost all the white plastic guide pieces as they were very brittle. The cables are cheap enough so I decided to replace them all anyway while the seats were apart.


              Then all that's left holding the back of the seat to the bottom are two phillips head screws at the rear of the seat back. The metal tabs that the screws attach to are notorious for breaking, all 4 of mine were intact luckily.


              Lift the back rest off of the seat bottom and continue to disassemble the seat bottom. See links for more details. The only thing I can add is that you have to completely detach the thigh rest in order to be able to remove the seat cover. There's a plastic holder sewn into the leather of the thigh rest that you can't remove unless the bracket for the thigh rest is separated. It's very easy, just a brass pin held in place by a metal clip, then the bolster just slides out.


              Remove the outside plastic holder on the leather first (bottom side of the above pic) and compress the foam to slide the front edge of the leather off otherwise you won't have enough play to slide the thigh rest off.


              Slide the thigh rest off the track:


              Now you can detach the inner plastic holder on the leather cover


              BONUS: found some vintage spare change:


              These gotta be worth AT LEAST double by now, if only I could find documentation that they came out of an M3... For sale thread coming soon...


              For the headrests, use a flat head screw driver to pry up the plastic strips holding the leather in:


              Pull the metal support out, it slides out easily:


              Compress the foam as much as possible before removing or you'll tear the cover like I did. Not a big deal if your old ones are shot, but it's nice to practice for when the new ones are going on. Def don't want to rip those...


              All apart, toughest part of the front seats was popping off the plastic thigh rest adjuster knob and the seat height adjuster lever, they were pretty stubborn and I felt like I was going to break them but they eventually relented.


              The seat back covers weren't that bad, however they had some dings and the leather wasn't going to match the new leather perfectly. They actually peeled off fairly easily, just go slowly. Once off, I used some 100 grit sandpaper to remove the fuzz that was left behind. Unsanded left, sanded right:


              Removing the seat covers is pretty self explanatory, just clip all the hog rings in the back and pull the leather off of the metal tabs along the frame. It's best the bend the tabs up slightly as it will make pulling the new covers on easier, just be careful not to go crazy as they can break off.


              Moving on to the rears, the biggest pain in the ass of this whole project so far has been removing the plastic seat belt holder. I was literally dripping sweat in the garage by the time I finally got them both out. At first I was going easy on them and they didn't budge, then I looked up the part numbers and saw how cheap they were to replace and yanked away, the eventually popped out but definitely not without a fight.


              Cut off all the hog rings and peel the covers off, pretty self explanatory. All done:


              I finished by refinishing the seat sliders, they were a little rough. Overall they came out great:


              All done, just needs some grease before reinstallation:


              All in all this took me about 4-5 hours spread over a couple days as I was also doing a few other projects at the same time. I took a million pictures to remember how the old covers were folded and tacked in place. I bought a steamer to help re-expand the foam, once I get the new release cables in I'll start on reassembly. I hope to have the seats done by mid-week.

              I haven't started tearing out my interior yet as I was holding out hope to attend the Vintage, but unfortunately my travel plans for later that week won't allow it. I'm also probably due for a timing belt replacement and don't want to risk that long of a drive on the one currently on the car. Bummed, but now I'll get to work on tearing out the old seats, the carpet, cleaning/redying it and the rear parcel tray, swapping the dash, and wiring in the premium sound speakers and new head unit. I'm also going to install some sound deadening throughout. I'll start that this weekend, stay tuned.
              '86 325e Zinnoberrot /// '02 325ci Schwarz II /// '18 M4 Azurite Black Metallic ///

              Albie325 Build Thread | Albie325 COTM Jan 2021

              Comment


                And I thought I had made a good write up on seat recovery on my local forum.
                Impressive is a weak word for your results.
                Oh and valid points on the paint. Pictures really don't show these flaws you mention, but surely they are sore for the eye in person. I'll be following your progress with interest.
                Keep up making this car even better!
                '85 Alpine Weiß 2-door with m20b30 ground up build

                Comment


                  sorry, accidental double post
                  Last edited by gnmzl; 05-10-2019, 04:14 AM.
                  '85 Alpine Weiß 2-door with m20b30 ground up build

                  Comment


                    Very nice! I've seen a few local E30 guys with the Autoberry kit and it's really nice. I've been thinking about ordering a kit for my front seats just to have on hand with the plan of recovering in the next year.

                    Comment


                      Originally posted by mike.bmw
                      Very nice! I've seen a few local E30 guys with the Autoberry kit and it's really nice. I've been thinking about ordering a kit for my front seats just to have on hand with the plan of recovering in the next year.
                      The autoberry kit was great, any shortcomings in the final product (see below) was 100% installer error. The quality of the leather and fitment were excellent.


                      Was out of town for a bit but ended up getting the seats completely redone. It took a lot longer than anticipated (doesn't everything?) due to my travel as well as it being hot as hell here in NC but overall it took me about 4-5 days, a few hours each day to knock it out. It's been 95+ here all week, redoing the A/C is steadily moving up in rank on the to-do list...

                      The week before I left, I had the F82 at the dealership getting one of the rims repaired. Took a corner a little tight and scraped it. I was pretty upset about it but it ended up coming out as well as could be expected. I got to drive the newest iteration of the 3 series as a loaner, a turbo 4 banger. I liked the look of it although it wasn't quite my color. I initially wasn't too keen on it but it ended up growing on me by the time I brought it back, was very agile and had some really nice features for base model.


                      Anyway, on to the seats:

                      I started by stripping and refinishing the headrest inserts, didn't want to stick these rusty ass things back on my "new" seats:


                      All stripped and repainted:


                      I then used a clothes steamer to steam all the foam inserts. Mine were in pretty good shape to start so I didn't notice a huge difference but you could definitely see the foam plump up in a few places.


                      Then with the center pads out of the way, I replaced all the seat release cables. I also replaced all the hydraulic pistons purchased on ebay through one of the guys here on R3V:


                      In order to get the little latch to fit through the hole in the handle, it was easiest to slip the cable end up through the space in the foam:


                      Twist the cable up:


                      And hold the lever down to give yourself enough space to pull the cable up and through:


                      Be sure to route the cable under the tab in the side rail to prevent in from binding:


                      Driver's side (2 cables total, p/n 52101916611 (465mm) and 52101916612 (820mm)):


                      Passenger side (4 cables total, 2x 52101916611 (465mm) and 2x 52101916613 (315mm)):


                      The extra criss-crossed cable is for the accessory latch on the driver's side of the passenger seat.

                      Now for replacing the covers you'll need these:


                      Hog rings with applier as well as a staple gun. The key is the staple gun needs to be an OUTWARD CLINCH stapler (curls the staples out rather than in to allow greater surface area to grip the foam).

                      Make sure you remember to remove ALL the support wires from your old seat covers. There is one running along the inside edge of each seat bolster cover (4 total per seat) as well as along pretty much the entire perimeter of the rear seat. There's also a couple along the inside of the upper portion of the rear seat that I didn't see initially and the seat back came out pretty wrinkly at first. When i realized there's supposed to be another wire in there I redid it and it came out much better. You'll see what I mean in the pics.


                      Do the side bolsters first. I found it best to start from the front and work your way back. First clip the inside of the bolster (with your inserted support wire) to the frame, then stretch the leather over the foam and use a sharp knife to poke holes to fit over the metal tabs. You'll need to pull a little tighter than you think otherwise the leather ends up loose. For the hog rings, I could see where they old ones were and tried to replicate that, as well as a few extras here or there for insurance.


                      For the center pads, start by securing the straps in the middle of the seat. For these, I recommend making them a little LOOSER than you think. They look good when you first get them in, but once you tighten and tack down the edges you end up creating a pucker because the centers are too tight. I redid most of mine at least once and still ended up with a bit of a pucker.

                      I found it easier to get your hog ring through the strap first, then load into the applier.


                      Once the centers are secure, it's basically a matter of stapling around the perimeter. I found that it helped to start at the middle where the straps are and work your way out, stretching the leather to take away the creases. Also remember that there's a slight inward curve to the pad once installed, stretch the leather a bit to accommodate for this. Once the pad is done, line it up and use hog rings to secure to the metal wires in the back. I didn't take a ton of pics of this but it's pretty self-explanatory, or see the links I posted in an earlier post.

                      Regarding cutting holes for all the hardware to fit through, make sure you have the leather stretched about 90% of the way in place before you even think about cutting the leather. By the time you work and stretch the leather, you'd be surprised how much the place you thought was correct for the cutout has moved. The last thing you want to do is make a cut in the wrong spot that will be visible on the final product. Also, try and avoid cutting the holes on the stitching line (move a little one way or the other if possible) to avoid the thread coming loose over time.

                      For the front back rest, don't forget to remove the inner white plastic ring for the headrest grommets to snap into, I almost threw mine out by mistake:


                      Moving right along:


                      To complete the fronts, I replaced all the pistons, regreased all the mechanisms, and refinished all the plastic parts with plastic resurfacer. For the pistons, I found it easiest to compress them in my soft-jawed vice:


                      For all 8 pistons I was done in about 15 mins. It's a pretty easy job with the hinges off the seats.

                      Fresh grease for the thigh rest screw mechanism as well as some teflon lubricant for the plastic rails:


                      Rough draft done:


                      The rear seat bottom was very easy and came out the best of all panels in my opinion. Same as above, I started with the middle straps first, then stretched the leather over the pad. Hog rings all around. I started by securing the exact middle of the leather to the exact middle of the pad, then worked my way around from front to back. I did each side evenly (one hog ring on the right, then an identical one on the left, then the next one on the right, followed by its counterpart on the left) rather than doing one side completely first to avoid ending up off-center.


                      For wires, there's a long wire running almost the length of the seat cushion (one front, one back) as well as a shorter wire that wraps around each corner:


                      For the rear seat back, there's an additional two wires (one each side) that runs between the outside smooth leather panel and the inside ribbed leather panel. These were what I initially didn't see and the seat back came out like poop until I realized they were there:


                      Hog ring in place (this helps stretch the center of the leather a bit tighter over the pad):


                      Here's where it is on the front of the seat back:


                      Cutting holes for the plastic seatbelt covers was the most nerve-wracking part of the whole operation, I'd check, double check, and triple check before you cut. Use your old cover as a template. And start small towards the middle of where the plastic covers go and extend out as needed:


                      As tough as the seatbelt holders were to remove, they proved equally difficult to pop back in place. I had to bend the insert tabs out a bit to get them back on:


                      Rough draft 2.0:


                      Pretty wrinkly right? The secret weapon is heat. I used a heat gun to then massage the leather out with great results.


                      Heated on the left, unheated on the right. The difference was more profound in person:


                      After doing all the seats, I treated with some leather conditioner and left in the sun while I kept working on the seat backs. The heat really helped the leather tighten up:


                      I got probably 90% of the wrinkles out and I hope it still gets a little better as they sit in the hot car a few times.

                      Last, I did the seat backs, this was the hardest part of the project. Folding the leather over the top corners of the covers was really challenging, I guess I must be a little rusty with geometry. I recommend investing in a nice sharp Xacto knife with a rounded (#10) blade for this part.

                      I first used the old covers as a template and cut them a bit bigger for some leeway:


                      I then roughly marked out where the cutouts would need to be to fold the edges over:


                      To attach, I used a strong 3M contact adhesive:


                      Following the YouTube M3 seat video, I started from the center and worked by way out to the edges:


                      This part came out great. For whatever reason, I had a tough time figuring out how to get the top corners to fold over without any wrinkles. I mirrored the old covers as best I could, but couldn't get it 100% perfect. The key is leaving a little bit of leather material intact to fold over the edge where you make your notches otherwise the underlying board will be visible.


                      Start at the corner and work your way around in each direction. I found making more frequent, smaller notches worked better than fewer, larger ones. The bottom edge was much easier and came out better. It was hard to take pictures of the process as I had to get things set up before the adhesive got too sticky.

                      Finished product:


                      Some wrinkling at the corners but overall not terrible.

                      I give myself a 10/10 for effort, and a 9/10 for result. I think that once I sit in these a bit and they sit in heat a bit more, creases from the straps being a bit too tight will diminish. I also think that I'm being a little harsh as the seats are standing alone, I think they'll look really good once installed.

                      Last, I had a bunch of packages to great me while I was away:


                      My neighbors had already taken in about 4 other boxes.


                      Finally had some extra cash to splurge on all the parts needed to properly do the manual swap. New Behr manual radiator, Sachs clutch kit, refurbed Bosch starter, new FTE clutch and slave cylinders, a Z3/UUC DSSR short shift kit, as well as all the seals/selector bushings and fixins.

                      My next task is to get working on removing the interior, cleaning the carpet and replacing the dash, wiring up the premium sound and doing all the prepwork on the Getrag 260 prior to install.
                      Last edited by Albie325; 05-28-2019, 07:08 PM.
                      '86 325e Zinnoberrot /// '02 325ci Schwarz II /// '18 M4 Azurite Black Metallic ///

                      Albie325 Build Thread | Albie325 COTM Jan 2021

                      Comment


                        Those seats look excellent. Nice work! Good to hear the autoberry kit is a good product.

                        Comment


                          Excellent job on the seats!

                          A little time in the sun will get rid of those wrinkles.
                          I do things.

                          Comment


                            nice job on the seats


                            -
                            Project
                            Parts for Sale
                            Feedback
                            YouTube Channel

                            Comment


                              I'm very impressed with how your seats came out! Very informative, bookmarked for future seat maintenance :)

                              Comment


                                Thanks guys, it isn't rocket science but it definitely takes some patience and trial-and-error. I have some time tomorrow, I think I'm gonna tinker around with them and see if I can't tighten them up a bit more
                                '86 325e Zinnoberrot /// '02 325ci Schwarz II /// '18 M4 Azurite Black Metallic ///

                                Albie325 Build Thread | Albie325 COTM Jan 2021

                                Comment

                                Working...
                                X