
I've been wanting to do wheel to wheel racing for some time through the 24 hours of Lemons or Chump Car platform for a while now. After a decade of wrenching on e30s, I saw the appeal of the e30 as a track car. About 4.5 years ago I picked up my first 318iS locally for cheap and planned to use it as a track car. Well ultimately I fixed stuff and have driven it over 30,000 miles on the street. I also have seen some of the limitations it has and that to do it right you really need a dedicated car if you want to do any sort of wheel to wheel racing.
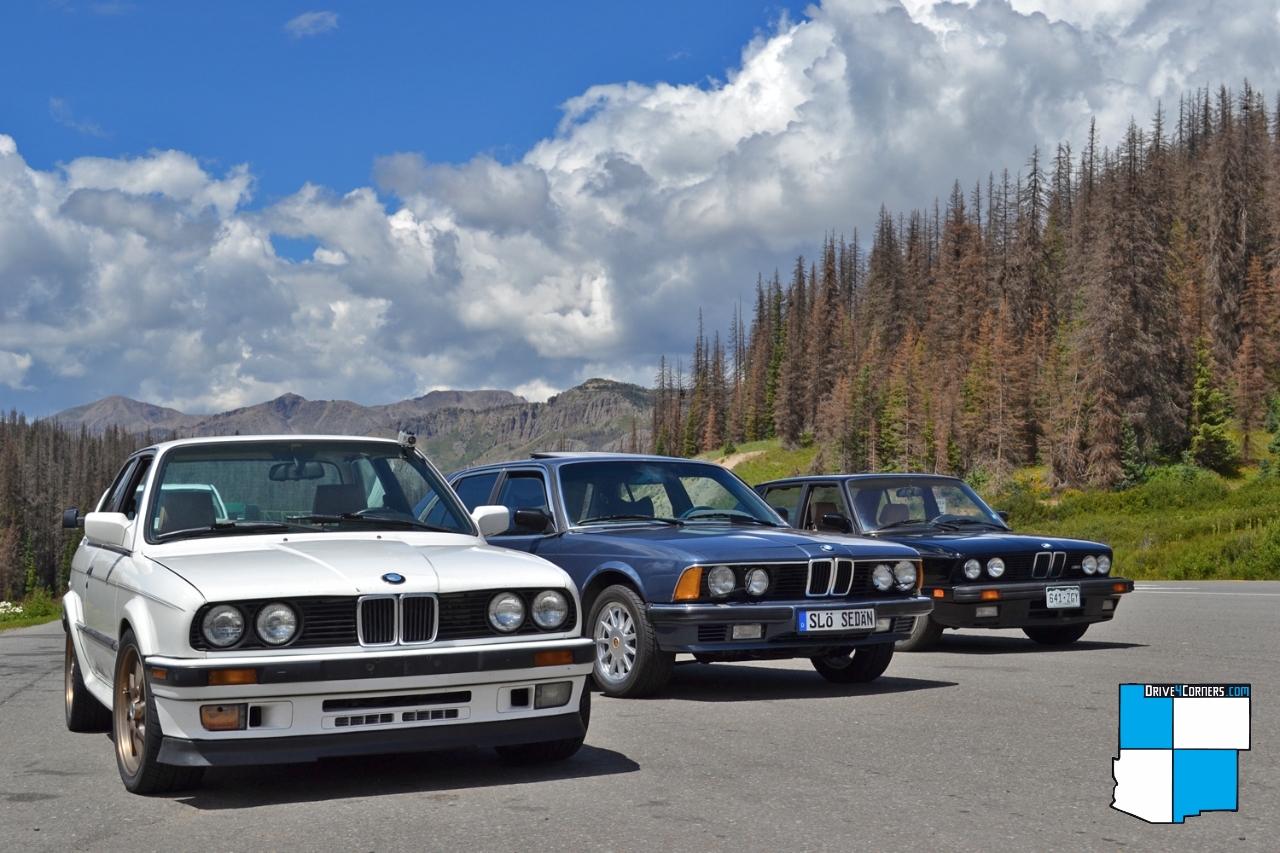
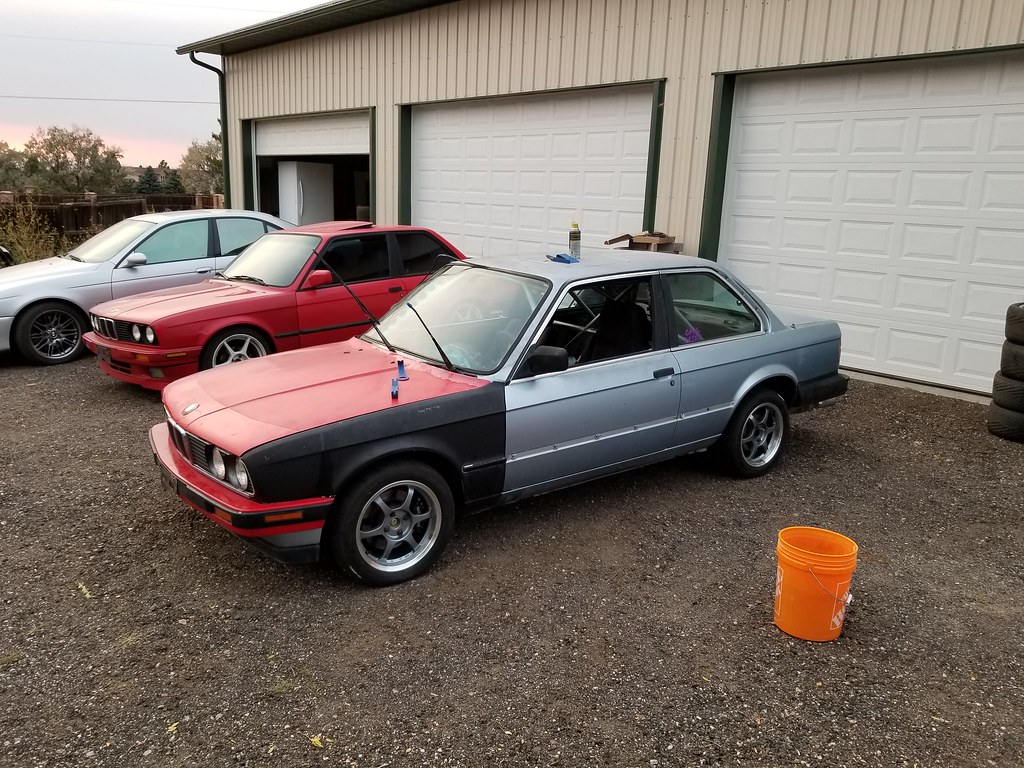
To give you some context, I grew up loving cars and driving. I also happened to be able to share that with my 2 brothers. This ranged from slot cars and hot wheels to go carts and Gran Turismo. The best part was having two brothers to play/race with the whole time. As I've grown we have spent less time together and life has caused us to have fewer opportunities to do these things together. We had talked about doing 24 hours of Lemons one day, but I didn't want that one day to be too late. During the current corona virus time, it has only enforced that mentality. Here is a picture of my first e30 and my 2 brothers' cars at the annual BMW driving event we organize here in the Rocky Mountains. Check it out at www.drive4corners.com if you want to learn more about it.
Now, I know you can do track days and have been doing them since I bought the 318iS a few years ago. Below is a picture and video from the last one I did in 2019. This lapping day was a practice session from the day before the BFE GP 2019 in which I participated in my first 24 Hours of Lemons event.We were racing a 1990 Subaru Legacy Sedan (ej22). Here is some in car video for those interested where I battled an M30B35 powered 535i and fiero. https://www.youtube.com/watch?v=wAFWVhgbmbY A battle of my 318is vs my brother in his 635csi M90 https://www.youtube.com/watch?v=mSDz0ZRB_cU&t=2s

So when I found out about a caged 1984 318i chassis at the 2019 D4C event, that stuck in my mind. I went to look at it in November and picked it up in January. The description of 'Caged Chassis' was an understatement as there was not much there but it is a great starting point for a caged race car with the disassembly completed by others and the cage needing some minor work but mostly complete. The plan was and still is to use the M42 chassis which is now a favorite of mine due to its fuel economy, reliability, and general technical superiority over almost any other engine used in an e30. It also happened that an m42 came up for sale for $250 with driveline and trans on facebook marketplace right around the time I was going to pick up the car.Total win.The guy was swapping to m50.
 IMG_3209 (1) by t sz
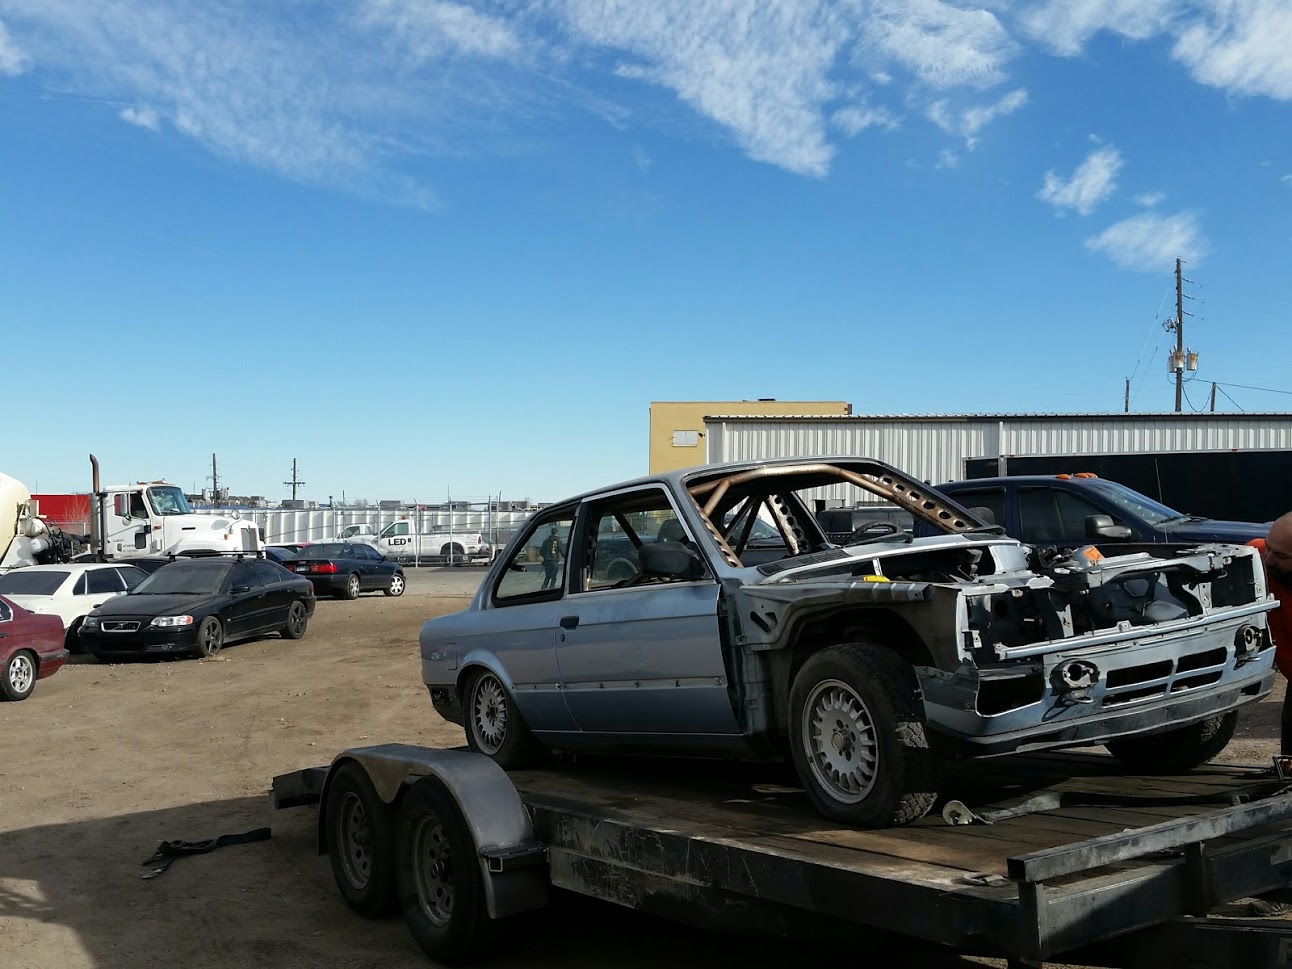
This is when we were and picked her up. Yes the rear springs were removed and sitting in the back seat for some reason along with grilles, rear windows, fenders, and a bunch of other stuff sitting out exposed to the elements.
 20200112_125941_1579650997018_resized by t sz, on Flickr
 20200112_130357_1579650999526_resized by t sz, on Flickr
 IMG_20190917_103959_475 by t sz, on Flickr
 IMG_20190917_103947_320 by t sz, on Flickr
 20200112_144545_1579651004248_resized by t sz, on Flickr
 20200119_095034_1579651006888_resized by t sz, on Flickr
 20200119_161108_1579651019118_resized by t sz, on Flickr
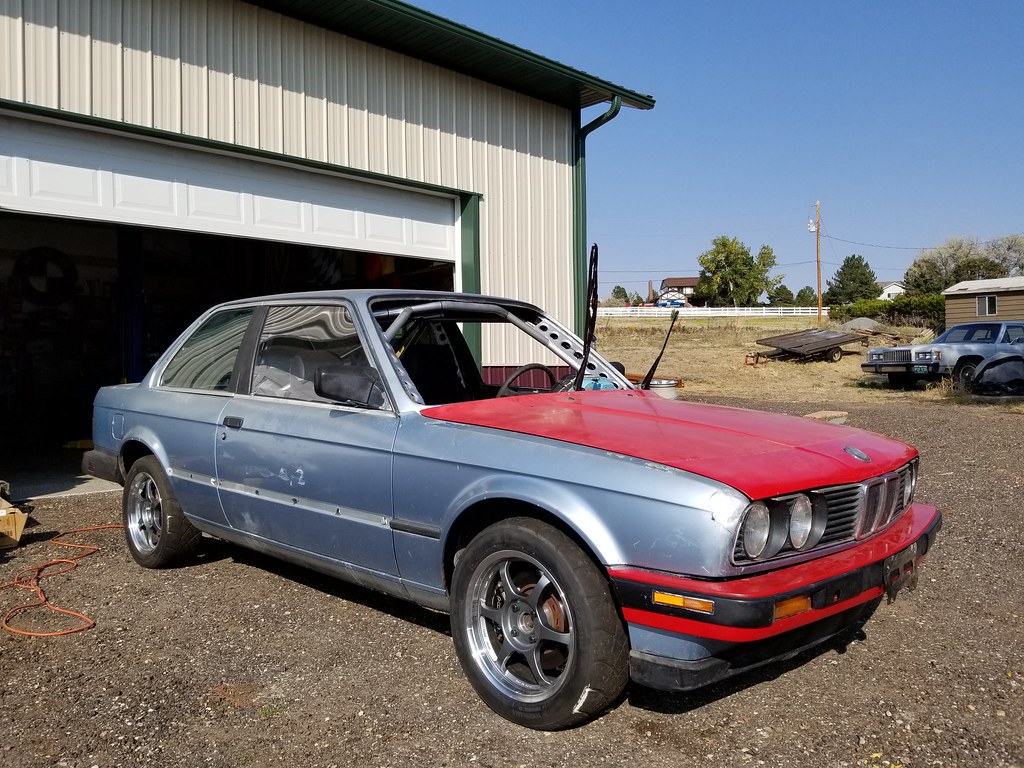
I had a damaged hood that I hadn't gotten around to replacing so i took the opportunity to swap it and install the damaged hood on this car. I have been referring to it as OMG Drift due to the window decal. The plan is to get it back together enough to be street legal. One of the first orders of business was to look at the rust on the cage and repair that. I found phosphoric acid as a rust converter and tested it out one of the first days working on it.
 20200202_100252 by t sz, on Flickr
 20200202_172020 by t sz, on Flickr

 20200202_172128 by t sz, on Flickr
 20200202_172058 by t sz, on Flickr
The 1984 318i has some drawbacks over most other e30s. The m10 was reliable, but the car had the square style C101, early steering column, smaller diameter front strut housings, rear drum brakes, sunroof, and diving board bumpers, The car has no ABS, early fenders and tail lights and those are all bonus for a track car because the 1984 318i curb weight was only 2365 pounds. I think we can bring that down a bit closer to the 2100 pound mark. The idea is lightweight and reliable. So M42 powered with a 4.10 LSD should be a good combination. I found these Motegi Traklite 2.0 wheels for sale local and they weight about 10 pounds each in 15x7 size and fit without spacers. I will need to get some centering rings though.
 received_2875483785837789 by t sz, on Flickr
 20200202_103140 by t sz, on Flickr
 20200321_123944 by t sz, on Flickr
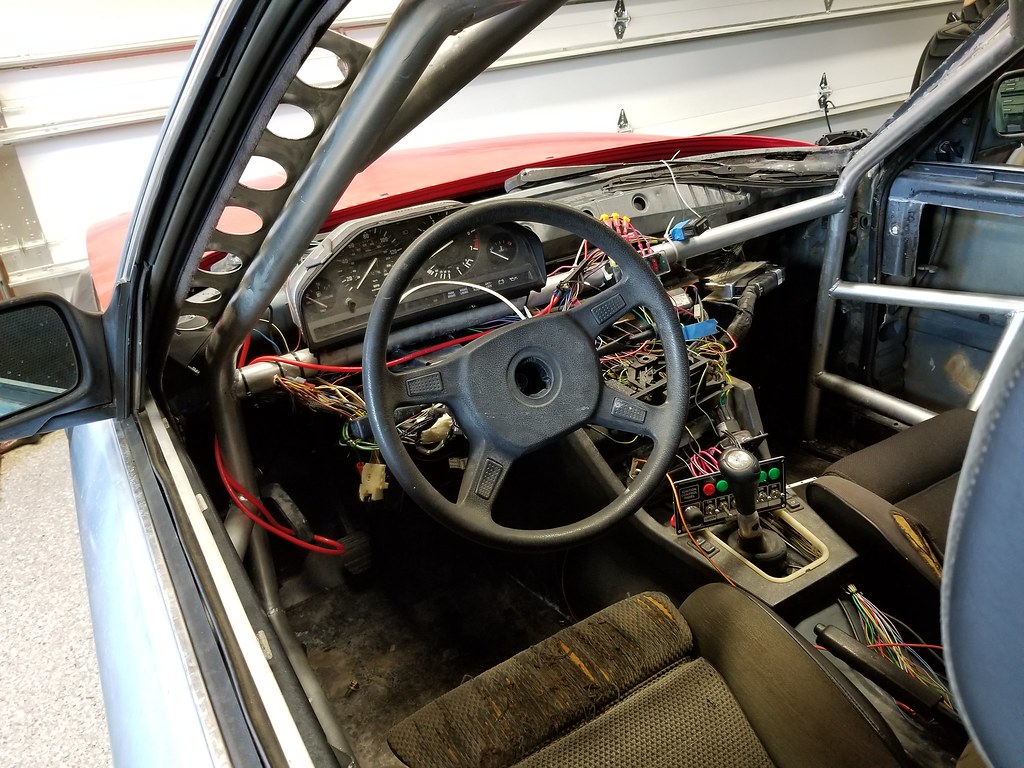
First order of business was putting in the steering column that came with the car. This column had the turn signal stalks and everything wiring wise for ignition with a key. Again the plan is to keep this street legal so a key with matching locks is important. It turns out the steering column is different early to late so we had to come up with a plan on how to get the shaft to work. After several days, we have steering that does not bind, and clearancing of the firewall for shaft angle. The early 318 doesn't have the metal support bar but that came with the column so we will have to figure out how to brace that more rigidly than it currently is. Then came the driveline and my brothers and I got the rusted axle lock plates out and dropped the axles so we could get the blown one rebuilt. The good one is being reused for now.
 20200222_153923 by t sz, on Flickr
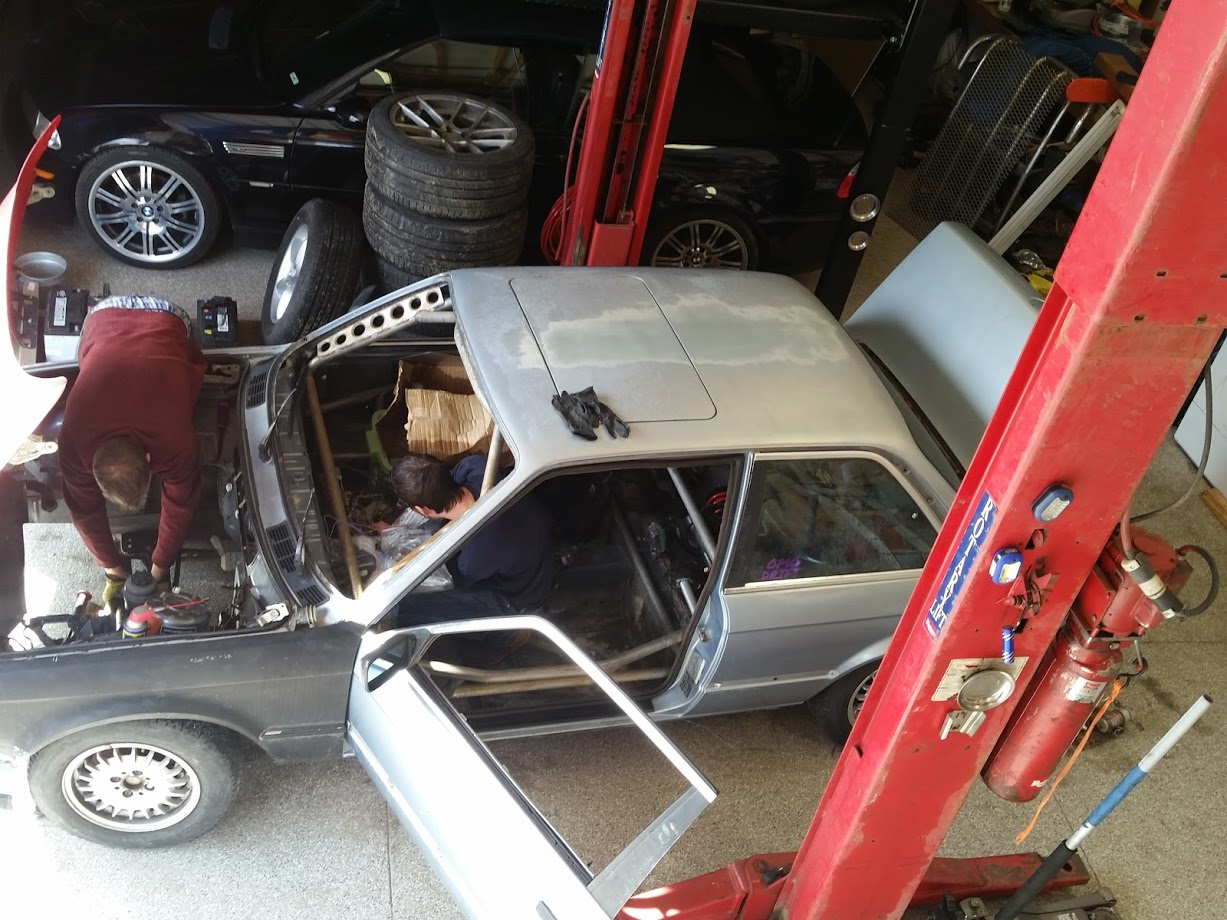
My older brother recently built a garage and was installing a lift where we worked on the car. His lift had sat outside and the arms were rusted together so the car has been on the ground and lifted with jackstands. I dug out my lock set and got that installed on the column and my brother got started with a complete wiring diagram and ordered parts for a custom wiring harness.
 20200222_142003 by t sz, on Flickr
 20200222_154011 by t sz, on Flickr
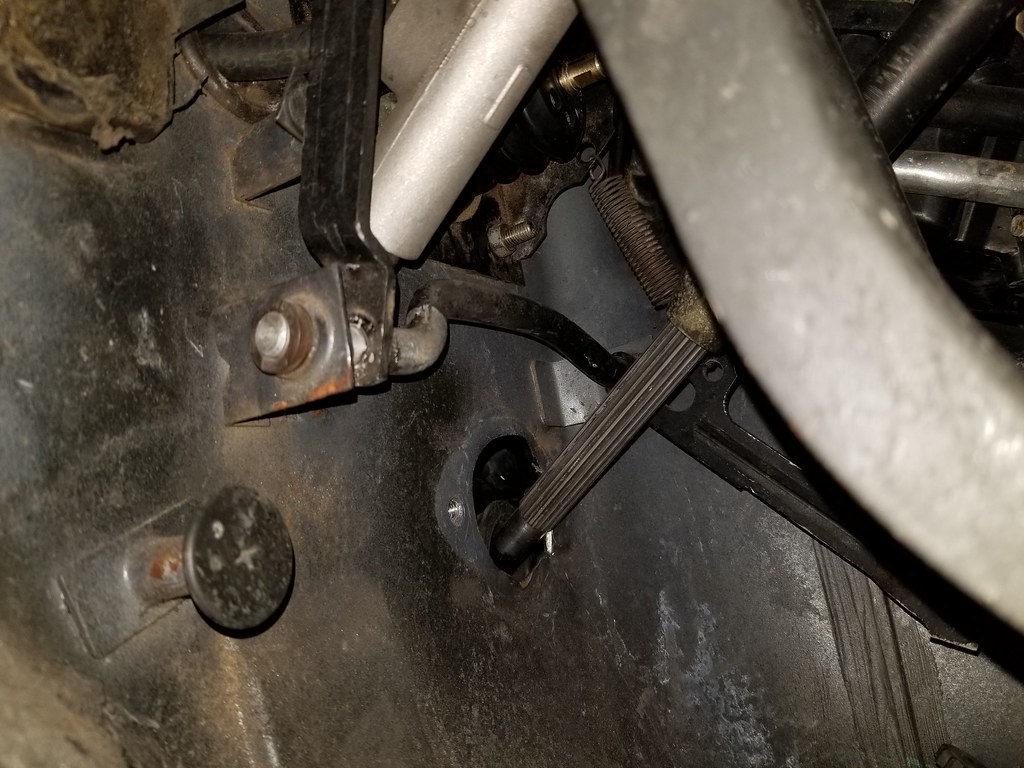
We got the brake booster and master installed and it looks like true lemons quality. I got a spare bumper mount and had a spare plastic bumper which had end caps so we can have a decent front end. It also came with the diving board for the rear so if we outbrake some fools we might have a chance of not getting too much body damage. I had some old front struts that we used to 'upgrade' the suspension with the red springs that came with the car. The driver side is still blown but now it should be traditional housing size with 51mm struts. Some trim was added and it is starting to look like a car.
 20200222_154022 by t sz, on Flickr
 20200321_112334 by t sz, on Flickr
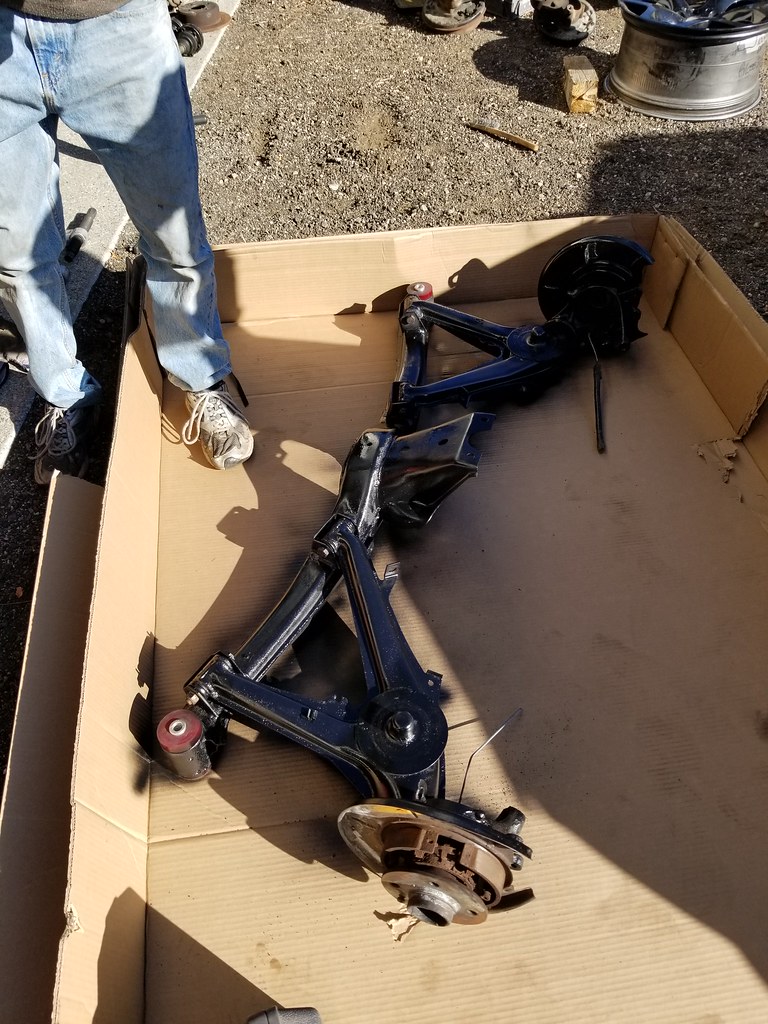
It turns out the diff that came with the engine is a 4.10 LSD and though I had a spare shift lever from my own 318iS Z3 shift lever upgrade, it turns out the own that came with the engine appears to be z3! You will notice the sledge, I did some body work and straightened the passenger fender so it looks pretty good. Rear tail lights are in and we installed the diff and got the axle shafts back in. Next up is dealing with the rust, painting the cage and installing the hvac and wiring. Clutch master cylinder is in too.
 20200425_140535 by t sz, on Flickr
 20200404_170837 by t sz, on Flickr
 20200404_173352 by t sz, on Flickr
 20200404_173410 by t sz, on Flickr
 20200404_173432 by t sz, on Flickr
 20200404_173559 by t sz, on Flickr
Well that escalated quickly. (not really this is a few months time and just a test fit to get it off the trailer)
 20200425_141705 by t sz, on Flickr
 20200425_163853 by t sz, on Flickr
 20200425_165114 by t sz, on Flickr
 20200425_171649 by t sz, on Flickr
The M42 should be a great motor on track. The Duct Tape Motrosport team has campaigned one with success. Here is some in car footage from a different lemons race I found in a 91 318iS. https://www.youtube.com/watch?v=qSFwA7_MR94
The plan is to compete in a race in 2021 when everybody can plan for it and we can test the car at some lapping days first. Here is a list of things that need to happen to get it on the road
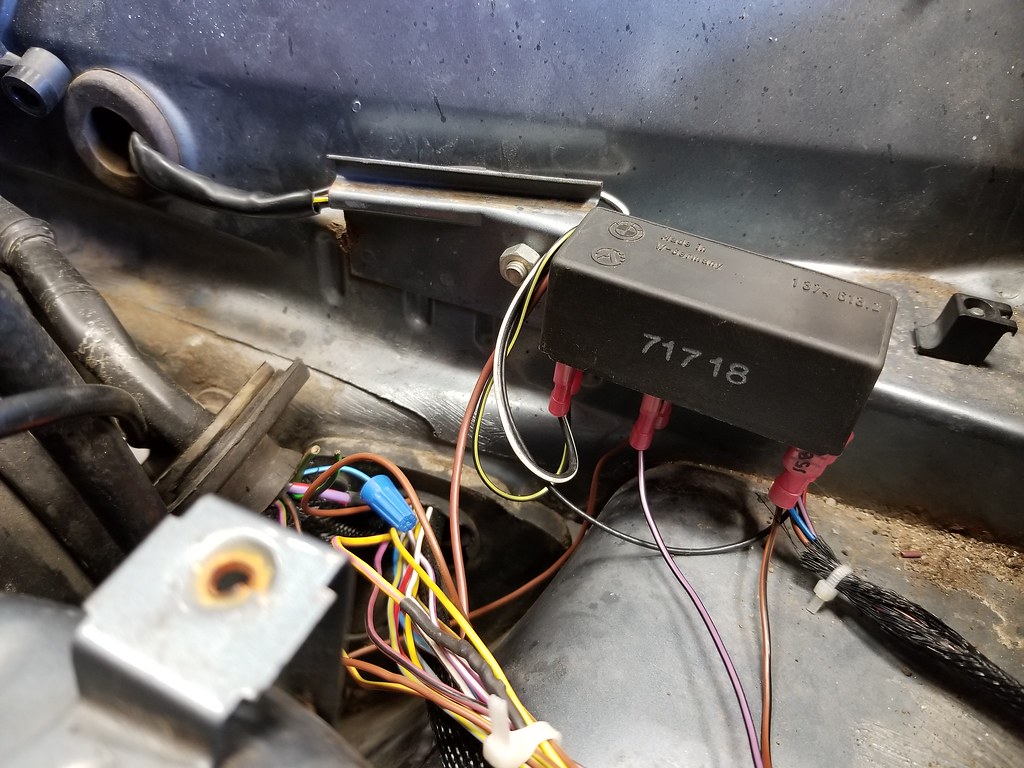
- Wire up the C101 connector to run similar to stock engine wiring
- Install battery and tray
- weld up floor pans and missing cage welds
- reinforce steering column/shaft for rigidity
- finish painting cage
- install seats
- replace right rear diff output shaft seal
- install driveshaft
- install trans mount
- install slave cylinder and bleed system
- bolt down engine
- set hvac unit in place
- install windshield
- wire chassis for lights and signals
- install instrument cluster and switches
- install exhaust
- alignment
- mount seats (driver and passenger)
- install fire suppression
- install roll bar padding
- figure out seat belts
- finalize pedals and cables
- finalize lemons theme
I am sure there is more to do but I wanted to document this project and specifically how much we have completed to date. Down the road it would be good to replace the rear drums with discs and install a z3 steering rack but I am trying to follow the lemons budget for the most parts on 'performance' parts which the driveline and performance enhancing parts it does meet. Stay tuned for more updates in the coming months.
To give you some context, I grew up loving cars and driving. I also happened to be able to share that with my 2 brothers. This ranged from slot cars and hot wheels to go carts and Gran Turismo. The best part was having two brothers to play/race with the whole time. As I've grown we have spent less time together and life has caused us to have fewer opportunities to do these things together. We had talked about doing 24 hours of Lemons one day, but I didn't want that one day to be too late. During the current corona virus time, it has only enforced that mentality. Here is a picture of my first e30 and my 2 brothers' cars at the annual BMW driving event we organize here in the Rocky Mountains. Check it out at www.drive4corners.com if you want to learn more about it.
Now, I know you can do track days and have been doing them since I bought the 318iS a few years ago. Below is a picture and video from the last one I did in 2019. This lapping day was a practice session from the day before the BFE GP 2019 in which I participated in my first 24 Hours of Lemons event.We were racing a 1990 Subaru Legacy Sedan (ej22). Here is some in car video for those interested where I battled an M30B35 powered 535i and fiero. https://www.youtube.com/watch?v=wAFWVhgbmbY A battle of my 318is vs my brother in his 635csi M90 https://www.youtube.com/watch?v=mSDz0ZRB_cU&t=2s
So when I found out about a caged 1984 318i chassis at the 2019 D4C event, that stuck in my mind. I went to look at it in November and picked it up in January. The description of 'Caged Chassis' was an understatement as there was not much there but it is a great starting point for a caged race car with the disassembly completed by others and the cage needing some minor work but mostly complete. The plan was and still is to use the M42 chassis which is now a favorite of mine due to its fuel economy, reliability, and general technical superiority over almost any other engine used in an e30. It also happened that an m42 came up for sale for $250 with driveline and trans on facebook marketplace right around the time I was going to pick up the car.Total win.The guy was swapping to m50.
IMG_3209 (1) by t szThis is when we were and picked her up. Yes the rear springs were removed and sitting in the back seat for some reason along with grilles, rear windows, fenders, and a bunch of other stuff sitting out exposed to the elements.
20200112_125941_1579650997018_resized by t sz, on Flickr20200112_130357_1579650999526_resized by t sz, on FlickrIMG_20190917_103959_475 by t sz, on FlickrIMG_20190917_103947_320 by t sz, on Flickr20200112_144545_1579651004248_resized by t sz, on Flickr20200119_095034_1579651006888_resized by t sz, on Flickr20200119_161108_1579651019118_resized by t sz, on FlickrI had a damaged hood that I hadn't gotten around to replacing so i took the opportunity to swap it and install the damaged hood on this car. I have been referring to it as OMG Drift due to the window decal. The plan is to get it back together enough to be street legal. One of the first orders of business was to look at the rust on the cage and repair that. I found phosphoric acid as a rust converter and tested it out one of the first days working on it.
20200202_100252 by t sz, on Flickr20200202_172020 by t sz, on Flickr20200202_172128 by t sz, on Flickr20200202_172058 by t sz, on FlickrThe 1984 318i has some drawbacks over most other e30s. The m10 was reliable, but the car had the square style C101, early steering column, smaller diameter front strut housings, rear drum brakes, sunroof, and diving board bumpers, The car has no ABS, early fenders and tail lights and those are all bonus for a track car because the 1984 318i curb weight was only 2365 pounds. I think we can bring that down a bit closer to the 2100 pound mark. The idea is lightweight and reliable. So M42 powered with a 4.10 LSD should be a good combination. I found these Motegi Traklite 2.0 wheels for sale local and they weight about 10 pounds each in 15x7 size and fit without spacers. I will need to get some centering rings though.
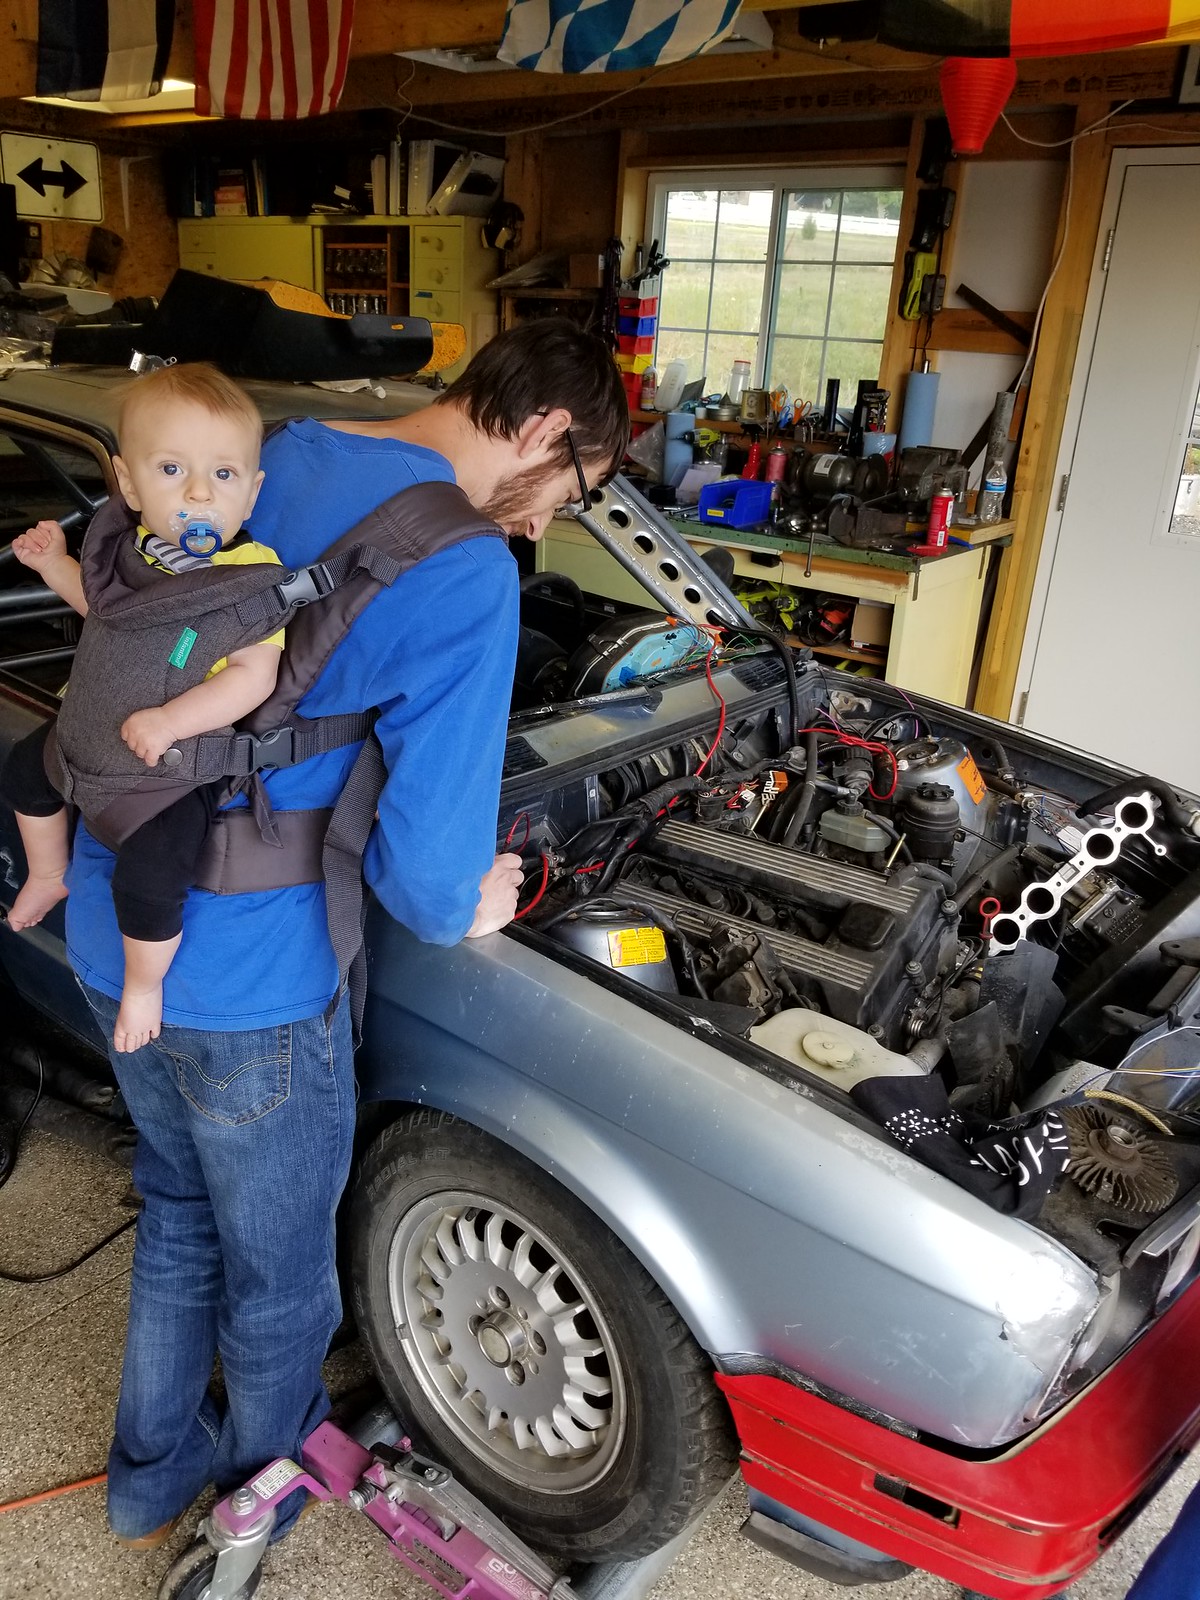
received_2875483785837789 by t sz, on Flickr20200202_103140 by t sz, on Flickr20200321_123944 by t sz, on FlickrFirst order of business was putting in the steering column that came with the car. This column had the turn signal stalks and everything wiring wise for ignition with a key. Again the plan is to keep this street legal so a key with matching locks is important. It turns out the steering column is different early to late so we had to come up with a plan on how to get the shaft to work. After several days, we have steering that does not bind, and clearancing of the firewall for shaft angle. The early 318 doesn't have the metal support bar but that came with the column so we will have to figure out how to brace that more rigidly than it currently is. Then came the driveline and my brothers and I got the rusted axle lock plates out and dropped the axles so we could get the blown one rebuilt. The good one is being reused for now.
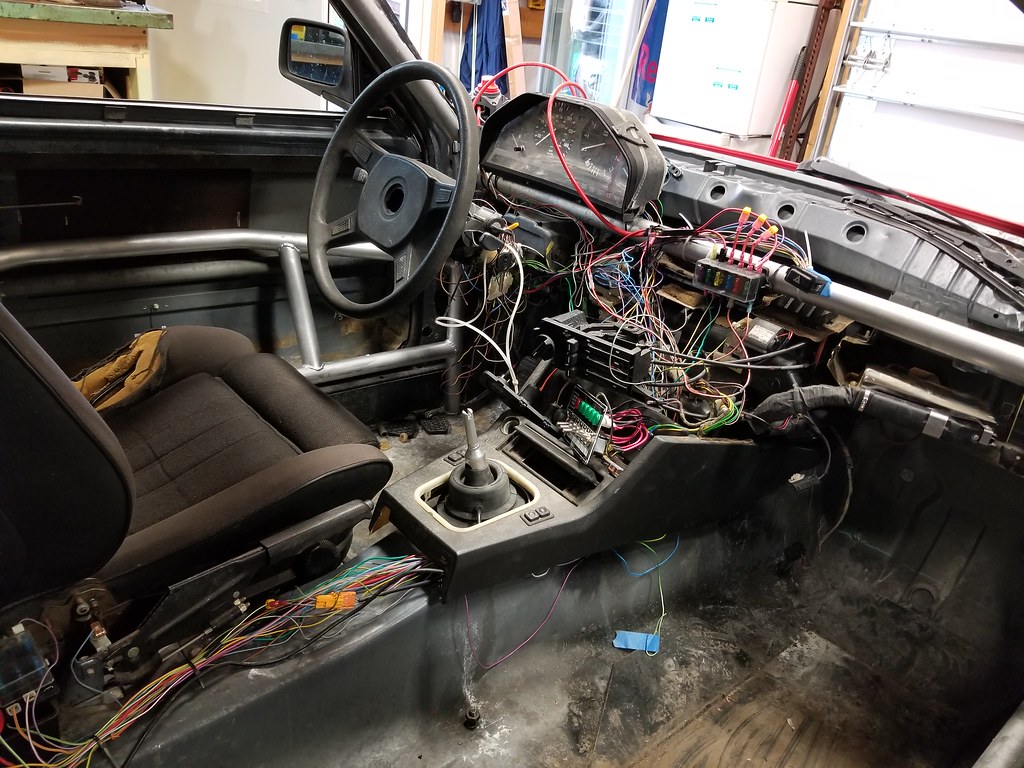
20200222_153923 by t sz, on FlickrMy older brother recently built a garage and was installing a lift where we worked on the car. His lift had sat outside and the arms were rusted together so the car has been on the ground and lifted with jackstands. I dug out my lock set and got that installed on the column and my brother got started with a complete wiring diagram and ordered parts for a custom wiring harness.
20200222_142003 by t sz, on Flickr20200222_154011 by t sz, on FlickrWe got the brake booster and master installed and it looks like true lemons quality. I got a spare bumper mount and had a spare plastic bumper which had end caps so we can have a decent front end. It also came with the diving board for the rear so if we outbrake some fools we might have a chance of not getting too much body damage. I had some old front struts that we used to 'upgrade' the suspension with the red springs that came with the car. The driver side is still blown but now it should be traditional housing size with 51mm struts. Some trim was added and it is starting to look like a car.
20200222_154022 by t sz, on Flickr20200321_112334 by t sz, on FlickrIt turns out the diff that came with the engine is a 4.10 LSD and though I had a spare shift lever from my own 318iS Z3 shift lever upgrade, it turns out the own that came with the engine appears to be z3! You will notice the sledge, I did some body work and straightened the passenger fender so it looks pretty good. Rear tail lights are in and we installed the diff and got the axle shafts back in. Next up is dealing with the rust, painting the cage and installing the hvac and wiring. Clutch master cylinder is in too.
20200425_140535 by t sz, on Flickr20200404_170837 by t sz, on Flickr20200404_173352 by t sz, on Flickr20200404_173410 by t sz, on Flickr20200404_173432 by t sz, on Flickr20200404_173559 by t sz, on FlickrWell that escalated quickly. (not really this is a few months time and just a test fit to get it off the trailer)
20200425_141705 by t sz, on Flickr20200425_163853 by t sz, on Flickr20200425_165114 by t sz, on Flickr20200425_171649 by t sz, on FlickrThe M42 should be a great motor on track. The Duct Tape Motrosport team has campaigned one with success. Here is some in car footage from a different lemons race I found in a 91 318iS. https://www.youtube.com/watch?v=qSFwA7_MR94
The plan is to compete in a race in 2021 when everybody can plan for it and we can test the car at some lapping days first. Here is a list of things that need to happen to get it on the road
- Wire up the C101 connector to run similar to stock engine wiring
- Install battery and tray
- weld up floor pans and missing cage welds
- reinforce steering column/shaft for rigidity
- finish painting cage
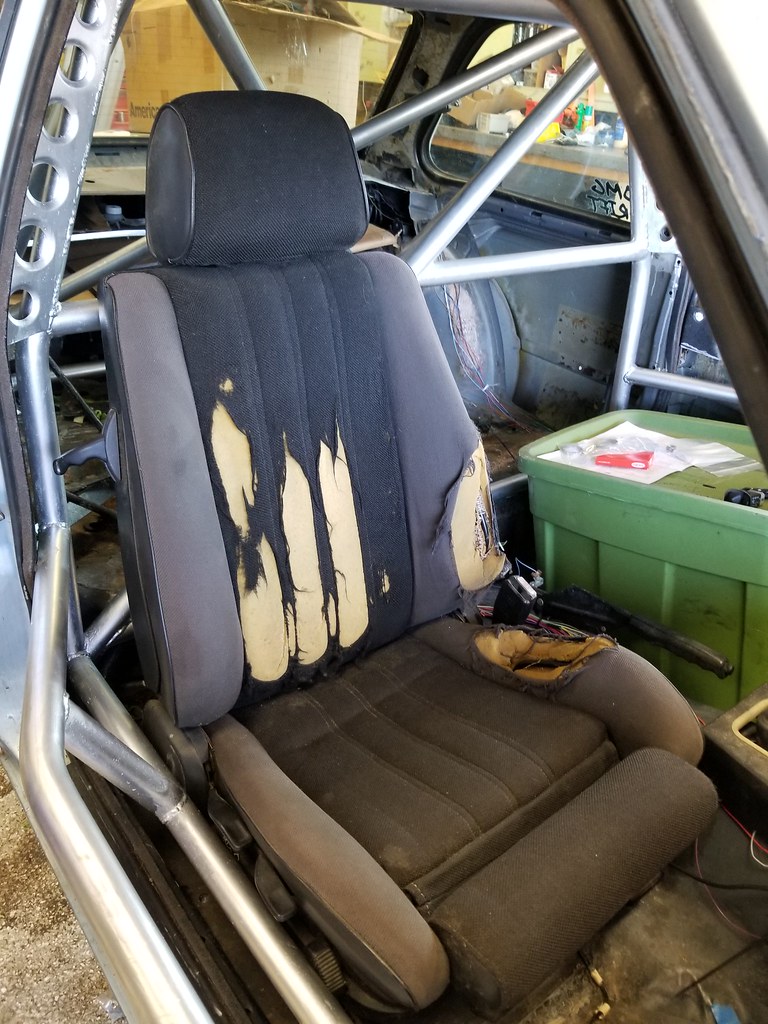
- install seats
- replace right rear diff output shaft seal
- install driveshaft
- install trans mount
- install slave cylinder and bleed system
- bolt down engine
- set hvac unit in place
- install windshield
- wire chassis for lights and signals
- install instrument cluster and switches
- install exhaust
- alignment
- mount seats (driver and passenger)
- install fire suppression
- install roll bar padding
- figure out seat belts
- finalize pedals and cables
- finalize lemons theme
I am sure there is more to do but I wanted to document this project and specifically how much we have completed to date. Down the road it would be good to replace the rear drums with discs and install a z3 steering rack but I am trying to follow the lemons budget for the most parts on 'performance' parts which the driveline and performance enhancing parts it does meet. Stay tuned for more updates in the coming months.


Comment