
The car is looking good! I have really had a renewed fondness for the E36 M3 lately, and Estoril was always my favorite color with Techno Violet a close second. So after the engine is in what is the next big step? You said OEM+, what are you thinking for the interior? Looks like a lot was missing?
-
Thank you!
Yeah, the E36 M just always comes back to me a bit. It's an itch I can never quite scratch.
After the engine is in I am going to refocus on the interior, dial that in, drive it (a lot) and then tackle the exterior.
I stalled on progress now that winter has arrived, so I need to determine what I can get done by spring and reanalyze my situation then.My previous build (currently E30-less)
http://www.r3vlimited.com/board/showthread.php?t=170390
A 2016 Toyota Tacoma TRD 4x4 Offroad in Inferno is my newest obsessionComment
-
February 7th, 2021
It's been a while since I spent any time on the M3, but I finally had some time for it this past weekend.
Prior to this I took the LM7 Heads to a local machine shop to have a valve job done, replace valve seals, check the overall condition of the head, and deck them perfectly flat.
Purchased an OEM Mahle Gasket kit for the engine as well.
The short block will be taken in sometime in the next few weeks for new cam seals, general cleaning of the block, cylinder honing, and a check of it's condition. I have the F-Body oil pan kit, with pickup tube, to replace the Tahoe's incompatible oil pan.
That aside, onto the M3 itself.
Went over to the Garage Mahal after being away for far too long. The M3 was just as I left it, ready to be worked on!
The plan for now is the front suspension, so it all has to go! I need the front subframe reinforced, so might as well pull and replace everything that attaches to it.
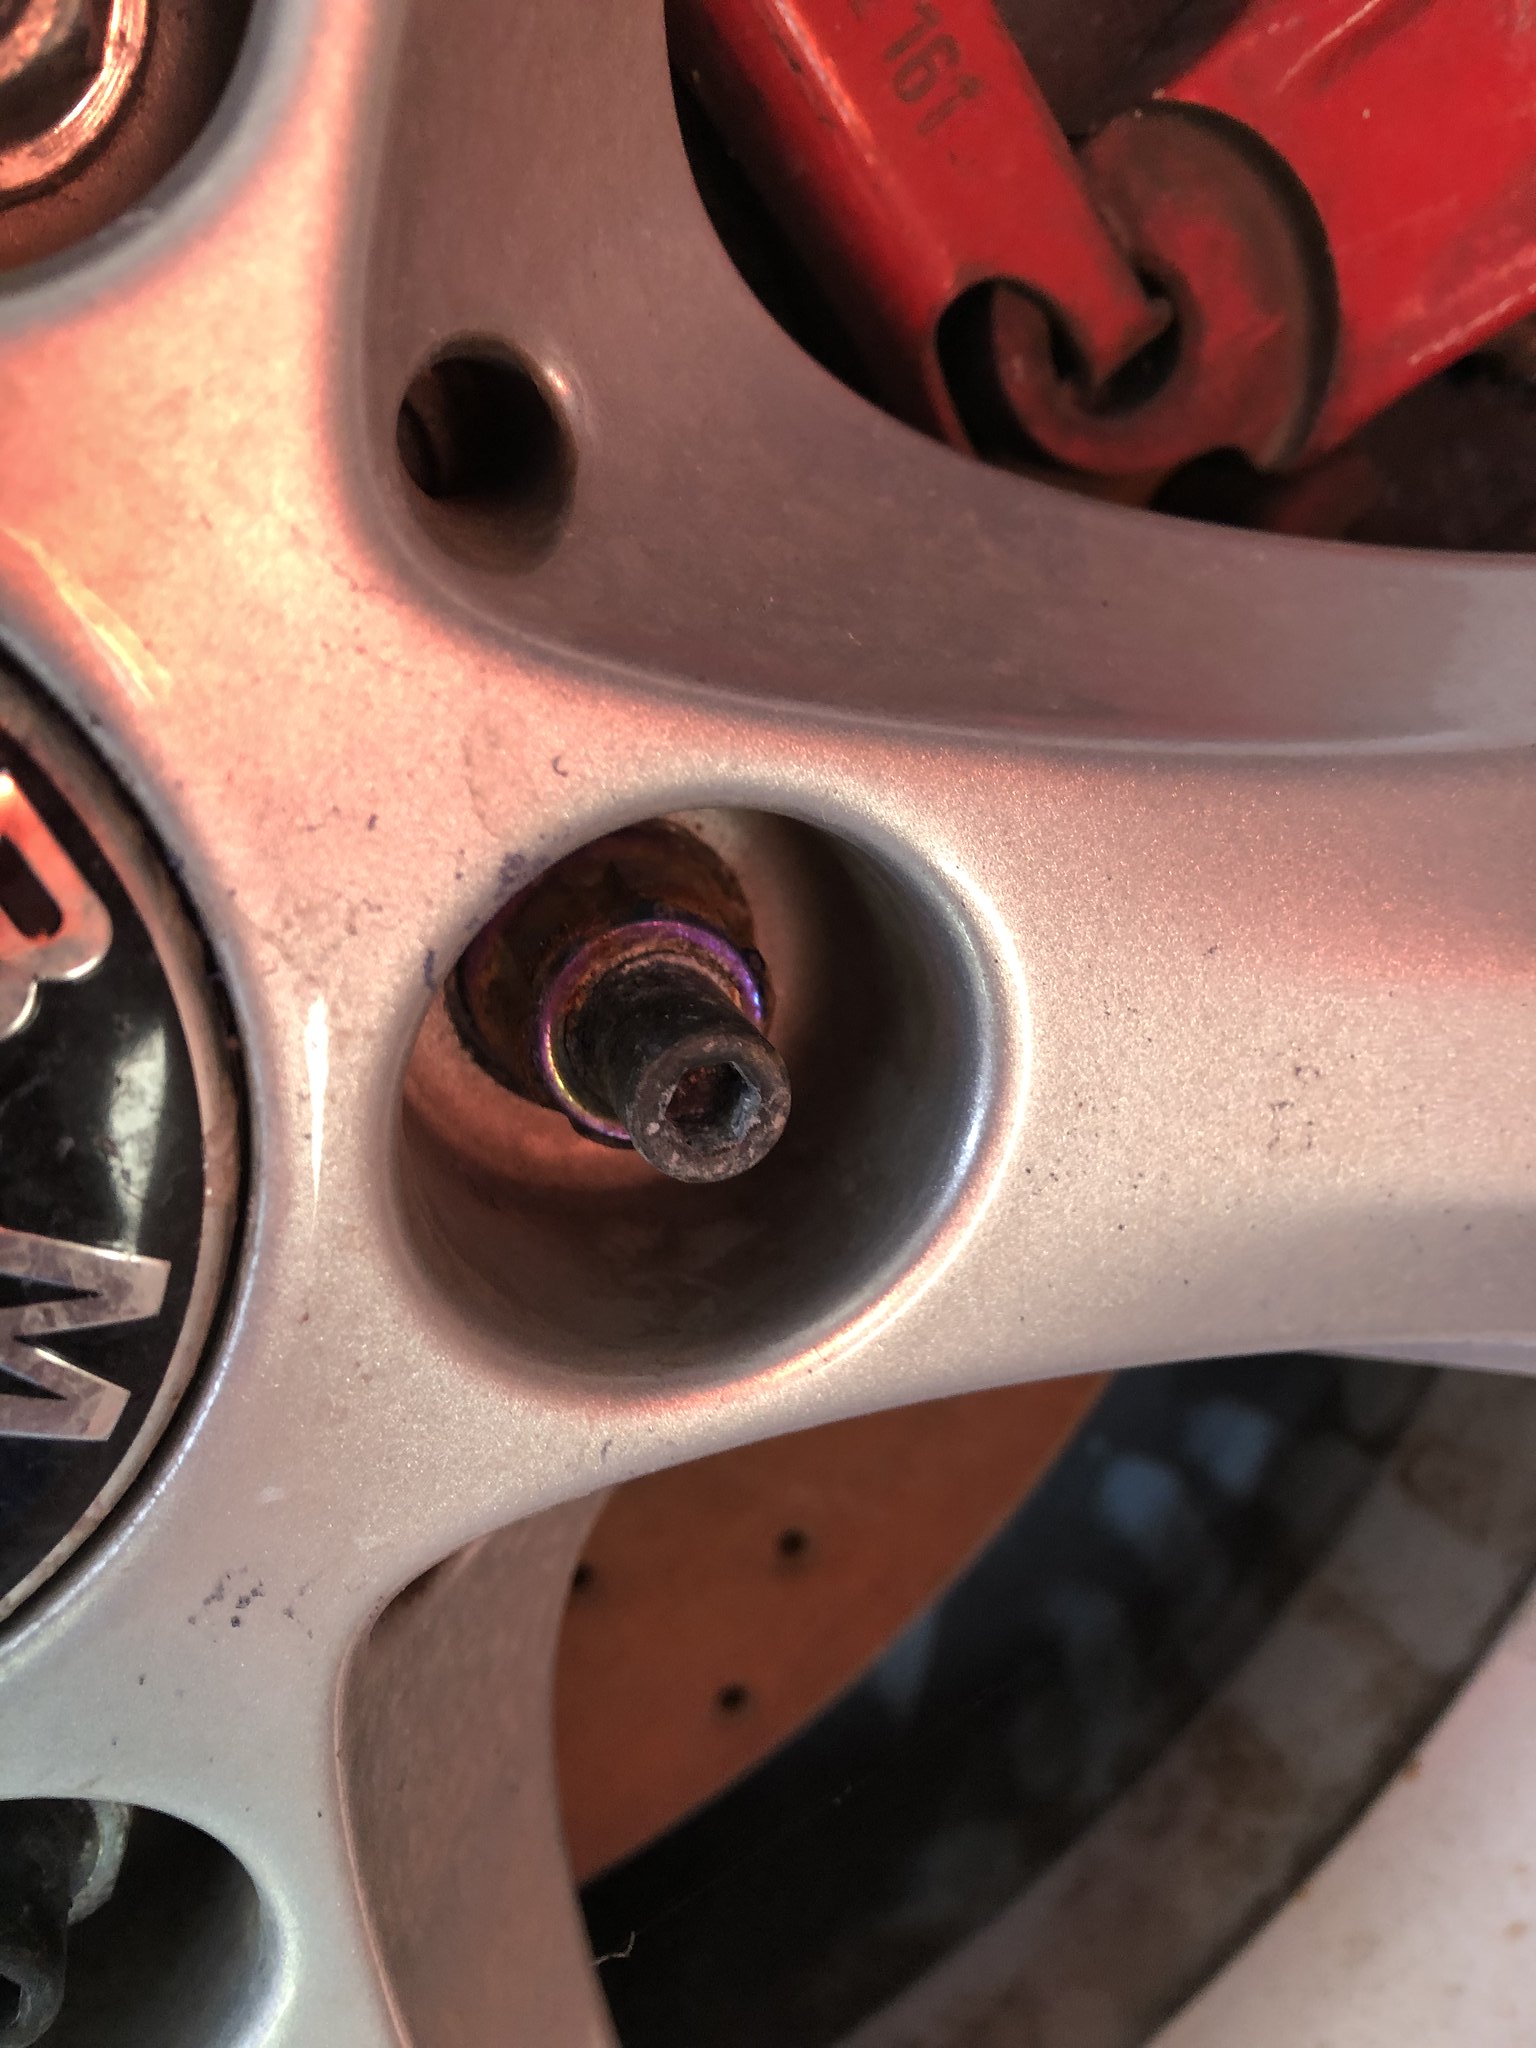
Tried to start by pulling the wheels and tires, but the PO added locking stud nuts and failed to leave the key in the vehicle. So I continued on without removing them. Added a bit of fun. I need to find a kit that contains a variety of different keys, but I haven't found one that appears correct yet. Can always use the old school 'beat a socket on' trick, but we will see.
 2-6-2021 Work by Michael Rickerd, on Flickr
I pulled the steering rack I removed from a junkyard so that I could move the car around. Threw that out pronto, as it was a mess. Picked up a Non-M Z3 rack from Detroit Axle, along with new tie rod ends for the E36 M3. No PS in this thing, so I ordered a block off plate from Garagistic to properly close it up.
Followed that by pulling the control arms. They had failed joints at all corners, so those will be replaced by Mahle OEM replacements. I'll also ditch the standard lollipop and replace them with Garagistic treehouse versions, centered to maintain stock geometry.
After that I pulled the subframe to clean and prep for welding.
Disconnected brakes and ABS sensors and removed the hub and wheel and tire. Detached the FK Coilovers (Need to research what they are exactly. Made in Germany though). Left the wheels and tires near the M3 but loaded everything else up into the truck to take home.
 2-6-2021 Work by Michael Rickerd, on Flickr
After that, I went to town with numerous rags and simple green. Cleaned the engine bay for a couple of hours. It was not greasy at all, just dirty. All the little nooks and crannies needed a decent amount of attention.
 2-6-2021 Work by Michael Rickerd, on Flickr
Left it like this for the day.
 2-6-2021 Work by Michael Rickerd, on Flickr
Ordered a variety of parts for this section of the car. Should all be here this week, and a good friend (the Vette Kart guy) will weld up my reinforcement plates (previously purchased) this week as well.
Hopefully next weekend will be spent putting the front end back together so that I can move on to the rear end refresh. I will replace and probably upgrade all of the bushings, as well as swap the differential input flange from the 6 bolt version to the 4-bolt version that works with the Vorschlag LS swap driveshaft and giving the diff a full gasket refresh and fresh fluid.
This will be more difficult than the front (basically same as E30) but I will research best removal practices before tackling it.
The gas tank has also been empty for several years so I will remove that and find out the best way to give it a good once over to make sure it's in great condition.
Left and headed home, but wasn't done for the day.
Cleaned the coilovers after removing the failed sway bar end links (still need to order these). These are in great shape. I hope my research leads to positive info about these.
 2-6-2021 Work by Michael Rickerd, on Flickr
The best part about a Maricopa County only car is that everything is so fresh. These are the subframe mounting bolts after being cleaned.
 2-6-2021 Work by Michael Rickerd, on Flickr
The control arm lollipop bolts aren't quite as nice though. Slight corrosion where the bolt enters the frame rail, but nowhere else. I'll take a small brush and clean out each of the holes, as well as replacing the (4) bolts, before reinstalling everything.
Cleaned on the right, fresh off of the swaybar on the left.
 2-6-2021 Work by Michael Rickerd, on Flickr
Touched some of the components up with black spray paint.
 2-6-2021 Work by Michael Rickerd, on Flickr
Pile of garbage components to be replaced. All replacements have been ordered except for the swaybar end links and plastic mud/water guards.
 2-6-2021 Work by Michael Rickerd, on Flickr
Hoping for another update next weekend!
Til then!
Approximate Hours Invested in Project Since Purchase: 215My previous build (currently E30-less)
http://www.r3vlimited.com/board/showthread.php?t=170390
A 2016 Toyota Tacoma TRD 4x4 Offroad in Inferno is my newest obsessionComment
-
February 8th, 2021
Finished cleaning up the front subframe yesterday afternoon. Goof Off did a great job of getting the relatively small amount of gunk off of the metal. It does dull the paint a bit though, but this whole thing will get repainted and clear coated once it is reinforced.
 Subframe Ready for reinforcement by Michael Rickerd, on Flickr
Dropped it off at my friends house this afternoon. He's done this upgrade before, which is nice.
Ordered the (4) M10x40 bolts I need to secure the control arm bushings. Which reminds me, I need the swaybar end links!
Later.
Approximate Hours Invested in Project Since Purchase: 218My previous build (currently E30-less)
http://www.r3vlimited.com/board/showthread.php?t=170390
A 2016 Toyota Tacoma TRD 4x4 Offroad in Inferno is my newest obsessionComment
-
February 13th, 2021
Some of the parts that I ordered rolled in last week, but unfortunately, not all of them. Wasn't able to get the front end put back together, but the front subframe went back in.
 M3 Work - Round 2 by Michael Rickerd, on Flickr
Spent Friday afternoon and all of today with the M3.
It has some interesting stable mates at the moment.
 M3 Work - Round 2 by Michael Rickerd, on Flickr
I forgot to take a picture, but the reinforcements were welded in to the motor mount tab, it was then sanded down, and then it was painted gloss black. I followed it up with (2) coats of clear coat as well. Got that torqued back onto the frame per the Bentley Manual. I left the front end at that. Missing the treehouse lollipops so I cant get the control arms back in yet.
Focused my attention on the rear end, and the removal of it all, and I am happy to say that it was incredibly uneventful. A Phoenix only vehicle, even at 24 years of age, is a blast to work on. Not a single bolt was corroded or difficult to remove. ABS sensors popped right out. The subframe slid right off of the two bolts (lowered on a platform jack) and out it came!
 M3 Work - Round 2 by Michael Rickerd, on Flickr
I had access to a platform jack, so I simply lowered the entire assembly and pulled it out from under the car to make removal of all of the pieces much easier.
I had to get the wheels off, so that means that I had to deal with the (2) locking lug bolts on the rear tires.
Was wayyyy easier than I thought it was going to be. Simply tapped a 22mm socket lightly onto the round lug bolt. I then pried the wrench away from the wheel while I loosened it. Undid the bolt with ease. Made me realize that installing these are basically a waste of money and time, as a thief could remove them without any excess noise or effort.
Anyways, with those two gone the wheels came off and the subframe was ready to be disassembled.
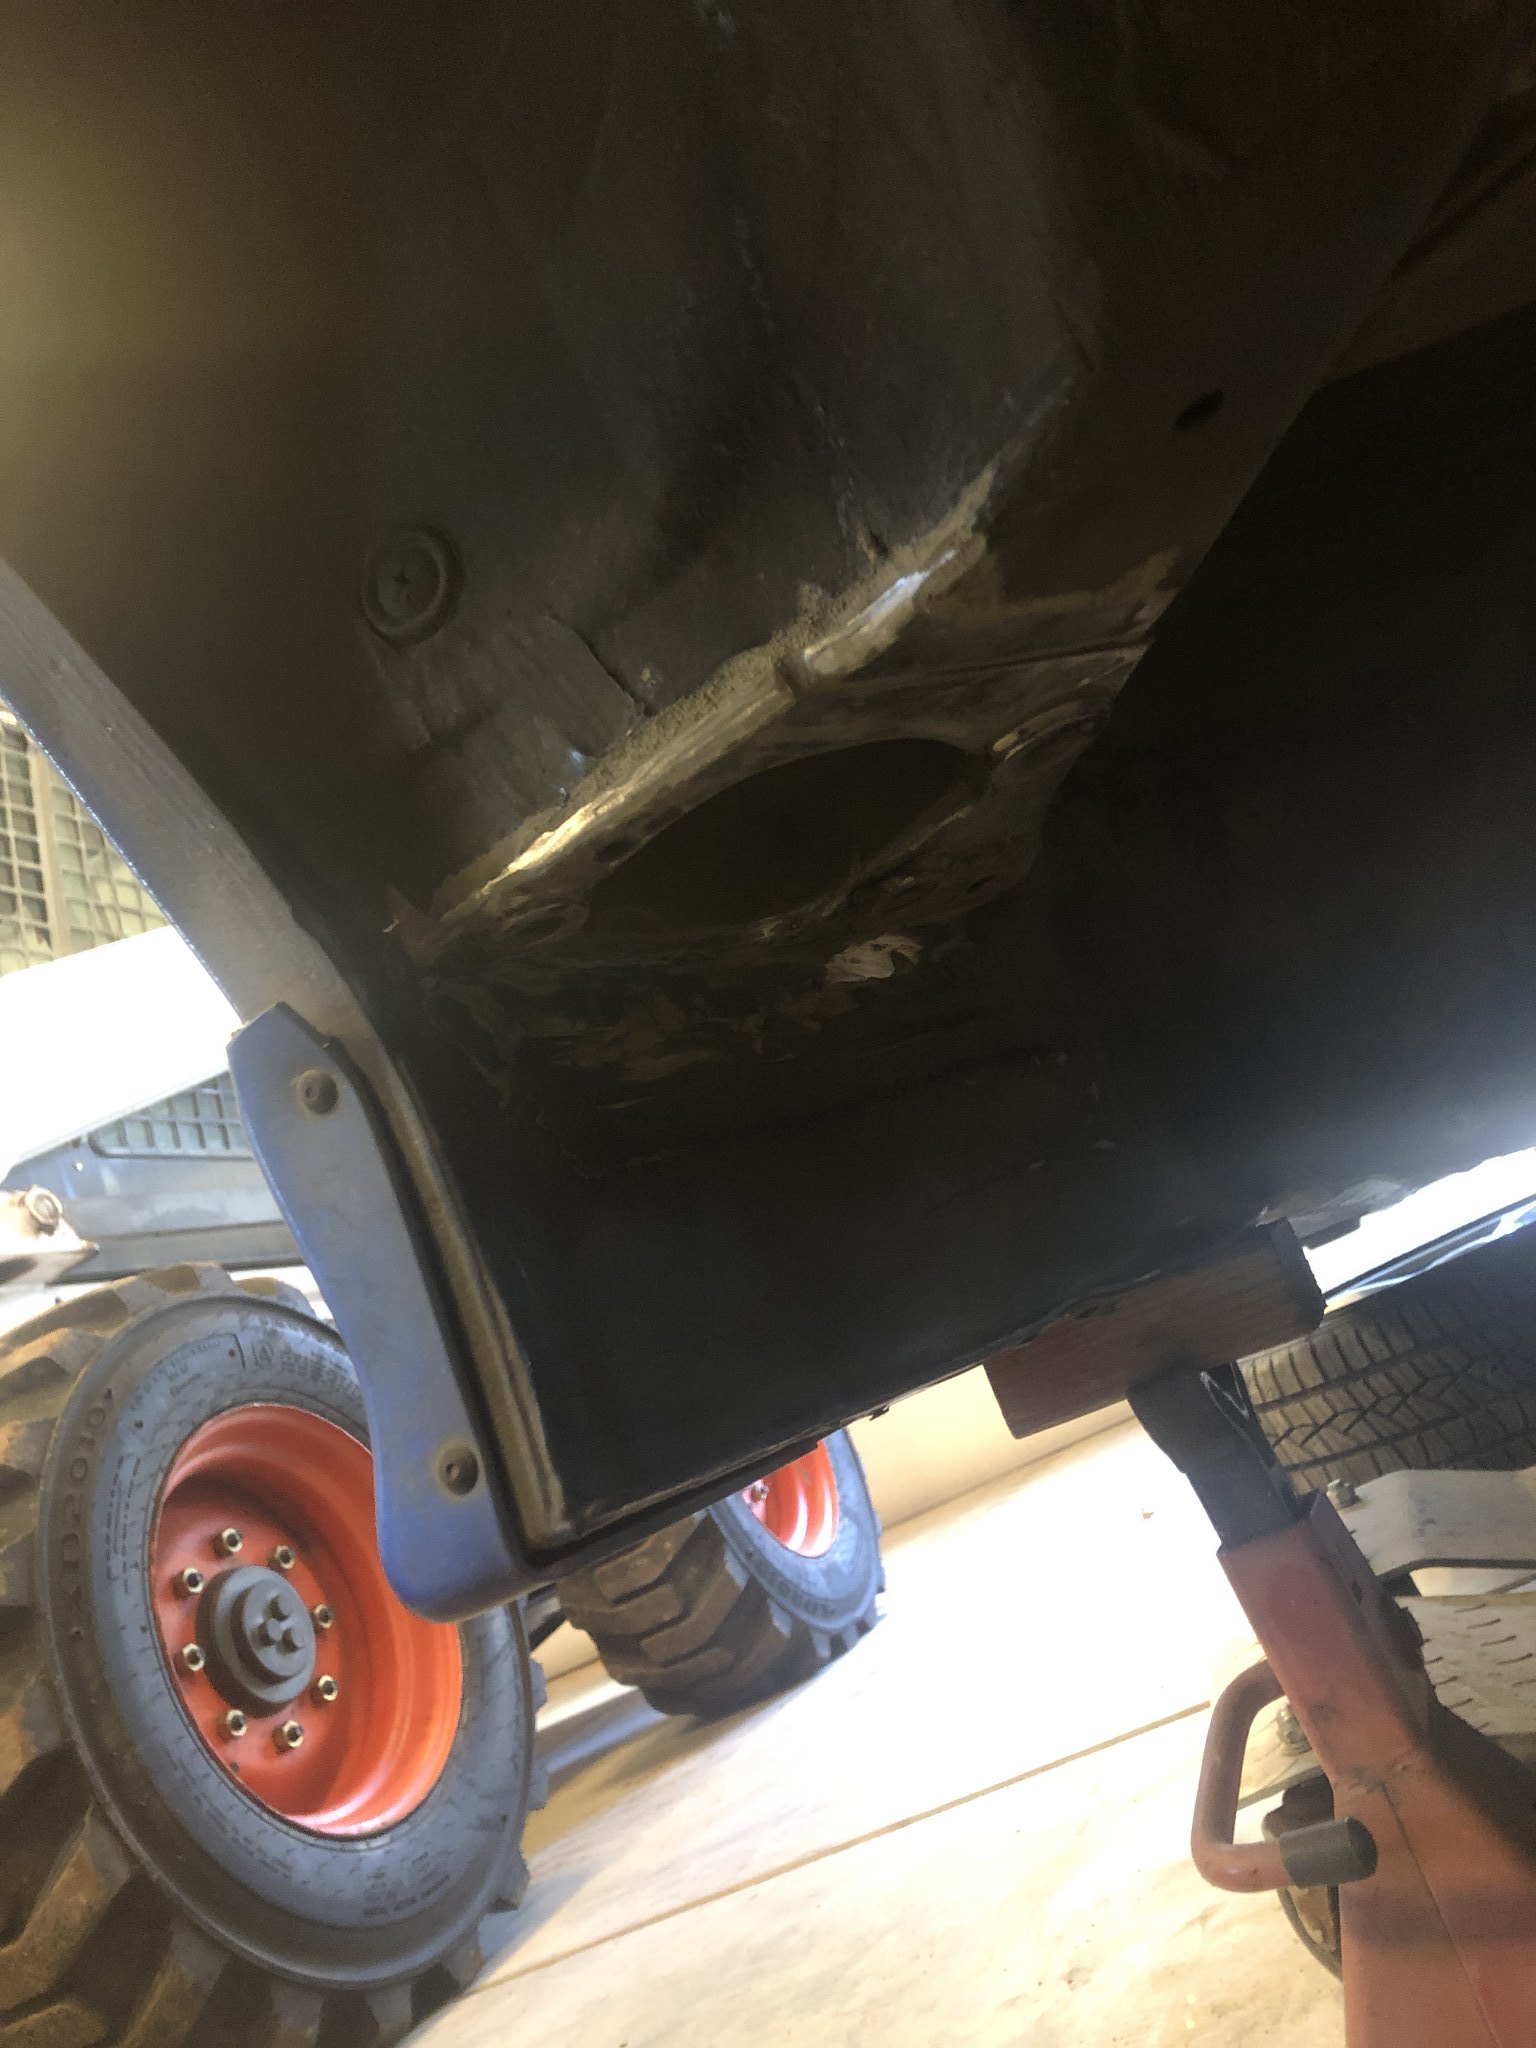
The trailing arm pockets all looked good, until I got to the last nut. A small crack is visible. This is a common occurrence apparently, but it instantly lead me to deciding that the pockets need reinforced.
 M3 Work - Round 2 by Michael Rickerd, on Flickr
Ordered up the rear pocket reinforcement plates and rear swaybar reinforcement plates from Garagistic. After I receive their delivery date I'll schedule with a buddy who is a competent welder to get all of these reinforcements welded in. The M3 comes with reinforced subframe mounts from the factory, so after these parts get welded in the rear will be as reinforced as it can be, bar a bunch of custom work.
After that was done I dropped the gas tank. I will be replacing all of the soft fuel lines, as they look OEM, and I do not want to deal with any fuel leaks (or any other issues) after this is driving.
The tank is in great shape. I'll be cleaning up the three straps that hold it in and adding new rubber isolators before reinstalling.
Spent the rest of the afternoon scrubbing the underside of the rear end now that everything is out of the way. The entire car is very 'clean' underneath, though it does appear that the front of the rear diff leaked at some point, as this is the only part of the underside that has any grease on it. Thankfully it is super dried out, so a nylon brush knocks 90% of it away.
 M3 Work - Round 2 by Michael Rickerd, on Flickr
I'll spend this week cleaning, painting, and clearing all of the metal in the rear end. I'll do a large order of bushings and other parts tomorrow. Going with 'street' poly bushings for the subframe. Reinstalling OEM rubber for the diff. This supposedly keeps diff whine from creeping into the cabin, something I don't want. I still have to research the other bushings. The car will also need two new half shafts as they have destroyed boots and compromised cv joints. I'll also be doing a full refresh on the diff.
It's still going! Hoping to have the car back on the ground in ~4 weeks.
Later.
Approximate Hours Invested in Project Since Purchase: 229My previous build (currently E30-less)
http://www.r3vlimited.com/board/showthread.php?t=170390
A 2016 Toyota Tacoma TRD 4x4 Offroad in Inferno is my newest obsessionComment
-
February 22nd, 2021
Got a bit of work done to the M3 this past weekend.
I met with a Tacoma friend who is a proficient welder and we scheduled the install of the RTAB Pocket Reinforcement Plates.
I prepped both sides with a grinder with an 80 grit flap disc, then worked the smaller areas with a Dremel with a small 80 grit flap wheel.
 M3 Work Round 3 by Michael Rickerd, on Flickr
Proceeded to prep the rear subframe for the swaybar reinforcement plates. Started by pulling the two plastic housings that connect the wear sensor and ABS sensor. Scrubbed off all large clumps of dirt and grit, followed by Simple Green, and then Goof Off to get it fully cleaned. Sprayed it with a hose and took it over to another friend who does stellar weld work.
Before all of that i removed the (4) bushings by heating the subframe with a MAP gas torch (burns hotter than propane or butane) and placing a piece of 2x2 (wood) on top of the bushing and hammering it out with a mini sledge. Very easy to do, taking ~90 seconds to get 2/3rds pf the bushing hot enough for rather gentle taps to free the bushing from the frame. The addition of the piece of wood means you don't damage the subframe with an errant swing. Definitely preferred to the expensive bushing removal tool.
 M3 Work Round 3 by Michael Rickerd, on Flickr
Today I prepared the (3) gas tank straps for reinstallation once the fuel lines that run on top of the gas tank get delivered and installed. Stripped down to bare metal and then painted them gloss black and clear coated them. I'll reinstall the (3) pieces of foam to protect the gas tank from excessive rubbing once they dry. Marked down the location of each one, so they'll be replaced in the same location.
 M3 Work Round 3 by Michael Rickerd, on Flickr
I probably won't get any more work done on the M3 for the next week as I have a 5-day overland trip across AZ this Thursday, but you never know!
I have all of the rear subframe upgrades and replacements picked out, so I just need to clean and prep each piece for reinstallation.
Approximate Hours Invested in Project Since Purchase: 240My previous build (currently E30-less)
http://www.r3vlimited.com/board/showthread.php?t=170390
A 2016 Toyota Tacoma TRD 4x4 Offroad in Inferno is my newest obsessionComment
-
Glad to see your progress is going well. I am in a similar spot on mine too just working on hard brake lines cause midwest rust.
Those coilover are either FK Highsport/Konigsport/Classicline. Some used Koni dampers and were quite well. They are not the bottom tier FK streetlines. There might be a sticker to identify which or just the part number. https://www.6speedonline.com/forums/...coilovers.html
Comment
-
Ah, that's unfortunate. Good luck with that. Having the appropriate type of wrenches can be a lifesaver.
Thank you for that link. It comes up super cluttered when I click on it, but I'll look back on it later and see if it load better.
I'll rock this setup for now and worry about changing it once the car is on the road.My previous build (currently E30-less)
http://www.r3vlimited.com/board/showthread.php?t=170390
A 2016 Toyota Tacoma TRD 4x4 Offroad in Inferno is my newest obsessionComment
-
April 27th, 2021
It's been quite a while since I've given an update, and not a whole lot has happened to the M3 due to winter and other commitments, but a few things have happened.
The rear subframe had the swaybar brackets reinforced with weld-in tabs. It was then re-cleaned and painted. I wrapped it up by installing Garagistic poly bushings. It is now 100% ready to be fitted back into the M3. I dropped everything as one assembly when I removed it, but I will reinstall everything piece by piece.
 M3 Work Round 4 by Michael Rickerd, on Flickr
My Tacoma friend welded in the RTAB pocket reinforcements. Went a bit overboard on some of the welds, so I need to grind the area flat so I can properly torque the three mounting bolts down to 57 ft*lb.
 M3 Work Round 4 by Michael Rickerd, on Flickr
The front end was just about finished. My Detroit Axle steering rack kit did not come with the locking nuts and retainers, so I order those and have them ready to go. Everything is in, but the tie rods are not yet connected.
I scrubbed the entirety of each wheel well before replacing the suspension. Not too dirty, relative to the area around the rear subframe.
 M3 Work Round 4 by Michael Rickerd, on Flickr
My rear end bushings arrived this morning. Went Lemforder and spherical to match my AKG adjustable lower rear control arms. Definitely a more aggressive setup, but I couldn't help myself. I apparently didn't learn anything with my E30, but oh well. Life is short. Plus, back then I didn't have a couple of Tacomas to drive around in when I wanted to relax.
 M3 Work Round 4 by Michael Rickerd, on Flickr
I have an appointment with a friend for this Friday to use his press to replace all of the bushings. After that I'll get all the pieces cleaned and painted before reinstalling them in the M3.
My AKG adjustable lower rear control arms should arrive early next week.
My Vorschlag 4-bolt rear input flange for the diff arrives this Thursday. I purchased a rear diff refresh kit from online, so I'll get that entire thing refreshed, and the flange swapped (need to look up a detailed procedure for this) before putting it back in the car. Diff will be the last thing installed.
I need to chat with the Driveshaft Shop about their high horsepower rear axle builds. I pulled my OEM ones out of the rear trailing arms already. Apparently you have to send them in so they can use some of the pieces to make their beefier finished product.
After I can get the car back on the ground I will bring it back to my own house to keep the project rolling. I'll get the brakes done at that point in time. Need to rebuild the rear calipers and determine if I want to rebuild the fronts or just upgrade to a BBK. Decisions decisions.
On a side note: My Tacoma rental business has been booming. Scooped up a 2021 TRD Offroad 4x4 Long Bed with tech package to help ease the burden on my 2016 TRD Offroad. Already looking for a third one as well. Or another E36 M3. or an E46 M3. Who knows.
 IMG-2010 by Michael Rickerd, on Flickr
Also, don't know if any of your watch Matt's Offroad Recovery on YouTube but I was able to meet him and his crew a couple of weeks ago at their shop! Cool experience.
 OVRFLG meets Matts Offroad Recovery by Michael Rickerd, on Flickr
 OVRFLG meets Matts Offroad Recovery by Michael Rickerd, on Flickr
Until next time (which hopefully isn't quite so far away)!
Approximate Hours Invested in Project Since Purchase: 240My previous build (currently E30-less)
http://www.r3vlimited.com/board/showthread.php?t=170390
A 2016 Toyota Tacoma TRD 4x4 Offroad in Inferno is my newest obsessionComment
-
May 13th, 2021
It's been a while, and updates have been lumped together, but I am working to get back on track with consistent updates now that warmer weather has arrived.
So, where were we? Ah yes, the reinforced trailing arm pockets and bearings/bushings arrived.
Since that time, the M3 has been relocated back to my driveway. Even though it was only 10 or so minutes away, in a heated garage, I didn't get nearly as much done on it as I wanted to this past winter. However, that's the past.
I will say, having the main carcass nearby makes working on everything so much easier. Oh, you just finished cleaning and painting this small bracket? Walk 5 feet and bolt it on! Boom, another thing refined and completed. Onto the next! This is very effective for me, as opposed to bringing a box full of stuff home and then randomly sifting through it. Plus seeing the car numerous times everyday gets me excited to work on it.
Anyways.
Used my 2021 Tacoma to tow it back home and park it in the driveway. I installed the rear diff carrier, upper arms, and AKG adjustable lower arms and threw on the 4 tires to get it loaded onto the trailer.
 M3 Work Round 5 by Michael Rickerd, on Flickr
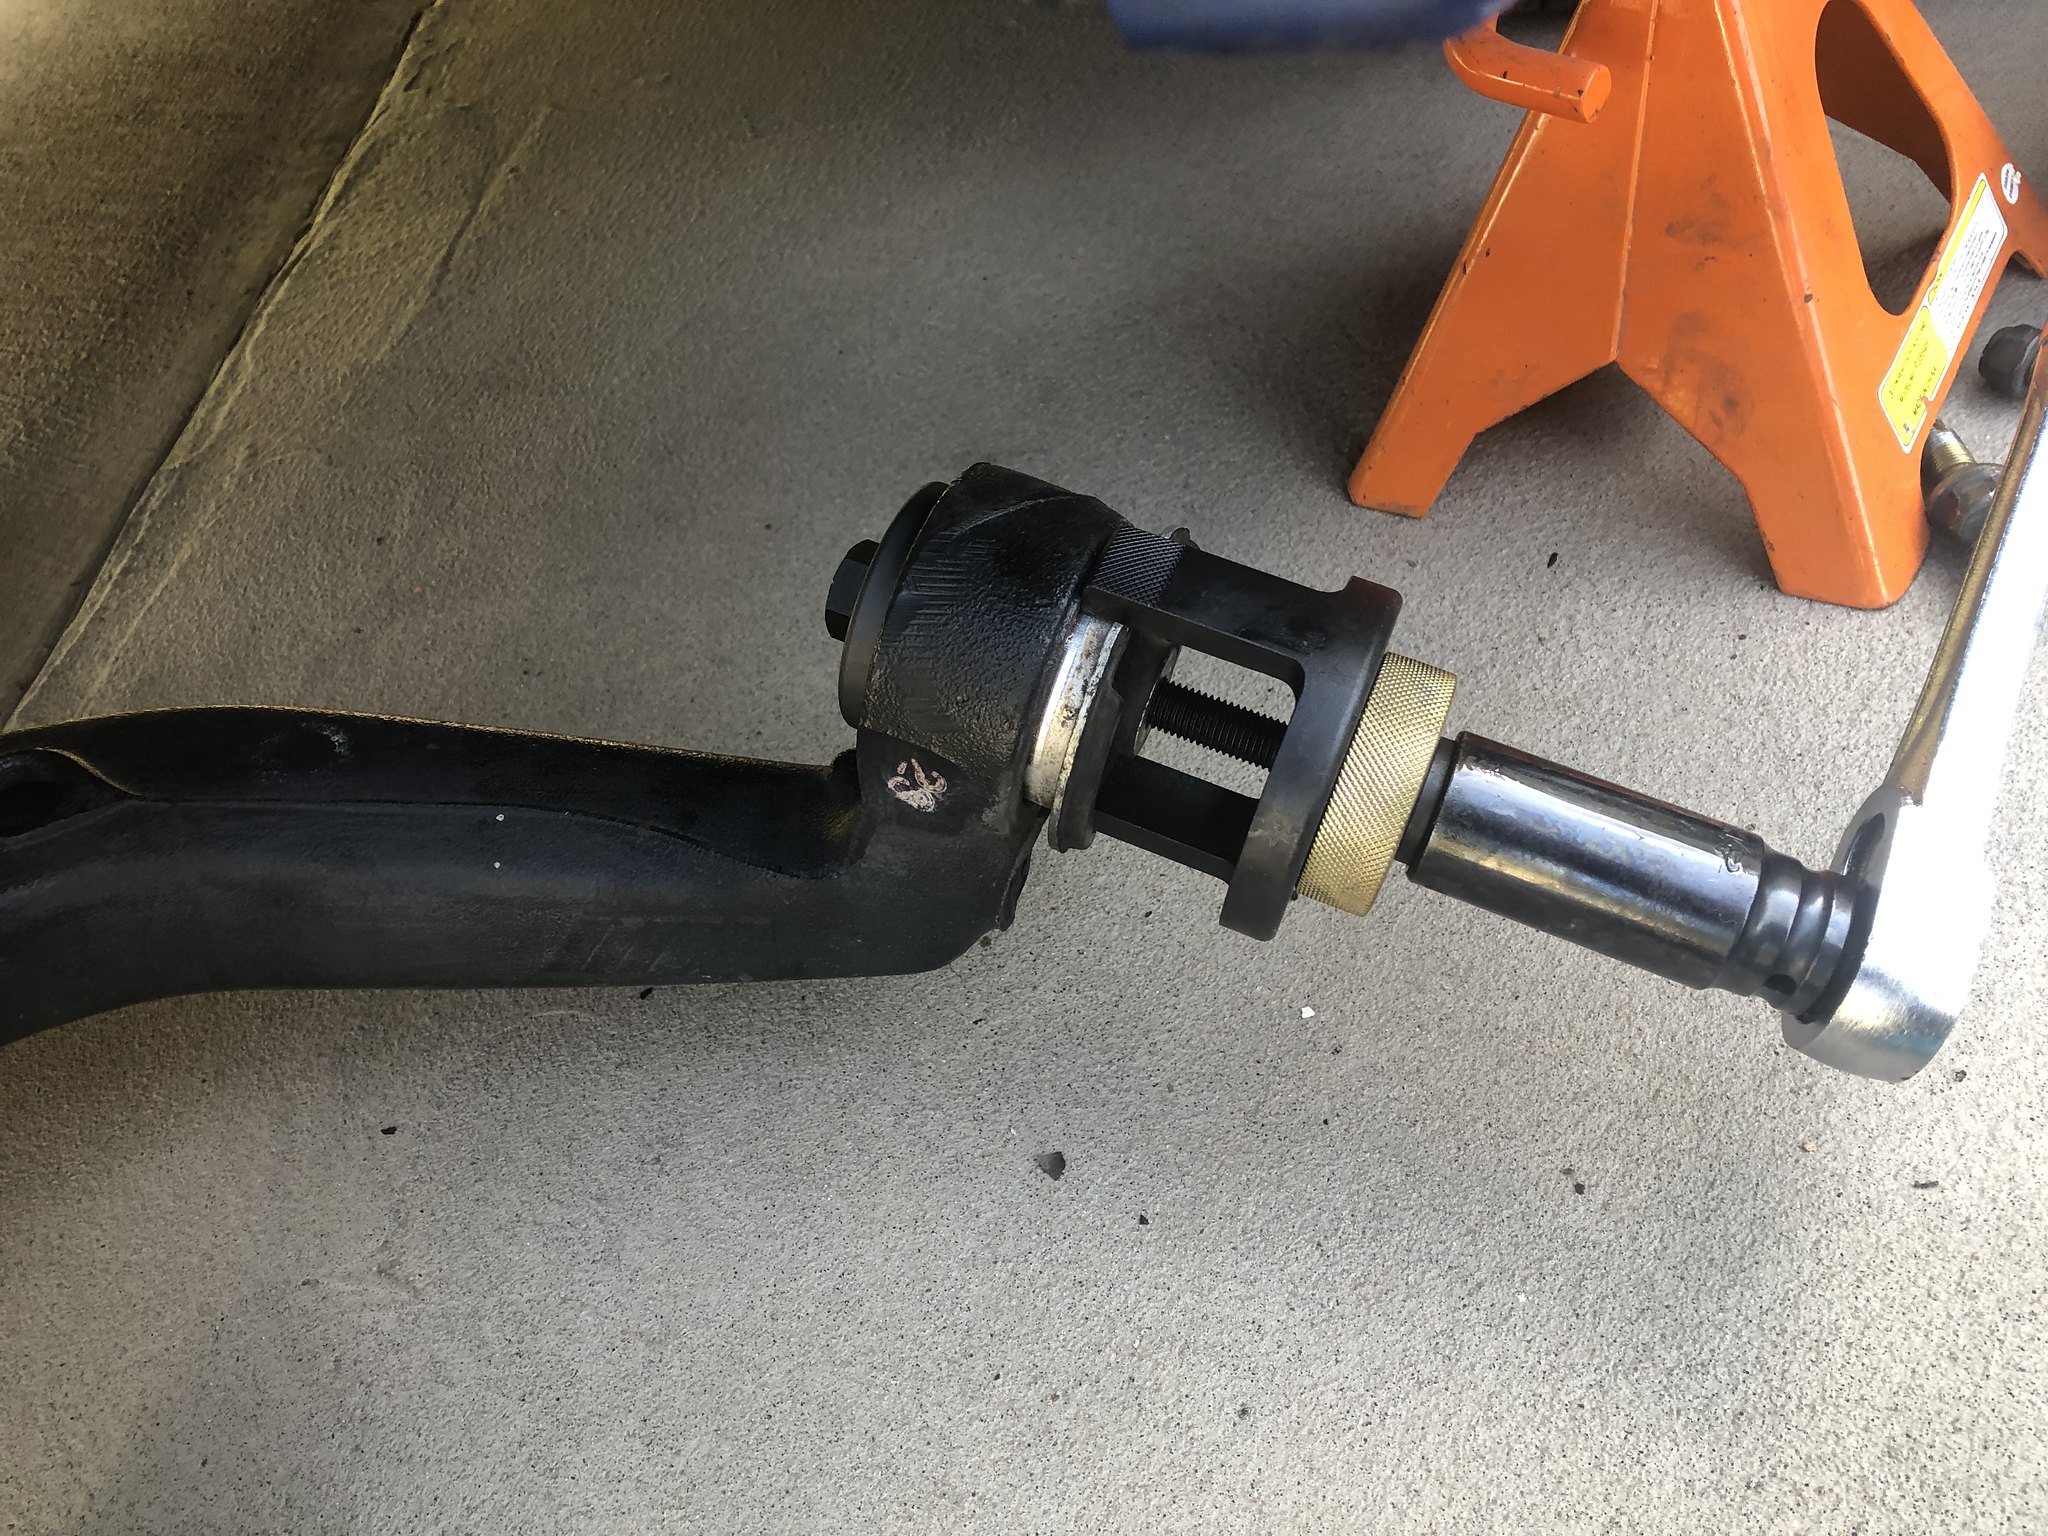
Lots of parts and pieces have been arriving, one of which was the BavAuto rear trailing arm bushing removal kit, so I made quick work of the two bearings in the trailing arm, and replaced the front bushing with the spherical bearing.
This kit is worth its weight in silver. I cant imagine trying to do these with a traditional press. Just find the right components, installed the nut on the bolt, and crank the 24mm nut down until you're done. A piece of cake. No binding, no skewed bushings, nothing. Just effective removal and installation. Happy to share this kit if anyone needs it, fyi.
 M3 Work Round 5 by Michael Rickerd, on Flickr
 M3 Work Round 5 by Michael Rickerd, on Flickr
I used seam sealer to close up the welds around the reinforced trailing arm pockets. It's a very light grey (as pictured) but I hit the area with a medium dark grey spray paint to protect against corrosion. After cleaning the inner wheel well (highlighted below) the difference is nil. I tried to texture the sealer as the factory did, but I may or may not have done a good job of that. The important part is that it is protected, so my concerns are taken care of. This car will be a driver at the end of the day, and the underside will get dirty and forgotten about most of the time.
 M3 Work Round 5 by Michael Rickerd, on Flickr
After that was done I went about starting to clean the underside of the rear end that was outside of the rear diff carrier. I started with rags and simple green, but the mess was too thick, and I wasn't making good progress.
So out comes the electric pressure washer and a foam cannon.
 M3 Work Round 5 by Michael Rickerd, on Flickr
Thirty minutes later, with my clothes fully soaked (thankfully it's warming up out here), it's pretty darn clean. Both rear wheel wells and the entire rear underside was done. Pressure washer is only 1800 psi, so I had to work it in close, but the ~10 dousings of simple green over the course of three days really broke everything up, letting the high pressure water get to the original material underneath.
 M3 Work Round 5 by Michael Rickerd, on Flickr
This was the final big part of the rear end. With all of this clean I can start installing things once more. Which I have already started.
Ordered Garagistic SS brake lines, those came in and I installed the four rear lines along with the hard lines on the trailing arm. Everything is still getting scrubbed, cleaned, painted, and perfected (or as close to it as possible without being superman) before reinstalling.
Ordered a Walbro 255lph pump to install in my stock housing to satiate the fuel demands of the V8.
Many things are arriving from ECS, one of which is caliper rebuild kits. I'll rebuild and clean each caliper, though I will probably only keep the stock rears, as I bet I'll upgrade to a BBK in the front before long.
Chase Bays has their BBE brake line kit and proportioning valve on their way to me as well. Aiming to wrap up the brake system next, and I'll work on the rear diff refresh on and off at the same time. I want to get the diff in before having the machine shop go over the LM7 block (heads are already ready to rock and roll) so I can prep to install the engine once it's done.
After that I'll need to prep to drop some big bucks on the T56 Magnum-F, short shift kit, bellhousing, clutch kit, and Vorschlag driveshaft before I can work on getting the engine buttoned up (wiring, cooling, etc.)
Little by little, it's coming along. I feel like the initial tedious part is over, the intense cleaning and scrubbing, and now I can simply bolt stuff together. But something always slows me down a bit!
Approximate Hours Invested in Project Since Purchase: 335My previous build (currently E30-less)
http://www.r3vlimited.com/board/showthread.php?t=170390
A 2016 Toyota Tacoma TRD 4x4 Offroad in Inferno is my newest obsessionComment
-
May 16th, 2021
More progress.
Went ahead and spent several hours cleaning all (4) of the brake calipers in their entirety. The pistons and their respective chambers all look great (no surprise here, no rust anywhere on this chassis or its parts), so once my rebuild kits arrive this upcoming week I will be able to slip those in and torque down the calipers. The Chase Bays BBE brake line kit arrives on Wednesday, so I will have the entire system installed (though not filled and bled until I connect the clutch feed line setup) and I can cross that off of the list.
Started with stuff that looked like this, fairly gritty/dirty with brake dust:
 M3 Work Round 6 by Michael Rickerd, on Flickr
And after about 1.5 hours per caliper I ended with things that looked about like this:
 M3 Work Round 6 by Michael Rickerd, on Flickr
The red paint still looks great, so I didn't respray any of the pieces. The brake pads are also full of life so I will leave them be for now.
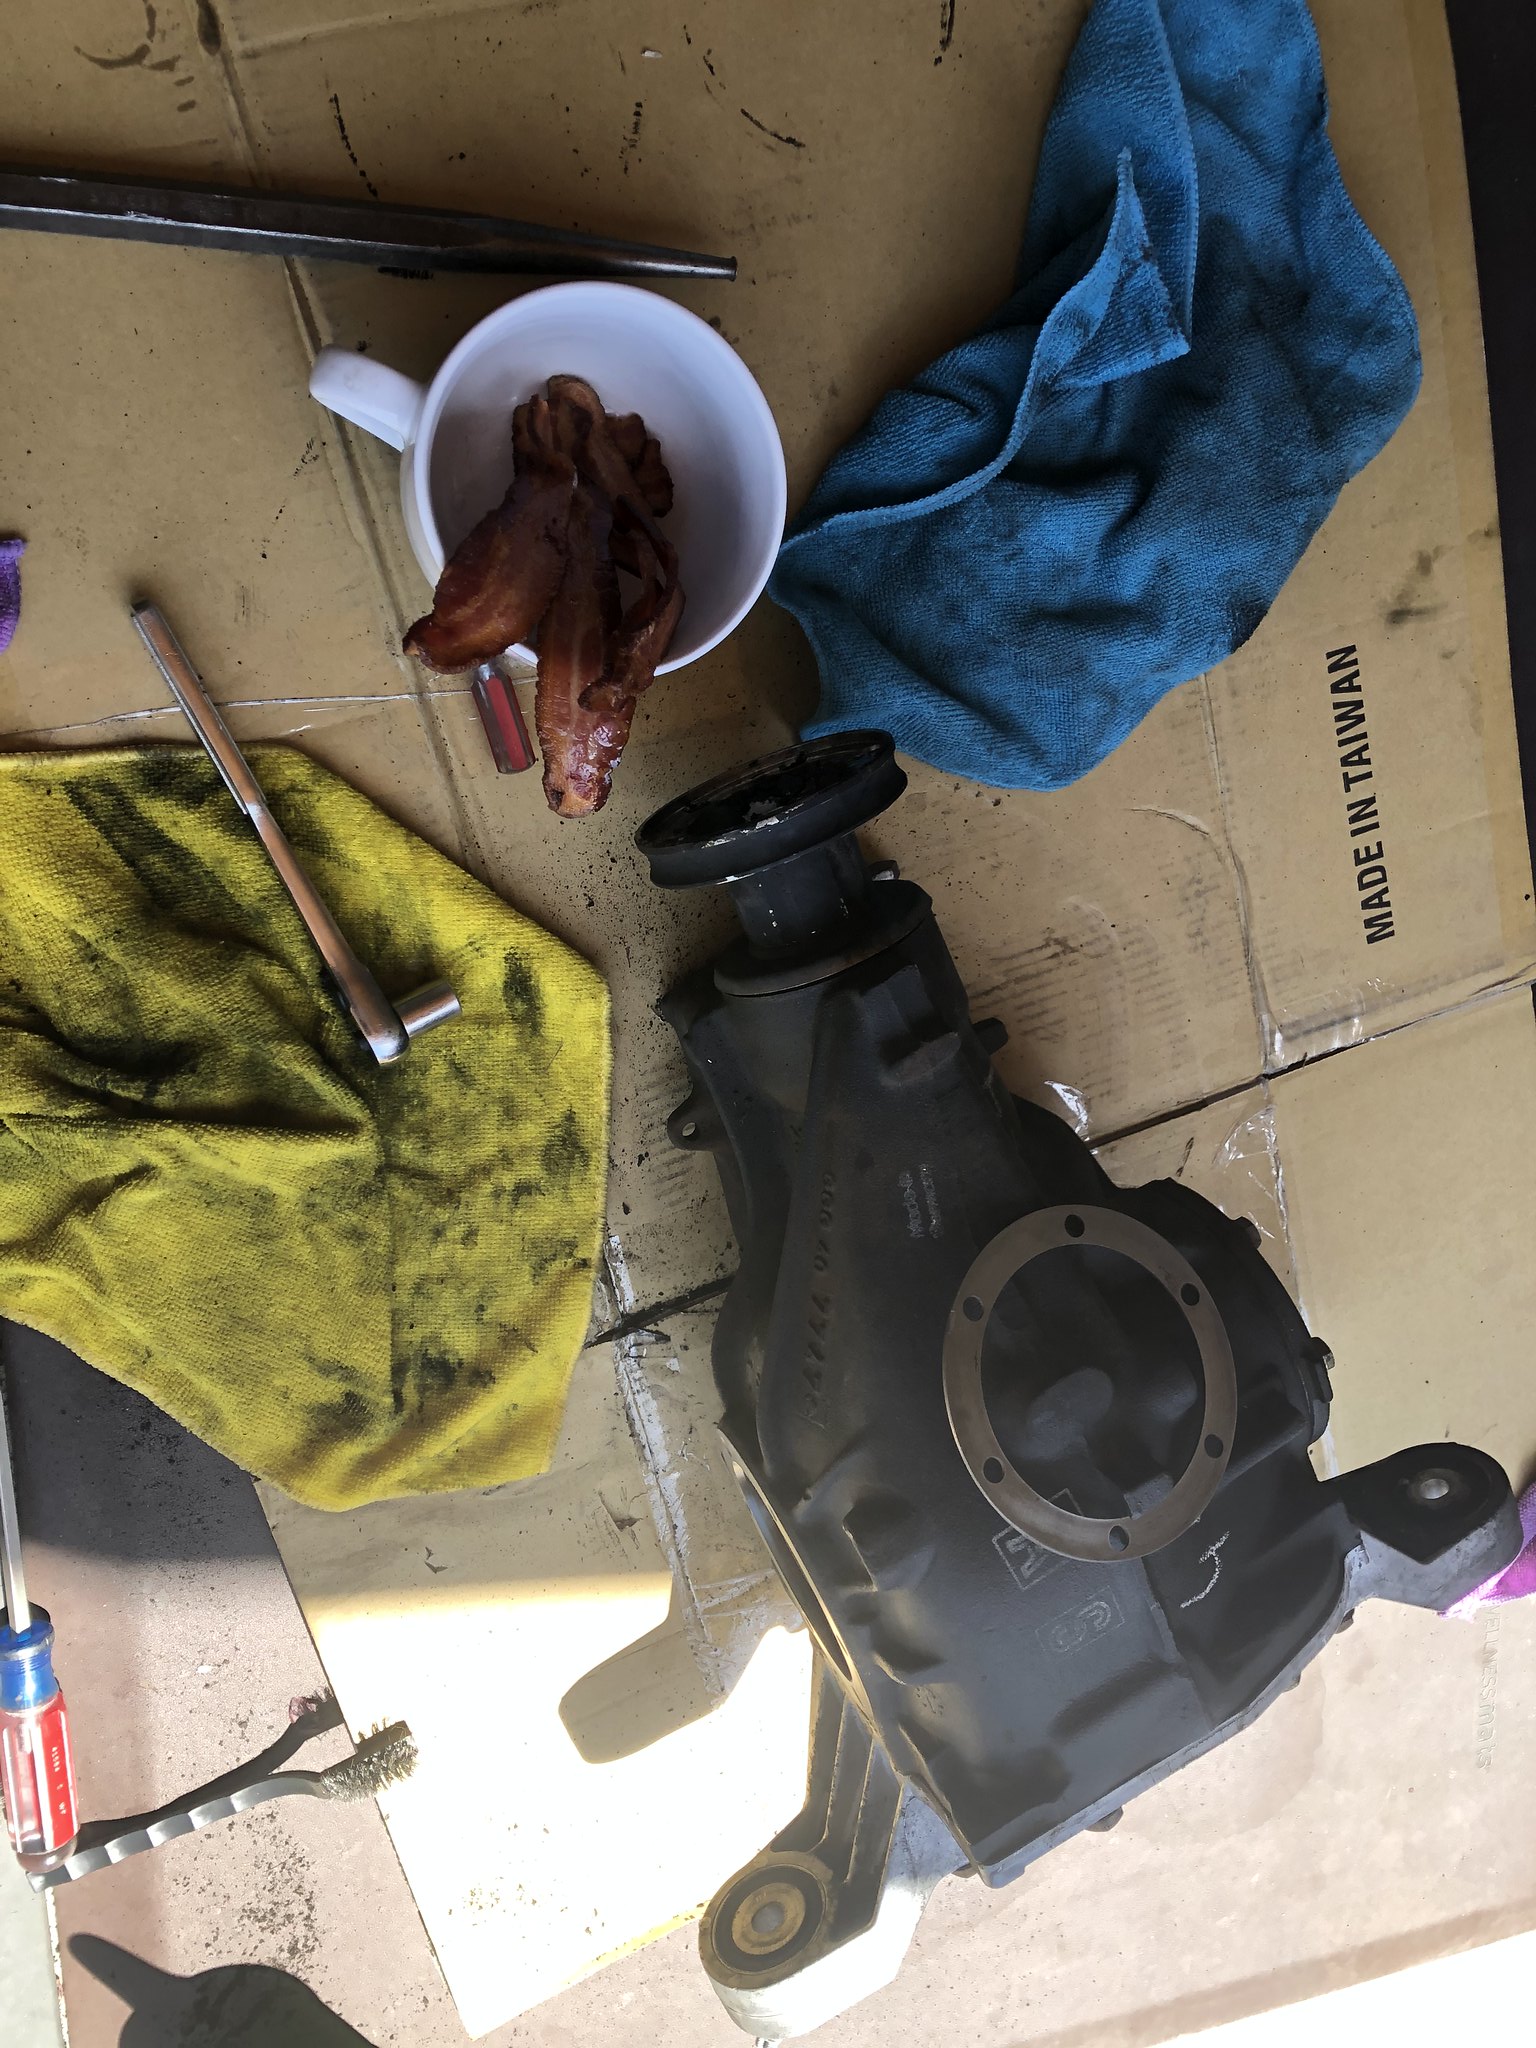
Next up was to fully refresh the rear diff. This included new output flange seals and circlips, new input flange (from 6 bolt to 4 bolt to use the Vorschlag 1-piece driveshaft), new cover gasket and Redline fluid, and of course as thorough of a cleaning as I could give it with a pressure washer, simple green, and a gallon of goof off.
The insides looked gorgeous as well. No issues spinning before or after all of the work.
 M3 Work Round 6 by Michael Rickerd, on Flickr
Wife brought out some garage bacon. Was delicious.
 M3 Work Round 6 by Michael Rickerd, on Flickr
I ended the day by installing the new plugs with the O-rings, as opposed to the crush washers, torqueing down all of the flange and cover bolts to spec (found some conflicting info here, went with 30 ft*lb on the cover, also added a small amount of gasket maker to paper gasket per numerous recommendations online) and filling her up.
Left it in the garage overnight, no leaks (I know that isn't a long time, but the car won't be moving for quite a while still so I'll keep an eye on it) so this morning I am going to install it into the final drive carrier and get this big chunk of metal off of my list too!
I'll go about reinstalling small rear end components (covers, nuts/bolts, etc.) and then I'll reinstall the rear bumper for now. Pulled it to prep it for paint, but my plans have changed a bit so I will handle the exterior body after the car is drivable under its own power.
I need to put in an order at Vorschlag for engine and tranny mounts and then get the engine (minus heads) over to my local machine shop for some work.
Not sure how long that process will take, but after that it'll get dropped in and we entire the final phase!
Approximate Hours Invested in Project Since Purchase: 353My previous build (currently E30-less)
http://www.r3vlimited.com/board/showthread.php?t=170390
A 2016 Toyota Tacoma TRD 4x4 Offroad in Inferno is my newest obsessionComment
-
May 20th, 2021
The rear diff went in without issue, and I torqued the rear bolts down to their values and the front bolt to its torque value. Plugged in the speed sender and clipped its wire into the small bracket. Still no leaks, so the final drive is complete!
A small group of parts I arrived, the most notable is the Chase Bays BBE brake line kit and proportioning valve.
 M3 Work Round 7 by Michael Rickerd, on Flickr
The caliper rebuild kits were in that pile, so I got to work getting all 4 calipers reassembled after their deep cleaning. Figured out the strategy for getting the seal on the piston and into the caliper, which saved some frustration.
With those replaced, in they went, torqued down to 50 ft*lbs. I ran the brake wear sensor to its connector on the subframe, but I have removed the ABS wiring. I cut the wiring at the sensor and attached it into its respective hole so that debris doesn't fall in. I'll do the same to the front.
The rear end is looking better every day! (Shock is getting replaced as it is blown, but this old one keeps things in place for now)
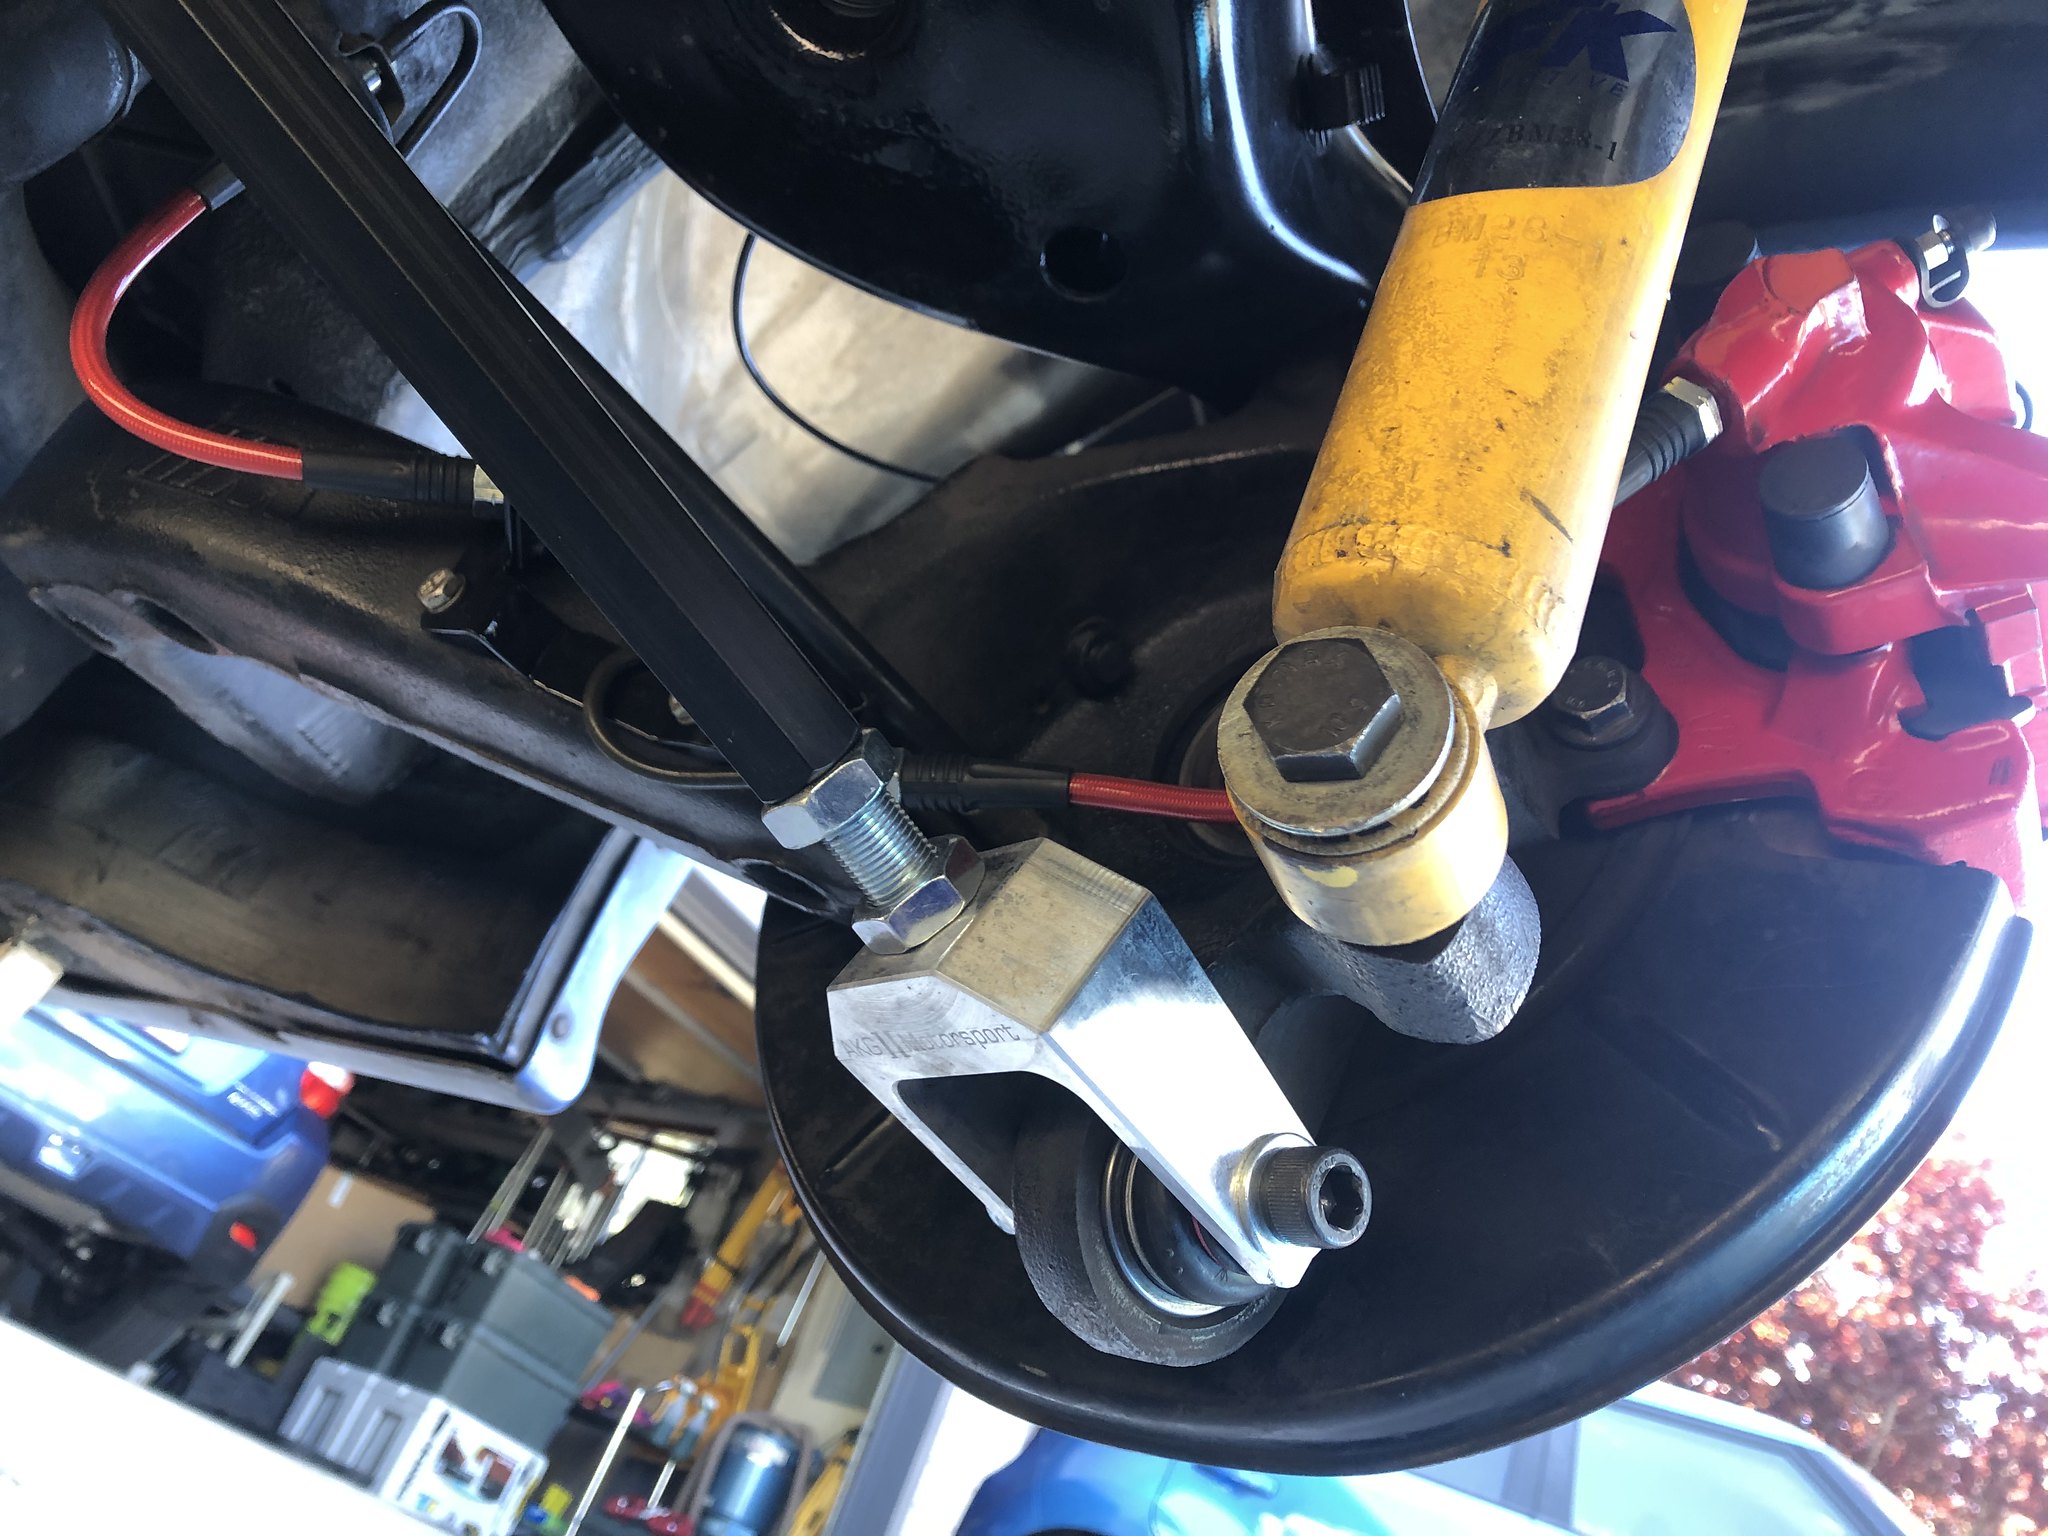 M3 Work Round 7 by Michael Rickerd, on Flickr
 M3 Work Round 7 by Michael Rickerd, on Flickr
The rear swaybar also went in, with new end links and everything completely clean. Had the bar backwards the first time, and the small nibs on the mounting bracket didn't quite line up with the upper control arm. Got it spun around and all is well.
I spent more time cleaning random parts (they are truly never ending), disassembling the fuel system (pulled everything except for the pumps for now), figured out how to best mount the C5 Corvette Filter and FPR using the OEM BMW mount, and cut and flared the fuel line that was too long for this set up with my new flaring set.
I blasted more of the undercarriage and the engine bay with the foam cannon and pressure washer. Trans tunnel is fully cleaned as well. All that is left is the front wheel wells, which I will get to once I put the rear end back on the ground.
I wrapped up the day by figuring out and installing my AN lines for my brake lines. This kit keeps the two factory hard lines to the rear and ties them into the system with an 'F' fitting. Two new AN lines run to the front calipers. The set up includes a proportioning valve with an easy to use handle. All in all a nice way to get this system set up.
 M3 Work Round 7 by Michael Rickerd, on Flickr
Also called Vorschlag to get their lead time on E36 LS1 engine and T56 transmission mounts. 2 weeks. So I dropped a nice chunk of change on a few chunks of metal, which will arrive sooner than I need them, but it's nice to get the purchase out of the way.
My kitchen remodel is almost done, so I can focus more time on the M3 and life in general (haha, hopefully) in the near future. Except I will then have to tear out the old kitchen and turn it into a living room. And then lift the roof off of my garage to add two bedrooms upstairs. And then build a front deck......... Yeah, maybe extra time isn't a reality.
Approximate Hours Invested in Project Since Purchase: 370My previous build (currently E30-less)
http://www.r3vlimited.com/board/showthread.php?t=170390
A 2016 Toyota Tacoma TRD 4x4 Offroad in Inferno is my newest obsessionComment
-
You could always live in the back of the Tacoma and ignore the house altogether...Simon
Current Cars:
-1966 Lotus Elan
-1986 German Car
-2006 Volkswagen Jetta TDI

Make R3V Great Again -2020Comment
-
My previous build (currently E30-less)
http://www.r3vlimited.com/board/showthread.php?t=170390
A 2016 Toyota Tacoma TRD 4x4 Offroad in Inferno is my newest obsessionComment
-
Nice progress thus far! Looks extremely clean under the dirt. I had a shop press in all the rear bushings and ball joints. They even said with their kits it was a bit of a pita. I like the chase bays setup, keep us updated!Comment

Comment