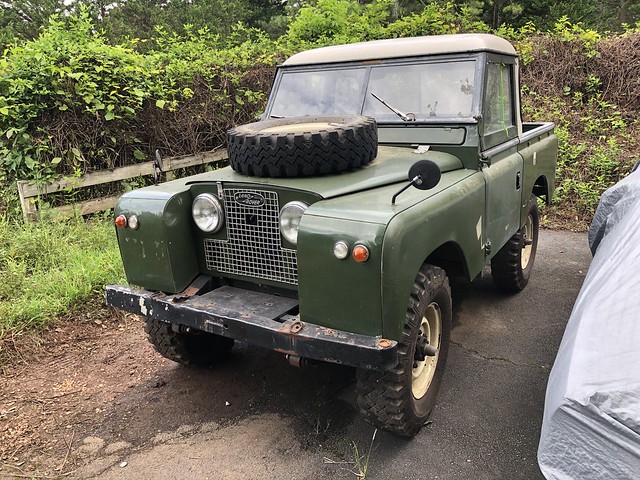
Announcement

Collapse
No announcement yet.

OFFICIAL Land Rover thread.

Collapse
X
 
  • Filter
  • Time
  • Show
Clear All
new posts

  • LateFan
    replied
    Turned out pretty easy. Generic DeWalt rental sawzall, with my Diablo carbide tipped blade.

    We only had it high enough to take off the wheel, and then collapsed the suspension, so we couldn't raise it higher safely. That meant we couldn't hold the saw horizontally and get at the bushing and push down. I had to be on my back with my left forearm pushing up on the blade and my right middle finder hooked in the trigger upside down.

    Zip zip, went right through.

    I didn't want to bugger up the welded and machined bosses on his control arms, so I pushed the blade tight to the strut and cut all the way through the steel bushing and bolt together. Took the paint off the blade, but no discernible wear on the teeth.

    Control arm looking straight up. Forward is up in the pic. CV boot not far away, so careful with heat.

    Click image for larger version

Name:	under strut.JPG
Views:	219
Size:	49.3 KB
ID:	9906302

    Forward side of bushing much narrower.
    Click image for larger version

Name:	strut forward.JPG
Views:	202
Size:	38.5 KB
ID:	9906303

    Bolt head recessed in arm.
    Click image for larger version

Name:	bolt head.JPG
Views:	204
Size:	46.3 KB
ID:	9906304

    Nice tidy mushroom.
    Click image for larger version

Name:	mushroom.JPG
Views:	201
Size:	36.5 KB
ID:	9906305

    That's a rust drip of PB after days of soaking. No movement at all.
    Click image for larger version

Name:	strut bushing.JPG
Views:	201
Size:	64.5 KB
ID:	9906306

    Leave a comment:


  • mrsleeve
    replied
    good deal that makes its much easier, and less of a PIA.

    post up what you did to get freed up, I am always intrested on how people solve stuff like this to file away for future use if need be

    Leave a comment:


  • LateFan
    replied
    Not trying to save it. New bolt and nut on the way.

    Leave a comment:


  • mrsleeve
    replied
    Also can you get a new bolt relatively easily it may be worth cutting mashing and buggering up a 10 dollar bolt to get it out with less frustration than trying to keep it serviceable, as you have heat treated it and likely removed some or all of its spec'd strength as a critical suspension component fastener

    Leave a comment:


  • mrsleeve
    replied
    Ahhh gotcha, on the bolt type, I know just what you are talking about. The press will work once the inner bushing sleeve gets bound up against the inner edge of the control arms smaller hole. You may have to break the system down and reheat once you get it lose from the rubber part and then continue on with the press, A traditional C-Clamp will not generate the needed force, that C- Style press should capable of 10-12+ tons of clamping force if you push your luck with a 2 foot breaker bar applying the torque, that would be dangerous though and I highly doubt it would take that much to get it to budge with a liberal enough application of the heat. You could also try to get the bolt good and hot then rapid quenching the bolt shaft while under tension from the press (or big C clamp if thats all you have access to, with the sleeve of the bushing pushed up against the inside of the control arm. The rapid contraction associated with the cooling of the bolt shaft and even moderate tension might get to dis bond as well. You might have to get a bit more heat on the situation than propane can generate, Mapp gas is a good home gamers alternative to an oxy fuel rig, but that might be what it takes to get things up to the temps needed fast enough before you heat soak everything else as well.

    As to hammer on hammer, it transfers the force of the hammer blow, but dampens the sudden impact forces that is the main cause of the deformation of what ever your whacking, as the hammer in the middle takes the impact force and just transfers it to the stuck bolt. Think about the balls on string when you pull one back and let it go, and hits the other 5 and the one on the other end is the only one, that moves, same idea. Wear some impact rated glasses when whacking hardened steel together its dangerous as it can fragment, do you have 4lb brass mallet? My 1st go to for anything like this is my 4lb brass mallet

    Leave a comment:


  • LateFan
    replied
    Propane.

    Bolt head changing color.

    Both sides of bushing smoking. Just trying to expand and contract the bolt so it'll suck in some PB.

    Doesn't do you any good to get the bushing out - the steel sleeve won't come through the control arm. The bolt ø is exactly the control arm hole size for alignment accuracy.

    Threads are not ruined. There is about an inch and a half of necked-down bolt end much smaller than the threads. Hex shape. I can sacrifice that end. Even just started on loose, the nut is over an inch back from the end - you can't hammer on it. I read about hammer on hammer technique - not sure why that has any effect unless you can't hit a bolt square.

    I've seen c clamp solutions - it doesn't feel like anything would be able to "push" it apart. I just saw a video of a LR shop where they couldn't get these same size bolts out of the control arm bushings with air hammers or anything. They cut the legs of the control arm off (1/4" steel) with a disk cutter so they could get the cutter wheel on the bolt and cut it.

    Leave a comment:


  • mrsleeve
    replied
    Define torched? Like a propane or mapp gas, or do you have a oxy fuel rig? Mapp might get it hot enough to get the rubber bushing to weaken enough to allow you drive it out with a hammer.


    Since it sounds like you have destroyed the end of the bolt with a hammer ( when whacking a bolt with a hammer more than a couple times leave the nut on it threaded to just flush so it protects the threads). from the control arm photo, is there a bit of a lip on the bottom side of the control arm like there is on the top? If so cut the mashed up end of the bolt off as square as you can, go rent a the biggest bushing press you can find (looks like a really beefed up C-Clamp) POUR THE HEAT TO IT get it red if you can, then use the press to get the bolt shank started moving, (since the head side of the bolt is in a recess on the other side it should be enough to get broke lose) and then you should be able to drive it the rest of the way out with a big ass drift punch.

    Bushing press for reference

    Leave a comment:


  • LateFan
    replied
    We narrowed down a leak in the RF strut bellows, so we decided to change it out. Pretty simple - 3 top strut nuts, an air fitting, and a big bolt through the lower control arm. Well, this bolt is apparently famous for not coming out. Smooth bolt through a smooth steel sleeve in the bushing, down in the weather and slop, and they bond together. Why would you assemble this thing without a bunch of anti-seize or something?

    It's 9" x 5/8 or 3/4 ø. 24mm nut, 21mm bolt head. We buzzed the nut off with an impact. The bolt will not budge. It will turn over 90 degrees with a breaker bar and a pipe, but all you're doing is twisting the rubber bushing. It's not moving out of that sleeve. We've impact gunned, sledge hammered (mushroomed the end of the bolt), breaker barred, torched, PB Blasted, let it sit....nothing.

    Click image for larger version  Name:	IMG_5253.JPG Views:	0 Size:	50.2 KB ID:	9905550
    Click image for larger version  Name:	IMG_5254.JPG Views:	0 Size:	47.4 KB ID:	9905551
    Click image for larger version  Name:	IMG_5255.JPG Views:	0 Size:	33.3 KB ID:	9905552

    The steel sleeve - when this goes back together, that will be buttered with anti-seize!
    Click image for larger version  Name:	IMG_5256.JPG Views:	0 Size:	73.8 KB ID:	9905553

    I went and got these. I think a sawzall from underneath the control arm, and these blades, and we just cut the bolt on both sides of the strut. We ordered a new bolt and nut.
    Click image for larger version  Name:	IMG_5263.JPG Views:	0 Size:	66.9 KB ID:	9905554

    Leave a comment:


  • LateFan
    replied
    The LR3. My son and I replaced front and center air distribution blocks, as well as the dryer on the pump. It's a desiccant system, and it eventually turns to a fine powder like flour and gets down the hoses and clogs the valves. There's a company that makes an updated aluminum-cased one as the OE piece has a plastic top that cracks.

    Click image for larger version

Name:	LR3 1.JPG
Views:	261
Size:	68.5 KB
ID:	9905540

    Click image for larger version

Name:	LR3 4.JPG
Views:	245
Size:	63.9 KB
ID:	9905541

    Leave a comment:


  • LateFan
    replied
    More info leaked -

    Project Code L663
    Coil springs.....with air suspension optional. Air susp will be more capable.
    Temperature monitors in the adaptive dampers.
    Electronic locking diffs.
    Heavy reinforced subframes, control arms, ball joints, bushings.
    18" wheel standard, with options to 22". AT and mud terrain available.
    There appears to be a steel-wheeled base spec version available.
    Heavy testing into chassis stiffness, speaks and rattles.


    "Land Rover’s Andy Deeks, product engineering team leader for durability and reliability -

    "...we elected to use the same aluminium model platform as the other bigger Land Rover models use. It’s called ‘D7U’. The platform has been through a programme of wide-ranging design and engineering overhaul – but it’s a monocoque. It’s relatively light and very stiff, and those are attributes we need. But there’s no ladder frame here, and we don’t have rigid axles.”

    "Deeks explains, “there are reinforced suspension subframes, as well as new stronger suspension arms, ball joints and bushes. We’ve got bigger wheel arches, more suspension travel, more wheel articulation and more ground clearance than on any other Land Rover. This car was designed to exceed the usual Land Rover capability targets that our other models are engineered up to. And it has been engineered for better durability and reliability than any car that Land Rover has ever made.” "

    “We know what reputation our cars have, and what some people will expect and say about the Defender,” he says. “This is a much more complicated car than the old one, that’s true. Engineering in the durability, the capability and the lightness we wanted would have been easier with less complexity. But nobody said this would be an easy car to make.”

    “It’s not a car of the same simplicity as the original, granted. It has its own character. But it’s easily tough and capable enough to be worthy of the name: more than, in both cases. The old Defender was a car that was durable because it simply wasn’t comfortable enough to drive it quickly off-road. This new one absolutely is – and trust me, it can take whatever punishment you’re prepared to ask of it.”


    Click image for larger version

Name:	Entry-spec-2020-Land-Rover-Defender-spied-news.jpg
Views:	312
Size:	79.3 KB
ID:	9860996
    Click image for larger version

Name:	Entry-spec-2020-Land-Rover-Defender-spied-rear.jpg
Views:	294
Size:	48.5 KB
ID:	9860997

    Click image for larger version

Name:	2020-land-rover-defender-testing-with-red-cross-experts.jpg
Views:	277
Size:	80.6 KB
ID:	9860998

    Click image for larger version

Name:	2020-land-rover-sand.jpg
Views:	280
Size:	70.8 KB
ID:	9860999

    Leave a comment:


  • LateFan
    replied
    Saw some more leaked info on Defender -

    The three variants will be:

    "• The three-door Defender 90. This will have five- and six-seat versions and will grow in length to 170 inches from less than 158 inches in the previous generation.

    • The five-door Defender 110. This will have five-, six- and seven-seat versions. It will increase in length to 187 inches.

    • The Defender 130. This variant will be a five-door, eight-seat passenger vehicle that is 201 inches. Previously, the Defender 130 was sold only as a double-cab pickup."


    The actual wheelbase is interesting -
    A D90 has a 102" wheelbase (the old one wasn't 90" either)
    A D110 has a 119" wheelbase.

    The 130 is the same wheelbase as the 110, with just a big overhang to hold more people. Don't know if they'll build that 4 door truck version.

    Engines:

    "Under the bonnet of the 90 and 110 models, there will be a choice of three petrol and three diesel engines in 2020 and 2021 and all Defenders will come as standard with an autobox and all-wheel drive.

    The diesel units will be offered in D200, D240 (four cylinder) and D300 300bhp (straight six) forms, with 0-62mph times of around 10.0sec, 8.3sec and 7.4sec respectively. It’s understood the D300 will be the only diesel engine offered in North American markets and arrives for the 2021 model year.

    Three petrol Defender engines - the P300, P400 and the P400e Plug-in Hybrid - will be on sale immediately. These are thought to all be straight-six units, and will be sold in the US, where many states adhere to the same strict ‘SULEV’ pollution regime as California. According to the leak, the plug-in P400 offers a torque boost from 400Nm to 645Nm and a 5.9sec 0-62mph time, Autocar understands."


    The base has 18" wheels, the fancier trims come with 20".

    It looks like many trim levels - Base, S, SE, HSE, and "X"...(?)

    The D90 is 170" long and 78 3/4" wide. Is that the body or mirrors?
    75 7/8" high - but that's going to depend on the spring settings I assume.

    Official intro at Frankfurt Motor Show in September.

    Leave a comment:


  • LateFan
    replied
    Tongue load doesn't seem to be affecting the rear height - self-leveling I assume. I guess they could have balanced the teeter totter trailer so it has no tongue weight, but they showed it driving around.

    [ATTACH]127967[/ATTACH]

    I see the updated Explorer is bragging about 12" of water fording...
    [ATTACH]127968[/ATTACH]


    Testing locations
    [ATTACH]127969[/ATTACH]


    These are from earlier - rear suspension shots. Beefy lower control arms, steel subframe, diff protected, sway bar tucked up above, exhaust tucked up pretty well..
    [ATTACH]127970[/ATTACH]

    [ATTACH]127971[/ATTACH]
    Last edited by LateFan; 06-24-2019, 12:11 PM.

    Leave a comment:


  • LateFan
    replied
    This one has a snorkel on the left windshield post.

    There's still some fake padding under the wrap.
    [ATTACH]127962[/ATTACH]

    [ATTACH]127963[/ATTACH]

    [ATTACH]127964[/ATTACH]

    Good approach and departure angles
    [ATTACH]127965[/ATTACH]

    Round headlights with center LEDs
    [ATTACH]127966[/ATTACH]

    Leave a comment:


  • LateFan
    replied
    Seems to be working today.....

    Defender testing in Africa. This outfit tracks and tags lions for wildlife research, so they have to go where the lions go, not the roads. It's right out of Mutual of Omaha's Wild Kingdom! They were always chasing some beast while hanging out of an old Land Rover.

    Click image for larger version

Name:	Wild Kingdom.jpg
Views:	1
Size:	60.2 KB
ID:	7201780

    Click image for larger version

Name:	Wild Kingdom LR.jpg
Views:	1
Size:	44.4 KB
ID:	7201781

    Click image for larger version

Name:	2020 defender-testingkenya elephant.jpg
Views:	1
Size:	83.9 KB
ID:	7201782

    Click image for larger version

Name:	2020-defender-testing-in-kenya lion.jpg
Views:	1
Size:	80.2 KB
ID:	7201783

    Click image for larger version

Name:	2020-land-rover-defender-testing-in-kenya tag.jpg
Views:	1
Size:	74.9 KB
ID:	7201784

    Leave a comment:


  • LateFan
    replied
    test test.....site won't let me post pics....? Been doing that a couple of weeks now.

    Leave a comment:

Working...
X