
I looked up the part number with BMW. Says it ended after the part number, so what do I use?
Edit: I stopped being a lazy ass and actually read some of this thread like I should of in first place. Found a couple solutions.
-
-
Looked up the part number for the bushing. Says its (ended)
So what can I use in its place??Leave a comment:
-
Do you have to have the spacers I between the frame and the power steering rack? I'm about to do this swap and need to know.Leave a comment:
-
-
-
Turns out there was a wee tiny area of the knuckle that was making contact with the yoke. Dremeled it for a wee bit more clearance.
Then the other day I was driving and realized it was pulling both L&R, depending on where I drove and the crown of the road. That's got to be something caused by the alignment. Taking it back to the shop on Thurs, will be eager to get this straightened out.
LOL, "straightened out"! get it? I crack myself up. ;DLeave a comment:
-
-
Does anyone know the dimensions (most importantly the length, ill figure out the id) of the spacers, the single one that needs to be cut and the 2 for the sub frame to the rack?Leave a comment:
-
By centered, I meant that the tie rods are the same length, so we're saying the same thing. I was wondering if there were markings on the rack somewhere that lined up so you could tell exactly instead of trying to measure the tie rods, which isn't easy to get an exact measurement with the rubber boots and such.
Spoke with a tech friend last night and he says I may have a bad reman'd rack from Rack Doctor.
Hoping that's not the case. Going out to the garage now to do some investigating.Leave a comment:
-
I think it's more important that your me tierods are the same length on each side and as close to the length of the old ones as possible. Beyond that i don't think it matters where the rack itself sits relative to its housing when installing.
You typically have to reposition the steering wheel anyway but I don't see how "centering" or not can effect alignment.Leave a comment:
-
So I finished the rack swap and ground down the knuckle from binding, then had it aligned. It pulls to the right pretty darn bad. The guy who aligned it asked if I centered the rack before install. The rack was rebuilt by Rack Doctor (reg E36 with new inner and outer tie rods) and looked to be centered when I got it. I measured the length of the old rack and used that length when installed the new rack.
Would it be possible that off-center rack would cause it to pull to one side? Aligned to E30 M3 spec of 0"-1/16" total toe.Leave a comment:
-
Hey everyone,
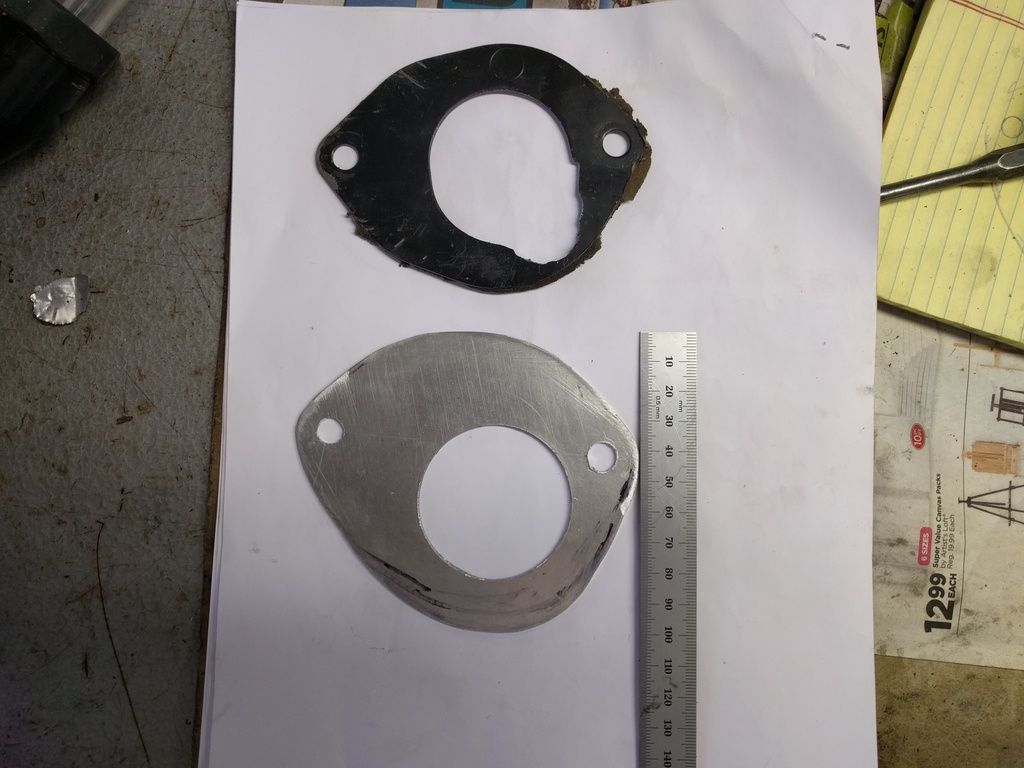
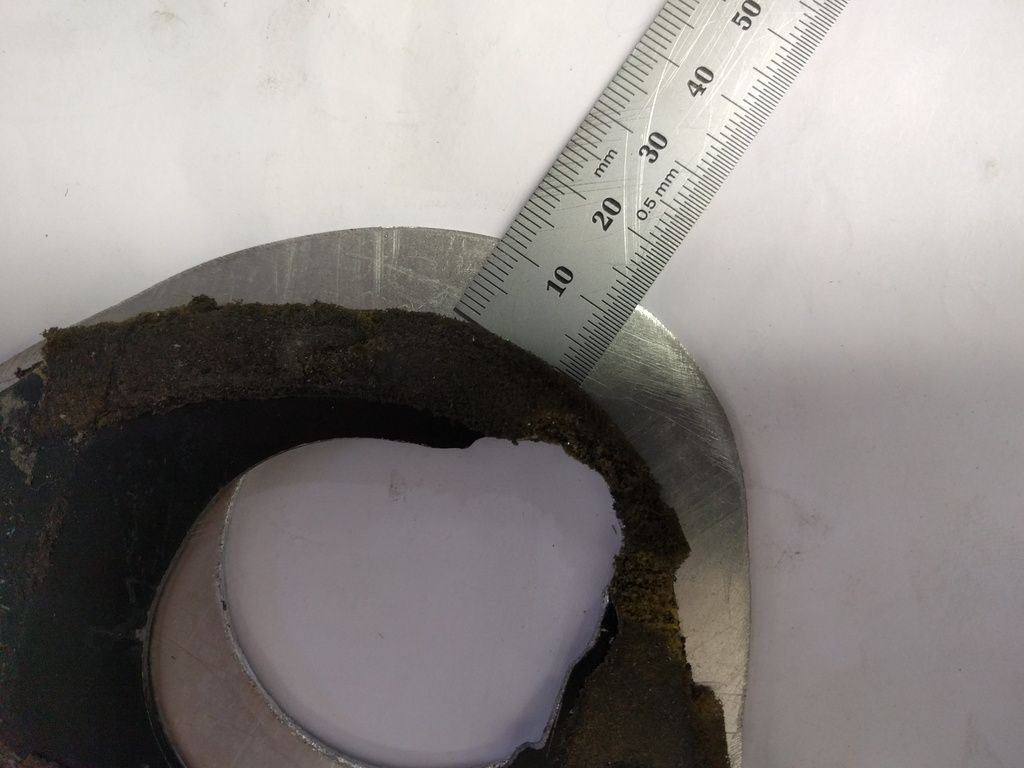
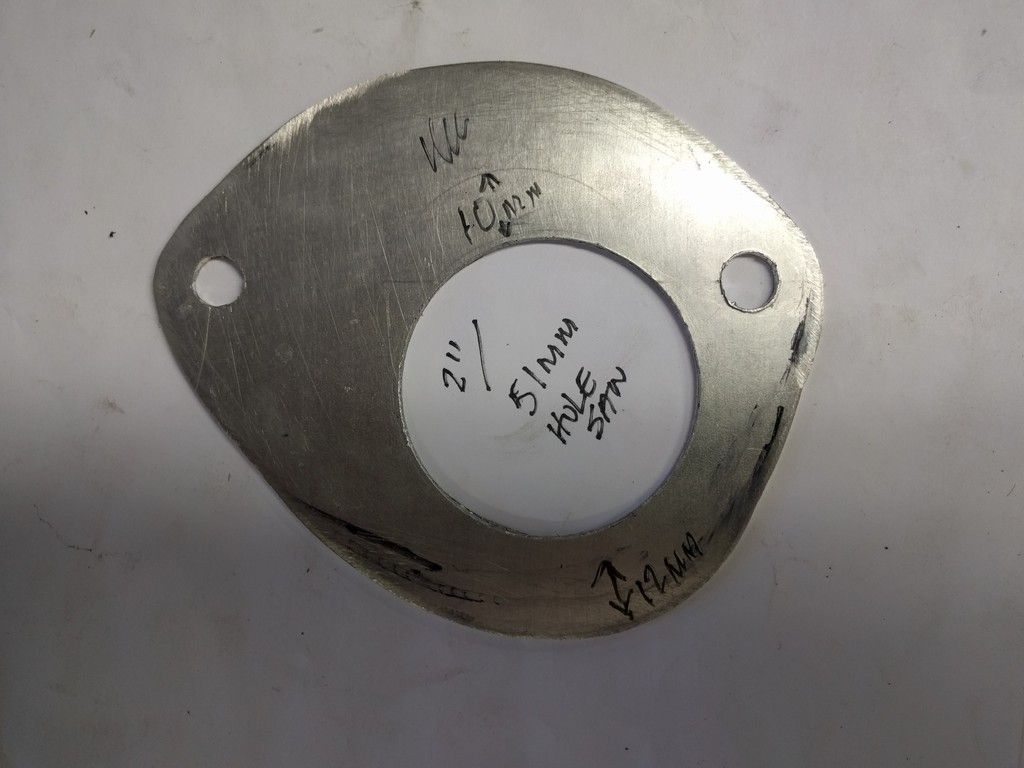
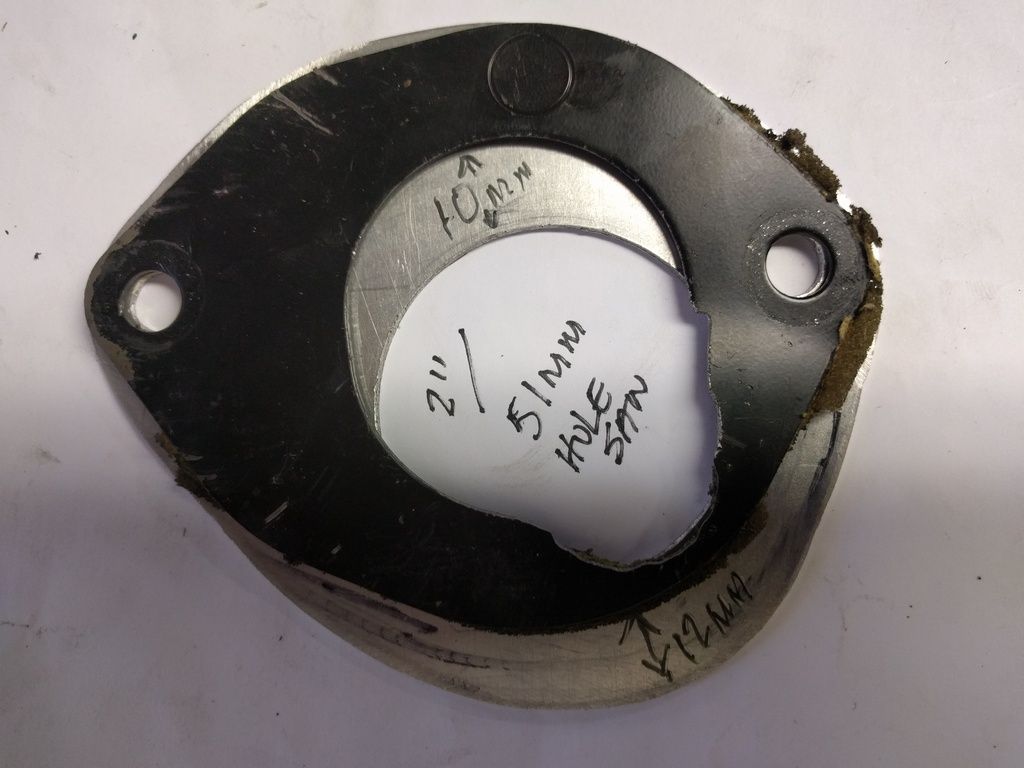
I've been working on an e36 rack swap for my 91' 318 with an airbag steering shaft. In order to get everything to work properly, I had to trim a bit of the firewall like most people. Modifying the firewall plate is a must if you keep the rack positioned with spacers on top (24v swap w/ e34 pan is too close & doesn't have enough room for any other positioning). Boring out the stock plate can work in some cases, but the boot gets a bit stretched with the enlarged opening, and the stock plate isn't left with much meat on one side for my liking. This is what led to making a new plate.
To help others down the line, here's some rough dimensions of the new plate that my friends were kind enough to help make. Each car is different, but a new plate allows you to keep the stock boot functioning/sealing properly. Essentially the opening is moved 10-15mm down and to the right (while looking from the driver's footwell). The new plate is a little longer on the bottom so it covers the enlarged firewall opening. I did have to put some grease in the boot/shaft area since the shaft would rub on one side of the rubber, creating an annoying squeaking noise. Otherwise it works well. Add a lick of paint and nobody will even know it's there!
-Joey
 Last edited by mtech325; 07-04-2016, 09:28 PM.
Leave a comment:
-
I was actually going to buy a slide hammer, but I found an 18" long chisel that had a wider edge and since it extended down far enough below the
car I could get a good whack on it with the small sledge. Just needed to spread that crack open a bit more...;DLeave a comment:


Leave a comment: