
How To Guide - E36 Steering Rack Swap
On an airbag car, is it possible to install the steering joint upside down? I'm curious if this would move the shaft enough to avoid cutting the firewall.
[update] should be obvious to anyone who has done this swap - splines are a different size on each side
-
We just did the swap. Standard E36 rack from Rack Doctor. HIGHLY recommend these people. Nice to work with.
We did the tab bend method, even though I hated to do that - just seemed like it would be way more time and complication to lift the engine. You just have to bend them back carefully so that your mounting holes line up.
Used the Dungeon Motorsports spacer kits. Spacers on TOP of the rack.
Steering coupler kit was nice, although we had to enlarge the holes just a hair for the bolt size. That odd clunk we always had in the steering was I think a broken fitting in the coupler recall kit that was on our car. Noise is gone.
We thought we had cleaned up / enlarged the coupler U-joints enough, but ended up hand filing with a rat tail file to make clearance. A Dremel wouldn't fit due to AUTOMATIC TRANSMISSION plumbing...I know...
It's the upper U-joint at the brake booster that mostly needs the attention so it doesn't bind. (We have a non-airbag '86)
We put the high pressure line with the 180 metal bend at the pump - works fine without bending it, although it is up against the lower radiator hose. Don't know if that's an issue.
Installed new E36 tie rod ends from Rack Doctor. Totally eyeballed it before we ran it over to the alignment shop......10 degrees off, oops.
Steering is so much better - tight and quicker, solid. A giant improvement.
Thanks for the guide and advice, OP and all.Leave a comment:
-
Aside from vorschlag, which is the same price as OE, does anyone know of an alternative for purchasing an early model steering shaft (non-air bag)? Started doing this swap and found that my u-joints are practically seized. Don't want to drop $300 on this part and I don't have fabrication toolsLeave a comment:
-
Thanks for the original writeup! I'm a diehard 02 guy that also has an 88vert, bought a rebuilt rack from Ebay and completed the swap in 5 hours by myself from wheels up to wheels down and a string alignment. Wayyyyy easier than I thought it was going to be.Leave a comment:
-
The
Looks like your getting close!
You could gently bent then HP line away from the knuckle to create the space you need
Mine was an 84 325e with early e OE hoses e36 rack swap.
I just had to flip the HP hose over (one connected to rack in your picture ) and reinstall banjo bolt from the opposite side. Then flip the pump side to match. It moves the steel line closer to the steering knuckle but allowed me ~1" clearance. The hard line won't flex once the hose is lined and snugged up.
Might be worth a try before bending. Not sure if the early/late e30's had different HP P/S hoses. If flipping it doesn't help I would look in to an early e HP hose if your ordering one anyways, it bolts right up.
Hope this helps!Leave a comment:
-
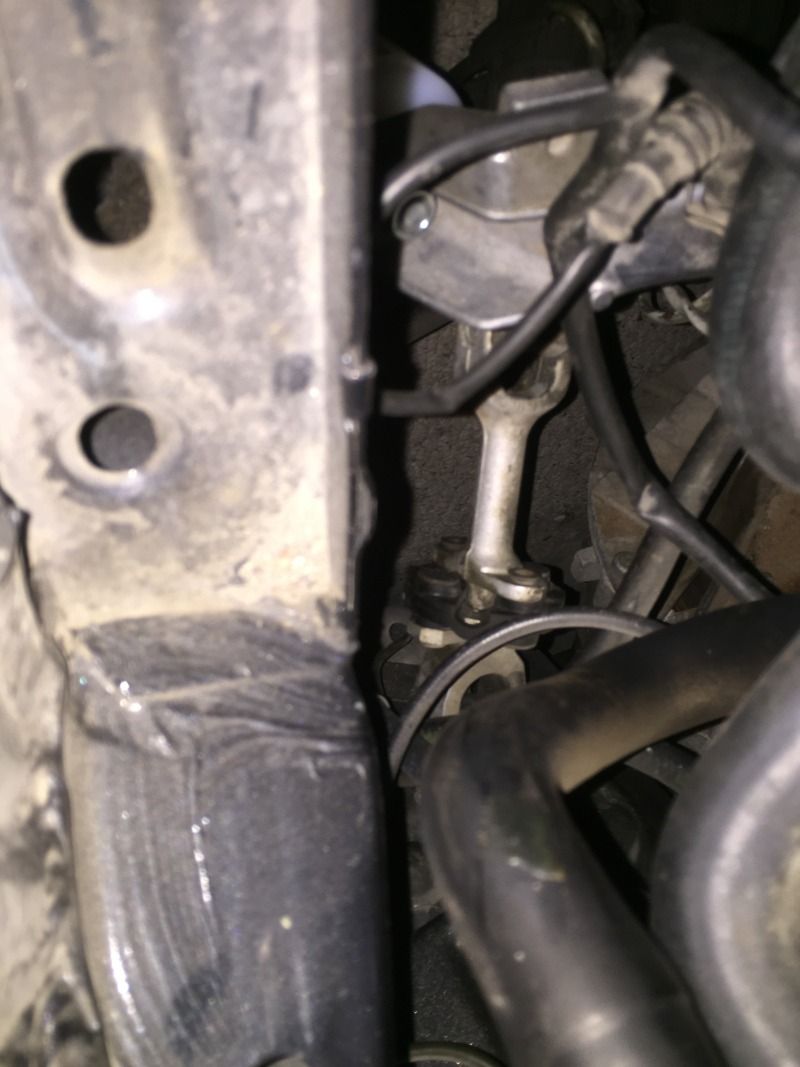
Okay guys, I'm trying to figure out how the PS lines go. I don't have the engine in, figured it would be easier to do it now rather than later, so I just have it mocked up. I ended up reusing one of the LP lines (will put a new hose on it later) since the fitting didn't have the same bend in it, and it was easier to run it to the reservoir. The HP line is also running really close to the steering knuckle. I've read that this bend needs to be opened up a bit, but the way I have it run, it looks like that would actually make the problem worse, maybe it's going the wrong way? Here's some pics, tell me what you think.
Edit: I'm thinking I'm gonna flip around the HP hose and see if that works out better.
Edit 2: I don't see how that's going to work.

 Last edited by rturbo 930; 07-11-2015, 12:59 PM.
Leave a comment:
-
-
I test fit with a few washers on mine. Once everything was lined up and installed, I removed the bolts and washers and measured the stack of washers to get the size needed. I think it was around 1/4in or so for me.Leave a comment:
-
Since I'm doing this on a euro shaft connection, I don't know what size of spacers I need. Does anyone have an out to out dimension for the steering joint? Like what the total length is when complete?Leave a comment:
-
If im not mistaken i have the same steering joint on my euro 89 316i (non airbag). It fits fine if u remove the rubber bushing, rotate the halves 90° to line up the holes and use a couple bolts, nuts and spacers to get the correct length required.Leave a comment:
-
Regardless if your doing a swap or just replacement. I would highly recommend taking the whole steering knuckle off the car from the steering column. It is so much easier to remount the knuckle on the steering rack when the rack is out of the car. When mounting the steering rack the knuckle slips onto the steering column pretty easy. Don't forget to get a wire brush and clean the splines on all parts.Leave a comment:
-
I have a european car and this is what my steering joint looks like
I think I read that this won't work for a steering rack swap but I just want to make sure. I need to get a north american one right?Leave a comment:
-
But you will need to open up the firewall hole. Airbag is definitely more time consuming.Leave a comment:
-


Leave a comment: