
Per Rob: "Absolutely torqued. I built a checklist as I developed my order of operations to avoid just such a calamity"
+1 for Rob. No Wall of Shame for this one :-)
-
Did those oil pump bolts in the 3rd picture get tightened before the pan went back on?Leave a comment:
-
Wow, it's been 1 month and 2 days since the last post. Seems like forever. Austin is still on lock down so Rob is solo a mano replacing the oil pan gasket, again. We WILL fix this oil leak. (More on that in a minute)
Built this in the meantime. UV-C decontamination chamber.
Literature says virus killing 253 nm UV flux is 40 mJ/cm2
1J = 1W x 1 sec
G5T8 UV-C bulb output @ 1m = 26 uW/cm2
26x1e-6W/cm2 x 3600sec = 94 mJ/cm2
Distance is 1/3 of 1m so ~300 mJ/cm2 in 1h
5 bulbs in each side of the box
UVC Flux ~= 1500 mJ/cm2 in 1h
There is no kill like over kill
Note: Measured with a UV-C dosimeter and recorded 1800 mJ/cm2 per 1h exposure. Science ... Bitches! :-)
Great for zarking packages, groceries and anything else coming into the house. Virus would need 5000000 sun block to survive an hour in there.

Back to M20, Rob's on the job. We are fixing the damn oil leak.
Pan out and cleaned. Confirmed it's not warped or cracked. Block mating surface is also true.

Pan re-installed and ready for Da Goop. (aka Permatex Ultra Grey Gasket Maker)

Goop applied to block. You have to let it sit and get rubbery for a while before proceeding. Permatex says mate surfaces snug, wait 1h then torque it down.


Looks like we got a consistent bead.


Torqued in criss-cross star pattern from center of pan outwards. Letting it cure & moving on.Last edited by dvallis; 05-02-2020, 06:29 PM.Leave a comment:
-
Ah, I see what you mean. Will have to get under the hood and check where those structural ribs are.
BUT I CAN'T .... since Austin is under quarantine and the car is at Rob's shop. Sigh ......
Nice ride BTW. Looks great.Leave a comment:
-
Mine was FG/CF also. Still had bracing so it could maintain some structure.Leave a comment:
-
You can't get too far to the edge anyways because of the bracing structure. This gives you a good idea of where my old vent setup was positioned, the side vents were as far forward as they could be.
Leave a comment:
-
Wow. I totally don't remember talking about that. Gotta love the R3V community though. Think about hood vents and you get a CFD analysis the next day. :-) Thanks!
Back to the nuts & bolts of it. Check the pics above. Close to the leading edge seems kind of useless since they're nowhere near the turbo. Slightly rear of middle would pick up the turbo and some downpipe. Looks like the best compromise.Leave a comment:
-
We talked about this earlier in the thread, but you don't want to put vents that far back on the hood if you are looking to extract air. Positive pressure has built back it on the hood by about the halfway point. The back of the vent so close to the cowl is actually going to force air into the back of the engine bay. Shorter vents much closer to the leading edge of the hood are going to be more effective.
Leave a comment:
-
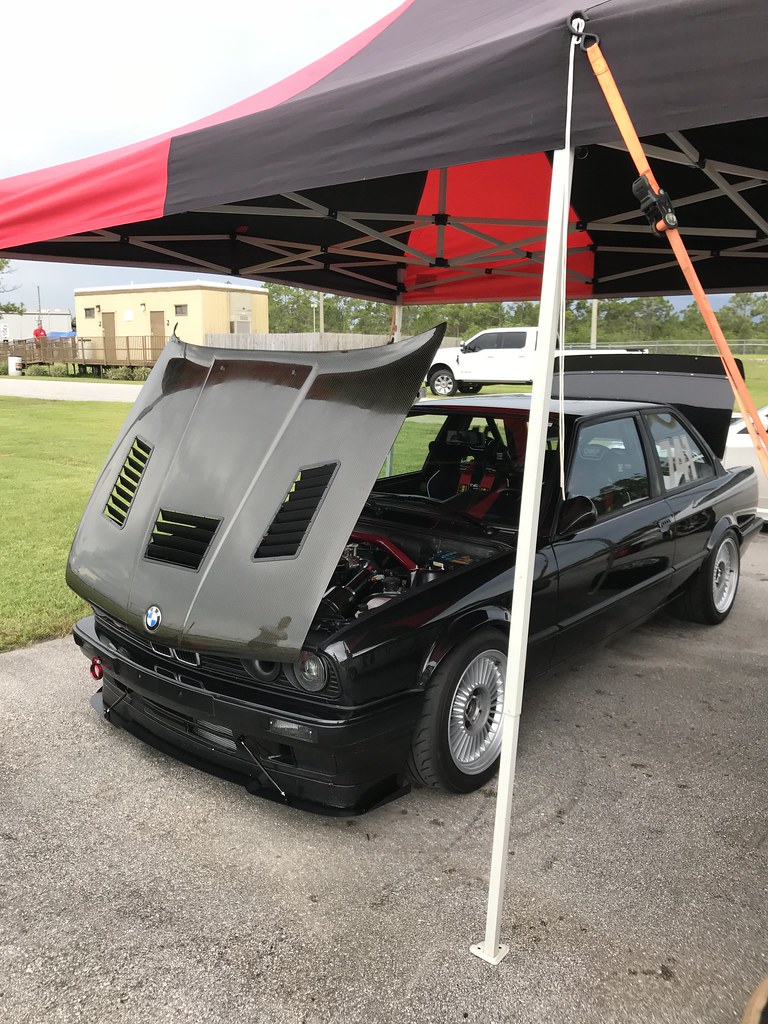
Pandemic Mechanic
Back to our regularly scheduled programming.
There's a lot of heat building up under the hood around the turbo and down pipe, so we're giving it a place to go. Some cardboard engineering to plan the location.


They come in a set, 7" x 23"

On to the new turbo snail. Taking this apart again.

This V-band is getting worse for wear with the heat.

Rob doing some rework on it with ant-seize

Taking this off is always fun

Have to unplug the wideband O2 inside the car to get the down pipe out.

Here's the patient

Pinhole leak by the v-band

Another one near the middle. Will be taking this to the welding shop.

Getting there

Taking this frigging flange bolt out is total hell

Victory!

New snail on the right. Doesn't look too different, right?

Here's a better look. Now you can really see the difference. I like that the smaller turbine is open, not divided.

We're swapping out that damn upper right flange bolt for a stud and nut. More on that tomorrowLeave a comment:
-
What to do in quarantine?
Play DCS World of course!
View from the Radar Intercept Officer cockpit of an F14B, dropping 1000 lb laser guided bombs.

Bad Hair Day inbound for a ZSU-234

Boom Shaka Laka


Leave a comment:
-
The Beast is too loud for normal conversation when tooling around. Well, even for shouted conversation. Picked up a pair of aircraft grade headsets and a voice activated intercom box,
At least Amazon and USPS are still working. Keep Calm and Wash Your Hands


Leave a comment:
-
I honestly think your clutch will be fine ---- as long as you don't engine brake, and have a good rev match. First if all, it's not broken/bedded yet, second if all, this is a road race build, not a shocking drag car.
Bone stock m20 Sachs clutches last me about 45-50 race hours (one season) with no sign of slippage when changing them. Sure it's half the power at 180/180 at the wheels, but again, stock replacement.
Leave a comment:


Leave a comment: