-
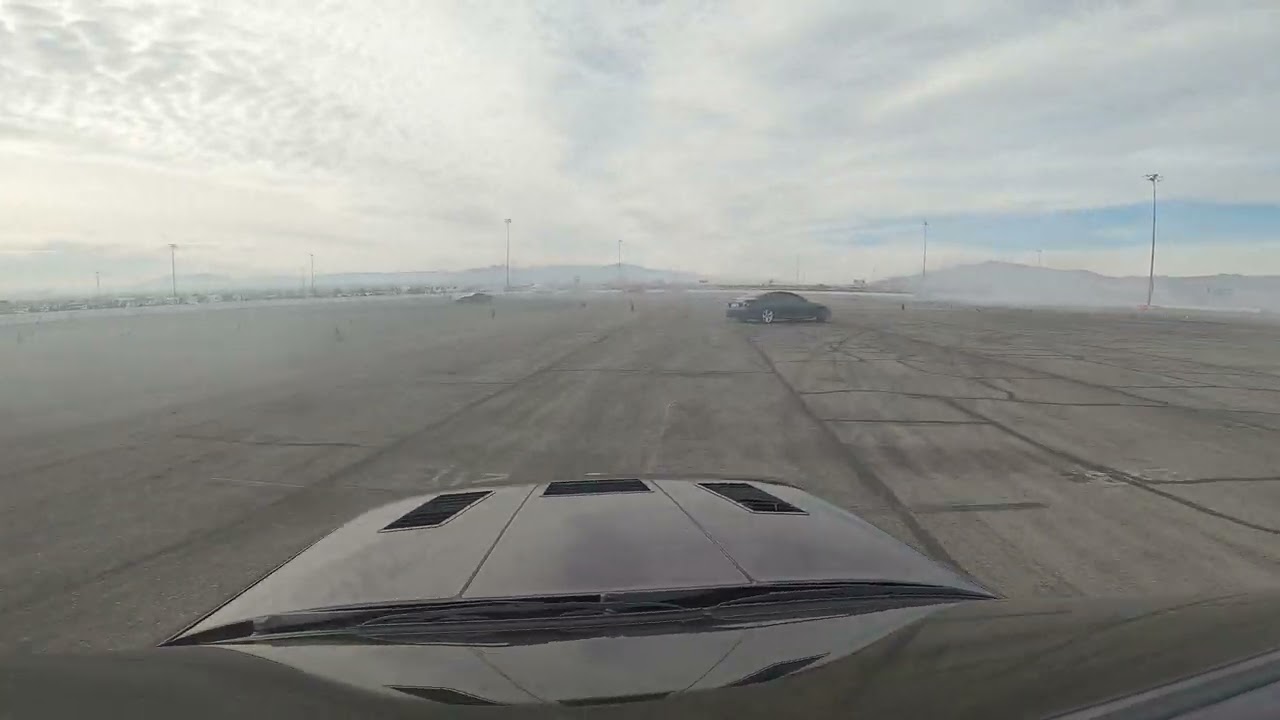
thanks, wish i had video of some of the more aggressive runs i did that day, i had a pretty sweet run with a 4 s-chassis tandem going on in front of me that got me super hyped...i was probably 3-4 cars behind them just pacing.....nothing super cool, but it was nice to have people i trust in front of me and not parking it in the corners...(which happened a lot unfortunately) i still don't like to follow too closely but i'm definitely opening up to it a lot more now that i trust my driving a lot more than before, but sometimes there's absolute chaos out there and i just rather play it safe since i'm not anywhere near done enjoying this car!!
-----
got tagged in some pics earlier!!


Leave a comment:
-
Nice driving. I love that cammy sort of sound they get when being worked hard.Leave a comment:
-

end of the year update!!
notes:
I sold the s52 head to a local drifter in need....really didn't want to sell, but he agreed to the "i don't want to sell price"
i went to japan for 3 weeks with the girlfriend.
i got fat.
i ordered a harper fab oil pan....while in japan and figuring out time zones to place the pre-order.
came back and worked during f1 madness here.
i dusted off the e30 and went drifting.
i need to do oil change - might do the s54 oil filter housing and redo the oil cooler lines (if needed), I want to go from a 120a to 80a bosch alternator, and replace the timing chain tensioner crush washer (it developed a small leak). Will probably pull the radiator to make the alternator/OFH job easier, and i'll remove the ac pulley off the crank while i'm there to gauge how much room i'll have for an eventual 3 row radiator upgrade.
- I need to redo rear subframe with taller-serrated tabs and I need to order a set of those Stimtech spherical RTABs. and do the rear fuel system still....Feels like i should do more "while i'm there" but i'm hesitant as i have more travel plans for this upcoming year. Basically both front and rear subframes will be pulled this year and hopefully i'll be able to have an alignment done that actually will help improve tire wear/life throughout these drift days.

Link ECU update.....I ordered a can-lambda over black friday, still no shipping info. I also bought a 2nd hand link can-gauge a while back. I think there is about $500 in sensors I could go with but I may wait until I go turbo to add those (flex fuel/fuel pressure sensor, and another for oil temp/pressure). I don't mind keeping the VDO oil temp/pressure gauges for now but it'd be good to setup the link with warning lights for both!
drifting notes: The car feels so fantastic. I am so thrilled how the car no longer fights me. The track layout was kind of daunting but by the end of the first lap going both ways i had it down. That's a huge improvement for me. I was keeping up pace with some v8 cars and I was smiling a bit too hard! Hopefully will update when some media pics pop up!


i replaced the delrin slip-on steering rack limiters with aluminum ones. I feel like the delrin ones wore down or even snapped out of place causing inconsistent rubbing issues in the past. 2 of the aluminum rack limiters are the same height as 3 of the delrin ones and seem to be the ticket with my setup.


small clip of me pacing a ls2 gto on my 2nd lap out of the day..... unfortunately had gopro issues and didnt get any of the spicier runs!! (note: i don't know the driver of the gto so i was trying to maintain the distance between us, there were times i could have throttled forward but i really dont need to pressure myself or him on a non-comp run. He actually asked if i wanted to do a light tandem run but we kept missing each other when we were going out and i ran out of tires already =*( maybe next time i'll dip my toes in as it seems to be much more fun chasing vs solo runs
Last edited by s14brent; 12-10-2024, 02:04 PM.Leave a comment:
-
i've been street driving the car more when I have time. Never really noticed the float on the freeway (mainly noticeable on rough surfaces at 65+mph)....so I decided to throw the rear sway bar back on for the streets (easy enough to disconnect at the track).
I forgot I replaced the endlinks and bought powerflex bushings back in the day - perfect lol

After making sure I had all the parts... I ordered more parts. I got the zinc plated bimmerworld rear sway bar reinforcement plates. Didn't want to risk any cracks in that area, really hate welding under jackstands at this age.

Local FB group had a meet


Leave a comment:
-
actually checked before working on the car earlier. Definitely not cracked.
--------

Installed the same condor extended front brake lines in the rear for e46 calipers. Old lines were in bad shape so this was a nice upgrade.

old

lantzfab wilwood 7/8 kit

unfortunately ran out of time and ate type200.
Clutch is a bit stiffer as expected going from like 5/8 to 7/8 clutch master. So far its decent, no leaks in the full -AN setup from the master to slave. Clutch is actually bled decently, but the brakes still have a little air in them. More brake fluid has been ordered. I might call my local bmw parts dept. for a throttle cable bushing. I will try to finish the job this weekend. I am kind of in shock I went through 2L of brake fluid in the motive pressure bleeder @8psi and I still have air in the system.
-----
finished it up this morning. used about .125ml of my remainding 250ml and got it feeling right with the motive pressure bleeder. I wish I read the install directions prior to ordering the lantzfab/wilwood clutch master kit. The longest part of this was getting the bracket bent to clear nicely since my 944 booster is moved a half inch over. Hopefully I won't have to revisit this for a long time as my lower back is hating me today!
here is a screen shot of how the bracket must be bent/modified. Instructions are actually on their site, I just didn't click it until I noticed they weren't included with the product.

Because of the modification I actually needed to tighten up the throttle cable as I had a bunch of slack after. Which meant I had to remove the intake tube for access. NBD, just wasn't expecting to do all that on the installation.
I failed to get some good photos from underneath because my gloves had brake fluid residue on it and purely forgot, but the setup is really nice. I like having the 2pc -3an clutch line, the pedal does feels quite a bit more stiff. I'm gonna have to stop skipping leg day for sure!Last edited by s14brent; 09-03-2024, 09:57 PM.Leave a comment:
-
well this week was brutal, I had a client cancel on me so I ended up being free Friday night so I decided to try and prep the car 3 prior to the next local drift event. That meant scrambling between jobs to mount tires, dismount tires, and remount tires LOL.


turns out 40 series is the game changer for me up front however the 17x8 style 32 fronts I had are +20 i believe. I was running a 25mm spacer up front (-5 offset) and even tried 30mm's (-10) with no luck. I still had issues still hitting the aftermarket front sway bar. <big sigh>
This is where I should have just swapped the stock sway bar on first, but I decided to swap the tires with the matching pair of rondals (17x8.5+13 and running the same 25mm spacer - effectively -12offset). Still hit the front sway, so i finally decided to throw the stock front swaybar on.

^you can see the sway bar rubbed off the fresh powdercoat off the style 32s here.....great
When doing the front sway swap, I noticed my R side tie rod boot was torn. luckily i had a spare tucked away. I also got reminded of the steering rack spacers when I removed the boots, so I added 2 more slip on limiters from SLRSPEED. I need to probably order another pack as I believe this was the major fix with the swapping back to stock swaybar.


I remembered the body roll with front sway and remembered I had some 12k 6" swifts (1" too long for the rears) hopefully the stiffer spring rate helps compensate for the smaller bar.

Basically got the car ready at 330pm the day of, but low and behold the event got sold out!! It was a blessing in disguise because I woke up to find a puddle under my clutch pedal.


^looks like its the plastic nipple. I feel like I JUST changed this damn thing. 3rd times the charm I guess.
I ordered the lantzfab wilwood clutch master cylinder upgrade. I'll be running 2pc PTFE -3an lines from the wilwood unit to the clutch slave. I was measuring it at 24" needed from below, but the -an fitting won't stick through the firewall like the stock unit so i needed probably 26" which isnt offered, so I think I will have a little extra long clutch line I have to figure out how to route when it all gets here, maybe service loop it. FUN times in the heat.
Leave a comment:
-

I decided to take my car out to "gears and grinds" last sunday and all of a sudden i'm rubbing at full lock again.......I ended up cracking RF fender flare at full lock.
Thankfully, laying FG mat isn't hard and its better than doing that "ziptie stitching". I do have one more flare that I could cut/replace/rewrap, but I'm going to try to make sure I get rid of this problem before using it.


my swift 17kg rear springs came in finally. I'm not sure why I went with 17kg....16kg and 18kg were readily available, but 18kg seemed like too stiff (feels like lexus big-body spring rates), and going from 14-16kg seemed like it might be a tad too soft for what i'm trying to achieve. I ordered these a month ago, and can't wait to see how the car performs with these. (yes i'm essentially taking out grip from the rear, and hopefully prolonging my tire life but hopefully i'll be able to fine-tune it with dampening and tire pressure to find that happy medium). Sidenote, i've had 10k/12k/14k on the rears over the years. Everyone's ideal spring setup is going to differ slightly for their hp/driving style and local track..i did a lot of searching on other e30 drift-guys spring rates and its all across the board.

I did some more clearancing in front of the RF wheel, not annoying at all. I did all of the measuring/cutting before the wrap, and did a whole drift event unscathed, but parking at a car meet is where the car decides to self-sabotage. LOL!
So I've just decided to go down to 215/40/17s vs 215/45's up front. I ordered 2x 215/40/17s and 4x 235/40/17s in Accelera 651 sports. They seem to be a reasonably priced 200TW tire and other track guys seem to get good life out of them.


i'll gain almost an inch (.8") of clearance across the arch so hopefully this will be the fix and can move on. I know Falken makes 615/660's in 215/40 also, and zestino dredge 140tw are also available so i'm not super worried about being stuck with a some weird size that might be disco'dLeave a comment:
-
Now that i've had some time to really weigh my options, I figured I should post my road map moving forward. I sold a couple parts off the s52 (cams and obd1 wiring harness) to help offset costs. crank, rods, and block are up grabs (locally). I'm keeping the head, oil pump, and accessories (alternator, power steering pump, vanos) good things to keep on hand basically.
-turbo stuff is on hold for at least a year. I'll collect parts here and there but i have other things I'd like to address first.
-I'm going to dyno the car as it sits with the turner chip, 24lb injectors, & 3.5" maf. Consider this the base-line.
-I need about $1000 more in link ecu parts (can lambda, flex fuel kit, and the can gauge to utilize the warning features that my VDO gauges lack.
-s54 oil filter housing install and reconfigure oil cooler setup. (replace vanos line while here) and add in the 034 fuel pump surge (need to buy a bosch 044 pump) and convert rear lines to -6 PTFE to match the front. Will run walbro 255 with e85 until its time to boost.
-install all link components/convert to MAP and get basetune then dyno tune on e85 for comparison. E85 won't do much in NA config, but the knock protection will be welcomed. I've already talked out these plans with a local tuner so we are all good to go! He's just waiting for the green light! He can also come to my house and do the base map here so I wouldn't have to trailer it to the dyno and pay the extra hours there.
-I'd like to eventually switch to obd1 valve cover with -an bulk head fittings for oil catch can setup v2 (might do this when I pull the head and install ARP headstuds later down the road). Get it powdercoated some ridiculous high-viz color and call it a day.
-stay here for at least another year while collecting parts. also would like to hot tank & resurface spare s52 head and load it up with upgraded valvetrain. It's the only way I see myself not getting distracted and selling off a ton of parts that get collected over time. I also need to move my e39 touring back into my garage before mid-october. (not sure if i mentioned it here before but i bought it back.) That car will be a little fun car while the e30 is down. Not going to be doing much to it but I do want to do the SLS delete/convert the rear to coilovers before the e30 goes under the knife for boost.
Leave a comment:
-
So pistons 4&6 are def cooked. Rings were like fused shut on them. Flex Hone is still a go when it arrives next week. However, replacing pistons on this is over $1000 for mahles, and like $300ea for a JE/Weisco low comp setup. I did find a set of used pistons locally for like $250, but new (nippon) rings alone would be $200ish + new wrist pins. So I kind of do agree a different block (m50/m52) would probably be the best route to go if i want to move forward. The guy who has the pistons for sale is actually interested in the crank & cams if I decide to part out. So that might be a thing.
Thanks for the tip on the cams.
I definitely dig the wrap, like i mentioned before, its a LOT easier when you have a good base to start with. Clear coat issues = just repaint imho!
Hot boi tails go hard in person LOL. also the tail light bulb is more pink, but shows up orange in that pic. I've been meaning to take the car out at night to get more accurate pics but i've just been too busy.
Yeah....most of my local buds are on kendas and are annoyed at me for not just running them already...i'm just stubborn and cheap. I def want to see how the car behaves with a stiffer respring of the rear - before I blow through an expensive pair just expecting better results from that.
Leave a comment:
-
Maybe you can find a cheap M52 block, even if it's scorched, you could have it bored out. Has to be cheaper than boring + pistons lol.
I wouldn't worry about cam journal scoring on the 24v, not sure why, but it is common. If the lobes are fine, I'd send it.
This car always makes me look at wraps, I think my Mini will be first on the chopping block for some sort of vvivid wrap or something lol, it's only a matter of time.
Kind of like the hotboi tails, should go well with the wrap IMO
Always hear good things about kendas from the drift guysLeave a comment:
-
picking up where i left off - I had to replace most of the tail light bulbs to fit the look of the ricer clears lol. This is more for reference to future me - philips is more pink, chinesiums are blood red.


I also got my e30 evo wing knock off back from my wrap guy. I'm guessing he had a helluva time with this one. I'm not SUPER pleased with it, but whatever. I actually have a giant 1750mm frp GT wing in my backyard that I still have to figure out if I'll be using. (i wanted to do a hot swappable trunk for events with the frp lid that I got, but the frp trunk lid was riddled with spider web cracks and I don't trust it from not recracking with that giant wing on there LOL)


I did another little ricer mod. I couldn't help it on this one though... an old-old buddy told me he still had this P2M quick release I had from my old s-chassis that I sold him, and asked if I wanted it back. Kinda crazy but I have something from my s-chassis in my car (18yrs later). So I dug the slim hub out from storage and installed it all. Its about 10-12mm longer than just the momo hub/nardi adapter setup (which luckily still works for me!)

Time for some bad news. Turbo plans are on full halt. Boroscope showed heavy scaling on cylinder 4 & 6. prepare for the worst.


^pretty rough scratches on the cam journals

^at least PO didn't lie about ARP headstuds I suppose.

^ i have no real words......this thing is roached. I'm going to see if a flex hone can clean that up. I actually don't want a fully built engine with over-bore pistons. I don't think its worth the expendable income to build/maintain an engine like that especially for just grassroots level events, so honestly a LS is looking pretty sweet again but I think this will be usable still.. I also still need to inspect the crank/rod journals, but it's honestly looking like a part-out for this motor but the bones are solid and I could also do a rebuild.. I ordered one of those valve spring compressors (2 at once). I'll remove all the valves and then try to clean the pistons/valves as best as possible and then make a decision. At the minimum at least I will keep the head, arp head studs, and oil pump as spares. Its a good thing this motor was so cheap, if i sold the crank/rods/pistons and block, obd1 engine harness and 413 dme i could probably come really close to breaking even while keeping a bunch of parts that i necessarily did not need LOL. So its' not all doom and gloom.


And leaving on a more positive note: I got the print from the last drift event in my office finally. Frame is 20x30 and the actual print is 16x26. I usually go for metal prints or acrylic topped, I'm not sure why I didn't do that this time around, but I definitely am proud to display it!
 Last edited by s14brent; 07-17-2024, 08:17 PM.
Leave a comment:
-
a few more photo trickled in from other media members out there.


had some time to stop by a buddies new shop to get tires swapped out. The last set of burners was a hazard pretty much, so i didn't mind swapping them out so early. I'm really hoping these advan fleva 701's work out better than the last set of burners. I still doubt I'll be going to the August event. Ever since the event, there has been record high temps here - and it has been BRUTAL!!

and sorry in advance guys. i'm really committing to the whole early 2000's drifting look/vibe. I ordered these back in April, didn't realize A) it would take so long, and B) its impossible to find a 5007L bulb in red so I ordered a couple pairs of LED's to hopefully sort that out at least.

I'll be putting those in along with my evo m3 wang (when its finally picked up from my wrap guy hopefully saturday before work) and it'll be done exterior wise for a while!!
Also, I pulled the trigger on the 17kg swift springs, however they won't be arriving until mid/end of July. I have to wait for the next shipment from Japan I'm guessing.
I also ordered a 20x30 framed print that my friend took. I think it will actually be something like a 16x24 print but It should really make a nice office addition to the wall space. I'm guessing it won't be arriving for at least a full 7 days. So there will be at least one more update before the updates go silent.Leave a comment:
-
Now that its' been a few days later, I do have a different plan of attack with the car. First off, review of the event.
It was 113°F on this fantastic friday. This car HAD working A/C... but race car......*sigh*
anyways, I think I got borderline heat syncope at one point, it was brutal out there and I packed 20 bottles of water and I had the last one on the drive home. I have to really stop doing anything in the summers here. I brought 4 spare tires (literally the only 245/35/17's out there from china - petlas velox sports). They had under 3k miles on them from the PO that I got the style 32's from. First off....one of the rear 17x9's +26 (e39 fitment) that I chose to not have refinished was completely flat. Thankfully I found out on Wednesday when I had made plans to pack out the car since I worked 12hrs on Thursday.

Thankfully I have this bead breaker and small tire iron for my mini-motos. I also happened to have this giant tub of tire sealant for just this scenario. I used soapy water to find the leaks and to verify fixed.


BOOM. Left-rear tire popped right down the center. thankfully everything was fine (bodywork and wheel, tire at least worked like a run flat driving back out to the pits, but the tire had corded and wrapped itself around the exhaust, axle, and even the brake caliper.

the photo below is right-rear. at least its a little better than before - which contact patch was only like 50% (which is why I did tire flipping on-site if it was available).

I wish I took a picture of the cords and crap that I cut out, but it was pretty bad. I must have had the worlds dullest snips packed in my tool bag so I was under a hot car with borrowed jack stands (I managed to forget mine smh). Anyways this is where the heat got me, probably the combo of being partially under the car for a prolonged period of time. (I think I will start to carry some sheet metal sheers in my bag from now on). I also did not want to go walk around the pits and ask to borrow more tools as I felt like an idiot when I realized I didn't bring my own jackstands. Also, my tiny hf "racing jack" was low on fluid so the first like 1/3 of a pump was no pressure - not scary at all. I actually added fresh fluid and bled it the day after the event and it works fine now.... but I have brought that tiny little jack to Arizona and Socal for over 10 years now and its' the first time I've had issues with it. I was ready to happily retire and replace it, but it seems like it doesn't want to die yet. After getting all the corded mess out and mounting the 2nd set of wheels on there, it seemed like an hour was needed to actually cool down, rehydrate and recompose myself from the heat/dizzy feeling. My 3rd-5th sessions spanned from 745-1130pm. I actually got about 9-10 full laps out of the 2nd pair. (still not great, but at least better than 6!!). My photographer friend left around 830, so I don't really have any other pics from the actual night session.
-------
Things I want to do to the car next in baby steps
-I actually noticed in pics the amount of squat in the rear is probably what's killing all the tires. At full lock the front of the car appears even higher in ride height. I want to get a pair of 17kg/952in/lb rear swift springs to get rid of some of that squat/grip. I wish there were cheaper 60mm ID springs I could use for testing, I'm currently on 5" length 14kg swifts. I feel like if I go to 16kg/892in/lb it will still have a lot of squat. 18kg seems like too much at 1008in/lb. I also know if I do this, I'll inevitably have to respring the car once its boosted.
-I'd really like to get my hands on a harper fab 24v oil pan. I really have the urge to lower the car a bit more now. I do not trust my luck to lower the car down anymore with the e34 oil pan.
-My next set of spares are 235/40/17 advan fleva 701 take-offs from an auto-x buddy.

I realize at some point I will need to stop running take-off's and buying the cheapest tires. I'm pretty sure once I try out these Kenda KR20A's i'll be happy. This also leads to how much will tires cost me when its' boosted. Sheeeeesh. Oh and I also really want to try out that VTT oil breather cap, I was trying to wait for restock on the vader solutions one, but they seem to have no ETA on restock.
-Not exactly an e30 upgrade - but I want to prep my Tacoma for towing. I need to get get a proper ball receiver, a variation of towing straps and a brake controller. I can't fit everything I want to bring to the track into the car at this point and I need AC if its in the summer. I'll plan to rent a trailer and just use all of my own equipment. I also think the bike rack can come off. It was fun while that lasted.
----
This is quite a lengthy post already. I'll update again hopefully after a few more pics start rolling in!!
Last edited by s14brent; 07-01-2024, 04:43 AM.Leave a comment:


Leave a comment: