Announcement

Collapse
No announcement yet.

New owner, BMW 325iX Touring

Collapse
X
 
  • Filter
  • Time
  • Show
Clear All
new posts

    Today I finally went to the guy who's helping me getting the Getrag rebuild. He's actually an old colleague of PieterVN :)

    We had a bit of trouble splitting the cases, turns out we forgot to put the trans in neutral. (I was probably asking to many questions lol).
    However in the end we got it split. (When doing it the correct way, all of the gears/shafts stay in the rear housing.)


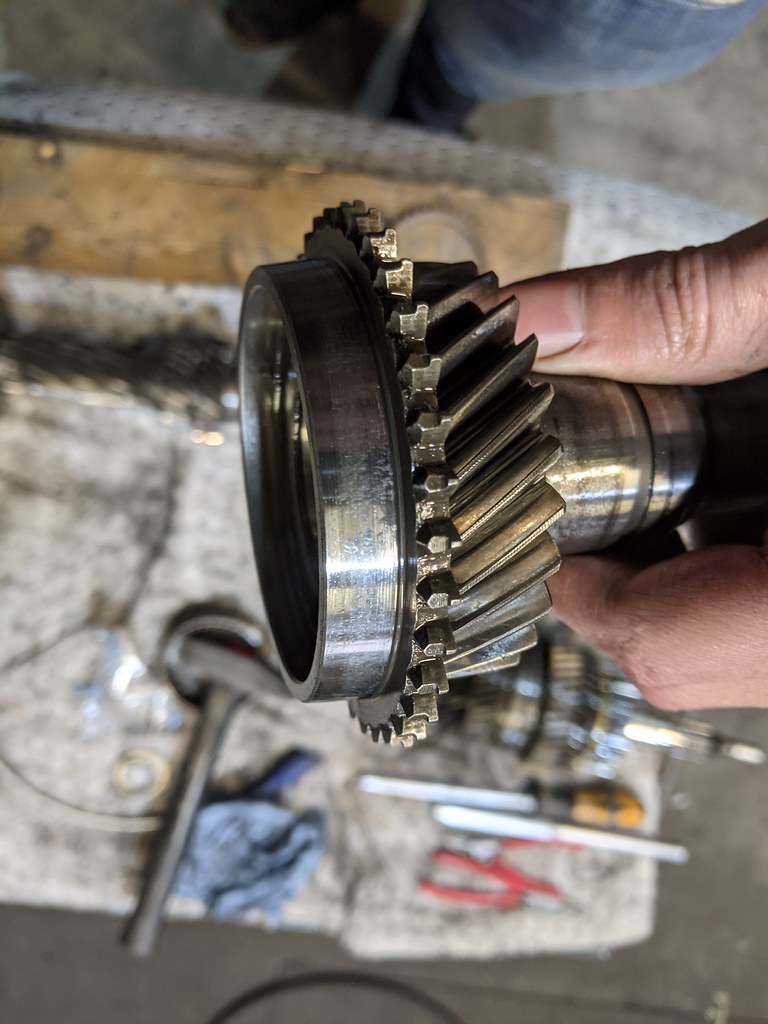
    This is the worst mating surface of a syncro ring the transmission has (this is on the input shaft, 4th gear if I recall correctly)
    However, it's still fine and will be reused again


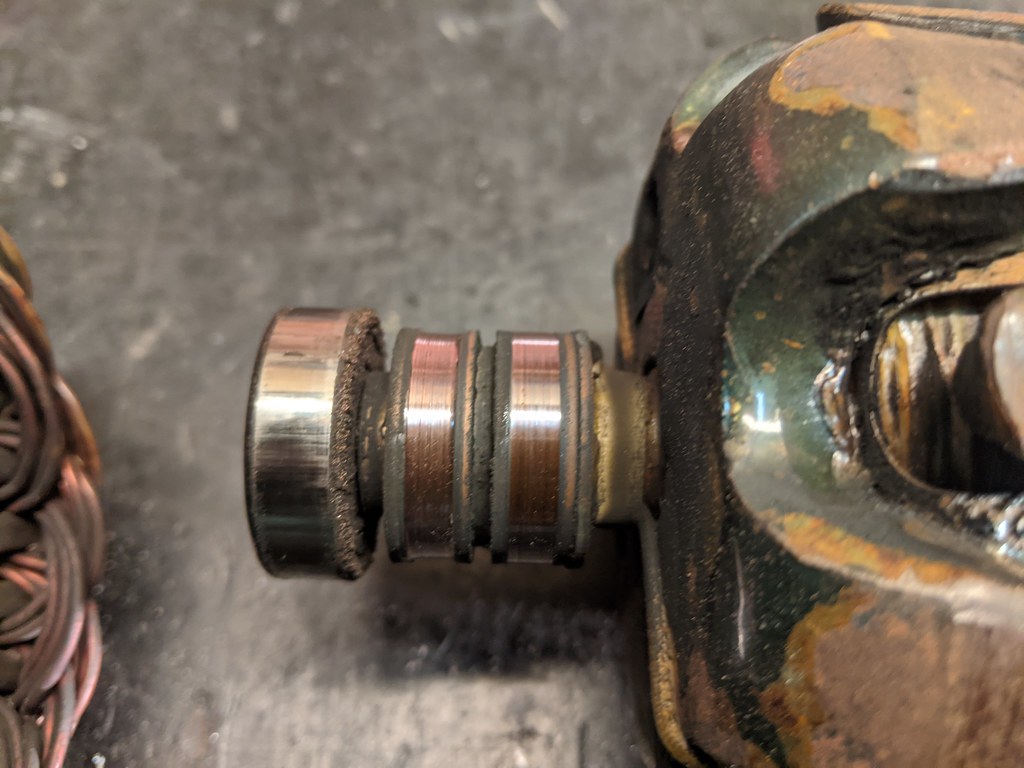
    I do have some wear on the selector shaft, there is a little roller that's pushed against this shaft and it's worn in a bit. The selector shaft is quite expensive so I suggested I might be able to laser weld and rework the shaft.
    (By laser welding you can also weld + add hard material)


    Parts..


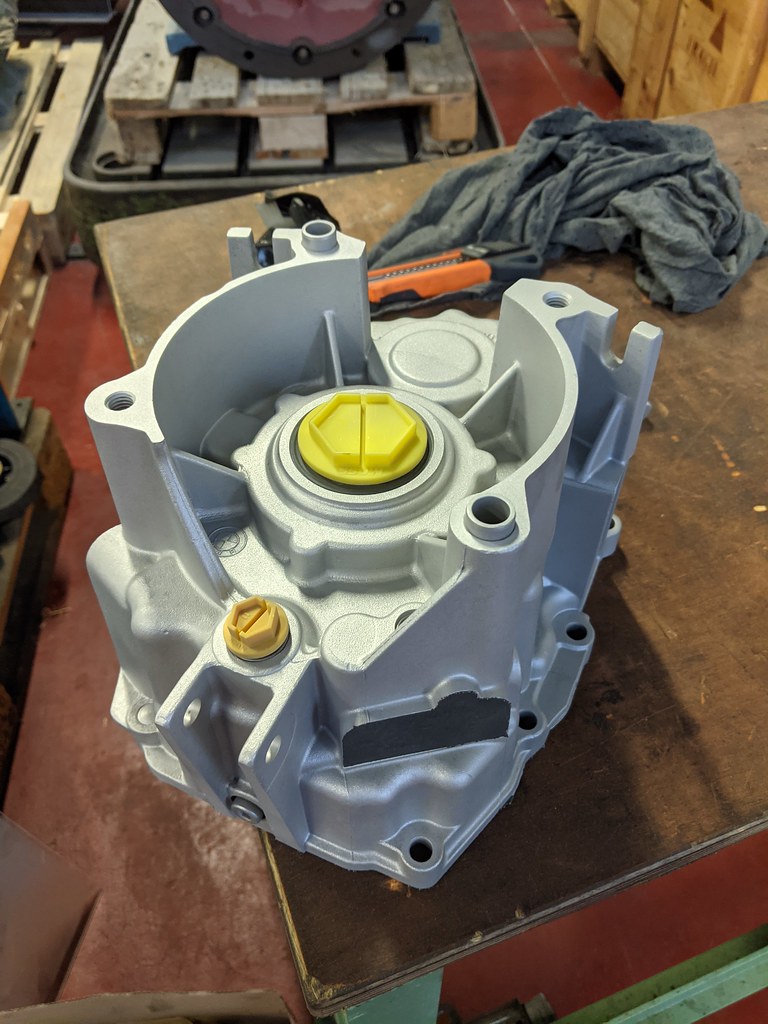
    Housings got put into a washing machine, however I will also glass bead blast them like I did on my transfer case + apply the ceramic coating.


    Overall we spend 3,5 hours disassembling the trans, pulling of the gears and syncro's from the main shaft were the hardest part as they were really stuck on there!
    I'll be buying new bearings or the input output and idle shaft. needle bearings for the gears won't be changed as he explained these don't see a lot of rotations.

    After getting home, I went to the workshop. as I'm getting the bolts plated for the Getrag, I decided to also disassemble the alternator and steering pump to get some more parts to plate, to make it worth while.
    Alternator looks a big old, but still works fine.


    And disassembled! rear bearing is definitely shot, I'm guessing that's the reason why I got some humming noise coming from the engine


    I'll also replace the voltage regulator as it's pretty cheap anyway


    Are there specs for the minimum diameter of the commutator? I'll probably get it resurfaced if not as it's pretty grooved


    Also needed to find out if I got a Vickers or Lemforder pump, it's a Vickers!


    Can't wait to get these bead blasted, will be quite the difference


    I already started the disassembly but got stuck on the rear half, not sure how to get it further disassembled


    Trying to be as organized as possible, I'll print this picture and when it's time to assemble I only need to put the correct bolts-screws on the same place.


    A little empty.. I also want to remove the engine mounts as I need to replace these when doing the X3 rack swap. the alu mounts will also get coated and bolts plated!
    1990 325iX Touring - November 2018 R3V Car Of The Month

    1980 Volkswagen Golf mk1 1.1
    1974 BMW 2002 Touring

    Instagram

    Comment


      Nice, looking forward to see all the cleaned gearbox parts and pumps. For the selector shaft it are the two indents that you are going to laser weld/fill?
      It this going to be the same hardness as the shaft itself? I presume this was originally forged?
      Belgian E30 Driver
      /
      //
      1990 - E30 - 318i Cabriolet Brilliantrot
      /// 1988 - E30 - 320i Touring Diamantschwarz (Sold)
      /// 1990 - E30 - 318IS Coupé Lazurblau

      Check out my Rare BMW Music Edition Cassettes Topic

      Comment


        Lots of great info on your works here! Nice build

        Comment


          What an amazing build!!
          -Brad, AlphaTeam Motorwerks, LLC
          91' 318iS - S54/6MT Swapped
          08' E90 M3 6MT - Daily
          04' Chevy Duramax CCLB - Work Truck/Hauler


          Originally posted by IronJoe
          Alpha Team: running through e30s, gringo icebergs, and 19 yr olds.

          Originally posted by 2mAn
          Brads a standup guy even though he likes buttsex

          Comment


            Originally posted by PieterVN View Post
            Nice, looking forward to see all the cleaned gearbox parts and pumps. For the selector shaft it are the two indents that you are going to laser weld/fill?
            It this going to be the same hardness as the shaft itself? I presume this was originally forged?
            Yes, the two worn down bumps will get laser-welded. forged isn't the correct term but hardend.
            I still need to test the hardness of the shaft with the instruments I use at work, then I can determine to use regular or hard filler material for the laser-welder.

            Originally posted by HenryGM View Post
            Lots of great info on your works here! Nice build
            Originally posted by spiDmang View Post
            What an amazing build!!
            Thanks guys! Your comments are much appreciated! :)
            1990 325iX Touring - November 2018 R3V Car Of The Month

            1980 Volkswagen Golf mk1 1.1
            1974 BMW 2002 Touring

            Instagram

            Comment


              Small update regarding the gearbox rebuild/X3 steering rack swap.

              I've had a local machinist weld the original holes of the spare subframe shut, I still need to drill the new holes to mount the X3 rack.
              To fix the rack in place, I also got some bushings/sleeves. I will counterbore the holes in the subframe and rack for these sleeves this way it's centered on fixed locations rather then some screw holes.

              First part orders have also arrived, X3 steering rack boots, some alternator parts and bearings for the transmission + a bunch of other stuff..

              This weekend I glass bead blasted the aluminium covers of the transmission, alternator and steering rack. I still need to do the engine mounts and subframe as well but I ran out of time.


              Some blanking plugs for hydraulic fittings were the perfect plug to screw in to the old seals (which will get obviously replaced.)


              Also some steel parts for sandblasted which will get replated and some will receive paint as well.


              After blasting the parts, the fun work continued.. ceramic coating the parts.. took some time to get into all the nooks but it's finished!


              Next up I'll be making a special tool to disassemble the X3 steering rack as I need to shorten the steering rack shaft to get the bumpsteer back to original.
              (I stripped the hex nut on the plug, hopefully I can get it loose by using the grooves in the plug, pictured here)


              1990 325iX Touring - November 2018 R3V Car Of The Month

              1980 Volkswagen Golf mk1 1.1
              1974 BMW 2002 Touring

              Instagram

              Comment


                Media blasting is always so beautiful to me
                sigpic

                (clicky on piccy to get to thread)

                Comment


                  Originally posted by econti View Post
                  Media blasting is always so beautiful to me
                  I know right! Makes me want to blast everything haha :D
                  1990 325iX Touring - November 2018 R3V Car Of The Month

                  1980 Volkswagen Golf mk1 1.1
                  1974 BMW 2002 Touring

                  Instagram

                  Comment


                    Today I had a couple hours to spare and decided to start the machining of the iX subframe for the X3 steering rack conversion.

                    To have a good reference I cleaned the bottom of the subframe on the manual mill.


                    Bolt hole also cleaned


                    Meanwhile I also let the wire EDM cut some shims for the Getrag transmission, BMW asks 14-15€ depending of the thickness.
                    A bit steep if you ask me.


                    1990 325iX Touring - November 2018 R3V Car Of The Month

                    1980 Volkswagen Golf mk1 1.1
                    1974 BMW 2002 Touring

                    Instagram

                    Comment


                      Got some more work done at my work (obviously after hours haha)
                      I stripped the hex nut on the X3 steering rack, so I needed another way to loosen the big plug, luckily there are some teeth.
                      After some CAD/CAM, milling and wire edming..


                      When trying to remove the centering sleeves/bushings on the spare subframe (the one I'm modifying) I had to weld them shut and hammer them out of the pockets.
                      Unfortunately BMW doesn't sell these separately, so new ones had to be make. I needed two to fix the steering rack in place anyway so I ordered some extra ones to modify.

                      BMW decided to use 15,17-15,18mm plugs, a strange dimension as all the ones I found are 16mm outside diameter
                      A little fixture was milled


                      And the sleeve fitted, I gave them 0,01/0,02mm of play (15,16mm) nice slip fit


                      I also wanted to drill the holes for the subframe and steering rack but unfortunately the manual mill it too small (and I never worked with the bigger CNC mill)
                      Although the interface/operating system it the same, there are a couple of differences in the way it's operated.
                      I texted my collogue and he is willing to give me a hand with milling the holes for the centering sleeves in the subframe and steering rack


                      1990 325iX Touring - November 2018 R3V Car Of The Month

                      1980 Volkswagen Golf mk1 1.1
                      1974 BMW 2002 Touring

                      Instagram

                      Comment


                        RE the gearbox rebuild is it fairly self explanatory how it comes apart? I need to do mine soon.
                        sigpic

                        (clicky on piccy to get to thread)

                        Comment


                          Originally posted by econti View Post
                          RE the gearbox rebuild is it fairly self explanatory how it comes apart? I need to do mine soon.
                          You do need some big pullers etc to pull open the housings. If I recall there is an article somewhere that describes how to disassemble the gearbox.
                          I'll have a look if I can find it.
                          1990 325iX Touring - November 2018 R3V Car Of The Month

                          1980 Volkswagen Golf mk1 1.1
                          1974 BMW 2002 Touring

                          Instagram

                          Comment


                            Today I got some help from my collegue to mill the holes/pockets in the subframe and steering rack.
                            We decided to resurface the subframe again as the subframe rocked just a few hundreds on the surface I milled on the manual mill.


                            Second operation was milling the holes and counterbores for the centering sleeves. After aligning the subframe and taking the zero point, the mounting surfaces were retaken to the original plane.
                            Then milling the screw holes and counter bore.


                            Then it was time to mill the steering rack, it took some figuring out and fiddling to get it all setup. some big parallels, V blocks and gauge blocks later..
                            (I don't have a picture of the actual setup though)


                            Only a small amount of material had to be removed from the steering rack, just the corner was touching.


                            Next up was the steering rack spindle/gear housing, I had already measured it on the CMM, after some 5 axis programming, I milled the quick connect couplings bigger and threaded the holes to M16x1,5
                            On the bottom hole there was some material broken off, I laser welded this section so I had a smooth surface for sealing.


                            After milling / tapping on the machine (only tapped 10mm deep, the rest is done by hand)


                            Also disassembled the actual steering rack, only thing left to do it shortening the shaft.


                            Very happy with the results thus far, only need to modify or make new hard lines for the steering rack and of course shortening the shaft.
                            I'll be glad once it's fitted under the car, took quite a bit more time than anticipated :)
                            1990 325iX Touring - November 2018 R3V Car Of The Month

                            1980 Volkswagen Golf mk1 1.1
                            1974 BMW 2002 Touring

                            Instagram

                            Comment


                              Very cool stuff man! Great work.

                              Comment


                                The Steering rack must really suck! haha Thats a lot of work
                                Simon
                                Current Cars:
                                -1999 996.1 911 4/98 3.8L 6-Speed, 21st Century Beetle

                                Make R3V Great Again -2020

                                Comment

                                Working...
                                X