
My name is Jonathan, and I have a BMW problem. Specifically, I have seven of them. However, this thread is about my latest acquisition. Over the last few years, I have had a number of vehicles filter through the daily slot - everything from an e39 touring, Jaguar XJ8, to e36 M3 and a 318ti. Some of these have left, while others (e36M, ti) have remained. What I eventually realized is that I was trying to fill the hole created when I sold the last M42 sedan that I owned. It was at that point that all of the key details began to fall into place. Queue AWDBOB informing me of this wonderful mess! You'll probably recall seeing this on his hooptie thread - the car that was just slightly too nice to fulfill that role (at least in the salt filled midwest). Around the same time, I became the owner, again, of a particular slicktop 318ti that I had absolutely zero desire to own. Queue the catalyst deal! As you'll see, we basically just ended up exchanging problems....
318ti in question. While cool, I already have one. It eventually revealed itself to have much deeper issues then I was expecting (see hooptie thread for carnage photos).
 Untitled by Jonathan Martin, on Flickr
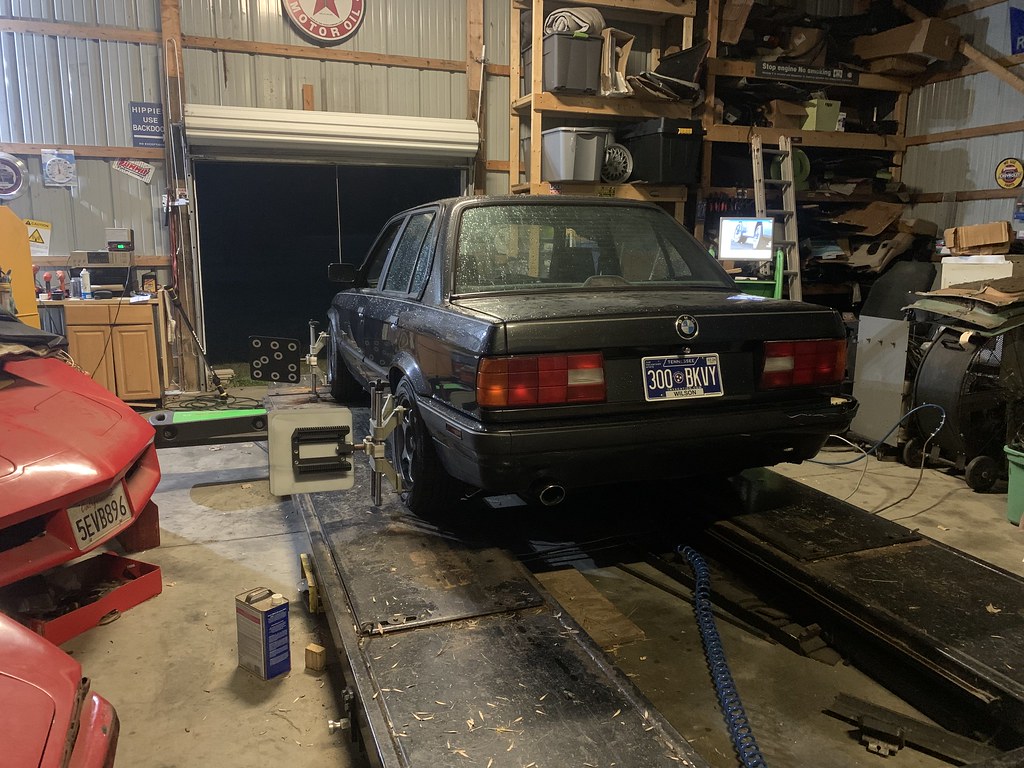
An e30, at its new home! Currently next to my friend Paul's m30-powered track car. It was rather strange to buy an e30 that actually ran and drove. Most of the e30s I have been involved with were usually delivered in boxes. This particular car is a 1991 318i sedan that is 98% stock. Unfortunately, I seem to have forgotten to take interior photos somehow.
 Untitled by Jonathan Martin, on Flickr
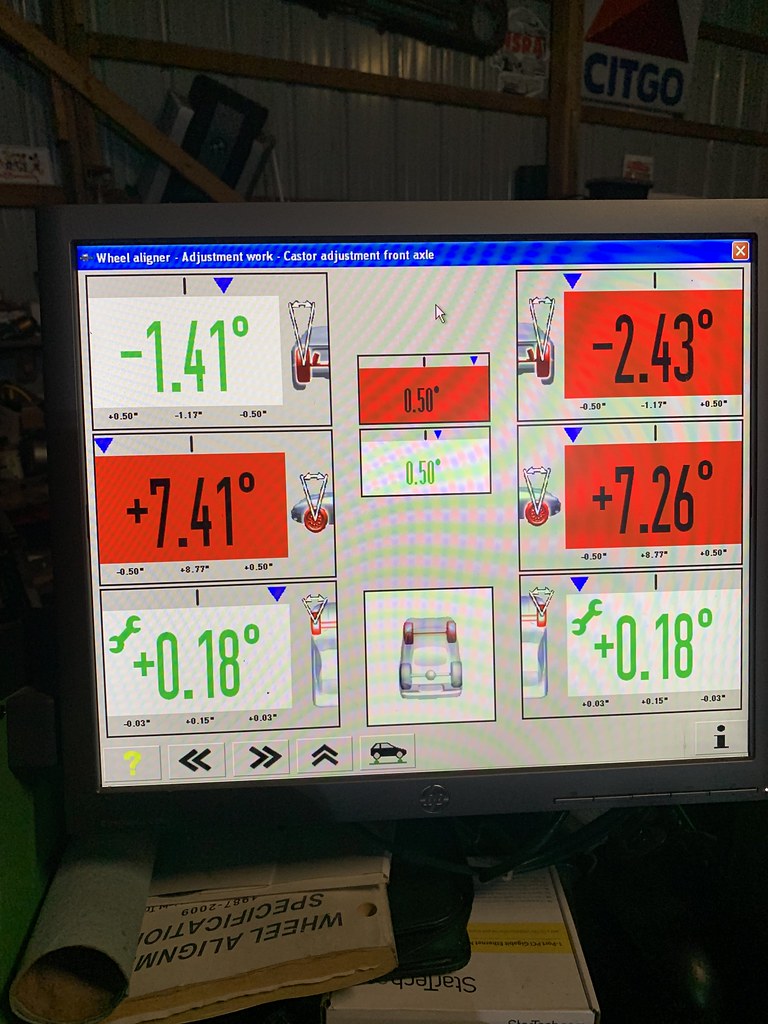
I decided to start by throwing it on my alignment rack. As expected for a thirty-two year old unibody, the readout wasn't exactly what I wanted to see. Read on to see why
 Untitled by Jonathan Martin, on Flickr
 Untitled by Jonathan Martin, on Flickr
 Untitled by Jonathan Martin, on Flickr
Front, after toe correction.
 Untitled by Jonathan Martin, on Flickr
It'll go back on the rack after getting the suspension back together. Onto the 1st to-do list! It has a transmission which leaked out of every seal, as well as the usual obliterated subframe and differential bushings. Its differential leaks horribly as well. In addition to that, both rear axles have boots which are completely destroyed. Lastly, both rear wheel bearings are also noisy.
Essentially, it is the average used e30! Moving forward to correct those issues, it was time to take it apart
A leaky transmission
 Untitled by Jonathan Martin, on Flickr
Now clean and resealed!
 Untitled by Jonathan Martin, on Flickr
 Untitled by Jonathan Martin, on Flickr
I opted to make a modification in the shifter department. It seems that essentially everyone swaps in a super short throw shift lever, which I am not a fan of.... especially with a Getrag 240. On my last m42-powered e30, I had a Z3 Lever and grew to absolutely hate it and ended up going back to a stock lever. For this car, I've opted to make the lever 1/2-3/4" taller. As an added bonus, the JB weld really doesn't flex like the stock shifter internals. My 318ti (formerly owned by moatilliatta) has a lever that was modified in similar fashion w/JB weld, which made me a fan.
After application of some strategic heat and cleanup
 Untitled by Jonathan Martin, on Flickr
The red mark is a reference for where the pieces originally met. I didn't want it to be that much taller, just a slight increase.
 Untitled by Jonathan Martin, on Flickr
Modified on left, stock on right
 Untitled by Jonathan Martin, on Flickr
Another approach I'm trying is to fill the rear carrier bushing with window weld. In the past I have used the Turner rear bushing... while it does work, I couldn't see $100+ for one with the window weld already on the shelf.
 Untitled by Jonathan Martin, on Flickr
 Untitled by Jonathan Martin, on Flickr
Moving rearward, I went ahead and dropped the subframe after I got the trans back in. A few interesting things came about upon further inspection.
 Untitled by Jonathan Martin, on Flickr
Obligatory "half of my car is on the ground" shot. Note super-awesome customer e30 m3 that is in for a engine and suspension overhaul later this year!
 Untitled by Jonathan Martin, on Flickr
Now, we return to the alignment chart. Every e30 I've had on the rack is generally off in the rear, unless it has some form of adjustability added. What was unusual here was that each side was inconsistent.. and I suspect this has something to do with it. I'm hoping that the arm is not bent - I assume it is not (at least not significantly), due to it reinstalling into the replacement subframe with no problem.
 Untitled by Jonathan Martin, on Flickr
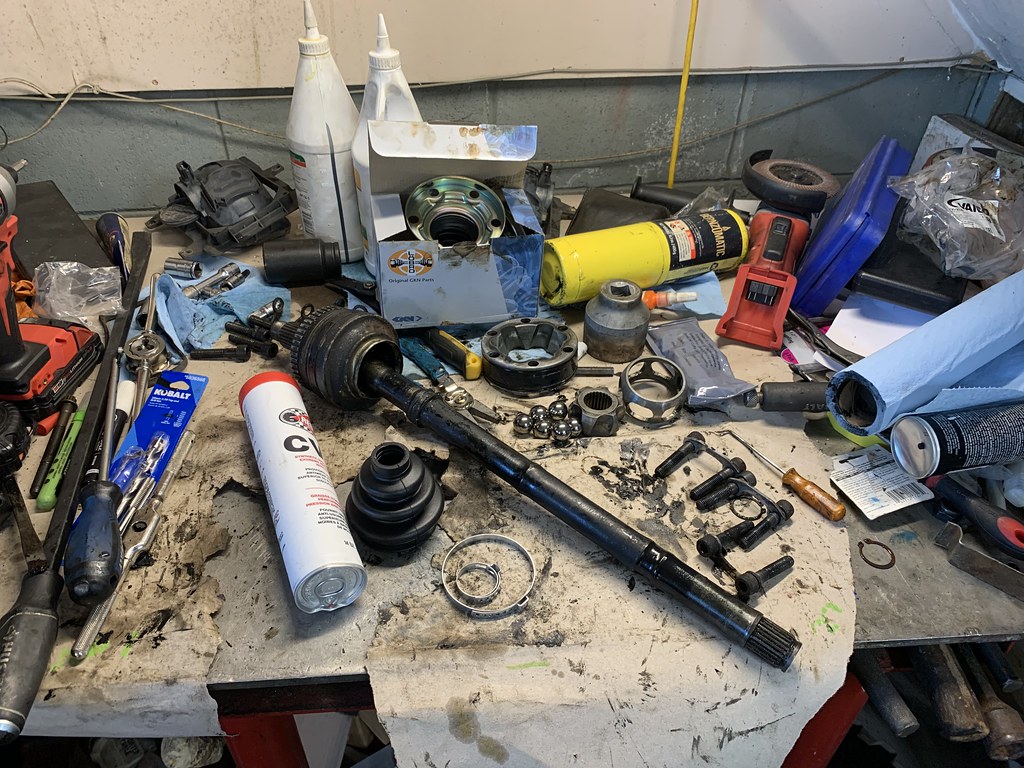
Another interesting failure - something rubbed through the boot retention piece on one of the axles.
 Untitled by Jonathan Martin, on Flickr
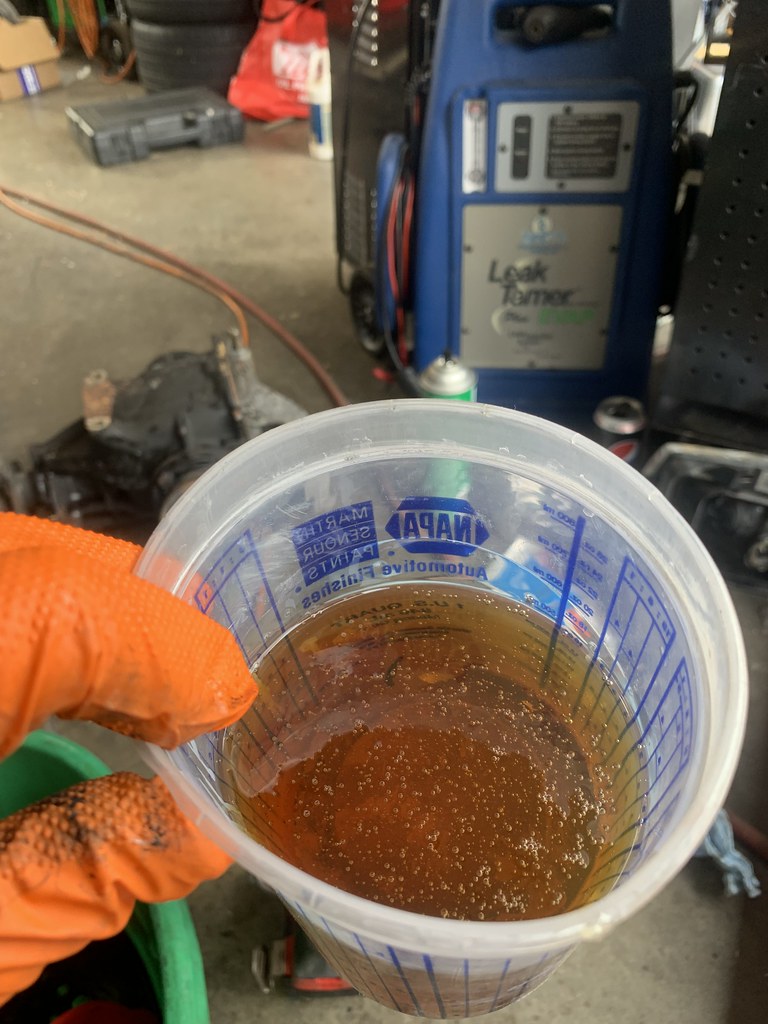
With everything out, I needed to reseal the differential. Pulled the drain plug, and this was what came out. That is the entirety of the fluid as well.
 Untitled by Jonathan Martin, on Flickr
It seems I am in need of a 4:10 small case. Massive problems call for massive solutions. To the least-organized parts shed ever we go! Usually, its totally full, as my mower parks in the open area.
 Untitled by Jonathan Martin, on Flickr
After some digging, I emerged with a small case 4:10 open, as well as a disassembled small case 3.64LSD from my ti. I'll have to order some bearings for the carrier - goal is to put the 4:10 ring gear on the LSD center. Fortunately, the second differential had significantly cleaner fluid.
 Untitled by Jonathan Martin, on Flickr
 Untitled by Jonathan Martin, on Flickr
Onward to reassembly! I went ahead and swapped out the brake hoses as well. Some of the hoses were dated 2014, others were original.
 Untitled by Jonathan Martin, on Flickr
Oddly, this car actually needed trailing arm bushings. I can't say that I've seen an e30 that was legitimately in need of a set before, most are just fine after 30+ years. Queue the highly advanced installation tool
 Untitled by Jonathan Martin, on Flickr
Another scar from this car's previous life as a parts car... for some unknown reason, the right trailing arm had a cut/slice, as if someone had tried to take a sawzall to the arm and then stopped. There is no damage to either arm besides this. Oh well... time to get out the welder. Cleaned up a bit for better weld penetration as well as photo documentation
 Untitled by Jonathan Martin, on Flickr
After a bit more grinding and some welding
 Untitled by Jonathan Martin, on Flickr
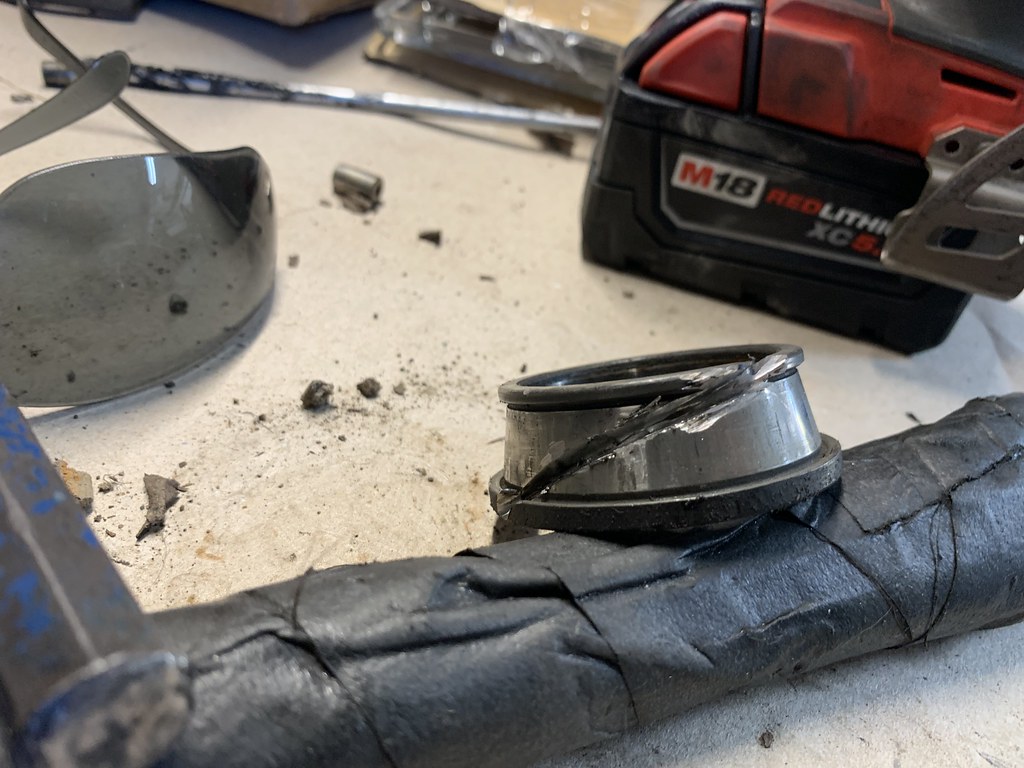
I think the other trailing arm noticed and decided that it wanted attention. This was by far the worst wheel hub I have ever removed - it took nearly an hour with the slide hammer and heat on the rear race.
 Untitled by Jonathan Martin, on Flickr
That brings this thread up to date. Besides wanting to use this e30 daily, its main deadline is Vintage in mid-May. I'm hoping to have the subframe and differential overhaul finished sometime within the next few weeks. Once that is wrapped up, I'll actually get to put some time on it and see what other issues show themselves. There is a bit of an oil leak at the front of the engine that I need to track down. Also, AC season is approaching rapidly here in TN - going to have to sort that as well. As the compressor isn't locked up I'm hoping to avoid any major trouble. Overall, I'm quite excited to (eventually) use an e30 on a daily basis again!
318ti in question. While cool, I already have one. It eventually revealed itself to have much deeper issues then I was expecting (see hooptie thread for carnage photos).
Untitled by Jonathan Martin, on FlickrAn e30, at its new home! Currently next to my friend Paul's m30-powered track car. It was rather strange to buy an e30 that actually ran and drove. Most of the e30s I have been involved with were usually delivered in boxes. This particular car is a 1991 318i sedan that is 98% stock. Unfortunately, I seem to have forgotten to take interior photos somehow.
Untitled by Jonathan Martin, on FlickrI decided to start by throwing it on my alignment rack. As expected for a thirty-two year old unibody, the readout wasn't exactly what I wanted to see. Read on to see why
Untitled by Jonathan Martin, on FlickrUntitled by Jonathan Martin, on FlickrUntitled by Jonathan Martin, on FlickrFront, after toe correction.
Untitled by Jonathan Martin, on FlickrIt'll go back on the rack after getting the suspension back together. Onto the 1st to-do list! It has a transmission which leaked out of every seal, as well as the usual obliterated subframe and differential bushings. Its differential leaks horribly as well. In addition to that, both rear axles have boots which are completely destroyed. Lastly, both rear wheel bearings are also noisy.
Essentially, it is the average used e30! Moving forward to correct those issues, it was time to take it apart
A leaky transmission
Untitled by Jonathan Martin, on FlickrNow clean and resealed!
Untitled by Jonathan Martin, on FlickrUntitled by Jonathan Martin, on FlickrI opted to make a modification in the shifter department. It seems that essentially everyone swaps in a super short throw shift lever, which I am not a fan of.... especially with a Getrag 240. On my last m42-powered e30, I had a Z3 Lever and grew to absolutely hate it and ended up going back to a stock lever. For this car, I've opted to make the lever 1/2-3/4" taller. As an added bonus, the JB weld really doesn't flex like the stock shifter internals. My 318ti (formerly owned by moatilliatta) has a lever that was modified in similar fashion w/JB weld, which made me a fan.
After application of some strategic heat and cleanup
Untitled by Jonathan Martin, on FlickrThe red mark is a reference for where the pieces originally met. I didn't want it to be that much taller, just a slight increase.
Untitled by Jonathan Martin, on FlickrModified on left, stock on right
Untitled by Jonathan Martin, on FlickrAnother approach I'm trying is to fill the rear carrier bushing with window weld. In the past I have used the Turner rear bushing... while it does work, I couldn't see $100+ for one with the window weld already on the shelf.
Untitled by Jonathan Martin, on FlickrUntitled by Jonathan Martin, on FlickrMoving rearward, I went ahead and dropped the subframe after I got the trans back in. A few interesting things came about upon further inspection.
Untitled by Jonathan Martin, on FlickrObligatory "half of my car is on the ground" shot. Note super-awesome customer e30 m3 that is in for a engine and suspension overhaul later this year!
Untitled by Jonathan Martin, on FlickrNow, we return to the alignment chart. Every e30 I've had on the rack is generally off in the rear, unless it has some form of adjustability added. What was unusual here was that each side was inconsistent.. and I suspect this has something to do with it. I'm hoping that the arm is not bent - I assume it is not (at least not significantly), due to it reinstalling into the replacement subframe with no problem.
Untitled by Jonathan Martin, on FlickrAnother interesting failure - something rubbed through the boot retention piece on one of the axles.
Untitled by Jonathan Martin, on FlickrWith everything out, I needed to reseal the differential. Pulled the drain plug, and this was what came out. That is the entirety of the fluid as well.
Untitled by Jonathan Martin, on FlickrIt seems I am in need of a 4:10 small case. Massive problems call for massive solutions. To the least-organized parts shed ever we go! Usually, its totally full, as my mower parks in the open area.
Untitled by Jonathan Martin, on FlickrAfter some digging, I emerged with a small case 4:10 open, as well as a disassembled small case 3.64LSD from my ti. I'll have to order some bearings for the carrier - goal is to put the 4:10 ring gear on the LSD center. Fortunately, the second differential had significantly cleaner fluid.
Untitled by Jonathan Martin, on FlickrUntitled by Jonathan Martin, on FlickrOnward to reassembly! I went ahead and swapped out the brake hoses as well. Some of the hoses were dated 2014, others were original.
Untitled by Jonathan Martin, on FlickrOddly, this car actually needed trailing arm bushings. I can't say that I've seen an e30 that was legitimately in need of a set before, most are just fine after 30+ years. Queue the highly advanced installation tool
Untitled by Jonathan Martin, on FlickrAnother scar from this car's previous life as a parts car... for some unknown reason, the right trailing arm had a cut/slice, as if someone had tried to take a sawzall to the arm and then stopped. There is no damage to either arm besides this. Oh well... time to get out the welder. Cleaned up a bit for better weld penetration as well as photo documentation
Untitled by Jonathan Martin, on FlickrAfter a bit more grinding and some welding
Untitled by Jonathan Martin, on FlickrI think the other trailing arm noticed and decided that it wanted attention. This was by far the worst wheel hub I have ever removed - it took nearly an hour with the slide hammer and heat on the rear race.
Untitled by Jonathan Martin, on FlickrThat brings this thread up to date. Besides wanting to use this e30 daily, its main deadline is Vintage in mid-May. I'm hoping to have the subframe and differential overhaul finished sometime within the next few weeks. Once that is wrapped up, I'll actually get to put some time on it and see what other issues show themselves. There is a bit of an oil leak at the front of the engine that I need to track down. Also, AC season is approaching rapidly here in TN - going to have to sort that as well. As the compressor isn't locked up I'm hoping to avoid any major trouble. Overall, I'm quite excited to (eventually) use an e30 on a daily basis again!


Comment