
You're building the 2002 BMW wish they had. This car is what dreams are made of!
-
1990 325i Touring - The Bonsai Bimmer - Patiently Waiting
1984 316 Coupe - The Base Model - Pain in the Ass
1988 750iL - The Daily Driver
...And a couple others... -
Evurbody likes a nugget!Comment
-
Danke! Hope all is well up there Stanley.
Right?!
10.2.17 Fab Day 1
Great progress was made on Saturday. It was “fabrication day” #1. I was extremely grateful to have the help of Jesus and Sergio, together we were able to knock out nearly everything on my list.
Maestro has been continuing to work in the engine bay and had gotten to the point of laying down a thick coat of zinc-rich primer.
Keep in mind everything here has been done with keeping the fabrication minimally invasive while improving structural rigidity throughout the chassis.
-------------------------------
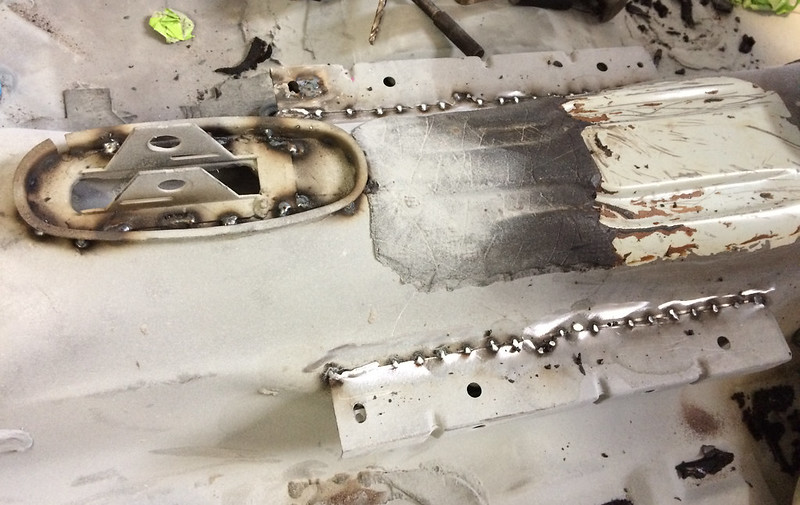
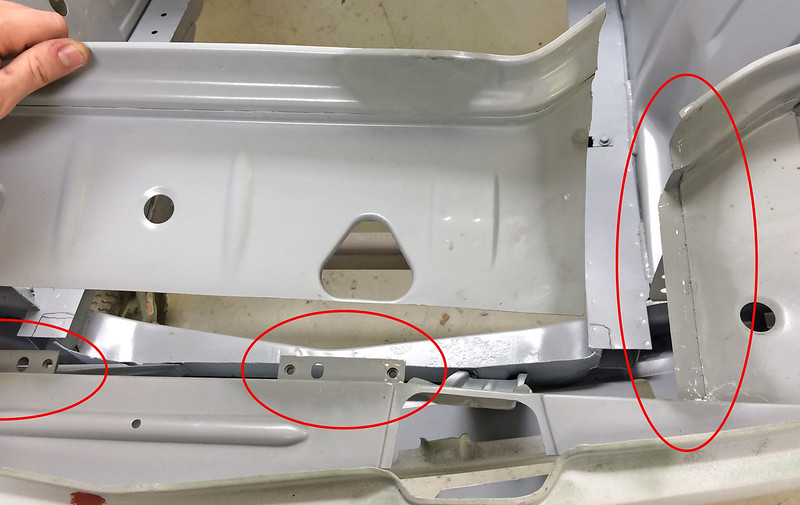
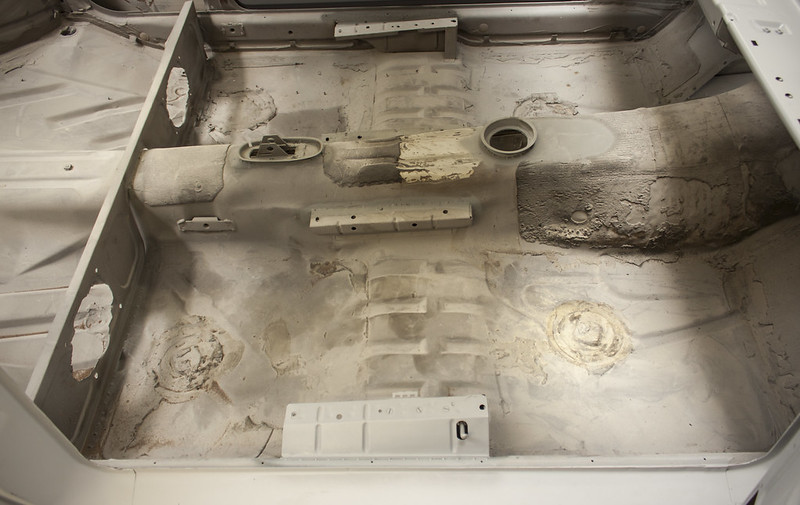
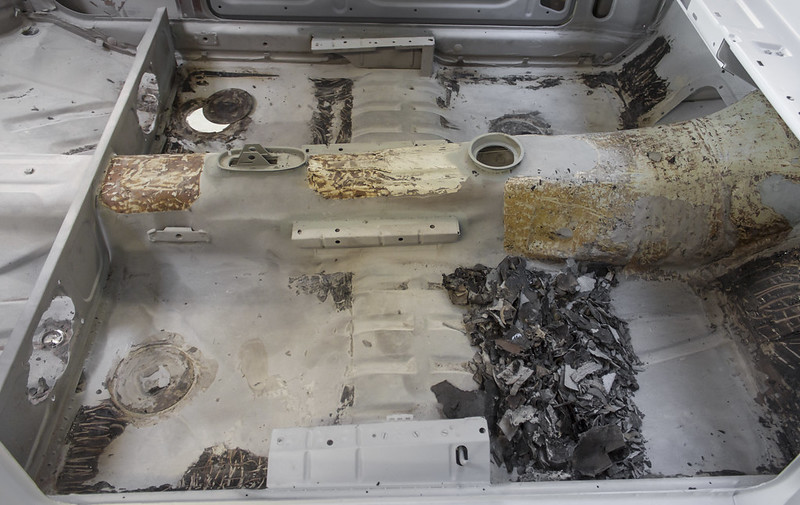
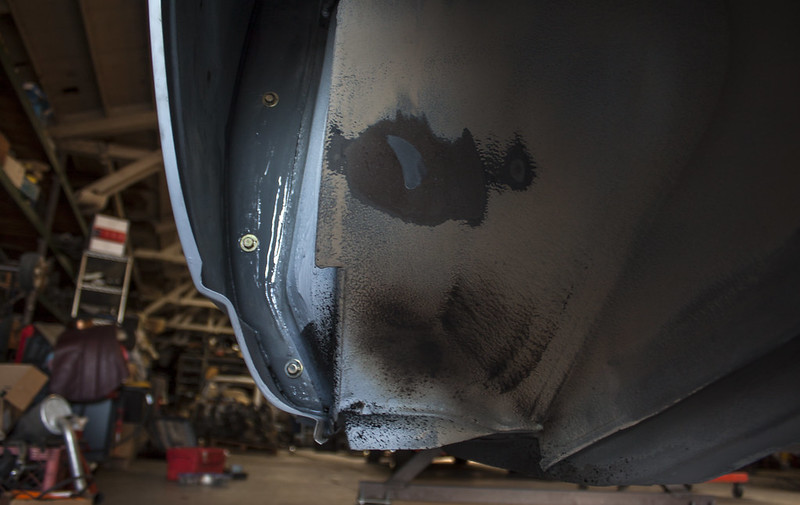
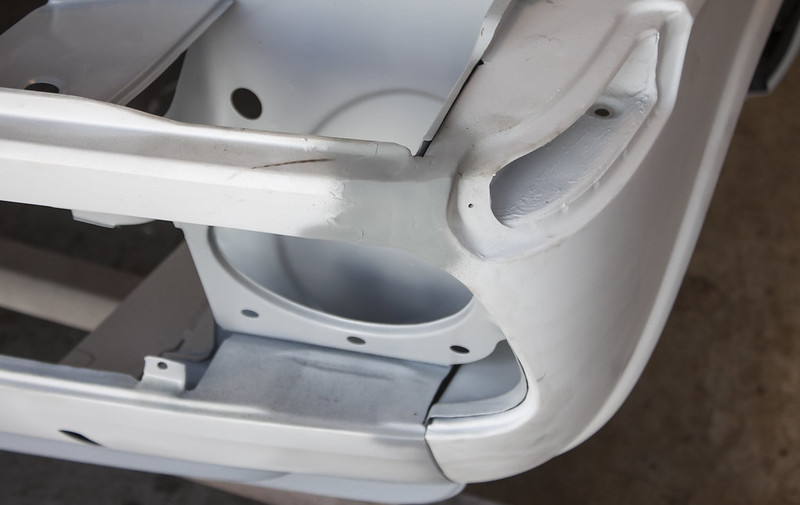
Before we get to the meat, here’s a warning. These are the inner bottom portions of each front fender. This is on a car that showed NO external signs of rust (anyone could have easily called it “rust free”). The fenders had never been removed and so there was a generous helping of body sealer covering/”sealing” this area from corrosion. This is a somber reminder that rust needs to be sought out, and never assume anything. The only way to correct it is to face it head on, a lot of times I’ve seen clients pull an Ostrich (I can’t [or don’t want to] see it, therefor it doesn’t exist) only to be bit in the butt later on.

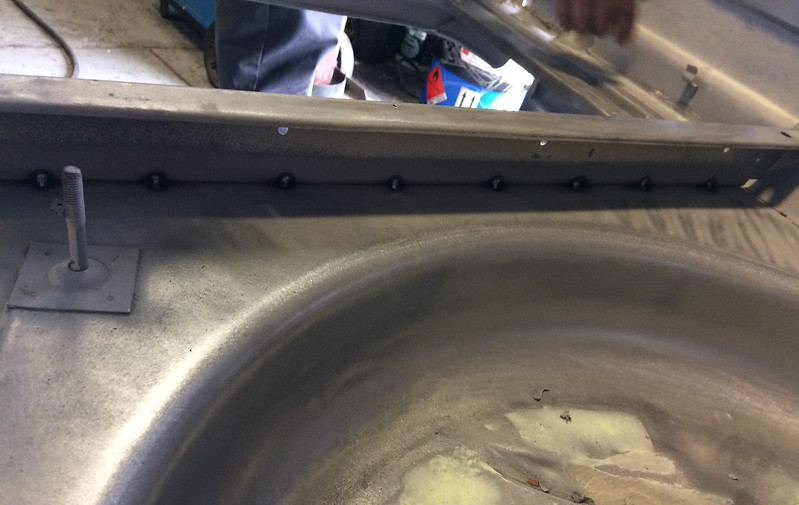
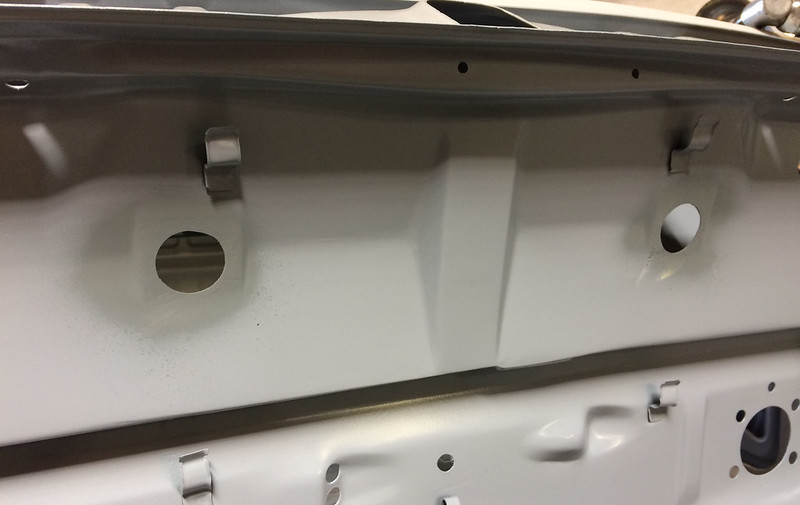
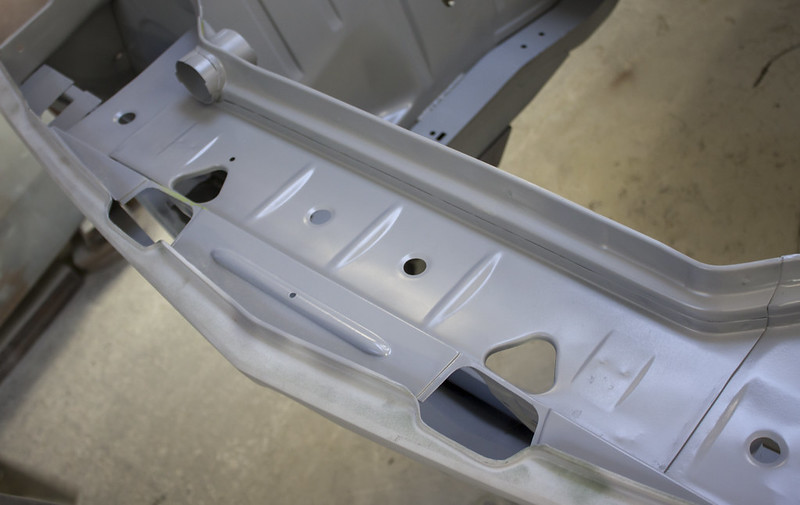
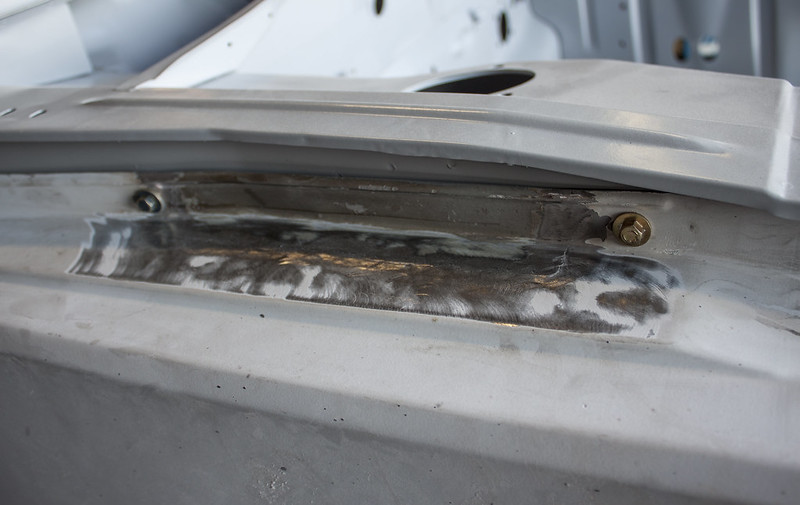
In the trunk we stitch welded the center divider and rear panel between the shock towers. Note that Maestro has been working on the trunk area.
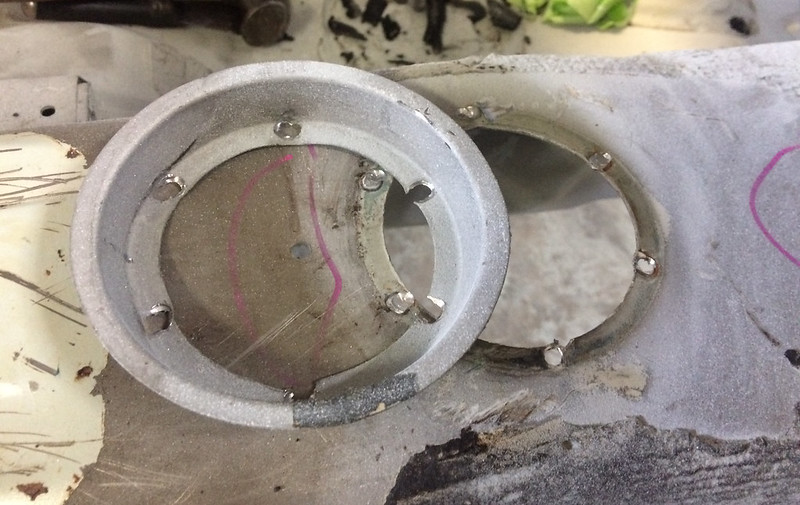
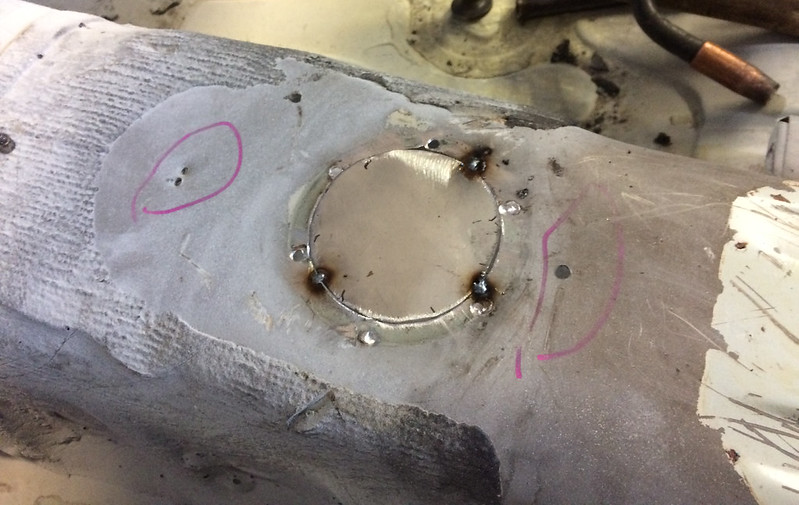
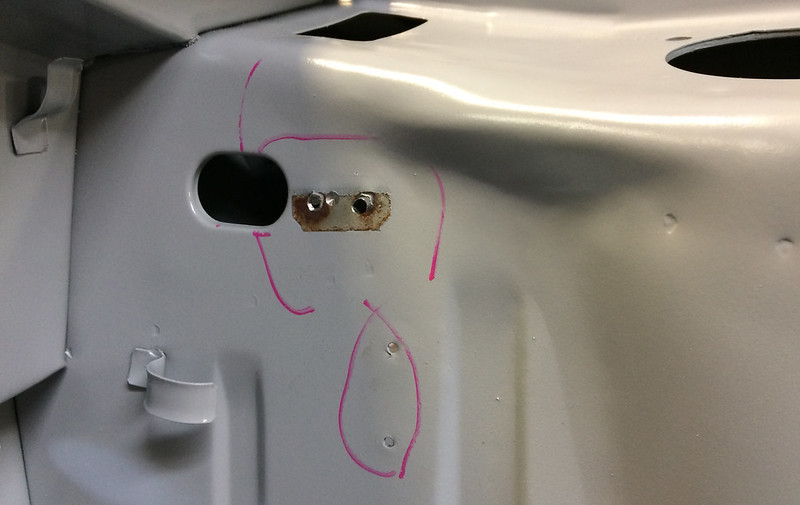
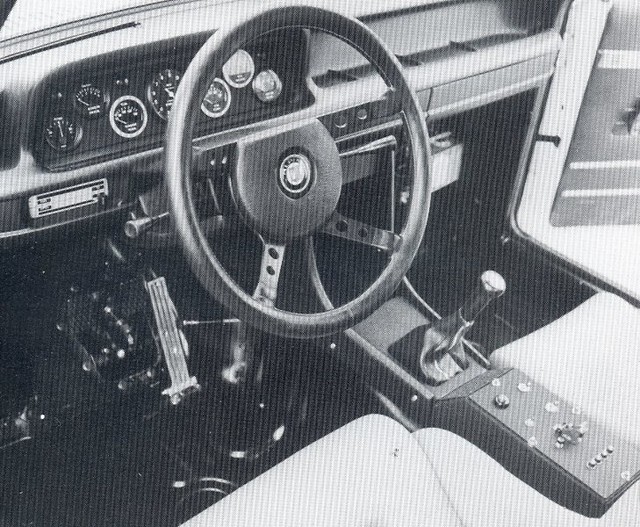
In the interior we removed the spot welds from the shifter surround and plugged the hole. Then we repositioned the surround 2.5” rearward and cut a new hole.

In addition we stitch welded the seat mounts, rear seat panel, and the e-brake sheet metal.
Lastly on the interior, Sergio welded in some captive nuts for new seat-belt mounting points on the B-pillars.
In the engine bay we removed a number of the unnecessary tabs/brackets.
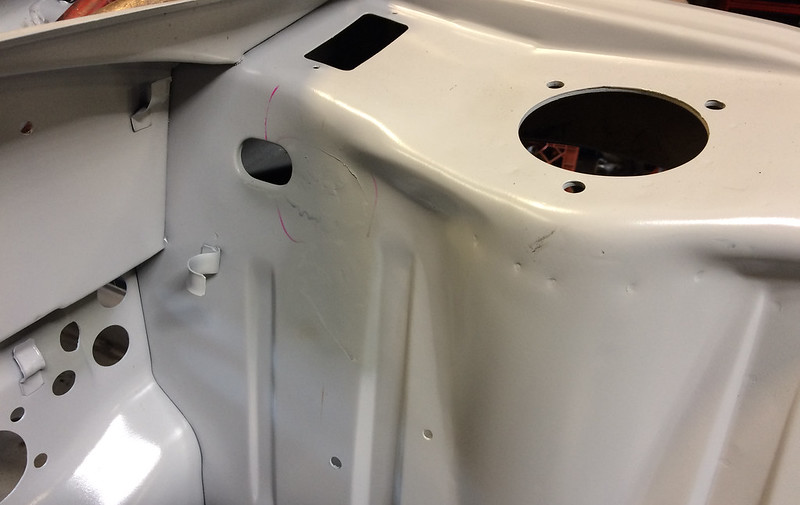
I plan on running the later-style heater core, so we enlarged the coolant hose holes up a smidgen.
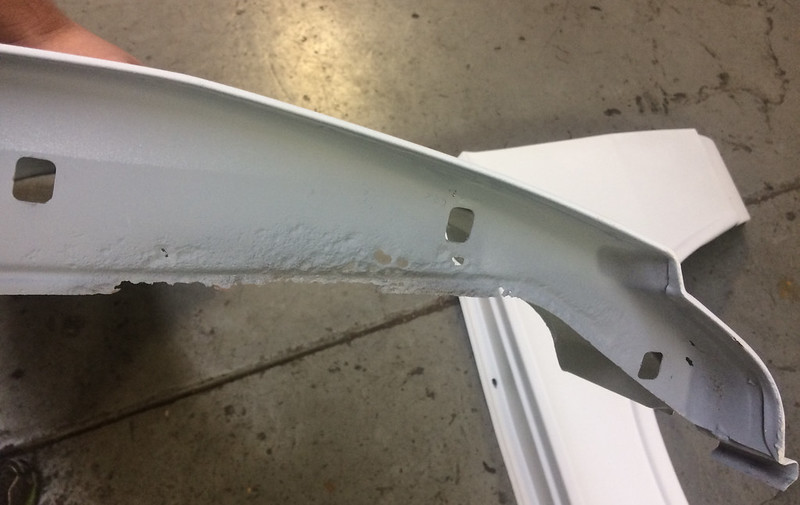
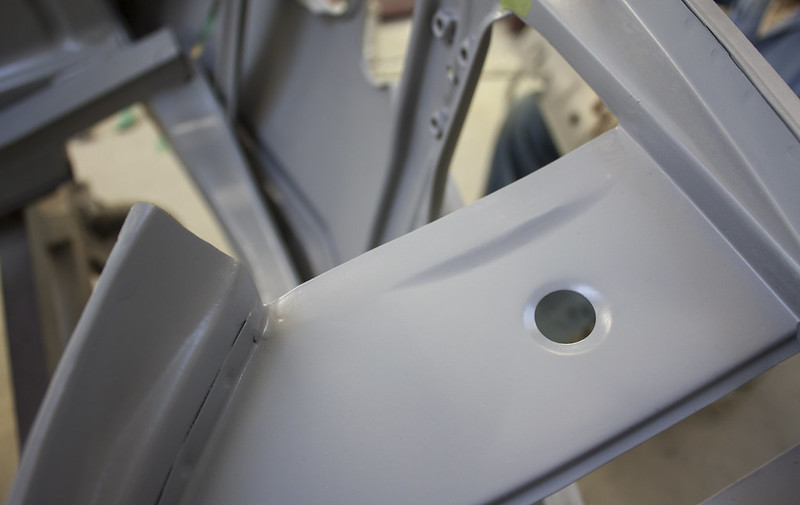
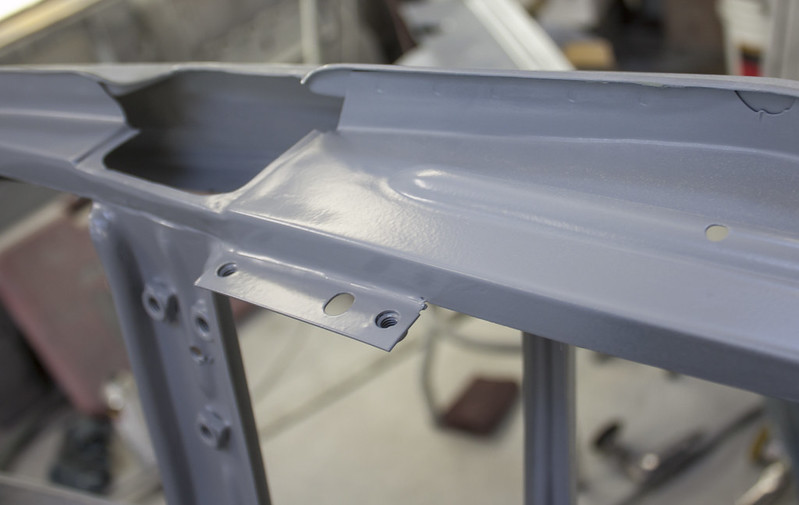
Since the front radiator support panel had to now be removable we ended up extending the side sheet metal sections by .5 inches, note that we mimiced the lip as well. We also liberated a few mounting tabs from an e24 and welded them on for the front-most tabs.
The result is a removable panel that could be mistaken as factory, by someone who didn’t know better. I’ll still add a couple mounting bolts.
And that just about wrapped up the day!
Still to come before paint:
1)Front frame rail gussets
2)Additional stitch welding
3)Converting to later style-fuel filler (debating)
4)Oil cooler hole and mounting
5)Coilpack mounting holes
6)Washer bottle mounting holes
7)Coolant reservoir and oil catch-can mounting holes
8)Front frame-rail support
9)Radiator mounts
10)Engine-bay headlight box cover/beauty panels
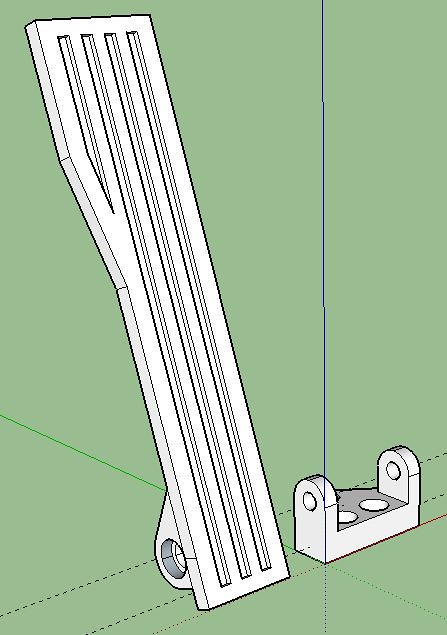
11)Grind off accelerator pedal mounting tabComment
-
AmazingSimon
Current Cars:
-1966 Lotus Elan
-1986 German Car
-2006 Volkswagen Jetta TDI

Make R3V Great Again -2020Comment
-
This isn't exactly the most glamorous part of the project, but I think it's the foundation on which the fun stuff can really shine.
-------------------------------------
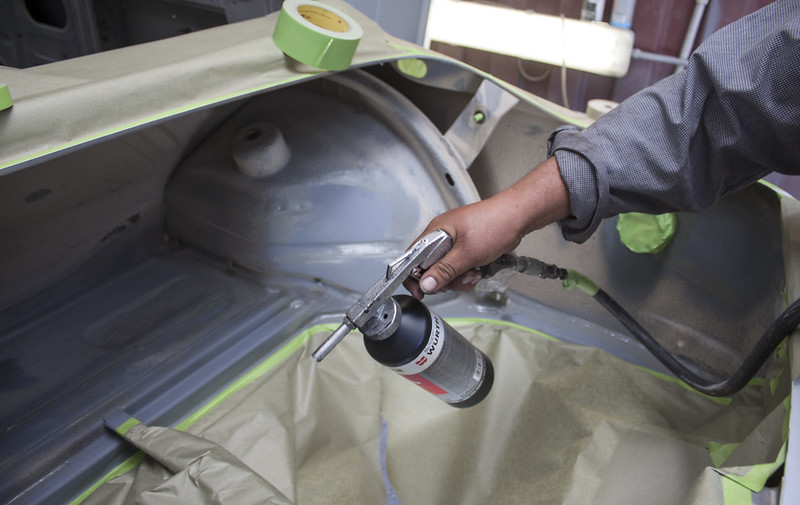
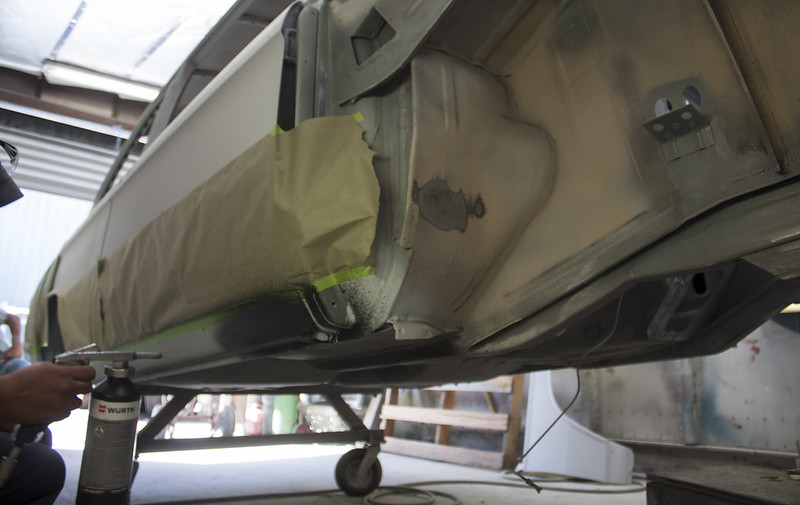
10.4.17 Wurth Texturing
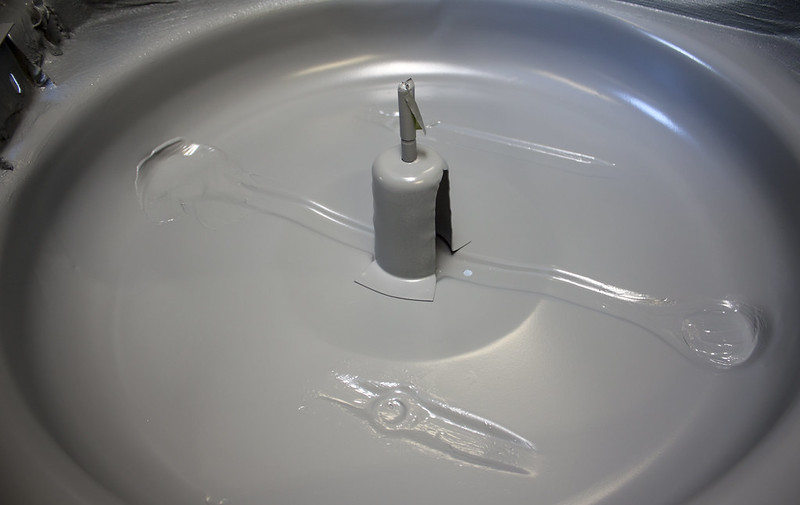
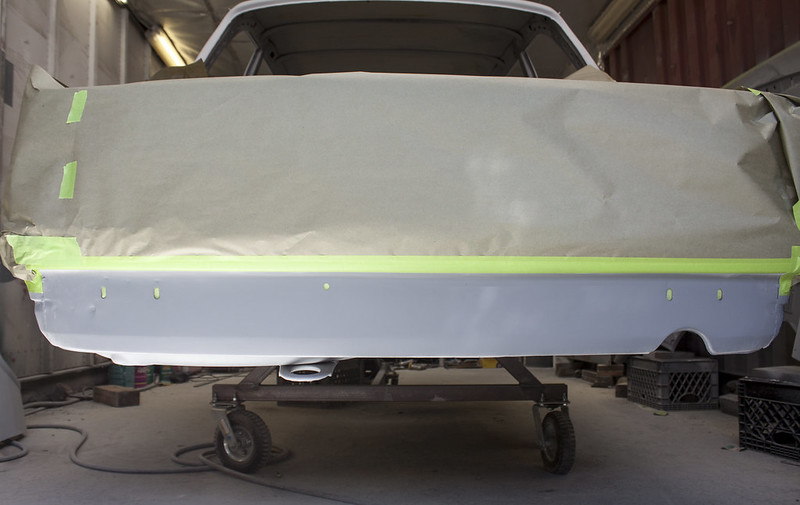
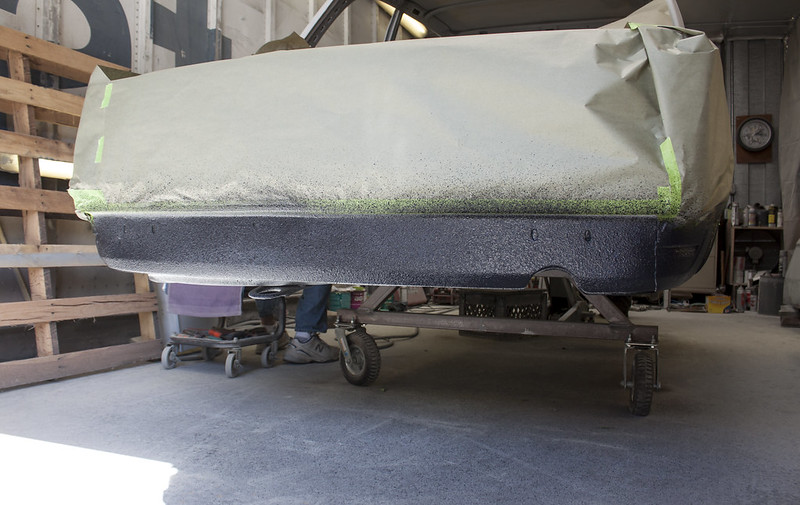
With the media blasting and trunk repairs, a lot of the factory texturing was removed or in bad shape. The Wurth texturing gun was brought out to get back to the OEM look.
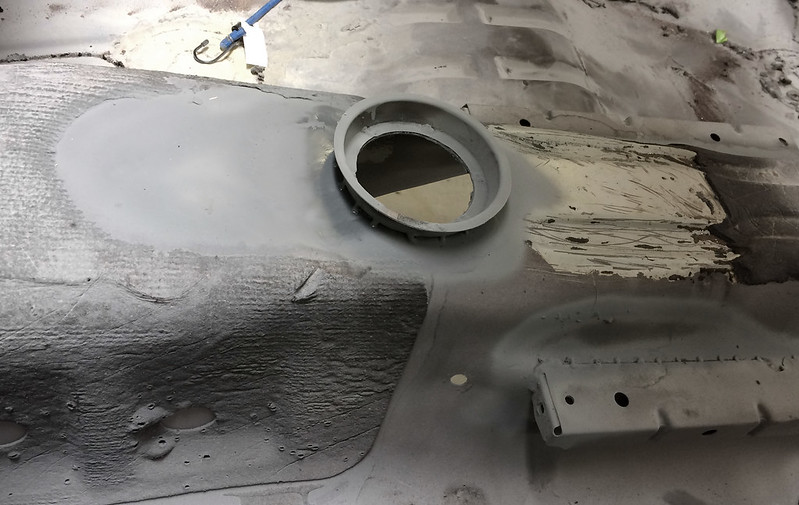
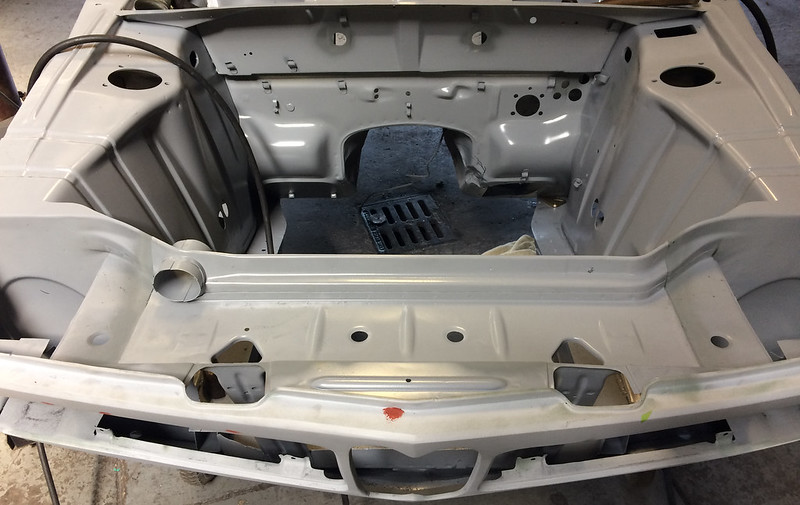
Maestro has just finished the rear wheel wells in the trink, so starting there we masked off the spare tire well and gas tank opening.
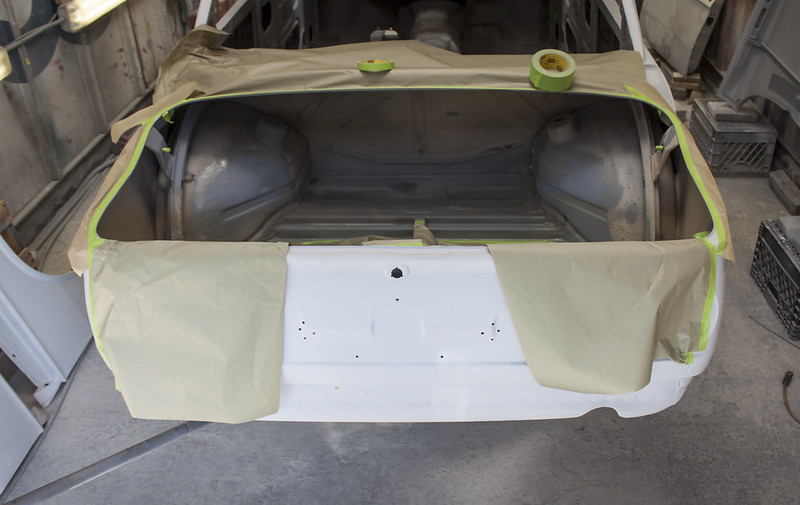
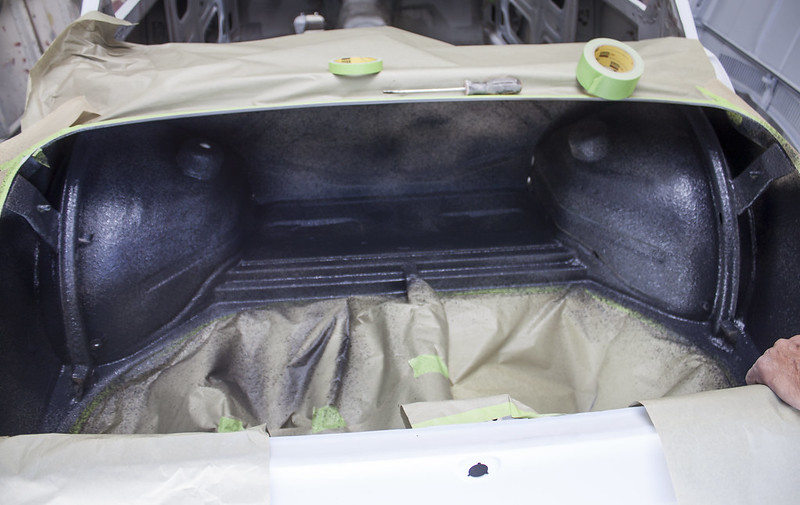
With that finished the final corrections to the trunk were made and then a coating of zinc primer laid over top.
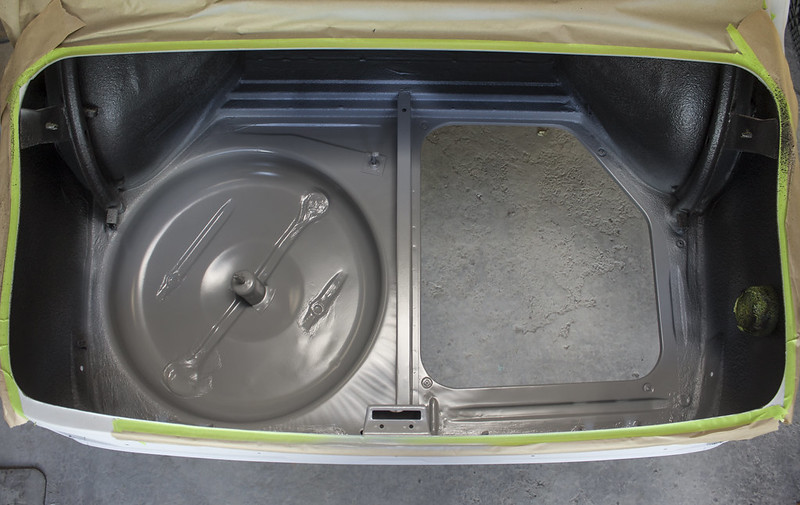
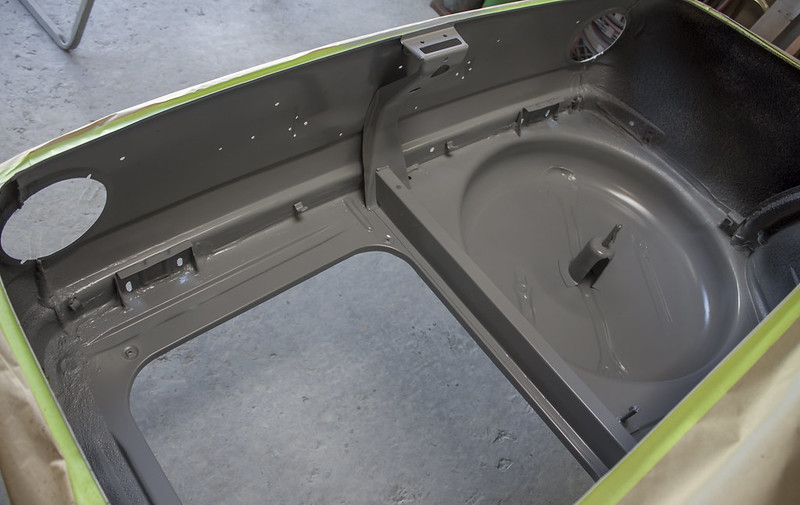
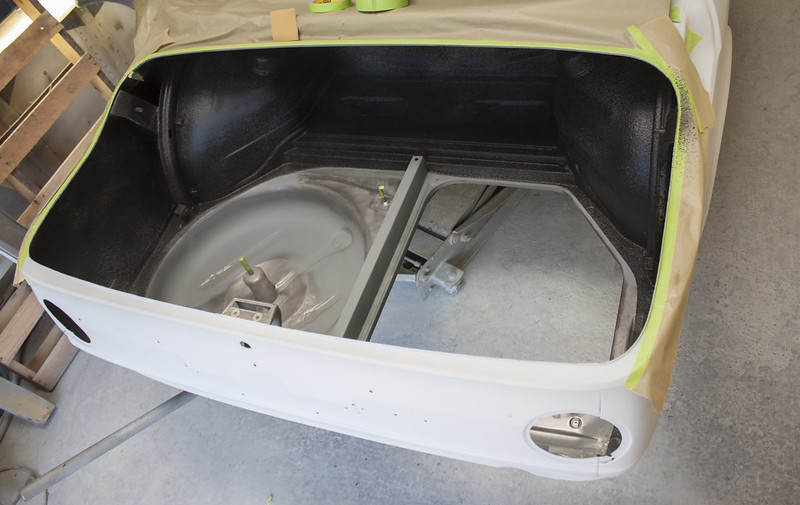
I don’t think the spare wheel well ever looked this good.
Next to get shot were the rockers and front/rear lower sections.
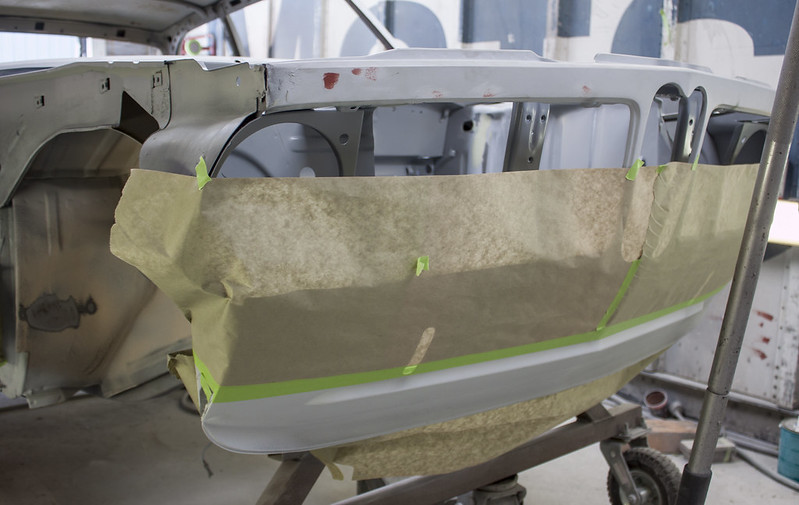
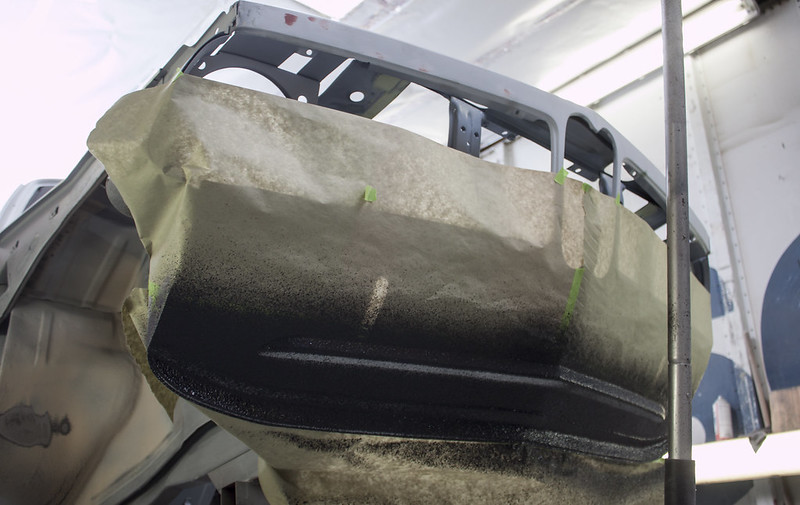
Up in the front Maestro has taken to smoothing out our fabrication work from Saturday. Namely making the small corrections needed to make the removable radiator support look like it could have been that way from the factory.

Looking forward to FabDay #2 this Saturday. We should get that wrapped up, then underbody clean up (and texturing). After that, the paint booth is looking mighty appealing!
If anybody is a bit tired of these “body-centric updates”... we’ve been reassembling “Project Pumpkin” right now. It’s pretty fun.
https://www.flickr.com/photos/152898...h/36809369083/
Also got a call from Momo yesterday, we’ll be doing some fun stuff with them next week.
-AndrewLast edited by SkiFree; 10-05-2017, 08:52 AM.Comment
-
I'd like to keep it with the factory side exit look, but a cool vintage Ansa double-tip would be tempting. The pumpkin should get driven, it will be living in Texas once finished.
Yesterday evening I removed the remaining factory tar. Should have done this sooner obviously. Spraying/wiping a little solvent throughout the cabin this afternoon will clear up any remaining tar/glue smears.
Comment
-
What did you use to remove the tar?
I have used both the dry ice and heat methods. The dry ice does a nicer job, but found you must be very patient and let the tar really freeze. Heat makes it come up quick, but things get sticky. Plain old gasoline is the cheapest method to removing glue in my experiences.Comment
-
Comment
-
Leaves an undesirable residue for paint prep which acetone fixes, but ~$2.8x/gal local gas prices vs ~$16/gal for acetone/lacquer thinner is a no brainer.
EDIT: ...and I meant the most recent removal. Noticed the scrape marks, freezing it tends to leave a honeycomb pattern.Comment
-
On the stuff stuck to the tunnel, I just used a scraper. No heat. The floor pans needed that bit of heat. Also, last night I cleaned up the residue with gas followed by the acetone via your suggestion (holy cow that acetone cleans the gas right up).
-------------------------------------------------------------
OK, well we had Fabrication Day #2.
Fender rust is now repaired (inner pillar mount sections on both sides and that piece on the upper shelf of the passenger side fender.
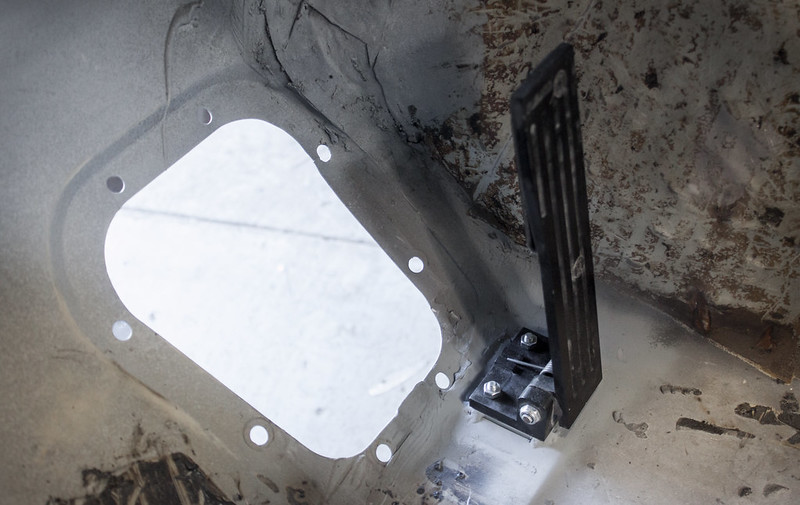
In the inside the stock "accelerator nubs bracket" was ground off and the IE pedal reinforcement plate welded on. It has been so fun to go from dreams to reality.
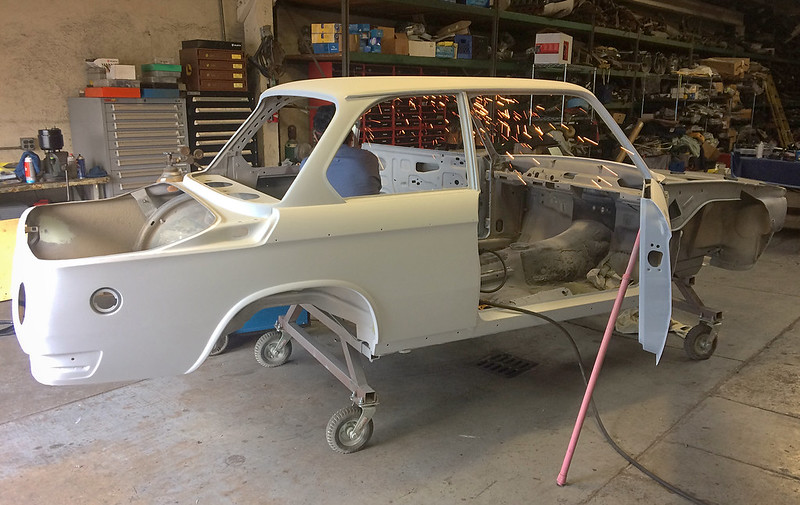
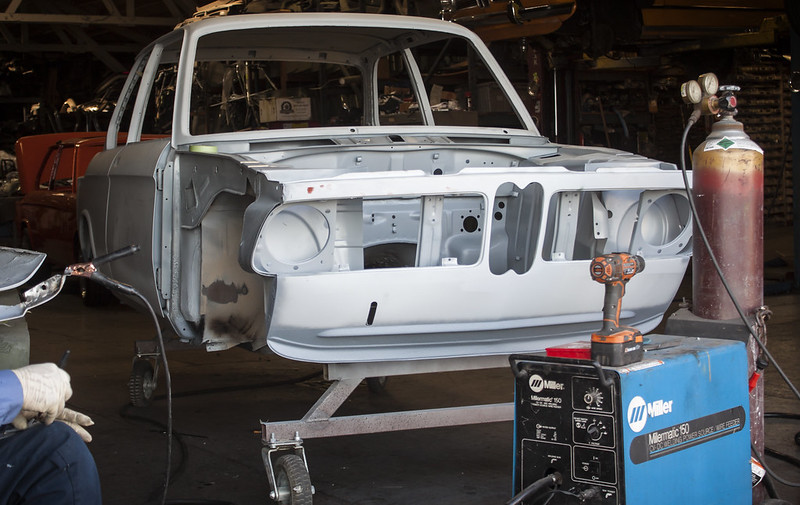
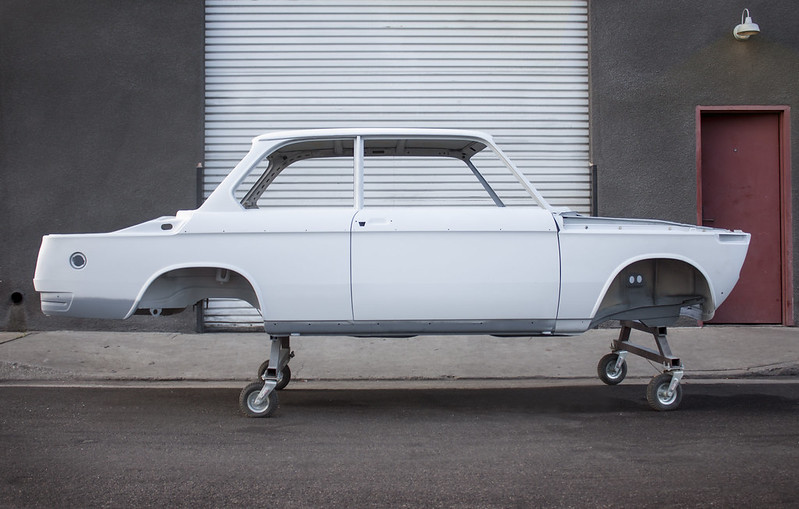
With the fabrication work on the fenders finished, the fenders were lines up and welded back in place. We then rolled the chassis back over to Maestro for a little more bodywork.
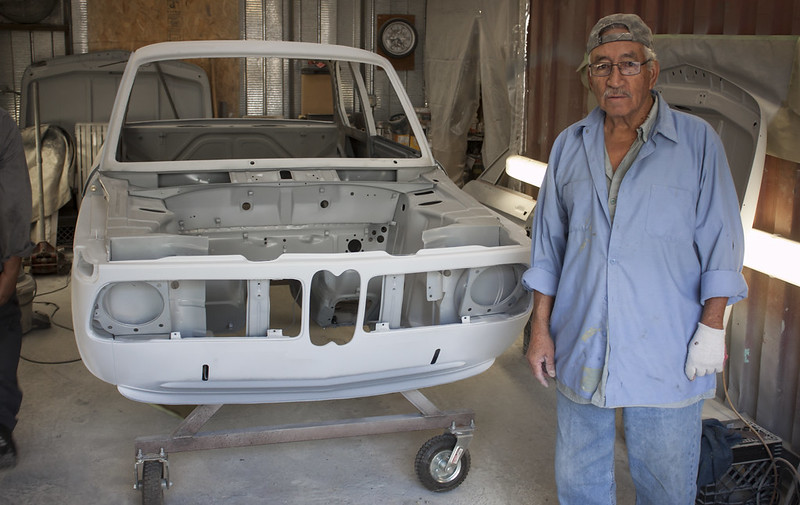
Maestro, the man himself. By all accounts, an artist.
The chassis is now %95 ready for paint. The following projects still remain.
1) cut hole for oil cooler
2) weld in a reinforcement brace at the front.
3) clean up the underbody, wheel wells, and spray on Wurth underbody coating.
 Last edited by SkiFree; 10-14-2017, 09:19 PM.
Comment
-
Artist.
Love.I BUY/SELL REFURBISHED CM5907s & CM5908s
HOWTOs:
DB vert plastic bumpers
OEM Keys
MTech1 docs
88 ix Lach/Card
91 ic Calypso 3.1
86 Cosmo 2.7
OEM+ or bust!

reelizmpro: I will always be an e30 guy.. I still do all of my own labor
TrentW: There's just something so right about a well-built M20 in an E30
e30m3s54turbo: I save my money for tuner parts.Comment
-
Really awesome stuff here... wowCurrent Collection: 1990 325is // 1987 325i Vert // 2003 525i 5spd // 1985 380SL // 1992 Ranger 5spd // 2005 Avalanche // 2024 Honda Grom SP // 2024 Yamaha XSR700 // 2024 Jeep Gladiator Rubicon

Comment
-
Wow!! Nice andrew. I need to give some TLC to my body. But want to get it running first. Then will pull everything back apart and paint. Great work! Can't wait to see it with paint
Sent from my iPhone using Tapatalk(SOLD) 1988 327i Build Thread: http://www.r3vlimited.com/board/showthread.php?t=155086
1970 Gruppe 2 2902 M20 Turbo Build: http://www.r3vlimited.com/board/showthread.php?t=373891Comment

Comment