
That's awesome. It's so weird coming from my garage to having that much space. I've been gone for a couple days down in Florida for a wedding so I should have more updates on the shop tomorrow. The metal walls should all be up in the back which is going to make it look 100x better.
-
-
Killer E30 man, lovin' it. Nice build.
Any idea what kinda numbers you're putting down with the S50?
Still trying to decide if I wanna go down the swap road, or build and Turbo the M20. Well, when I find one that is
Comment
-
Comment
-
Went to dankfest yesterday. Pretty much the last time the car will be out in public until SOWO.
Plans for the offseason are to clean it up and do some mods that I neglected that really need to be done in order to get the car to where it really needs to be.
List of things currently planned are:
Respray the exterior (some body work will be involved removing dents, etc and will be stock color)
sideskirts?
rear valence (Zender?)
Install crackless dash
seats reupholstered
fix small rust in battery tray
get car tuned properly
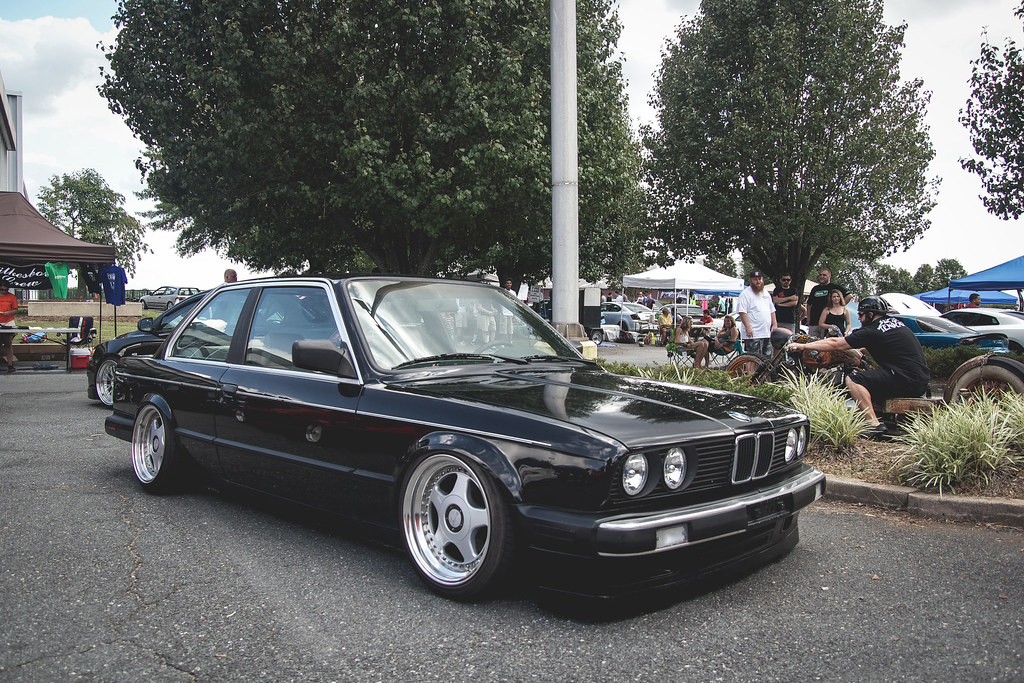 BMW at dankfest (1 of 1) by Dillon Makar, on Flickr
Last edited by dillon7; 01-07-2015, 11:20 PM.
BMW at dankfest (1 of 1) by Dillon Makar, on Flickr
Last edited by dillon7; 01-07-2015, 11:20 PM.Comment
-
Long time no update.
I'm back at school so I haven't even been around the car for a couple months. I've just been planning what to do to it during the winter. I contemplated selling it but I figured it would be hard to sell for a good price with the condition that it is in. My shop is getting a paint booth in November so I decided to be the test dummy and be the first car sprayed in it.
The shop is pretty much complete when it comes to all the restoration work of the building. The walls and floors are painted and all the metal work is done. Basically all that is left is to finish the office. I don't have any pics but I'll get some during thanksgiving.
Now it's time to start buying machines and fab stuff so we can start building more cars.
Here is a little teaser pic of the floors finish.
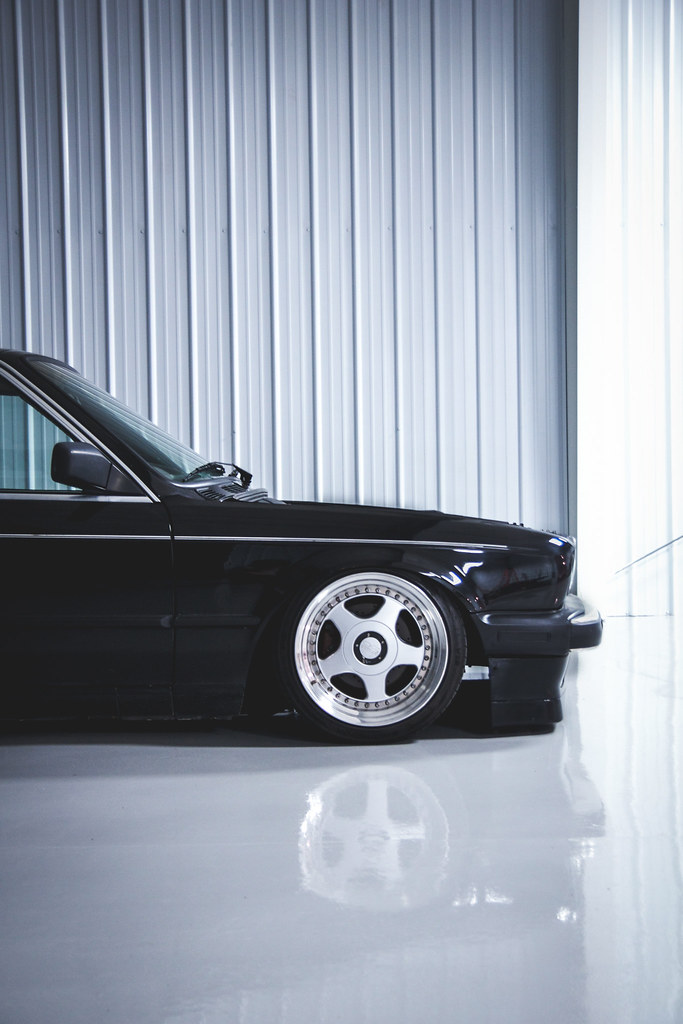 Vertical e30 shop front end (1 of 1) by Dillon Makar, on Flickr
Last edited by dillon7; 01-07-2015, 11:21 PM.
Vertical e30 shop front end (1 of 1) by Dillon Makar, on Flickr
Last edited by dillon7; 01-07-2015, 11:21 PM.Comment
-
UPDATE TIME
First of all, sorry for the lack of updates. I've been busy with school and I haven't worked on the car at all, I have just been working on the shop. It's a new year though which means time for round two on the BMW. I'll try to get the rest of the pictures in this thread working again but let's move onto the new stuff.
Here is quick update on the shop and some of the stuff we have done to it.
We finally got a couple machines installed with plenty more to come.
 Drill Press (1 of 1) by dillonmakar, on Flickr
 Laithe (1 of 1) by dillonmakar, on Flickr
 Mill (1 of 1) by dillonmakar, on Flickr
 Band Saw (1 of 1) by dillonmakar, on Flickr
Put some new tile down in the office.
 Office with new floor (1 of 1) by dillonmakar, on Flickr
 CLose up office floor (1 of 1) by dillonmakar, on Flickr
Installed some shelving to put parts on.
 Shelving (1 of 1) by dillonmakar, on Flickr
Race car chassis for future bad ass hot rod build.
 Race Car Chassis (1 of 1) by dillonmakar, on Flickr
Got some other major things done as well that you can see in the photos above. Obviously, the floor got painted. Also, the blue lines running around the shop are the airlines that we finally have working which are amazing. We also installed a lot of new lighting and many other miscellaneous things.
Okay, enough of the shop and onto the car. So as previously stated in my previous post, I have decided to respray the car. It looked great in photos but it had plenty of imperfections and the roof had a lot of "crows feet" so I figured now is better than never.
It took about two relaxed days to strip the car and everything actually went pretty smooth. I won't bore you tear down pics I'll just show the final result. The only negative thing was the discovery of rust...which was slightly expected. There are only 3 areas on the entire car and they are all right next to each other which I guess is a good thing. I'll be taking care of it while I do the body work this week so I'll post a lot during the repair.
 Bmw and Subbie tear down (1 of 1) by dillonmakar, on Flickr
New wheels
 BMW Tear Down (1 of 1) by dillonmakar, on Flickr
Ugly booty
 BMW Rear End Tear Down (1 of 1) by dillonmakar, on Flickr
cancer
 Tail Light Rust (1 of 1) by dillonmakar, on Flickr
more cancer
 Battery Tray Rust (1 of 1) by dillonmakar, on Flickr
And last but not least, after stripping the car I decided to give a little test run with the sander. No going back now.
 BMW Sander (1 of 1) by dillonmakar, on Flickr
Current plan is to sand the car tomorrow then start on body work. Stay tuned!Last edited by dillon7; 01-07-2015, 11:32 PM.Comment
-
1990 325i Touring - The Bonsai Bimmer - Patiently Waiting
1984 316 Coupe - The Base Model - Pain in the Ass
1988 750iL - The Daily Driver
...And a couple others...Comment
-
Started some of the grinding work on the car today. The most pressing issue was the roof. The paint had developed "Crows feet" so the guy painting the car suggested that I strip it down to the bare metal to completely fix the problem. Grabbed a grinder and 80 grit sand paper and got to work. It took much longer than I expected but I finally got it all off.
Perks of being on air are being able to air out to reach the roof easier...;D
 BMW aired out for grinding (1 of 1) by dillonmakar, on Flickr
Grinding away
 Me Grinding roof (1 of 1) by dillonmakar, on Flickr
Finished with the 80 grit
 Roof Grinded (1 of 1) by dillonmakar, on Flickr
I still have to go back over it all with 180 grit but my arms were tired so I will get to that tomorrow. Before calling it a night I went ahead and got the pin stripe off as well.
 BMW removing pinstripe (1 of 1) by dillonmakar, on Flickr
Plan for tomorrow is 180 grit over the roof, start body work (fixing dents), and then go from there.
Also, I'm looking for a black vinyl sport interior and early model rear valence (zender or any other kind) so if you have one for sale let me know!Comment
-
Worked the past two days on the car so this update will include both days.
First thing first was bondo/putty work. I don't have photos of all the places but the sunroof, roof, passenger door, and passenger rear quarter panel were the main areas.
 Sunroof wet bondo (1 of 1) by dillonmakar, on Flickr
 Roof bondo (1 of 1) by dillonmakar, on Flickr
Here is the area of the door I worked on and you can see the high low spots. For some reason I don't have a pic doing the bondo work but oh well.
 door sanded (1 of 1) by dillonmakar, on Flickr
After a lot of sanding and applying more bondo/putty and then some more sanding I arrived at this point.
 Sunroof bondo sanded (1 of 1) by dillonmakar, on Flickr
 roof bondo sanded (1 of 1) by dillonmakar, on Flickr
Next, it was time to address all the bare metal on the roof. Mixed up some sealer and had my dad spray the roof since I suck at painting and he has a lot more experience than I do.
 Dad spraying sealer (1 of 1) by dillonmakar, on Flickr
The sealer dried really quickly and then it was time to prime the roof. Don't have any action shots but here in the first layer.
 first coat of roof primer (1 of 1) by dillonmakar, on Flickr
I let it dry overnight and came back today to do the second layer. Before shooting though I did some more sanding on all the places that were hard to reach such as door jams, window jams, trunk jam, etc.
 window jam sanding (1 of 1) by dillonmakar, on Flickr
Also did the front valence.
 front valence sanded (1 of 1) by dillonmakar, on Flickr
Finally, I moved onto the roof and passenger side of the car to do a lot more of a certain something...sanding. Sanded all the primer and prepped it for the second layer which came out like this.
 final primer (1 of 1) by dillonmakar, on Flickr
 final door primer (1 of 1) by dillonmakar, on Flickr
 final primer right rear (1 of 1) by dillonmakar, on Flickr
That's as far as I got this weekend. The next good couple hours of my day were spend cleaning the shop from the awful mess I made and definitely decided to never do bodywork in there again. I had to go back to school tonight so I won't have any updates for a little bit but I plan on coming home next weekend to finish all of the prep work so that it can be painted two weeks from now. The plan for next week is to wet sand the entire car, look for anymore possible small dings, fix rust issues, and then be good to go for paint!Comment
-
-
-
Do you go to App? Sweet build!Comment
-
Comment
-
Awesome, I'm hopefully transferring there after I finish my associates at community college here in Raleigh. One of my best friends is a junior there and is into jeeps and cars in general. I'll let you know next time I'm up there with the e30.Comment
-
Comment


Comment