88' Zinno M3 (Progress Thread)

Collapse
X
 
  • Time
  • Show
Clear All
new posts
  • archie
    R3V Elite
    • May 2010
    • 5448

    #46
    YES! He adds the bumper tape! Was gonna ask but just saw it.
    Bumper tape on the E30 M3 is like a frame around a beautiful photo.
    88 M3 Diamantschwarz
    89 M3 Zinnoberrot
    56 Isetta

    __________________________________
    ALL California E30 M Owners CHECK HERE
    http://www.r3vlimited.com/board/showthread.php?t=307420
    __________________________________
    LIKE ARCHIE'S on Facebook!
    www.facebook.com/archiesicecream

    Comment

    • bradnic
      No R3VLimiter
      • Jul 2012
      • 3550

      #47
      Booya on both the tape and the Strömumg :-)
      I BUY/SELL REFURBISHED CM5907s & CM5908s

      HOWTOs:
      DB vert plastic bumpers
      OEM Keys
      MTech1 docs

      88 ix Lach/Card
      91 ic Calypso 3.1
      86 Cosmo 2.7

      OEM+ or bust!


      reelizmpro: I will always be an e30 guy.. I still do all of my own labor
      TrentW: There's just something so right about a well-built M20 in an E30
      e30m3s54turbo: I save my money for tuner parts.

      Comment

      • jhaurimn
        R3VLimited
        • Nov 2012
        • 2224

        #48
        Originally posted by archie
        YES! He adds the bumper tape! Was gonna ask but just saw it.
        Bumper tape on the E30 M3 is like a frame around a beautiful photo.
        Originally posted by bradnic
        Booya on both the tape and the Strömumg :-)
        Thanks guys :) bumper tape really does complete the look of the car.

        I havent been doing much lately, as temperatures here have been subzero for over a week. Its been miserable actually. I brought the m3 over to fix the fuel line which meant my daily 325i got stuck outside. Then this happened...


        I bought some oem premium speakers to replace the aftermarket ones. My intent was to have everything stock. But now Im not sure if I should do that or go with better performing, subtle looking speakers. Thoughts?


        And a preview of whats next...


        I found out that trim piece Raul was talking about that goes into the oil cooler comes with the front bumper, and cant be bought seperately...does anyone have an extra one?
        Last edited by jhaurimn; 07-29-2016, 08:37 AM.
        Current:
        1989 325i
        1988 M3
        1987 325ic
        Past:
        2001 330ci
        2001 M3

        Comment

        • ksjdan
          Grease Monkey
          • Jul 2012
          • 330

          #49
          Excellent choice of dye. If you want a good result, you should use a aerosol sprayer.
          My 1990 325is Build Thread

          Comment

          • jhaurimn
            R3VLimited
            • Nov 2012
            • 2224

            #50
            Originally posted by ksjdan
            Excellent choice of dye. If you want a good result, you should use a aerosol sprayer.
            After ordering everything, I realized leatherworldtech sold a disposable spray gun to spray the dye. So I am waiting on that to arrive now :)

            Edit: And now I just discovered preval is at homedepot! I will probably give that a try so I can conquer the seats this weekend. So excite
            Last edited by jhaurimn; 02-28-2014, 07:40 AM.
            Current:
            1989 325i
            1988 M3
            1987 325ic
            Past:
            2001 330ci
            2001 M3

            Comment

            • jhaurimn
              R3VLimited
              • Nov 2012
              • 2224

              #51
              Well, heres the results of the leatherworldtech kit. I tried using both preval and the crown spra tool. Both did not work well with the dye. That being said, if you blot the final layer of dye with the sponge, it leaves almost no brush strokes and evens the dye out. If you have a compressor with an airgun, id absolutely reccomend using that.

              So heres what I started with. I didnt get good before pictures of the passenger seat, as it was in pretty good shape to begin with. The driver seat was the reason I went through with this.

              First, I had to take care of this rip.


              I bought 'liquid stitch' with my repair kit. While its not the best, it will keep the rip closed, so it doesnt keep catching on my pants and rip even more.


              You can see in those pictures the extend of the cracking. In this one you can see most bolsters are cracking as well. The thiegh bolster and upper side bolster in particular have seen better days.


              So, if you want more info or pictures on the process, I can post them or send them to you. But heres how the seats turned out after applying the leather filler, sanding it down, and putting on 5 coats of dye.


              Heres the passenger seat. There was much less cracking on this seat, so it looks almost new now.


              Very satisfied with the kit. I spent $100 on everything when it was all said and done. Waiting for the dye to cure completely before I throw them back in the car.
              Current:
              1989 325i
              1988 M3
              1987 325ic
              Past:
              2001 330ci
              2001 M3

              Comment

              • e30m3s54turbo
                No R3VLimiter
                • Jun 2010
                • 3195

                #52
                Your seats came out great!
                Projects Hartge,Alpina & AC Schnitzer Builds.http://www.r3vlimited.com/board/showthread.php?t=280601
                http://www.r3vlimited.com/board/showthread.php?t=227993
                http://www.r3vlimited.com/board/showthread.php?t=289362

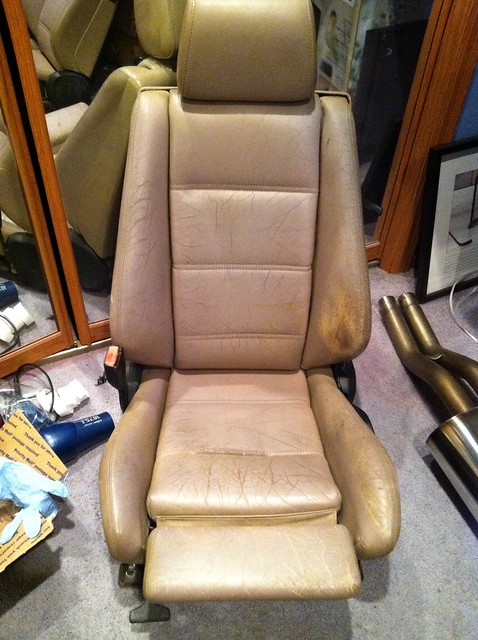
                DSC04926 by Raul Salinas, on FlickrDSC03413 by Raul Salinas, on Flickr
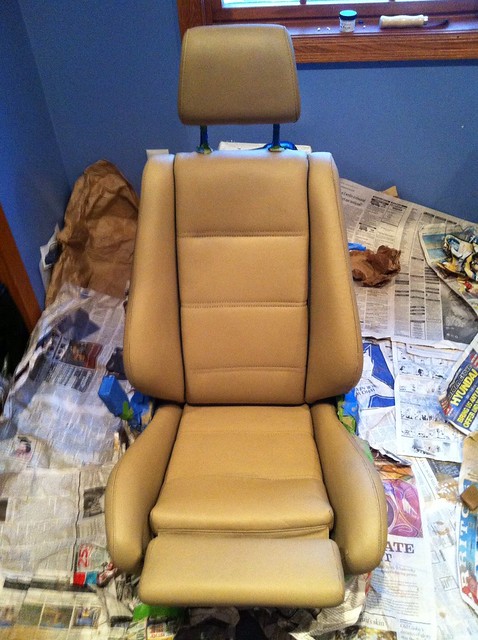
                Comment

                • The Dark Side of Will
                  R3VLimited
                  • Jun 2010
                  • 2796

                  #53
                  Originally posted by jhaurimn
                  So, if you want more info or pictures on the process, I can post them or send them to you. But heres how the seats turned out after applying the leather filler, sanding it down, and putting on 5 coats of dye.
                  I would very much appreciate that. Is there a "seat restoration" thread on R3V?

                  Comment

                  • CorvallisBMW
                    Long Schlong Longhammer
                    • Feb 2005
                    • 13039

                    #54
                    Wow, those look brand new. Fantastic.

                    Comment

                    • Javier h
                      E30 Enthusiast
                      • Sep 2007
                      • 1189

                      #55
                      Seats

                      The trick, as I understand it, is to sand the cracks down and then apply as little filler as possible. What I did on my other seats was nearly strip the color...pretty much leaving NO CRACKS whatsoever on the seats. Be very careful. You dont want to go into the hyde itself either. I used a chemical to achieve this taking just a few seconds. Let that dry before sanding. Make sure also that you sand everything well before dying as it will make the paint stick, otherwise there is a tendency to peel. Then I barely applied anything (as far as filler was concerned) as it wasnt even necessary. The cracks will likely not come back as bad as if you filled it. Also, it helps if you let these cure a few months. This assumes you have extra seats. Nothing beats re-upholstering though but all things considered if done properly, you can extended the life a few years before sink money into buying new leather.

                      Comment

                      • YAN-3
                        R3V OG
                        • Jan 2004
                        • 6018

                        #56
                        well, this is nice to see. congrats on a M3 and keep up the great work!

                        Comment

                        • Nats88M3
                          Wrencher
                          • Sep 2013
                          • 209

                          #57
                          Damn that's some good detailed work... congrats!!

                          Comment

                          • jhaurimn
                            R3VLimited
                            • Nov 2012
                            • 2224

                            #58
                            Thanks for the kind words guys! Im very excited with how the seats turned out.

                            Originally posted by Javier h
                            The trick, as I understand it, is to sand the cracks down and then apply as little filler as possible. What I did on my other seats was nearly strip the color...pretty much leaving NO CRACKS whatsoever on the seats. Be very careful. You dont want to go into the hyde itself either. I used a chemical to achieve this taking just a few seconds. Let that dry before sanding. Make sure also that you sand everything well before dying as it will make the paint stick, otherwise there is a tendency to peel. Then I barely applied anything (as far as filler was concerned) as it wasnt even necessary. The cracks will likely not come back as bad as if you filled it. Also, it helps if you let these cure a few months. This assumes you have extra seats. Nothing beats re-upholstering though but all things considered if done properly, you can extended the life a few years before sink money into buying new leather.
                            Thanks for posting this info, good for me and others to know. I did put as little filler as possible down, and avoided heavy sanding as like you said I didnt want to go into the hyde. And unfortunately, our winter isnt going anywhere so these seats will be able to cure for awhile :p
                            Current:
                            1989 325i
                            1988 M3
                            1987 325ic
                            Past:
                            2001 330ci
                            2001 M3

                            Comment

                            • robrez
                              No R3VLimiter
                              • Jul 2008
                              • 3376

                              #59
                              Thanks for the write-up. I needed this to get psyched for my own leather dye project. Can you provide more info. on the Liquid Stitch product. Is it a Leatherworld product too?

                              Also, in retrospect, do you think the cost/benefit analysis would favor taking the seats apart prior to dying? Or do you think it wouldn't be worth the extra work?

                              BTW, a full-write-up on the seat dying process would be awesome. I know there are already a couple DIYs but it's nice to see different peoples' perspectives. And your seats came out well.
                              sigpic
                              January 2012 COTM

                              Comment

                              • jhaurimn
                                R3VLimited
                                • Nov 2012
                                • 2224

                                #60
                                Originally posted by robrez
                                Thanks for the write-up. I needed this to get psyched for my own leather dye project. Can you provide more info. on the Liquid Stitch product. Is it a Leatherworld product too?

                                Also, in retrospect, do you think the cost/benefit analysis would favor taking the seats apart prior to dying? Or do you think it wouldn't be worth the extra work?

                                BTW, a full-write-up on the seat dying process would be awesome. I know there are already a couple DIYs but it's nice to see different peoples' perspectives. And your seats came out well.
                                Yes liquid stitch is a product they sell. It worked good but is hard to make it look nice. If you are using it before dying the seats you should be okay.

                                I got into most of the hard to reach areas, so it's not required. However taking the seat back off of the seat bottom is a good idea. You'd have to try really hard, pressing the leather to look into the deep creases to see the parts I missed.

                                I might post up some more pictures tomorrow that shows a more step by step with a description of what I did. But it's really pretty straight forward, I just followed the directions they give you :)
                                Current:
                                1989 325i
                                1988 M3
                                1987 325ic
                                Past:
                                2001 330ci
                                2001 M3

                                Comment

                                Working...