
Top !
-
1990 325is
m52b28
3.73lsd
g260 (1987 325is 5spd tranny) -
Jordan - that is very cool ! That is one thing I've always wanted to do/swap on my 318i sunroof car! Please document the process in detail :)Mtech1 v8 build thread - https://www.r3vlimited.com/board/sho...d.php?t=413205
OEM v8 manual chip or dme - https://www.r3vlimited.com/board/sho....php?p=4938827Comment
-
Jordan, you don't want a set of RZ378s for this build do you? Sorry if wrong venue to ask.1991 318is Brillantrot daily driver (slow restoration)Comment
-
Thanks, I'll do my best. The bodyshop is literally across the driveway from the BMW shop I work at, a brisk 30 second work from my counter, but they do work quick lol. I'm trying to pop over there a half dozen time a day to check on progress and break balls on anything I don't like.Originally posted by Jean View Post
Today I went into the shop and tore down the getrag 240 that came with the car. I already knew it was toast when I drained the fluid and saw a ton of syncro teeth grouped around the drainplug magnet. The previous owner confirmed she was a grinder, and told me he already had a known good 240 set aside that he would give me since I intent to keep the original drive train. Sweet.
I wanted to take a look inside, but more importantly I wanted to tear down the trans to have a spare set of assembly hardware to have cad plated with the rest of the cars hardware. With a spare set I can carefully swap all of it one bolt at a time without upsetting anything.
Here is what I believe to be the 2nd gear synco, with many missing teeth:

Here is the same syncro ring on the right, look how many teeth its missing compared to the 1st gear syncro on the left with none missing:
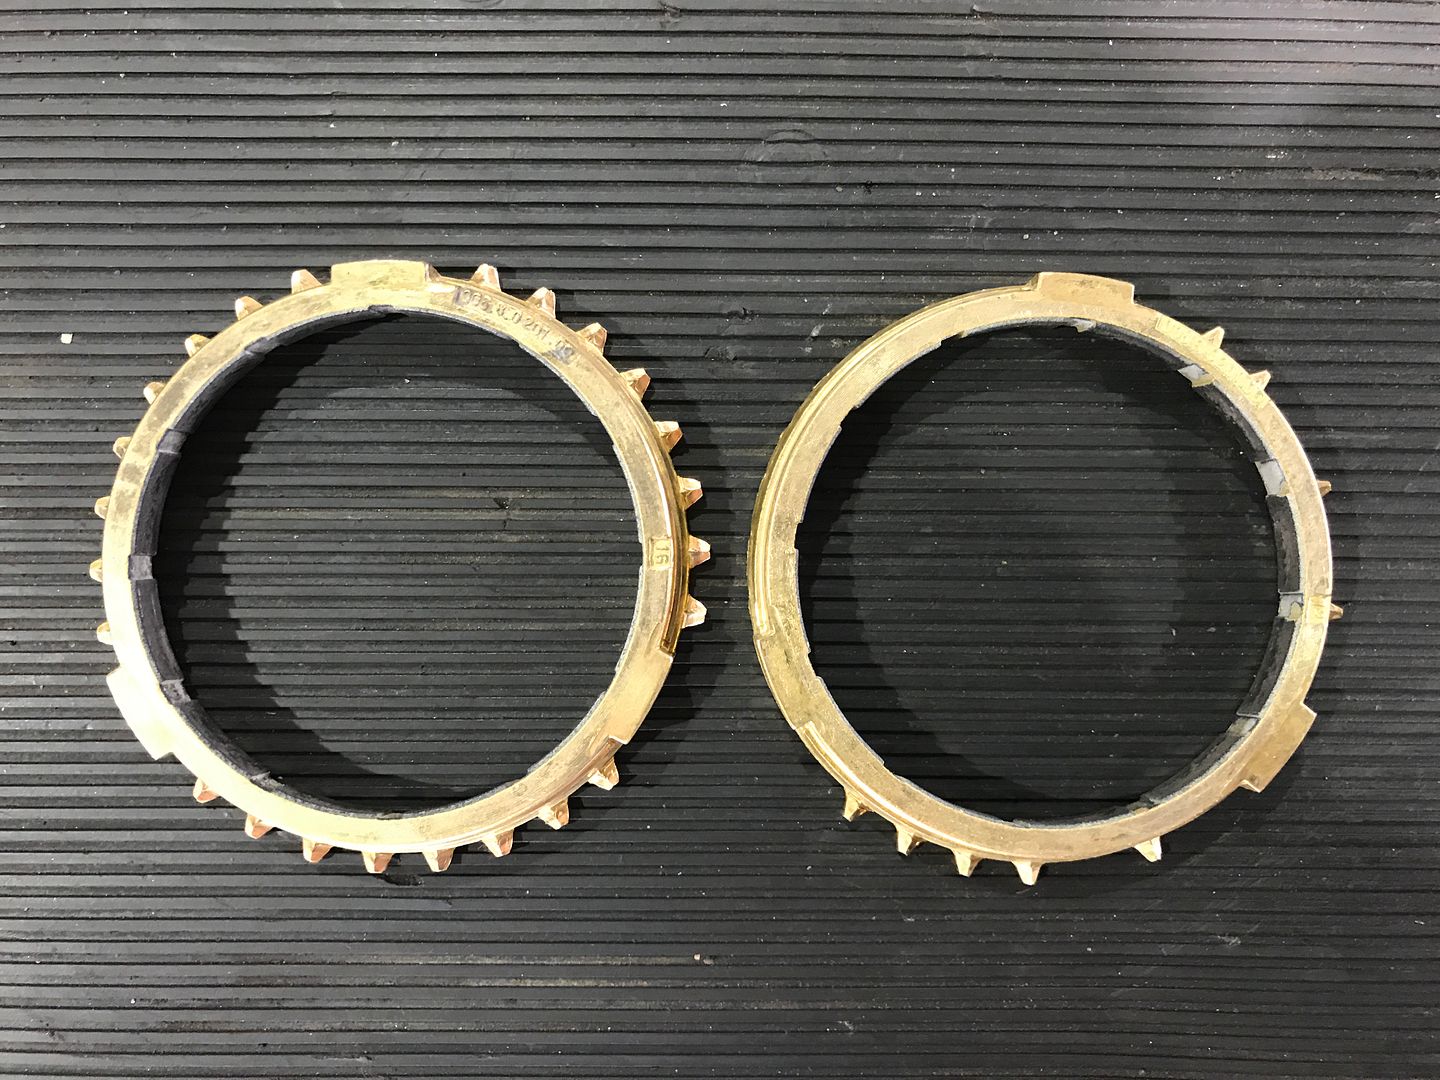
It makes sense that 2nd gear is going to be the one worn more than any other, and none of the other syncro rings were damaged although the clutch friction lining on the ID looked to have seen better days.
I set aside all of the hardware in a bin, and then tossed the rest in the scrap metal bin behind the shop.
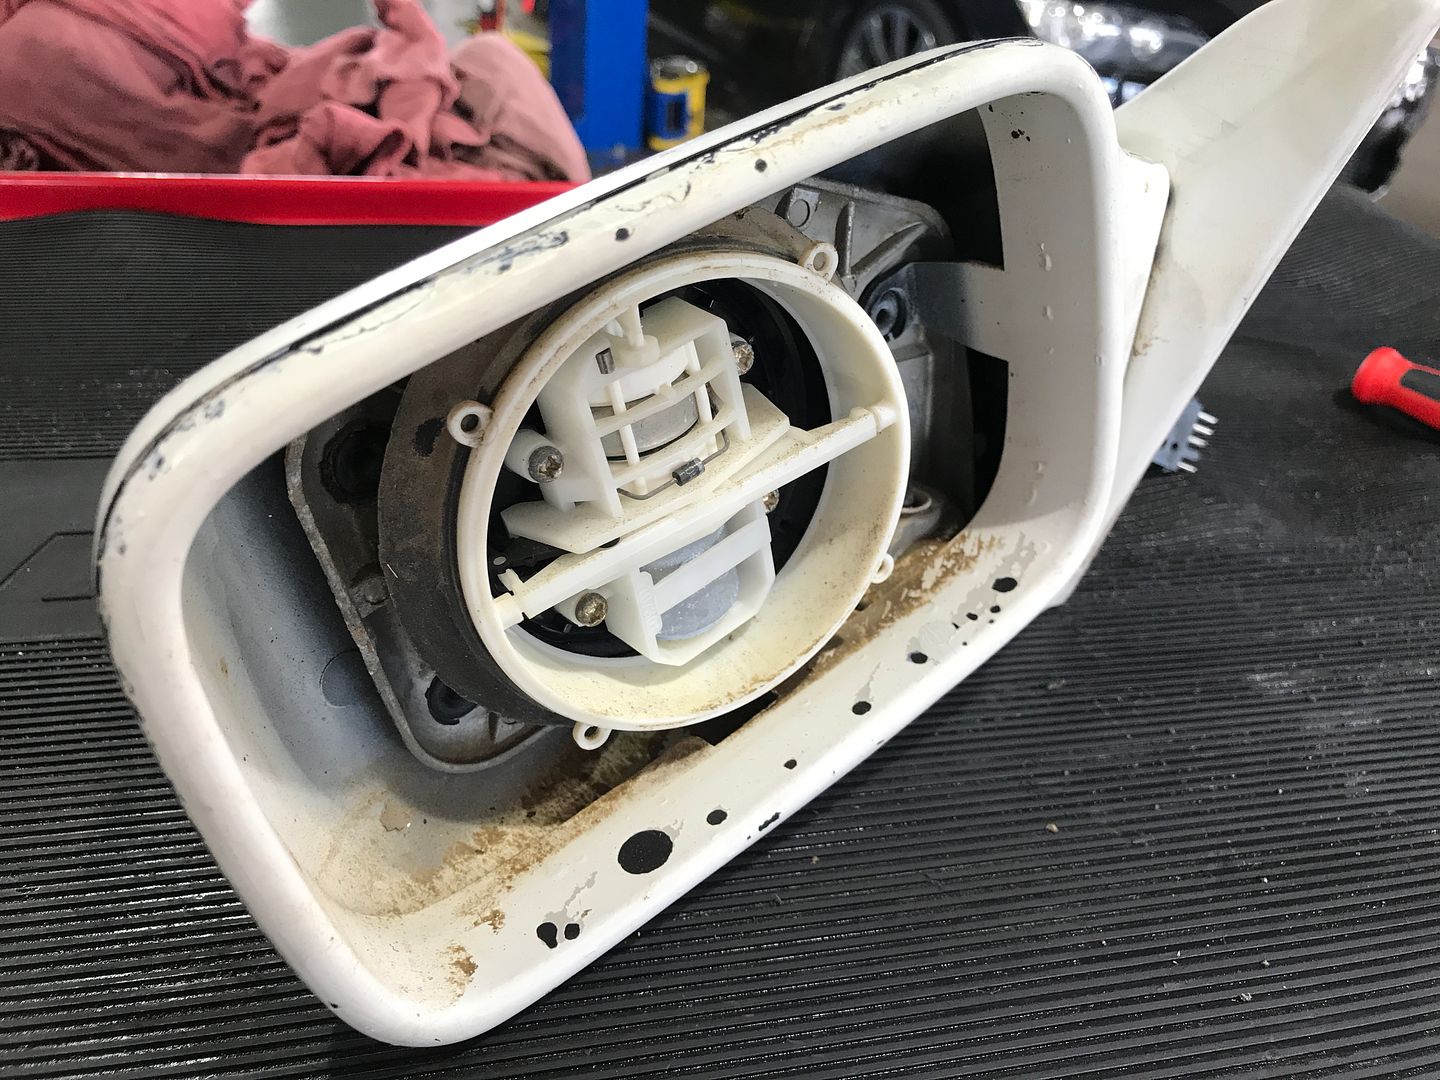
Moving on, I started to prep many of the small parts that need to be painted on the car seperate from chassis itself. Brake ducts, fog lamp blanks, hood hinges, hofmeister kink trim, and the door mirrors.
The paint on the door mirrors was strangely blistered, with each blister filled with a small amount of brownish black tar like liquid. Weird. Don't know if this is a result of the paint used or what. I disassembled both mirrors and bead blasted them raw inside and out, forgot to take an after pic.
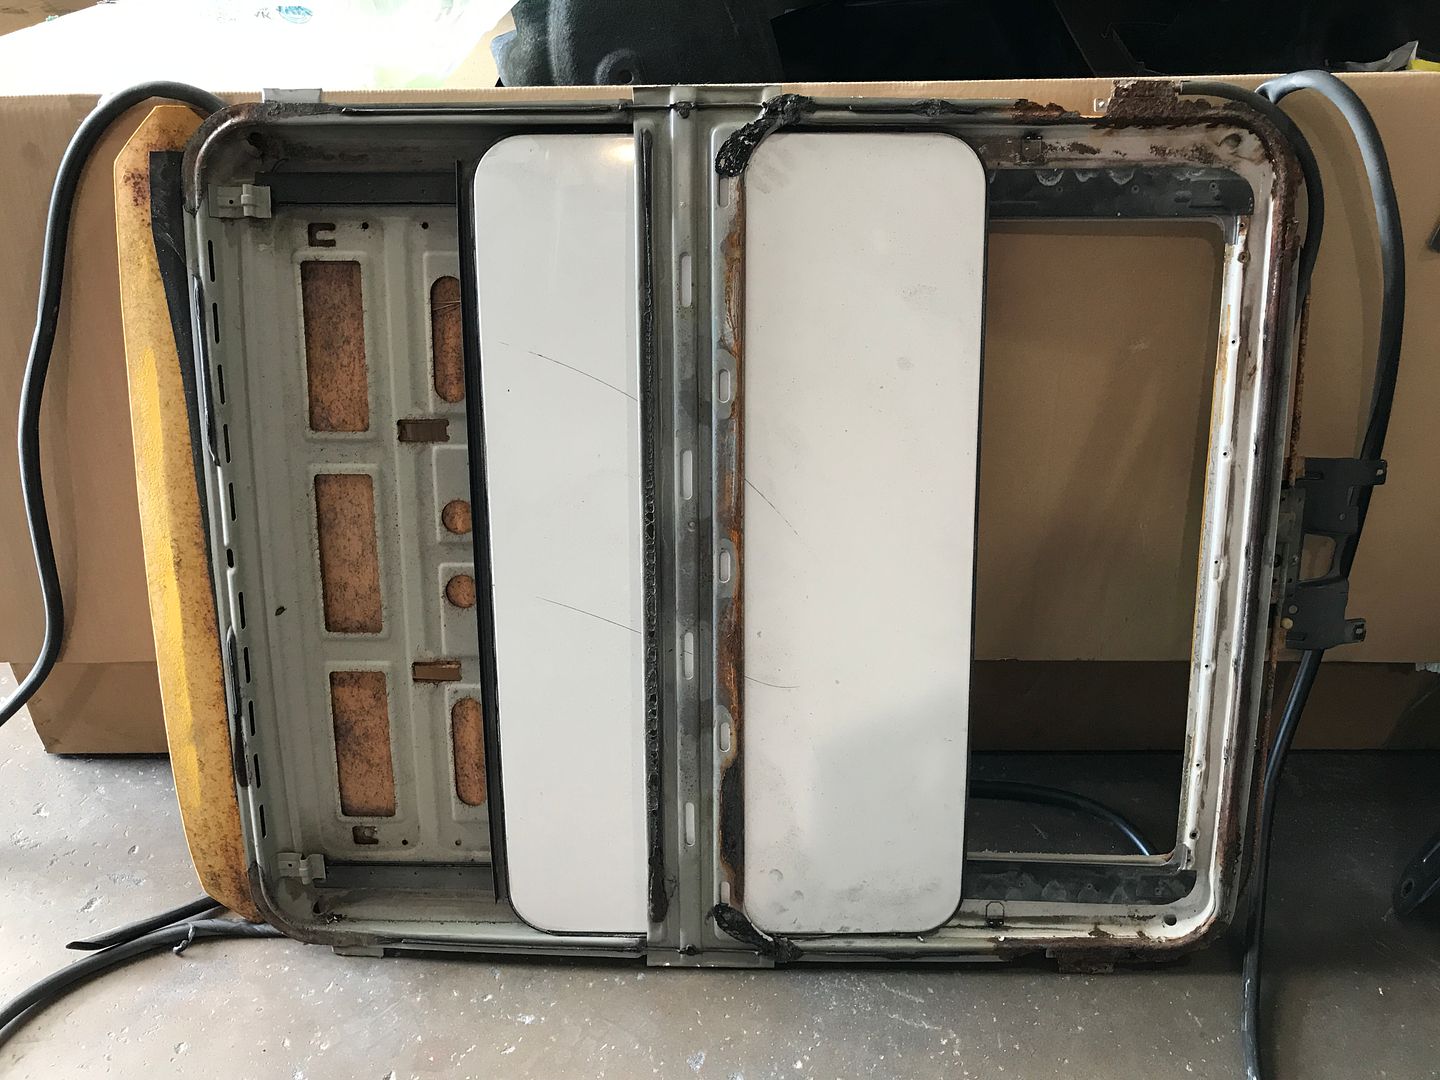
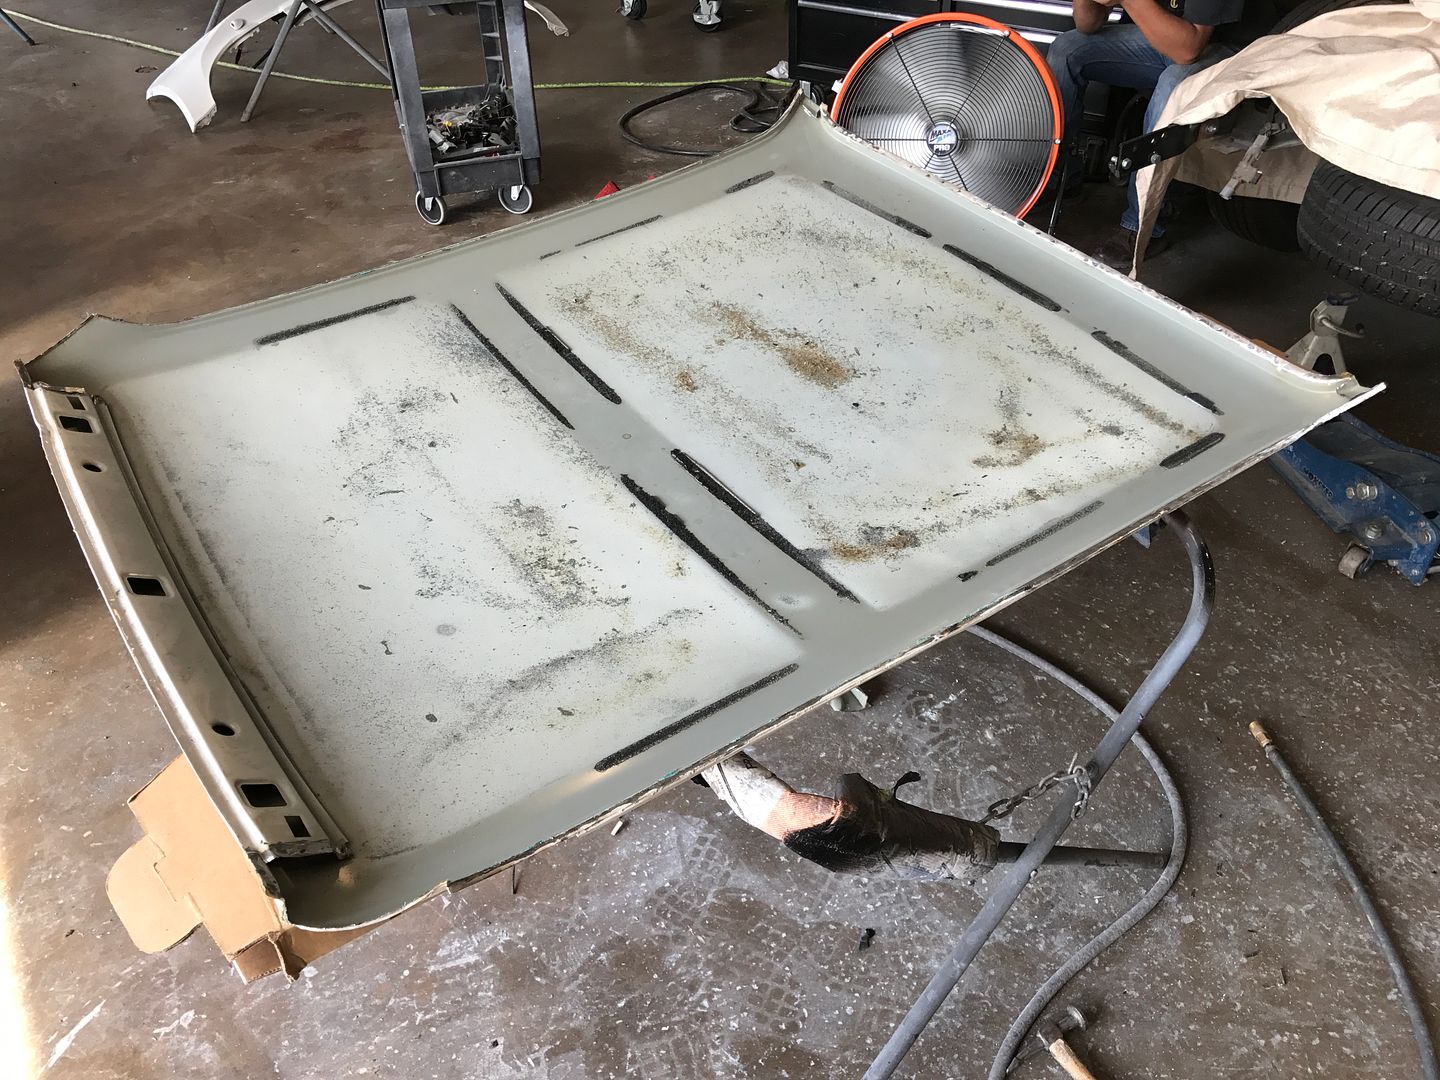
I went next door to the body shop and found they had removed the rest of the roof skin and sunroof cassette while I went to Biloxi yesterday to retrieve the slicktop. Sunroof panel itself is 99% rust free, only a tiny bit of surface rust around a single mounting tab. If anyone is interested in it let me know, I'd love to recoupe a few bucks where I can. I pulled the plastic mounting/guide rails which were in good shape and set the rest aside.
Monday I am going to weigh the cassette, sunroof panel, etc because I want to know just how much it adds up there.
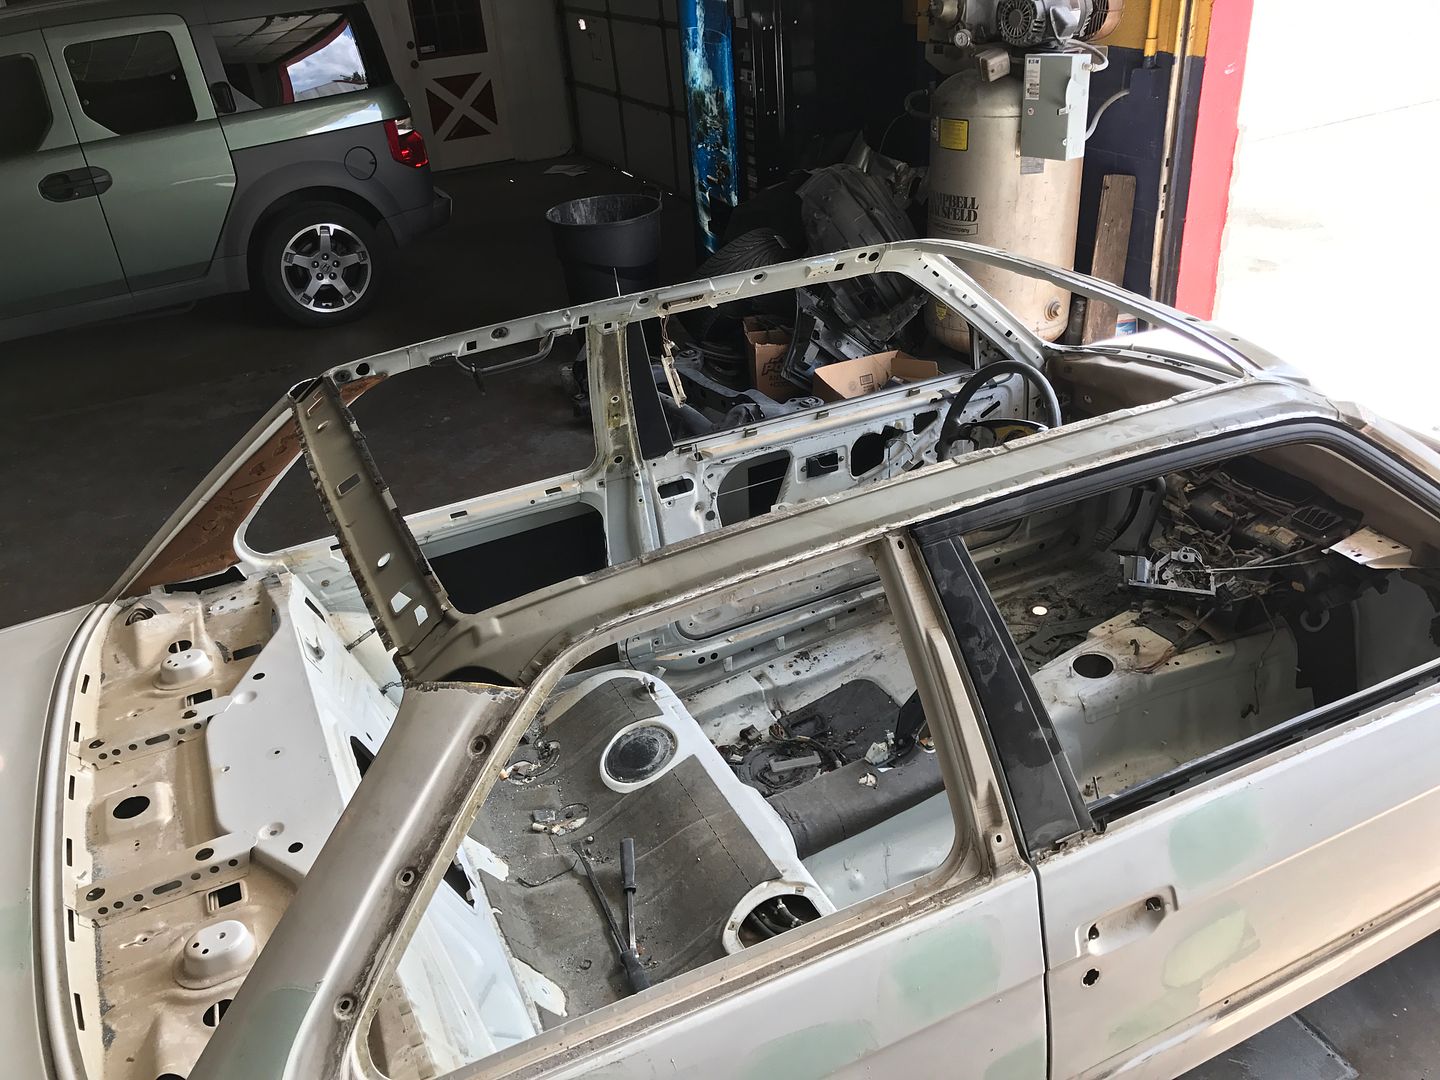
Over to the chassis, which has been completely scalped now. Nice.
Comment
-
Damn, I love your build threads.sigpic
Gigitty Gigitty!!!!
88 cabrio becoming alpina b6 3.5s transplanted s62
92 Mtech 2 cabrio alpinweiss 770 code
88 325ix coupe manual lachsilber/cardinal
88 325ix coupe manual diamondschwartz/natur
87 e30 m3 for parts lachsilber/cardinal(serial number 7)
12 135i M sport cabrio grey/blackComment
-
The body man is just killing it, its clear metal work is his first calling as its what he excels at for sure.
He had most of the roof structure removed from the roof skin by about noon today.
By the end of the day he had the slick top roof skin fit to the cars roof structure and started tack welding it in place.
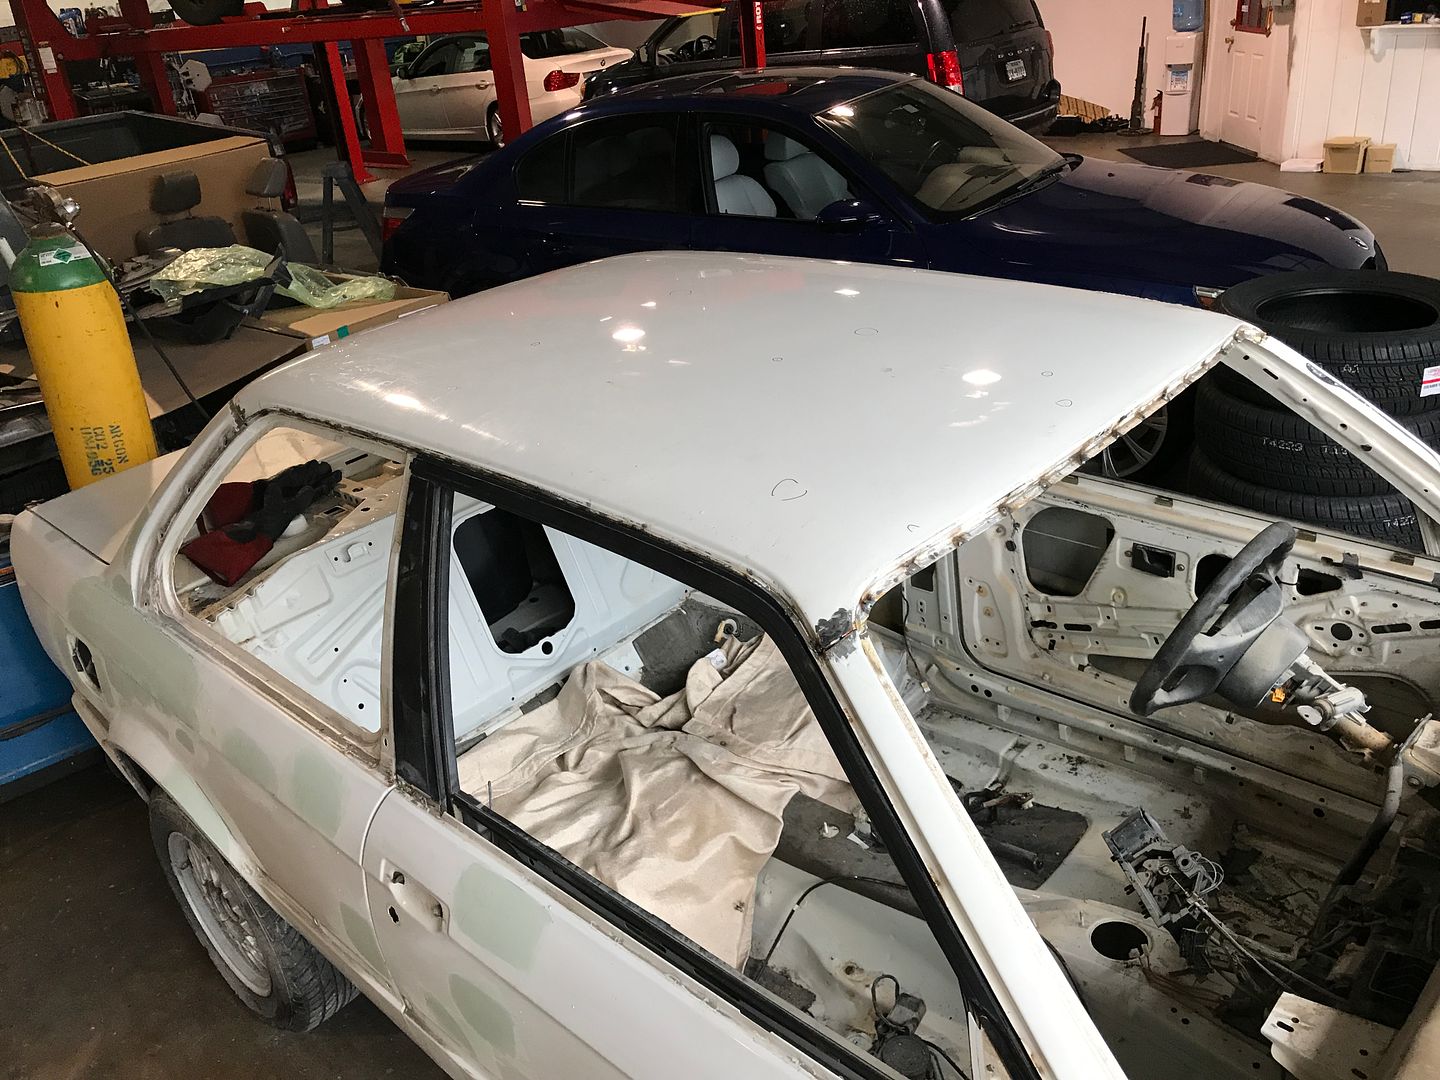
The tacking process is a bit slow, he has to move around a lot to avoid heat soaking a given area too much and causing the skin to distort. He should be able to finish it up tomorrow and will then go back with filler rod and braze the roof skin to the A/C pillars like how it was done during production.Comment
-
The body guy I talked to was going to chop my roof at the pillars and weld on the new one. That idea didn't sit well with me.Originally posted by Jordan View Post
I like the way you're doing it much better. It looks great so far! You and your body guy are knocking this thing out quick. '90 325i - 5 speed coupe
'05 330ci 6MT ZHPComment
-
Very nice!
Thanks for sharing.
[IMG]https://cimg4.ibsrv.net/gimg/my350z.com-vbulletin/550x225/80-parkerbsig_5096690e71d912ec1addc4a84e99c374685fc03 8.jpg[/IMG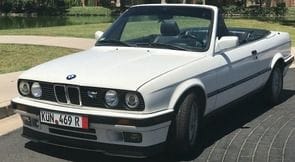
Comment
-
Missed this earlier, I might be depends on size, condition and price.Originally posted by c0rbin9 View Post
Today the roof got some more peremeter tacks, and the A/C pillars got brazed into place.
Here is the passenger rear C pillar immediately after blazing:
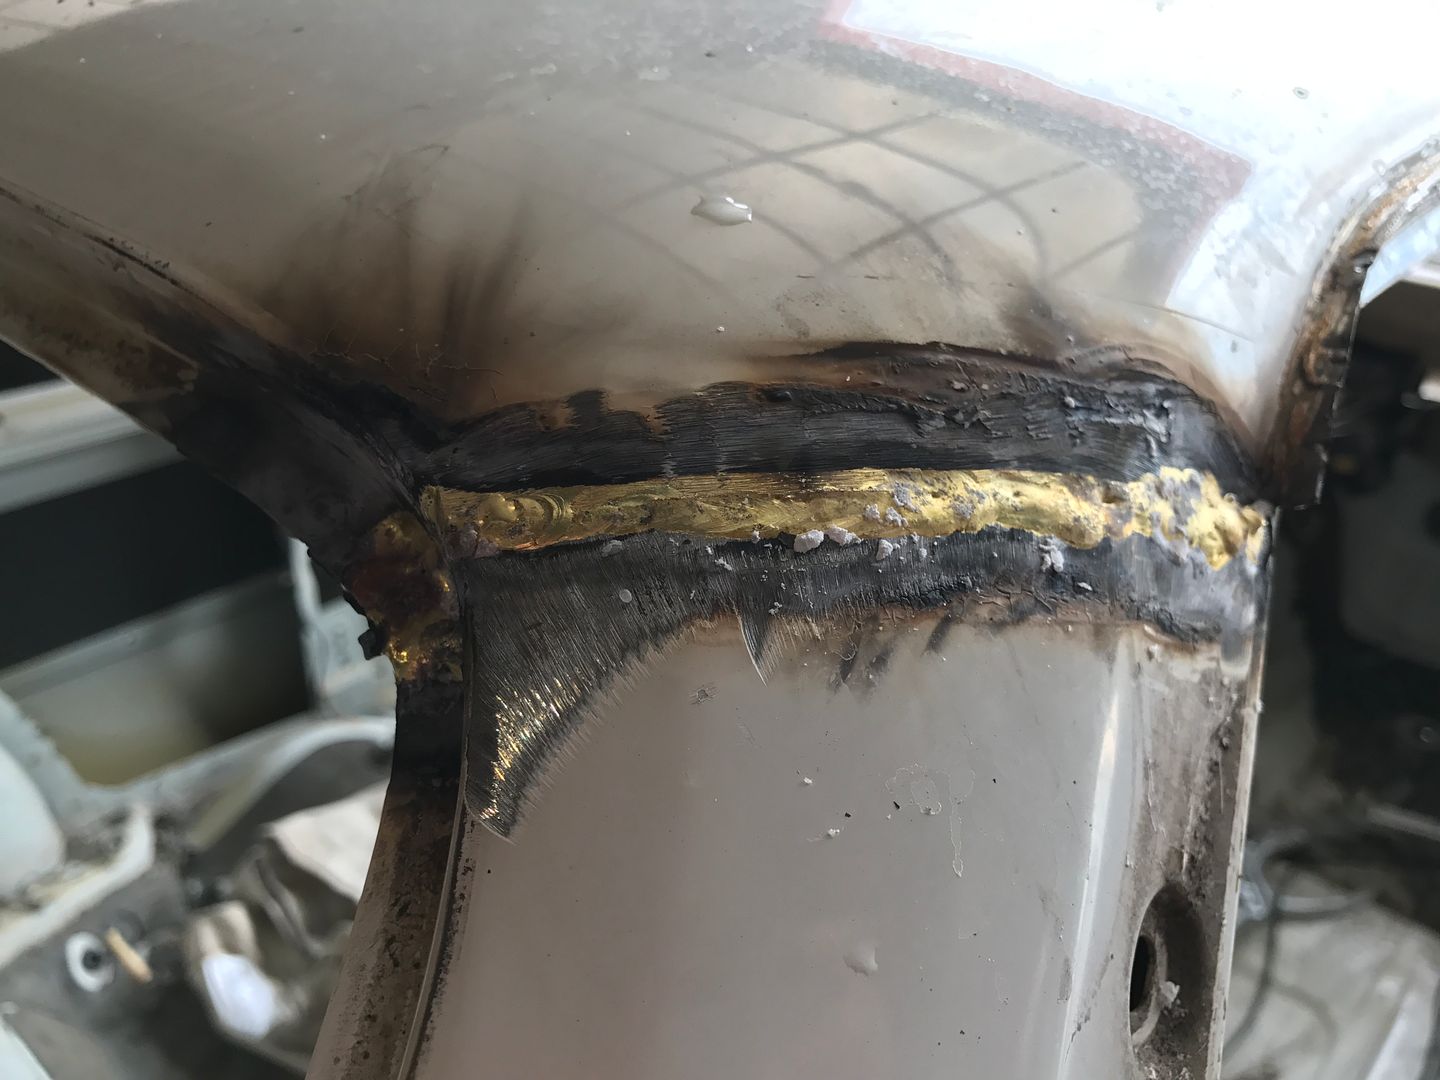
Here is the passenger A pillar after it was ground down flush. Now it'll be body filed smoothish and then finished with metalglaze.

Comment
-
very cool to see the roof swap being documented
can you explain/elaborate why the roof gets brazed instead of welded at the pillars?
is it maybe to avoid warpage?
genuinely curious
keep up the good work!
on a youtube channel i watch Ammo NYC they document a roof swap they did because of rust on the cowl and it was amazing the level of difficulty to remove and replace the roof.
The rain guards are rolled over so he had to make a tool to un swedge the "drip rail" to allow the roof skin to come off
Last edited by iwantspeed; 09-20-2017, 11:05 AM.Comment
-
Very Nice! love the roof swap.Comment
-
Just saw that video last night. An insane amount of work to fix a relatively small amount of rust, and incredible to see how it's done. I don't suppose you subscribe to The Smoking Tire too?Originally posted by iwantspeed View PostComment
-
You know I'm not exactly sure why the roof is brazed at the A and C pillars rather than stitch welded, but its how BMW decided to do it during original production on all E30's. Brazing was also used on the tail panel/quarter panel union (the line under your tail lamp) and at the A pillar/wiper cowl union, you can see the edge of that if you remove the fender.
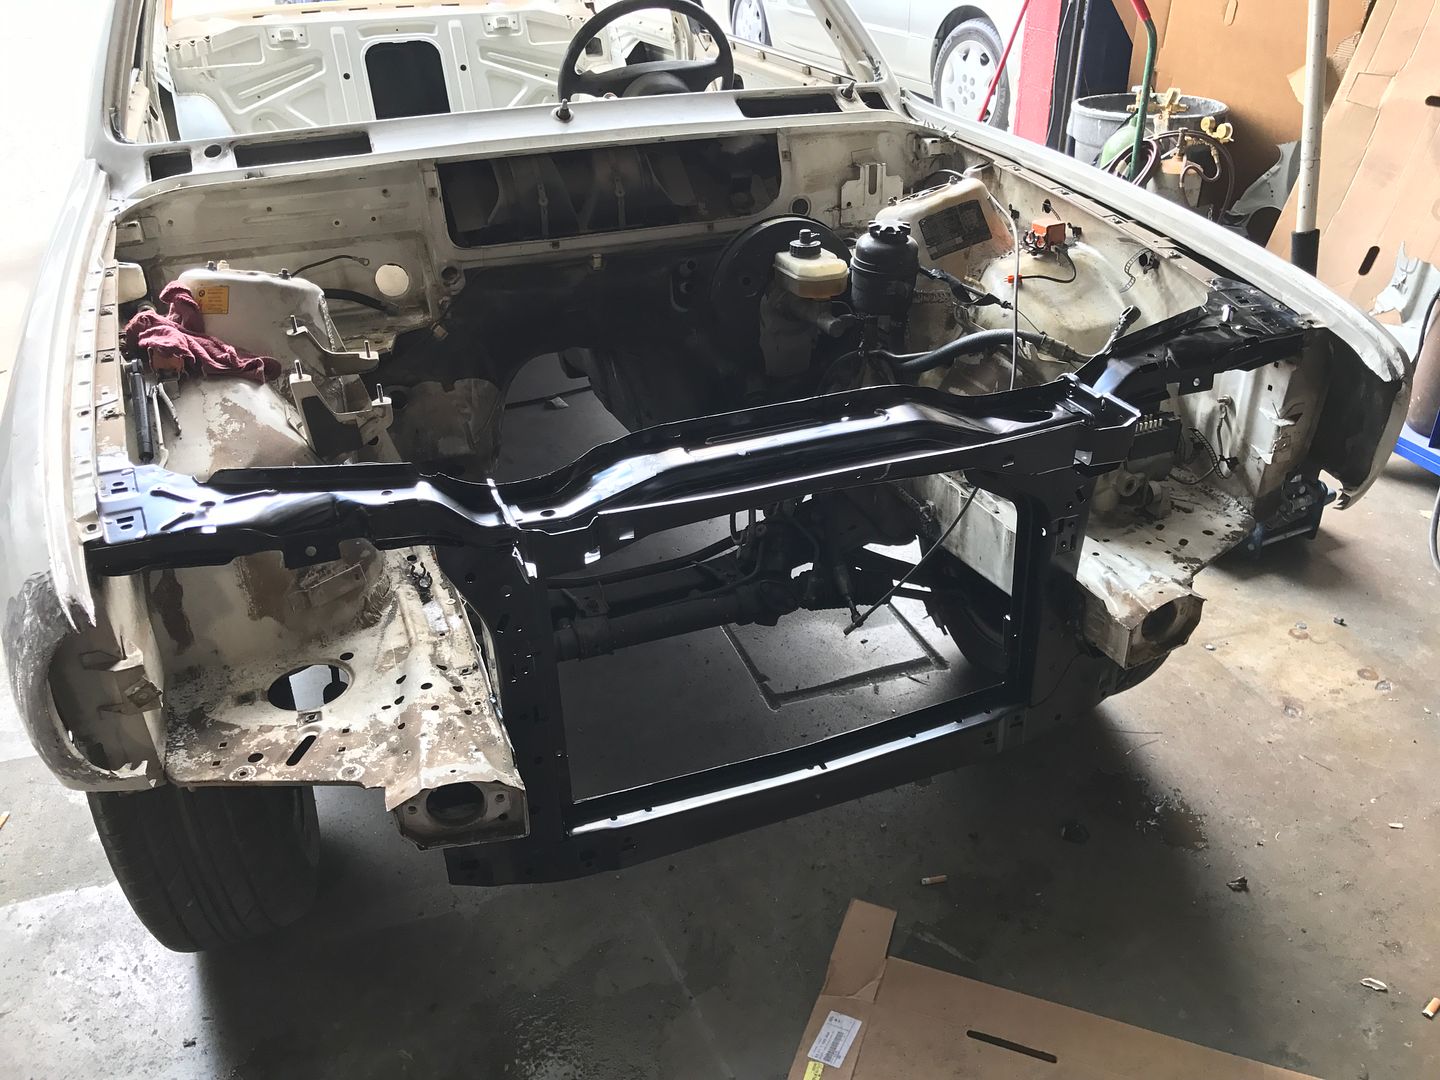
Front core support showed up from the dealer today. Bodywork dude had the stock one completely removed and the new one welded in.. in I shit you not... 30 minutes. I've started calling this guy animal mother...
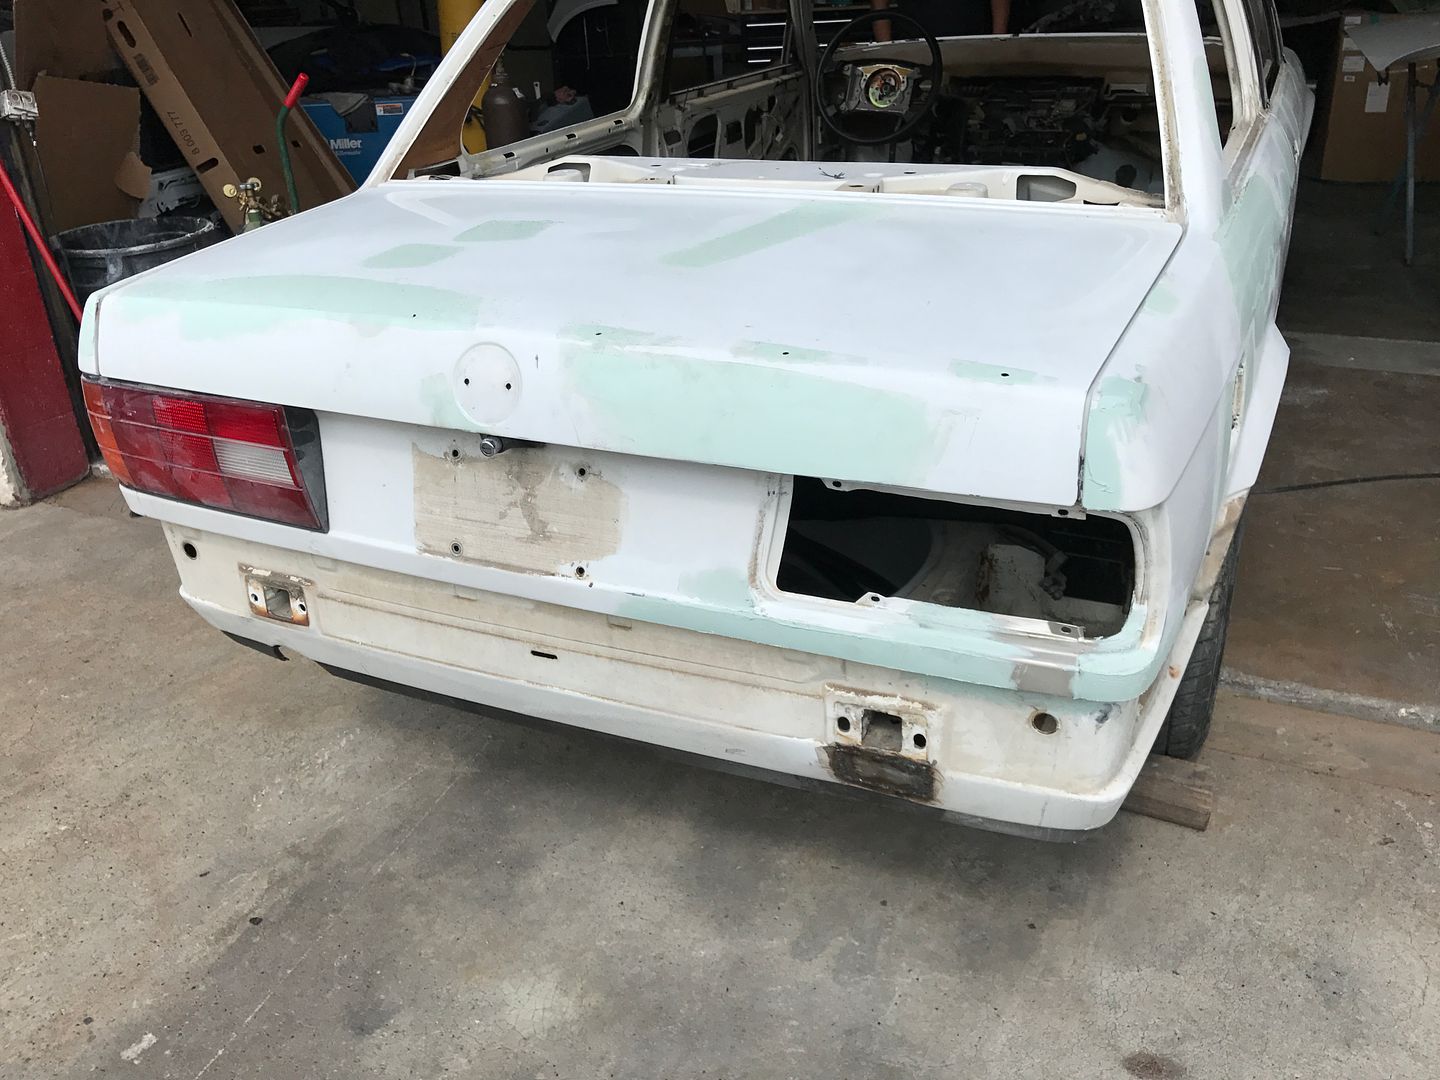
Donor metal is welded in to replace the rusty spot under the tail lamp from a piss poor previous repair, and I had him cut off and shave the tow hook opening since that entire fist sized area on the lower valance is bondo, presumed from the same incident as above, and the tow hook with a bit tweaked. I would never hook onto it and wreck the paint finish, and straightening it to look unfukt would be difficult... so off she goes.
Comment
-
Perhaps it was brazed so they could do it quickly, rather than having to take lots of time to do spotweld after spotweld just on the pillar? As they can't just run a fat bead quickly due to heat warpingComment
-
When brazing you heat the whole area allowing the metal to flow. Therefore it requires less heat, which is always better, and also will flow ever the raw edges sealing it mechanically. It also works as a filler as you can sand/grind it a lot easier which in return, less heat.
Ever watch a old timer lead a car. Its awesome to watch."Socialism is a philosophy of failure, the creed of ignorance, and the gospel of envy, its inherent virtue is the equal sharing of misery." - Winston Churchill
"People sleep peacefully in their beds at night only because rough men stand ready to do violence on their behalf" -George OrwellComment


Comment