-
Are you keeping the "mess under the intake" intact? Hated replacing all that on one my first 318is, deleted it on the last one. Probably what I hated most about the m42, such a dumb design. -
Yea the forum revision couldn't even get the R3V logo accurate. People probably think they aren't in the right place to begin with. Then they get blinded by the over saturation of white on white on white that is the new layout. That's my guess.
Great work as always!Leave a comment:
-
Jordan, sorry. To bmoores. The PM system may not be working mind you, so just let him know the only way I could figure out.Leave a comment:
-
-
Those look great Jordan. Looking forward to see this move closer to the finish line!Leave a comment:
-
Rails are always one of those subtle things that once done look great. Nice work!Leave a comment:
-
I need to do the same thing with my seat rails. They turned out great.Leave a comment:
-
It seems since the forum refresh and overhaul the traffic in this thread sure has died down....
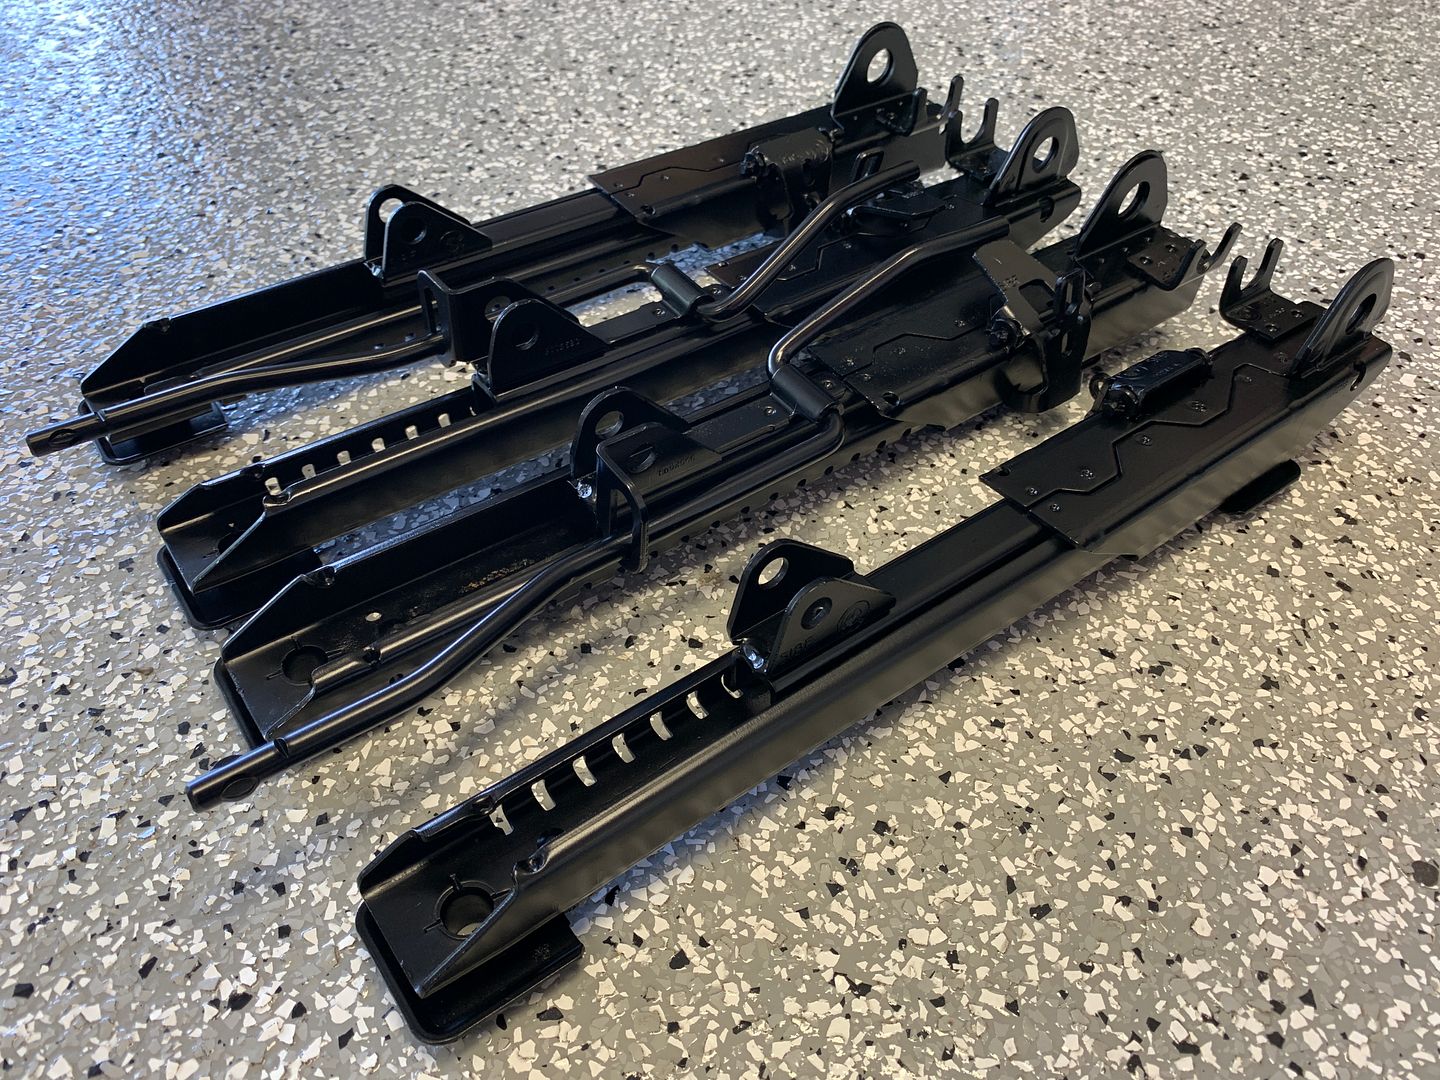
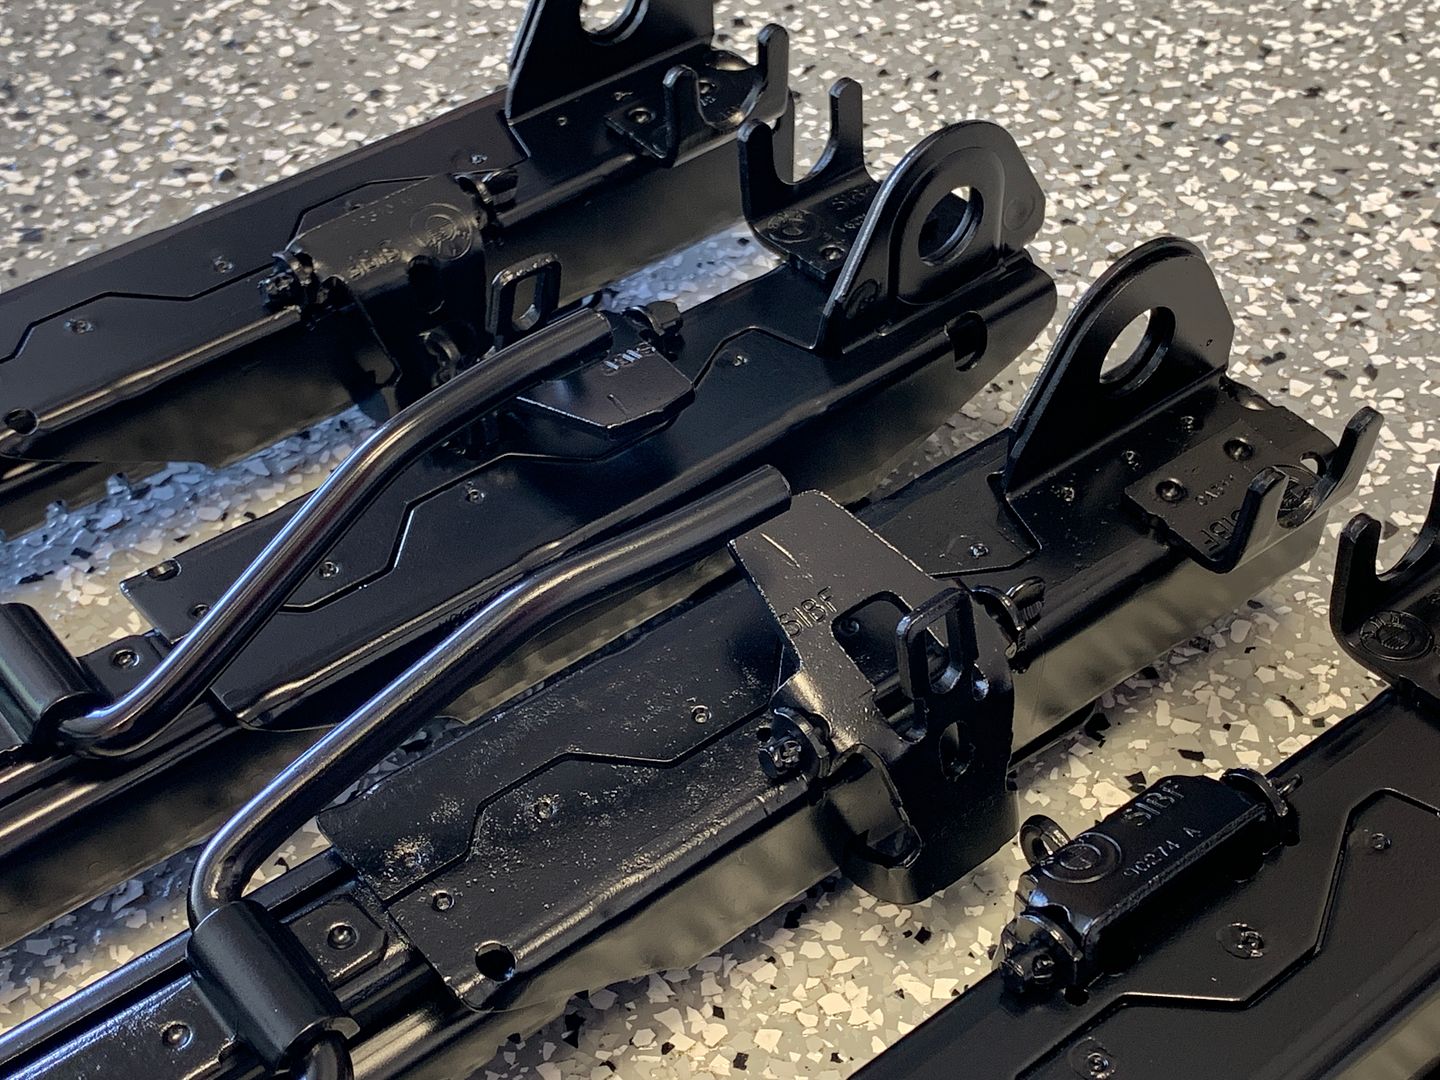
Today's project was simple enough, take the four seat rails, blow them apart, bead blast them, and then refinish them to look like new. Unfortunately as I came to realize BMW crimps and stakes the rails sections together during manufacturing so taking them completely apart really isn't possible, and would be destructive. Just the same I should be able to attain favorable results simply being thorough with blasting and painting.
I had already bathed them in the ultrasonic cleaner at work a few months back with removed all of the loose paint, fast food crumbs, hair, and other nasty shit that builds up over 25+ years. Here is what was left after coming out:
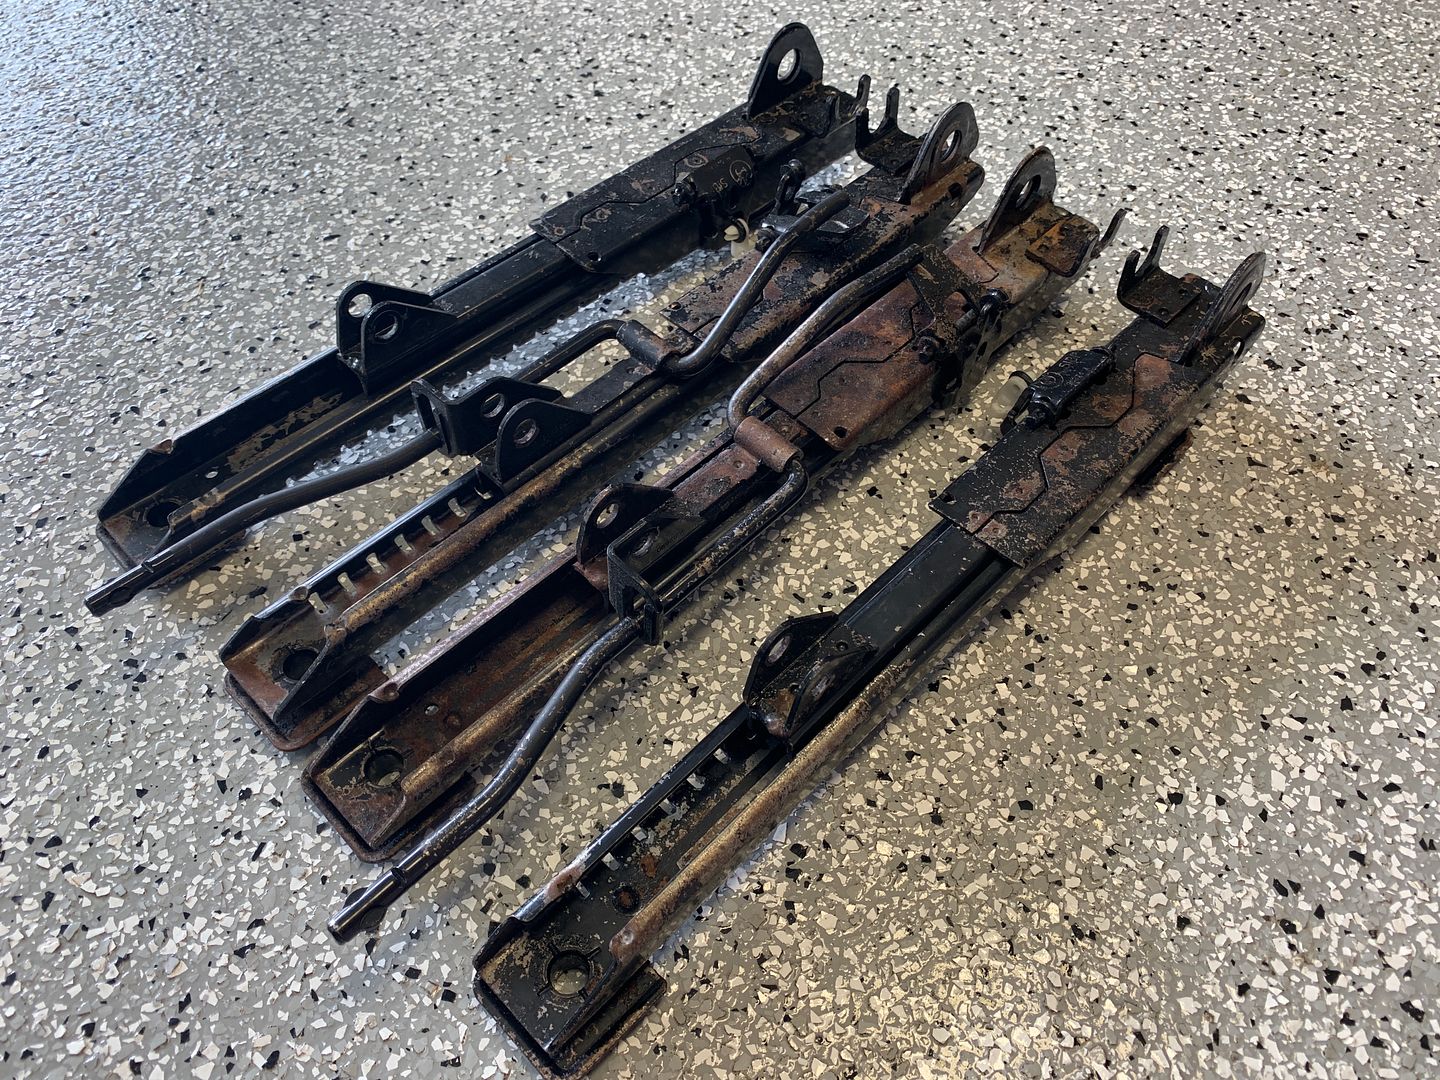
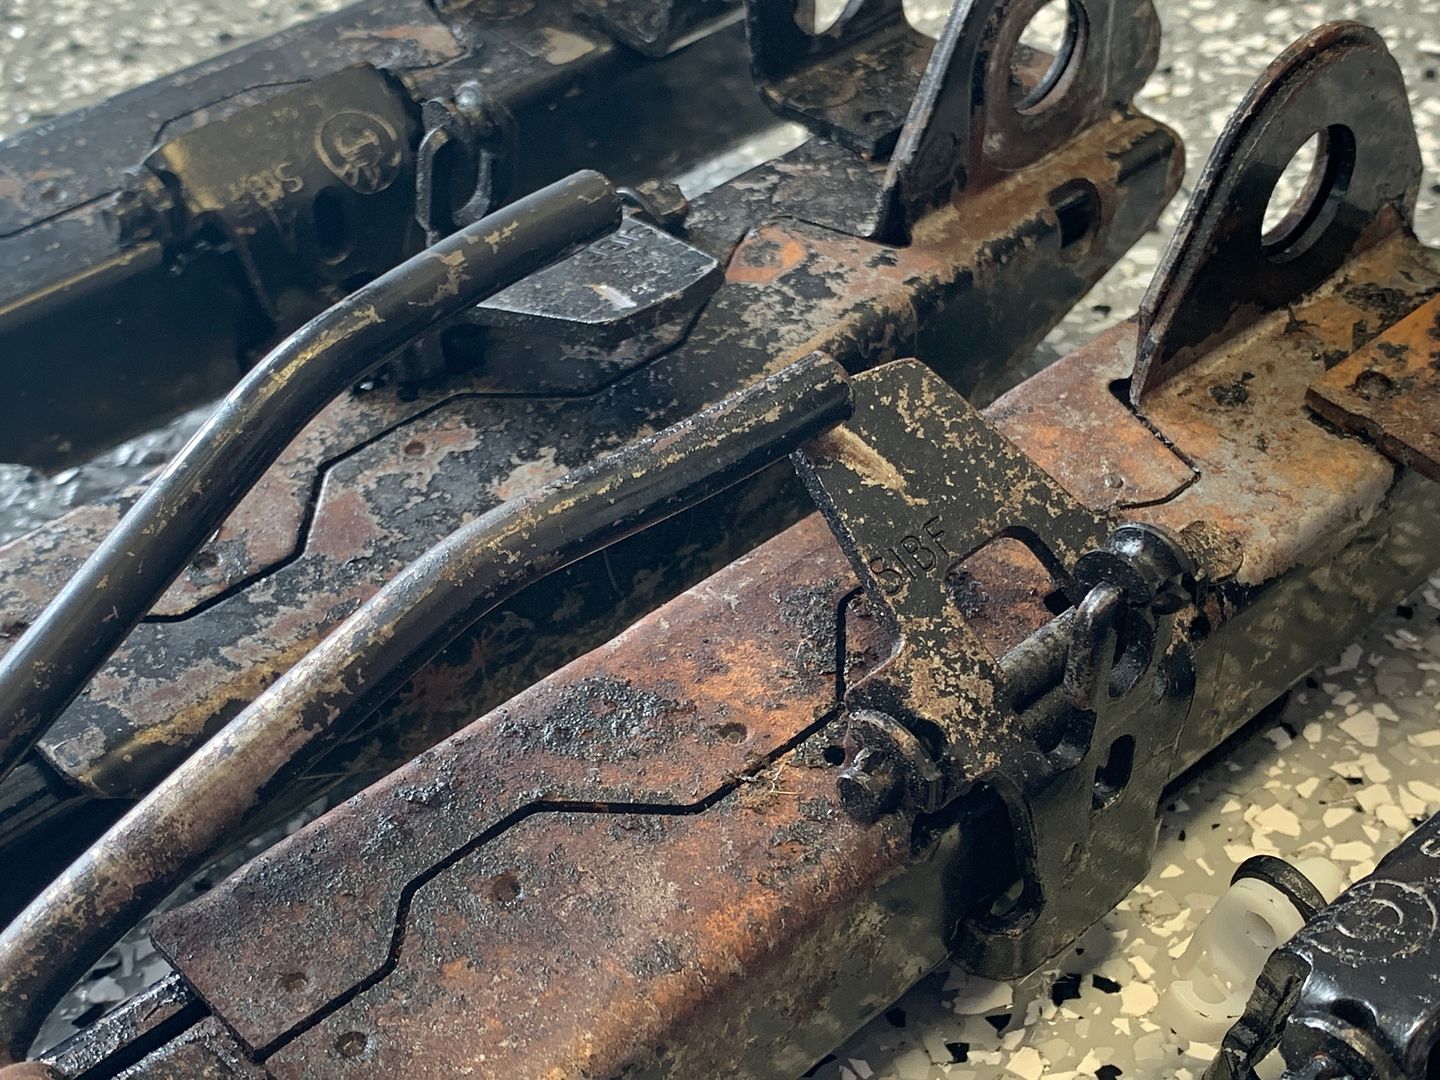
It took about 45 minutes per rail to thoroughly and completely bead blast them free of the remaining paint and surface rust, 3 hours in total. Only the drivers inner rail had any significant pitting from surface rust, but it cleaned up well enough and it cannot be seen of course once installed as it is up against the transmission tunnel.
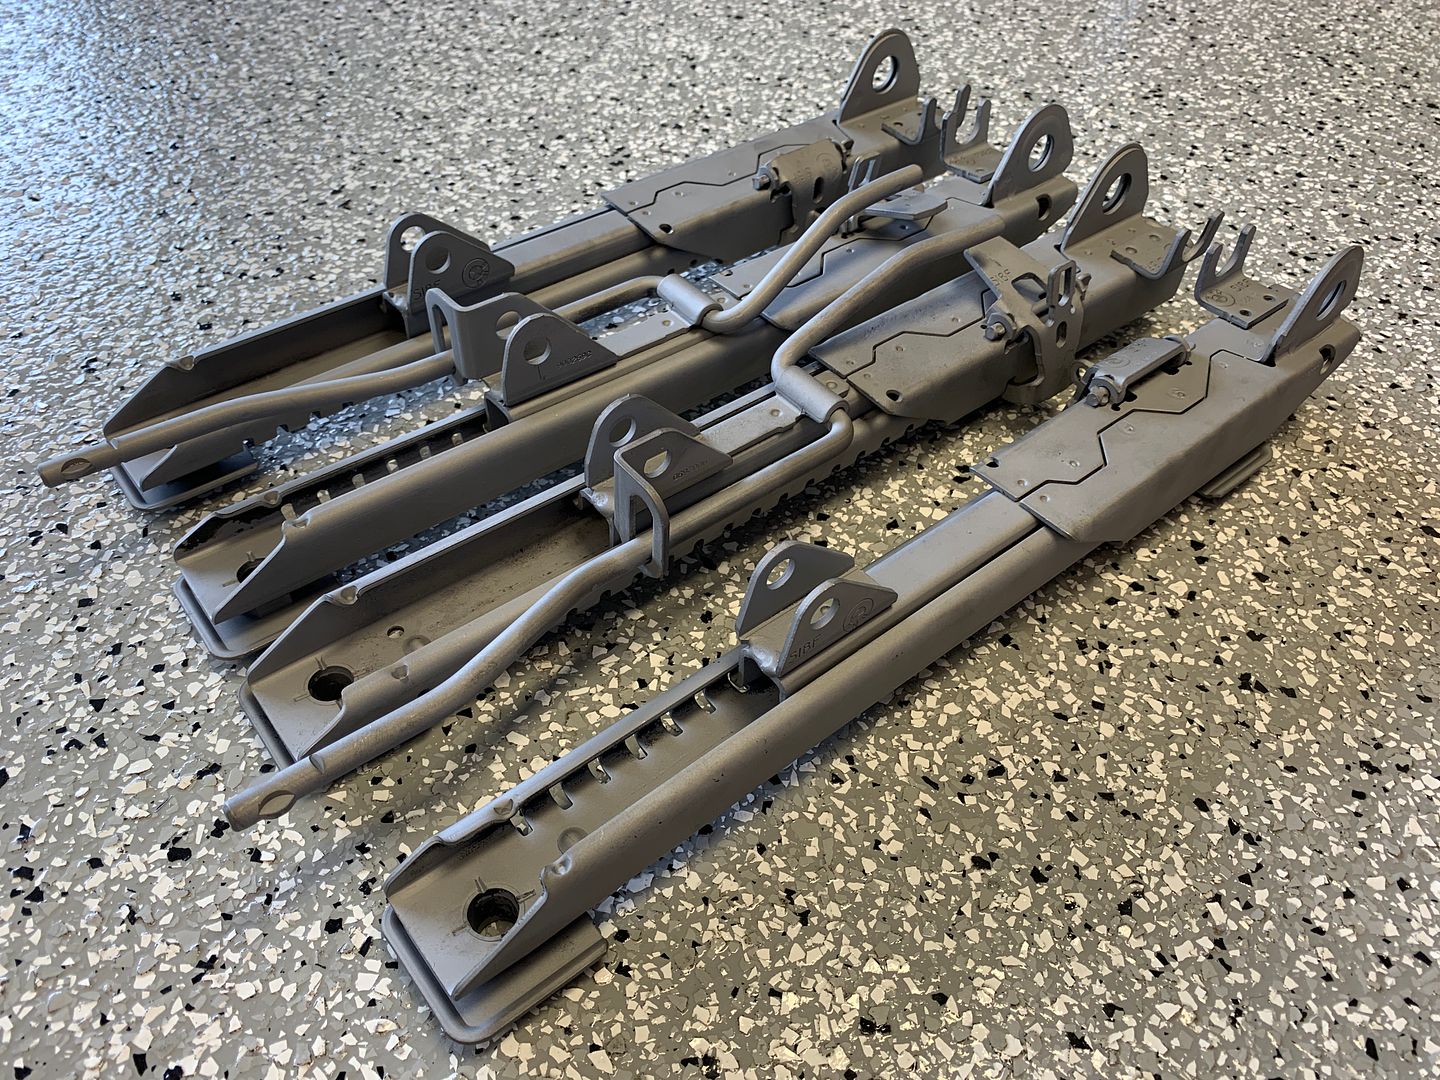
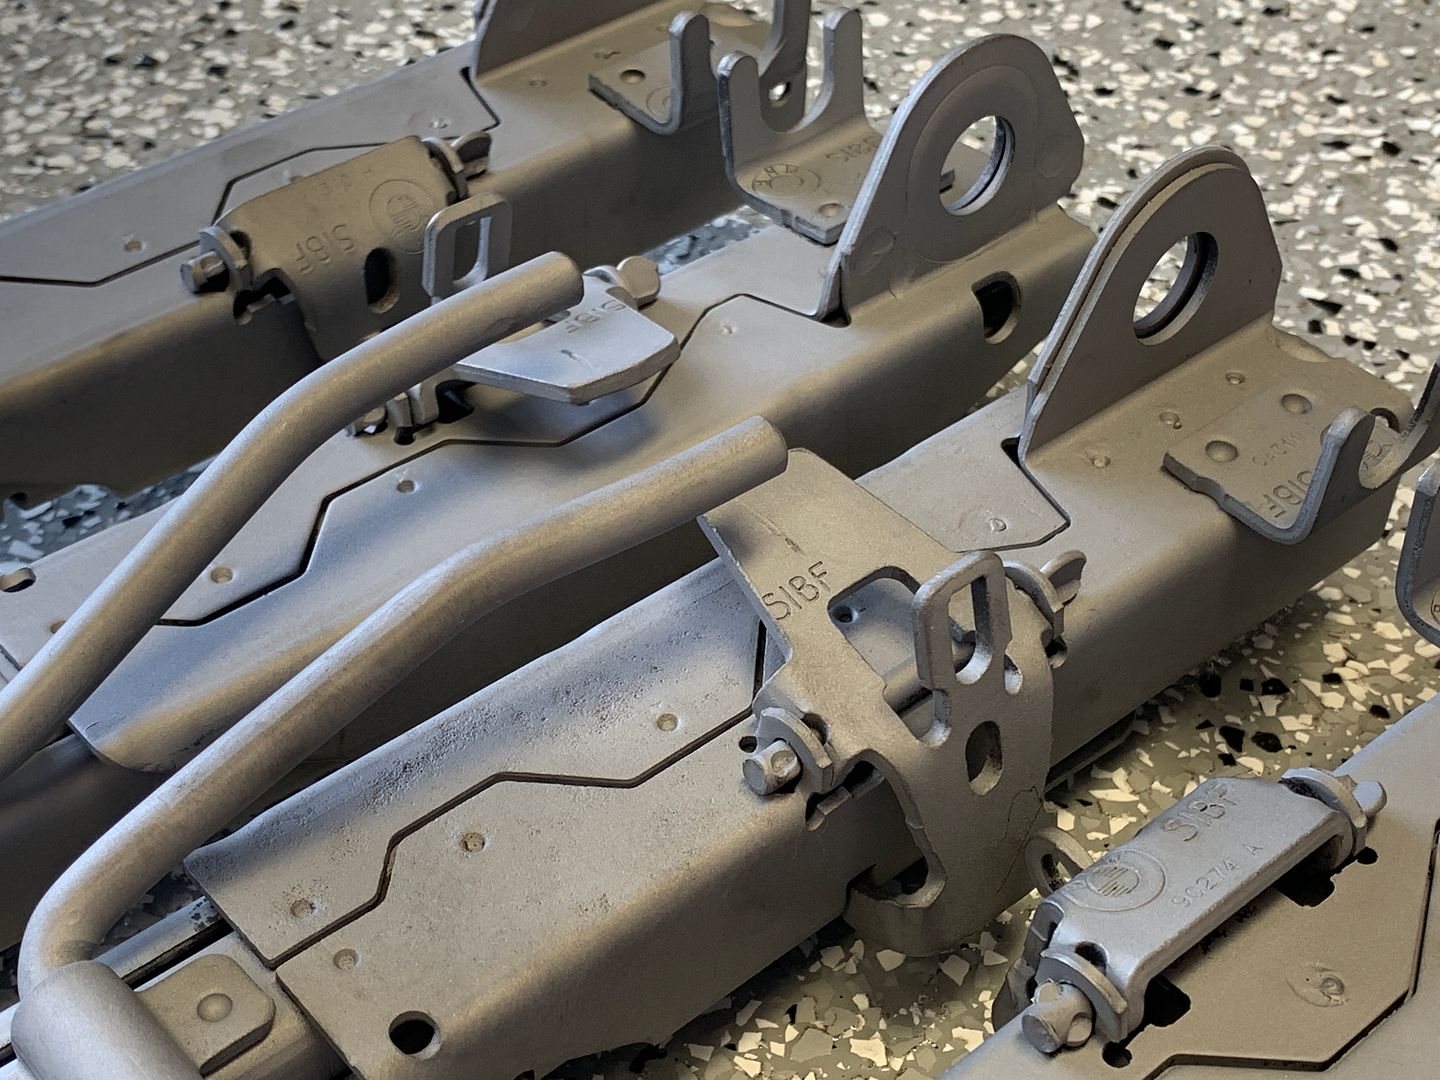
After that each one got thoroughly blown out with compressed air, bathed in wax/grease remover, and then blown out one more time before painting. SEM 49143, TRIM BLACK ULTRA SATIN was used here matching the original finish and sheen precisely. Each rail got 3 coats from all angles in all positions, which took about 1.25 cans
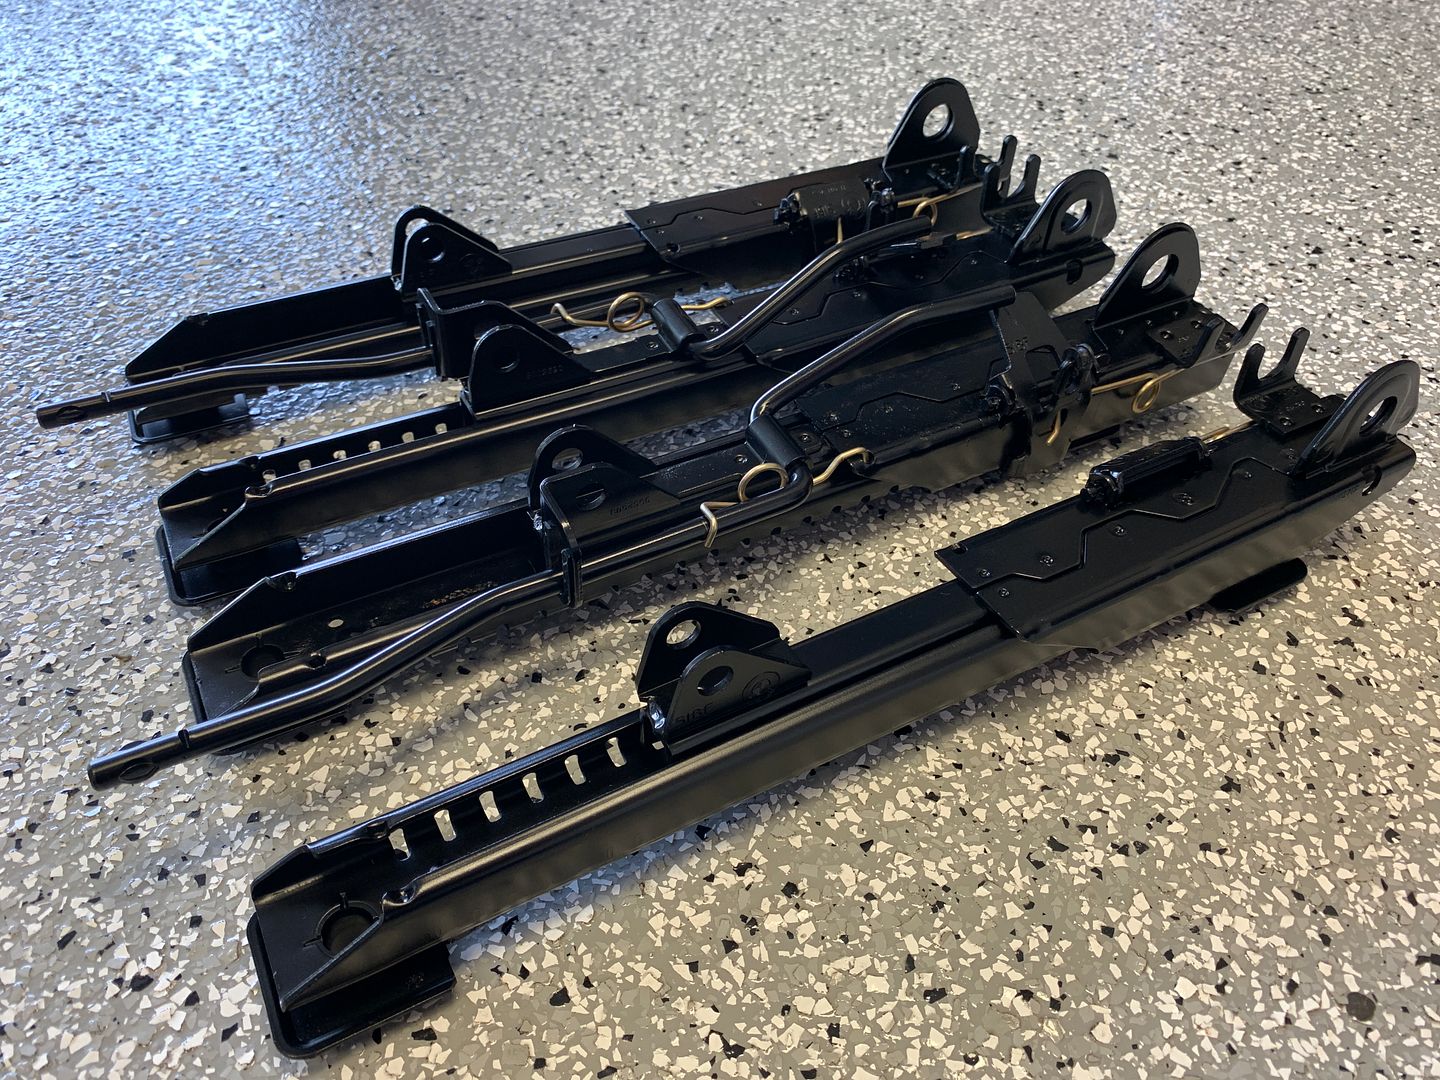
and lastly pictured here with the return springs that were yellow zinc chromate plated over a year ago reinstalled.
 Last edited by Jordan; 08-18-2019, 01:05 PM.
Leave a comment:
-
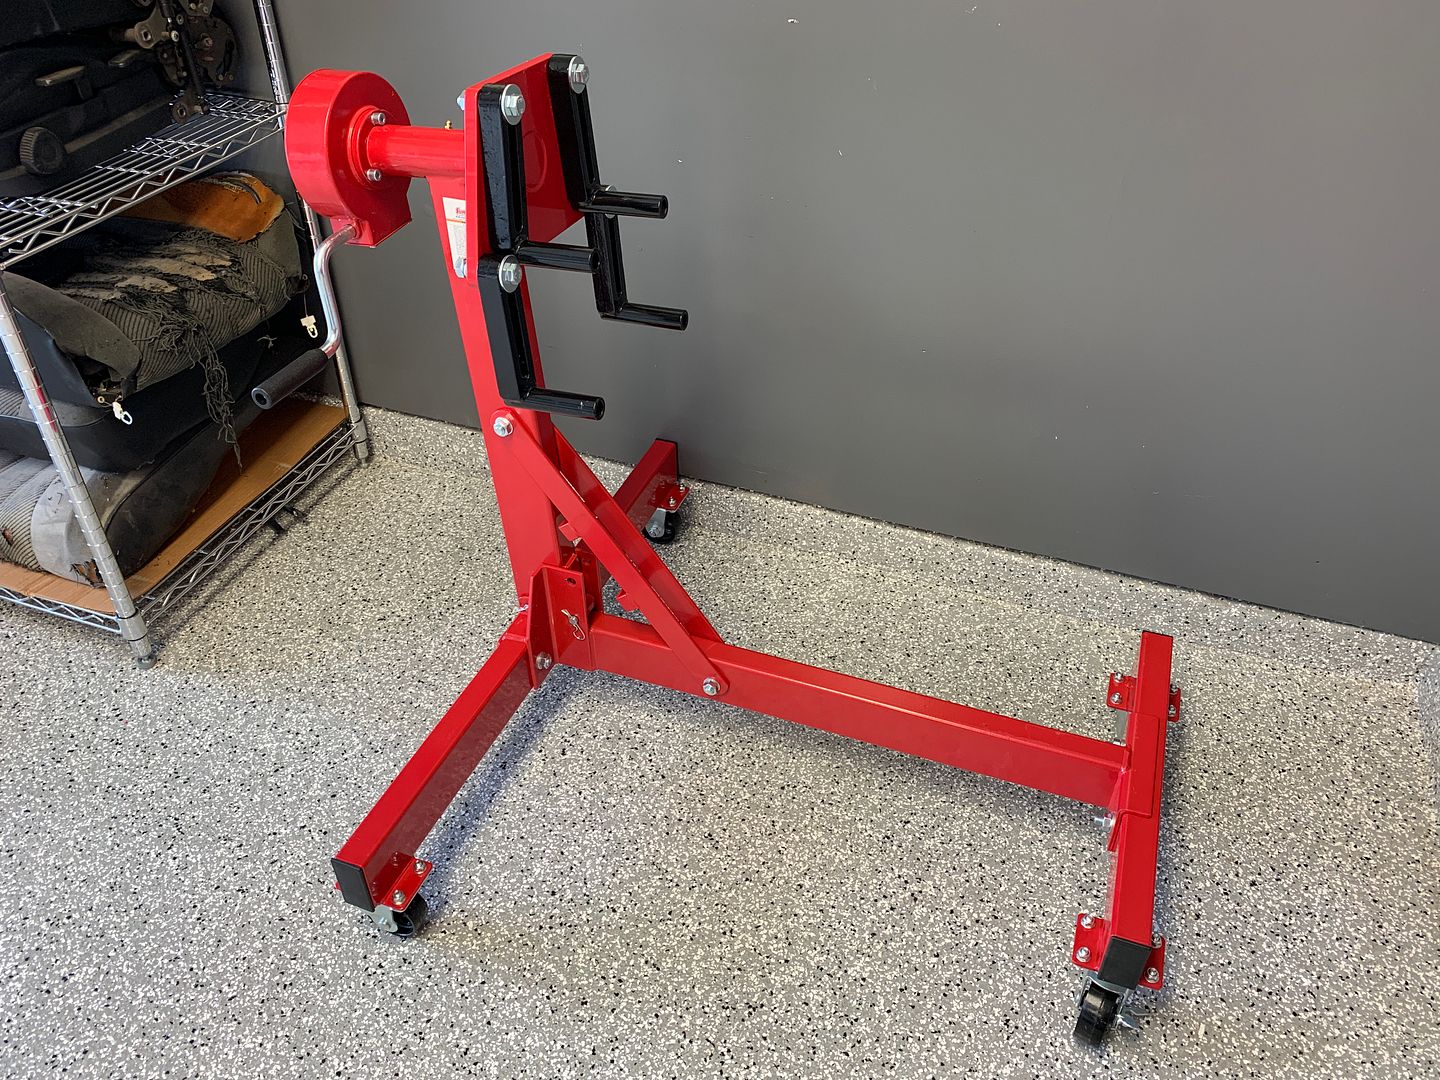
While I continue to wait on the machine shop to finish with the bottom end I'm doing what I can to prepare on my end.
I've always had the shitty little $50 engine stands that are a pain in the ass to turn, particularly in a controlled manner, and even worse to upend after the heavy top side of the engine is pointed down.... I went ahead and treated myself this go round and bought a nice hand crank stand.
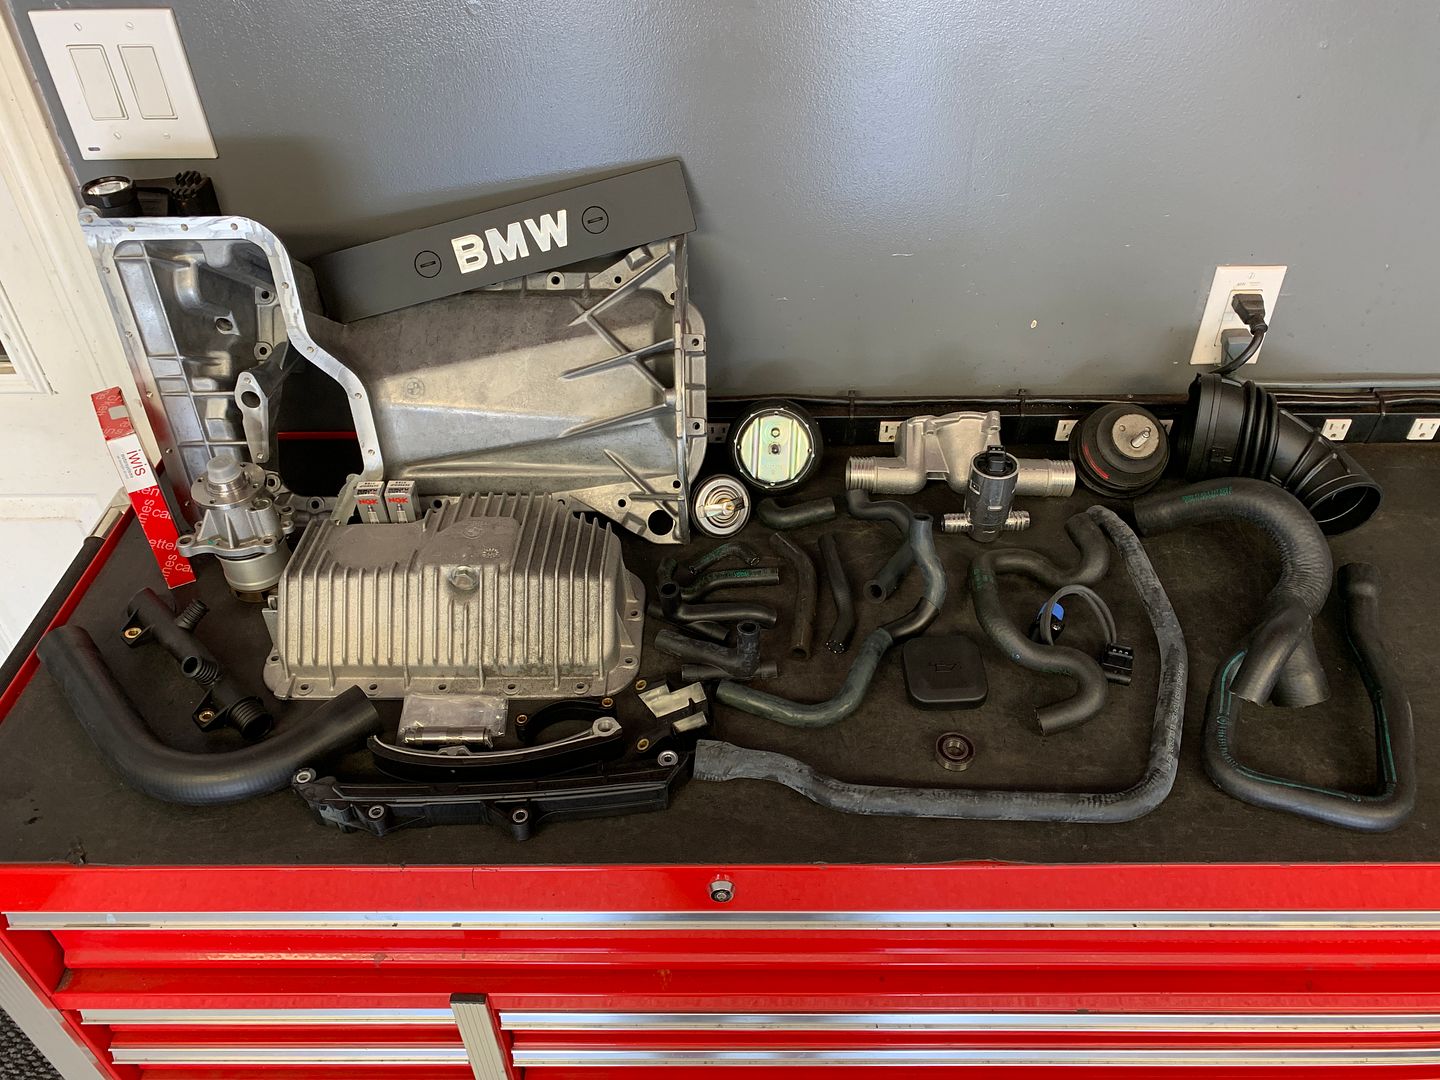
I put a big order in with the dealer last week, pictured here is about $1900 of stuff :barf and it isn't even all that much.... New upper and lower engine oil pans, water pump, thermostat housing, thermostat, engine mounts, idle control valve (this one hurt) eleventymillion coolant, ICV and crankcase vent hoses, along with the full array of timing chain guides rails, tensioner, idler and chain itself.... few other odds and ends.
Leave a comment:
-
-
You can buy a roll of the OEM stuff with adhesive already on it for like $20, P/N 51131916525. I have a roll of about 25 feet, and I only need enough to do 2 sets of grilles. You're welcome to the rest if you want it mike.bmwLeave a comment:
-
-
Jordan, what kind of adhesive do you use to attach the foam strips above the headlights on the grills? Permatex or Barge contact cement or something more specific?Leave a comment:
-
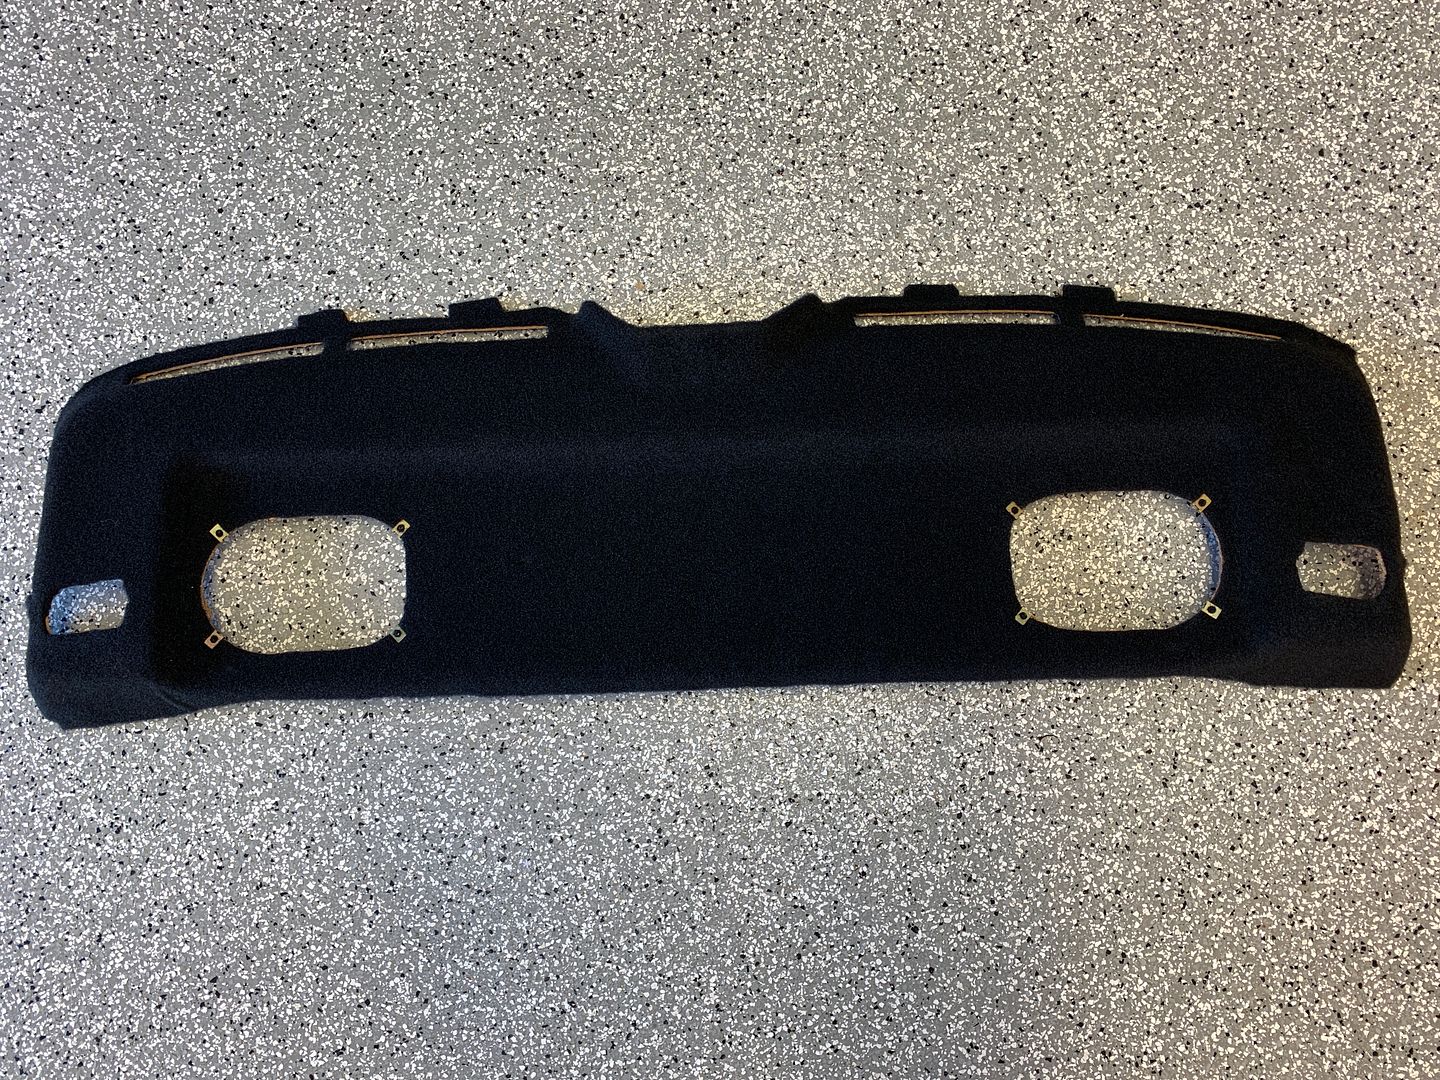
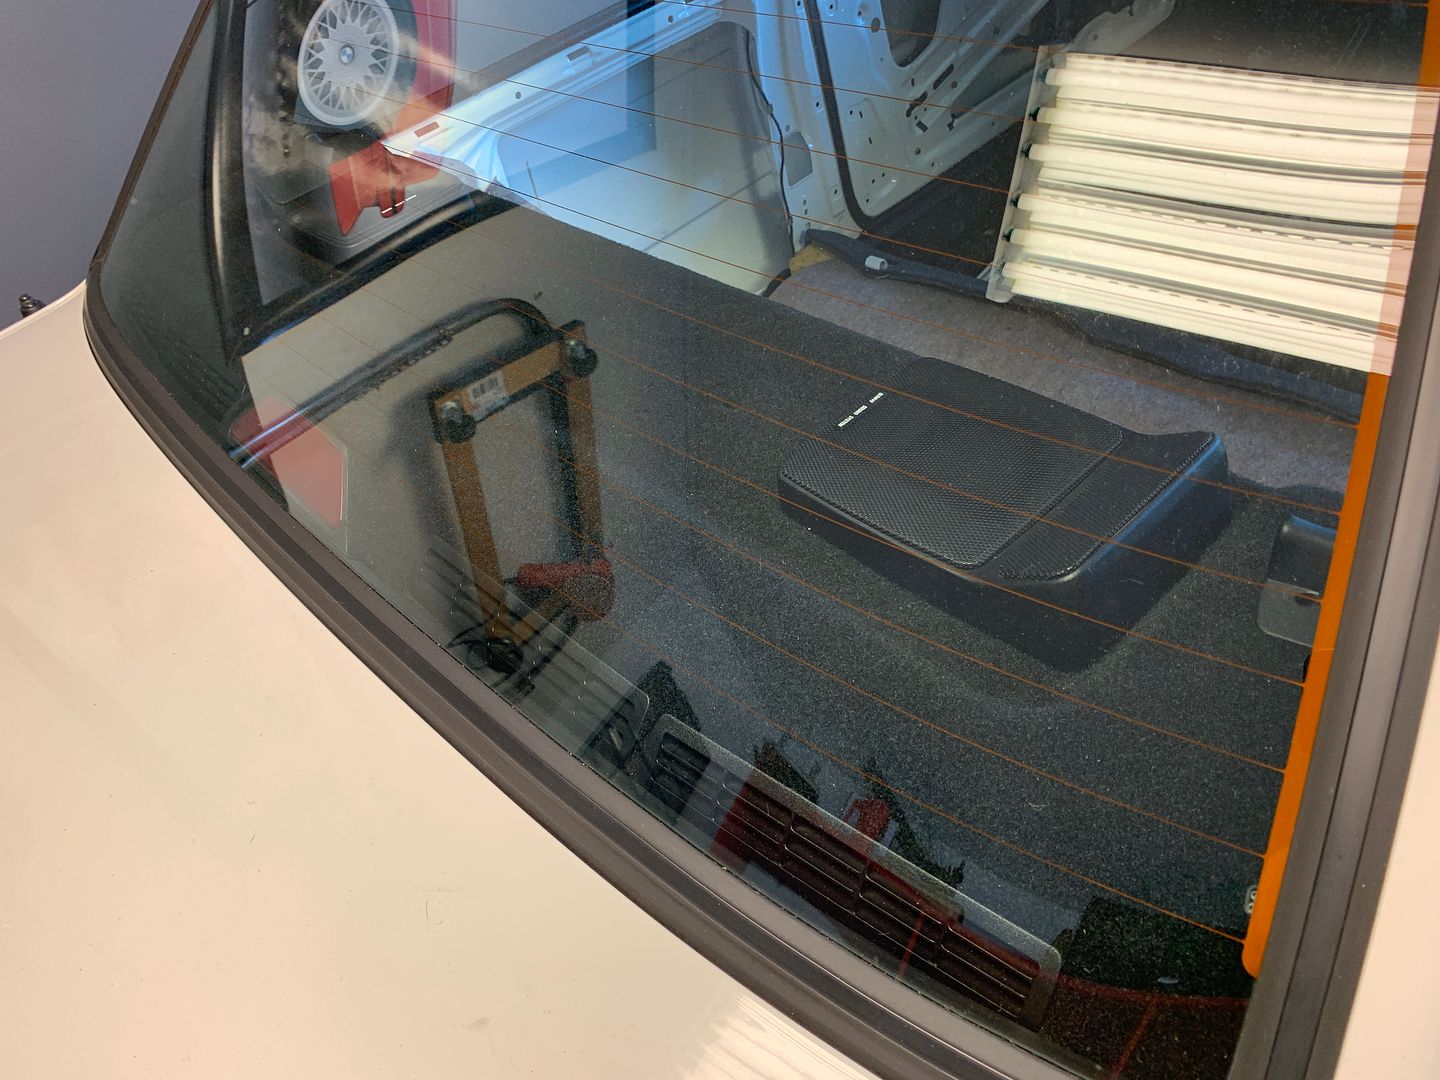
Parcel tray got some love today, fully reupholstered in black carpet.
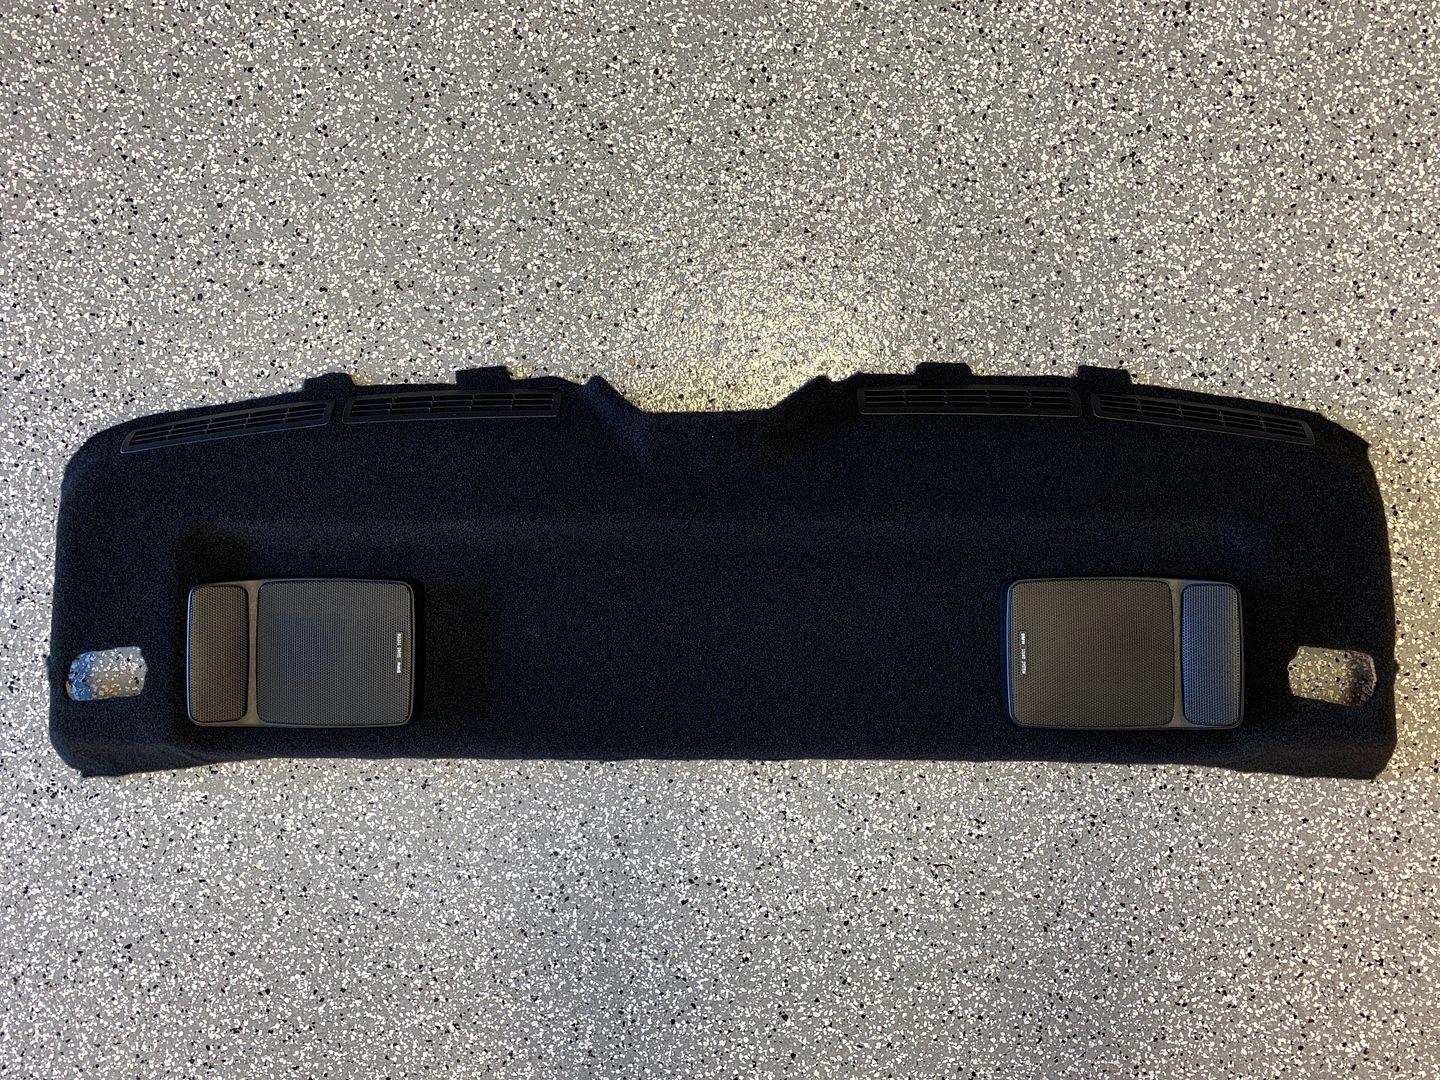
Speakers and vents installed
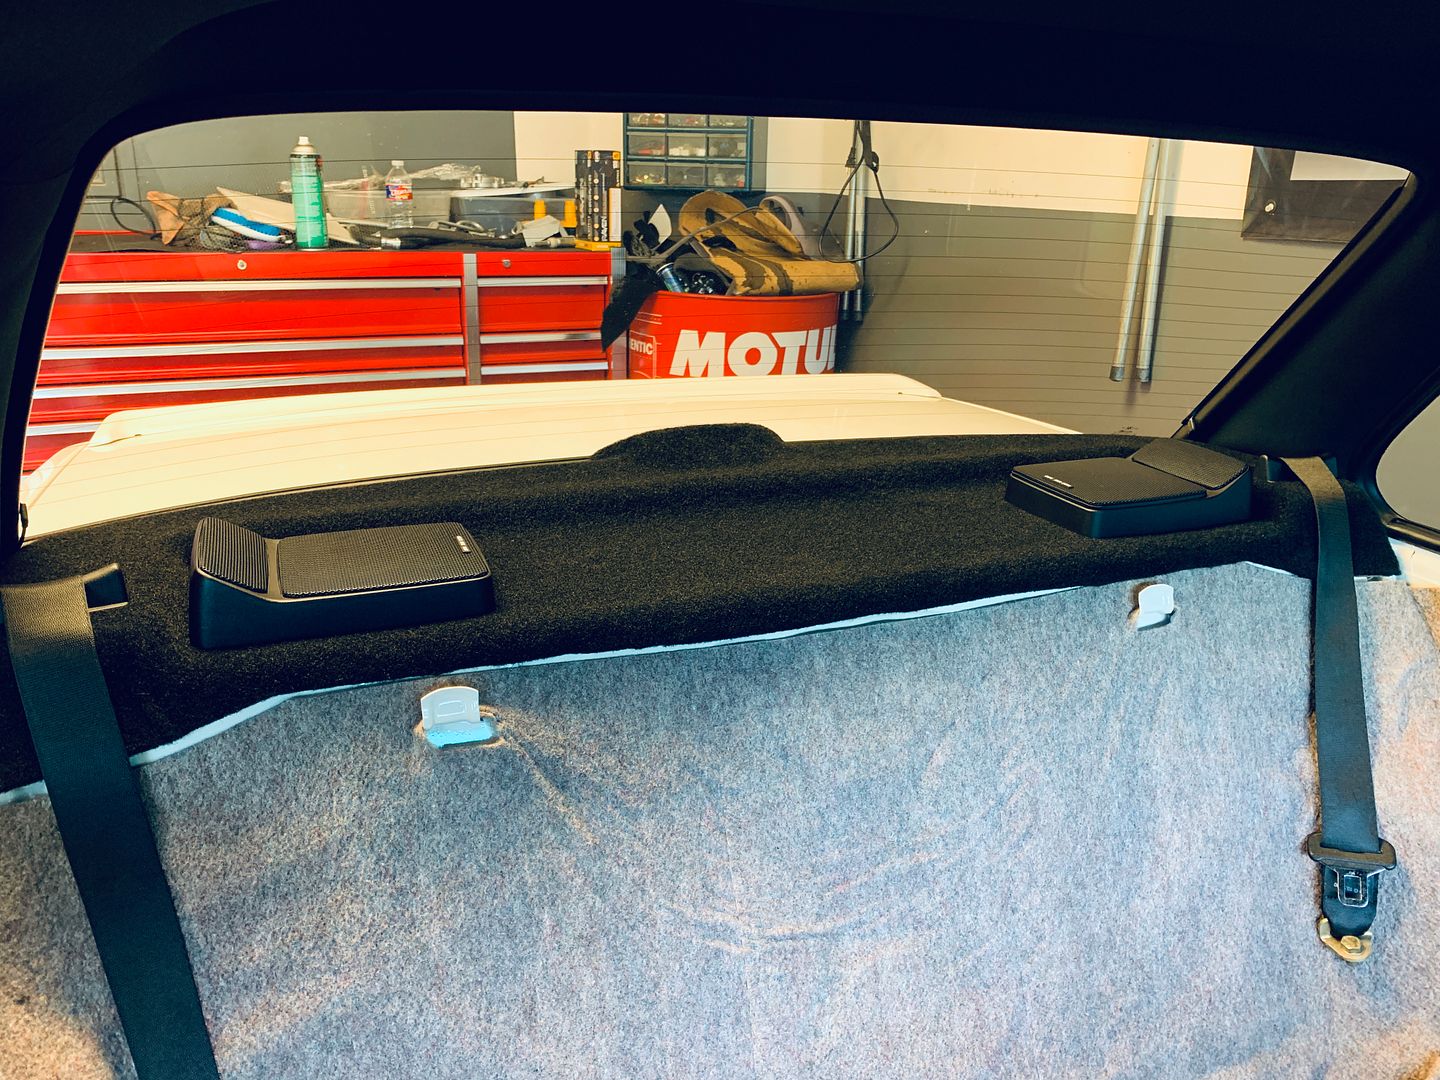
Installed into the vehicle.
Leave a comment:


Leave a comment: