-
Beautiful work. Maybe I missed it, but did you install an upgraded/updated thrust bearing or stick with the original design? -
^ this is my favourite component/part of the build.
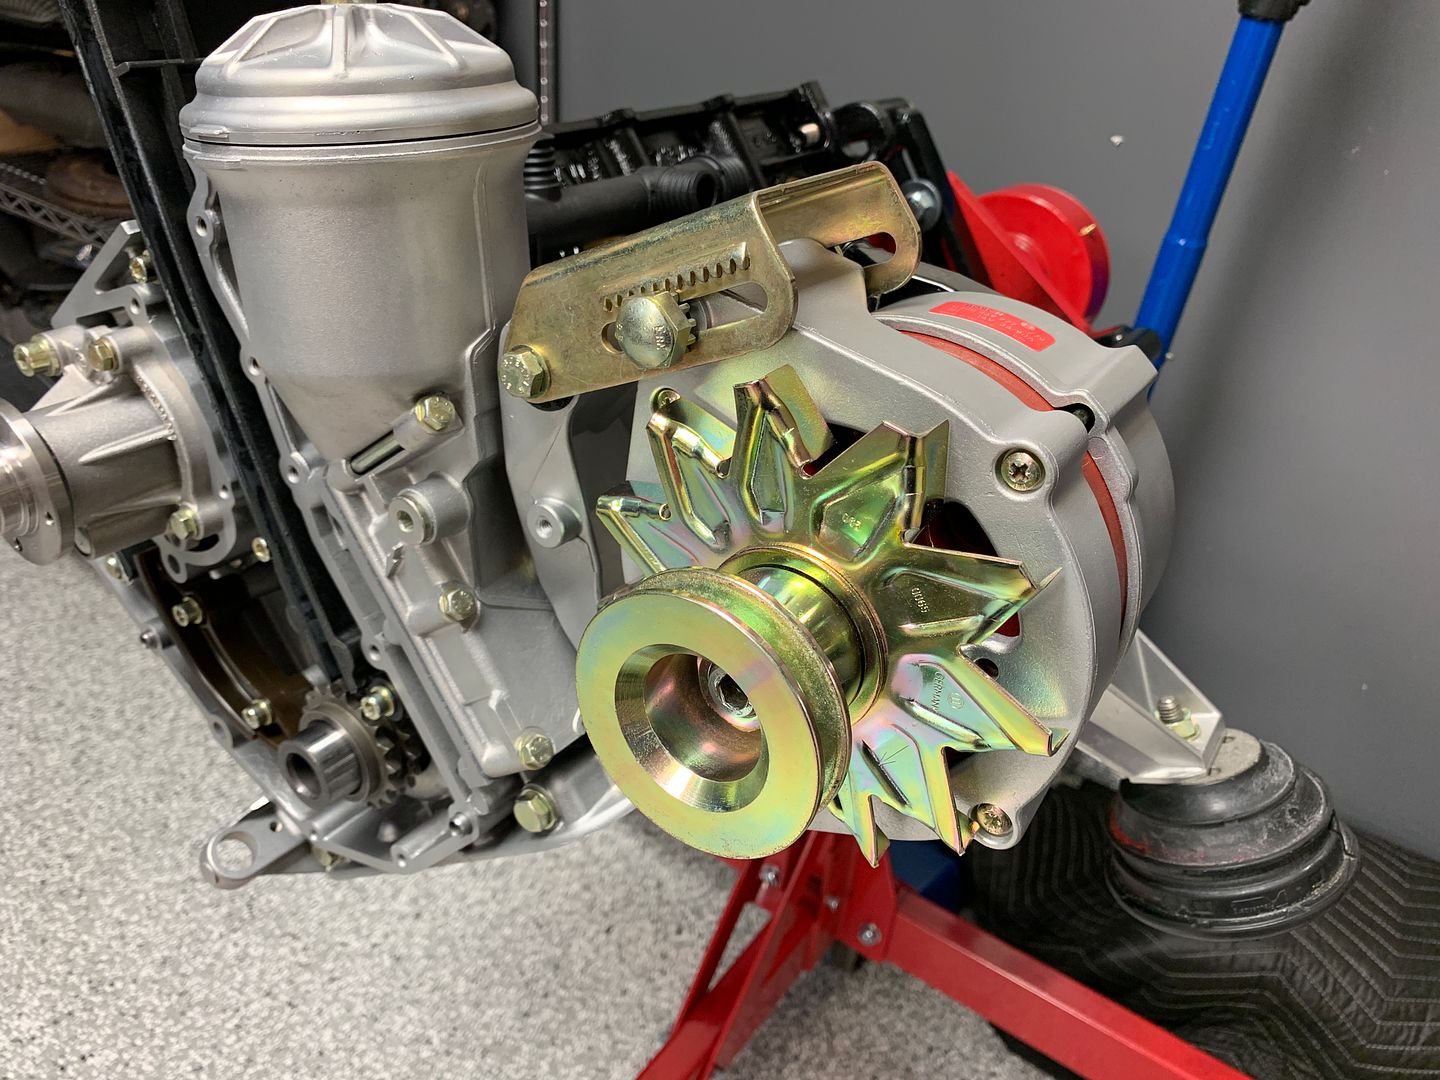
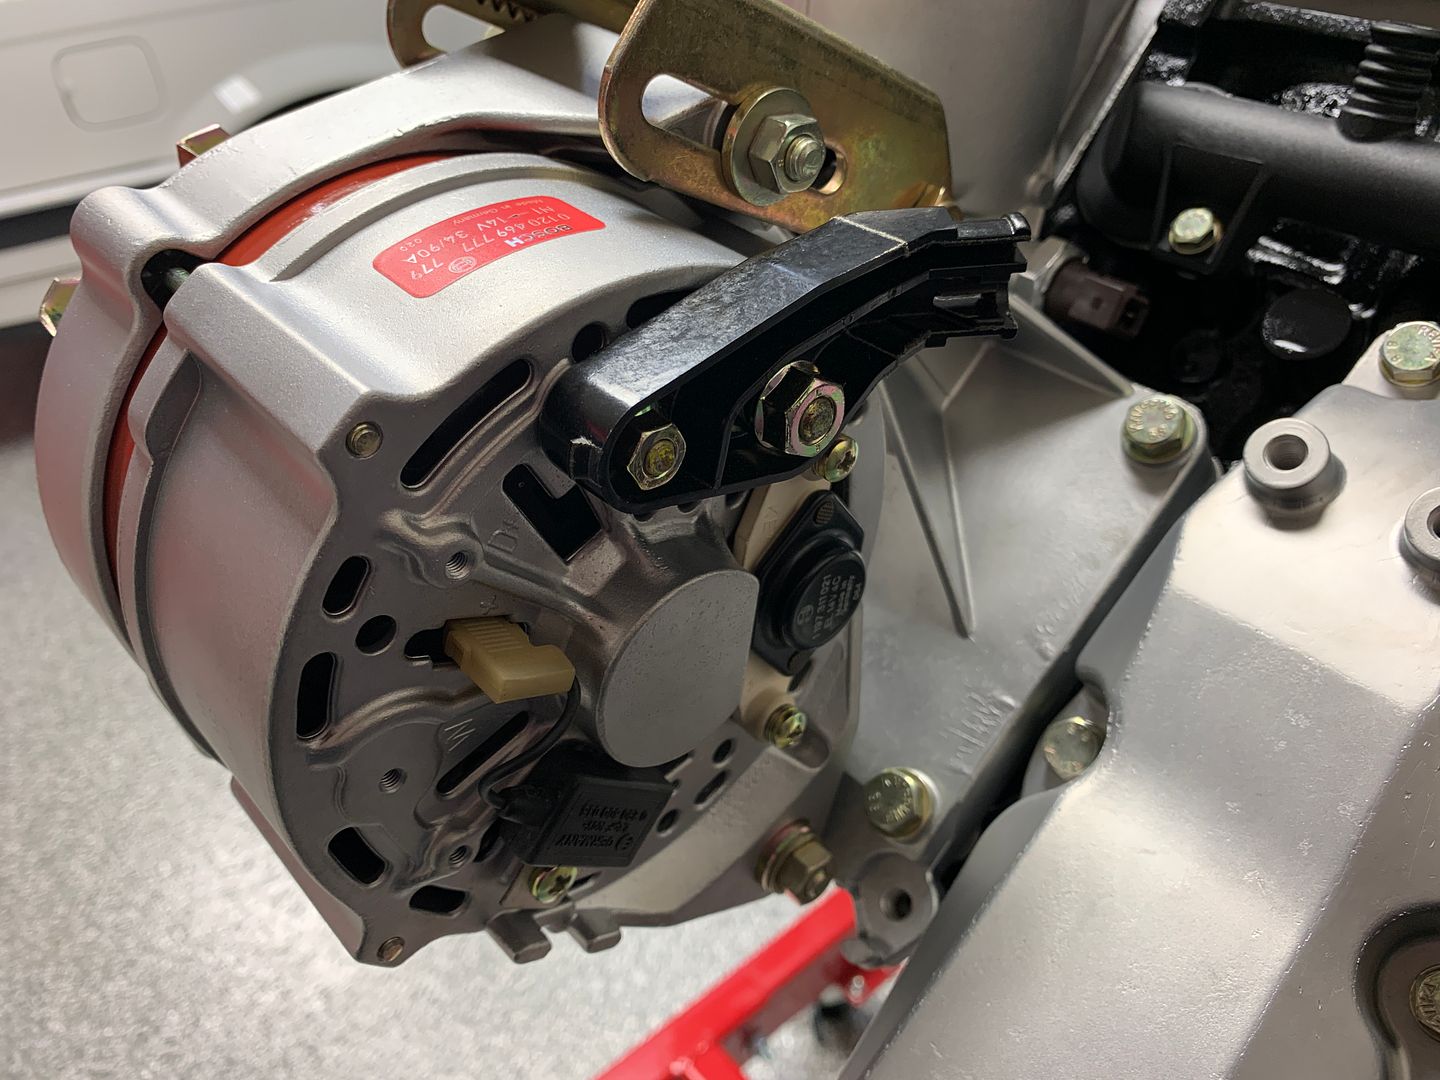
The Alternator lovingly rebuilt and better than new - most people wouldn't even know what went into this.Leave a comment:
-
Just a small amount of progress this evening, realistically I'm out of work to do until the pistons arrive.
Four new alternator mounting bushings.
and hello alternator
Leave a comment:
-
The rear oil galley plugs on these are perfectly reusable, the one I ended up installing came from the same engine I harvested the timing case from. The front oil galley passage remains open to fee the lower chain oil squirter, and a long rod through the galley easily drives out the plug. I'd rather have it clean clean clean than have the plug, but the it not being mentioned to me is just another item to hold me up. Luckily I had a solution.
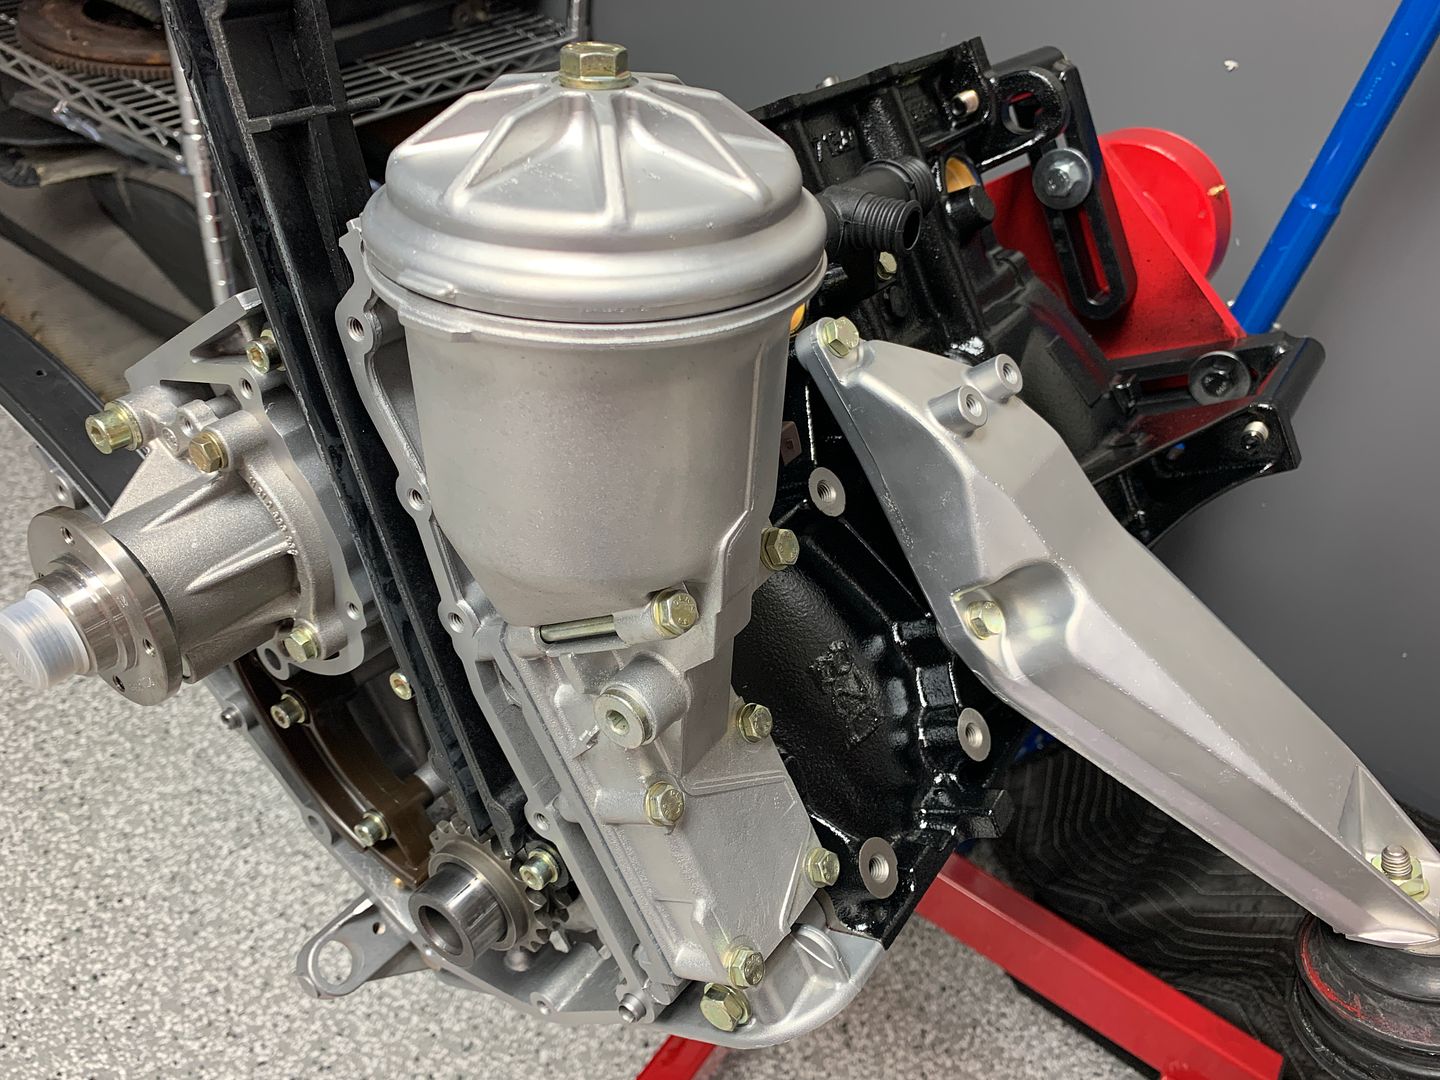
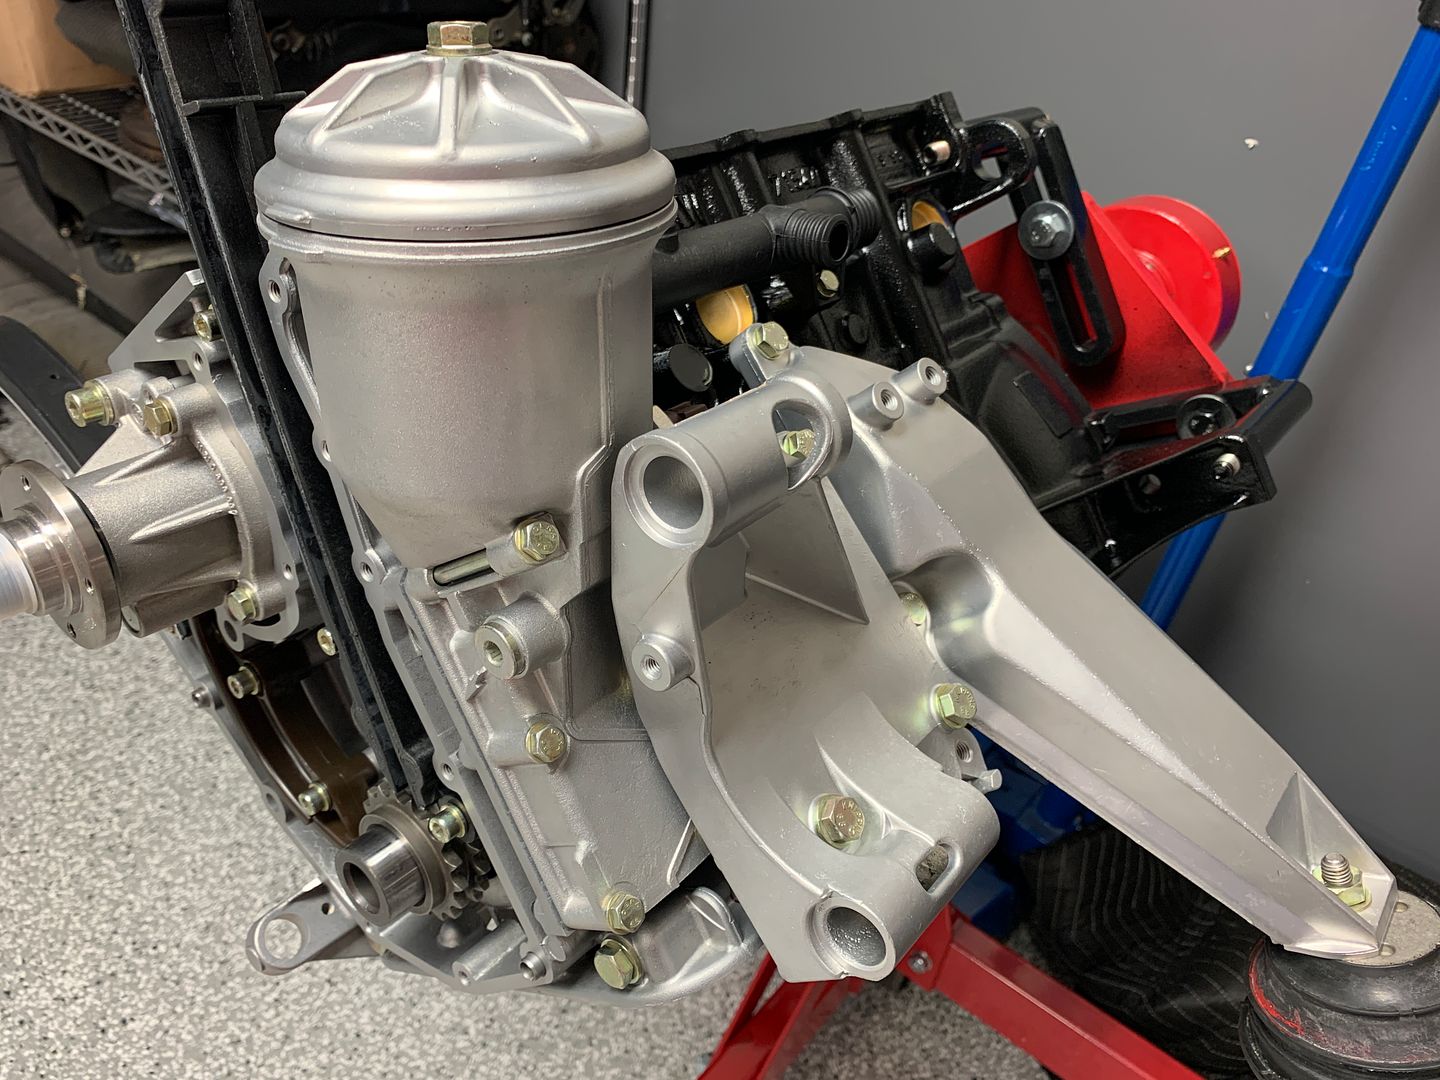
Tonight I got a few seals and gaskets I needed and was able to install the oil filter housing and alternator bracket.
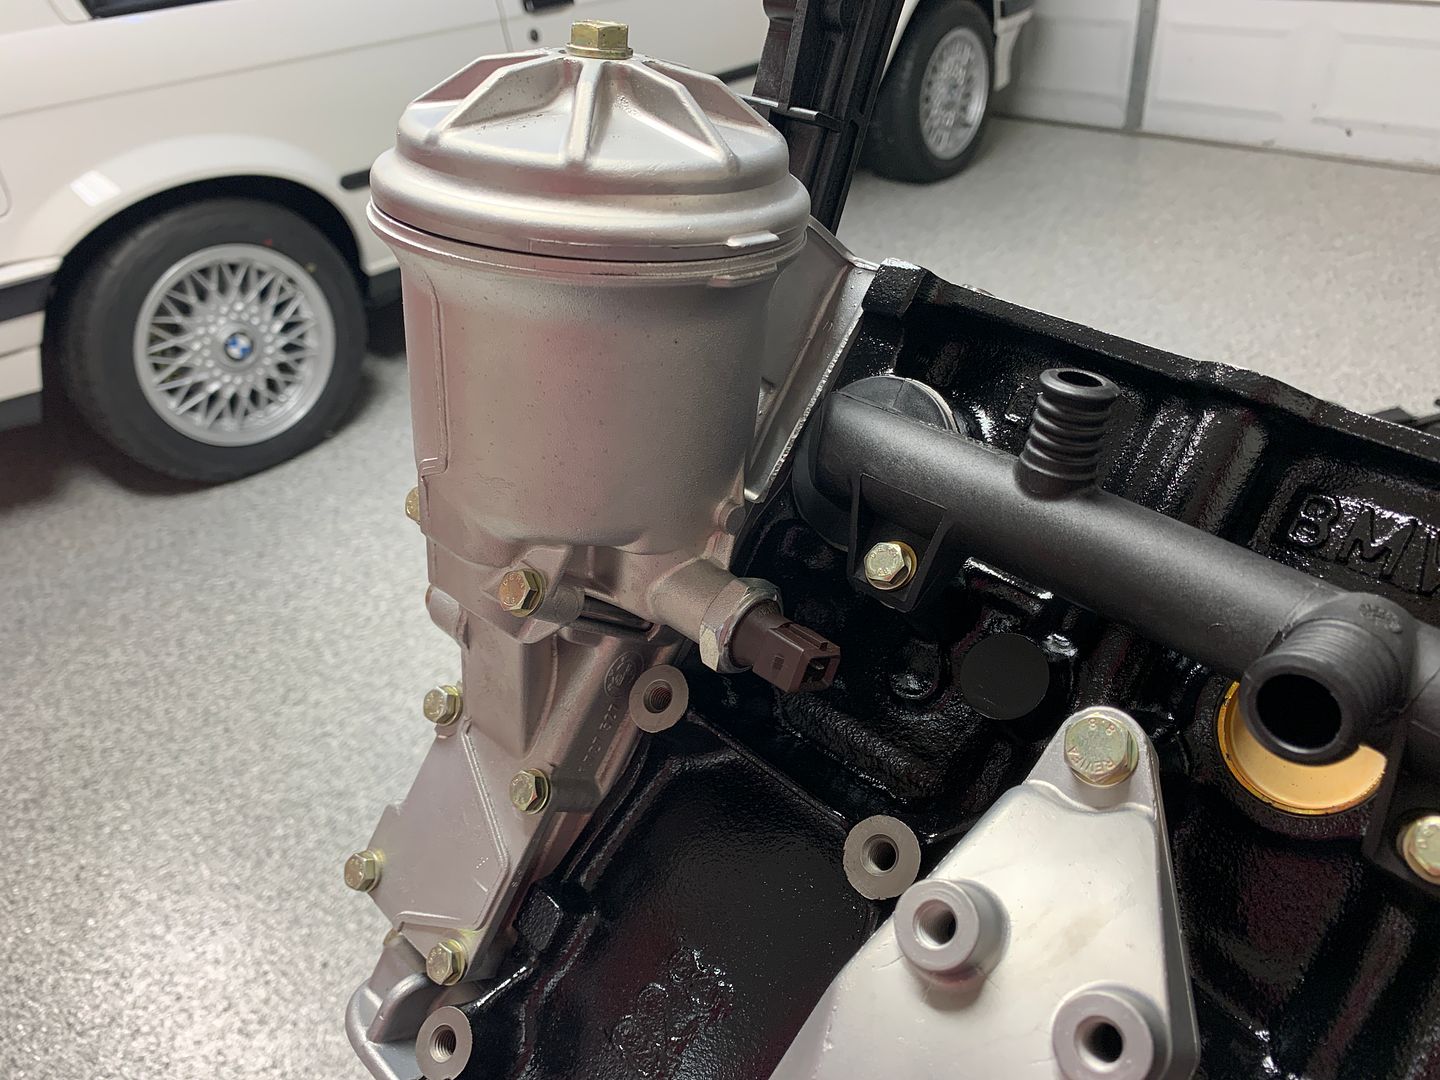
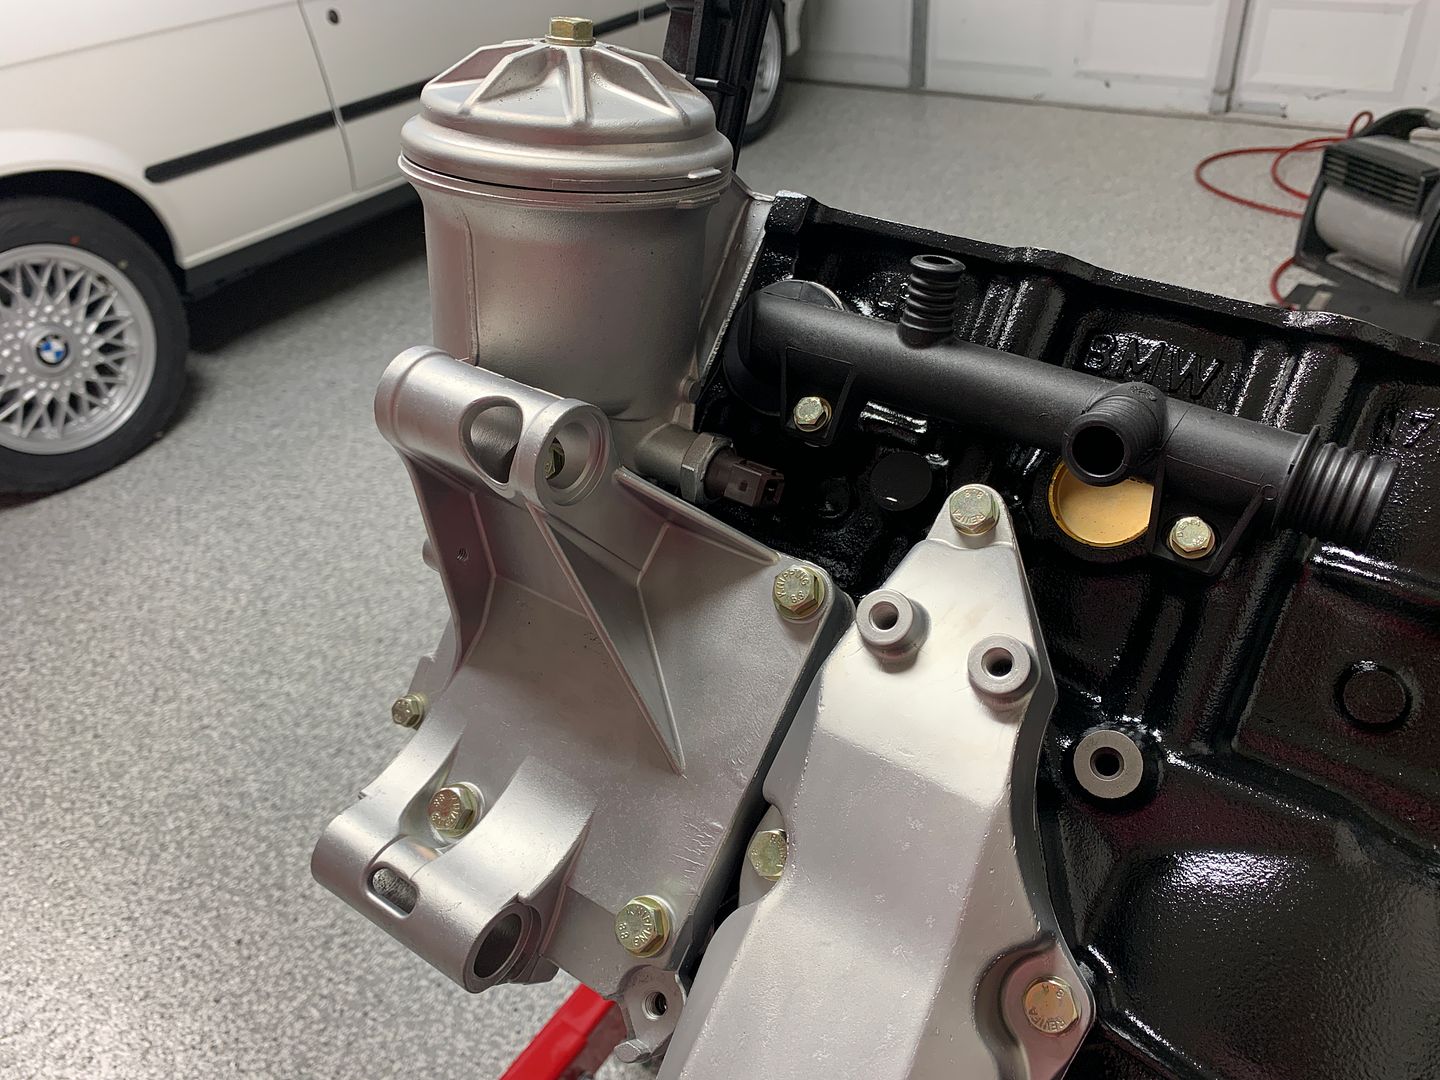
I should have the alternator bushings tomorrow so I can hang the alternator in placeLeave a comment:
-
plug usually gets damaged when removed...most just drill/tap/pull it. At let the machine shop had done the right thing and cleaned the block the correct way, plugs out and allLeave a comment:
-
Got what I could done today but I'm up against a parts hold as I forgot to order the gasket/oring for the oil filter housing stand, the front crankshaft seal, and the alternator bushings so I can't get quite as far as I'd hoped... oh well. I'll have the stuff I need in hands later this week.
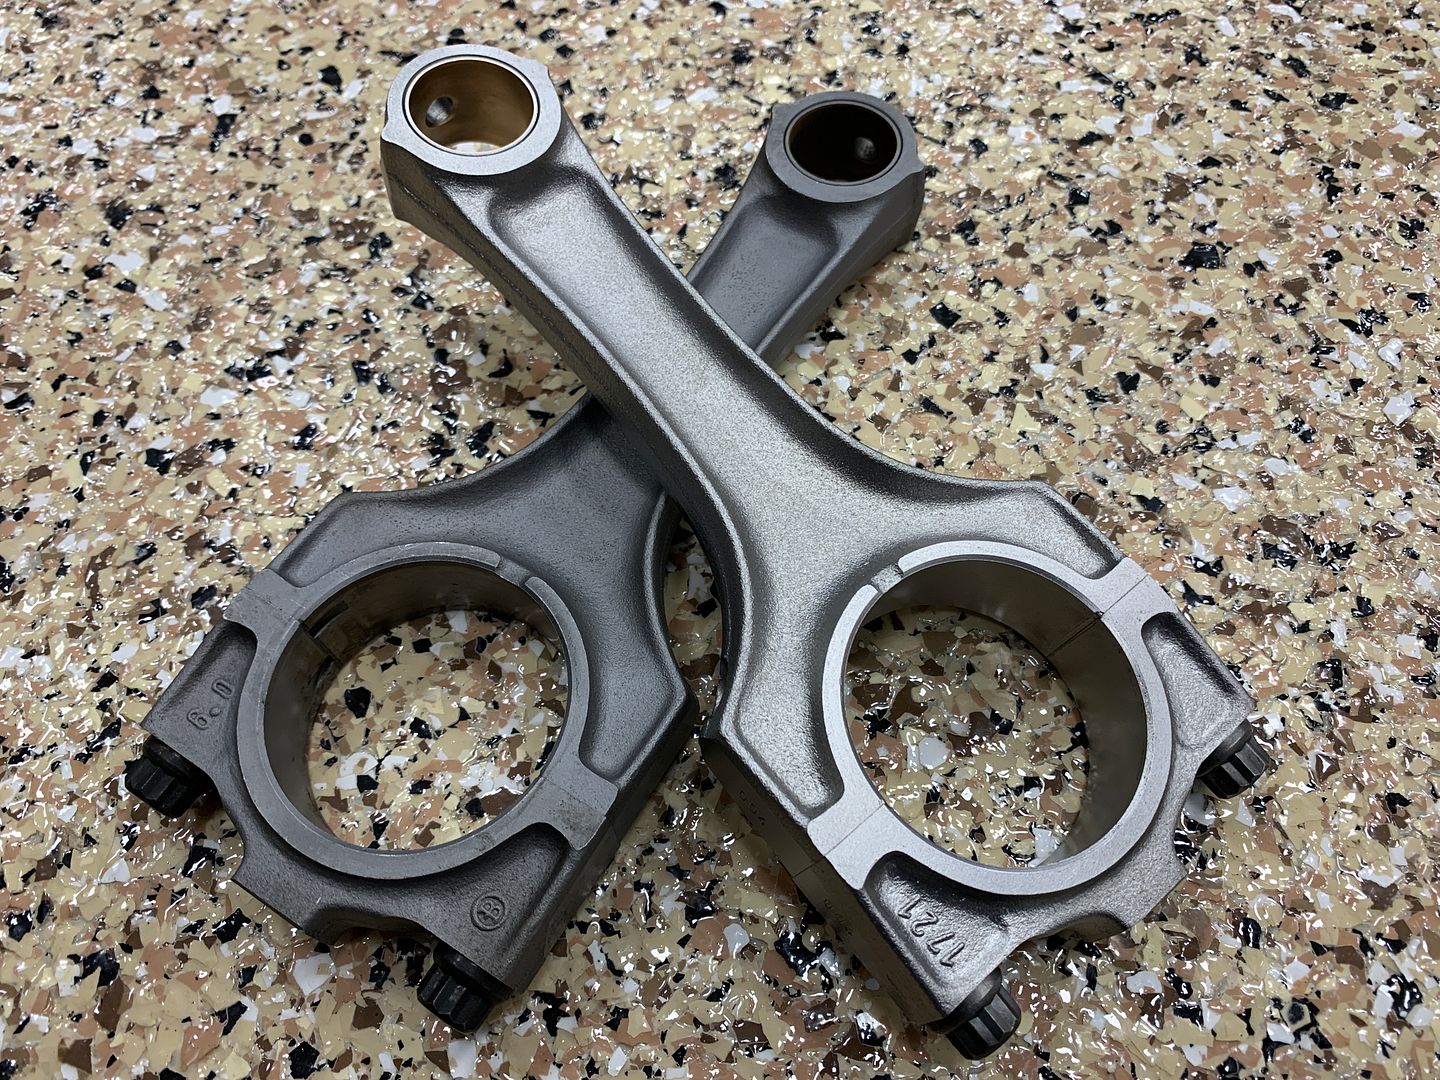
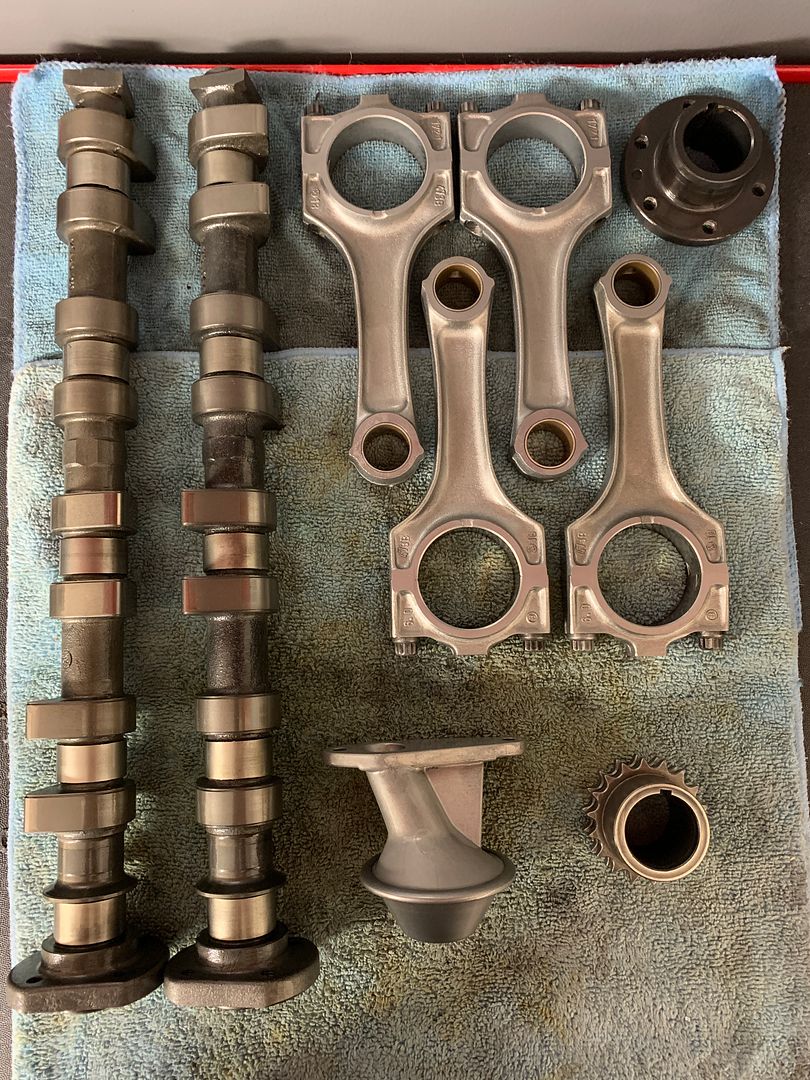
I have the machine shop weight match each connecting rod, and then carefully balance them. The rods were balanced to within 0.5 gram of one another. For reference a single US dollar bill weighs exactly 1 gram. Before they started this process they blasted them in the same cabinet as the engine block. While clean is clean, my standards are a big higher... I took all four rods over to Jon's house and went after them with the vapor blaster. While its chief purpose is aluminum cleaning/brightening it sure does a nice job on steel as well. Just need to immediately dry and oil them (I use WD40 for this) or they will flash rust from the humidity in the air.
Before and after speaks for itself.
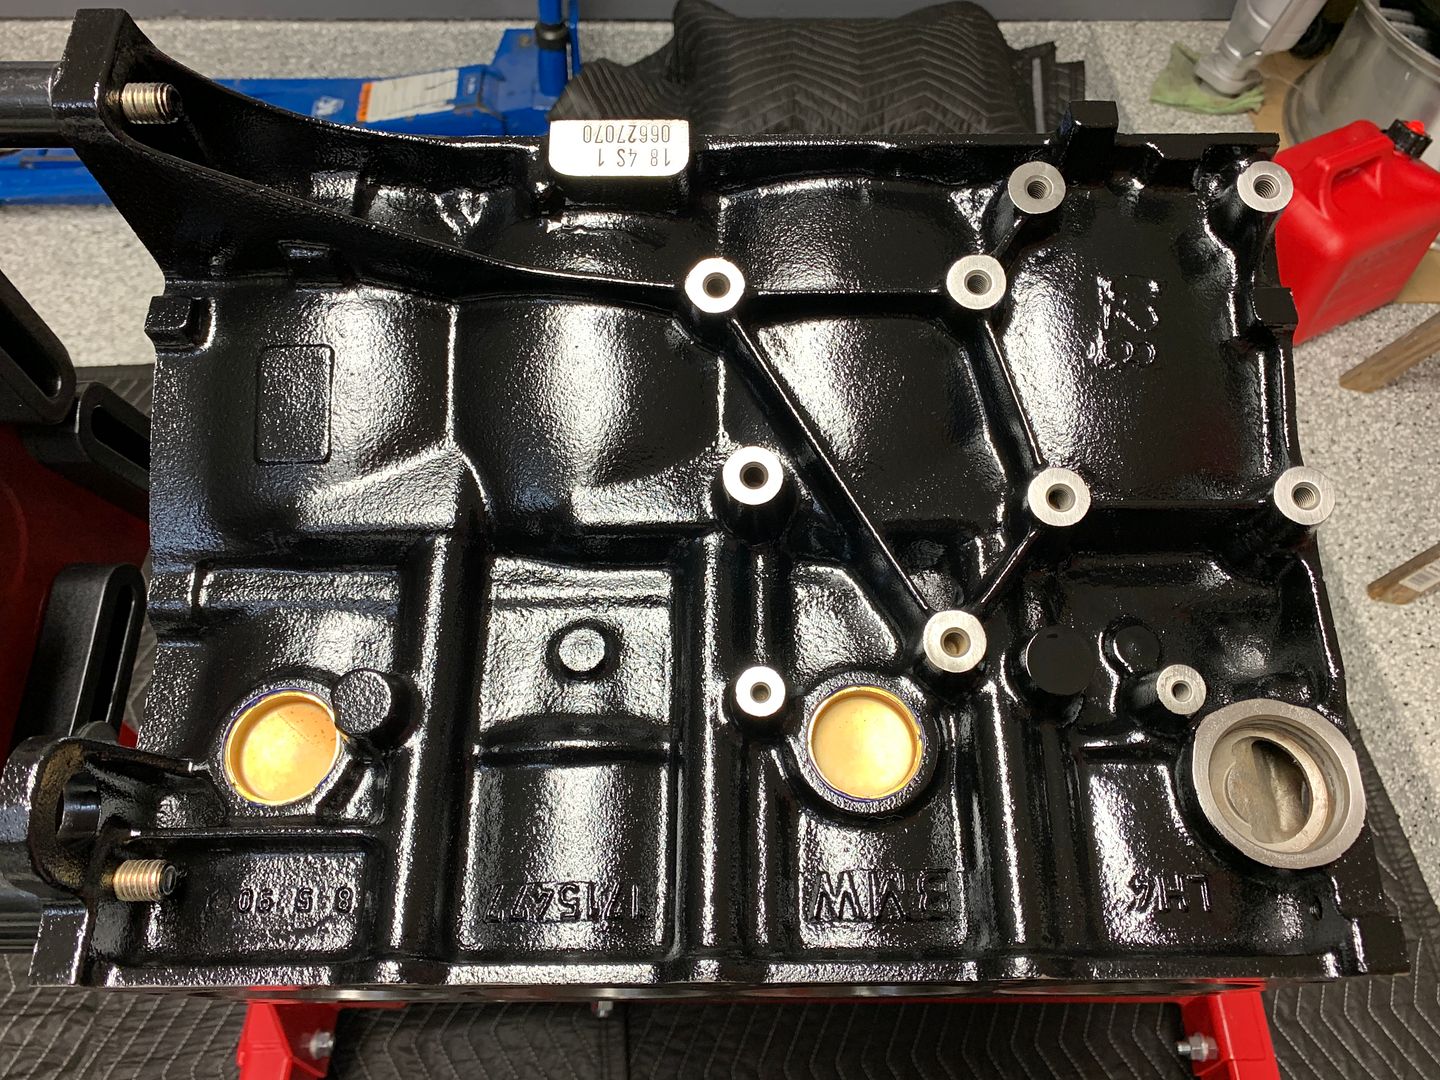
The next task was an unexpected gift from the machine shop. When cleaning the block out they knocked the rear oil galley plug out (and subsequently discarded it) Luckily I noticed it missing, and happened to have a spare on hand. It is a 12.5mm steel pellet about 5mm thick.
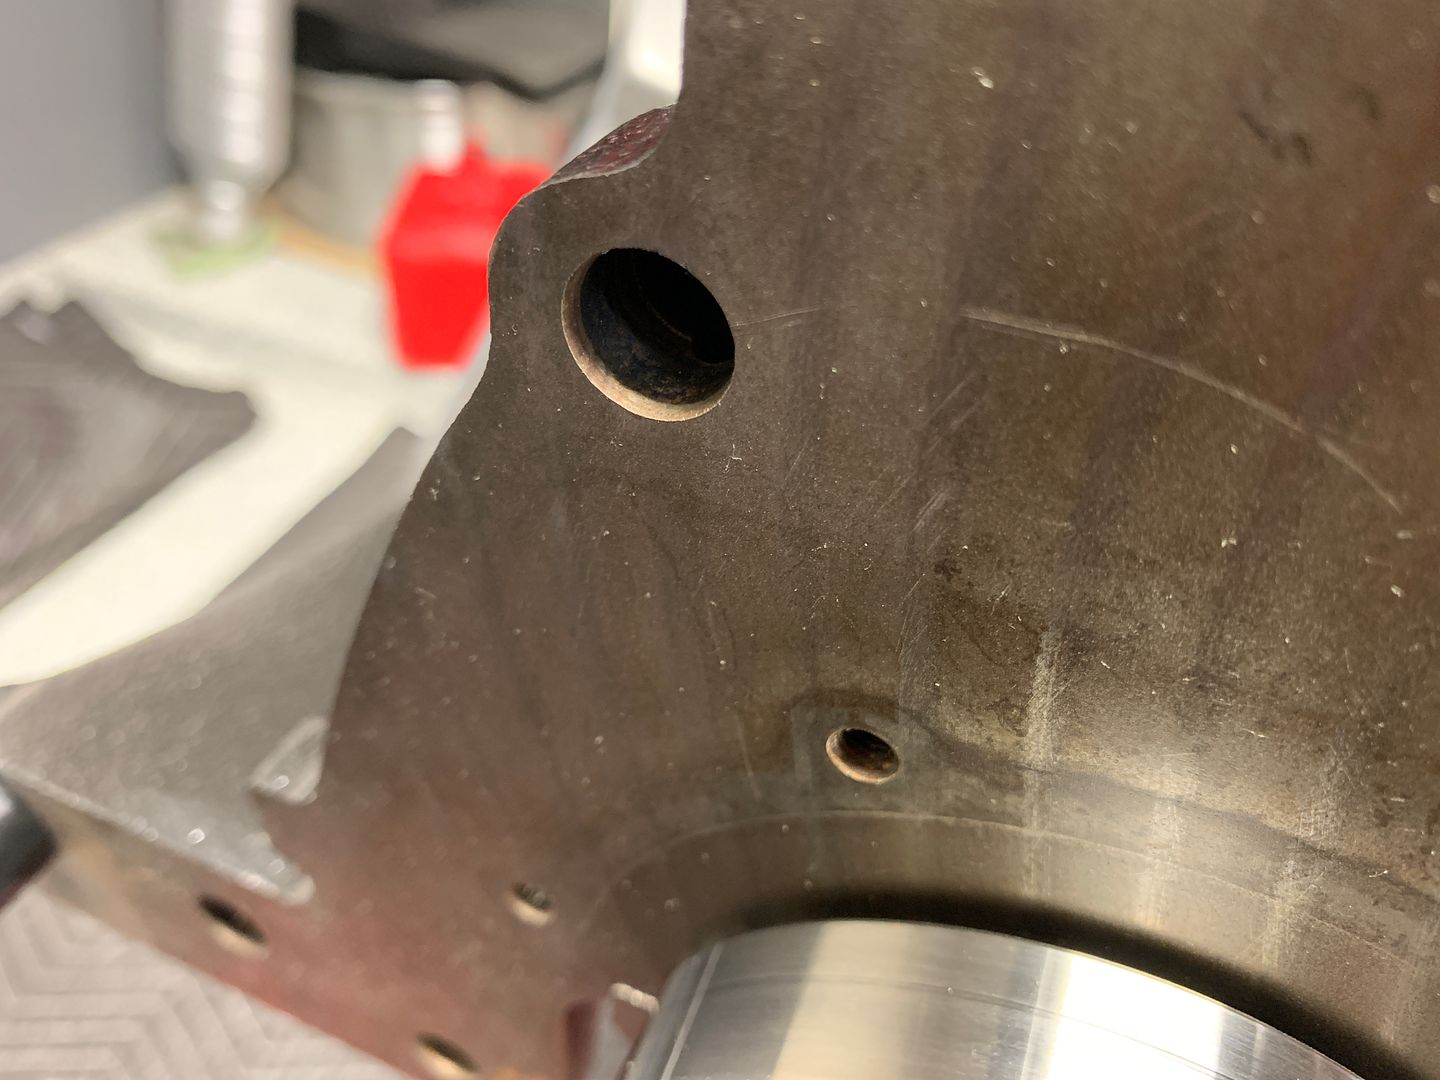
However I had a small issue in that the engine is already on the stand, so driving it in with a drift and a hammer is out of the question.... ah but I came up with a solution...
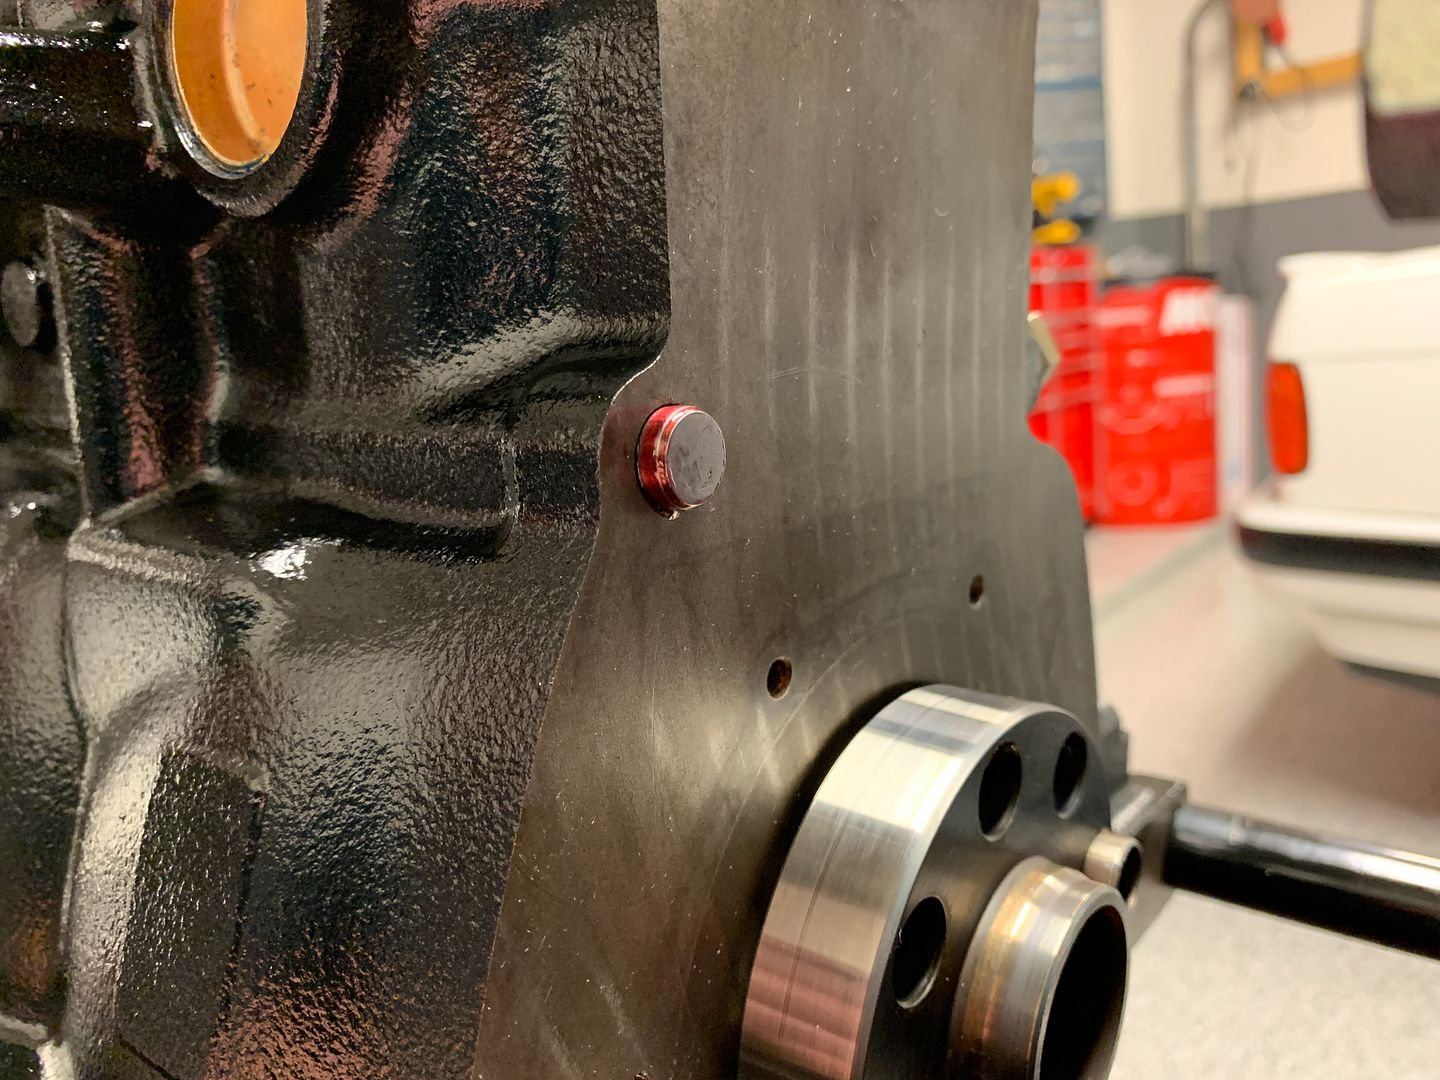
Tapped into place with a wrench and red loctite applied as sealant.
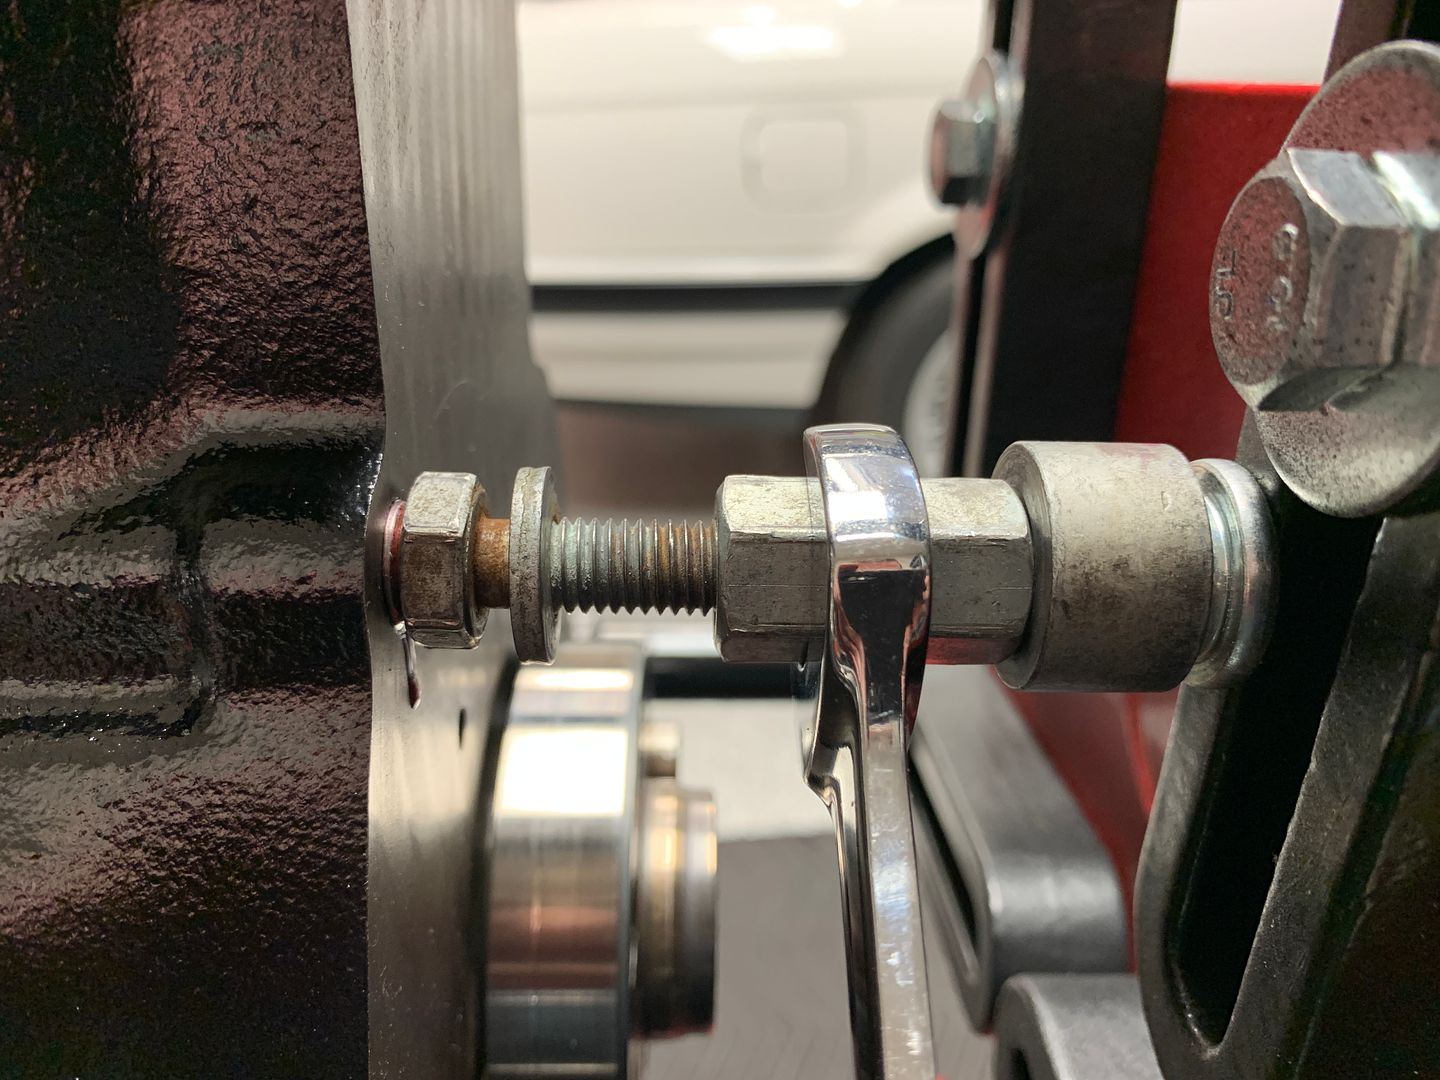
Two bolts threaded into a threaded coupler allowed me to make a press tool to push against the engine stand to drive the oil galley plug in flush, worked perfectly.
Last task back there, install the rear main seal cover
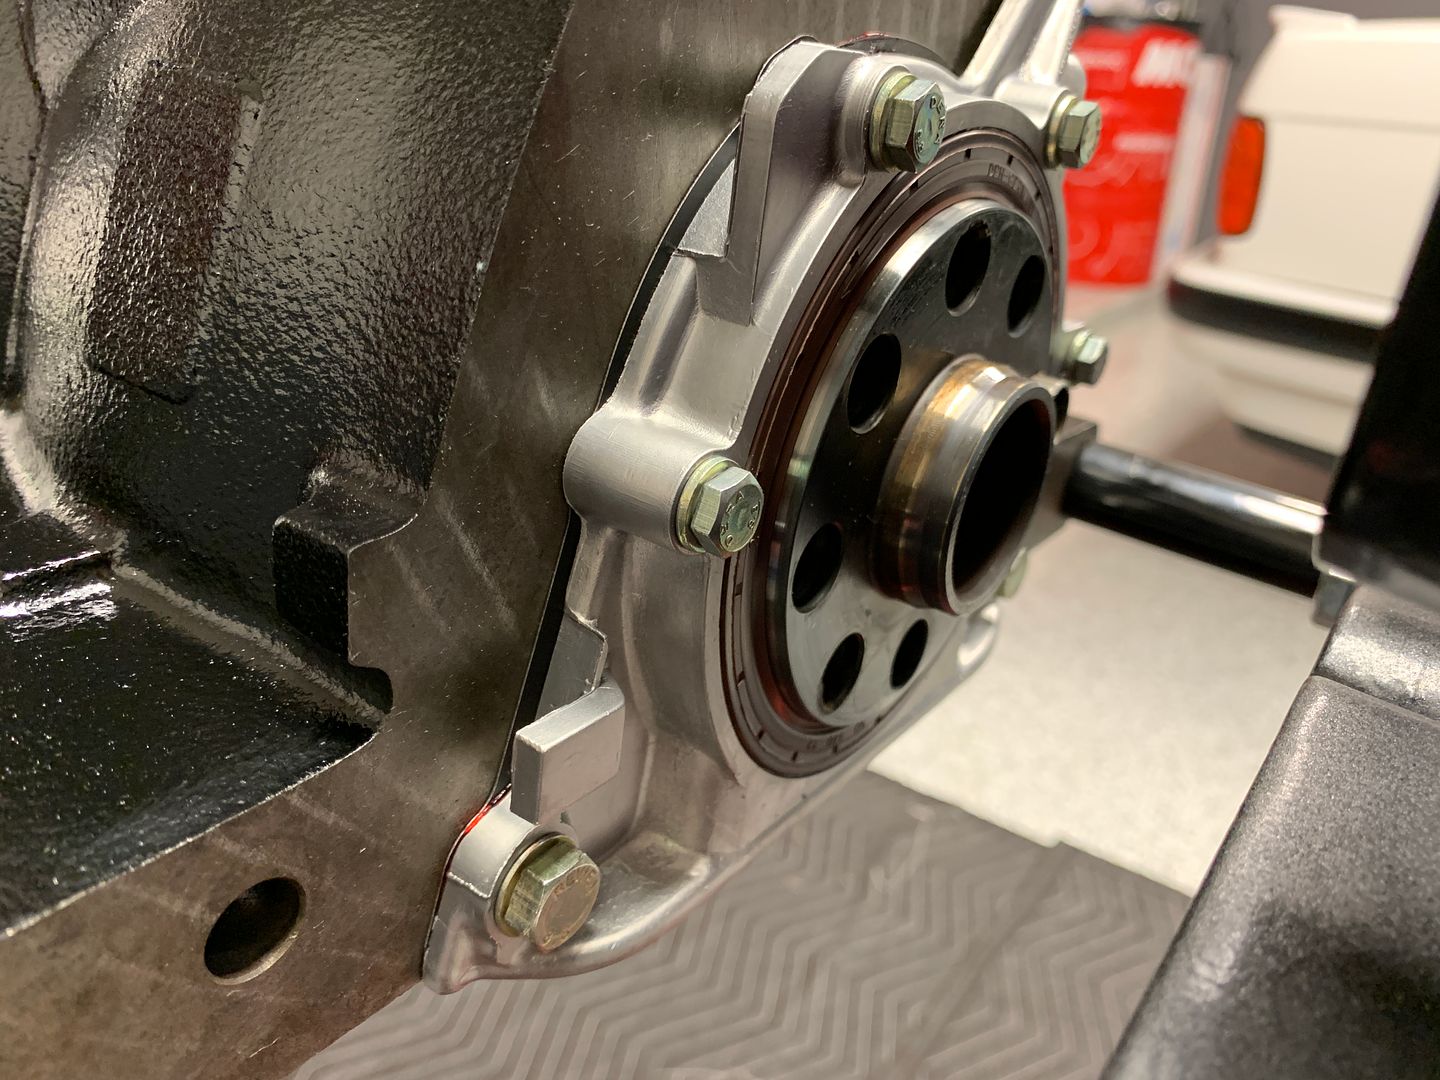
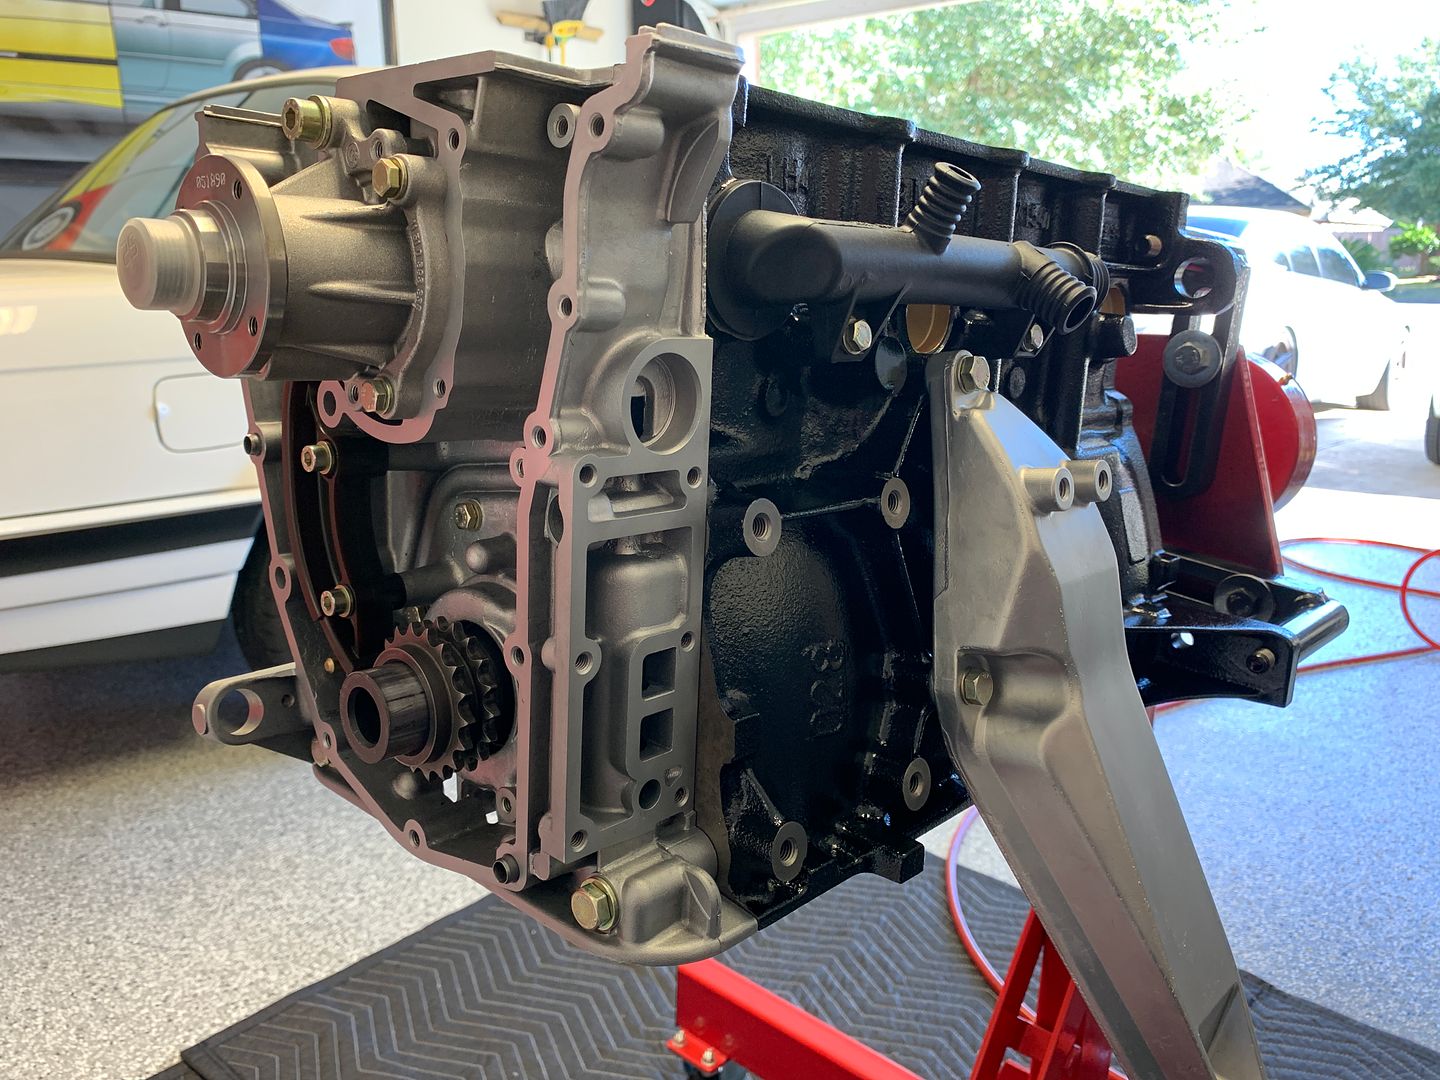
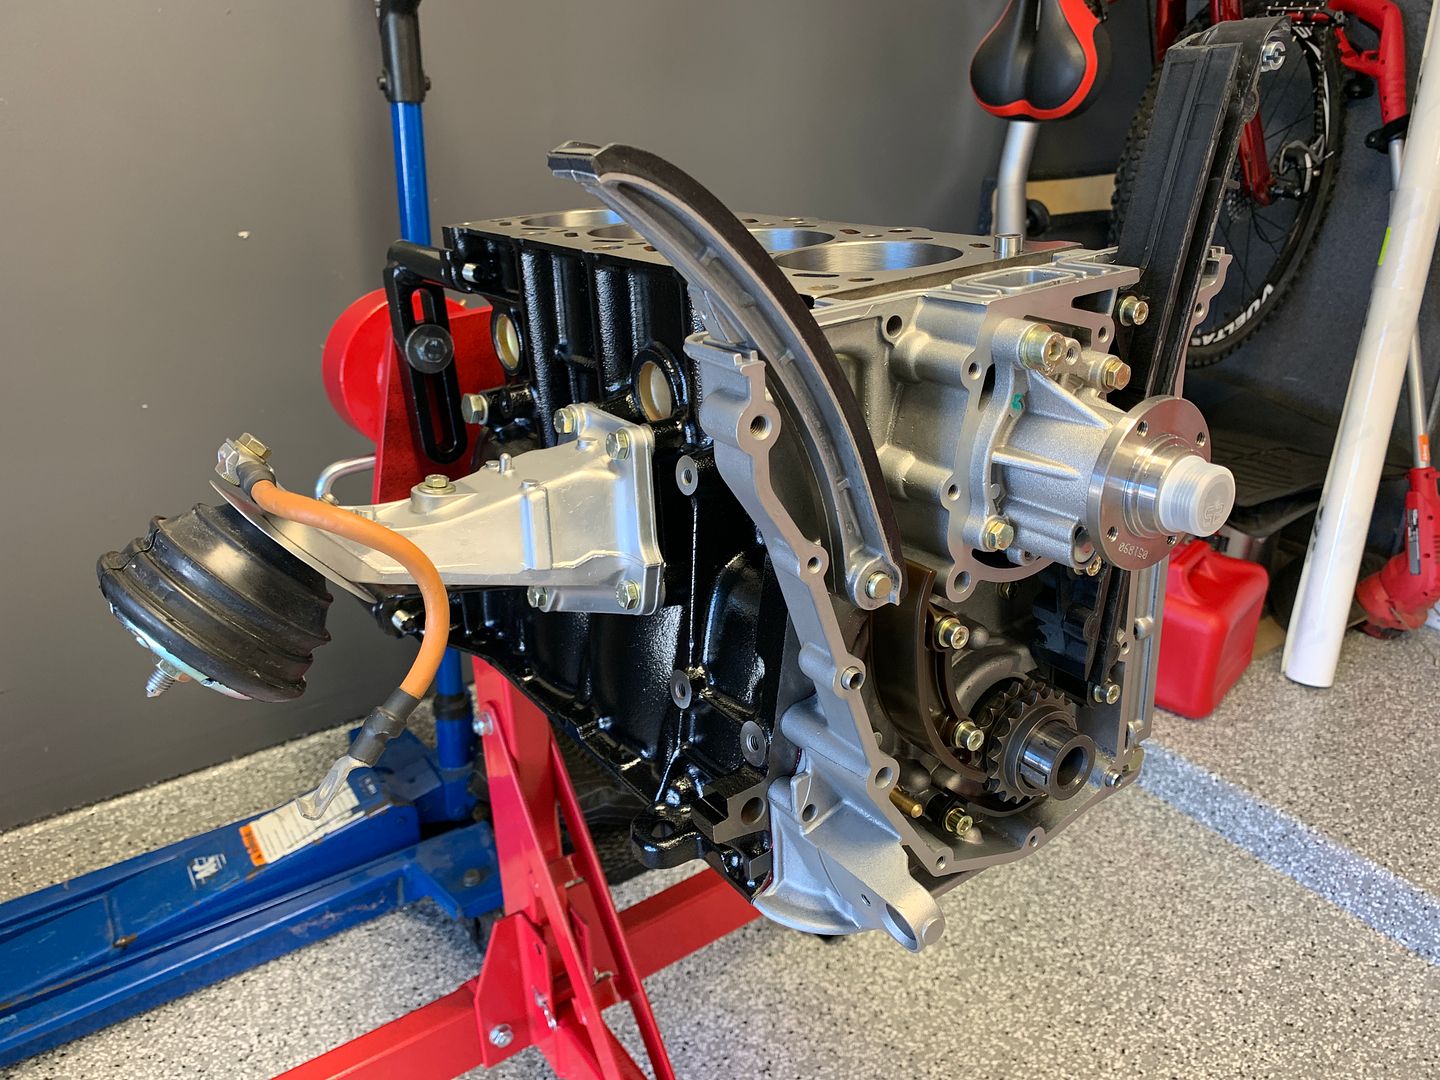
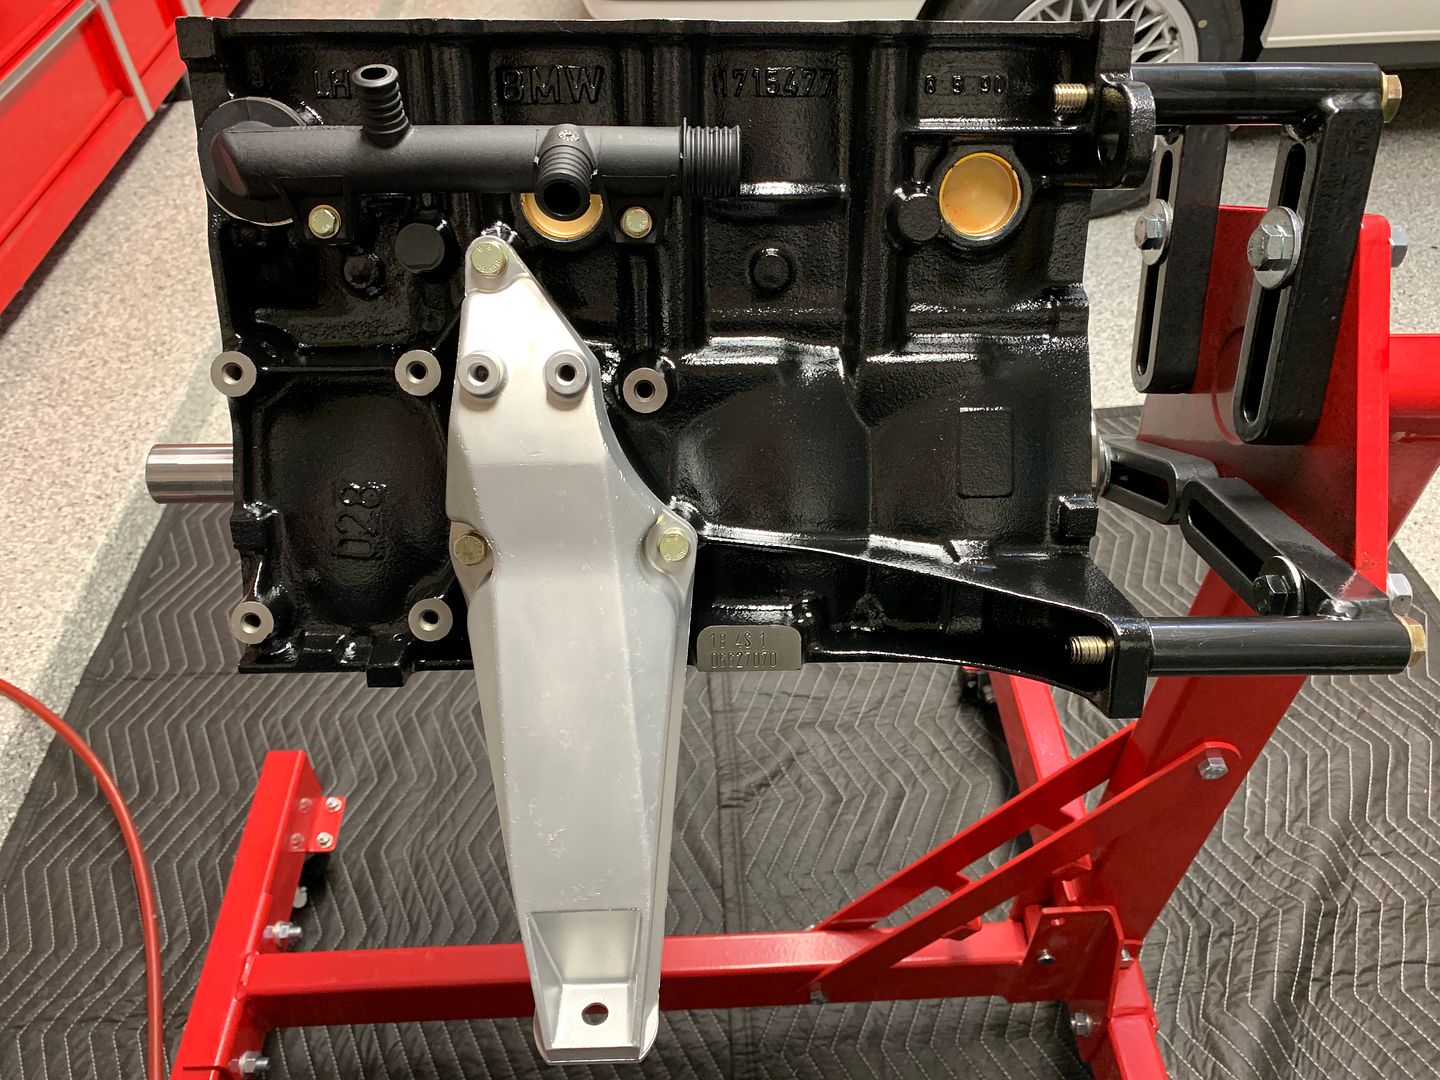
With that done I moved back to the front, I wanted to get the main timing case installed today. Applied ample assembly lube to the oil pump housing and drive before dropping it into its home.

Thoroughly against my want for originality I elected to set the correct early timing case aside and install the late production M42 timing case I had picked up from a 10/93 E36 318i to alleviate my fears of a timing chain idler sprocket failure. Mounted up and looking tasty with a new Genuine water pump
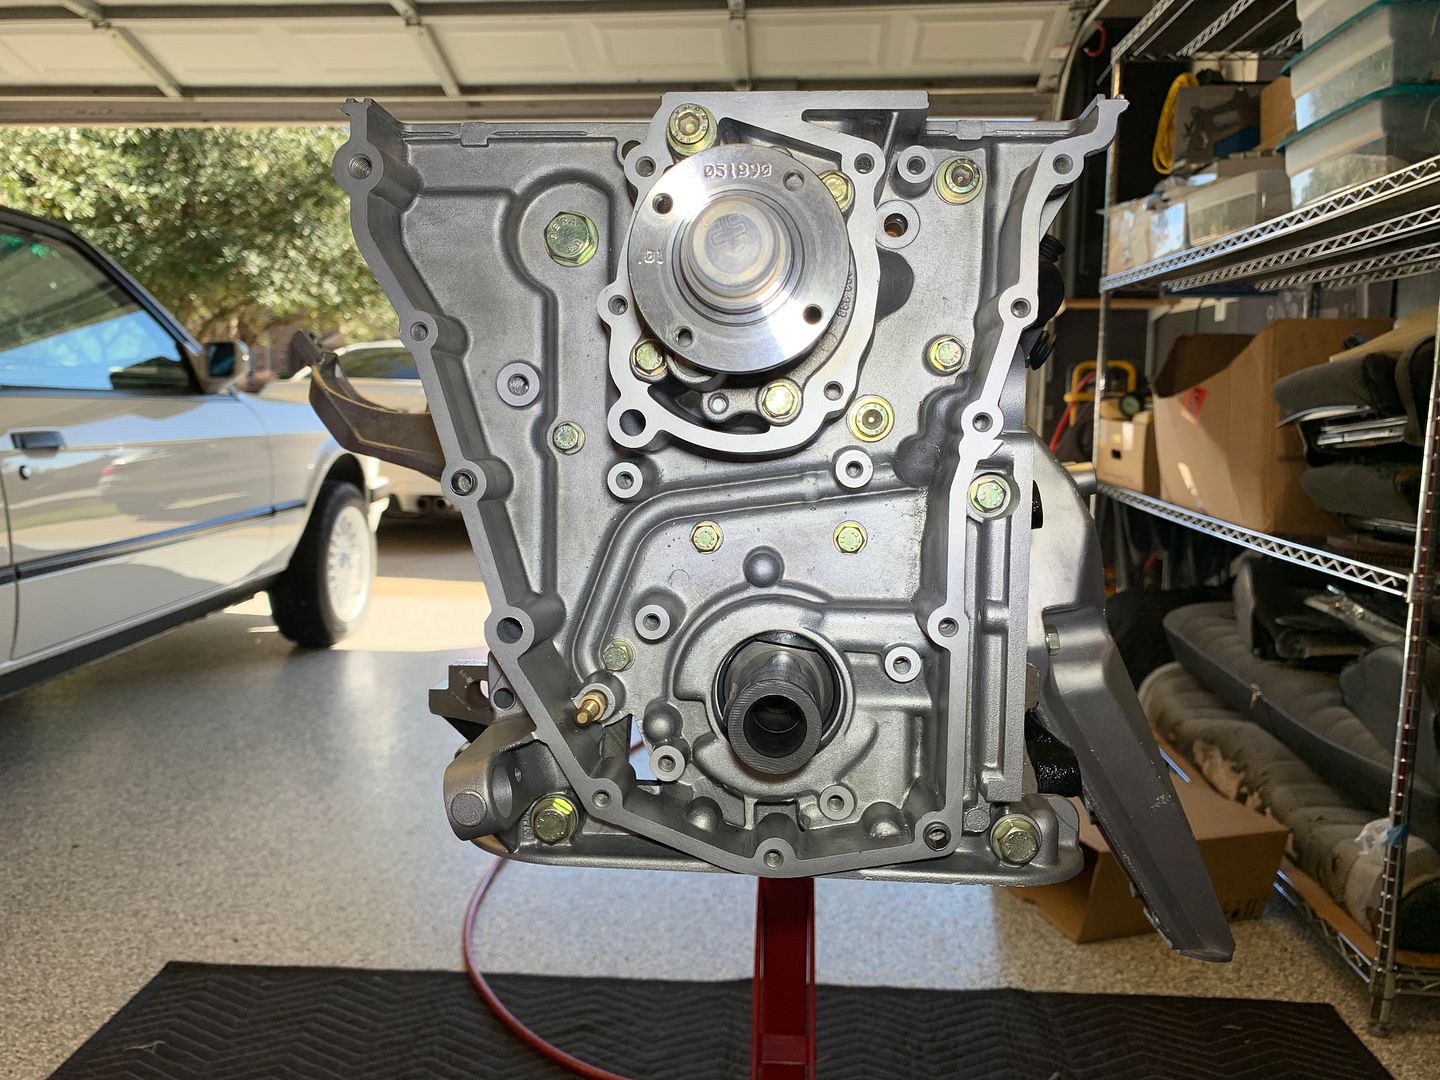
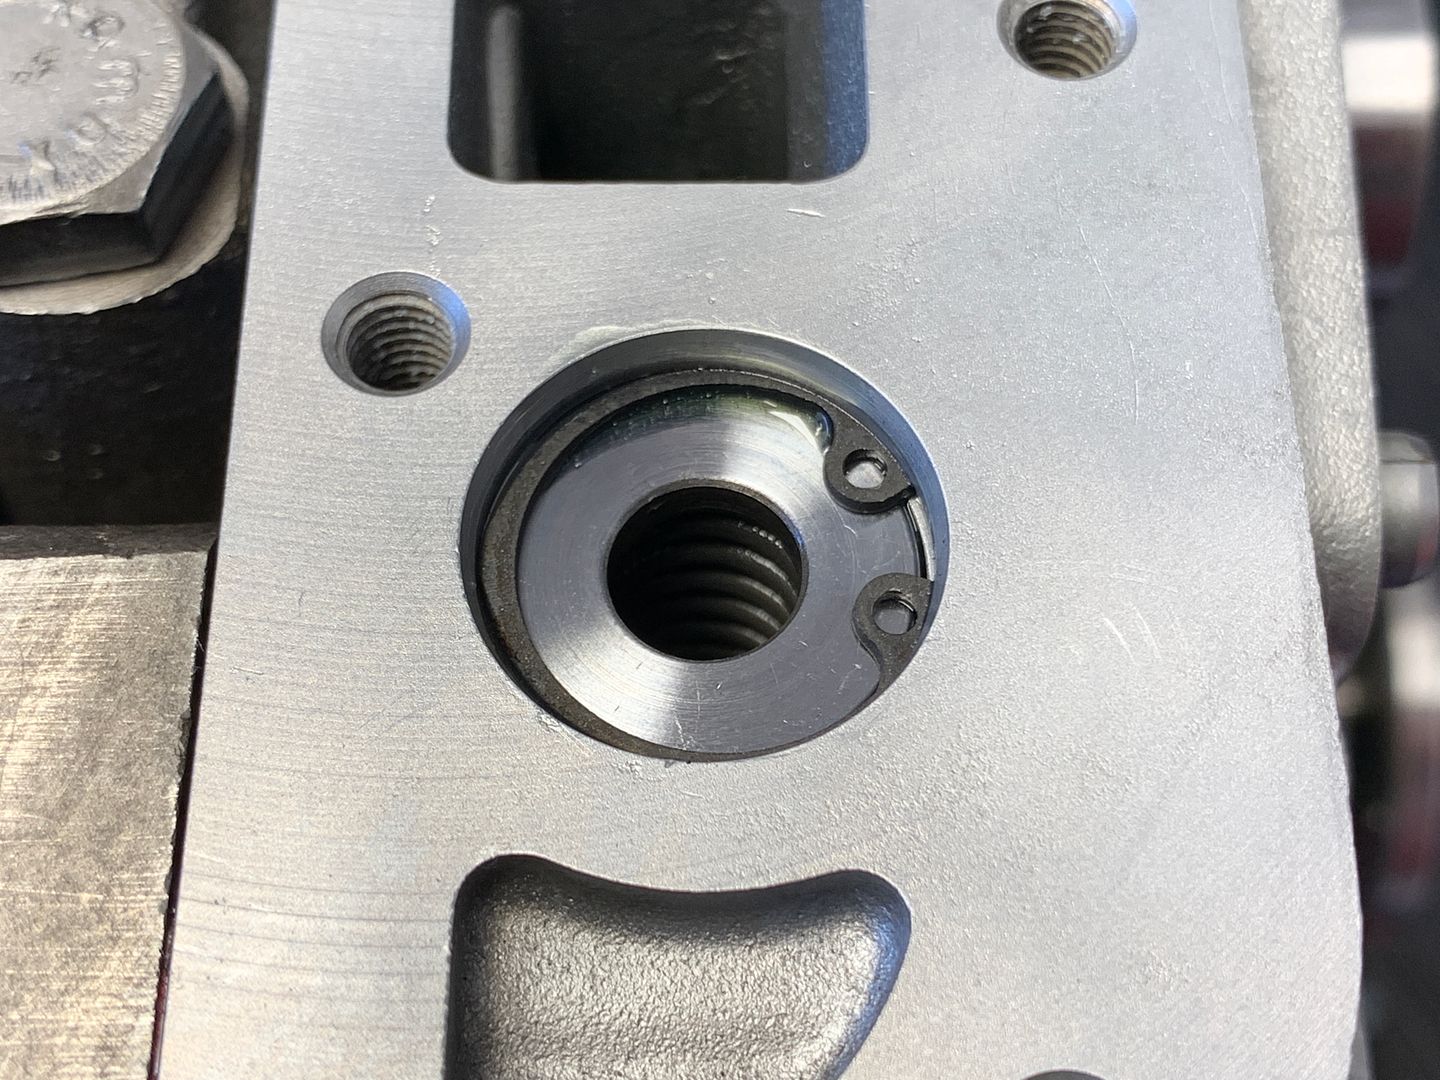
Flip it over and we'll install the polished oil pressure relief valve. Yes I am aware there is an updated valve available that is made out of plastic and not prone to seizure in the timing case bore, but back to that originality thing... I doubled down on premptive measures though by polishing the valve itself and the bore of the timing case it resides in. The end result glides silky smooth.
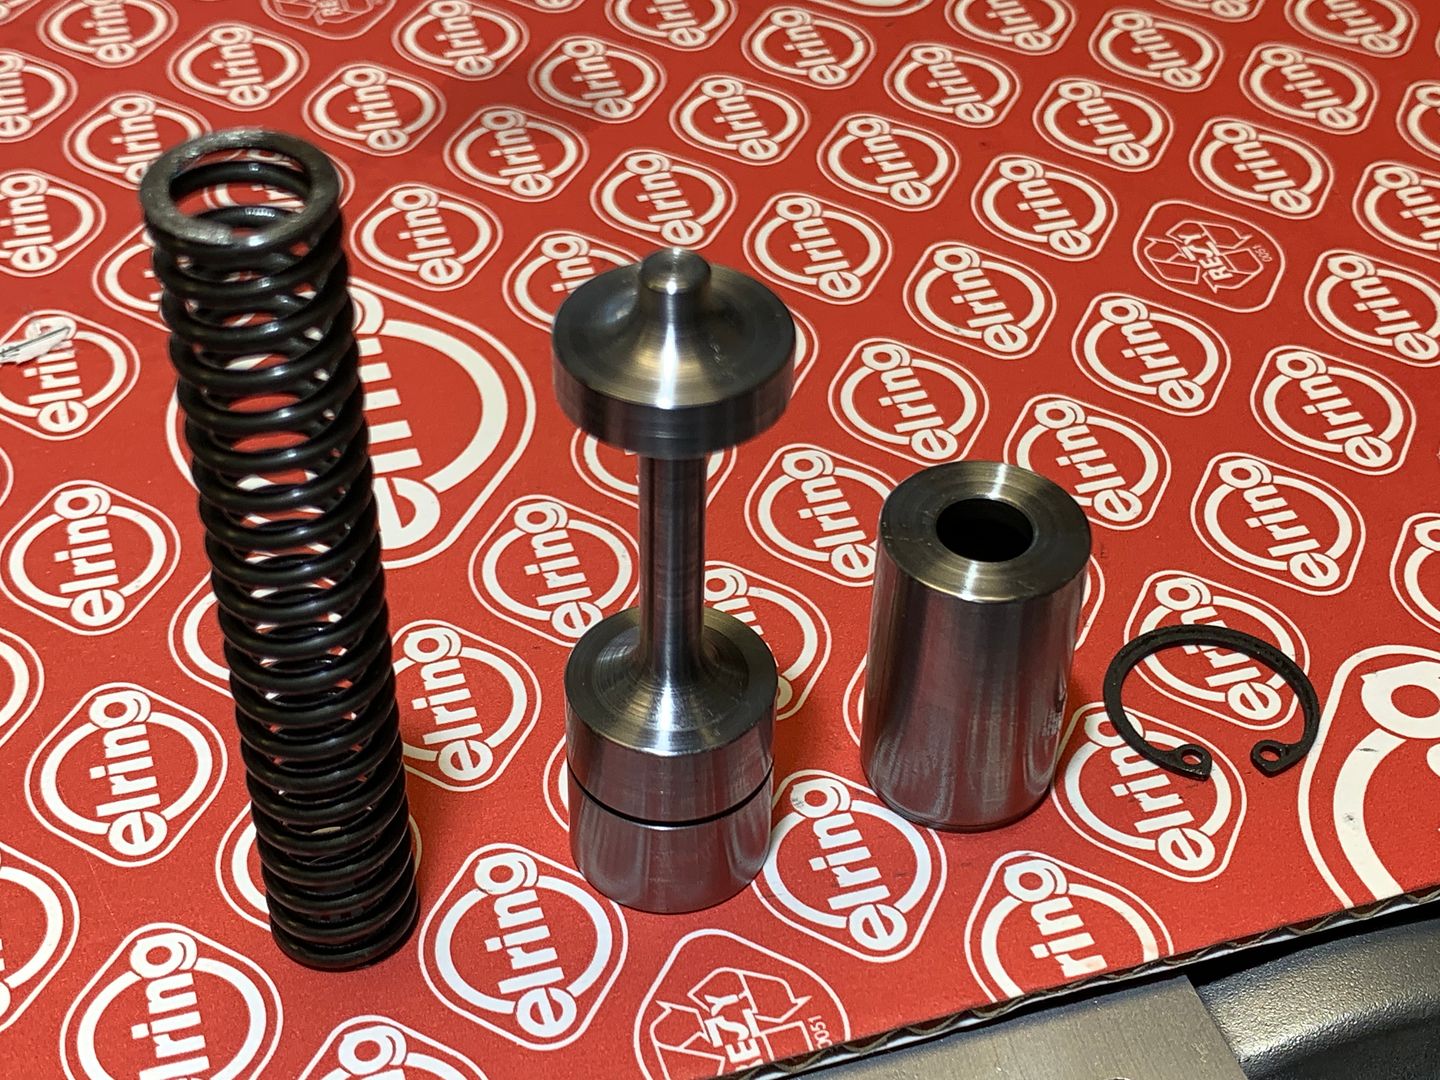
Preloaded and circlipped in place.
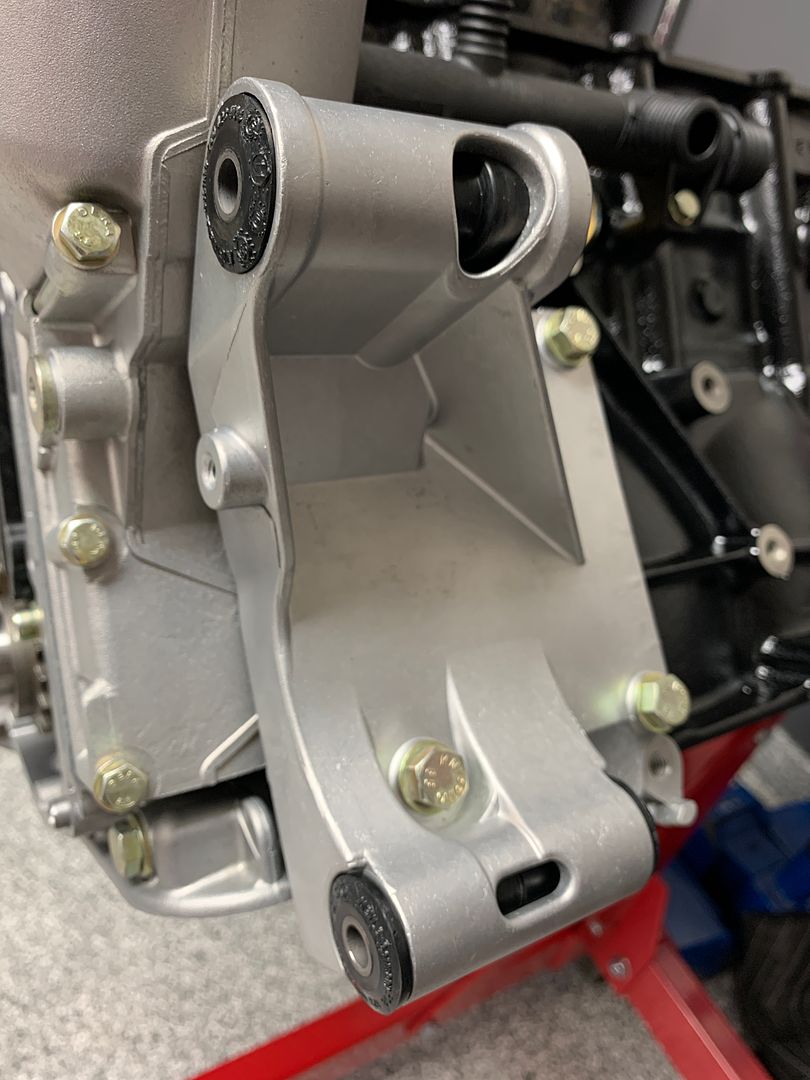
Rest of the new timing chain guides in place, along with engine mounts, and the main ground strap.
Leave a comment:
-
so glad to see updates Jordan. great way to spend Thanksgiving weekend :-)Leave a comment:
-
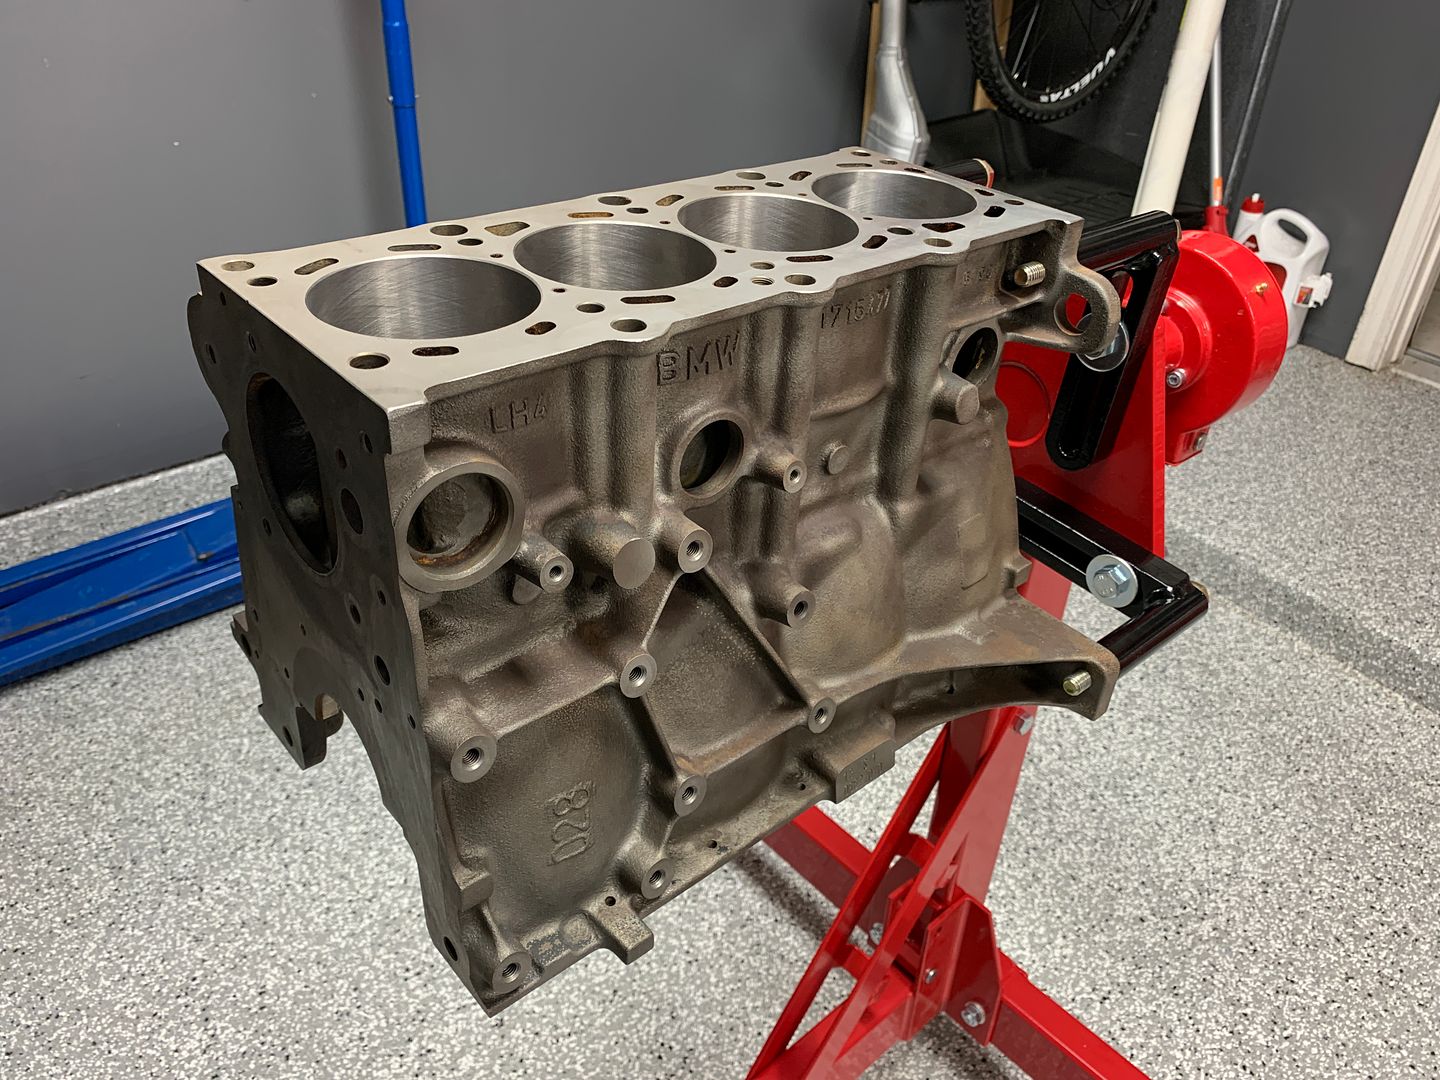
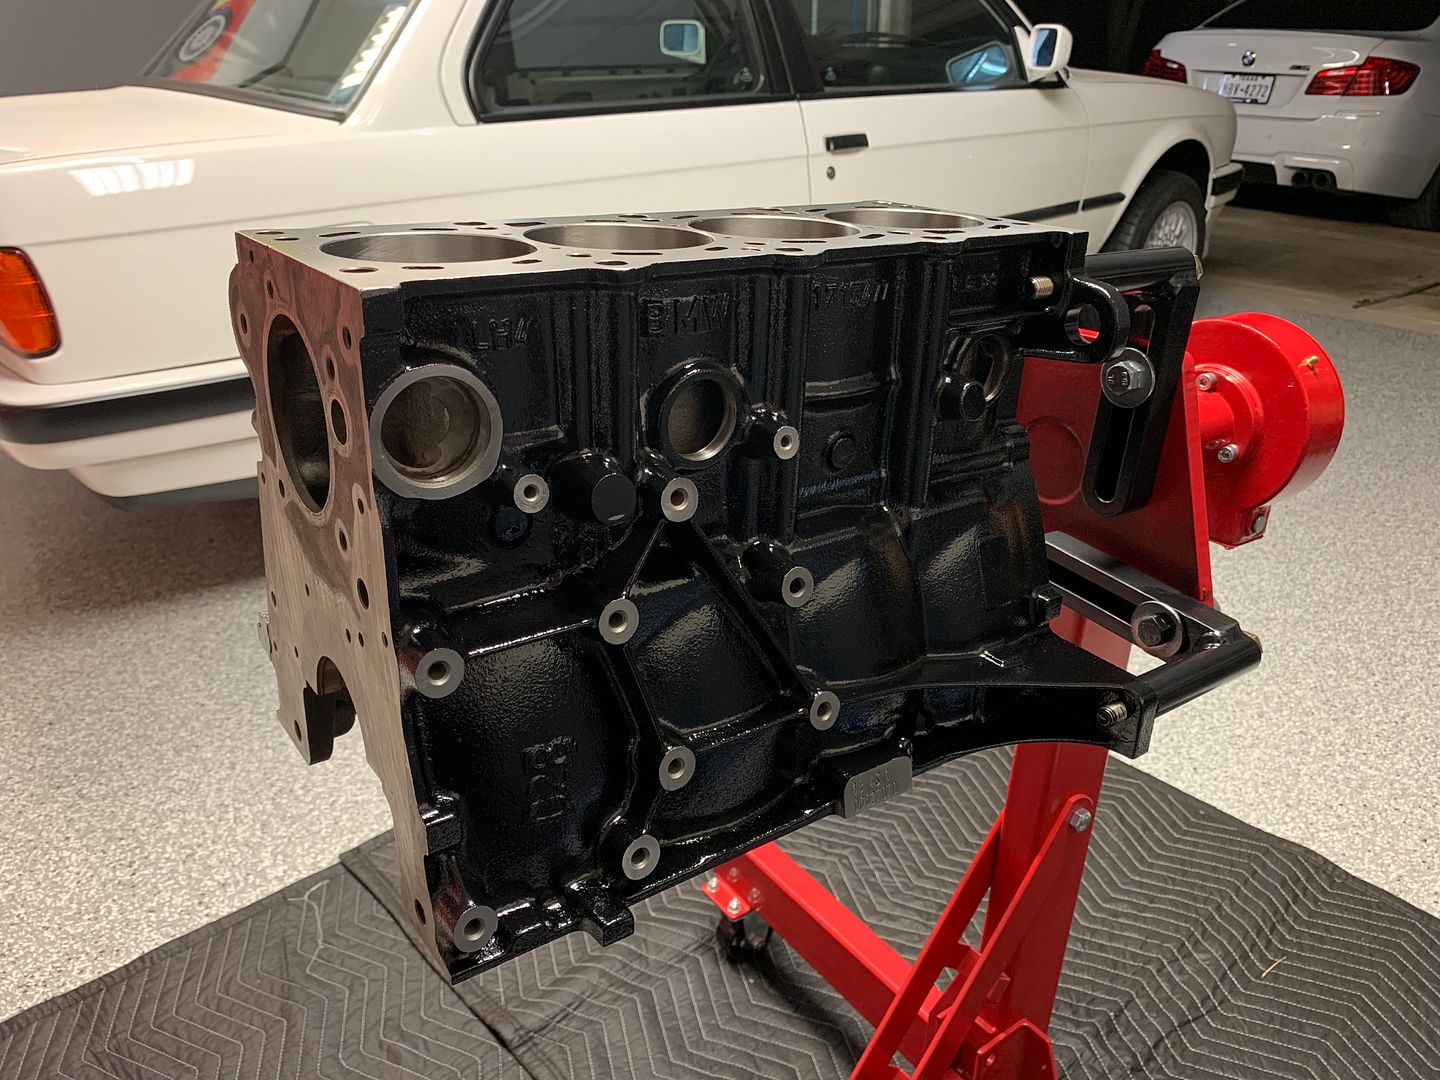
I'm pleased to finally (mostly) have my engine home from the machine shop today. When I got the message this morning that everything would be done and ready to pickup I ran on over and picked it all up. I'm still waiting on the pistons from JE which should come in next week, but having the block and crank means I can get a lot done in the mean while.
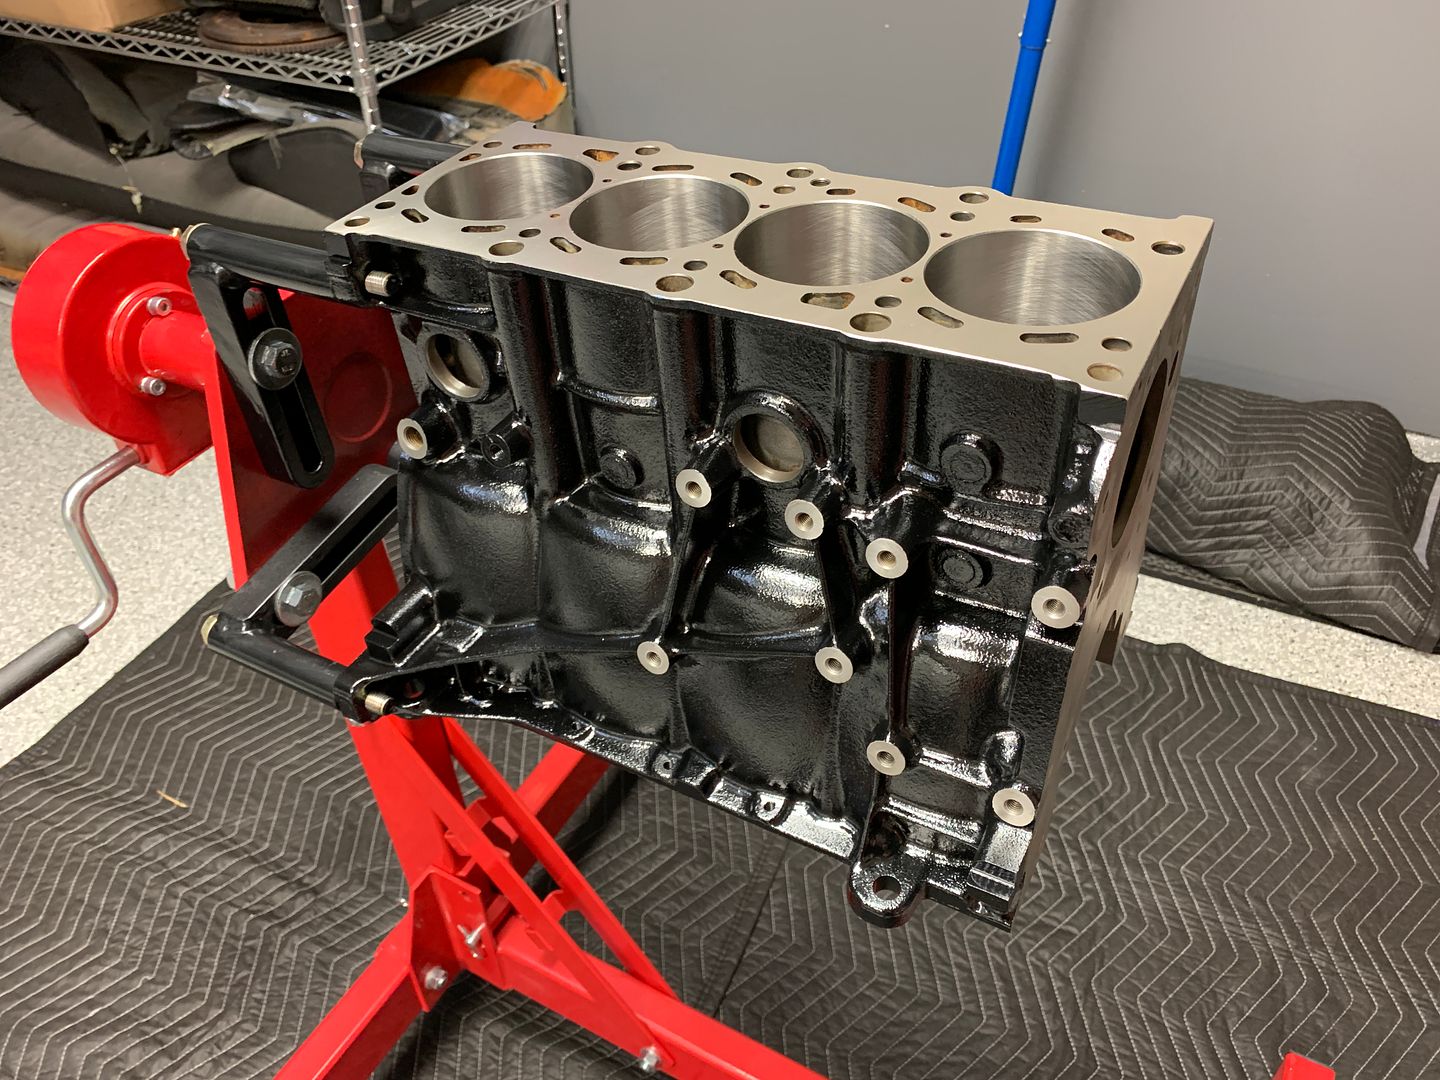
Alone with boring the block to 87mm I had the machine shop blast the block bare and then thoroughly wash the block in their industrial washing machine to remove any latent grit. The final result is super clean and required only minimal prep once hung on the stand to paint.
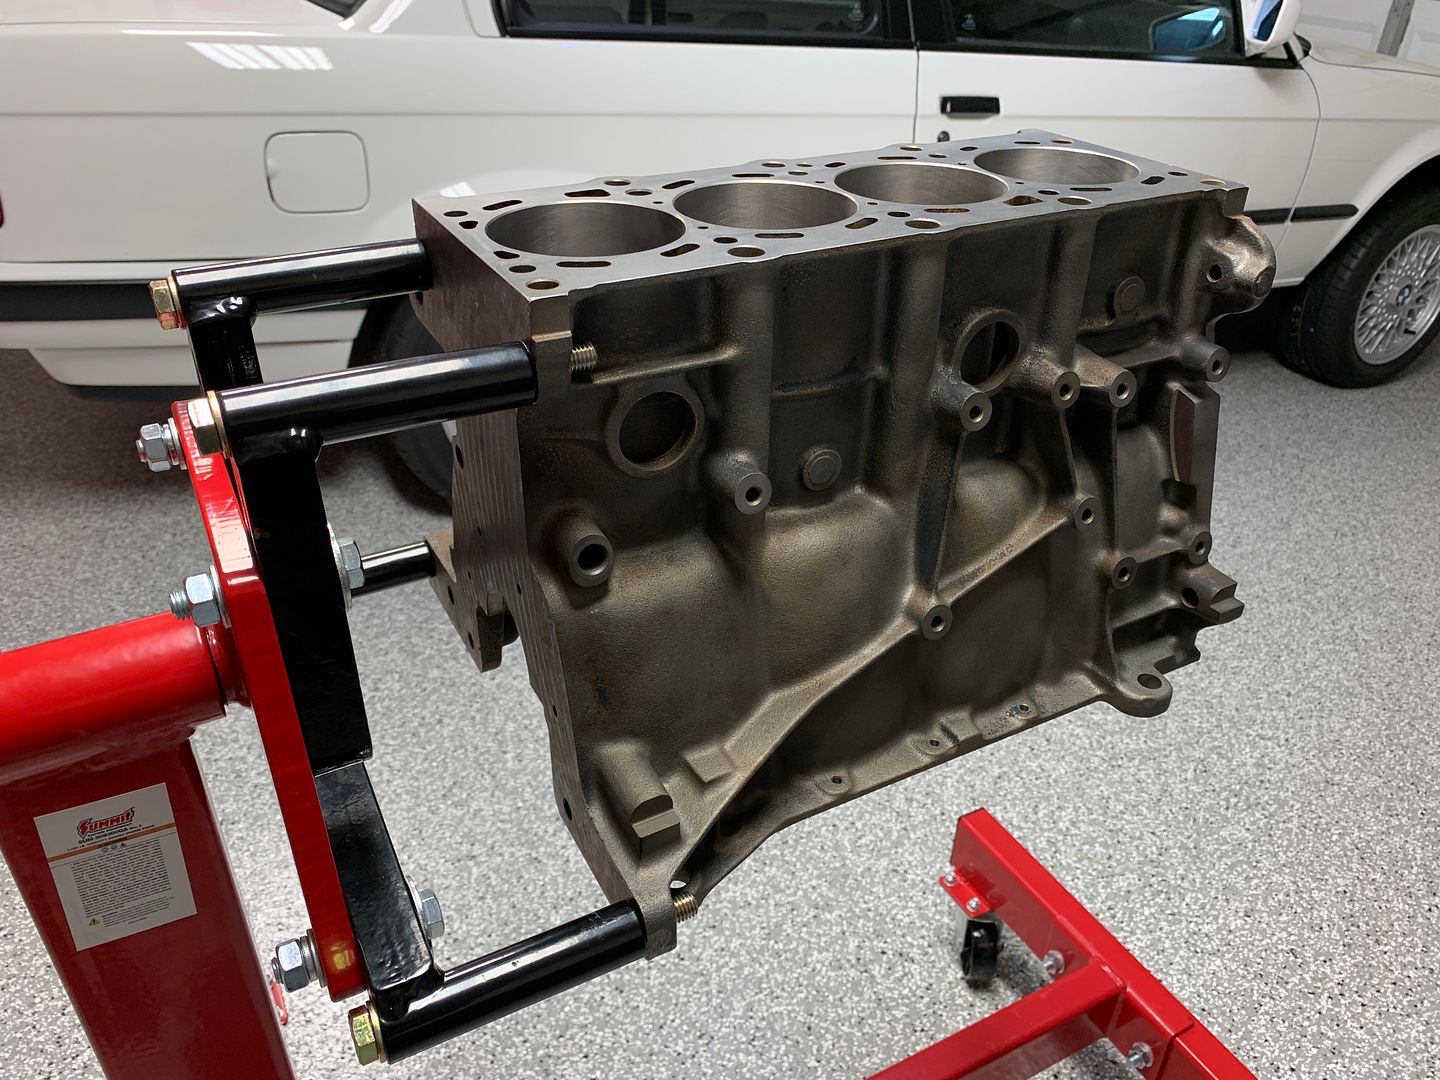
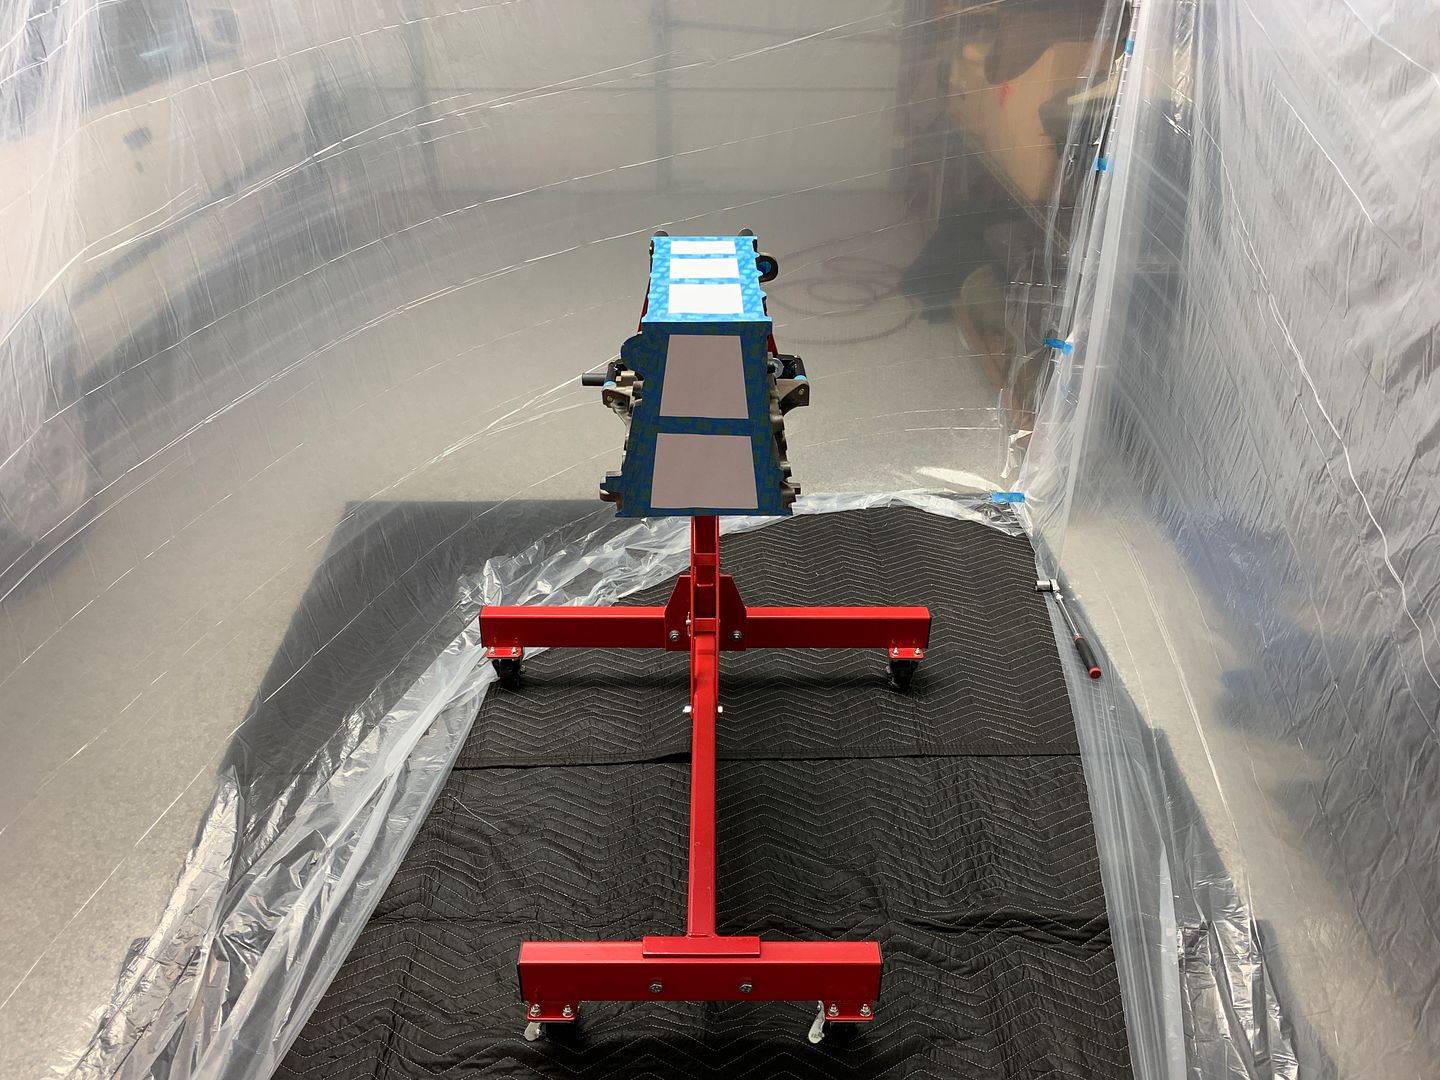
First task was to carefully mask the block for painting. I also didn't particularly want gloss black paint on my nice epoxy floor, much less on the E30 sitting several feet away... so $5 worth of plastic sheeting later I had myself a makeshift paint booth. It worked wonderfully to keep the paint off everything else, and doubled as a means by which to concentrate and inhale the aerosol propellant heh....
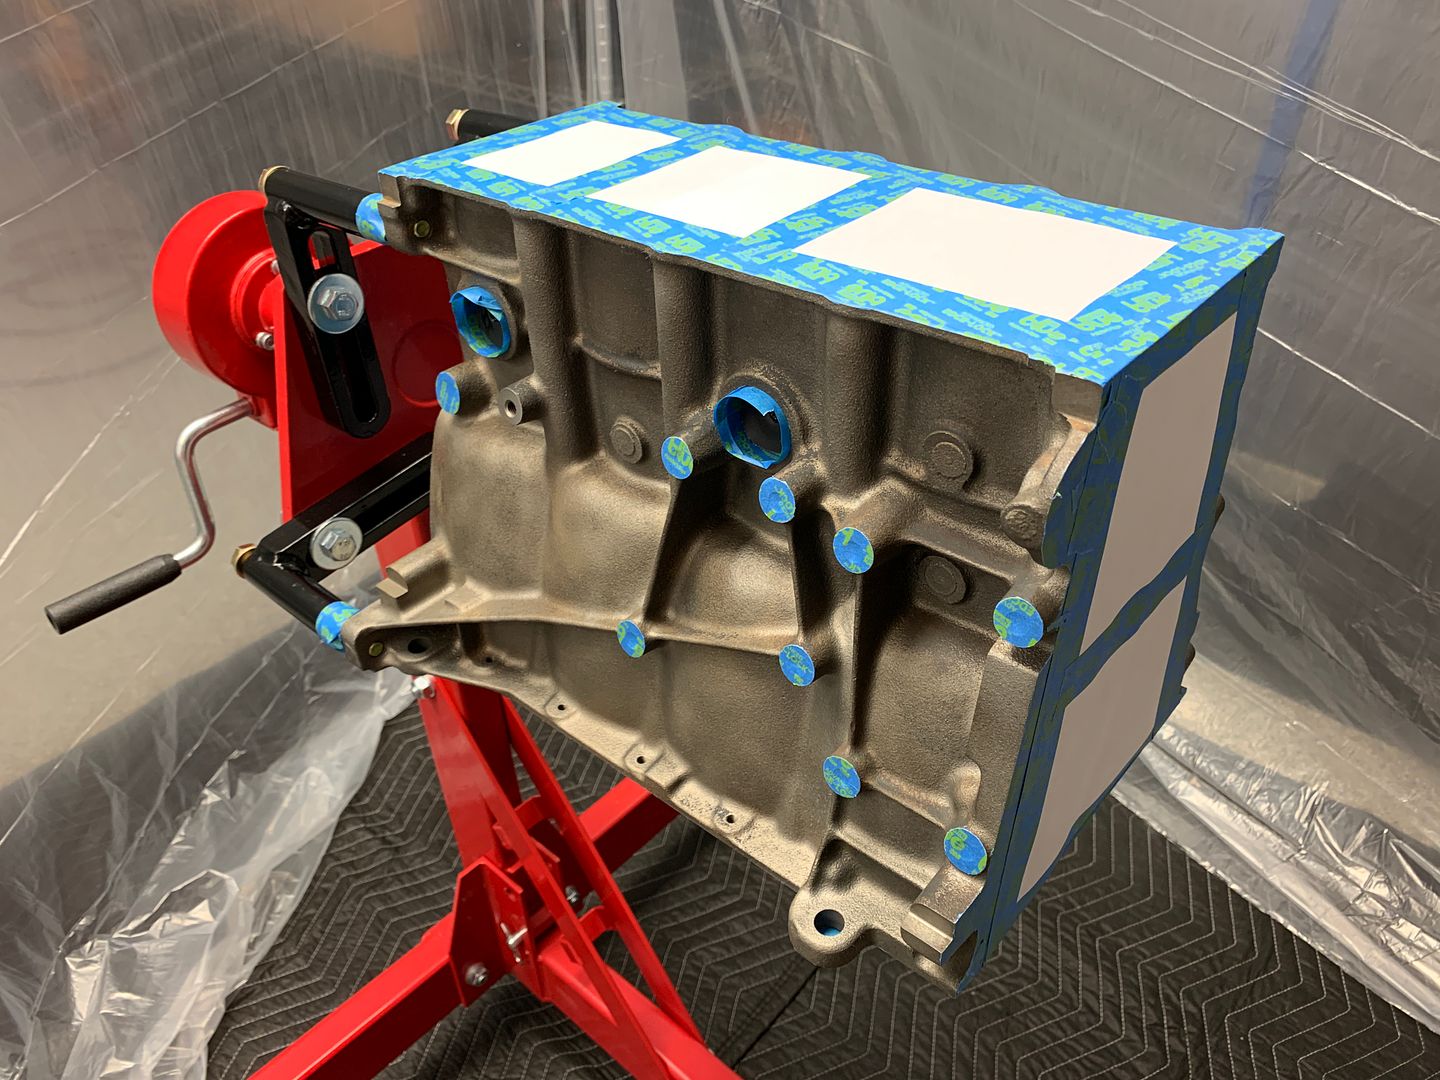
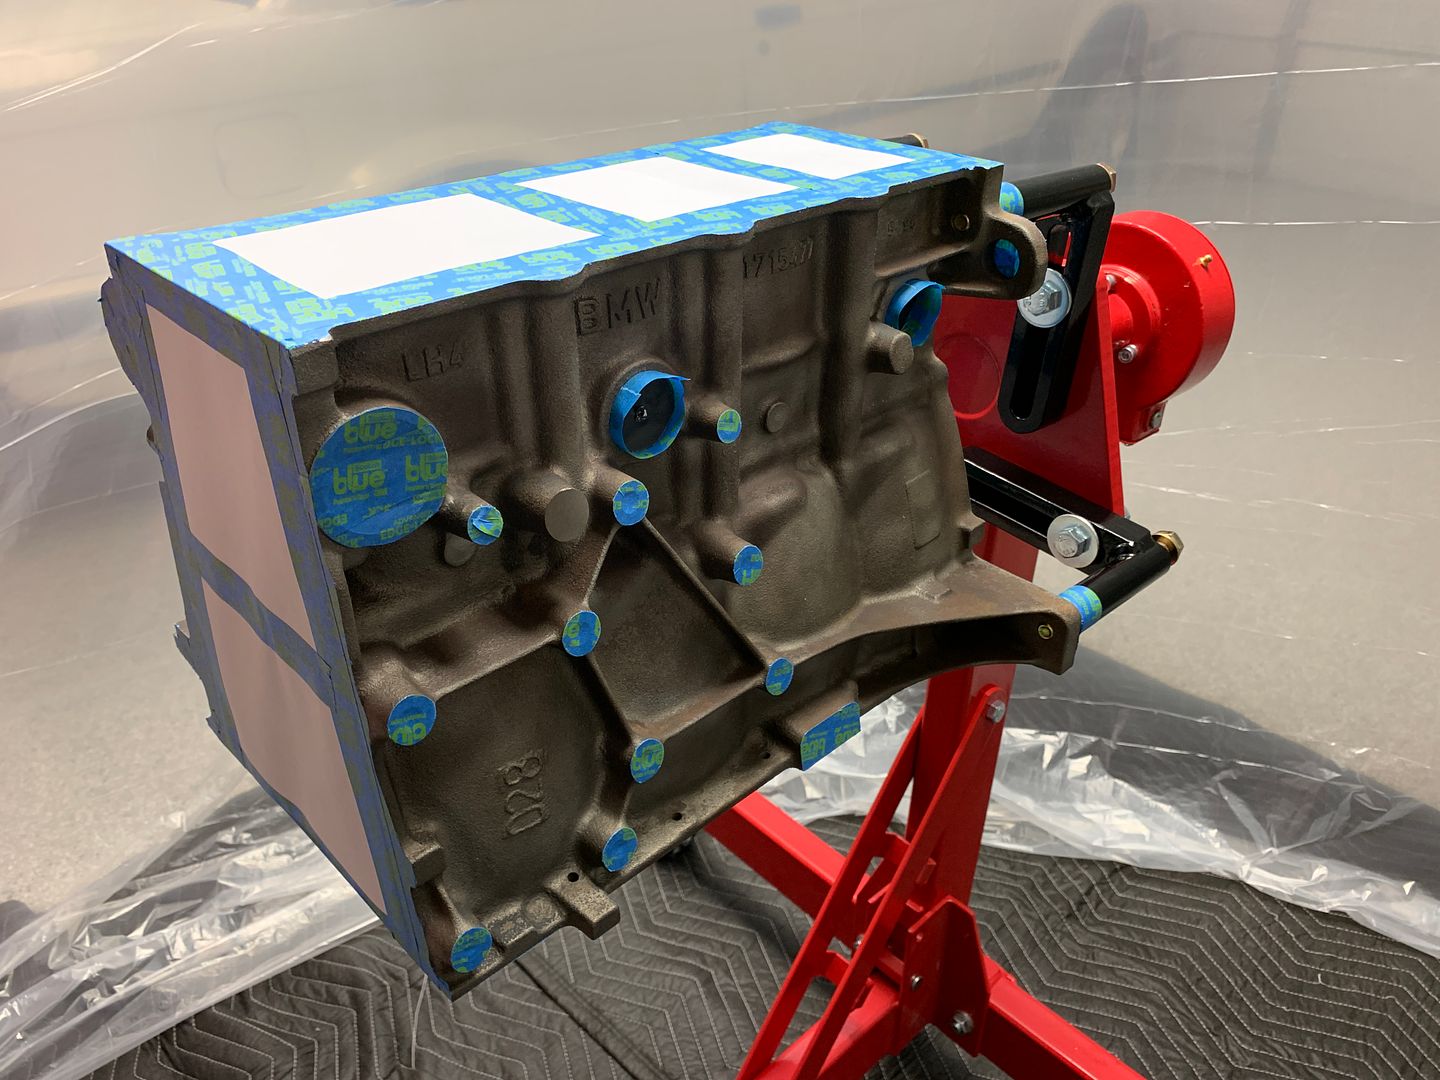
An hour later the paint was sufficiently dried so I pulled down the plastic sheeting and demasked the block.
Lets drive new freeze plugs into the block, coated with a thin later of hylomar.
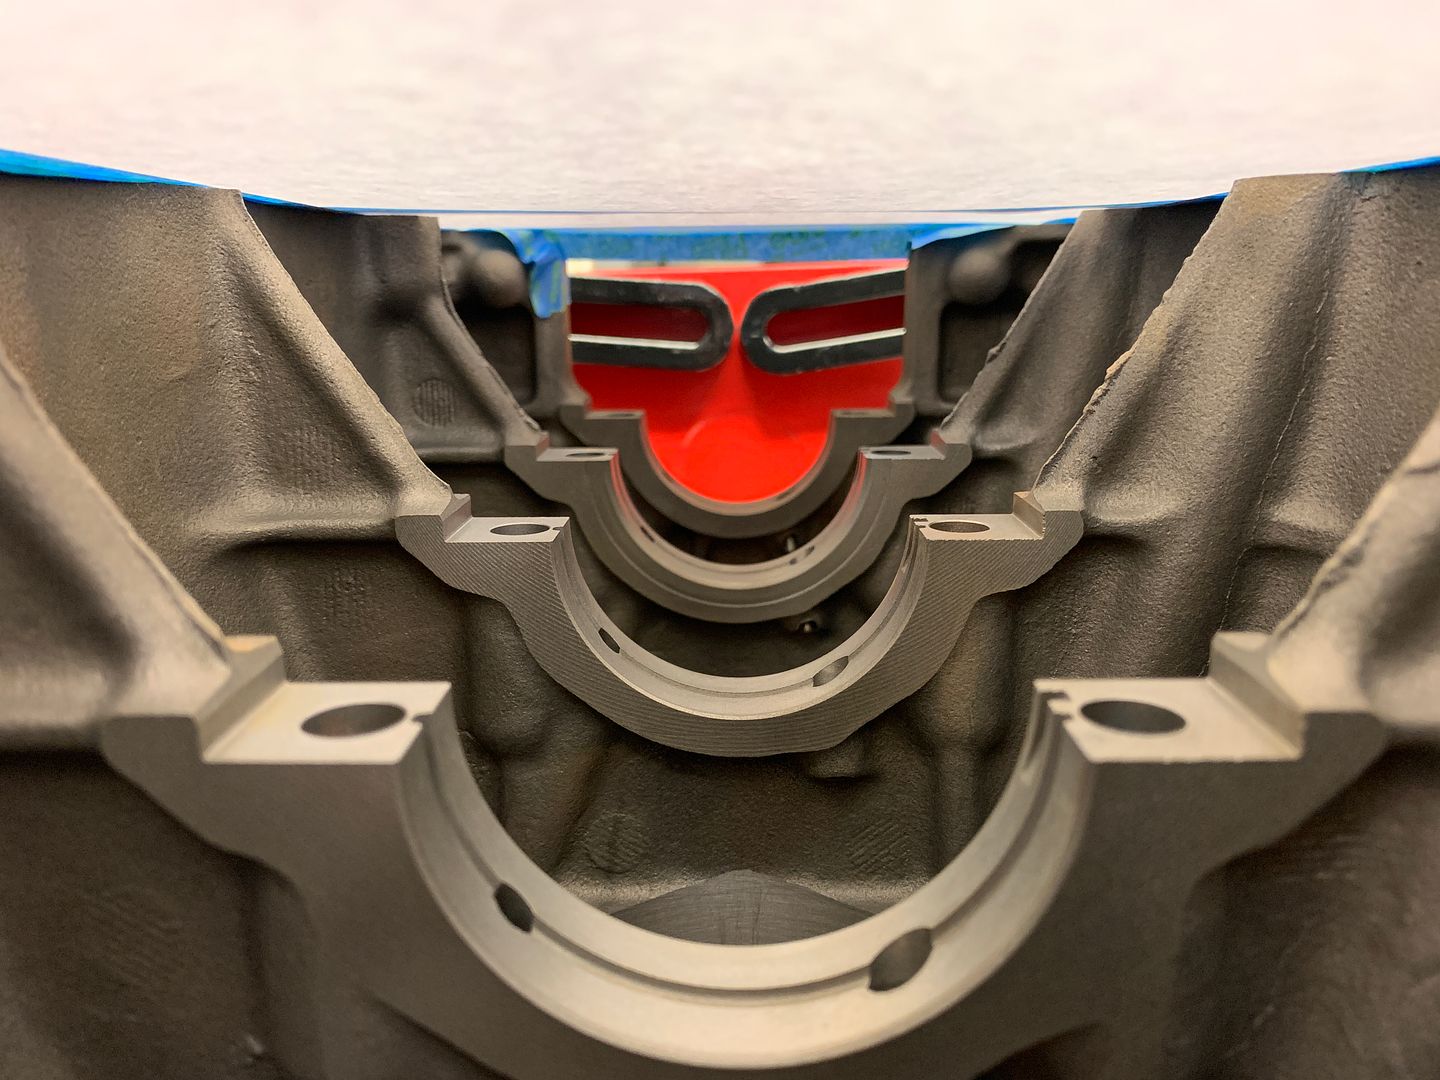
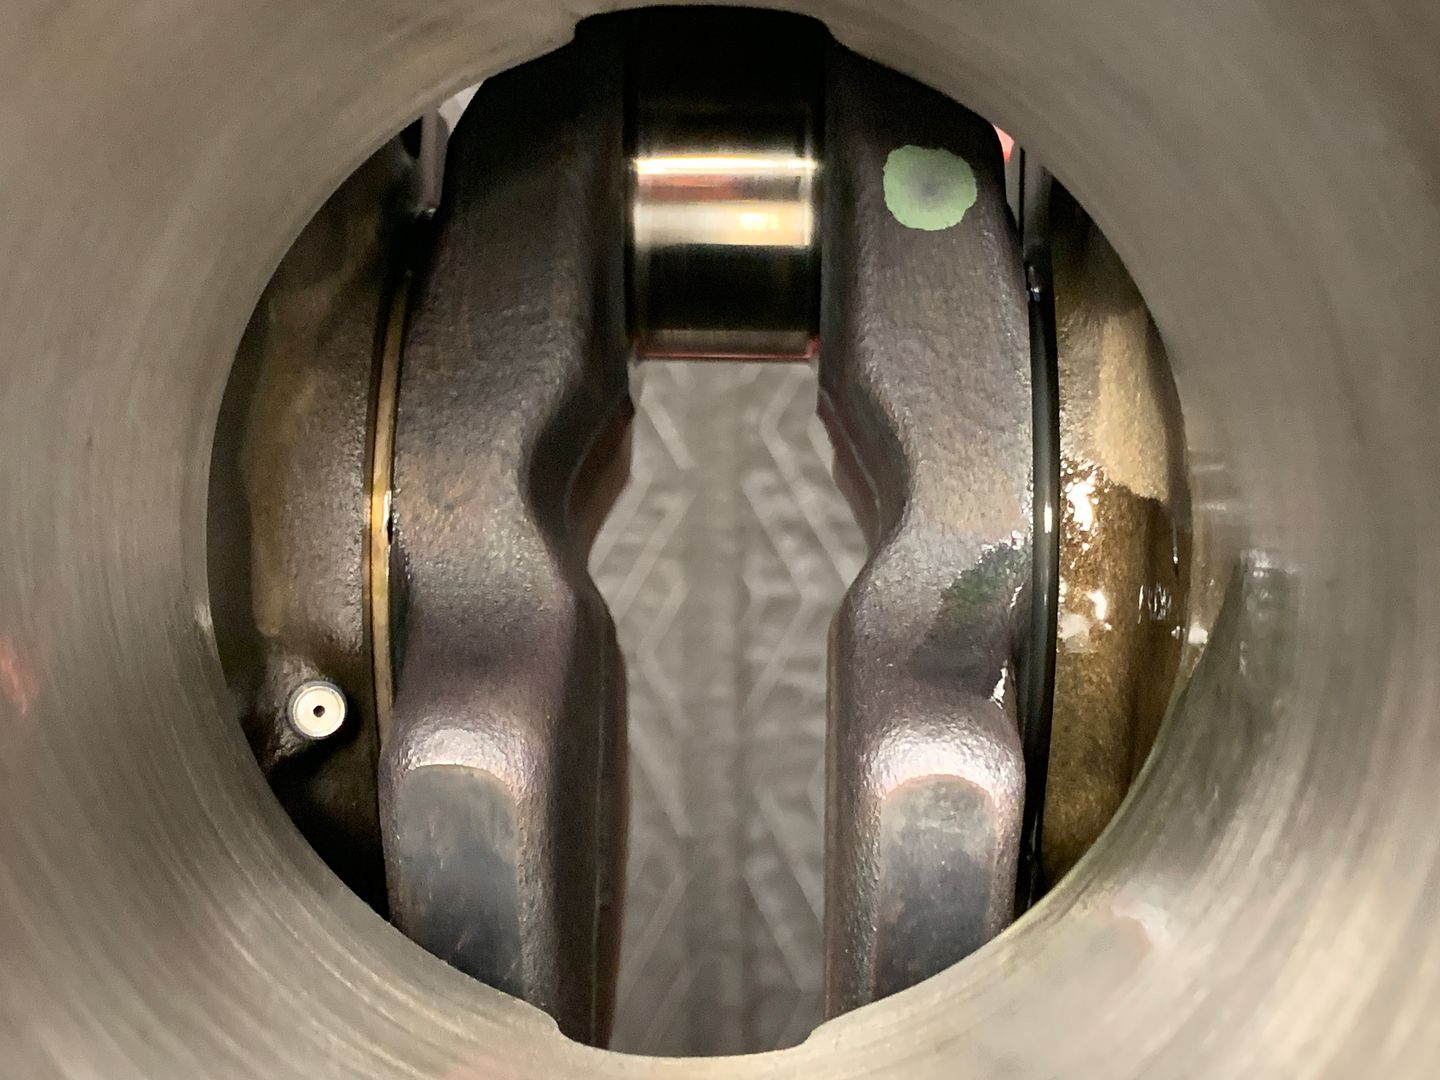
Oil squirter jets and main bearing shells dropped into place.
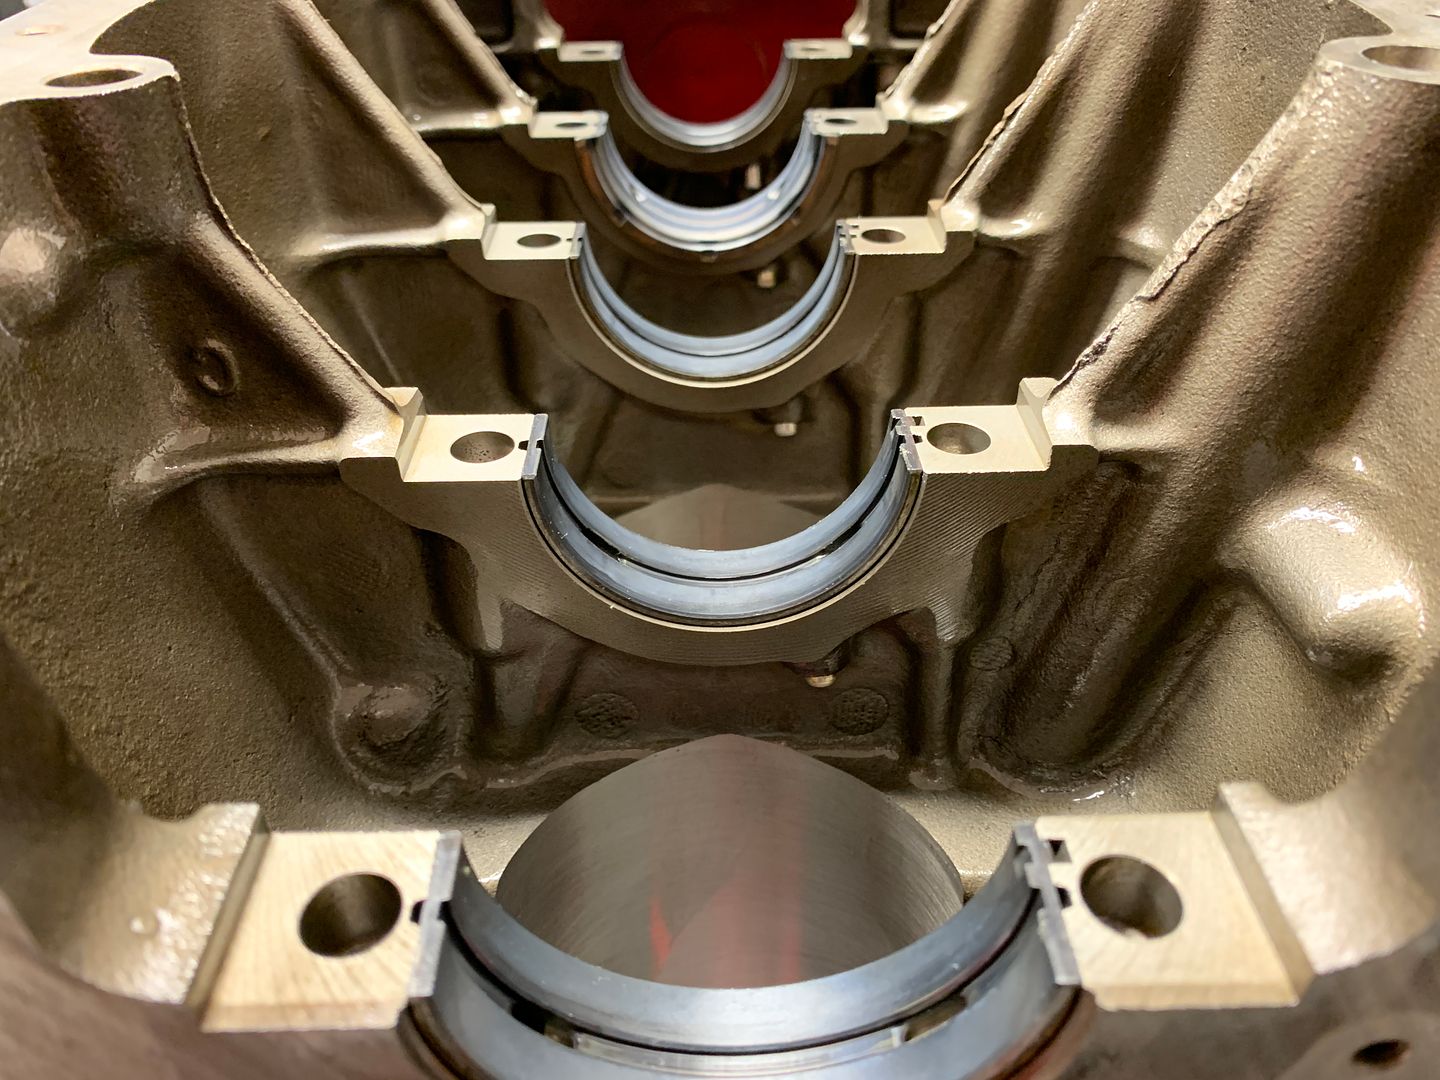
M47d20 88mm stroke crankshaft sitting in its new home.
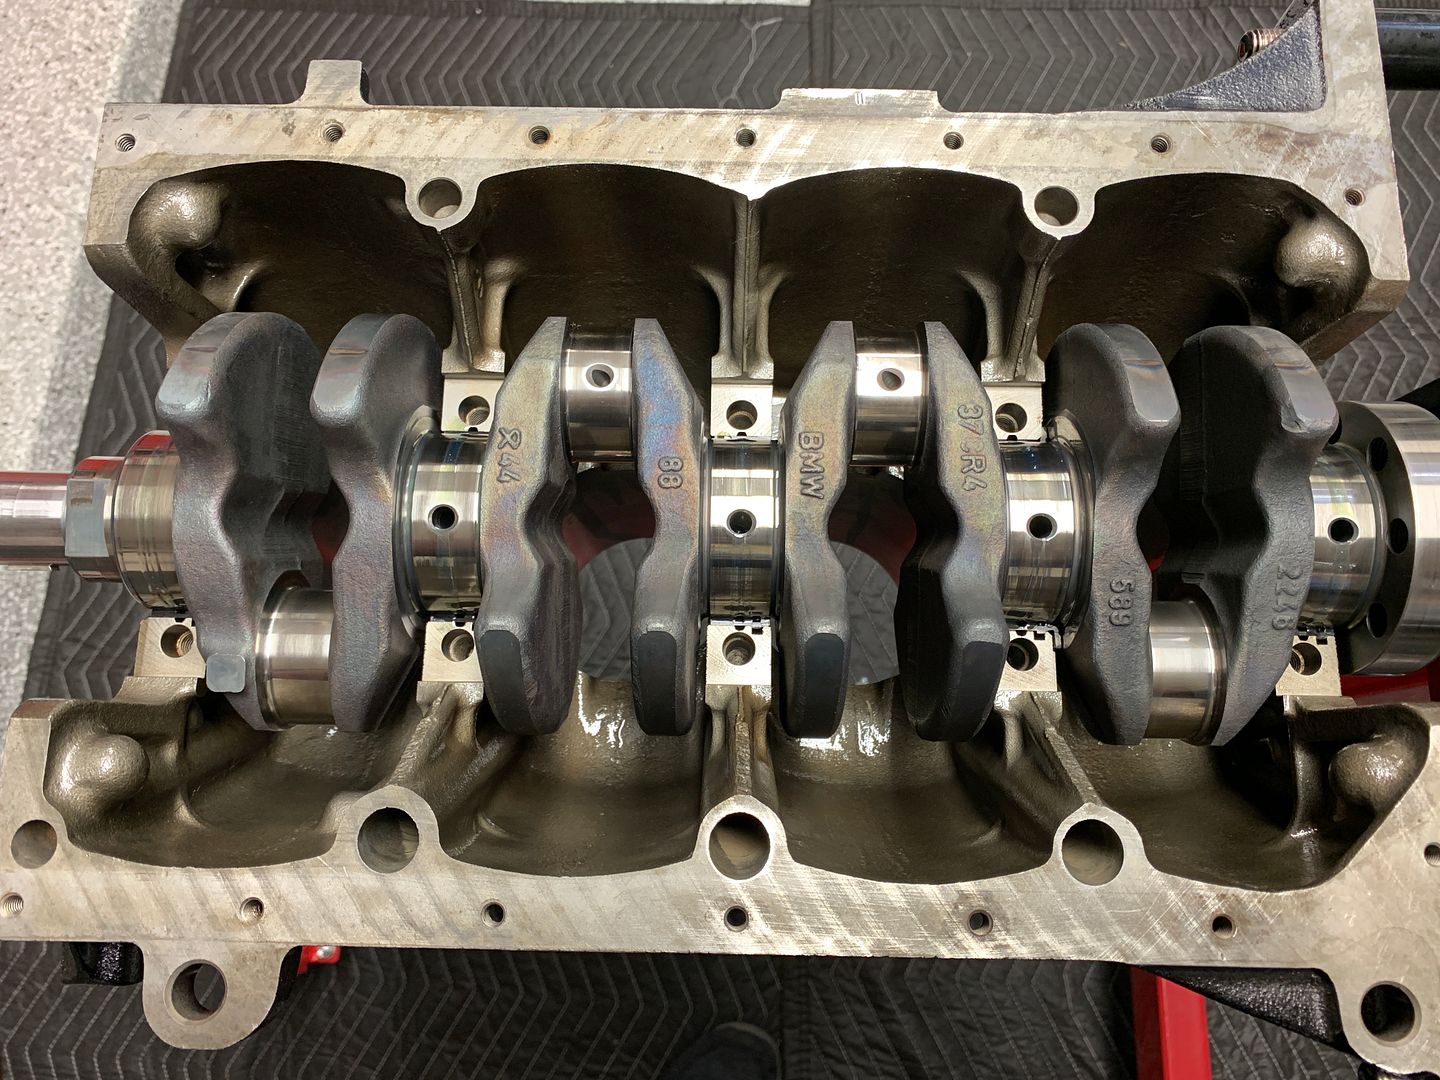
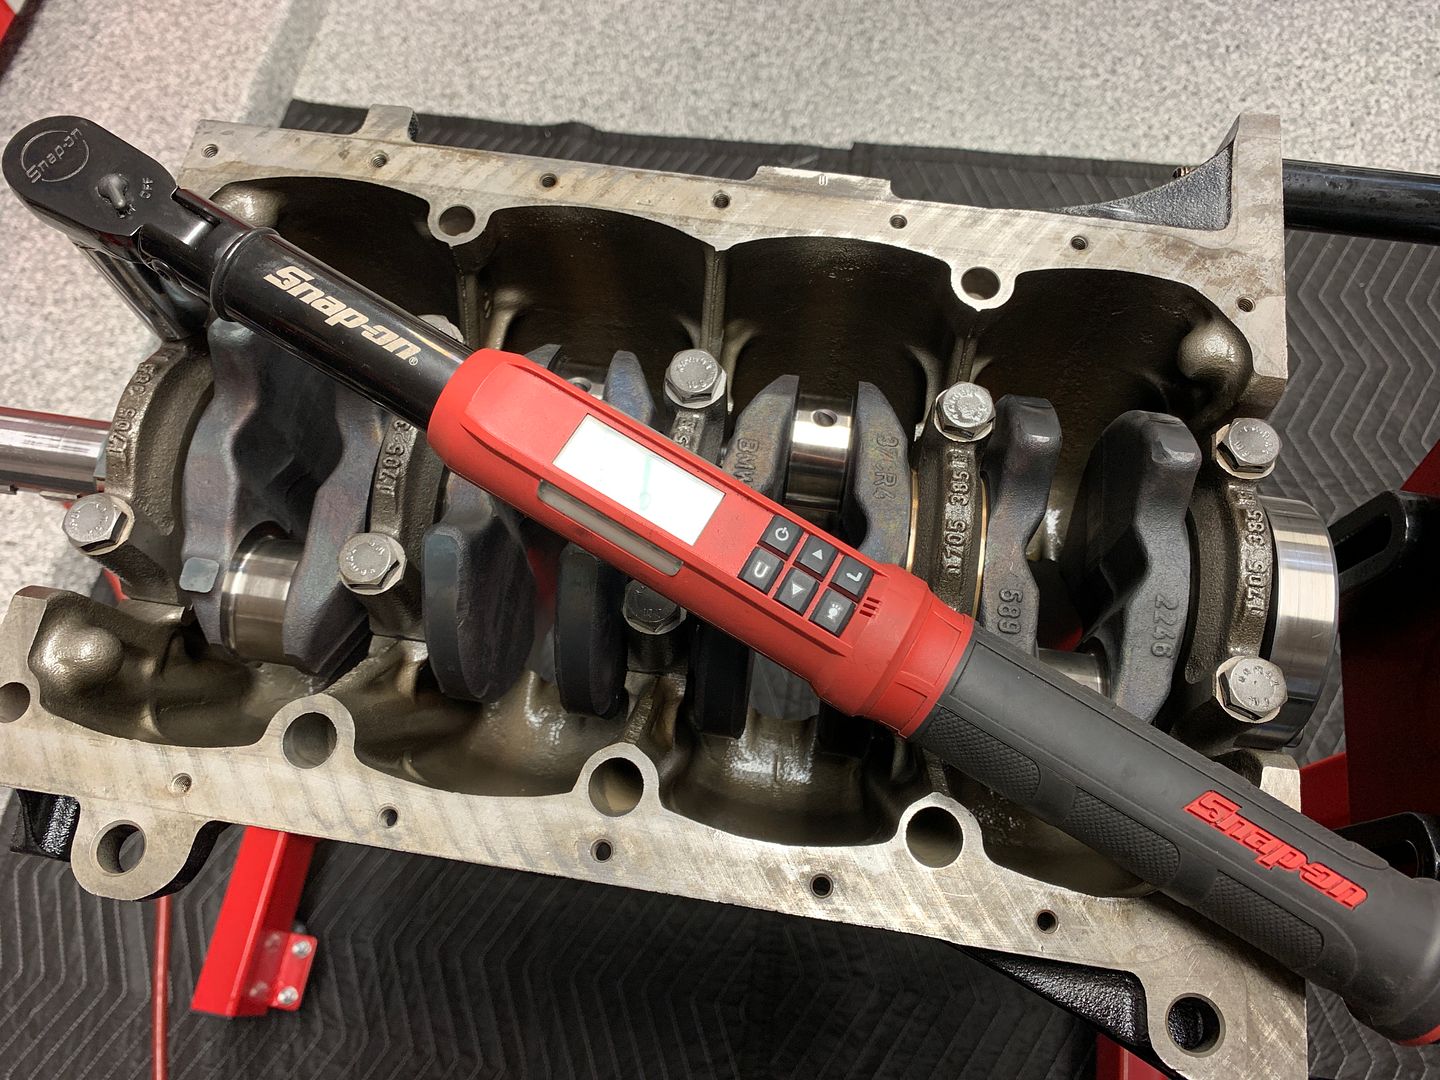
Torquing the main caps down
Another view of the oil squirters
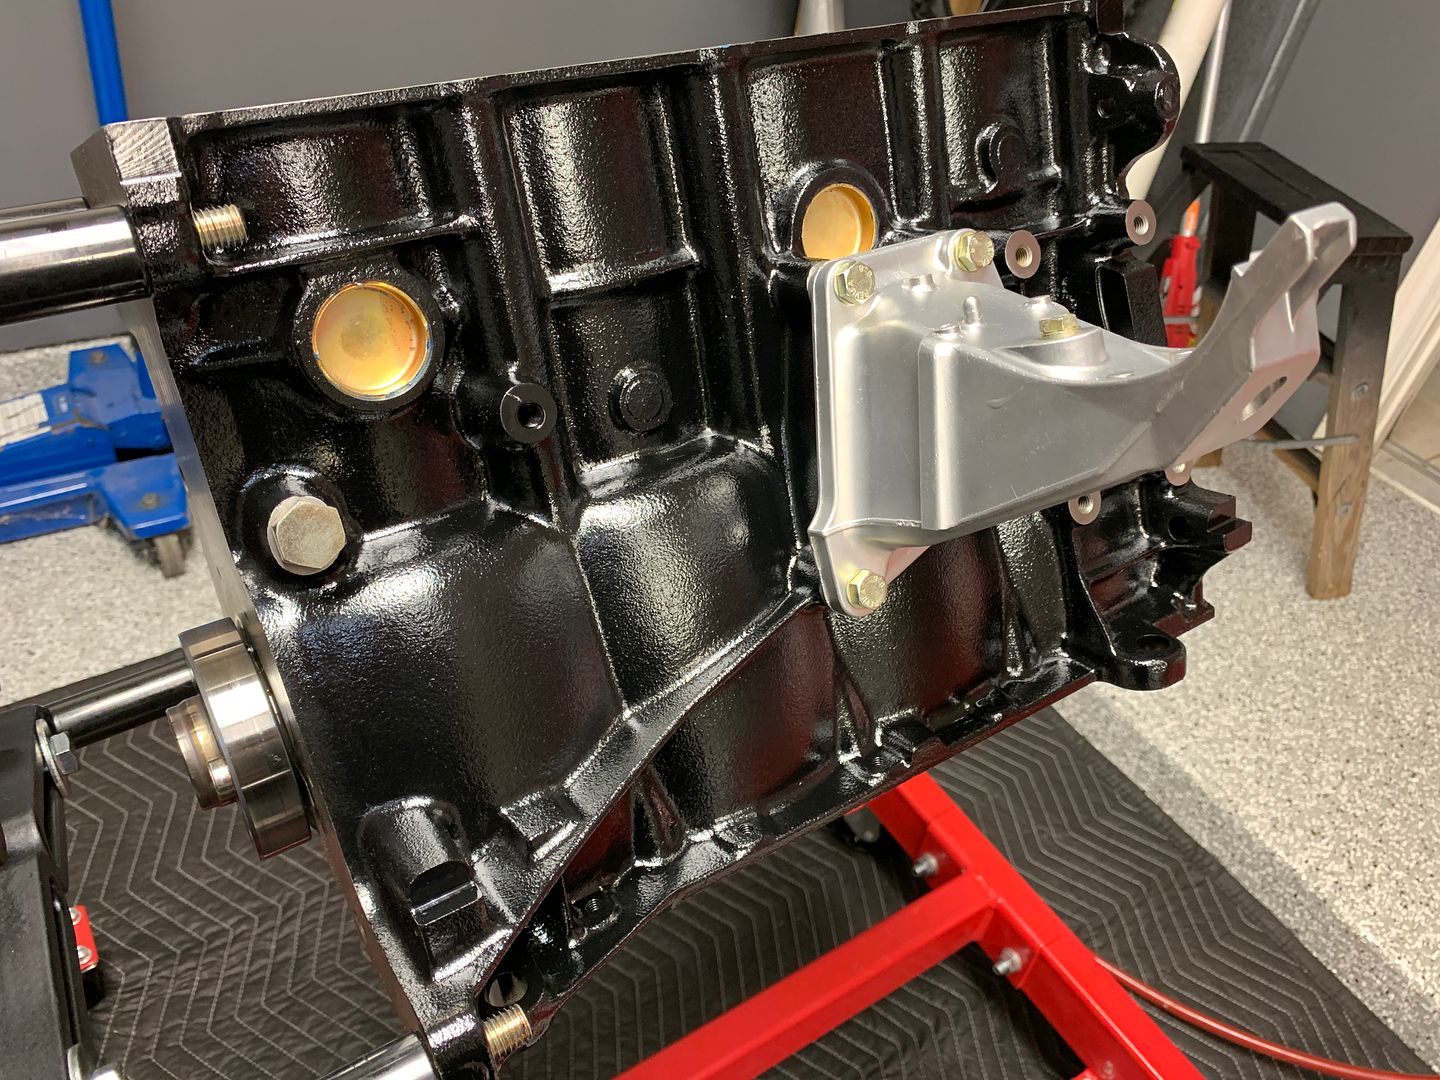
The first vapor honed aluminum parts installed, both engine mount arms, and the plastic coolant pipe
More to come later on this weekend.....
Leave a comment:
-
-


Leave a comment: