
dude! you are legit! i like it.
-
sigpic
Gigitty Gigitty!!!!
88 cabrio becoming alpina b6 3.5s transplanted s62
92 Mtech 2 cabrio alpinweiss 770 code
88 325ix coupe manual lachsilber/cardinal
88 325ix coupe manual diamondschwartz/natur
87 e30 m3 for parts lachsilber/cardinal(serial number 7)
12 135i M sport cabrio grey/black -
Just read your entire thread, I like the attention to detail. Great job, keep the updates coming!Comment
-
The first pic in this thread is so sad!
Serious restoration...
Well done mate ;)Comment
-
Saw this on facebook and I'm glad there is a build thread on it. So awesome to watch a total transformation in progress whether it's heavily modified, totally original or something in between. Looking forward to watching this as it progresses.Comment
-
Great work. I'm very jealous of that rotisserie setup. Would you mind measuring the height of the car when it's tipped on its side?Comment
-
Thanks guys, I'm starting to get really excited now. Paint shop should be taking it back soon. Yesterday the painter came over and took some measurements, looks like the rotisseries should fit in the booth which makes his pickle tickle. It'll be a lot easier for him to reach all the odd angle areas in the bay, trunk and interior to get paint everywhere if he can articulate the car.
If you get tired of slow updates I can send you a parts list to donate :D
I can, but I imagine you're wondering if it will clear a residential garage? It will. Length wise its questionable though. I'll measure today for you and post up.Tenured Automotive Service Professional - Avid BMW Enthusiast
Vapor Honing & E30 ABS Pump Refurbishment Service
https://mtechniqueabs.com/Comment
-
Time pours into this project like water down a drain, I'm right at 90 hours now.
On Thanksgiving I put a half day in at the shop, glass bead blasting and wire wheeling hardware to get it ready for plating. I'd say almost half of it is done now, mainly the big stuff. The small nuts, bolts etc are more of a pain in the ass and time consuming to process.
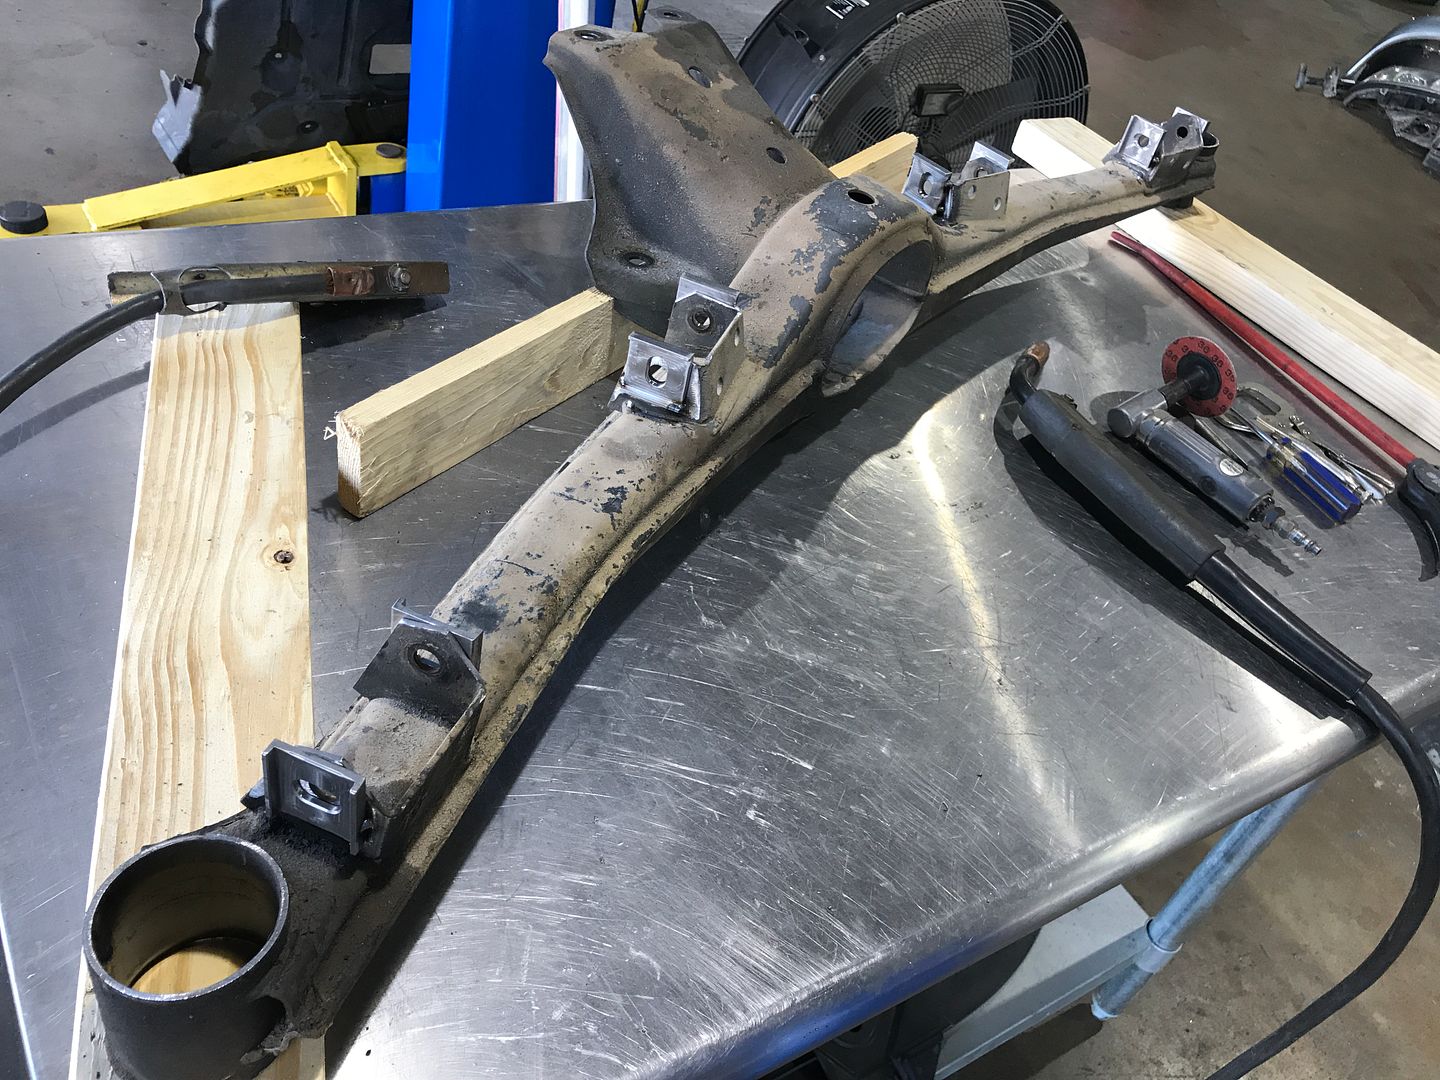
I ordered front subframe reinforcements from Garagistic along with rear subframe camber/toe adjusters for good measure. Both the front subframes I have looked about the same, M42's are so hard on the engine mount standoffs.
Blasted and ready for some love from the welder:
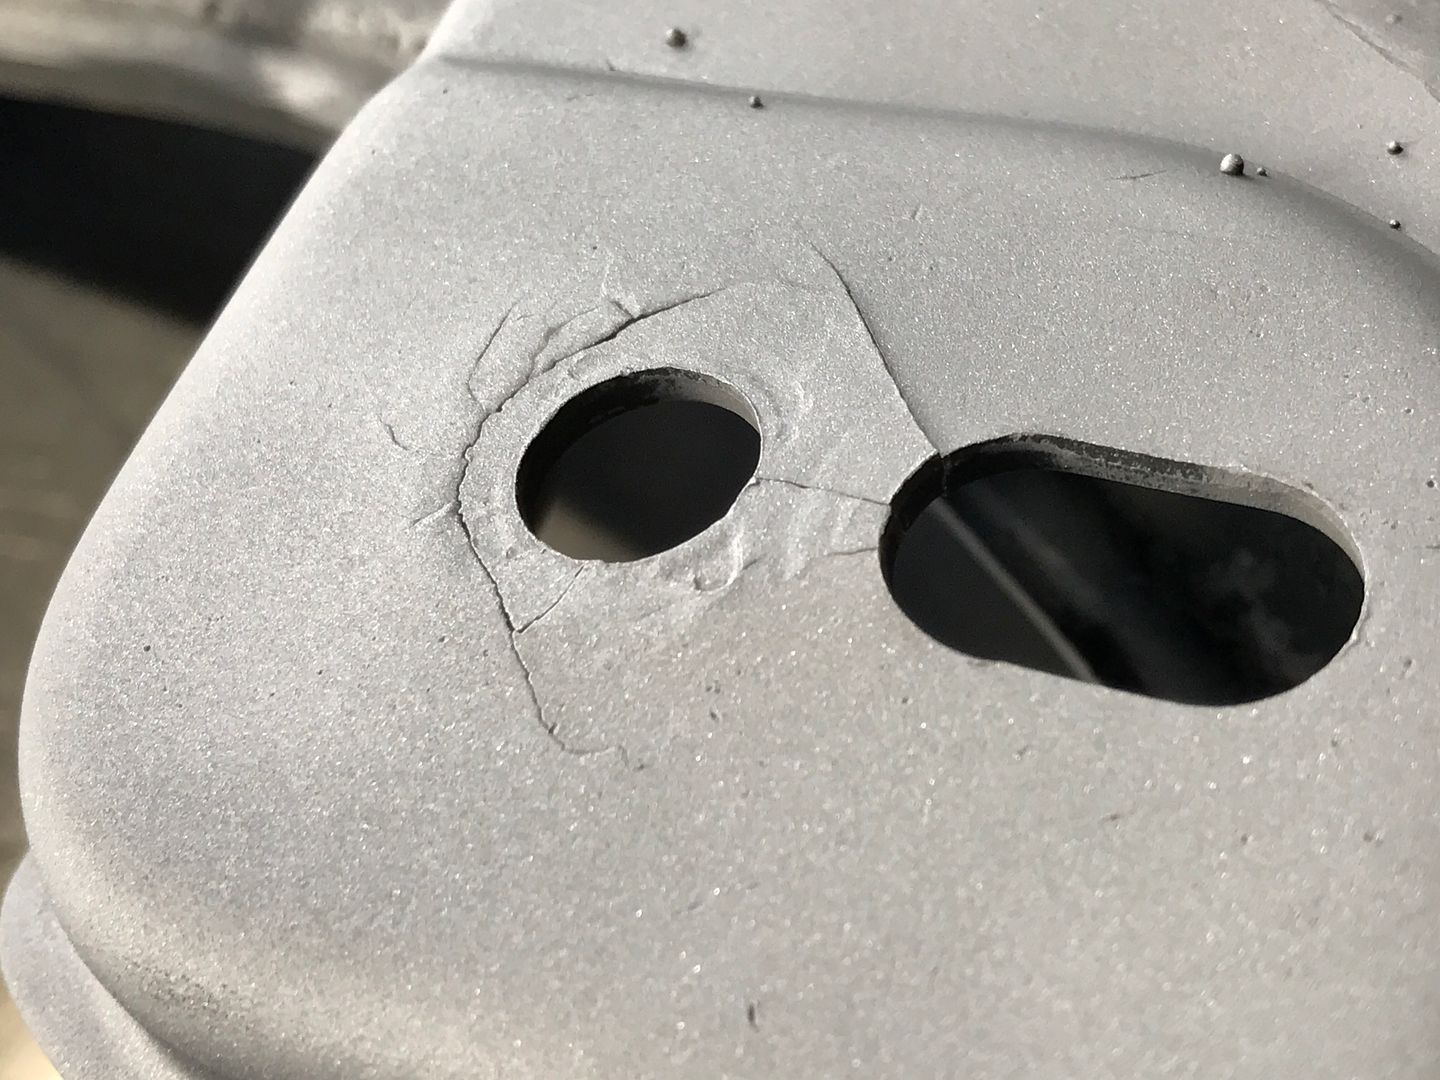
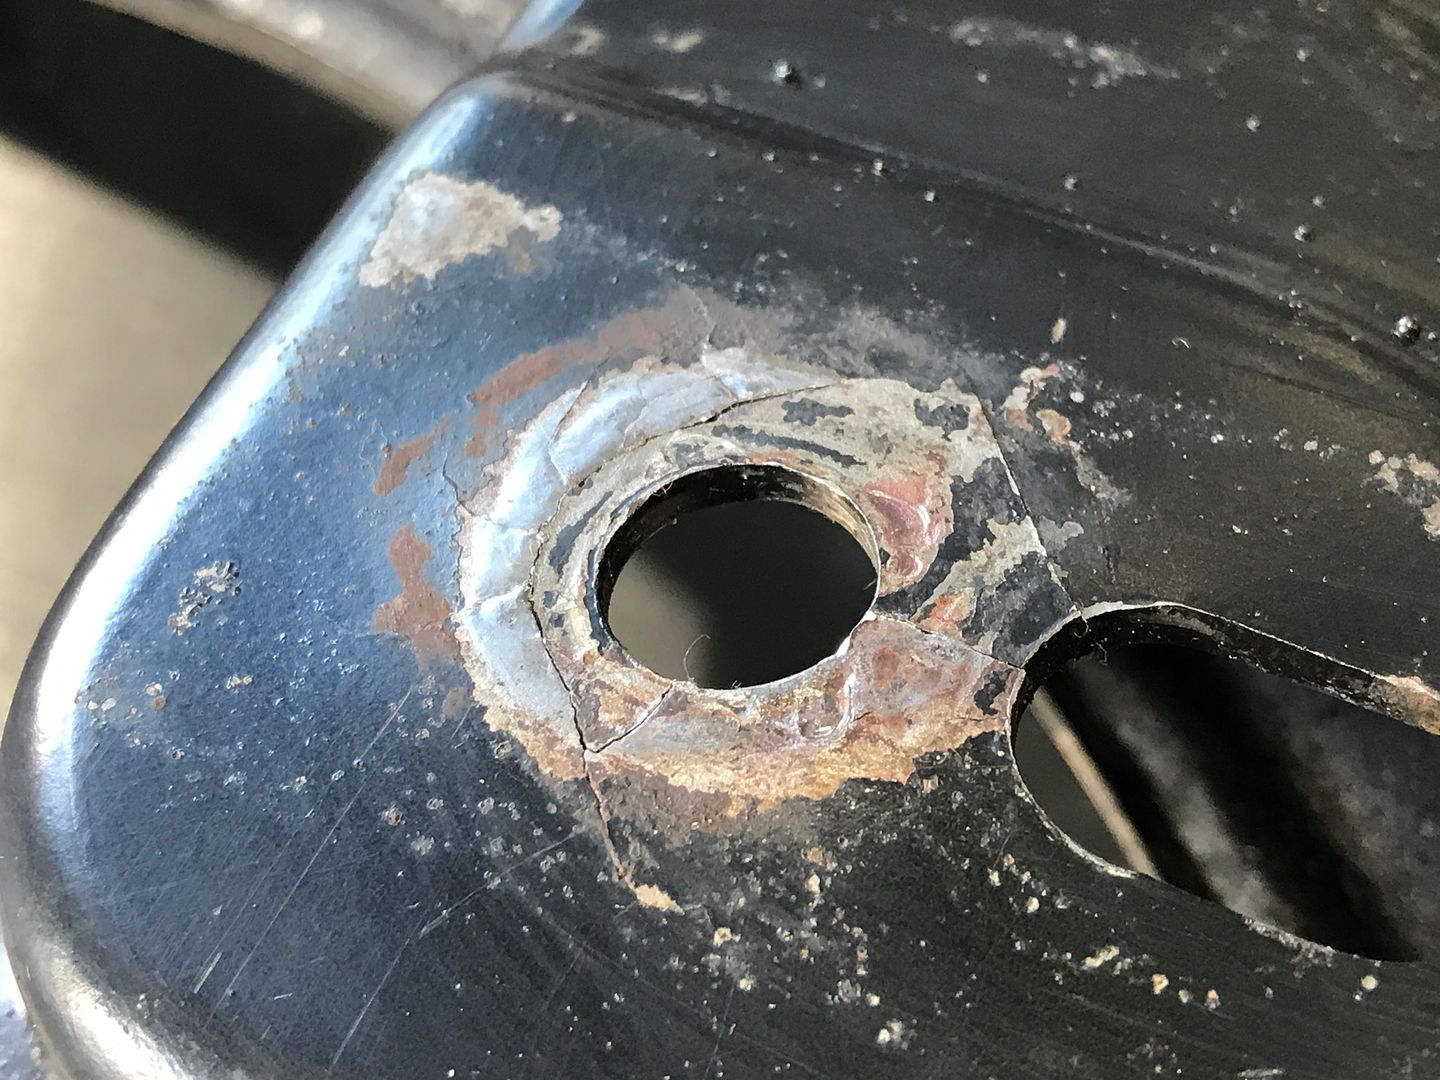
Main reinforcement plate set in place after beating the top flat again, which was domed from being tugged on by the engine over the years.

Welded in place on each side.
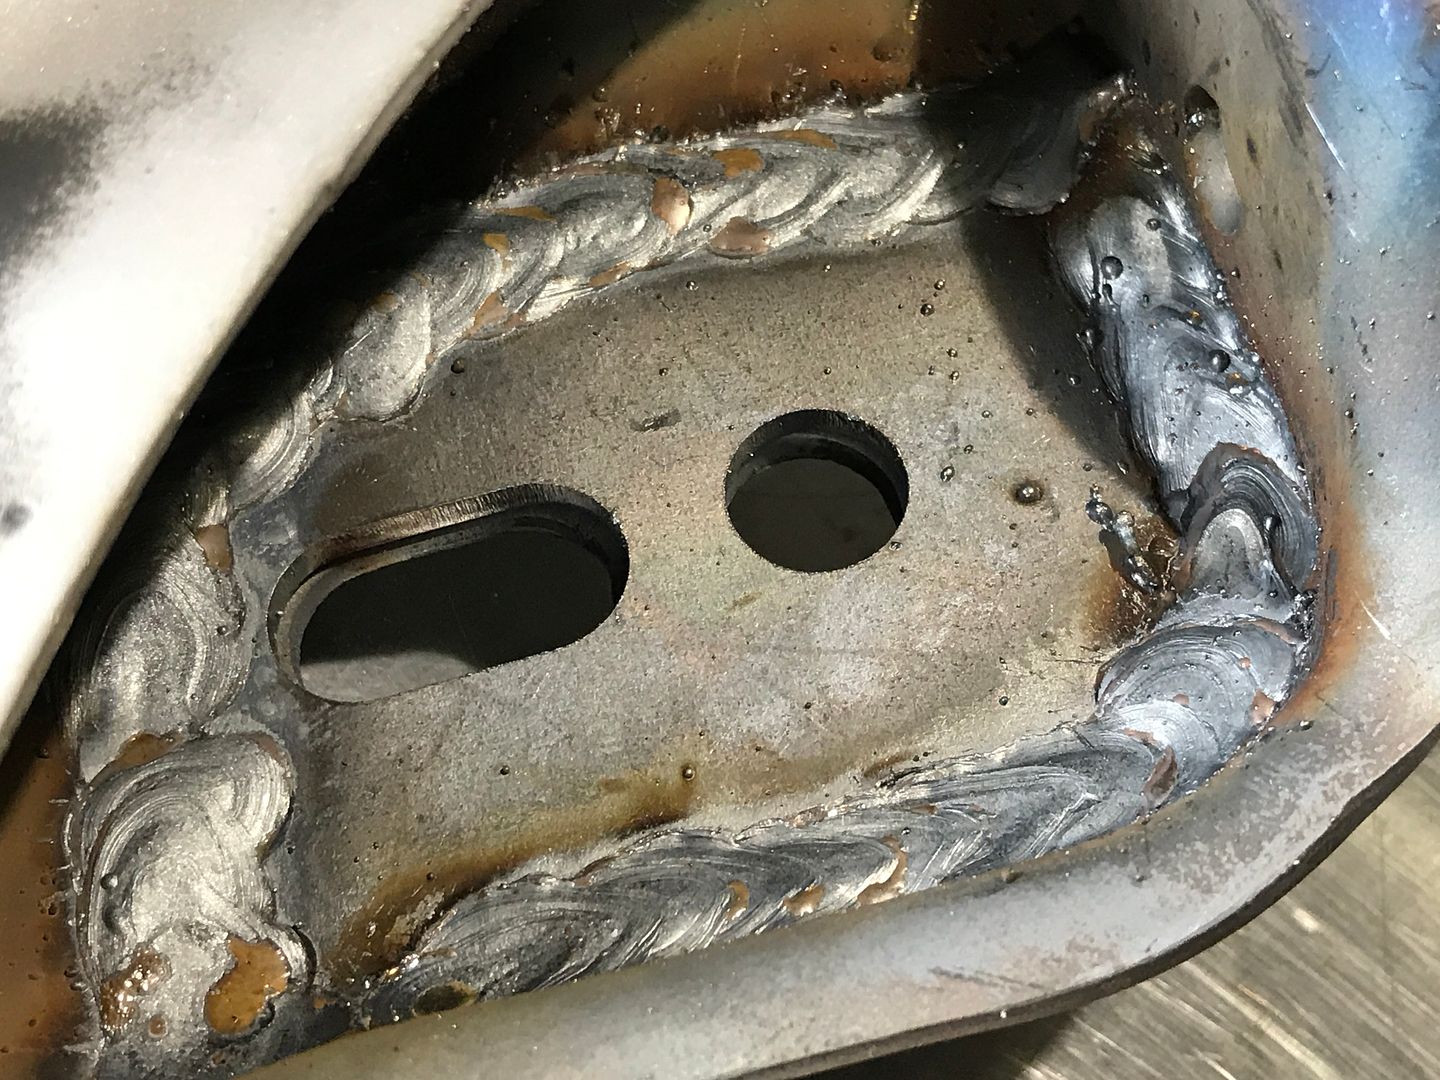
Additional stiffening plates welded on after the main reinforcement plate on each side.

After I was done welding those in place I moved on to the rear subframe. I pressed the bushings out and proceeded to make a rudimentary jig on the table to hold the subframe level out of wood scrap and a few washers to shim it to perfection.

I then clamped, leveled and tack welded all 8 adjuster plates in place before finish welding them in place. Neglected to get a finished shot, but all of that is ready to go to powdercoat next week now.
 Tenured Automotive Service Professional - Avid BMW Enthusiast
Vapor Honing & E30 ABS Pump Refurbishment Service
https://mtechniqueabs.com/Comment
-
Great progress.
[IMG]https://cimg4.ibsrv.net/gimg/my350z.com-vbulletin/550x225/80-parkerbsig_5096690e71d912ec1addc4a84e99c374685fc03 8.jpg[/IMG
Comment
-
Seriously cool build!89' 325ix Diamantschwarz/Black rattle can...
Insta: r_moose_w
Originally posted by flyboyxComment
-
Considered getting one of those tumbler things to clean the bolts off? Or are they not effective enoughComment
-
You know I certainly have, but I can't find a video out there on the net that shows me a verifiable end result that is both clean of corrosion, old plating, and has a decent surface finish. The metal needs to be completely clean, and have a mild luster to it to attain a final finish that is like factory.
If I were to send everything straight out of the glass bead blaster to plate it would take the plate very well, however the finish would be dull and non reflective.
If anyone has some first hand experience and thinks they know a winning combination of media by all means I'm open. I don't mind buying whats needed to save myself a ton of effort.Tenured Automotive Service Professional - Avid BMW Enthusiast
Vapor Honing & E30 ABS Pump Refurbishment Service
https://mtechniqueabs.com/Comment
-

1989 325is l 1984 euro 320i l 1970 2002 Racecar
1991 318i 4dr slick top
Euro spec 320i/Alpina B6 3.5 project(the never ending saga)
Vintage race car revival (2002 content)
Mtech 2 turbo restoration
Brilliantrot slick top "build"Comment
-
Enjoying this thread...as much as I did your last one. I need to start my own build thread sometime soon. Have lots of pictures, just need to organize it all.
What's your plan for the dash board? New like the last one? I think new dash is NLAComment
-
The dash is NLA yes, I'll need to find a clean original one. I'm a long long way from there, so not really looking yet unless one pops up local.Tenured Automotive Service Professional - Avid BMW Enthusiast
Vapor Honing & E30 ABS Pump Refurbishment Service
https://mtechniqueabs.com/Comment
-
Lots more work today. I finished the rear subframe by slotting the adjuster holes, and set it in the pile of shit slated for the powdercoaters next week. I picked the best of everything I had to send out, saved the left overs of value, and added to the scrap pile behind the shop with the rest.
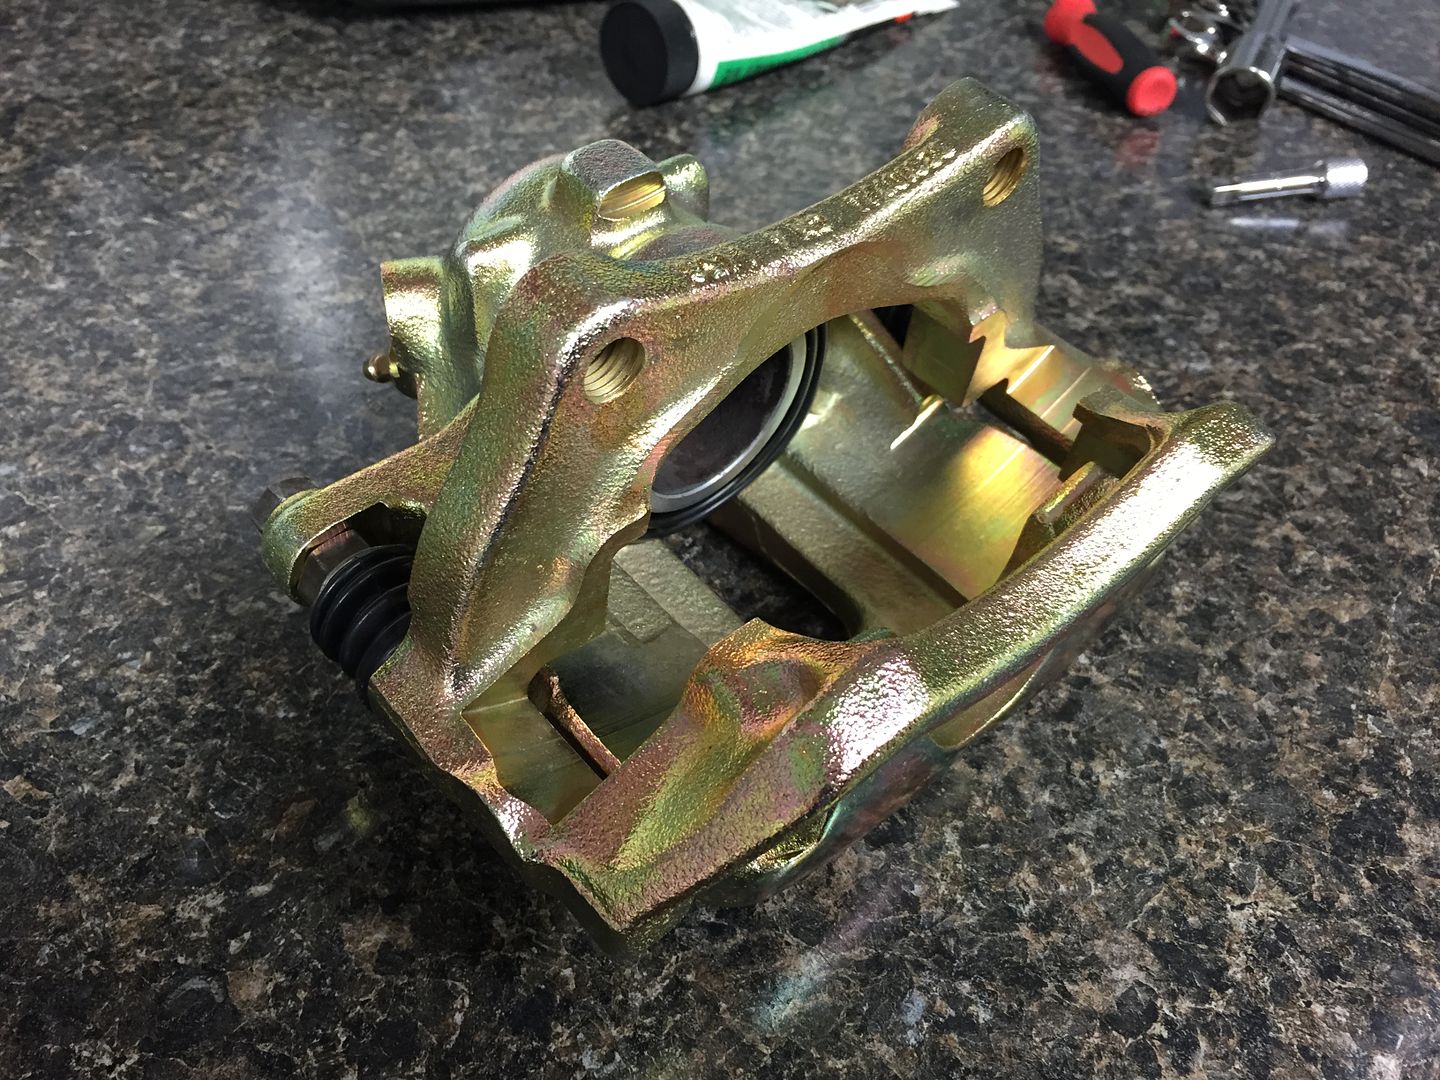
I broke down both front calipers to clean and glass bead blast them.
Hard to believe this little turd nugget:

Will look like this soon:
After that I quite seriously spent the rest of the day bead blasting hardware, much to my dismay. This is really really not fun, but the end results are very much worth it.
After blasting everything gets a mist of WD40 to stop it from flash rusting while it awaits plating.
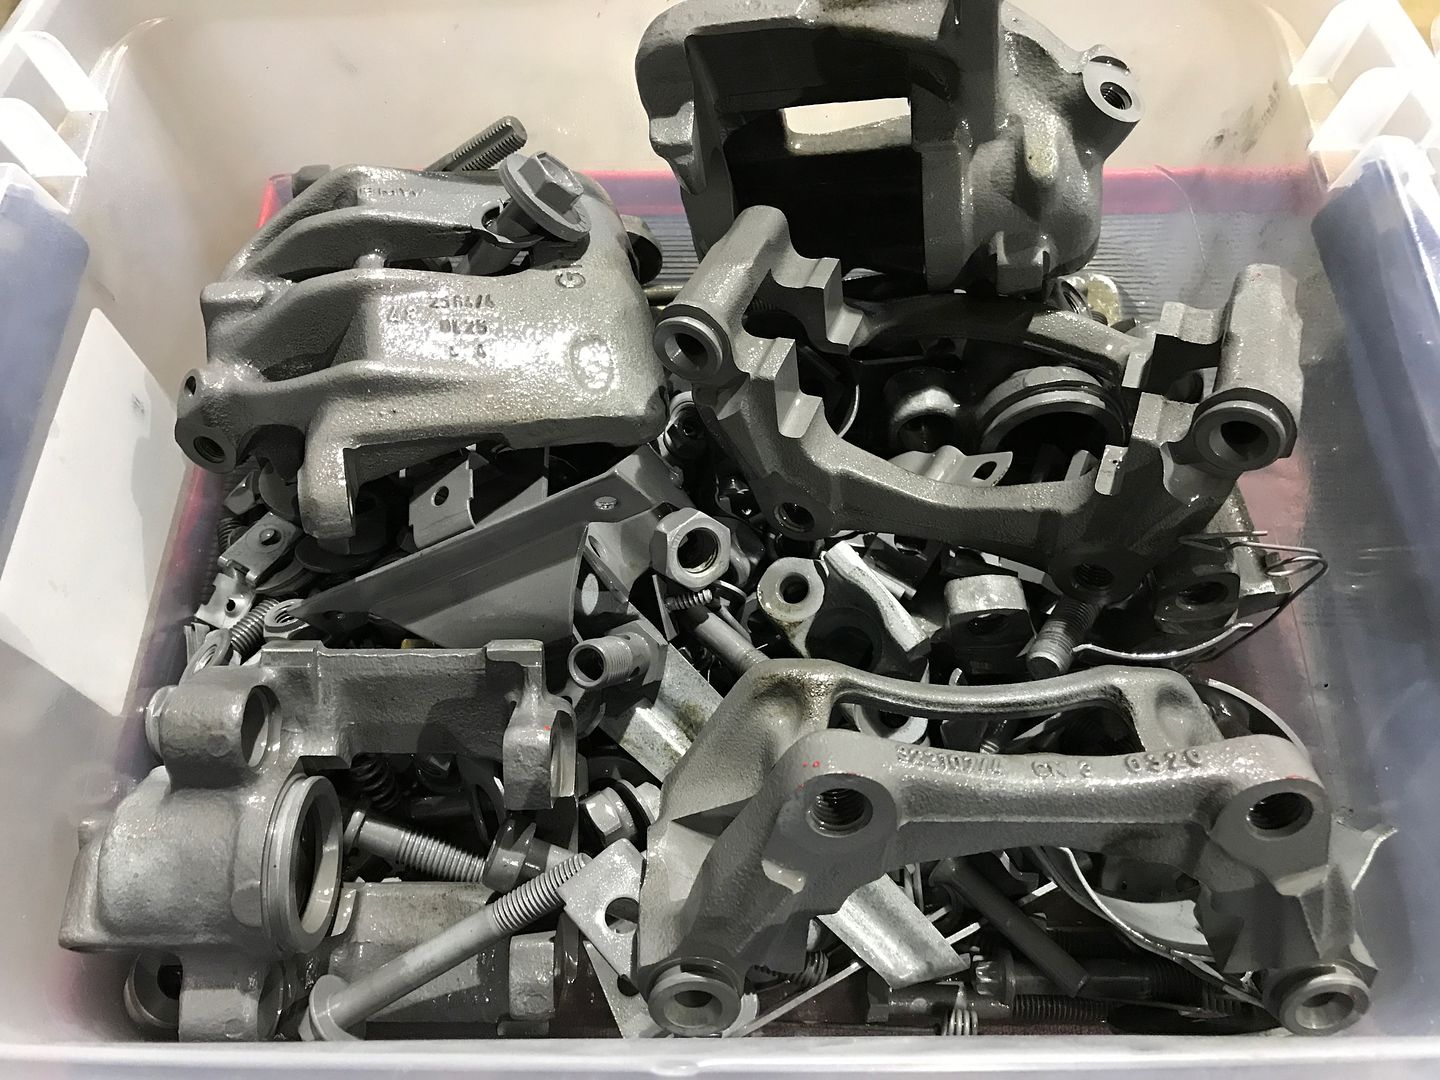
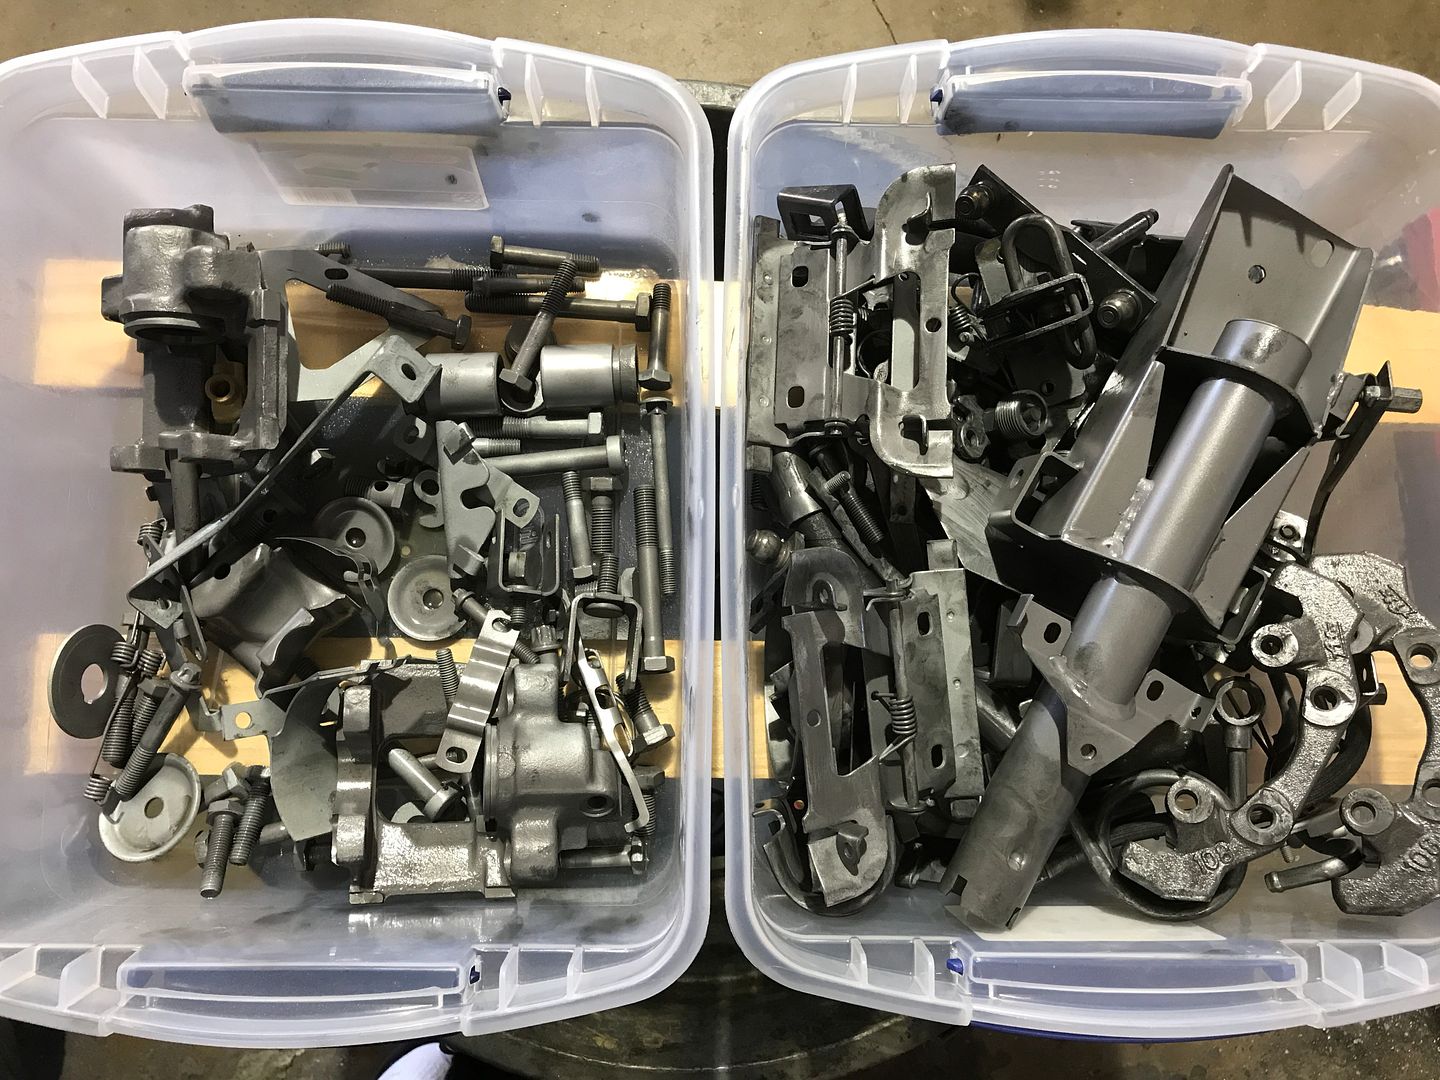
I ran out of large items to blast and I'm down to just the small stuff now. I've organized the remainder into two seperate bins, "poles" and "holes".

Anything with a hole it in gets put on a coat hanger necklace for processing without getting dropped.
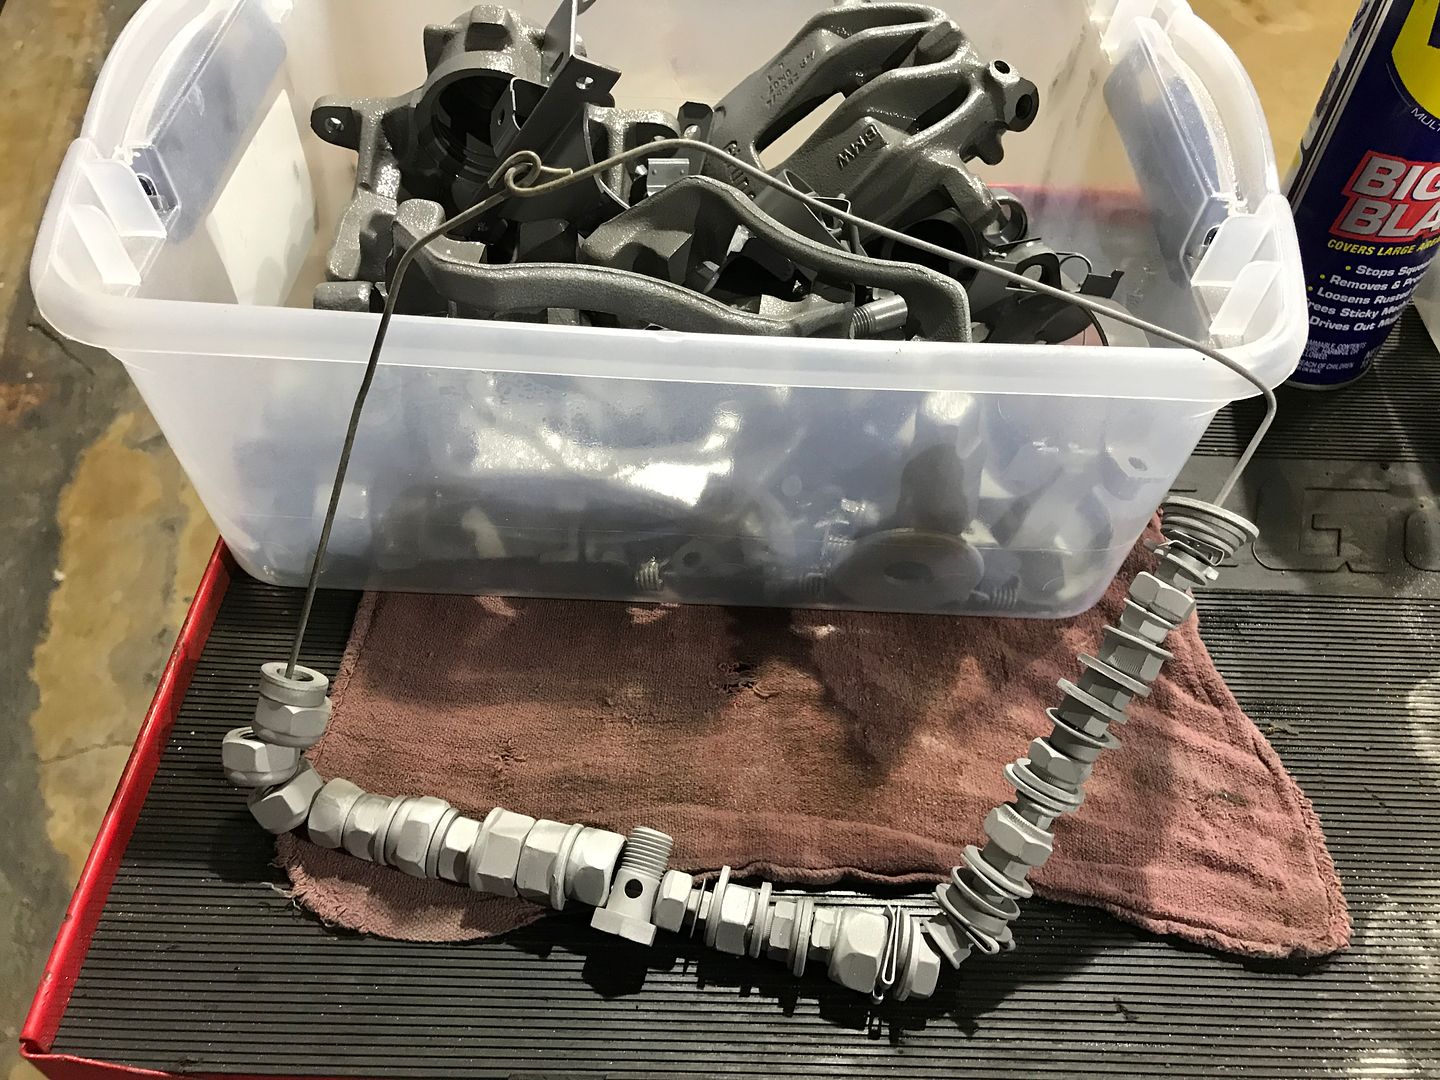
Everything else needs to be either held one at a time being careful not to drop it through the large mesh floor, or cleaned while stuck to a magnetic tray. Tomorrow I plan to put another 8hrs or so in blasting.Tenured Automotive Service Professional - Avid BMW Enthusiast
Vapor Honing & E30 ABS Pump Refurbishment Service
https://mtechniqueabs.com/Comment


Comment