
Thanks man! Lot of work but has been more than worth it.
6A LDY Hey I made a mistake as to which compound I used for the chrome trim. I actually used Meguire's 210 Ultra Pro Finishing compound. Its a much finer cut than the other one I mentioned, was out in the garage today prepping the car for ceramic coating and realized I mixed them up, my bad
-
This is the first time in a long time that i've been just blown away by the quality of a build. Great work, OP! Looks incredible. I love all the attention to detail.Leave a comment:
-
-
Thanks! Happy to help with any advice.
The SEM trim paint I used was SEM Trim Balck Ultra Satin 49143. I've used that on a bunch of items and it seems to match very well with the OEM texture.
As for the buffing compound on the chrome trim, I just used the Mequire's M100 Mirror Glaze Pro Speed compound, same thing I used as the final step for the paint. It's a mildly aggressive abrasive and didn't do much for any deeper scratches but did great on getting the haziness and water spots out of the chrome pieces (they're not actually chrome, but polished aluminum).
I should have posted some pics of the SEM can and Mequire's bottle earlier on in the thread if you want to see what they look like.
I unfortunately did not have a template for side skirts, they are NLA and no one seemed to have any. I used the skirts themselves as well as some masking tape to measure out where the holes should go, and I posted a PDF to the sideskirt manual that has the hole diameters. There's an install post a few pages back in the thread for each of the MT1 components.
Leave a comment:
-
This is really an incredible build. I am putting together my 323i MT1 car and had some questions
- what exact SEM trim paint did you use (satin, matte, gloss etc) and what buffing compound did you use you for the "chrome" trim
Also I maybe I missed it, but where did you get the template for the side skirts, I have yet to mount mine...Leave a comment:
-
It's actually an E28 tool kit, but E30's come with the extra two screw holes already in the trunk so I'm not sure if it was an upgradeable option? As for the cover, it's part # 51491916246. It is made to fit they regular small tool kit so I had to modify it to accommodate the larger E28 version.Originally posted by Staszek
Wow, that makes a lot of sense now that you mention it! Will have to give it a shotOriginally posted by Skarpa
moatilliatta mike.bmw monty23psk as long as it actually happens, I plan on being there! No excuse not to for onceLeave a comment:
-
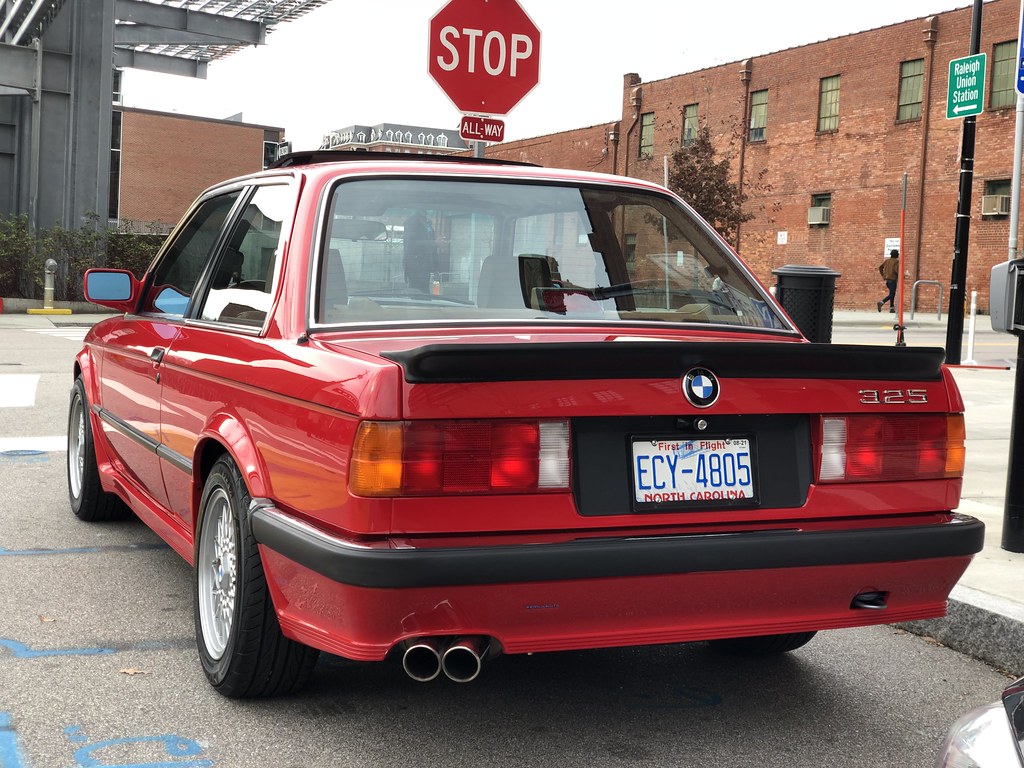
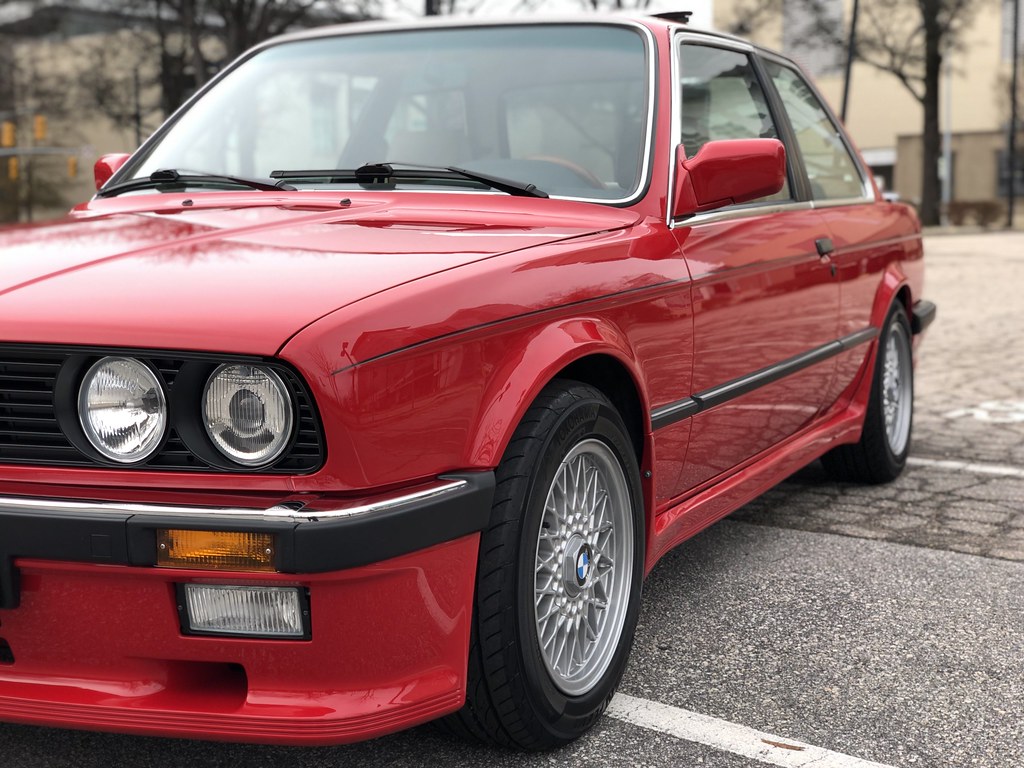
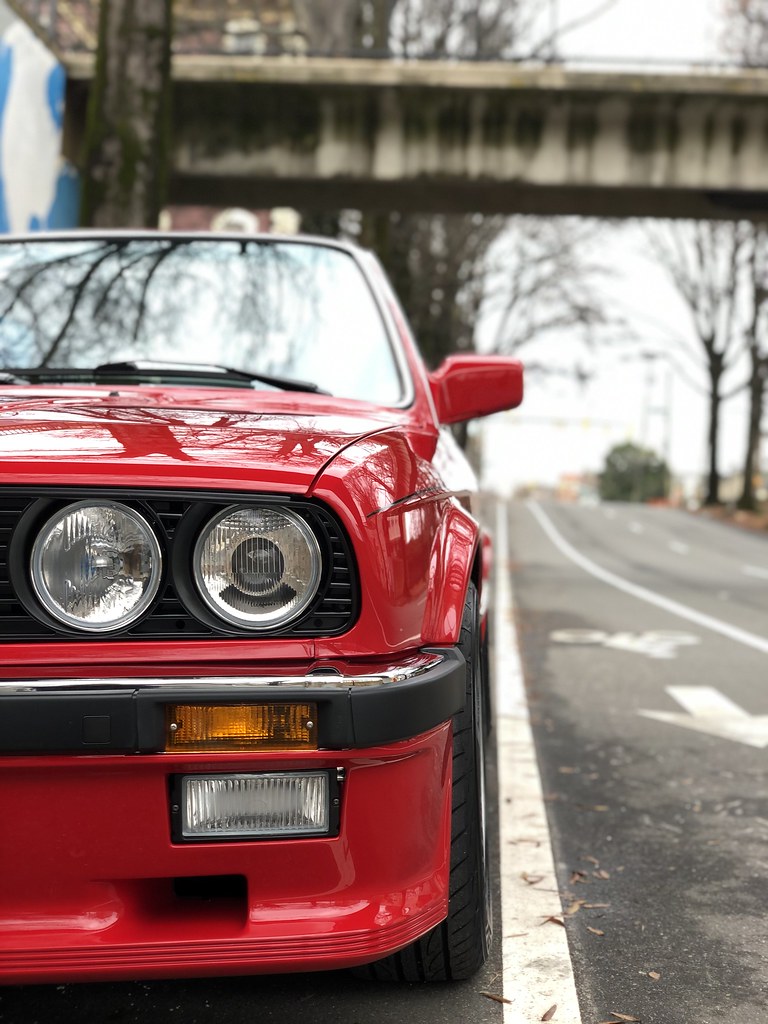
PS. Small tip on car photoraphy even though I'm not a photographer either: Car pics usually look more dynamic when there is more free space in front of the car than at the back. If the image is cropped right in front of the car it feels a bit crammed. Like there is no where for the car to go (even though it's parked)
Thats why these pics:


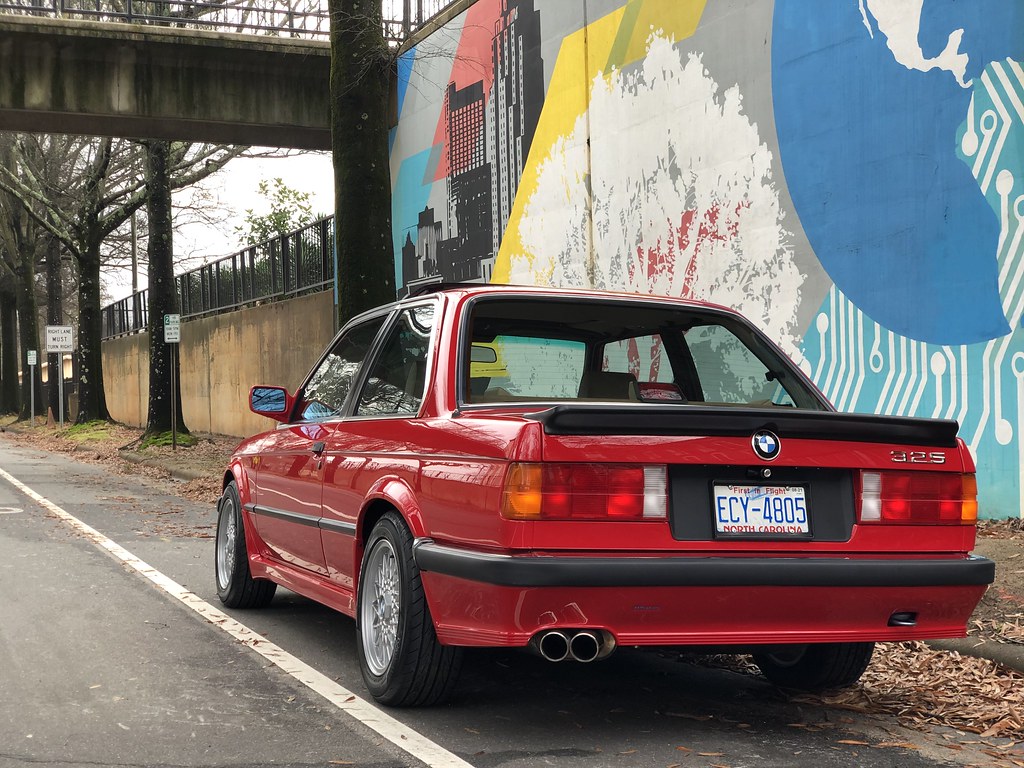
Work better than these:


Especially this shot would be awesome if there was more room in front of the car. That would also take in more of the mural which is more interesting background that the traffic lights and the sky in the distance. But this really is nitpicking. The shots look great anyway. Even though te day is cloudy, the light works well for the vibrant colors of the murals and the car.Leave a comment:
-
So beautiful! I may have missed it earlier in the thread, but why does your toolkit look so different and how did you get the sweet padding for the trunk lid?Leave a comment:
-
Vintage is fuel for my motivation. E30 Turned our great and I hope to see your there! Great detail work, I could look at it for hours!
Don't slack on getting the ceramic coating and clear-bra, paint condition only goes down from here.
Regardless, I think if not a Vintage meet, a Clarion meet will be in order.Leave a comment:
-
Exactly, I read this and hope you can make it out to Vintage this year.Leave a comment:
-
-
Thanks! Have been driving the car a bunch lately and really enjoying it again.
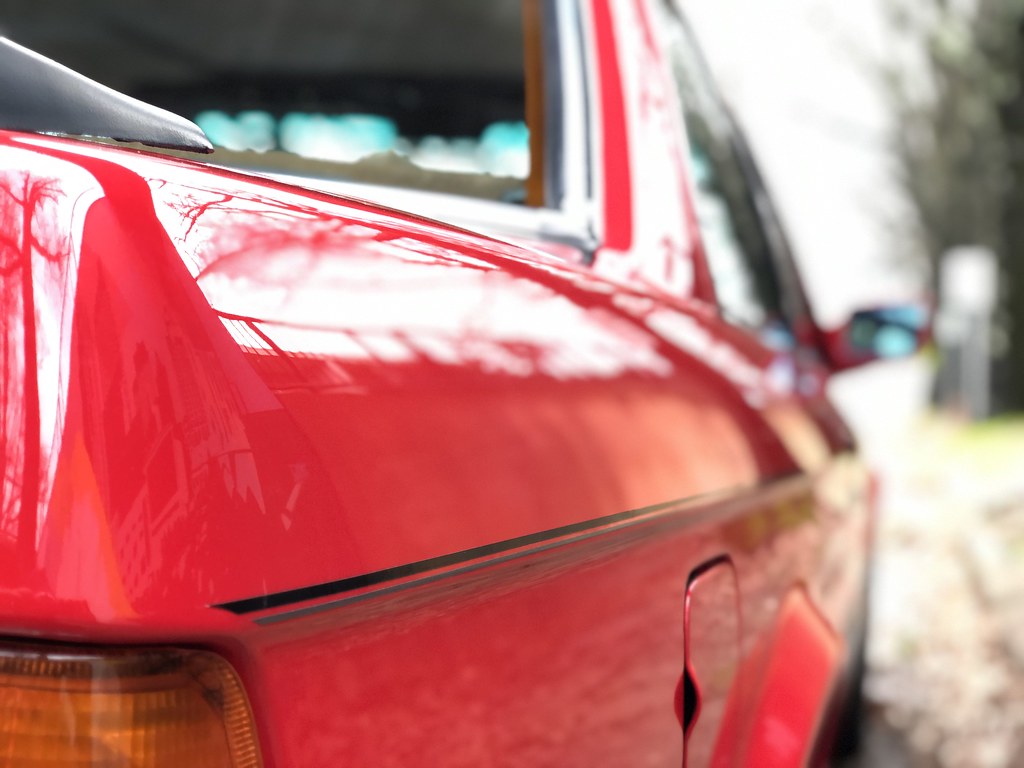
Sorry I've been slacking on getting the pics posted but most have already been listed on the January COTM article. Still pumped I was chosen! Here's those and a few extras that didn't make the cut:


A peak of the finished trunk and tool box:


The interior:


Then I tried to get "artsy" at some spots around town. I'm certainly no photographer but tried my best with my IPhone. I had no fucking clue what I was doing but the car made most of the pics come out ok:


As the weather gets nicer I'll be taking more and more pics of the car and posting them up. I still have a few small projects to finish as well:- Clean and refinish the trunk tools (jack, wheel chock, lug wrench)
- Make plastic wind deflectors for the front of the MTech kit (these are NLA and the only repro's I've found are stupidly expensive for something I can easily make myself)
- Clean and seal the paint. Have been waiting on the clear coat to fully "gas out" before adding any protective coatings .Debating on ceramic coating +/- some clear bra on the front of the car
- Clear UV reflective window tint (won't actually be tinted, but will hopefully keep the cabin cooler and less likely to crack the dash)
- I'd really like to drive this car out to the Vintage this year if it happens
Leave a comment:

Leave a comment: