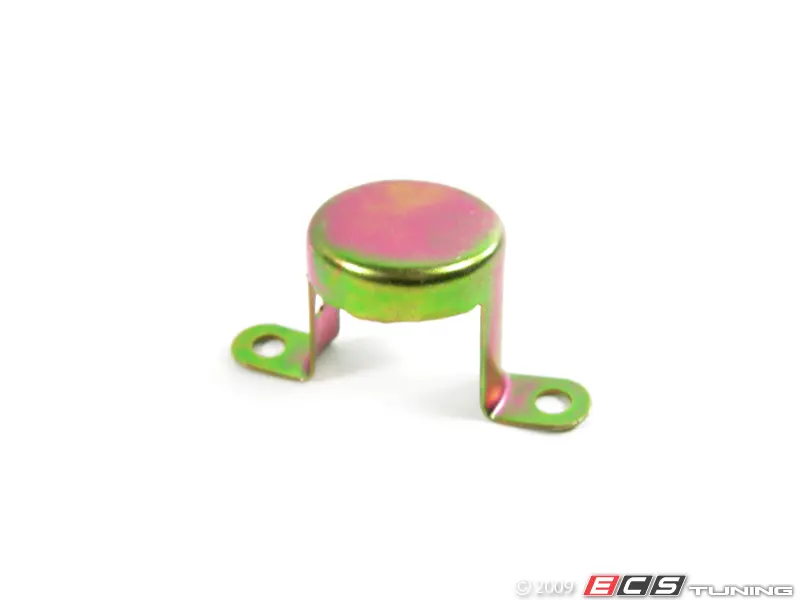
E30 from Ukraine - "Shadow of Intelligence"

Collapse
X
 
  • Time
  • Show
Clear All
new posts

  • The_Glory
    replied
    Yes, I agree - even in appearance this grill does not inspire much confidence. But the goal of my project is to collect as many original options as possible. Therefore, I am more interested in this grille as a "collector's exhibit" and not as a practical engine protection.
    By the way, I drove for seven years on a low suspension -60mm on our bad roads without any engine protection at all, and I never broke the lower engine pan.

    Leave a comment:


  • roguetoaster
    replied
    The factory skid plate or engine cover isn't worth the bother since it collects debris very effectively and provides about as much protection as a cope cage does for a tank in a modern war zone. Either get an aftermarket unit, or omit it entirely.

    Leave a comment:


  • The_Glory
    replied
    Assembly_26. ETK_51_Body equipment. (part 2)

    Let's return to the ETC section ЕТК_51_Оснащение кузова

    One of the smallest and simplest subdivisions of ETK - Protective edging/threshold overlays


    We are talking about door seals.


    I washed them, treated them with silicone spray and installed them a long time ago.


    The front ones are in good condition, but the rear ones had to be glued a little. If possible, I will replace them if I find the whole ones, because the price of new ones is not at all pleasing.

    Next, we go under the bottom to install everything that has not yet been installed there.

    Heat insulation


    First, the heat shields of the catalyst and muffler.


    On my heat shields, chemical corrosion has severely damaged the mounting holes. I first tried to restore them with riveted aluminum covers, but then I found and bought whole heat shields. Just in case, I painted them with aluminum-zinc paint, and used stainless nuts and washers for fastening. This should reduce chemical corrosion between aluminum and steel.
    The heat shield of the muffler is attached to the studs with four stainless M6 nuts.


    The heat shield of the catalyst is slightly different from my right front mount, but not critical. Perhaps it depends on restyling. It is attached to the gimbal tunnel with eight M8 bolts, and to the tank shield with two self-tapping screws.


    The heat shield is not fully attached, as it will still need to be removed to install the gimbal. I screwed it so that it does not lie "underfoot" in the garage.
    The heat screen of the exhaust manifold pipes and the lower plastic protective shield of the engine compartment had to be slightly repaired.
    In the original, some paralon was glued under the foil on the inner side of the screen of the exhaust manifold pipes. From dirt and water, he turned to ashes. In addition, chemical corrosion damaged this heat shield even more. So I bought almost a whole heat screen, but the paralon there was also in junk condition. It was possible to order a new one, but not very cheaply. Therefore, I decided that it would be easier, cheaper and better to "upgrade" the existing one - first of all, to get rid of the paralon that accumulates moisture.
    So, first we remove the remains of paralon and glue, then sandblast.


    After that, many small holes appeared from corrosion. We glue them with aluminum tape.


    Cut a strip of the required size from heat-resistant non-combustible asbestos cloth.


    We glue it around the perimeter with aluminum tape.


    And with the same tape, we stick it to the screen instead of paralon.


    We glue the entire inner surface of the screen with aluminum tape.


    We paint the outer surface with aluminum-zinc paint.


    And we get a thermal screen that is no worse than a new one. And maybe even better.
    Compared to my old screen. By the way, it has a large opening. I don't know what he is for. Maybe for right-hand drive cars?


    The lower plastic protective shield of the engine compartment is not quite right for me - it is for restyling. But according to the fastening, it is also intended for cars with air conditioning - with three large holes. Therefore, it will be like this for now.


    I had to seal the cracks a little.


    Even earlier, this is how I restored the broken right mount - using the same mount from my old shield, which I tore off at a railroad crossing.


    By the way, I also had to make a cutout for the hoses of the oil cooler. On restyling, they are located differently and do not interfere with the shield. A little "kolkhoz", but such...)
    So, the heat shield of the exhaust manifold pipes and the lower plastic protective shield of the engine compartment are ready for installation.


    The screen is attached with two (or three in another version) plastic nuts Special (51 48 1 923 999), which also fasten the sound insulation of the motor shield, and three metal washers Visitor Messages (51 48 1 884 110) to the bottom. There is also part E30 Classified Forums (07 14 6 949 380) on the ETC diagram, which actually also refers to the attachment of this screen. I had E30 Classified Forums washers, and I ordered new Visitor Messages washers, but as it turned out, either three Visitor Messages washers or three E30 Classified Forums washers are used. Maybe it depends on the year of release.


    Fastening with plastic nuts together with noise insulation.


    Mounting on the bottom - in my case, M6 studs were welded to the bottom, so E30 Classified Forums washers were more suitable for me. And the new No. 7 remained unnecessary.


    The lower plastic protective shield of the engine compartment is attached to the body with four plastic nuts #11 (16 13 1 176 747). But the diagram still shows fasteners No. 12 and No. 13 - these are self-tapping screws and inserts for the side plastic shields. More on them later.


    I tried it on - it turned out well. Of course, I will install it after installing the motor.


    Two plastic nuts on each side. But the side shields of the arches will be attached to these holes.


    So, now about the side shields.
    Air duct


    As I said, I have the lower shield from restyling, so the side shields, accordingly, are also part Groups on the ETK diagram.


    But air channels Forum and Uncategorized Groups for blowing the brakes will not work for me, since the front apron does not have holes for them, and the BBS apron has them much lower. So, I will come up with something on the spot after installing the aprons. And for now, I bought Taiwanese analogues of shields - it won't be such a pity that they will be a "collective farm" :)


    On the diagram, parts No. 1 and No. 3 are shields and ventilation ducts for cars of 83-85 years of production, which do not have a lower shield. Photo from the Internet.


    If I find it, I will gladly buy the correct lower shield for my case - for cars of 85-87 years of production. It is one-piece with side shields, and without ventilation channels. Photo from the Internet.

    By the way, blowing is provided under these shields. This seems to me to be a disadvantage of this option. After all, through the channels, the brakes cool better - I'm convinced by my own experience.
    In an ideal case, I need it for an air conditioner - with holes at the bottom. So that there would be no "kolkhoz" at all ;)


    And for now, it will be as it was on the restyling, only with small improvements to the side shields and their channels ;)


    To finish already with the lower protection of the engine compartment, I will write about one more rare option that I have not yet found and bought. I will buy it if anyone has it, by the way ;)
    Ref. protection panel fur south engine


    Metal engine protection for cars up to 1987 - 51 71 1 929 451 (photo from the Internet)


    Metal engine protection for cars after 1987 - 51 71 1 971 001 (photo from the Internet)


    I'm not sure if these options are interchangeable and compatible with the corresponding plastic shields, but to find out, you need to find at least one ;) They are both available to order new, but the price of 400 and 1100 Euros, respectively, does not suit me at all...

    I will write about other subdivisions gradually in the following parts.

    Leave a comment:


  • The_Glory
    replied
    Originally posted by QuiqueUy
    love the updates! happy to see this car is going to finish !

    the amount of detail is amazing
    Well, I said from the very beginning that I would write everything in as much detail as possible. Although everyone knows this already :)

    Leave a comment:


  • QuiqueUy
    replied
    love the updates! happy to see this car is going to finish !

    the amount of detail is amazing

    Leave a comment:


  • The_Glory
    replied
    Originally posted by roguetoaster
    Lots of us are reading, but I suspect that we aren't posting lest we interrupt the flow of posts. Way to document your project and maintain some level normality in times such as these OP!
    OK, thanks.
    I thought that our club forums died out like mammoths, but apparently this is a global trend - the times of Instagram and Tik-Tok have come :)

    Leave a comment:


  • The_Glory
    replied
    Originally posted by Kotyarko_O

    Звiсно! (Of course)
    О, кого я бачу! ) Так ти можеш і на нашому форумі читати )) (Oh, who do I see! ) So you can also read on our forum)) )

    Leave a comment:


  • roguetoaster
    replied
    Lots of us are reading, but I suspect that we aren't posting lest we interrupt the flow of posts. Way to document your project and maintain some level normality in times such as these OP!

    Leave a comment:


  • Kotyarko_O
    replied
    Originally posted by The_Glory
    Anyone interested in this...? )
    Звiсно! (Of course)

    Leave a comment:


  • The_Glory
    replied
    Anyone interested in this...? )

    Leave a comment:


  • The_Glory
    replied
    After all the pipes are laid, you can install the tank.
    The E30 had a total of three tank options.
    The first - (16 11 1 176 250) is the rarest, was placed only in the first year of E30 production - until 83. In the ETK, its volume is 58 liters, but in the photo it looks smaller than the pre-restyling tank of 55 liters.
    The second - (16 11 1 177 983) before restyling tank for 55 liters, installed from 83 to 87. Such a tank was installed on diesel cars even after restyling.
    The third - (16 11 1 180 175) tank for 63 liters, installed after restyling, since 1987.

    Photo from the Internet - two tanks before restyling. 83-87 years on the left, up to 83 years on the right.

    The photo shows that in the second version, the volume was clearly increased and a connecting tube was added between the halves of the tank.
    In the third version, the volume was increased, but instead of the connecting tube, an "ejector" was used, thanks to which the fuel was sucked from one half of the tank to the other.


    In my case, the second version of the 55-liter tank was installed. So, let's move on to the corresponding subdivision of ETK.
    [URL='http://ru.bmwfans.info/parts-catalog/E30-4-doors/Europe/325i-M20/L-M/1985/browse/fuel_supply/fuel_tank_fuel_feed/']Fuel tank/fuel supply system[/ URL]


    Part No. 7, 8, on the diagram, is a fuel level sensor, which is placed instead of the priming pump No. 10 with sensor No. 11 in complete sets without a priming pump.

    Tank and filler neck details.


    The clamps are new original, the rubber rings of the fuel level sensor and the fuel pump are new, the rubber gasket of the plug is new. The tank is attached at 5 points, but the number of bolts and nuts is not correctly indicated in the ETK. You actually need 4 bolts and 1 nut. By the way, I used stainless bolts and nuts. The neck pipe has different diameters at the inlet and outlet, so it can only be replaced with the original one. Fortunately, mine was preserved in good condition. The sump pump was cleaned and painted with zinc paint. The filler neck was sanded, coated with anti-gravel and painted. But I didn't really like her. And here's why.
    In total, there were four types of filler necks on the E30. I had the simplest one - just a pipe. The rubber gasket of the plug was not very tight, and on the slalom, with an almost full tank, gasoline spilled out onto the wing. I heard that there was a case when this caused the car to catch fire during a burnout - it's good that they were able to put it out quickly. Therefore, just in case, I decided to replace the neck with a safer one - with a valve. Such nozzles were installed on cars that ran only on unleaded gasoline. But for some reason, both necks have the same ETC number (16 11 1 180 956). Then I noticed two interesting parts in the ETK, one of which turned out to be the same valve - General Forums (16 11 1 180 157). According to ETK, it fits all E30s - I ordered it.


    I will write about the second part No. 18 (16 11 1 176 708) a little later.

    This is a plastic valve.


    For some reason, I decided that it is placed at the junction of the upper wide part of the neck and the lower pipe. But no matter how hard I tried, the valve would not fit there. I just couldn't fit physically. So I decided to buy another neck with a valve. And after comparing them, it became clear that that valve cannot just fit into a regular neck. For it, a special landing ring is welded into the wide part of the neck, above the ventilation tube.


    Why in the ETK these two necks go under the same number, and it is indicated that the valve fits both of them - is not clear. Although externally and in terms of fastening, they are really the same. But the new valve turned out to be superfluous :)


    Well, let's talk about the types of necks - I also have a neck for an additional tank - it has a metal valve.


    I have already mentioned this tank before, and I will write briefly again in the relevant ETC section.

    And the last type of necks is a plastic neck that combines the expansion tank of the tank ventilation system. I'm not exactly sure, but it seems that such necks were put on touring cars of the last years of production.


    So, I also brought the second neck into proper shape, as well as the tank. Although, the tank was still in excellent condition.


    By the way, in the photo, there are four galvanized brackets that are placed at the places where the tank is attached - for some reason, they are not shown in the ETK at all.
    Inside the tank is also clean and beautiful.


    We install the fuel pump on the rubber rings, then screw the fuel level sensor to it, and the fuel supply and return hoses, which I wrote about in the previous section. We put a protective hose on the fuel supply hose and fasten it with a tie, fix the hose with tape. We install brackets on the mounting holes of the tank.


    I immediately screwed the brackets of the protective shield to the tank - it's more convenient that way.


    Everything is ready for installation. It is better to put the tank together. And by the way, it is much more convenient to put it before installing the rear beam and suspension. But in my case it didn't work out that way, so I had to tinker with it a bit. Let's start with the simplest. We insert the rubber spacer No. 18 (16 11 1 176 708), which I mentioned at the beginning, into the hole on the right rear spar.


    I didn't have it before, but now the neck is more protected from rubbing against the body.


    Next, a protective rubber coupling No. 17 (16 11 1 176 761) is also placed on the neck in place of the body bracket
    We screw the neck with a bolt to the body bracket.


    Now tank. An important point - first you need to lay the wiring under the bottom to the level sensor and the pumping pump, because after installing the tank it will be very difficult to do it. Also, be careful not to pinch the ventilation hoses between the tank and the body.


    I already wrote that I had to remove the pump tank because it was in the way. The rear beam and suspension are also a bit of a hindrance, but we are not looking for easy ways! :)
    As the practice of several attempts has shown, it is better to immediately tighten the two rear bolts with large washers, then insert the tank to these bolts with grooves, and press it back.


    Then tighten the front central bolt on the cardan tunnel.


    Then tighten the front right nut and evenly tighten all four fasteners.


    Only then does the tank fall into place, after which we tighten the last front left bolt (without bracket) near the pump.


    We screw the fuel supply and return hoses to the corresponding fuel tubes. The tank is in place.


    We connect the filler neck to the tank with a pipe on clamps. It's also not very convenient, but it's done!


    We connect a thick hose and a 6 mm plastic ventilation tube to the corresponding fittings of the tank. We connect the wiring connectors to the fuel level sensor and the fuel pump.


    We insert four clips, put a gasket.


    I also cut this pad from splenium, instead of the original one from paralon. And close the hatch with a lid on screws.


    The tank is installed.

    The following is not a large division of ETK.
    Heat insulation screen


    Part Forum is not used. Apparently, this is a part for the tank before 83, which I wrote about above - in the photo on the right.


    Part No. 13 is no longer available for order, but although it makes its way through the ETK, it is most likely also used together with that tank before 83.


    Because there is simply nowhere to put it on my tank. My friend managed to buy it, but he also never found a place to install it.
    So, there are two plastic shields that are attached to the bottom with three plastic nuts each, and a metal shield that is screwed to the tank with two brackets. The tank mounting bolts are also shown on the ETK diagram.
    Here are all the details.


    We screw on the left shield that closes the tank and the pump, and also presses the fuel pipes.


    But the right shield that closes the tank.


    The brackets of the metal shield are screwed to the tank.


    Then we screw a metal shield to these brackets, which closes the connecting tube of the halves of the tank from the exhaust system.


    The thermal screen of the exhaust system will then be attached to this shield.
    Everything is installed.


    The last unit of ETK remains - the first :)

    Additional fuel tank


    Another interesting and rare option in the fuel system section is the S850 Additional tank.
    I've written about her before, so I'll just remind you. This option was available on cars with the M20 engine before restyling and on the M3. An additional 15-liter tank was installed in the trunk behind the rear seat partition.


    Had his double neck


    The wiring for the additional fuel level sensor and the sensor on the instrument panel on two scales.


    The entire trunk lining is also different.


    I have most of it except the trunk liners, but I won't be installing that extra tank. Because this is the rare case when the original factory option is installed not "bolt-on", but with the use of welding and body drilling - the brackets must be welded to the trunk partition in place and a large hole drilled in the bottom for an additional filler neck. I have no desire to do this after painting the body. In addition, I don't have skins, and without them the look will not be aesthetic at all. Therefore, only the electrical part - wiring, and the sensor on the instrument panel will be installed. But that will be later. And we'll see... maybe someday I'll find the skins, then I'll install the tank. And for now it will lie as a collector's item :)


    This concludes the large section of the ETK "Fuel supply system".
    Although there will be two entries on the adsorber and the fuel filter, but that is another chapter.

    Leave a comment:


  • The_Glory
    replied
    The next subdivision of ETK

    Expansion tank/tubing


    But I don't consider it, because my car is equipped with a fuel system ventilation system with a carbon filter, according to the environmental standards of that time "Euro 2". This system, in addition to the ventilation tubes, includes an adsorber with activated carbon and a valve for admitting gasoline vapors into the intake manifold, instead of releasing them into the atmosphere.
    So, we are considering this option.

    Expansion tank/filter with activated carbon


    Details of this system


    If you look carefully at the scheme, everything is clear, except for two of its elements. Part No. 26 (13 31 1 287 351) is a clamp for two hoses, but it is not clear where exactly it is placed. If anyone has a photo of where it should stand, I would be grateful. As long as I put it according to my understanding, I will show you exactly where.
    The ETK does not specify the number of clips E30 Classified Forums (16 13 1 177 490) - I counted six of them under the bottom and four more above the tank, ten pieces in total. They are no longer available for ordering, but the replacement number (16 13 1 177 494) comes exactly the same.


    Clamps are all new original, Gates hoses.


    The steel ventilation pipe (16 13 1 177 466) is new. I bought new 6mm and 8mm plastic tubes for truck brake systems, but then accidentally found the original ones in good condition. I recently wrote in detail about the restoration of the adsorber - I replaced the activated carbon in it and painted it. I also mentioned the metal hose shield in the rear right arch - lucky to find one as it should be and in excellent condition. Also a plastic shield for it. Let me remind you - these two shields are of two types, although they have the same ETK numbers. Everything is cleaned, painted, galvanized.


    The expansion tank was washed.


    By the way, I accidentally bought a tank for a convertible along with the pipes - it turns out to be a little different there.

    I made notes on the assembly for myself - the size, length of the hoses, and the size and number of clamps are indicated there. Maybe it will be useful to someone.


    First, we push a thick 14x20 hose and 6mm and 8mm plastic tubes into a special body channel. Silicone spray helps a lot in this.


    We connect the corresponding hoses to the tubes according to the diagram.


    And the hoses, in turn, are connected to the expansion tank and the filler neck according to the same ETK scheme.


    Thick hose to the neck. There is a thin hose 6x11 and on the upper fitting of the tank. We connect an 8x13 hose to the second upper fitting of the tank, which goes to a plastic tube of 8 mm and then to a steel ventilation tube. We connect a thin 6x11 hose that goes to the tank to the lower fitting of the tank.
    By the way, I found a very good diagram for all these hoses and tubes.


    We put the tank on its brackets and screw it with a self-tapping screw.


    We cover the hose and ventilation tubes with a metal shield and fasten it with four plastic nuts (there is an option for fastening with six plastic nuts).


    Hoses and tank installed


    We put the bracket of the plastic shield.


    My welder slightly changed the places of its fasteners, but not critically. Now the shield is screwed to it not with a self-tapping screw, but with a plastic nut. The second lower and upper fasteners remained stock, on self-tapping screws to the bracket on the body.


    This is all over in the back arch, let's go under the bottom.
    The hose and pipes from the channel go to the hatch under the rear seat, to the tank. The steel pipe of the tank ventilation also goes there.


    I laid the pipe together with the fuel pipes - it was visible in the photo in the previous section. It passes on the other side of the spar and is attached with separate clips opposite the attachment of the fuel pipes.


    Next, the tube goes above the tank and is fixed there with four more clips of the same type.


    Under the hatch, a steel tube is connected by a hose to an 8mm plastic tube.


    A 6 mm plastic tube and a hose go into the hatch under the rear seat. There they will be connected to the tank.


    Now the front part. A steel tube wraps around the spar near the silent block of the front suspension, and goes to the fuel tubes.


    Install the adsorber bracket on the left spar. The fuel filter bracket is attached together with it - it is also in the photo.


    We install the absorber, fasten it to the bracket with a clamp.


    We connect the tube to the adsorber with an inlet hose.


    We connect the outlet hose with the valve to the adsorber.


    Next, from will be connected to the choke.
    And here is where I put the double clamp #26 (13 31 1 287 351) on the hoses.


    There are no other ideas. After the complete assembly, I will look at where it is better to put it.

    PS
    There are separate sections on the adsorber and fuel filter in ETK, so I will write about them in detail later.

    Leave a comment:


  • The_Glory
    replied
    Assembly_25. ETK_16_ Fuel supply system

    The next step is the fuel system. It has long been in need of a fairly serious repair - the tank has been leaking at the joint for a long time and has already been several times, right on the road, sealed with "cold welding" (by the way, it holds up well), the pipes are very rusty, with "plumbing" from hoses, hoses with cracks, clamps are rusty, some parts were missing altogether. Therefore, the fuel system was almost completely replaced. To do this, I bought new original steel tubes, original clamps, all hoses, plastic tubes, fasteners, rubber neck and pump covers, clips and other small parts.


    I also found the tank, valve neck, metal and plastic shields in the rear right arch, plastic shields on the tank, tanks and fuel pump mounts in very good condition. Everything was cleaned, painted and galvanized.

    So, the next big ETK section - ЕТК_16_ Supply system fuel

    We start again from the end of the chapter. There is such an interesting subdivision:

    Fuel cooling system


    Judging by the ETC, this interesting option was only available for the Australian market - probably because it's very hot there ;) I've only seen this thing for sale once on ebay, in the same Australia. I didn't have time to buy, and delivery would be too expensive. But I kept the photo, because I will probably see something here live...
    The photos are not mine - just for information about the rare E30 option.


    Judging from the photo, a special air conditioner hose with fuel pipes around it serves as a radiator. Therefore, it is logical that this option was placed only together with the air conditioner.


    Further, the tubes with the shield were somehow attached to the motor shield, perhaps instead of the usual shield.


    Then they went to the return fuel line.
    This is such an interesting thing. Maybe someday I will buy it later! ;)

    Well, now about my car assembly.
    An external outboard fuel pump was installed on pre-restyling cars. It is located under the threshold, in front of the rear left wheel. There was also an option with two pumps - with an additional pumping pump in the tank. This is exactly the option on my car. Let's start with it.

    Fuel pump


    Details of the outboard fuel pump.


    Pump No. 8 on the diagram (16 14 1 179 232) is used only in combination with a pumping pump. The original pump is BOSCH 0 580 464 070.


    I bought it new many years ago, and there are no complaints about its work until now. That's why I left him. But I have been interested in its fastening for a long time. I had it attached with a rubber ring Albums - like in this photo:


    But the ETK still has parts #10 (16 12 1 178 642), #11 (16 12 1 178 738), №12 (16 12 1 178 668), which I have never seen on an E30. I found their photo in Google.


    These are rubber casings of the pump. I liked the look, so I ordered it, although I was not sure that they would fit, and the set costs more than $100. Fortunately, they approached. But, at the same time, rubber ring No. 9 becomes redundant. The pump is attached either through a ring or through these casings. They are not compatible together.
    I was also interested in details №14 and №20 I understand that they are needed to reduce fuel pulsation from the pumps. I didn't have them at all. I can't say that it somehow negatively affected the operation of the fuel system, but I decided to assemble everything as it should have been from the factory. I found these tanks, and No. 14 is available in three versions.


    The first Wahler


    Second Bischoff


    The third Bosch


    The first and second are just empty tanks with a through passage. The third is under a rubber plug inside with some kind of membrane on the spring. But I don't know what was done with it, because there are traces of welding on it. Therefore, I chose the first option for installation.

    I also want to pay attention to details No. 4 (16 12 1 177 892) and No. 5 (61 21 1 243 530). Only number 5 can be used. In most cases, they are broken, but the price of new original ones is inadequate, in my opinion. And there are no analogues for the number. I also had them torn, I was trying to think of something there, some kind of collective farm :) I was lucky to find a whole pump mount with all these parts. But I also found an alternative - after searching on Google "vibroisolator" I found this [URL='https://www.detal-if.com.ua/ru/bolt-bolt-shajba-bbsh.html']this[/URL ] A great option for ridiculous money, compared to the original.

    So, let's start the assembly.
    All clamps were new original stainless steel. As practice has shown, even after 30 years, they spin up much better than the new Chinese ones.


    I made notes on the assembly for myself - the size, length of the hoses, and the size and number of clamps are indicated there. Maybe it will be useful to someone.


    We put the covers on the pump - they become very tight. We screw the tanks.


    The terminals are now more protected by a casing.


    We screw the pump bracket to the body through vibration isolators and a hose clamp.


    By the way, in the section on plugs, I wrote that plugs are placed near the fuel pump in the doorway. I had these holes welded here when the fasteners for the pump were restored. But on the right side, these plugs remained under the antirust.


    Two plugs with a diameter of 20 mm (51 71 1 801 066) are required for each side.


    An outboard fuel pump is installed.


    Hose No. 18 with protective hose No. 19 is first installed on the tank, so we will talk about it later.
    And as it turned out later, it is better to put the black tank General Discussion already after installing the tank, because it gets in the way a little, and it is not convenient to screw the hose Regional Forums from the tank to it later. I had to remove it.

    The next subdivision of ETK
    Fuel pipe/ mounting elements


    At first I wanted to make custom copper fuel lines from a pattern from old pipes. But then I still decided to order ready-made original steel ones. It's good that they are already bent and fit perfectly, unlike the original brake pipes, which have to be bent in place yourself.


    Only three pipes - fuel supply (16 12 1 179 285), fuel return (16 12 1 177 372) and tank ventilation (16 13 1 177 466).


    The diameter of all tubes is 8 mm, the length is specified in the ETK.

    Old and new.


    Details of tubes and their fastening.


    I made notes on the assembly for myself - the size, length of the hoses, and the size and number of clamps are indicated there. Maybe it will be useful to someone.


    First, we connect the hoses to the pumping pump and to the tank.


    The thick 12x18mm hose is the hose for the outboard pump, which I wrote about in the previous section. And a thin hose of 13X18mm is a fuel return hose. At the other end of this metal tube of the tank, you need to connect the same hose, although it is not shown on the ETC diagram.

    The fuel pipes perfectly fit the shape of the bottom and are screwed to it with a special fastener - parts No. 3, 4, 5, 6. Their number is not indicated in the ETK, but I counted six points of such fastening. The fuel supply and return pipes are attached together with the rear brake pipe.
    According to the original, I have only one attachment point left - the first one, on the left spar. This is a threaded sleeve Special and a stainless screw Blogs welded to the body.


    At other points, the rusted threaded bushings have been replaced with regular M6 threaded studs. Moreover, some turned out to be very short, and it was difficult to screw the tubes to them. A small "kolkhoz", but not critical, in my opinion. I left the old plastic clips #6, just cleaned them, and bought new ones Groups They are made of stainless steel and numbered 16 12 1 155 064 each come complete with stainless screw Blogs Although the screws did not agree with me - I replaced them with stainless M6 nuts with washers. Only the holes in the slats had to be increased to 6 mm. The number of additional plastic clips Visitor Messages is also not indicated in the ETK. I put the old ones, as many as there were - 4 or 5 pcs.


    Next will be about the tank ventilation system.

    Leave a comment:


  • The_Glory
    replied
    Assembly_24. ETK_35_ Clutch

    To finish with the pedals, you need to install the clutch master cylinder on them. Let's go to the corresponding section of ETK.
    Clutch

    Its first subdivision.
    Clutch


    Although it was a long time ago, I already changed the clutch disc and release bearing. I had no complaints about the clutch, so I don't plan to climb there again. I'm not even going to unscrew the gearbox from the engine. Therefore, we skip this section. If I do climb there, I will write about it later.

    The second subdivision.
    Clutch control drive


    Details #6, 11, 20-24 are not used. Parts #20-24 are used only on right-hand drive cars.

    Clutch drive details.


    Bolts and nuts are galvanized with "yellow zinc".
    All other parts are new. In the photo, only the hose is old - I really liked its blue color, after I washed it off the dirt - almost the color of the car :) But it turned out to be short, because the vacuum amplifier brake shifted forward, and a new hose had to be installed as well.
    But, first I wanted to restore the original clutch master cylinder. Although it worked fine, I took it apart.


    Cleaned, painted the body and installed a new repair kit Frenkit 419007.


    On the left are old original parts, on the right is a new repair kit.


    I found their numbers on the old original parts, maybe someone will need them.
    Cuff


    corrugation


    Hose insert


    FAG housing


    Assembly is simple - remove the corrugation, remove the locking ring, pull out the stem and spring. Pull out the rod ring from the hinge, remove the cuffs. Assemble the parts from the repair kit in reverse order. I did all that and then bought a new cylinder :)


    I don't know why... it's just that I changed the clutch cylinder a long time ago, even after buying the car, so I decided it's better to change it for prevention. Well, together with the master cylinder as well, so that everything is already new, and you don't have to climb there anymore. Both cylinders were bought by ABS. Main ABS 51718X, working ABS 1800.


    Rubber inserts Blogs and Albums in the motor shield are the same (21 52 1 156 082), but are no longer available for ordering. Although they were almost intact, I decided to replace them with new ones according to the replacement number (21 526 863 043) for E36 and other newer models. I somehow broke the plastic Visitor Messages (21 52 1 151 697) hose flange when removing the cylinder, so that's new as well.


    Old parts on the left, and new parts on the right. The new inserts, in addition to the installation groove, have an additional "collar", which externally fits snugly to the sound insulation of the engine shield.


    Bracket No. 12 (34 34 1 163 565), similar to brake pipe brackets. I already wrote that only 10 of them are needed for the car. 2 pieces for the front brake pipes, 7 pieces for the rear brake pipes, and 1 piece for the clutch pipe.
    The clutch tube is steel with a WP polymer coating, 260 mm long.

    Now a small "live hack" that I found on the Internet. If you look carefully at the first general photo of the parts, you will not see a hose with a metal tube E34/E28 Forums (21 52 1 153 513). It is available to order, but at the price of 75 Euros - too much for me. I just cut my old hose off when I took it off so I wouldn't have to mess with it. If I had known its price then, maybe I would have fainted! :) Although, it would still have to be changed, it was cracked. So, we buy a regular rear brake hose (34 32 1 159 881), 200 mm long (I bought an ATE hose), and a WP steel brake pipe, 100 mm long.


    We connect them, and we get a similar hose, only 10 times cheaper.


    We compare it with the original hose - no difference. So why pay more? :)


    Now about the assembly. It would be more logical and easier to install the clutch master cylinder together with the hose, immediately on the pedal unit, and then install everything together on the car. But I did not do this, and now it was very inconvenient to screw it and insert the hose with a plastic flange. But still I screwed it up.


    Screw the cylinder rod to the pedal.


    The cylinder body and its hose exit through rubber inserts in the motor shield.


    The outer rubber inserts tightly adhere to the noise insulation with their "collar" - much better than the old original ones.


    As I said, the old beautiful blue one :) the hose was now short and didn't reach the tank, so I put a new one.


    It remains to screw the tube to the cylinder. It was also not very convenient to do it, but I screwed it up.


    Next, we put a clamp and attach a "self-made" hose to the tube.


    The working cylinder of the clutch will lie on the shelf until the gearbox is installed. Then, on the spot, I will bend the tube of the "self-made" hose.
    That's it with the pedals.
    Next will be about the fuel system.

    Leave a comment:


  • The_Glory
    replied
    Assembly_23. ETK_35_Pedal control

    As I already wrote in the previous section, the vacuum brake booster is attached to the engine shield together with the pedal assembly. Therefore, we proceed to the next section of ETC:
    Pedal control

    It is more convenient to install the accelerator pedal first, and then the pedal unit. Therefore, we start with this unit.
    Accelerator pedal drive/cable LR


    Accelerator pedal details.


    Details #3, 18, 19 are not used.
    I didn't have the locking bracket Special at all, so I bought a new one, and also bought new rubber bushings #11, 13 for the spring, because the old ones were rusted and fell apart. Everything else was simply cleaned and painted.
    The number of rubber bushings is not correctly indicated in the ETK - you need one of each. They differ in width. Wide No. 11 (35 31 1 113 725) is placed on the accelerator pedal lever, and narrow No. 13 (35 41 1 113 728) is placed on the pedal assembly.


    For some reason, I forgot to remove plastic bushings Visitor Messages and rubber stop #10 for the pedal lever before painting. Therefore, I had to clean them well from the paint. But they were preserved in good condition.


    Details of the cable assembly


    For some reason, I also forgot to unscrew the stop of the accelerator pedal before painting, although I tried later, but could not. I didn't want to break the bolt, so I left it as is and painted it.


    By the way, about the stops - as it turned out, there are two more, the existence of which I had no idea. In the photo below, the places of their installation are shown by red arrows. I have already said about the upper one - it is a rubber stop (35 41 1 158 149) of the accelerator pedal lever, which I had not noticed before under the paint. And the lower one is the stop of the clutch pedal - about it in the next subsection.


    The assembly is very simple - we insert the bushings into the brackets, lubricate them with silicone grease, insert the lever and lock it. We fix the pedal in the bracket on the bottom. By the way, this is a "weak" point of the E30 - water from wet shoes constantly flows down the pedal onto this bracket and it rusts very badly. I had a welder make it anew. Therefore, just in case, I filled it with anti-rust. Another point - the pedals and brackets are different before restyling and after restyling.
    Next, we connect the pedal to the lever, but we do not put the locking bracket yet - so that we do not have to remove it again when installing the noise insulation and the interior carpet. We insert a spring with a rubber insert No. 11 and a cable with a rubber insert No. 9 into the lever. We put the same stops that I mentioned above.


    We lead the cable through the motor shield, and fix it in the hole with latches.


    Next, we proceed to the installation of the pedal assembly.
    Pedal/stop light switch


    Details of the pedal unit.


    The mounting is galvanized, the pedals are painted, everything is cleaned.
    I cut gasket Forum (35 11 1 150 370) from splenium, although it is available to order and is not expensive, but in the original it is made of foam. In my opinion, in this place (as well as the steering column gasket), splenum fits much better - it does not absorb moisture, which can provoke corrosion.
    Pedal bushings No. 9 (35 21 1 109 541) are missing from the photo. Actually, they are there, I just didn't remove them from the pedals.


    They sit there very tightly, there are no signs of wear and play, so I decided not to touch them so as not to break them, because new ones are unreasonably expensive. So I painted it.


    Rubber bushings CSS Examples and Regional Forums under the springs are the same as on the accelerator pedal. Their number is also incorrectly indicated here in the ETK. Wide No. 18 (35 31 1 113 725) requires one, and narrow No. 12 (35 41 1 113 728) requires two. The wide one is placed on the clutch pedal, and the narrow ones on the bracket of the pedal unit (brake pedal) and on the body bracket of the steering column (clutch pedal).
    In total, 35 31 1 113 725 - 2 pieces, 35 41 1 113 728 - 3 pieces are needed for the car.


    Rubber pads on pedals Private Messages and General Forums are the same - 35 21 1 108 634.
    I bought new ones, for beauty, although mine were still more or less normal. By the way, there are inexpensive analogs, but judging by the reviews, they wear out very quickly.


    Parts No. 32 and No. 34 are used only if cruise control is installed on the car - this is its switch with a bracket. There will be a separate section about cruise control, but it is more convenient to screw this switch now than later to an already installed pedal unit.

    Part No. 31 (35 21 1 155 135) is a spacer used only on all-wheel drive restyled E30s. I already wrote about it last time - it is needed for the "bolt-on" installation of the double vacuum brake booster from the E32/E34 on the E30.


    I already mentioned the stop of the clutch pedal. I saw a bushing on the engine shield with a broken bolt in it, but I didn't even know there was supposed to be a stop as it was broken under the carpet. But after seeing it in ETK, I ordered it. It consists of two parts - a plastic screw Members Rides (35 31 1 152 237) and a rubber pad General Discussion (35 31 1 153 896) on it.


    The emphasis is on assembly.


    He began to look for where it was placed and took a closer look at the sleeve. Under the paint and sealant, it turned out not to be a bolt that was broken, but a plastic stop screw.


    It was easily drilled out, and the stop fell into place.

    On the diagram in the ETK, two parts that were installed by me are missing - plastic covers of the head of the axial bolt of the pedals.


    Maybe they shouldn't be there, but I saw them in a photo on the Internet, so I left them. They perform their decorative function.

    But I don't have detail No. 22. This is some kind of additional spring on the clutch pedal. It is not on all E30s, and it probably depends on the configuration or year of production - I don't know for sure. I have a clutch master cylinder ring instead - it is there in the photo.

    So, we assemble the pedal unit according to the ETK scheme.


    Do not forget to put a splenic pad. And the place for the stop of the clutch pedal is already ready.


    We fasten 4 nuts to the vacuum brake amplifier, and 2 bolts from above to the steering column bracket.
    We attach a spring with a rubber sleeve from the clutch pedal to the same bracket.
    We fix the rod of the vacuum brake amplifier on the brake pedal. We hook the spring of the brake pedal without a rubber sleeve to the rod bolt.
    We hook the spring of the accelerator pedal with a rubber sleeve to the bracket of the pedal assembly.
    We screw in the stop for the clutch pedal.


    The pedal assembly is installed.


    It remains to screw the clutch master cylinder to it, but more on that in the appropriate section.

    Leave a comment:

Working...