
wow that looks great! from here looks like a great painter too which is really hard to find these days
-
Boris - 89 E30 325i
84- E30 323i -
Yeah, the paint came out really great. The level of orange peel / texture is at least as good as any new BMW that I have seen. There were a few piece parts with imperfections, which they already corrected for me. Also a fairly long piece of masking tape was left under the "overhang" in the body above the rear bumper, from when they were cutting & welding, which got painted over. I pulled it off and there is a tiny grey line where you can see primer at the edge of where the tape was, although it is only visible if you are sitting on the ground. I talked to them about it and they said to just bring the car by when it is in roadworthy condition again and they can handle it for me. So...all around a solid business and the guy takes pride in his work. Compared to the utter shit that I have seen come out of other collision shops from insurance repairs, this is a real treat.
I do have one point of comparison too. My other car is an older diesel Jetta. The clear coat was going out badly on it, so earlier this year I took it to Maaco for a refresh. It is not a car that I really care all that much about, although I was also not interested in one of those "$499 special" jobs since that would probably end up worse looking that the old paint in 18 months lol. They actually did a decent job...it was a straight "line of sight" paint job where they just sanded over the whole exterior and then sprayed with single-stage. No door jambs or anything, although I did have them spray the bumpers off of the car so that the paint would not bridge the tight gaps and chip. It was $2100 all said and done. The car looks pretty good, but the amount of orange peel is definitely higher than OEM. It is thankfully a color which does not show it. Either way, the E30 paint job was considerably more costly, but then again the Jetta was at Maaco for 3 days and the E30 was at the other shop for 6 weeks.Comment
-
Updates! The reassembly has been progressing slowly but steadily. Twice now I have had to place some online orders for some small clip and fastener type things that I ended up needing either more of, or a different version of (US vs. Euro). That always adds some amount of time, sometimes 1-2 weeks for the more uncommon Genuine BMW bits and pieces. I should be getting what I hope is the last "surprise" order of parts near the end of this coming week, at which point I should be able to put the rear of the car back together the rest of the way. I broke one of the new license plate light holders by accident, and found that I needed a totally different "D" shaped license plate screw body nut since I have the Euro rear plate filler. There are also a few fasteners in there which I decided to get to be able to replace all of the little self-tapping screws which hold the fenders to the body under the hood.
r3v sleuths needed!
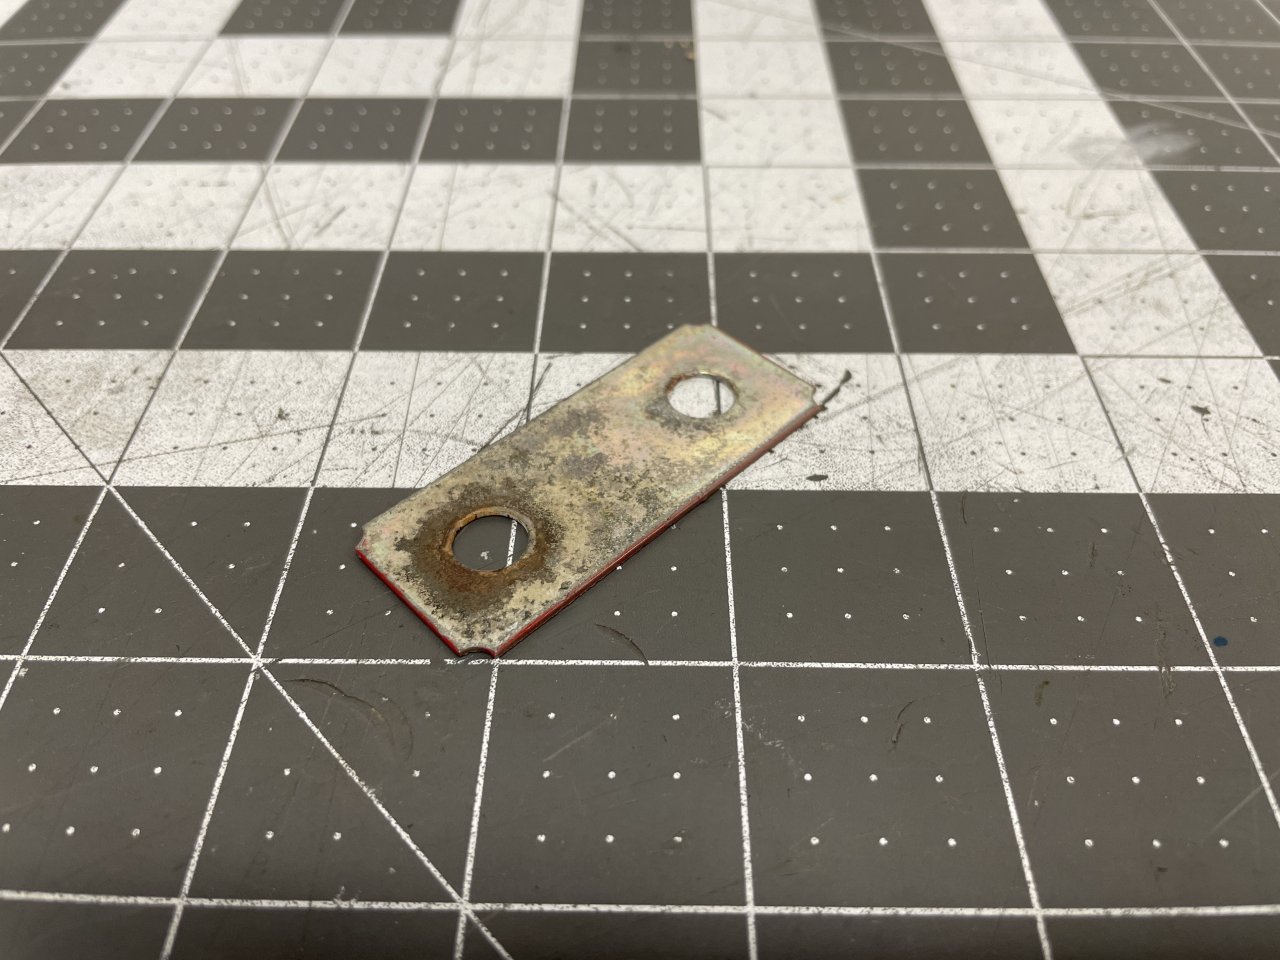
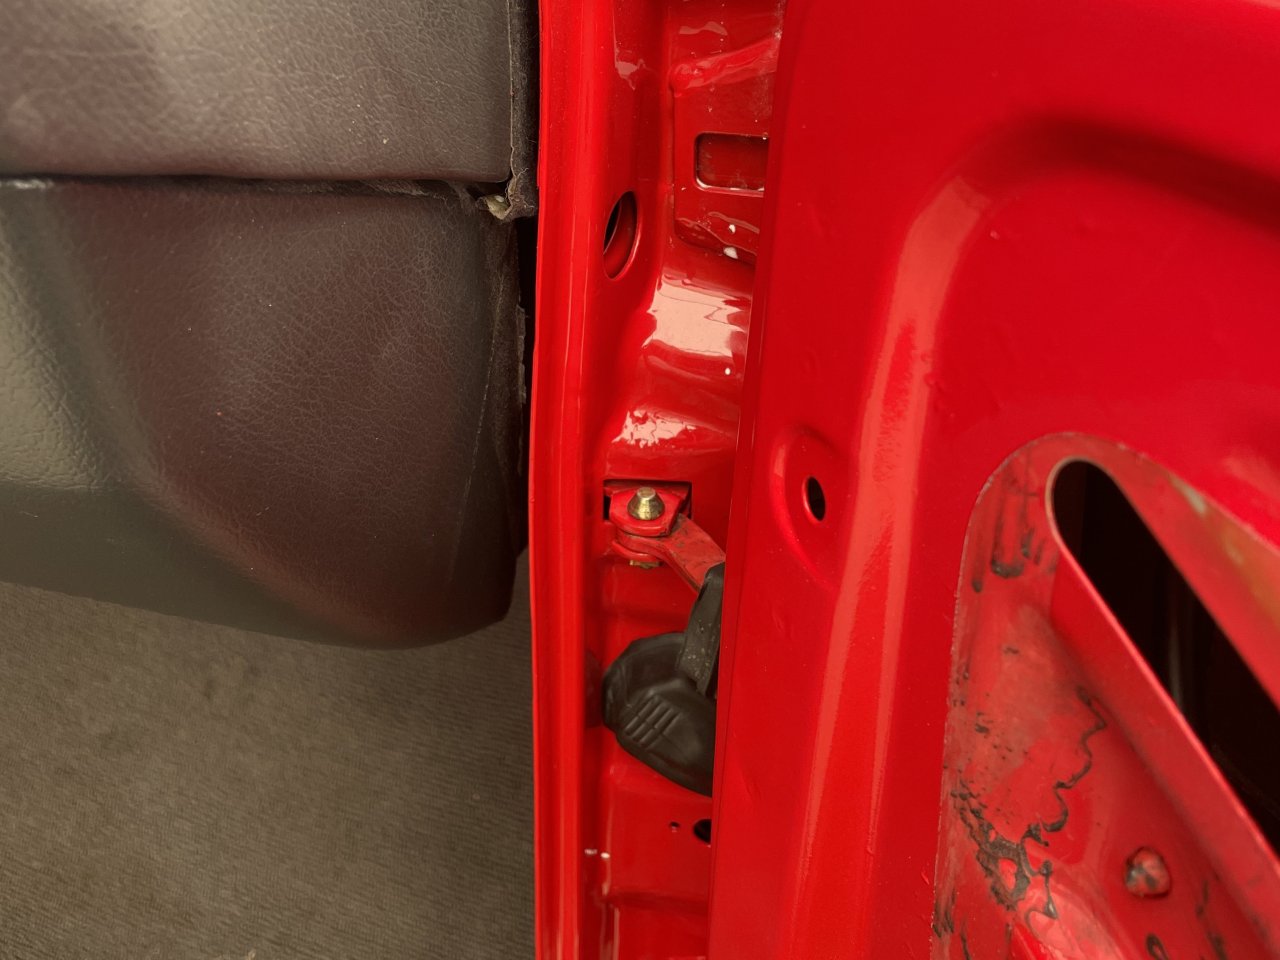
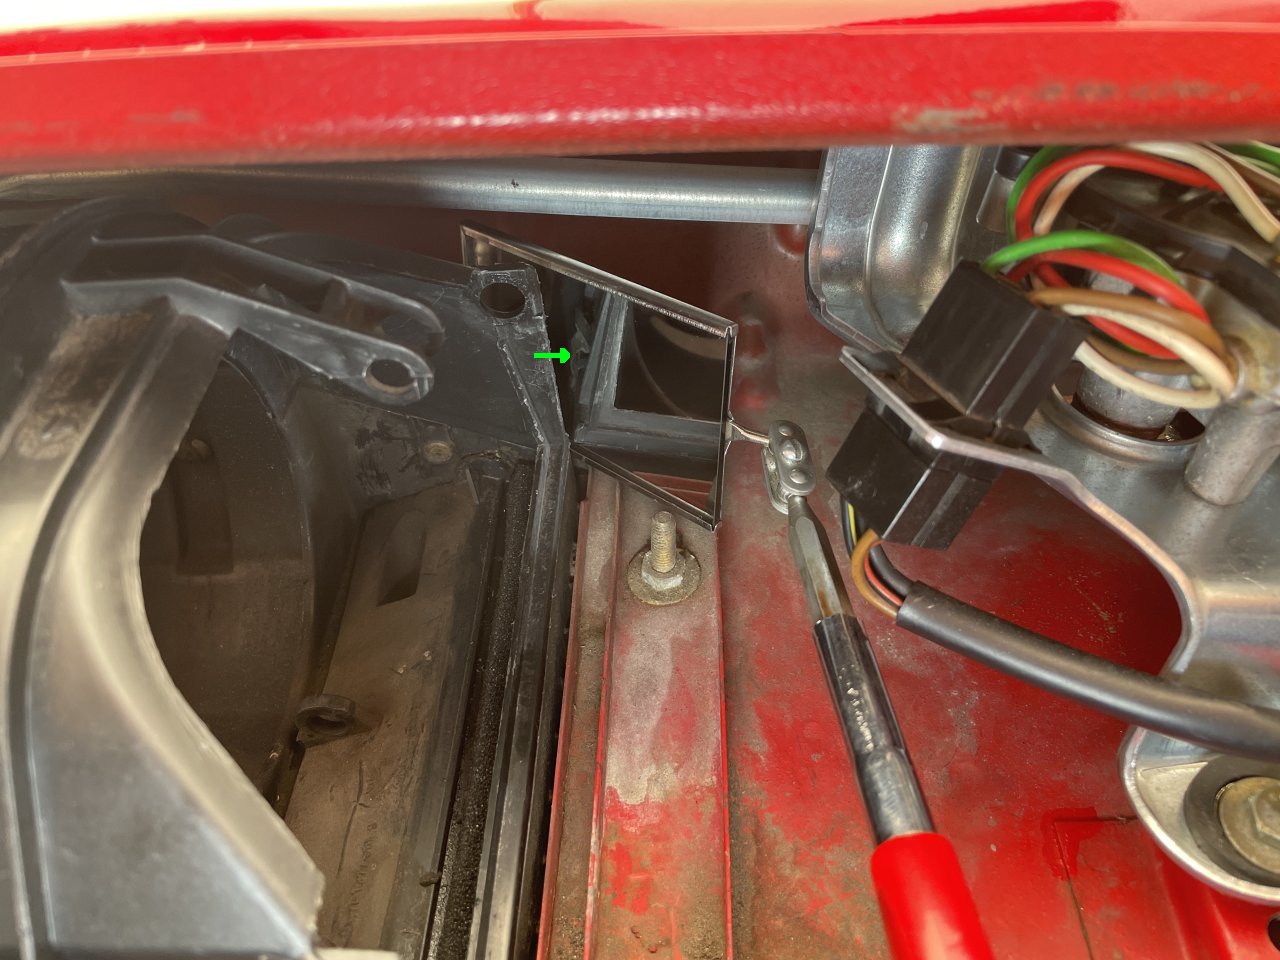
I need some help identifying a part. The body shop gave me a small baggie of parts that they had removed when pulling the doors and cutting + welding the battery tray area. I cannot figure out where this little plate came from. It has some red paint on the edges, and looks like it was exterior-facing. The only other things that the shop removed were the hood and trunk lid.
Also, does anyone know where these little rubber bumper thingies go? I ordered 2 since the diagram indicated that they are needed, but I honestly cannot remember where the old ones were or if they were even there.
Part number 51318236877, item #23 in diagram: https://www.realoem.com/bmw/enUS/sho...diagId=51_0830
Pics of bumpers: https://www.ecstuning.com/b-genuine-...r/51318236877/
/ r3v sleuths needed!
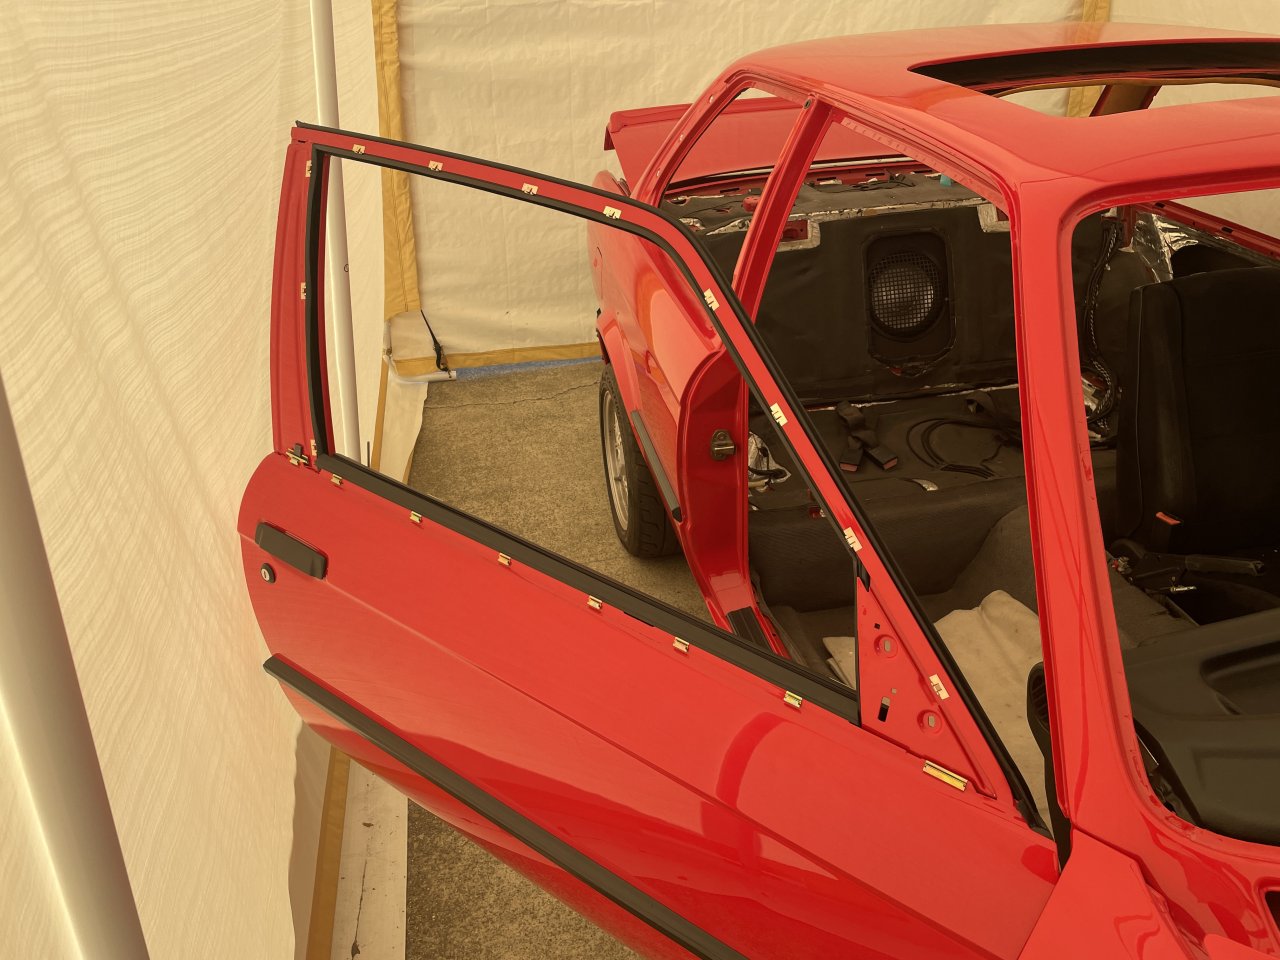
Anyway, here is a progress dump from the last couple of weeks.
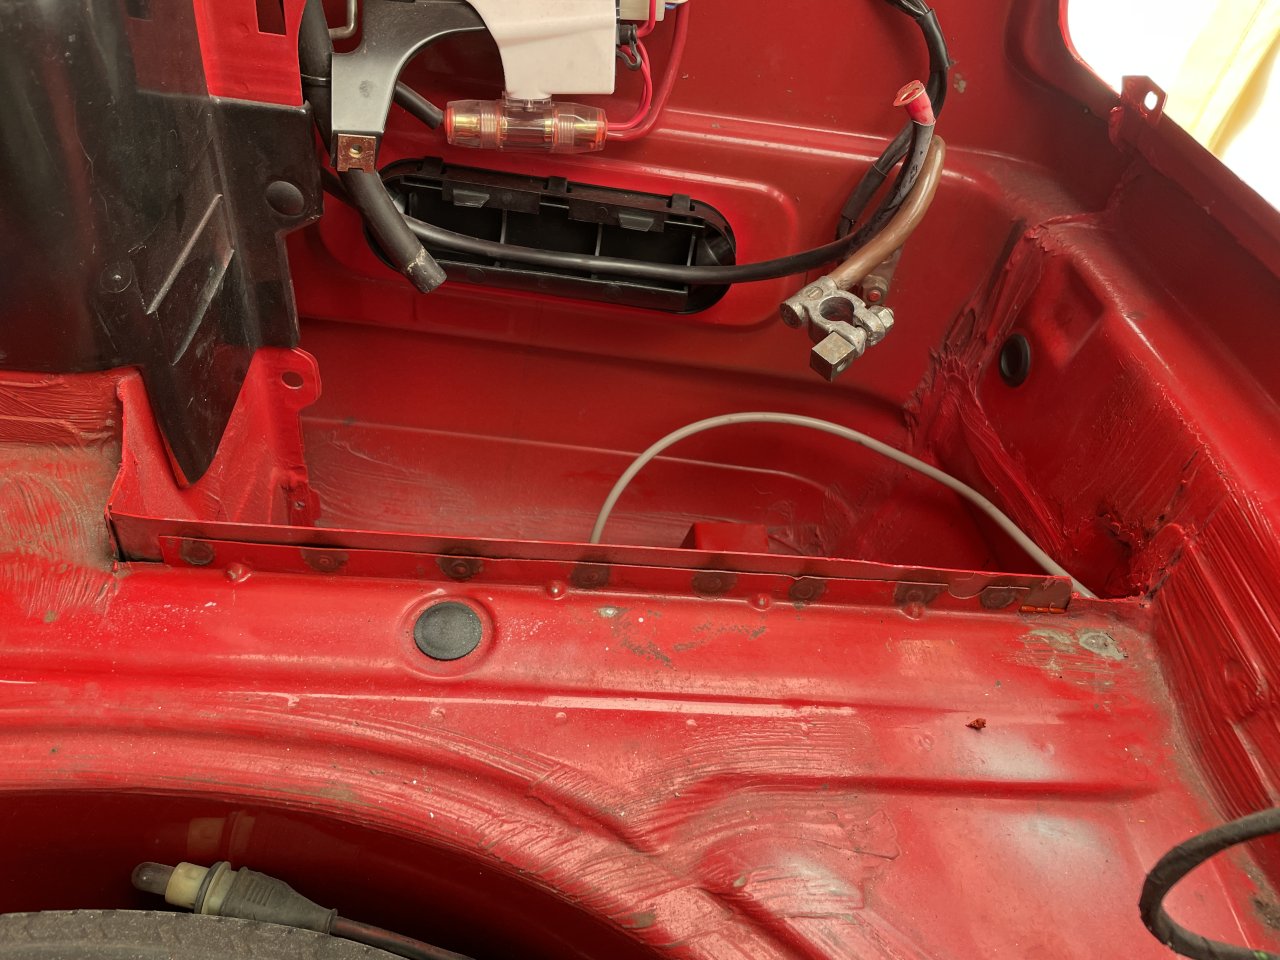
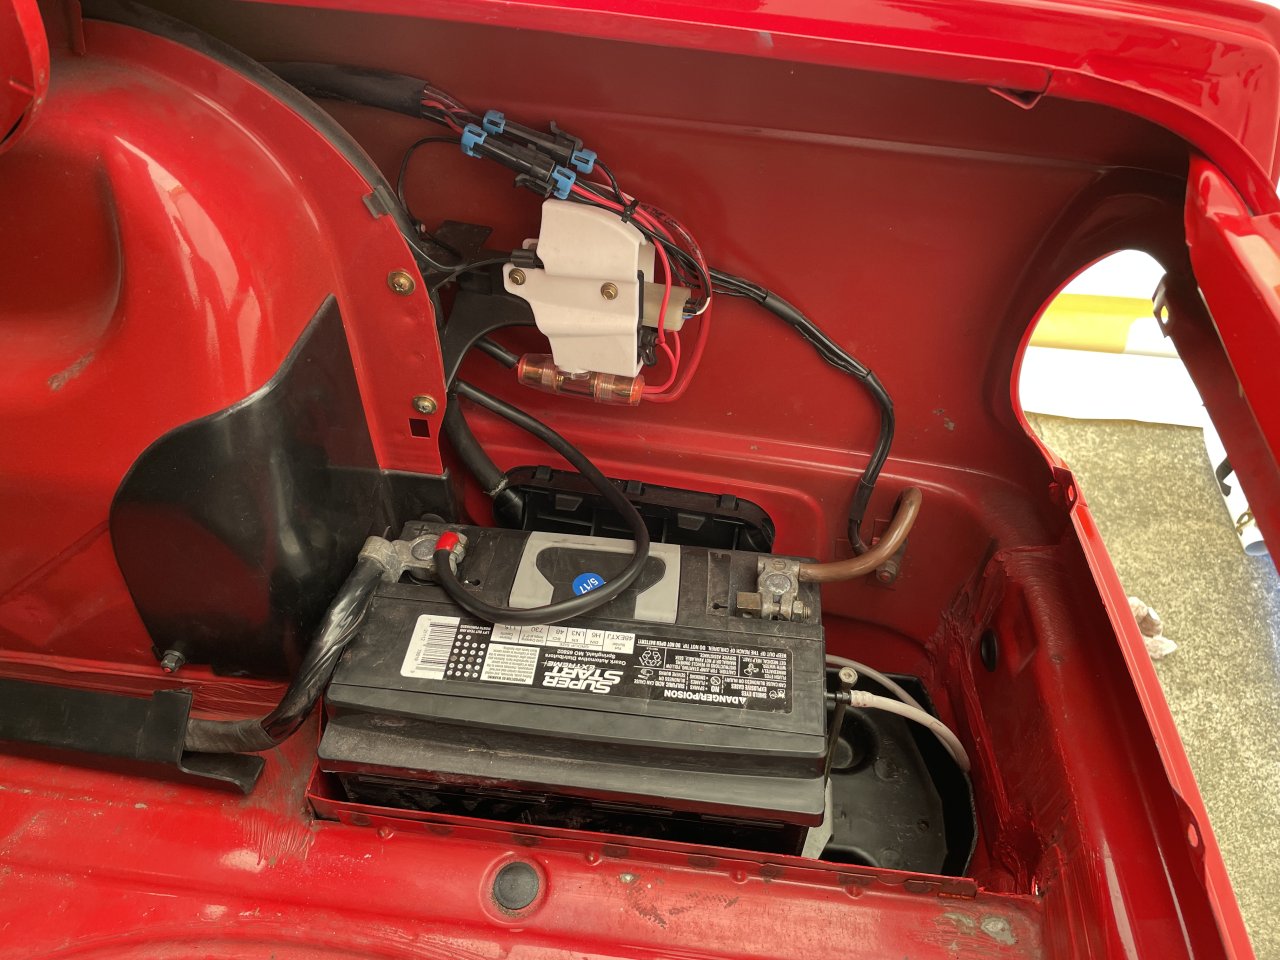
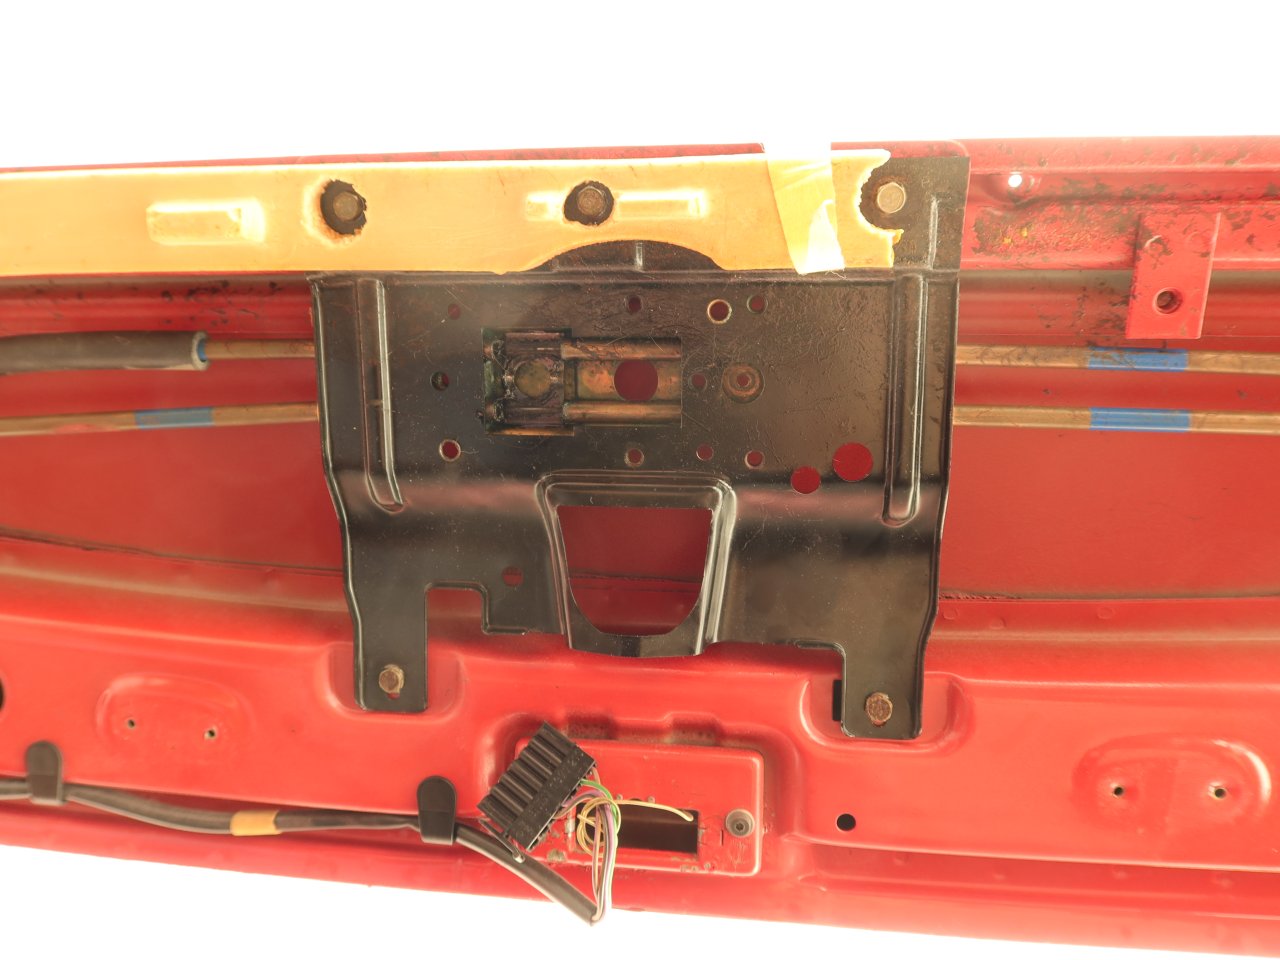
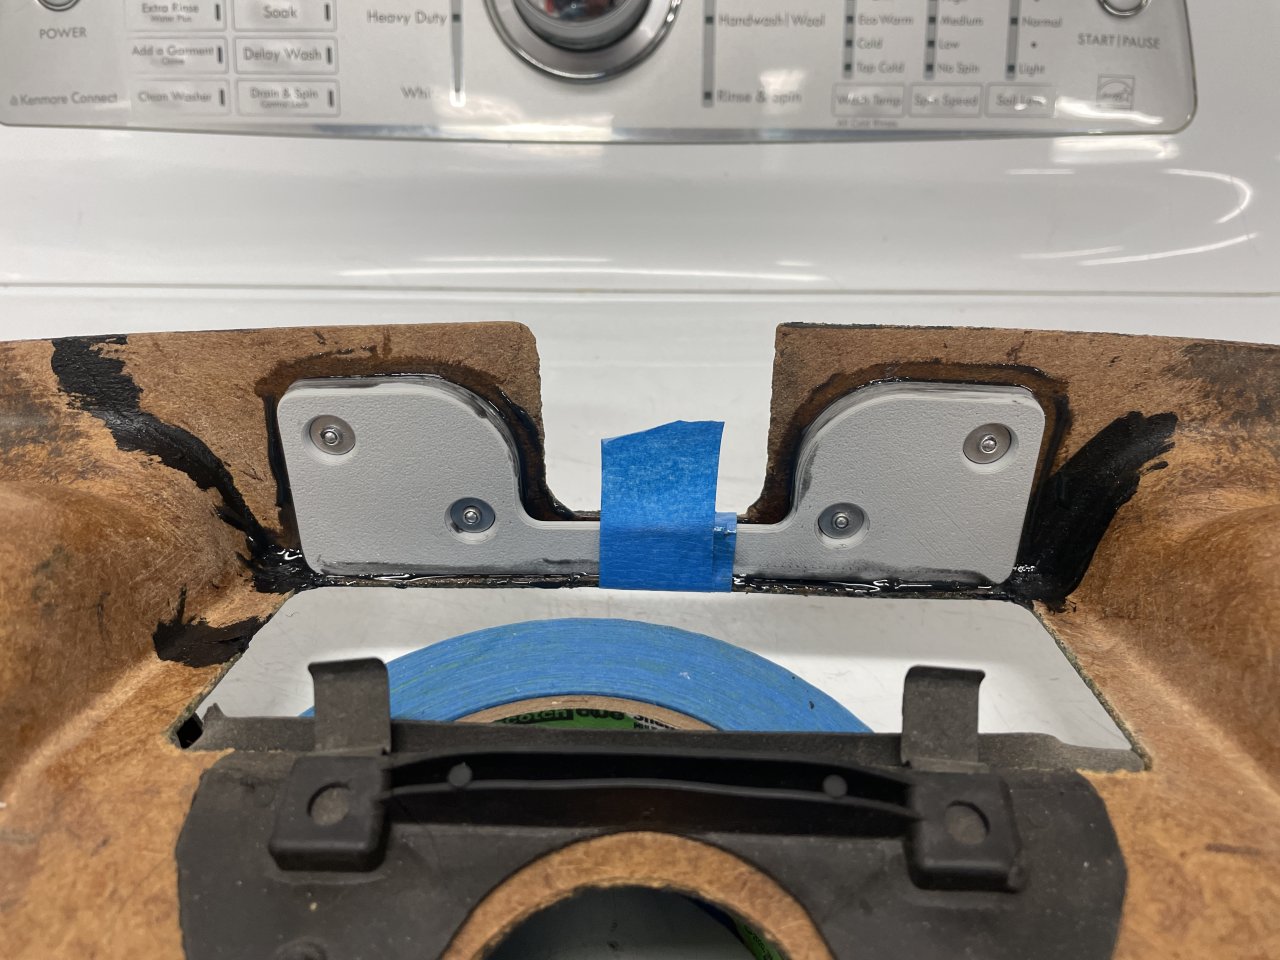
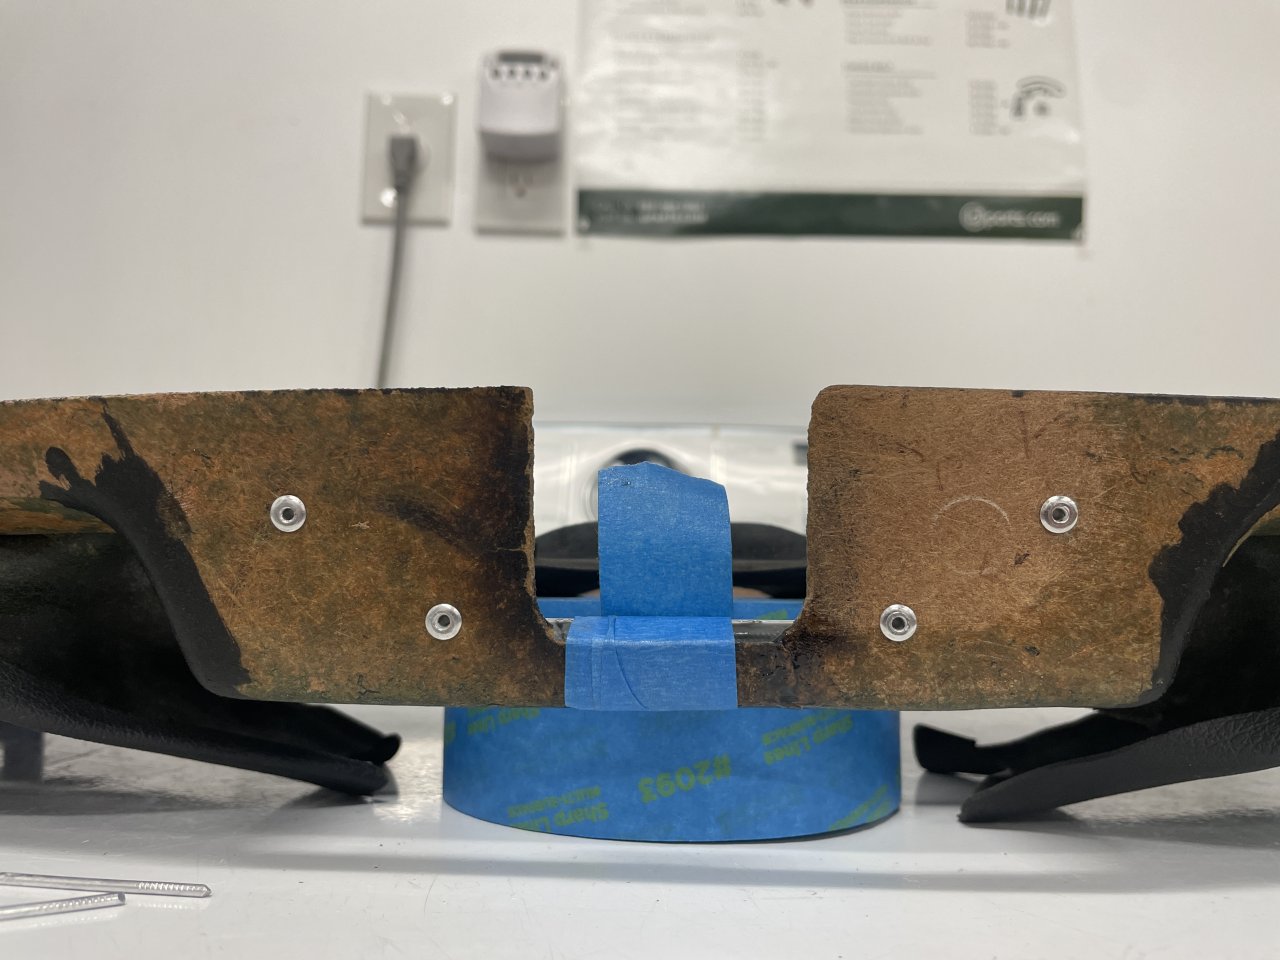
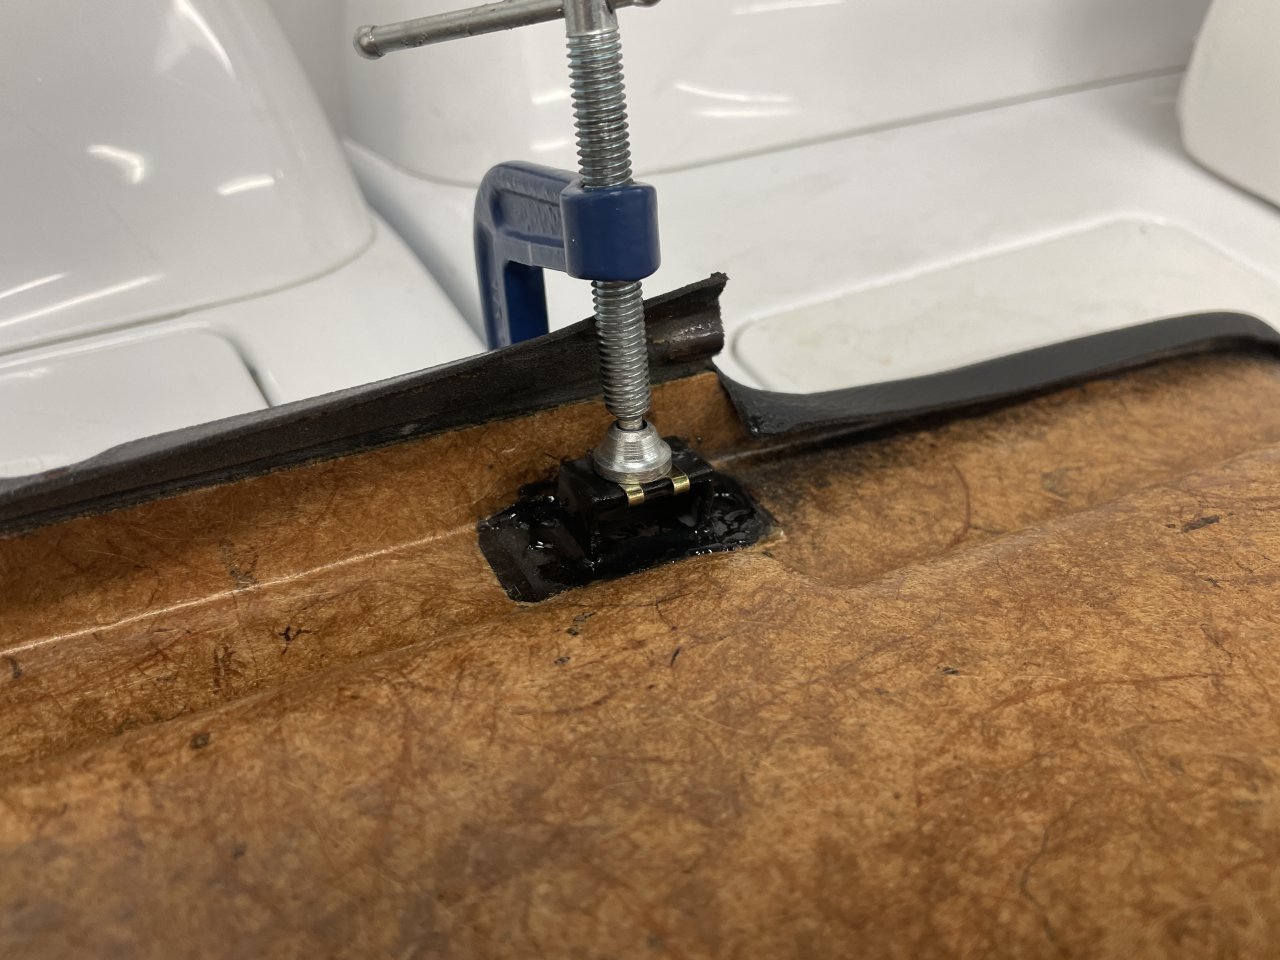
The battery tray area repair looked pretty good. They got the new body sealer in place, and unless you really know what you are looking for, you cannot tell that the repair was done. There is a weld line there from the factory, so they cut things at that line and welded the new metal in along it. There was also a sort of crunched part of the front of the battery tray recess, maybe from kicking up something from the road in the past. They straightened that out, too. The only quibble is that they did not really take much care in putting the metal body plug back in and it was definitely not water tight. But, no big deal, I used some Permatex Ultra Black RTV to seal it in and properly bent the 4 metal prongs to grip the body.
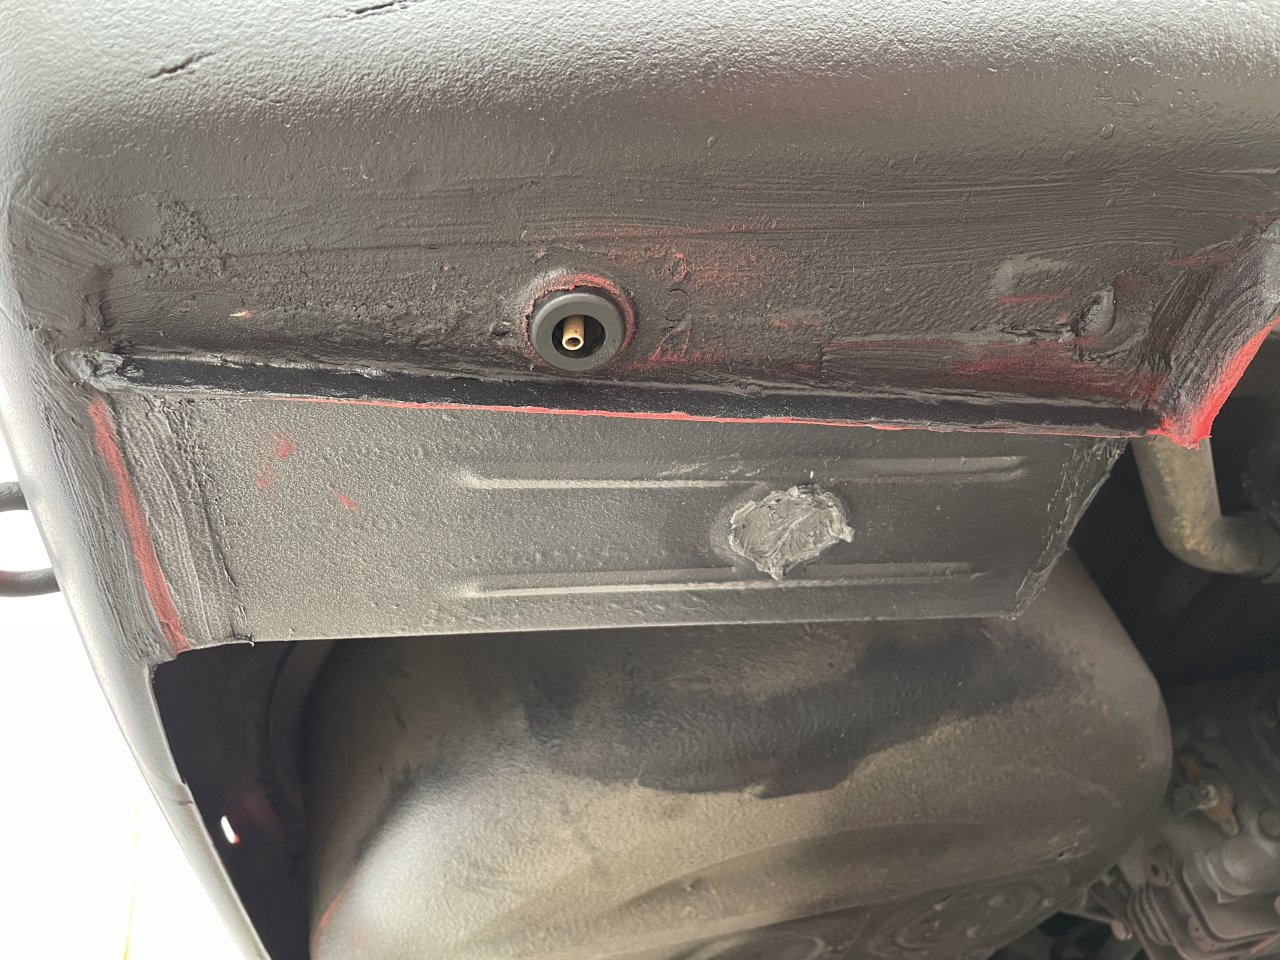
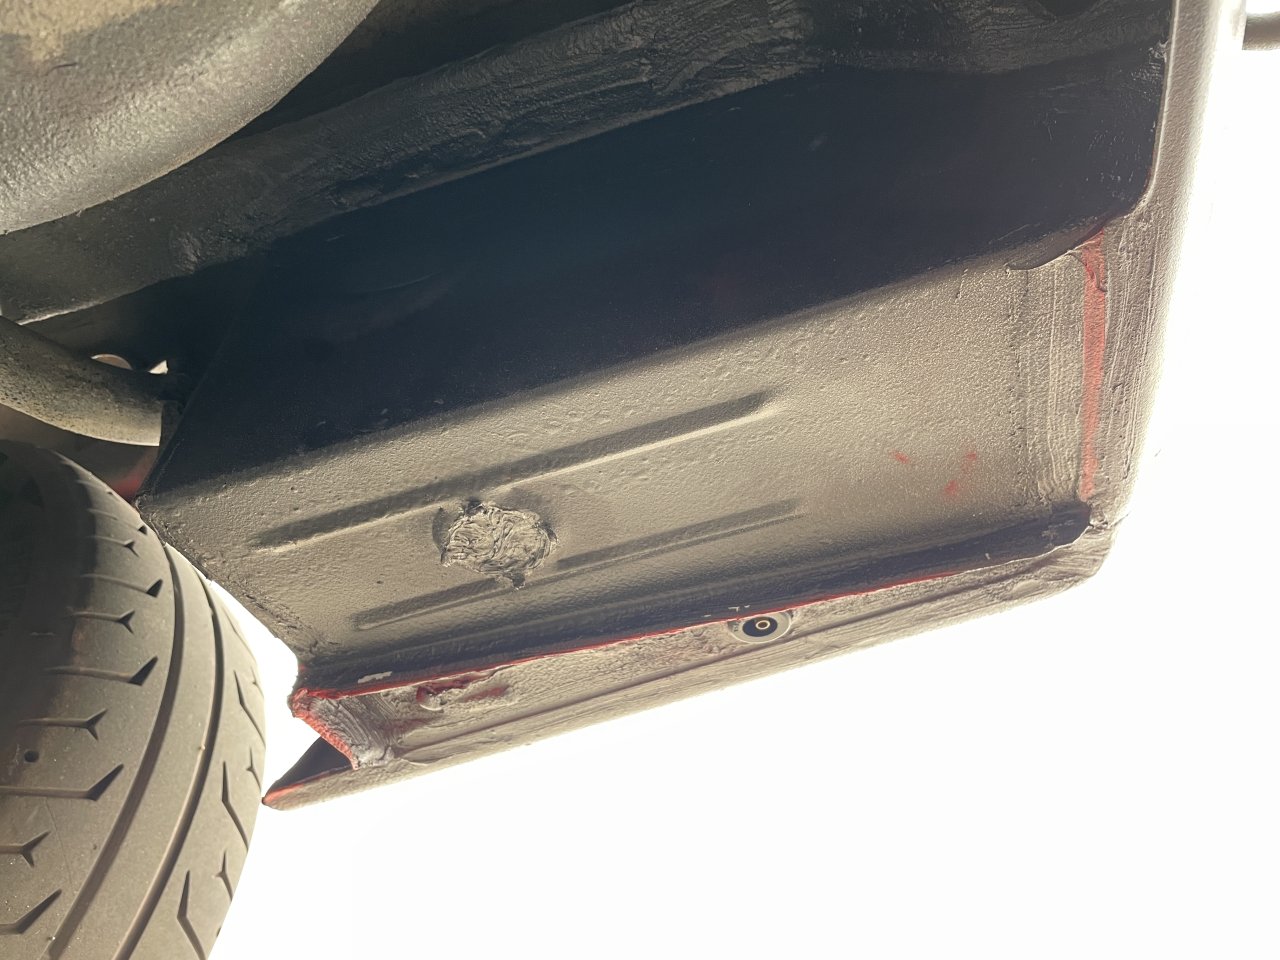
Due to the replacement metal being replica parts, the tray wall is missing the 2 rectangular cut-outs for the cover clips. I may just leave well enough alone here since the carpet should keep it in place, but I can always drill + file new openings in if I am really bothered by it. The upper rectangular hole has a plastic clip receiver in it now, so that will be fully constrained. I will also lightly sand the spot welds and hit them with some touch-up primer and paint at some point. Now that I have all new seals around the trunk, water should not be getting in, so I am slightly less concerned with rust back there.
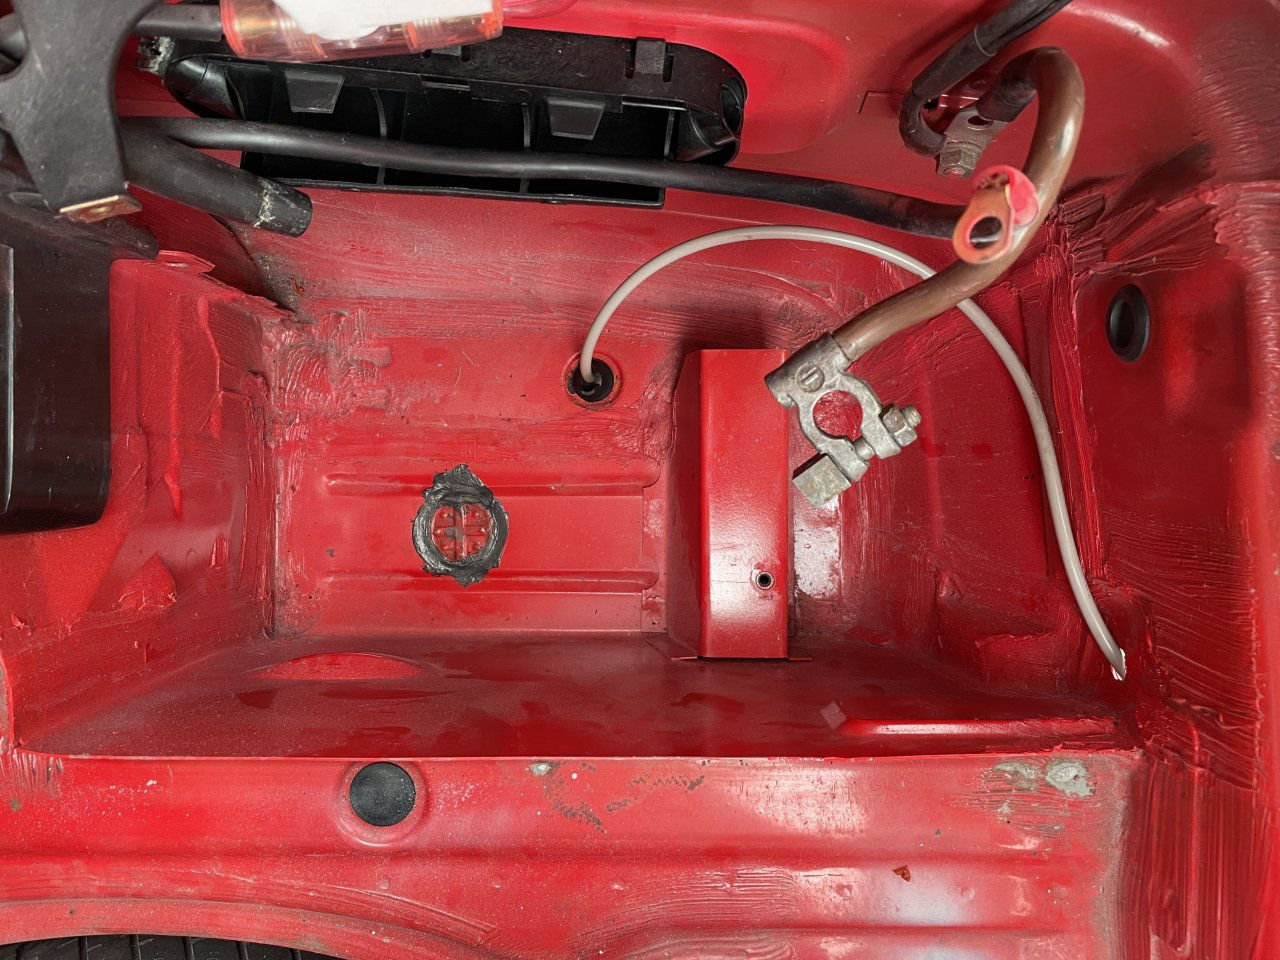
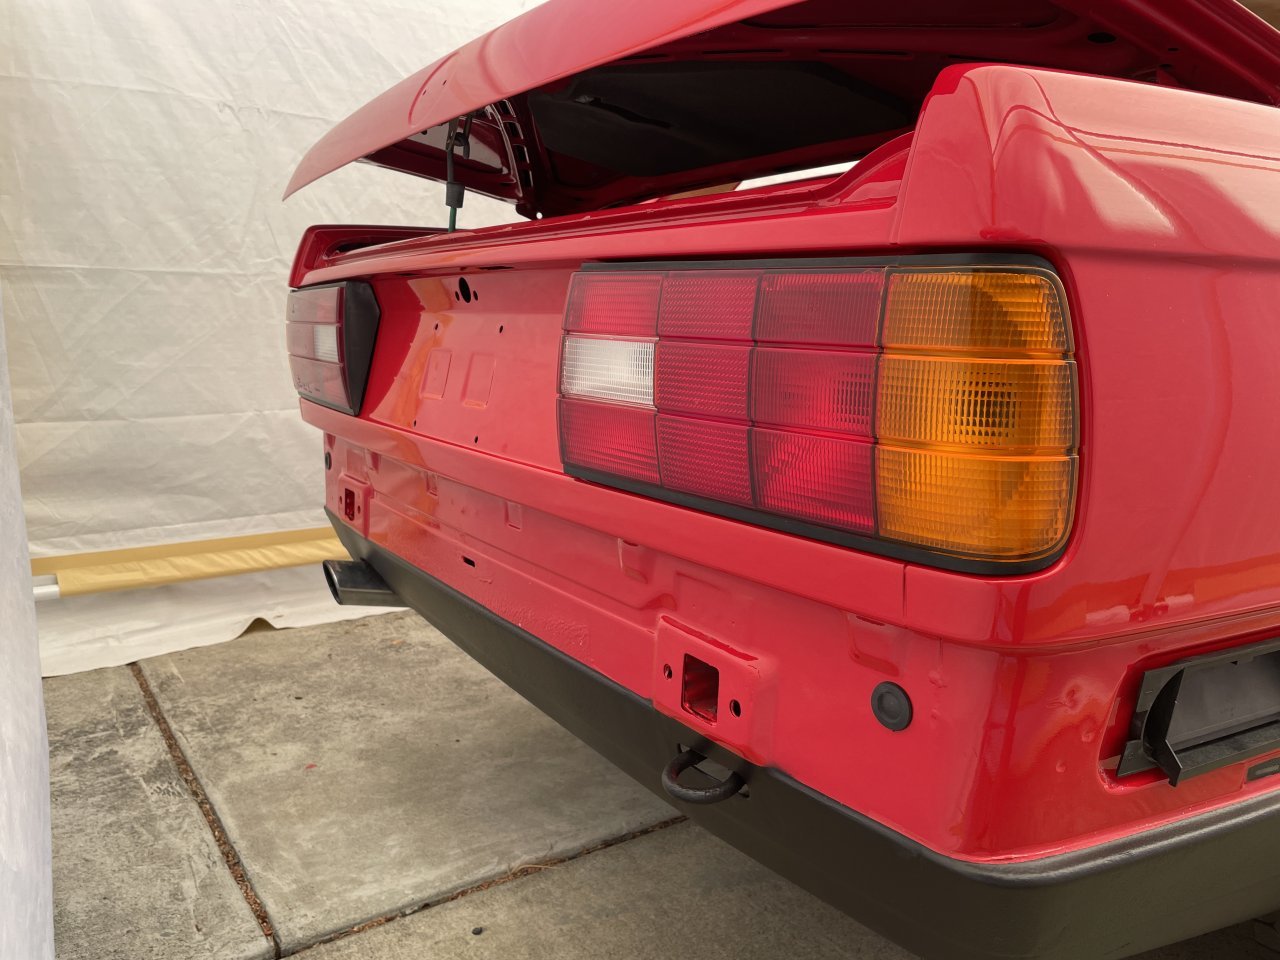
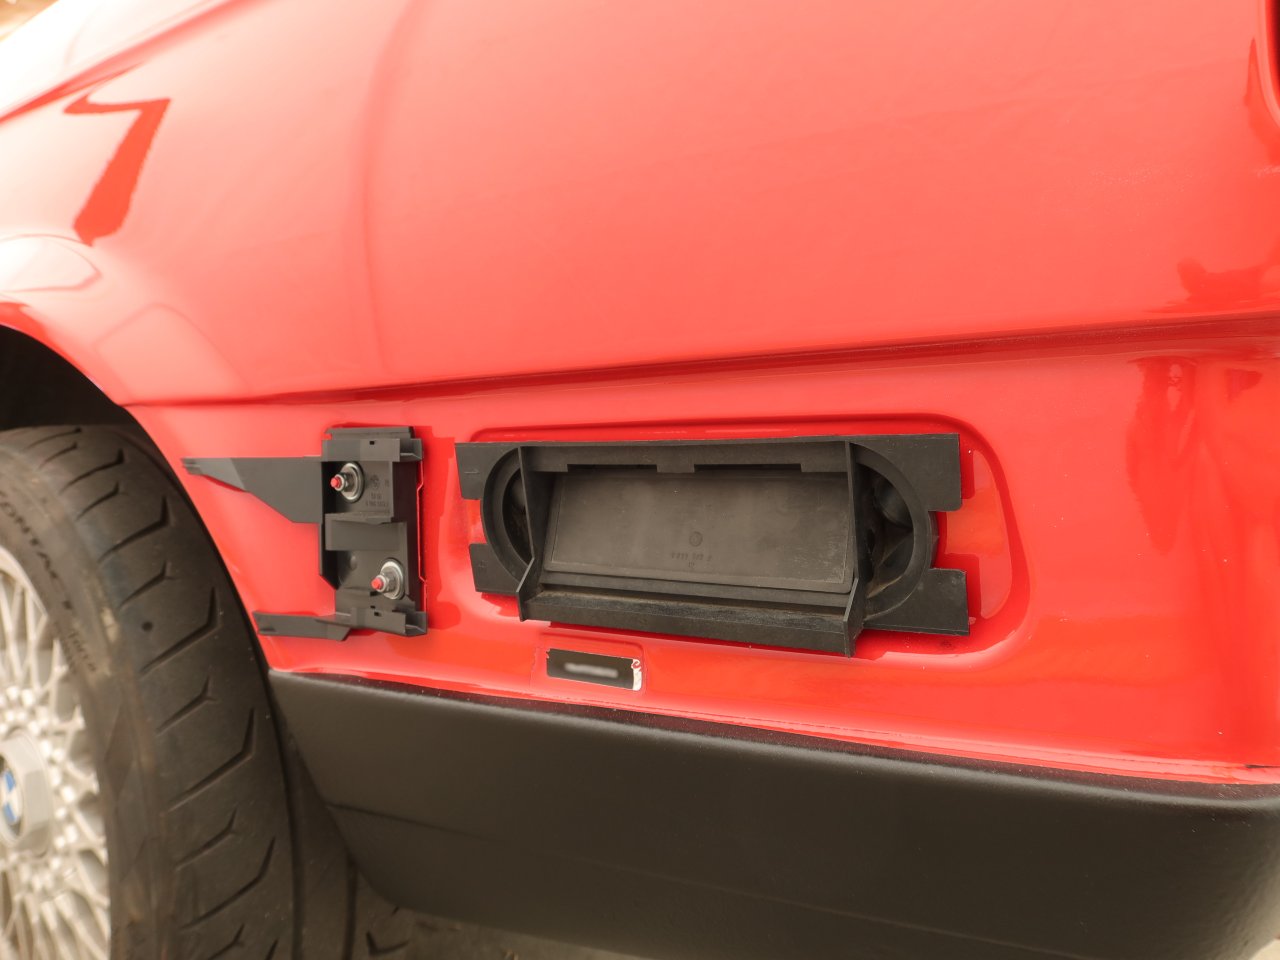
So the rear is looking pretty good now with the repair. Since I have the Euro bumper trim inserts, there is no use for the rear side marker lights. Up to now, I had just tucked them in to the bumper, but I never really likes having those loose in there. So, I found some perfect rubber sealing grommets to fill the holes with and tuck the marker light pigtails up inside the trunk with the rest of the harness.
Grommets: https://www.mcmaster.com/7291N43/
I forgot to post these earlier, but the shop did a really nice job of wrapping all of the miscellaneous piece parts. It was like Christmas in August!


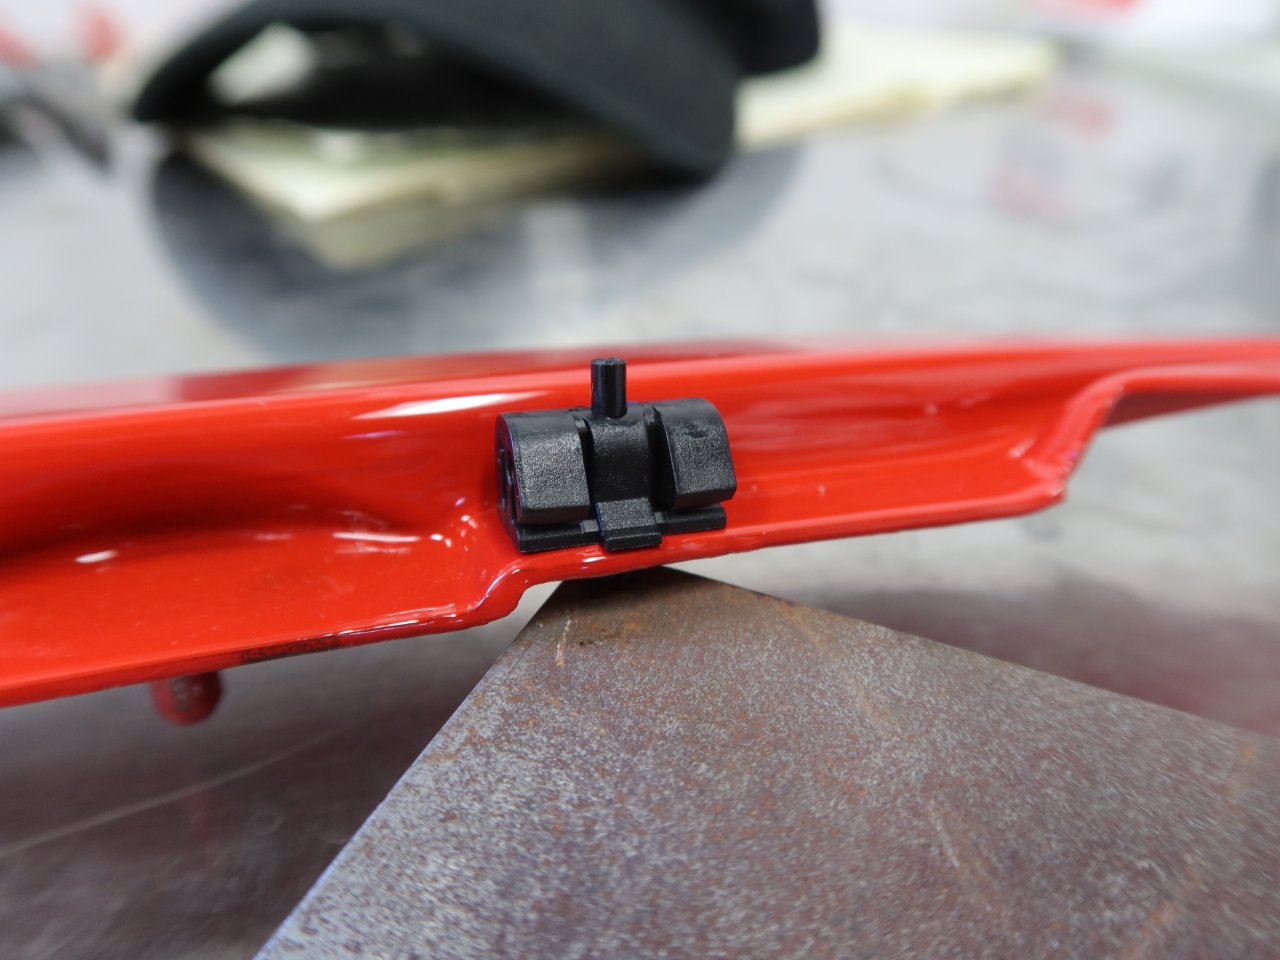
One of the more interesting little bits of reassembly was putting the new clamps in for the trim piece that lives behind the rear side windows. These little clamps are what secures the black strip to the body-color part. Removing the old ones was a bit of a chore and I do not think that there is any way to do it without destroying the clamps. The new clamps were a little bit of work to put in as well, mainly because the little plastic locking pin is really hard to get into place. It required a hammer, and since I am not interested in wrecking the fresh paint, I needed to use a little punch and set the part carefully on the corner of some scrap metal to avoid bending the carrier or scraping the back side. These little trim pieces are ones I hope to never have to do again. Also, I am not sure if I can even remove them from the car without ripping the bottom metal post off given how tight of a fit it is in the round plastic grommet thing in the C-pillar.
New door trim clips got installed as well. These are, thankfully, easy to do. Be warned though...get them on in the right place and in the right orientation, because removing them will scrape through the paint down to the metal as I learned when I took the old ones off.
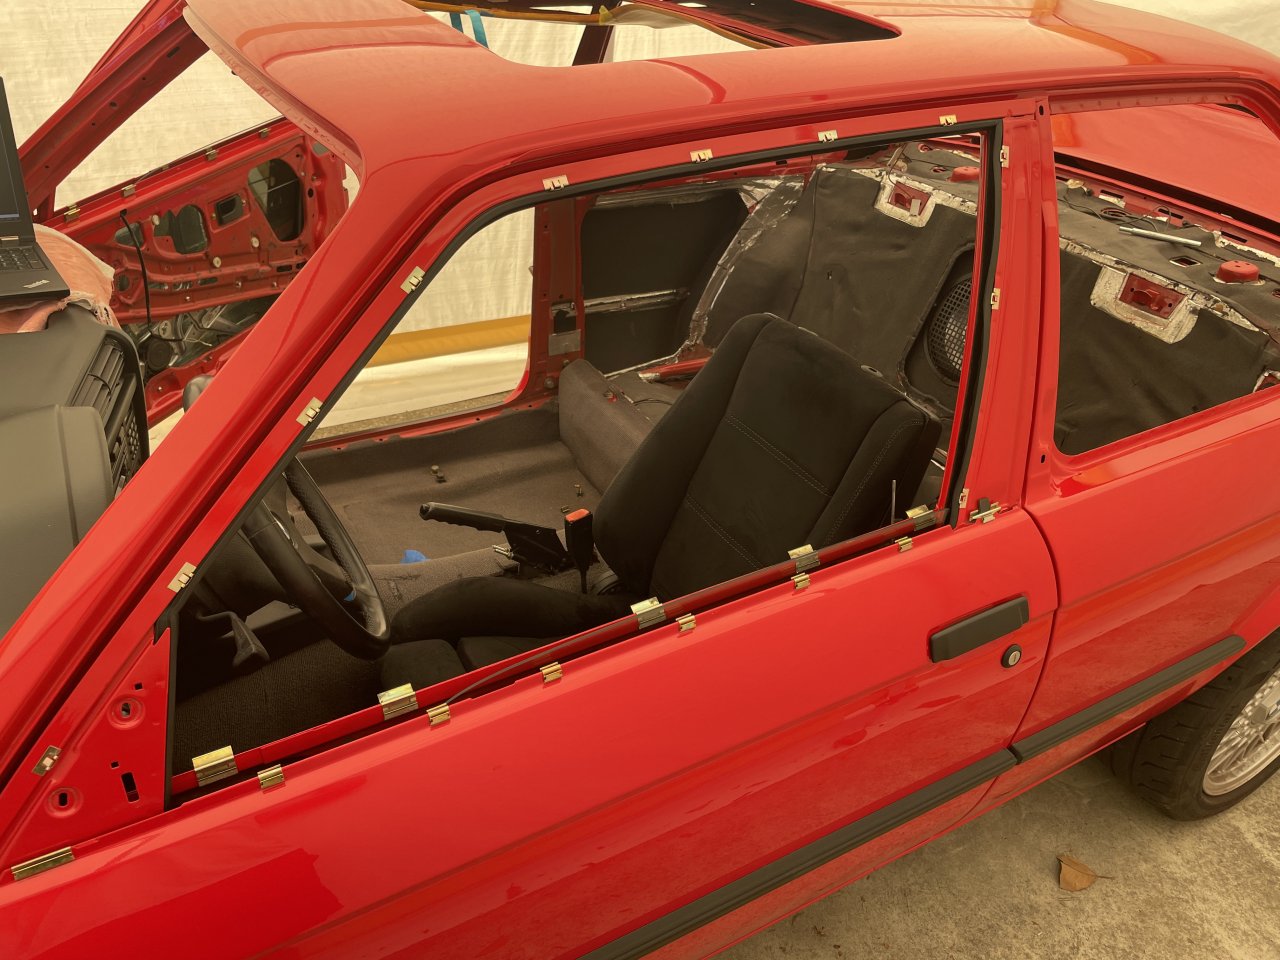
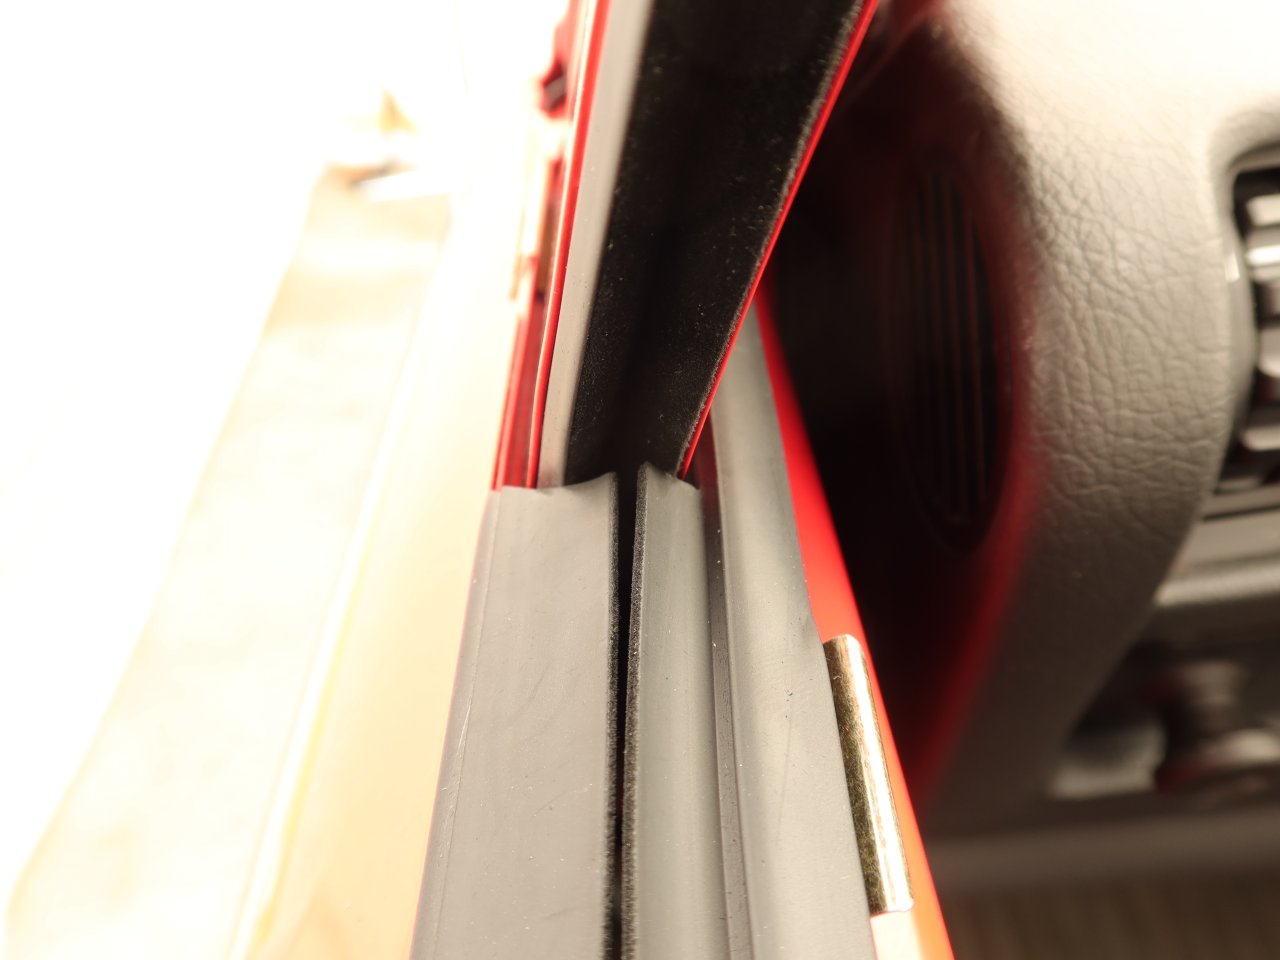
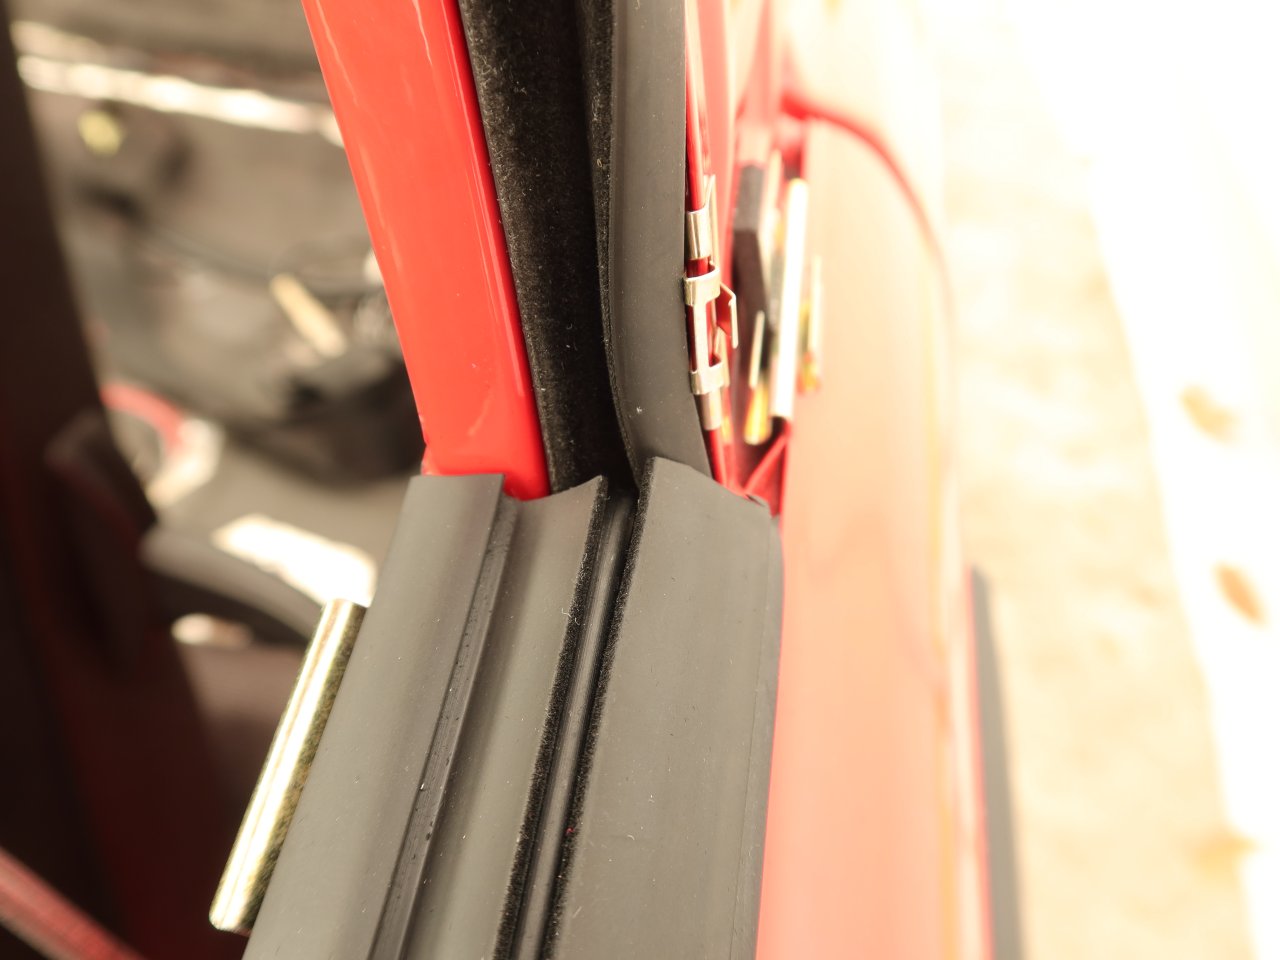
Getting the inner and outer bottom window seals in was a little bit of a chore, the outer ones less so than the inner one. They are both made of some thin aluminum which is over-molded with rubber. The clips that they slide into are pretty tight, so you need to work each one a little at a time so as not to bend or distort the aluminum carrier inside the seal. The driver's side went on without any issues, but the passenger side took 5 tries. The first 4 attempts caused it to bow out in between a couple of the clips, so I had to carefully pull it out, straighten it (or as I finally found, pre-emptively bend it to counteract the curvature from installation. The other thing is that the passenger side one was ~5mm too long to fit properly, so tin ships were needed to remedy that. Also, the fuzzy rubber flaps were not cut super well and were a little too long, so some careful trimming with scissors at the ends. But, despite this, I think that less water will be getting in to the doors now since the old seals were in pretty bad shape!
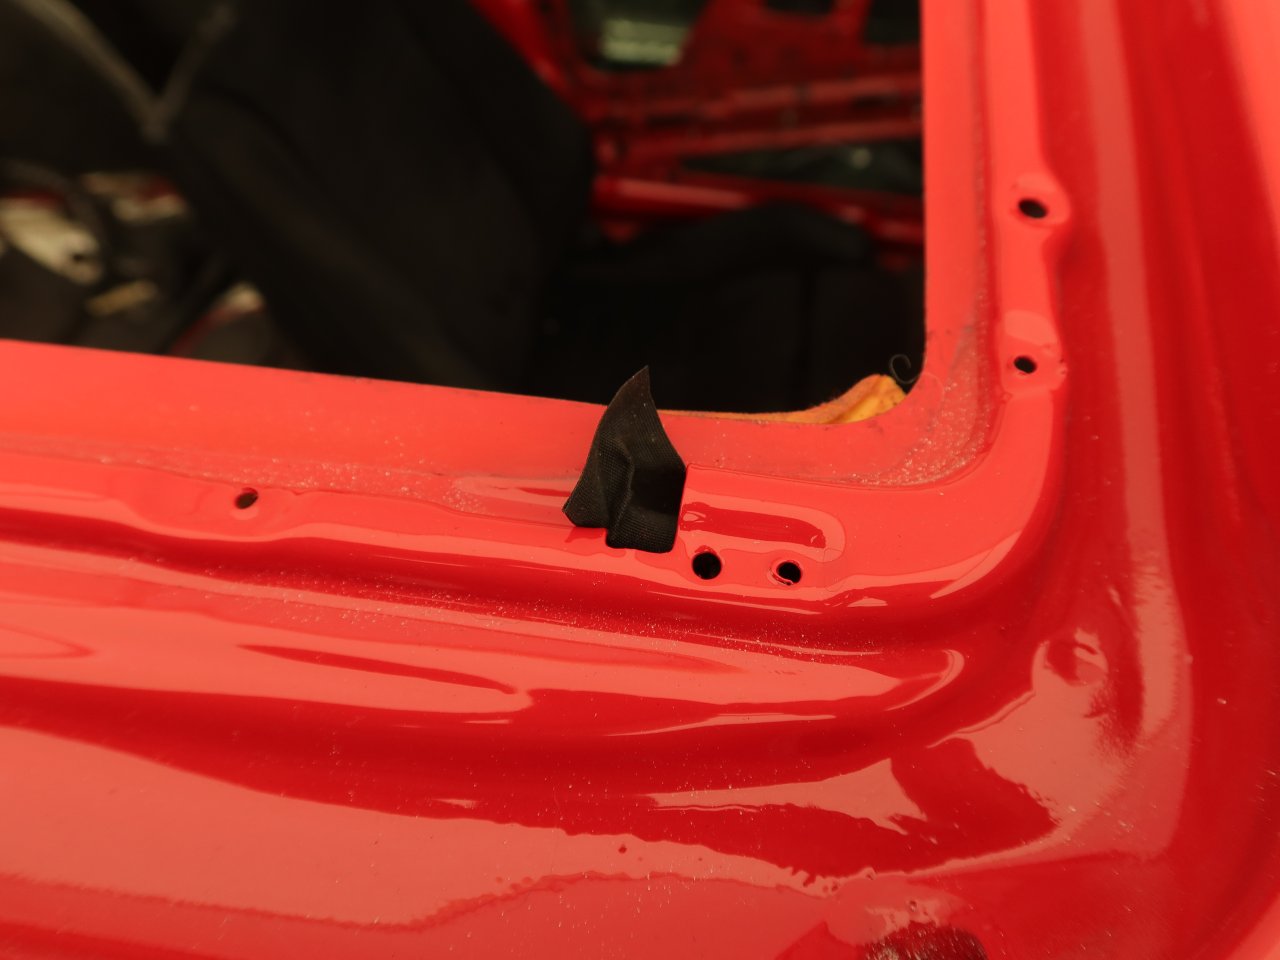
I made an oops when getting the pins back in to stopper on the passenger side. One downside to doing the reassembly in the porta-garage is that I cannot open the doors fully. When trying to hammer in the pin on one side, the hammer jumped and gouged the new paint in the jamb. Luckily, I have a touch-up kit on hand. And, since the paint on the car is new and mixed to OEM color specs, the touch-up paint is a perfect match! Other than the surface texture being a little wavy where I hit the paint, it is something that only I will ever notice.
At the recommendation of the body shop, I got my touch up kit from here (primer + base + clear). The touch-up paint smells like cancer, so it must be the good stuff.
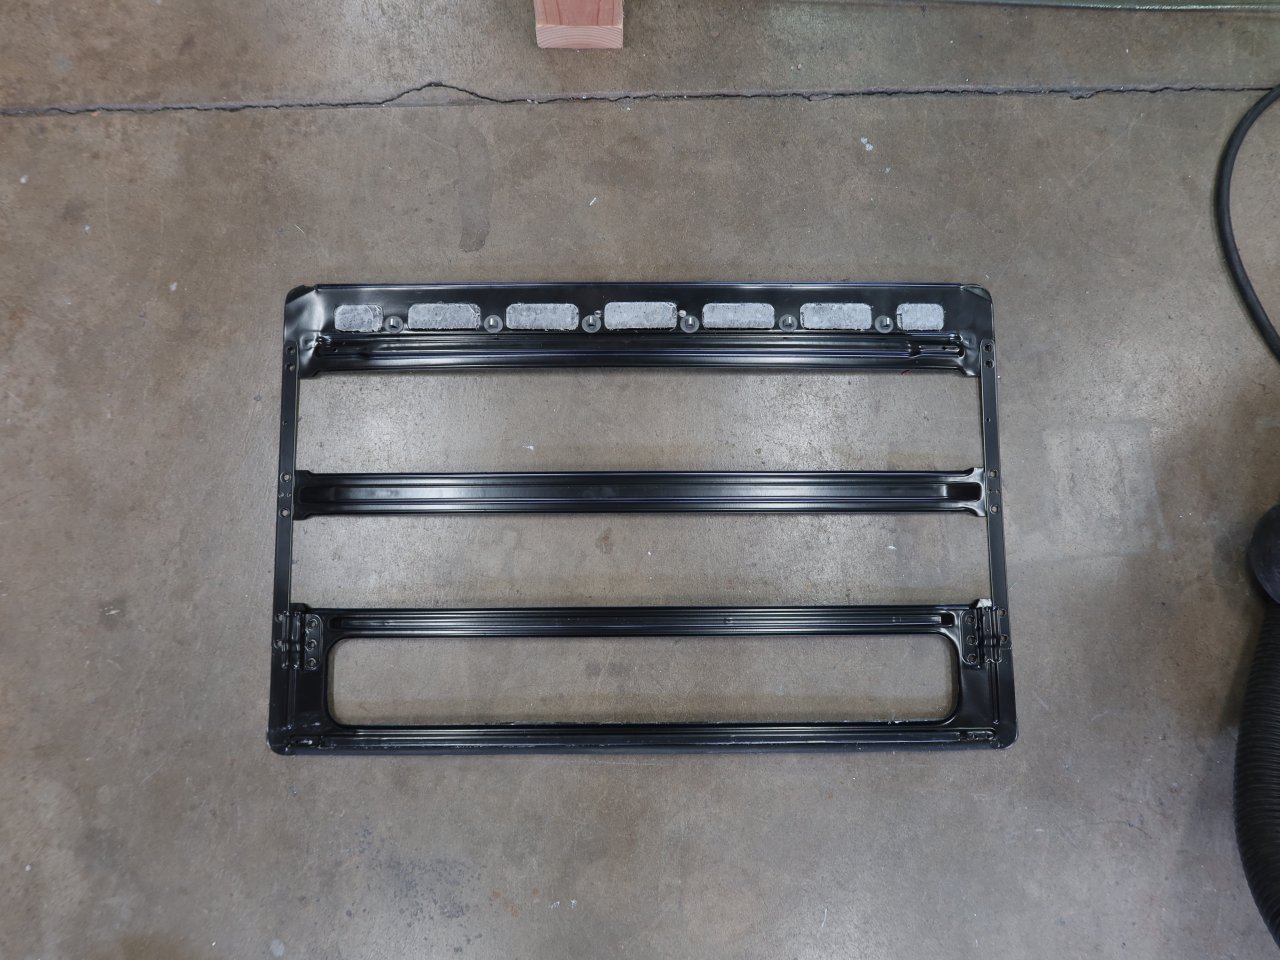
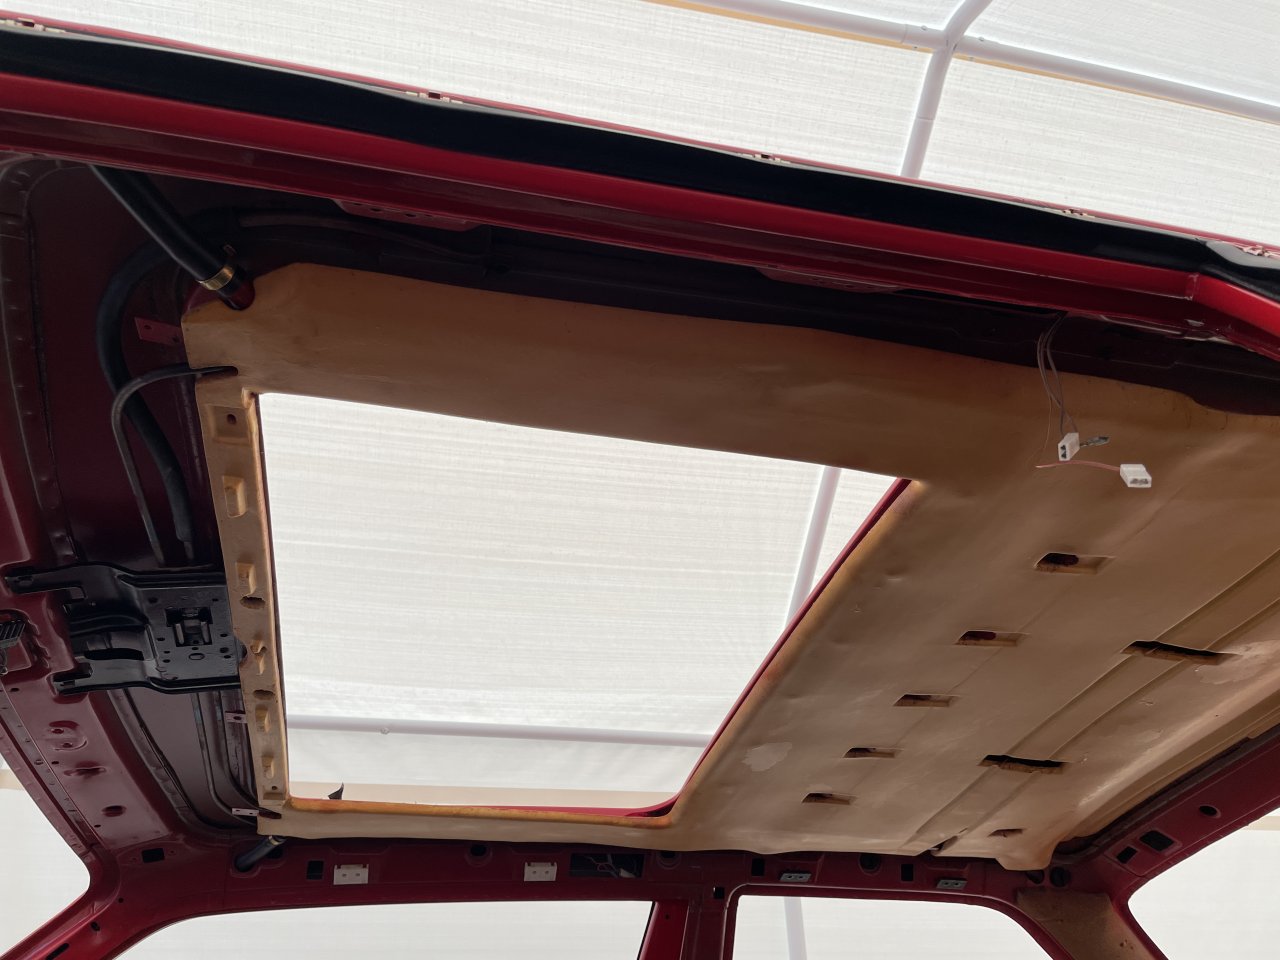
One of the last things that I will put back in the car is the sunroof assembly since that must be done after the new headliner. But the manual drive mechanism has to go in before any of that. I am going to need to spend a little time up there with some brush-on contact cement in order to get the foam panels back into place. In hindsight, it was totally unnecessary to drill the little holes in the foam strip to get at the screws for the mechanism, since the foam ended up breaking loose. Live and learn lol.
The little copper tubes for the sunroof cables come out of these openings in the sunroof cassette. However, the tracks need to get inserted under them which I found to be a hassle to deal with. For now, I have wrapped the ends in some fabric harness tape to protect the paint, and stuffed them into the interior where they will not obstruct the tracks during reassembly.
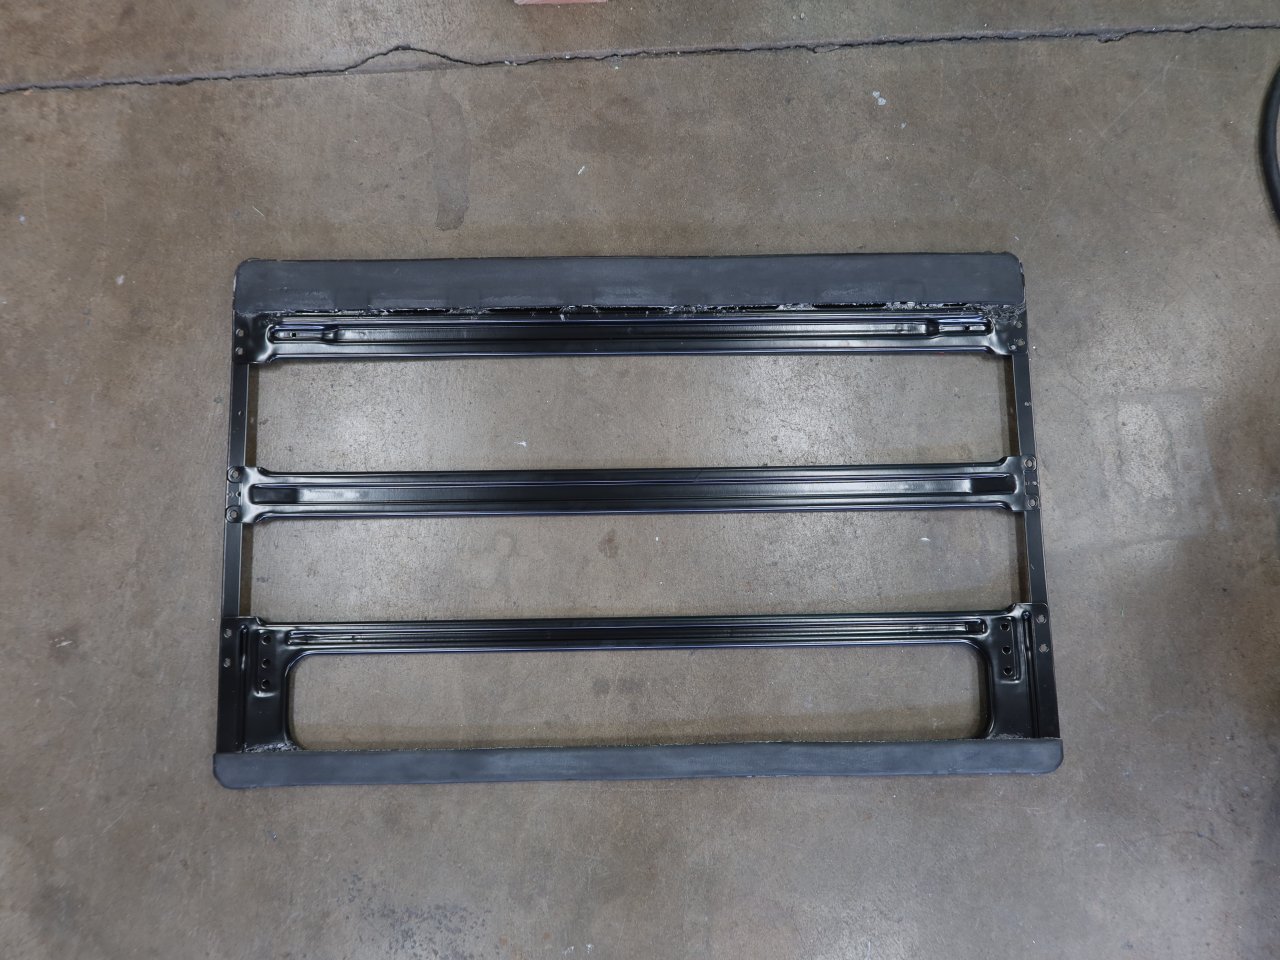
A while back I had all of the various steel parts from the sunroof area stripped and powder coated. The really important item in this regard was the frame for the sunroof headliner panel...I wanted all of the old adhesive and grime removed so that the new fabric can be secure glued into place. Also, surface rust had started here and there, so this should provide a solid barrier. I glued the rubber trips back into place with some 3M 90 strength contact cement spray.
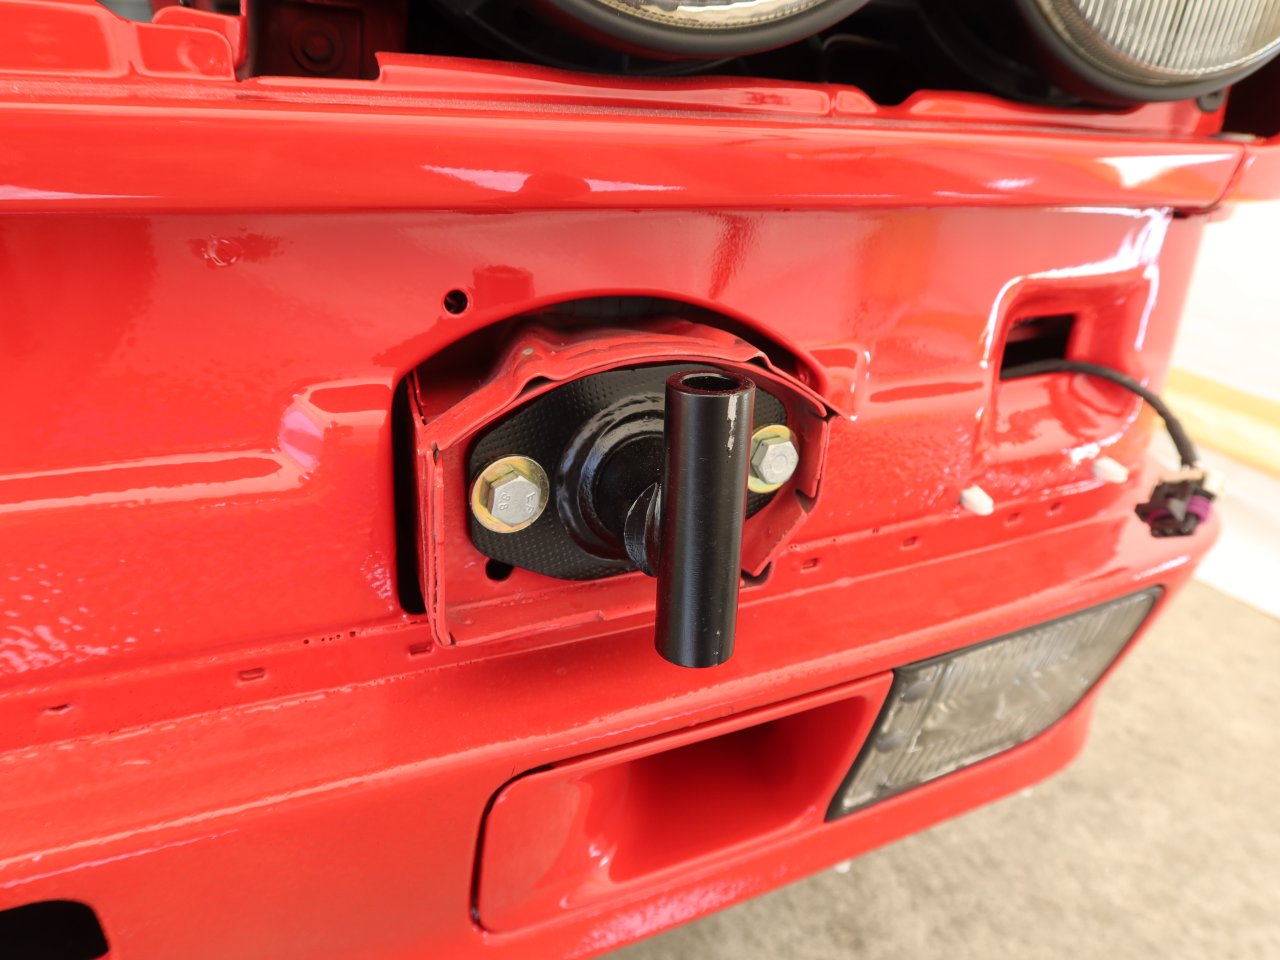
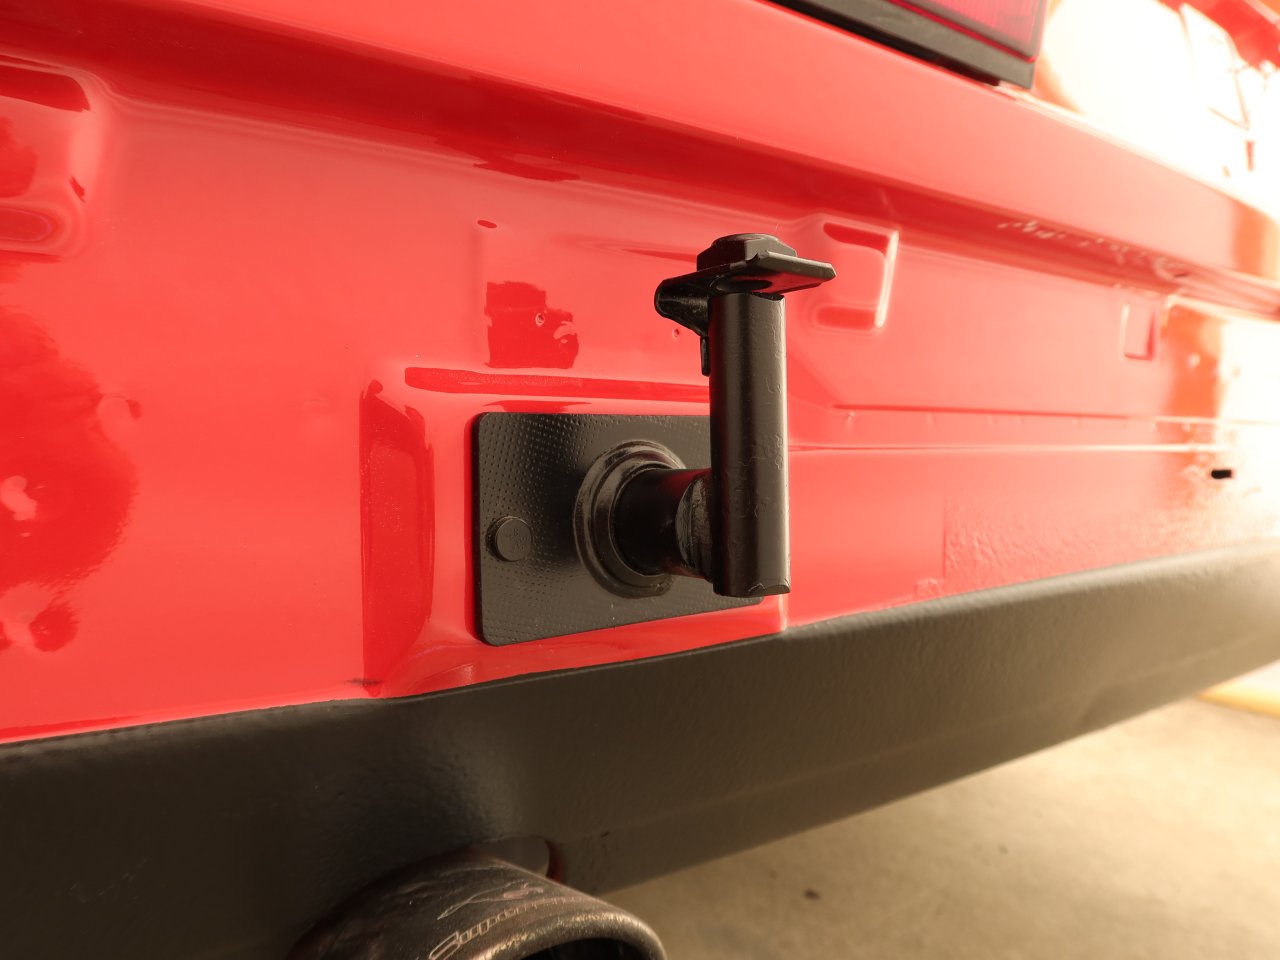
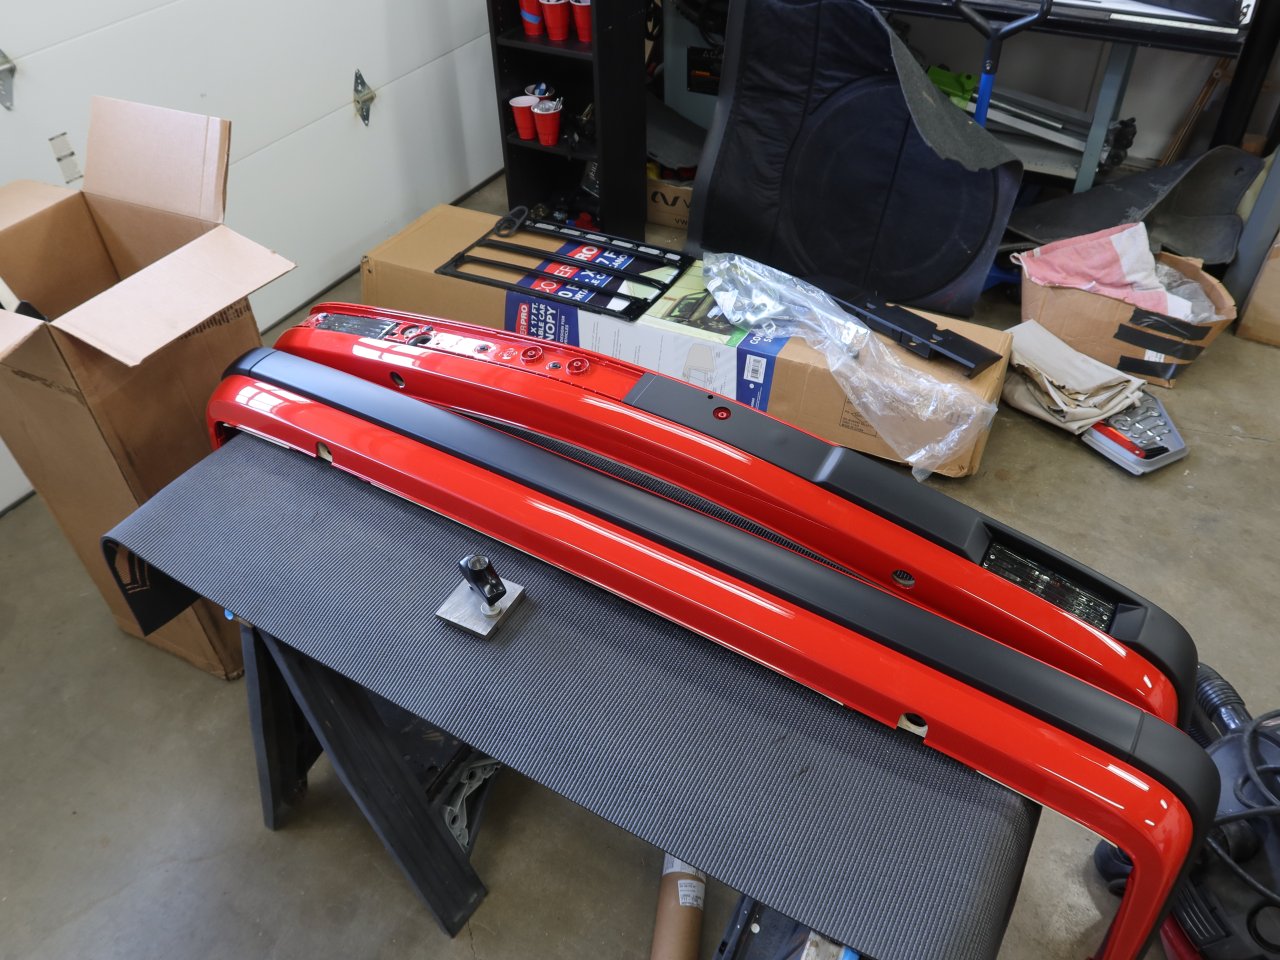
My bumper shocks look pretty nice with the SEM Ultra Black satin trim paint. The front ones need a little touching up as they got scraped when I was test fitting the bumper. I find that spraying a Q-tip with the paint and dabbing it on works great for touch-ups. Also, nice new fasteners make me feel good lol. No more nasty rusted crap in there. In the rear, a couple of the nuts with integral washers were rotted out, so they needed replacing anyway. Clean threads made for much easier reinstallation versus the headache of removal.
Same deal for the bumper mounts...nice new fasteners. Also, I put in new rubber seals around the sunroof drain outlet things. The old ones were coming apart, and probably letting water in. If you do yours, always remember to put the butt-joint of the seal at the bottom so that if (when?) it breaks, the gap is at the bottom. The outlets themselves were in perfect shape, and just needed some scrubbing with Simple Green to get them cleaned up.
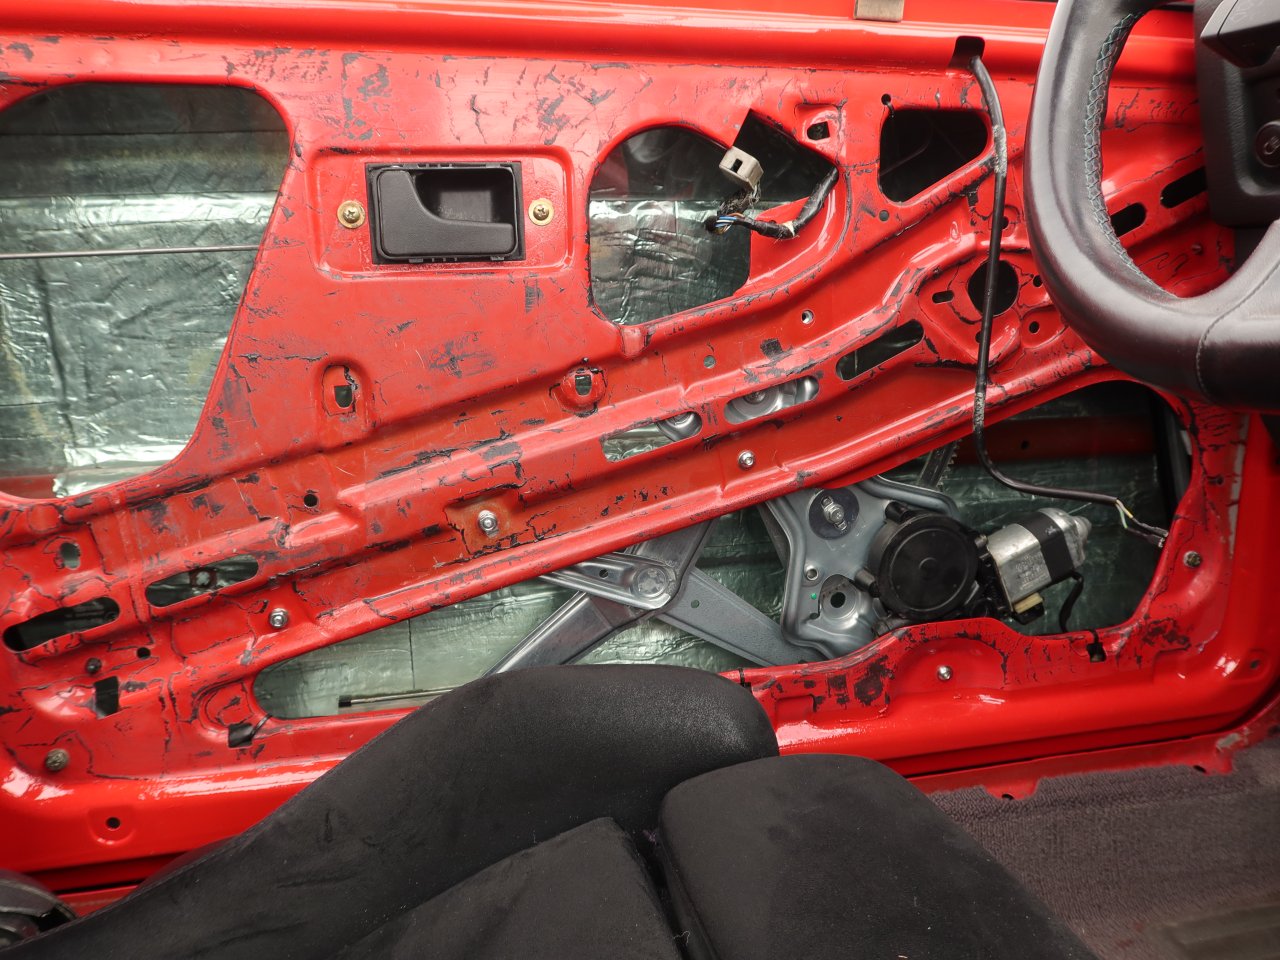
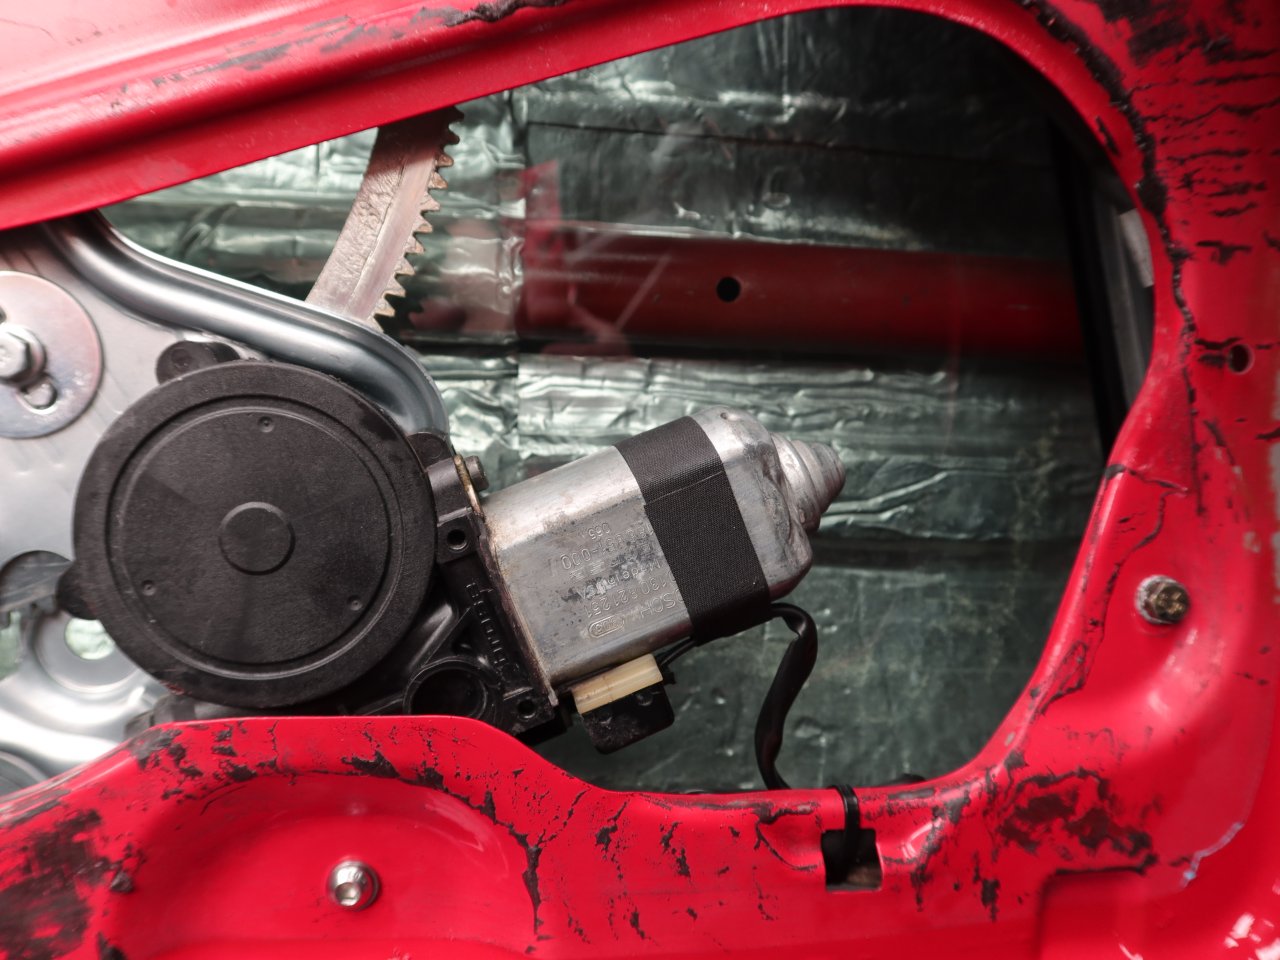
I replaced the window regulators with new ones since the old ones were getting to be in pretty sorry shape, particularly the plastic wheel things. The old motors were cleaned up and reused since they were in fine shape, the brushes still have a ton of life left, and new ones are some combination of NLA and obscenely expensive.
The bumpers will go on the car soon too, but I want to be mostly done walking around it first so that I don't bang a tool into them.
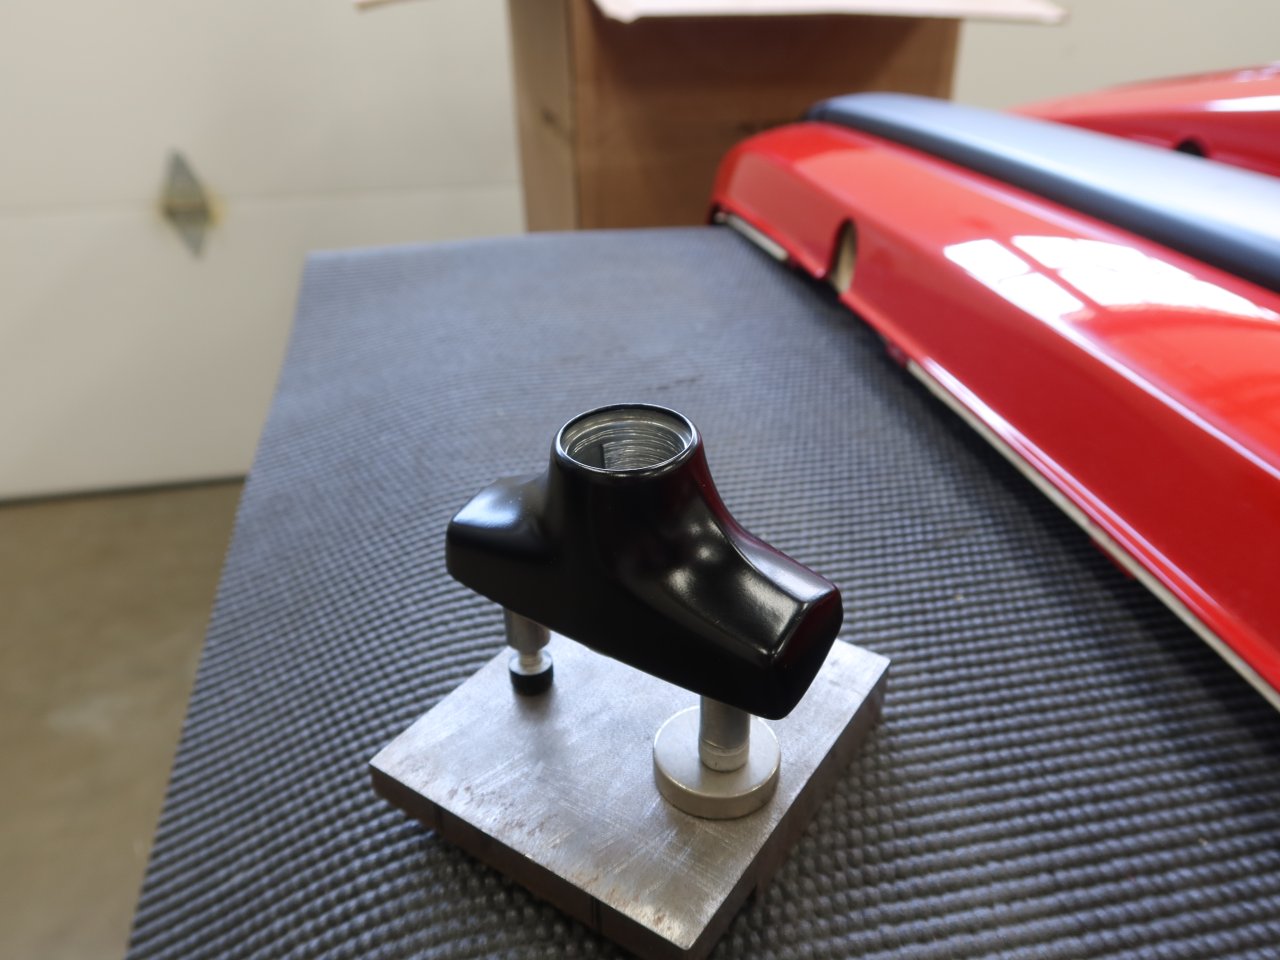
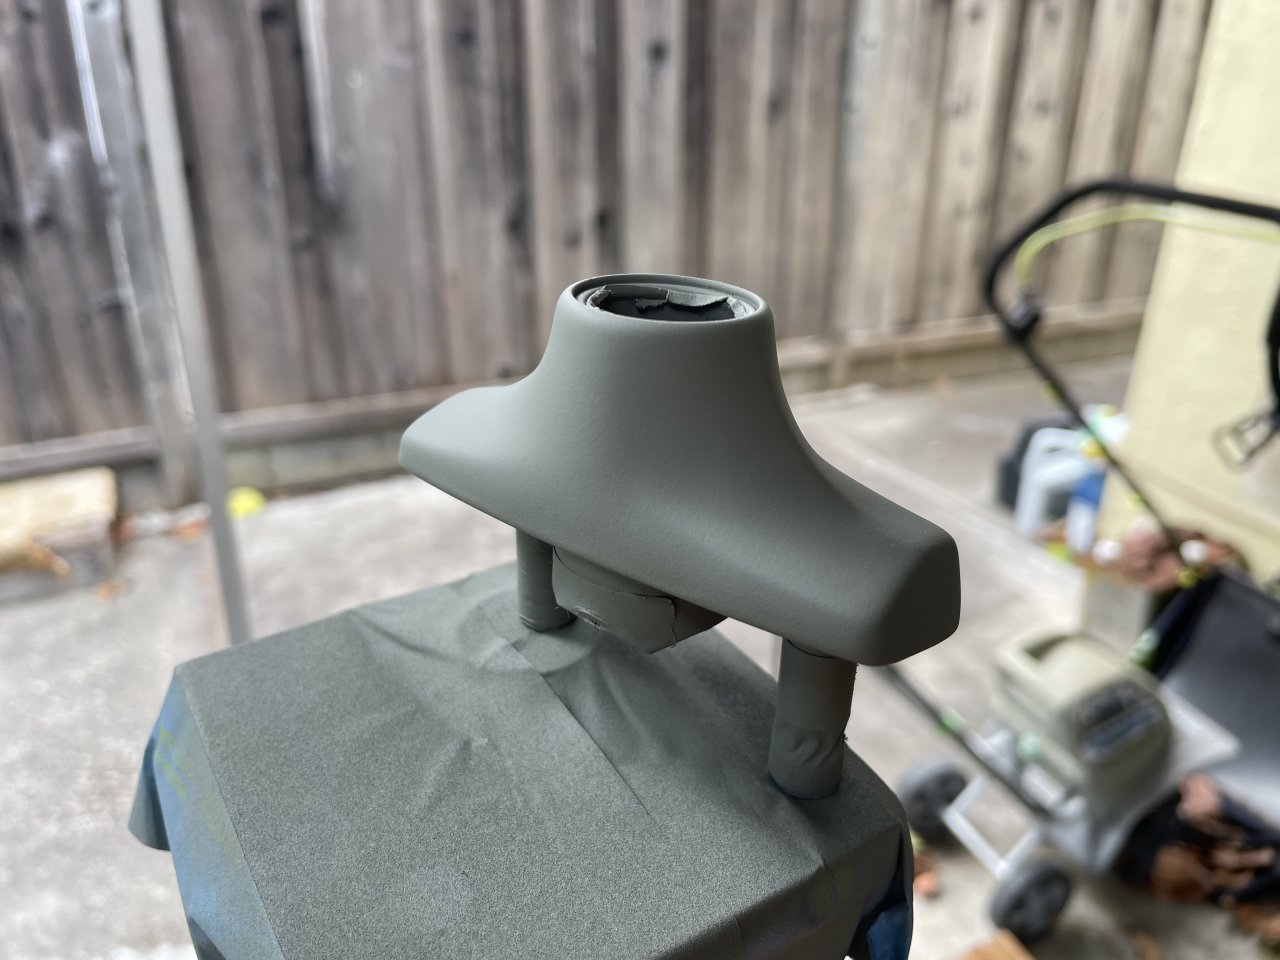
One item that I ended up stripping and doing myself was the trunk lock cylinder housing. The body shop got some paint into the central bore, which I cleaned out, but it came at the cost of chipping the paint at the front perimeter. The SEM paint is readily attacked by isopropyl alcohol (do not use it to clean painted surfaces, especially the SEM paint...it takes it right off!) so stripping it was super easy. I then spent some time masking the part, and I put in a sacrificial o-ring in the outer groove to get a perfect line there. I am not much of a painter, bit I think that it came out well.
Speaking of locks and o-rings, I found some commodity parts that are perfect drop-in replacements for the OEM ones (which do not have part numbers as far as I know). Both the door locks and the trunk lock use rubber o-rings to seal against the moving middle cylinder parts.
The doors both use a 24mm OD x 20mm ID o-ring. I used these ones: https://www.mcmaster.com/1295N247/
The trunk uses a 25mm OD x 21mm ID o-ring. Here is what I am using: https://www.mcmaster.com/1295N249/
Most moving parts, like the gear teeth and work gears in the window regulators, sunroof cables, lock cylinders, and similar spots are being lubricated with Loctite LB 8034. This came at the recommendation of our fellow member Jordan.
https://www.rshughes.com/p/Loctite-L.../079340_36781/
That is where the project stands now. This coming week I need to (successfully) SMOG test the car since registration is due very soon. I checked with a nearby SMOG tester and they do not seem to care if the windows and bumpers are missing...only that the emissions equipment is there and functioning, which it is. Once that hurdle is cleared, I should be about ready to take the car to the upholstery shop for the headliner, and after that I can put the glass and sunroof back in. From there it is just a few more little things left to do, and then I can finally enjoy the car!Comment
-
To your first question on the mystery part, I am 99% those are door hinge shims. Did they return a few or just the one? Car looks great, it must be so satisfying putting that back together. I have owned my 318is for 14 years now and some day I will experience this level of joy...Comment
-
I knocked out a couple of small things today after work.
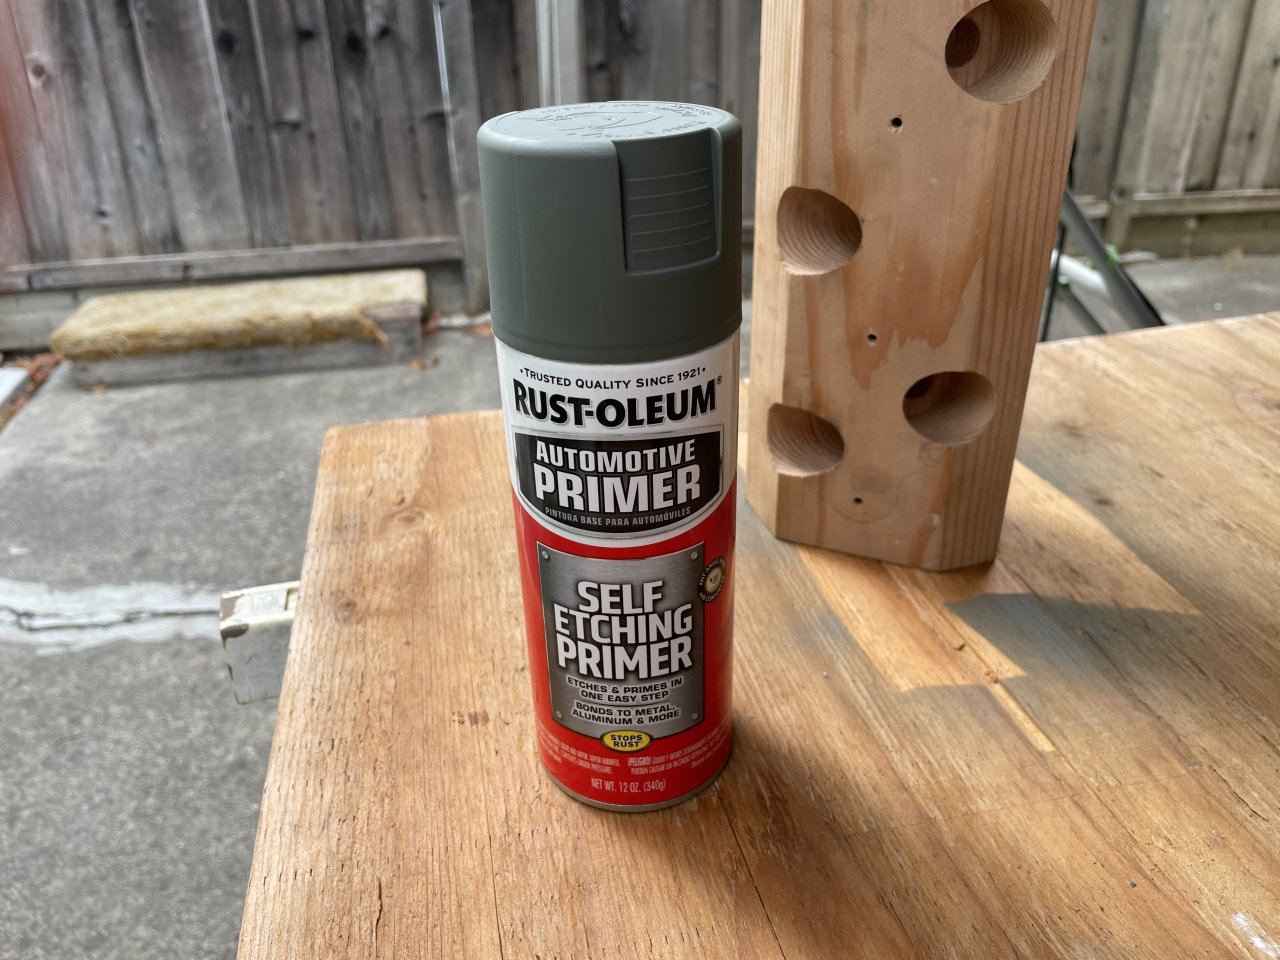
For one, the trunk lock cylinder body needed repainting again. Despite being 2 days, the adhesion of the SEM trim paint was a joke and I was able to brush off all of the paint in about 40 seconds with a wire brush. The lock body is made of cast zinc as far as I can tell, and apparently it is a challenging material to paint. So for this attempt I went and got some etching primer, since various online discussions seemed to indicate that this would stick well. We shall see. I gave it a couple of coats of primer, and then a couple of coats of the black SEM paint (not shown). If the paint is peeling or chipping 2 days from now, then I am just going to have it powder coated.
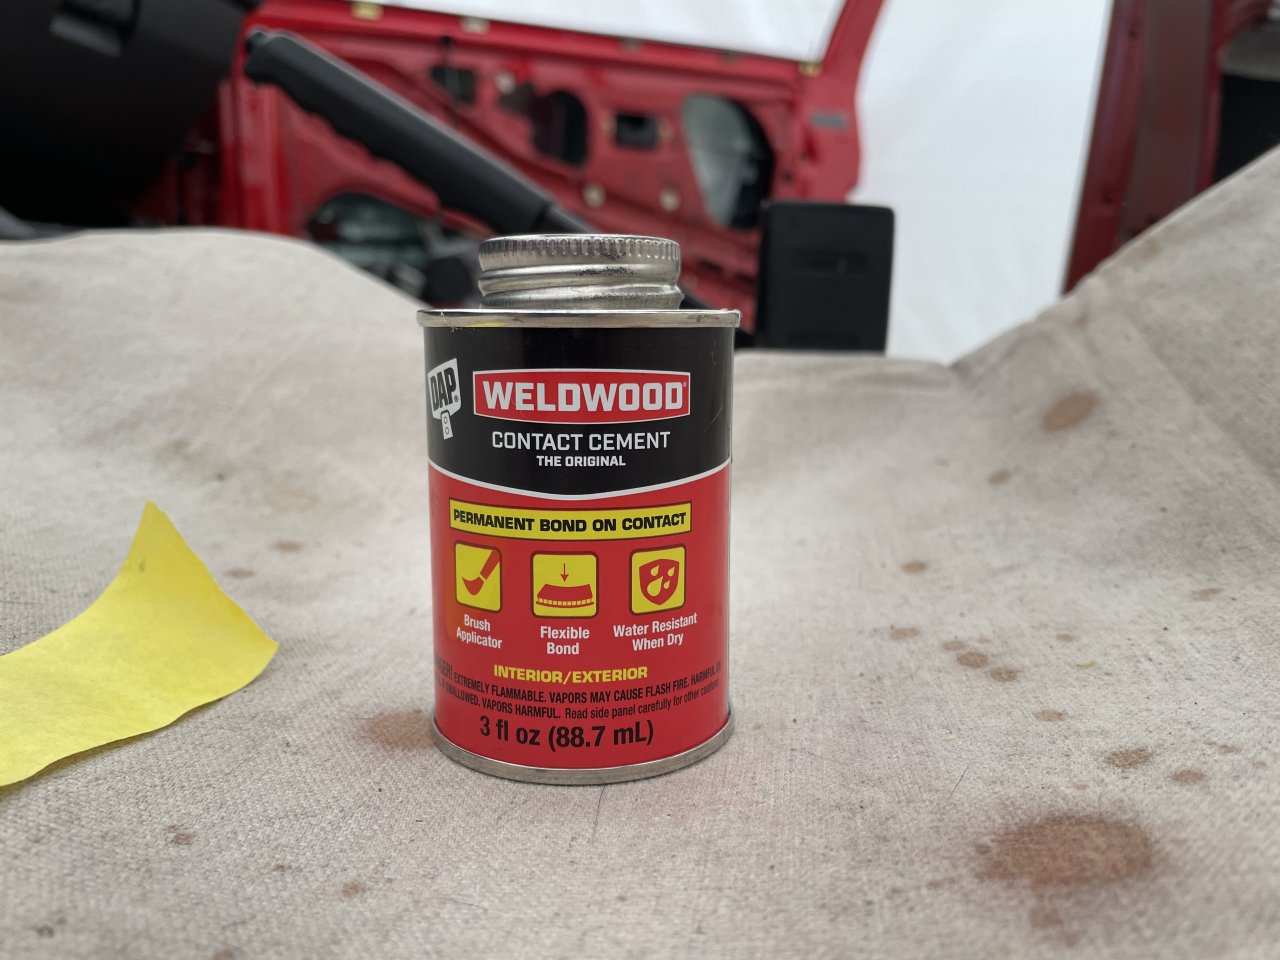
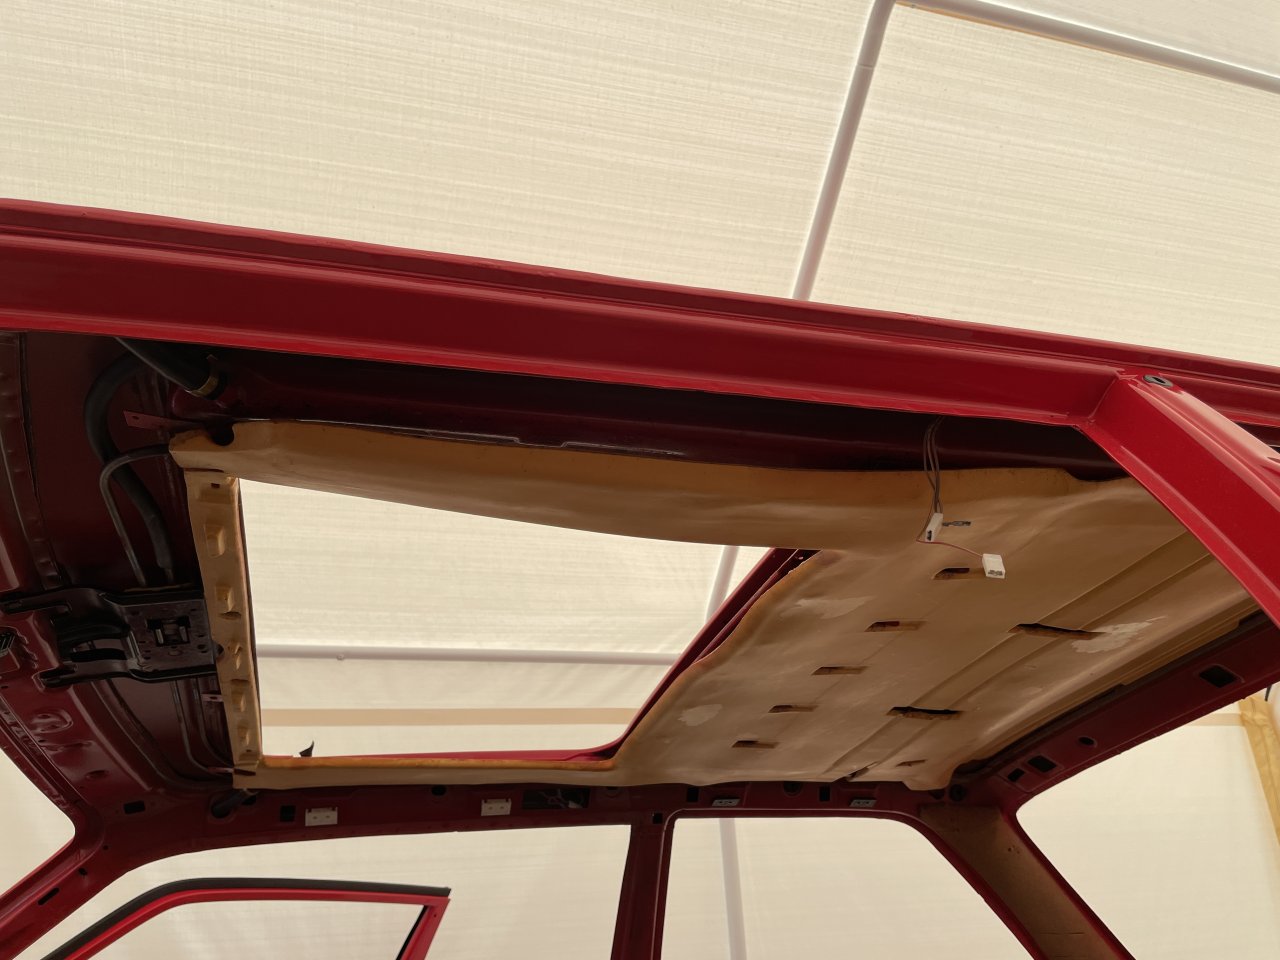
The other thing that needed to be dealt with was the sagging headliner foam panel. It was starting to fall down in a few spots, so I used some brush-on contact cement to remedy this. I strongly recommend against using a spray-type adhesive lol. You are gonna get it onto something you do not want it on, no matter how careful you are. Even with the brushed on type, I put a drop cloth down in the car, and it saved my carpet from a couple of drips.
There are a ton of different options out there, and I went with this one mainly because it came in a small quantity. The next size up was a full quarter of a gallon, which I do not see myself using up during my lifetime.
The passenger side was the one that was really coming down badly, and a chunk of the foam up at the front of the sunroof opening had gotten broken off. That all got got glued back into place before I remembered to snap some pics. The driver's side was not too bad and took a lot less glue. I used up about 75% of the little container. The headliner fabric will hold the foam up for the most part, so that was not really my concern. The issue I was worried about was driving the car to the upholstery shop with no windows and having the passing air catch the foam and really mess it up. I can get to the shop on small side roads where I will not need to go faster than 30mph thankfully.
Comment
-
More progress this weekend. The car is in a sufficient state to be taken to the SMOG tester now. All indicator lights are present and connected, and it has side mirrors. The shop I plan to go to is ~0.8 miles away and can be reached via small residential streets, so it should be pretty straightforward. Driving without any window glass will be special lol.
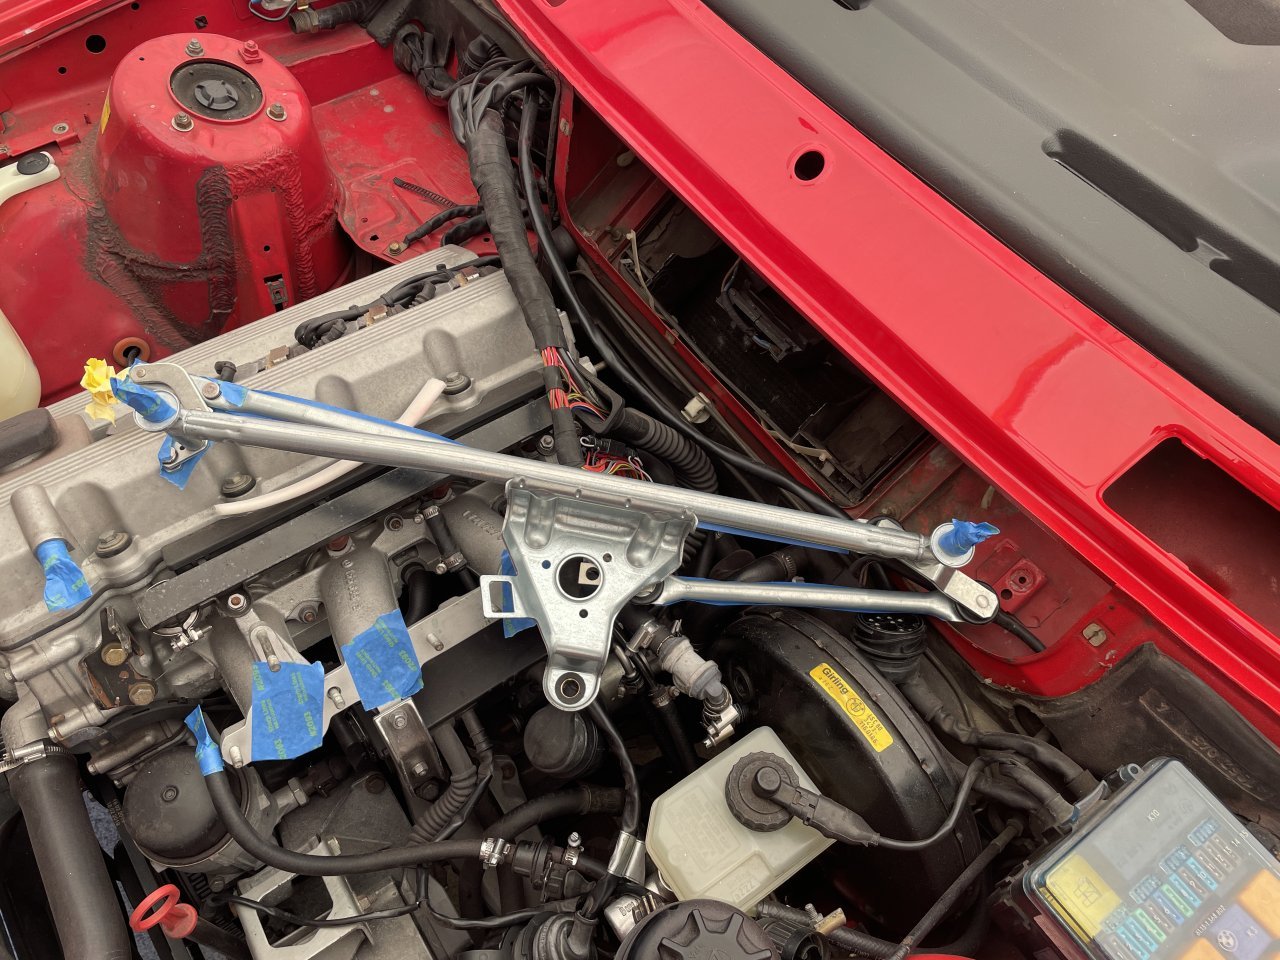
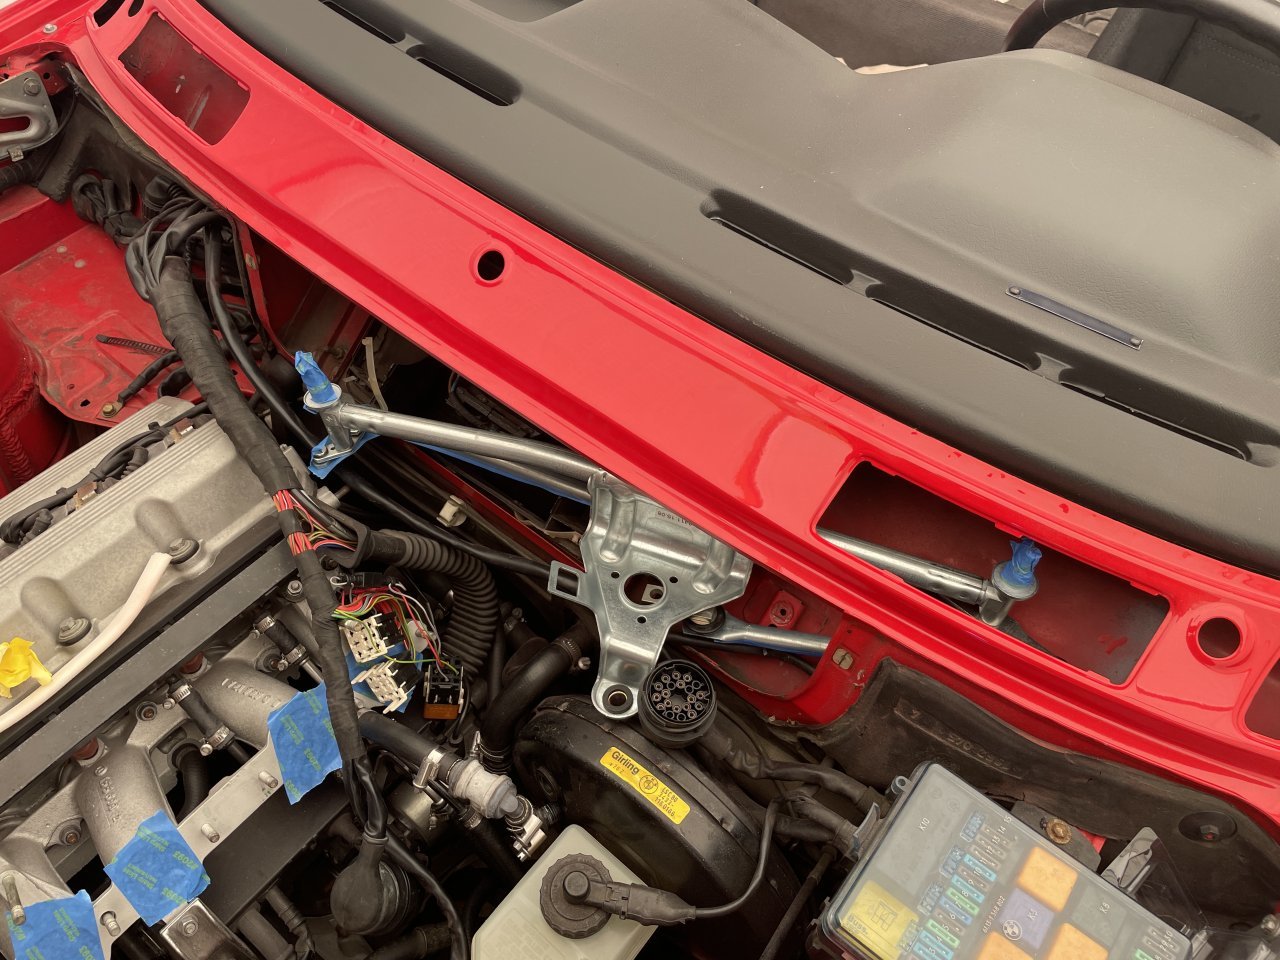
I installed the new windshield wiper linkage first. It was pretty simple, really. With the opening clear, you can just move it in, engage the driver's side threaded post, rotate a little about that post to get the passenger side post to its hole, lift it up so the posts go through the holes, and then rotate the entire thing backwards & up to get clear of the HVAC box. No drama, no hassle. Note that I taped up all of the metal bits that could scratch the paint up. Additionally, I broke out the touch-up paint and coated the various scrapes and scratches down under the cowling just to prevent rust. A couple of scratches were made when learning how to remove the old linkage!

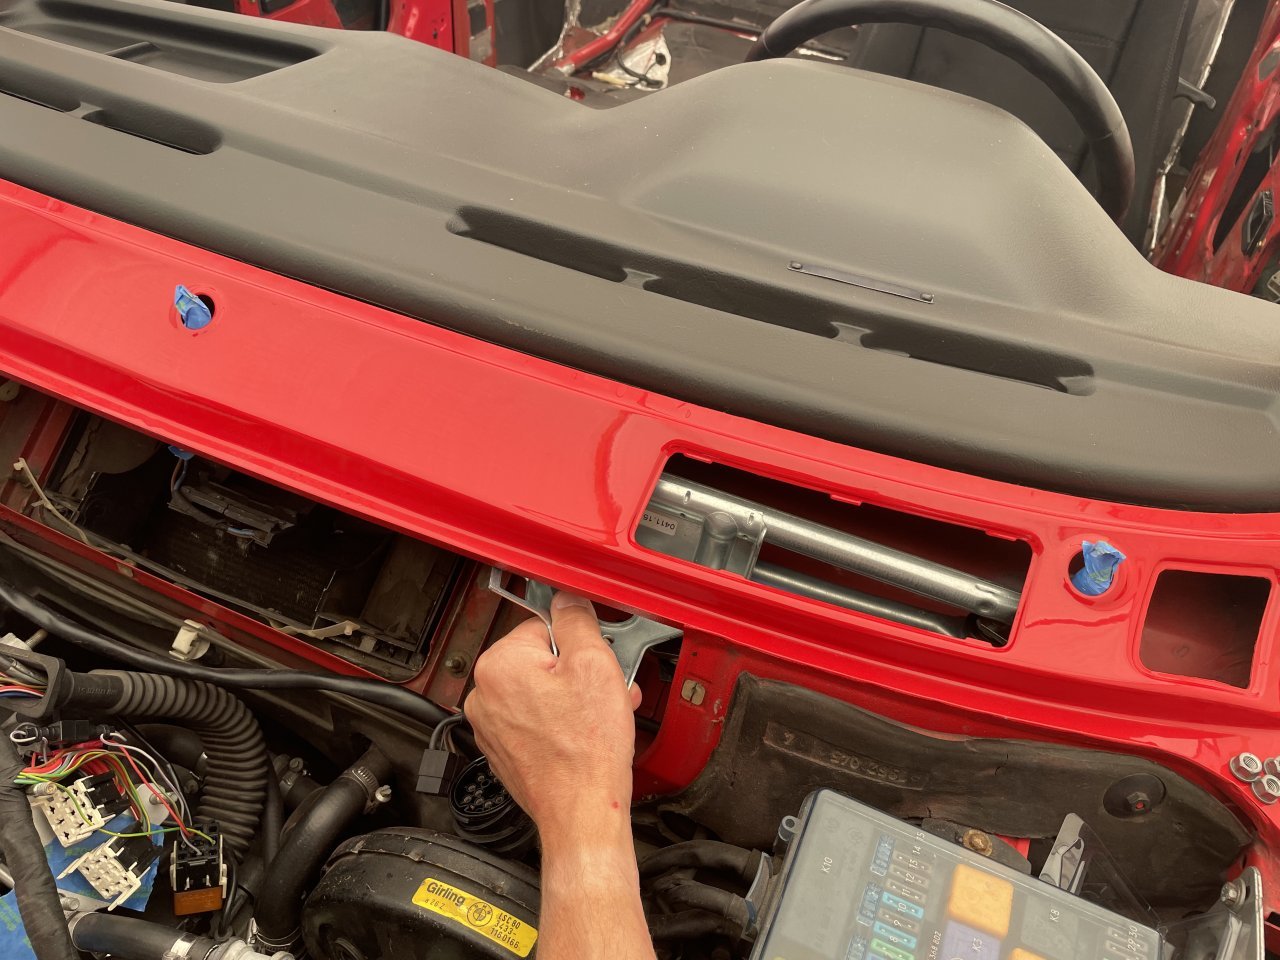
Unfortunately, I forgot to order up a new motor cover (the original one had a hole worn into it somehow), so I will need to get back in there at some point in the near future.
Here is the stack-up of the various bits and pieces that secure all of the wiper posts. The black rubber grommets (2nd from left) should be installed before you try to put the linkage in.
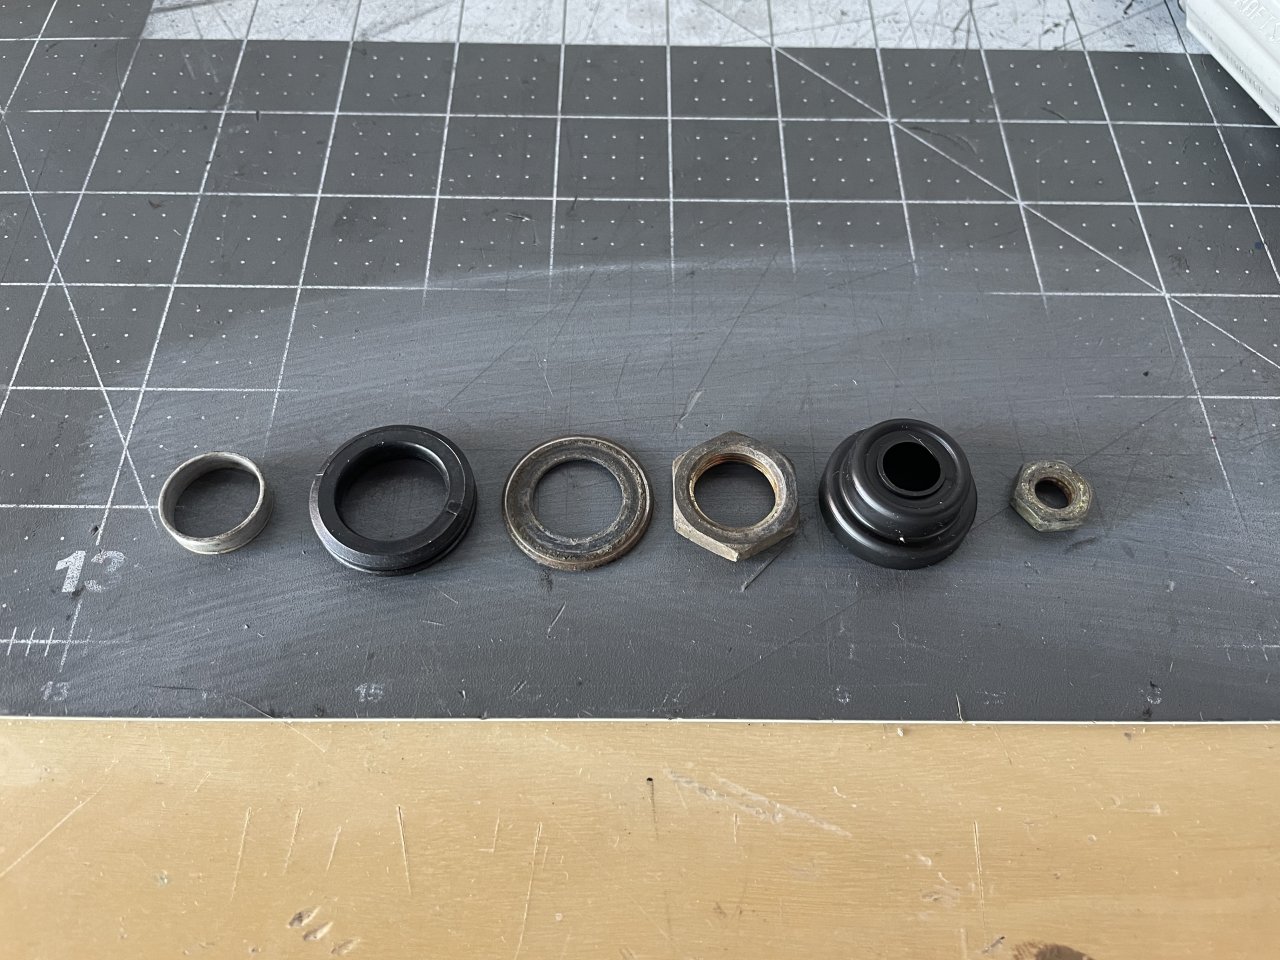
As far as achieving proper timing/alignment of the wipers and stuff, it is really easy. Once you have the linkage secured into place, you just take the loose arm at the bottom and push it to the right as far as it will go (so, rotate the driver's side post as far CCW as you can). Then take the small little arm piece which bolts to the motor and put it into a straight line with the longer loose arm that you just pushed to the right. Install the motor, connect it, and activate the wipers so that the motor will complete a full cycle and then stop. Then, while keeping the 2 loose arms in a straight line, pull them to the left just enough to get them onto the drive post of the motor. Secure them onto the motor, and then activate the wipers. You should see that the wiper posts start by rotating clockwise ONLY, and then counterclockwise back down into place. If they start out moving even slightly counterclockwise (as though they would drive a wiper arm downward initially), then you messed something up.
I also replaced the rotten old gasket foam on the HVAC cover piece. This stuff is PN 51711825972.
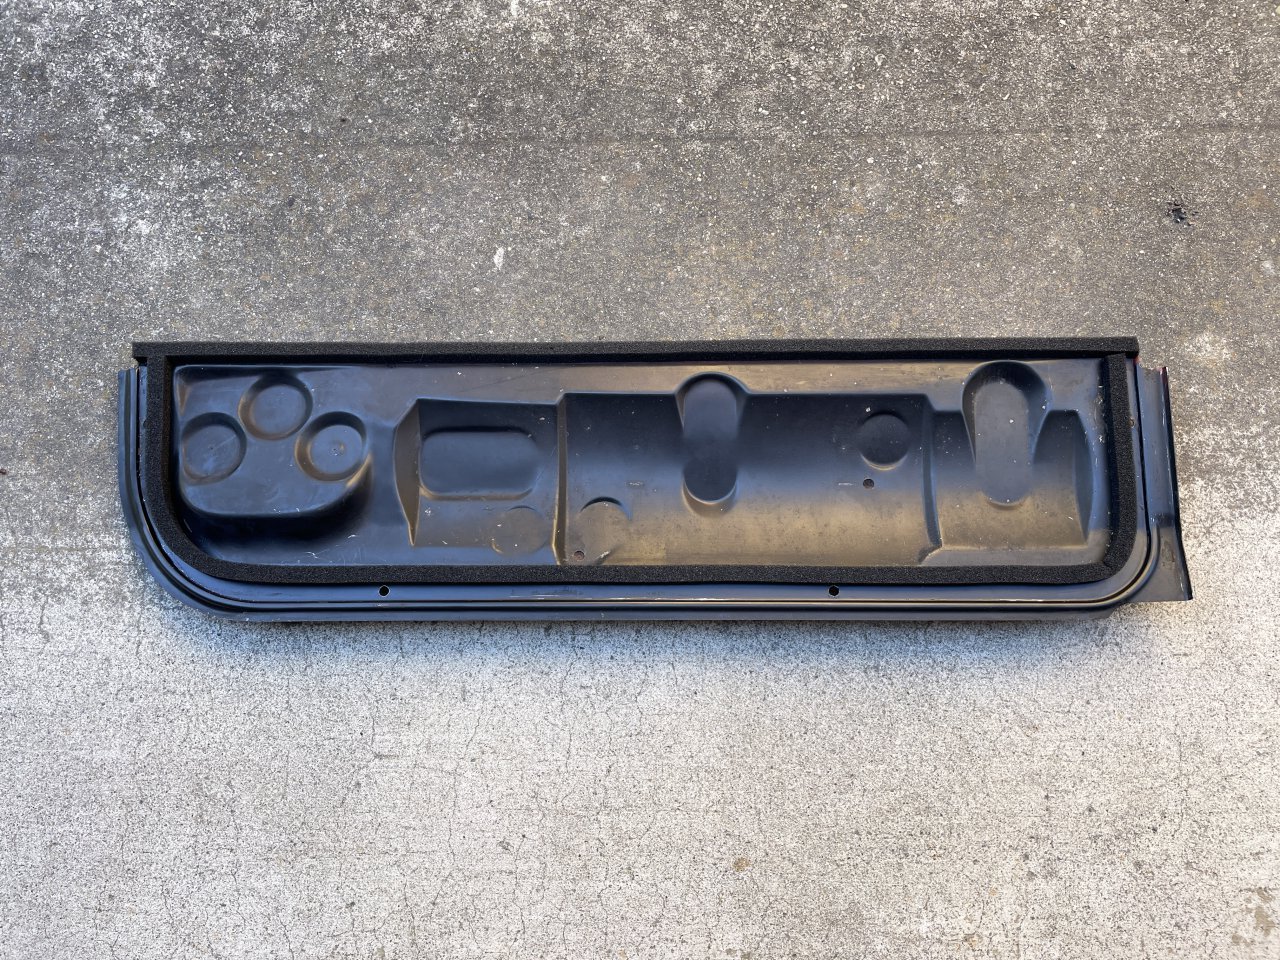
An added bonus was that the foam roll was a lot longer than it needed to be, so I used a bunch of the extra sponge gasket strip to replace the old rotten stuff on the HVAC recirculator flaps. For the upper ones, be sure to align it with the outer perimeter of the flaps since the surfaces that they seal against are sort of narrow and do not protrude inward much. Unhooking the upper flaps' white clip things from the lower flaps is a big pain. The plastic is old and hard, and the clips are annoyingly tight in their holes. I applied some dry lube to a Q-tip and dabbed it onto them, and then used some needle nosed pliers to compress and pop them out. Similarly when I was reinstalling them this weekend, I applied some dry lube and used the pliers to push them back through the holes.

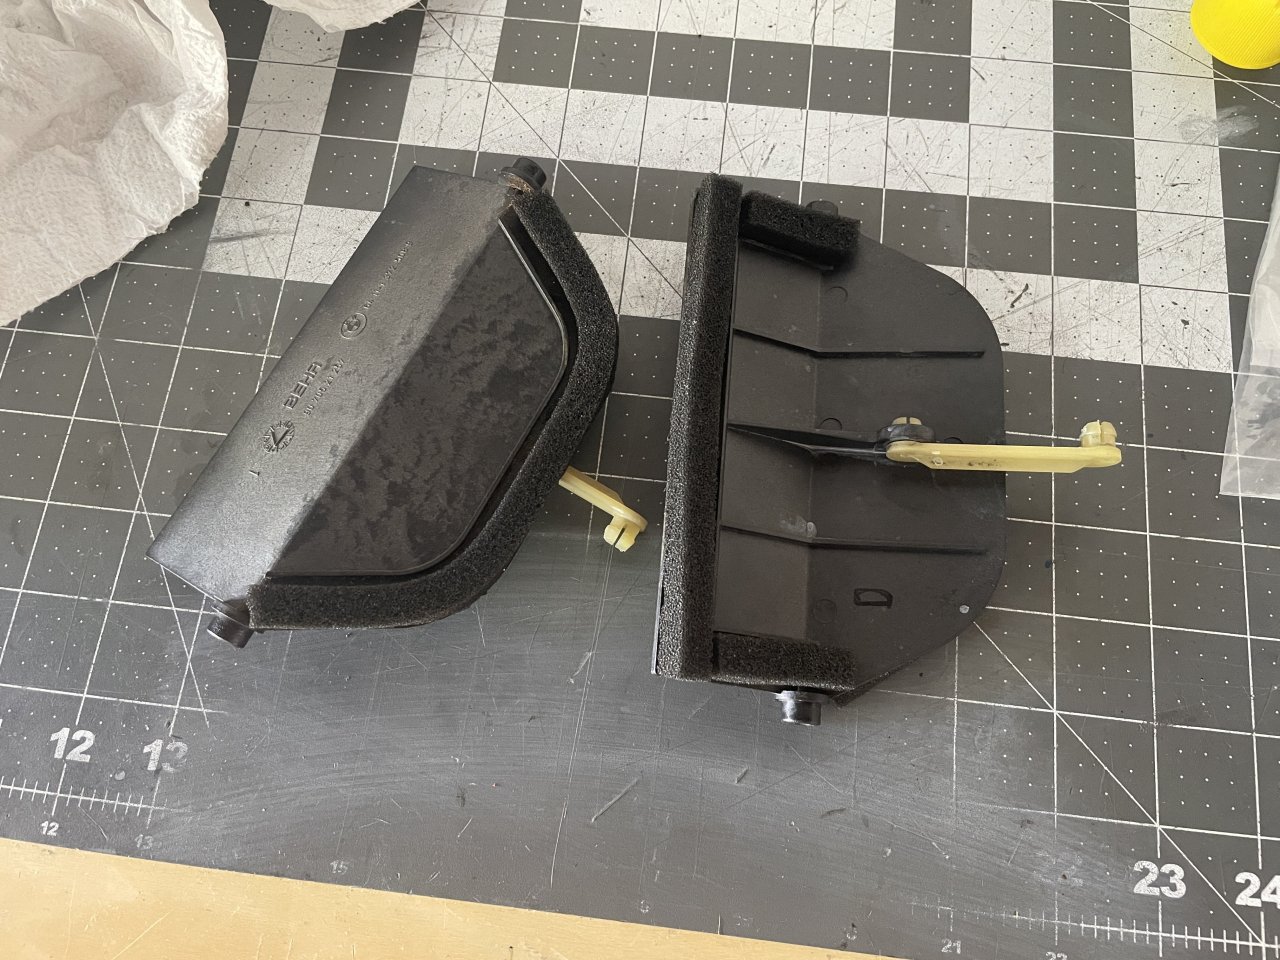
Getting the upper blower cover back on was a little tedious, but not too bad since I sort of figured out how to deal with the metal clips during disassembly. The rear ones are the only challenge, and not too bad anyway. The trick is to just push hard on the middle of the bowed portion of the clips. This pushes them against the plastic body of the blower housing, straightens and elongates (giggity) them, and enables the hooked part at the top to jump over the incut edge of the housing.
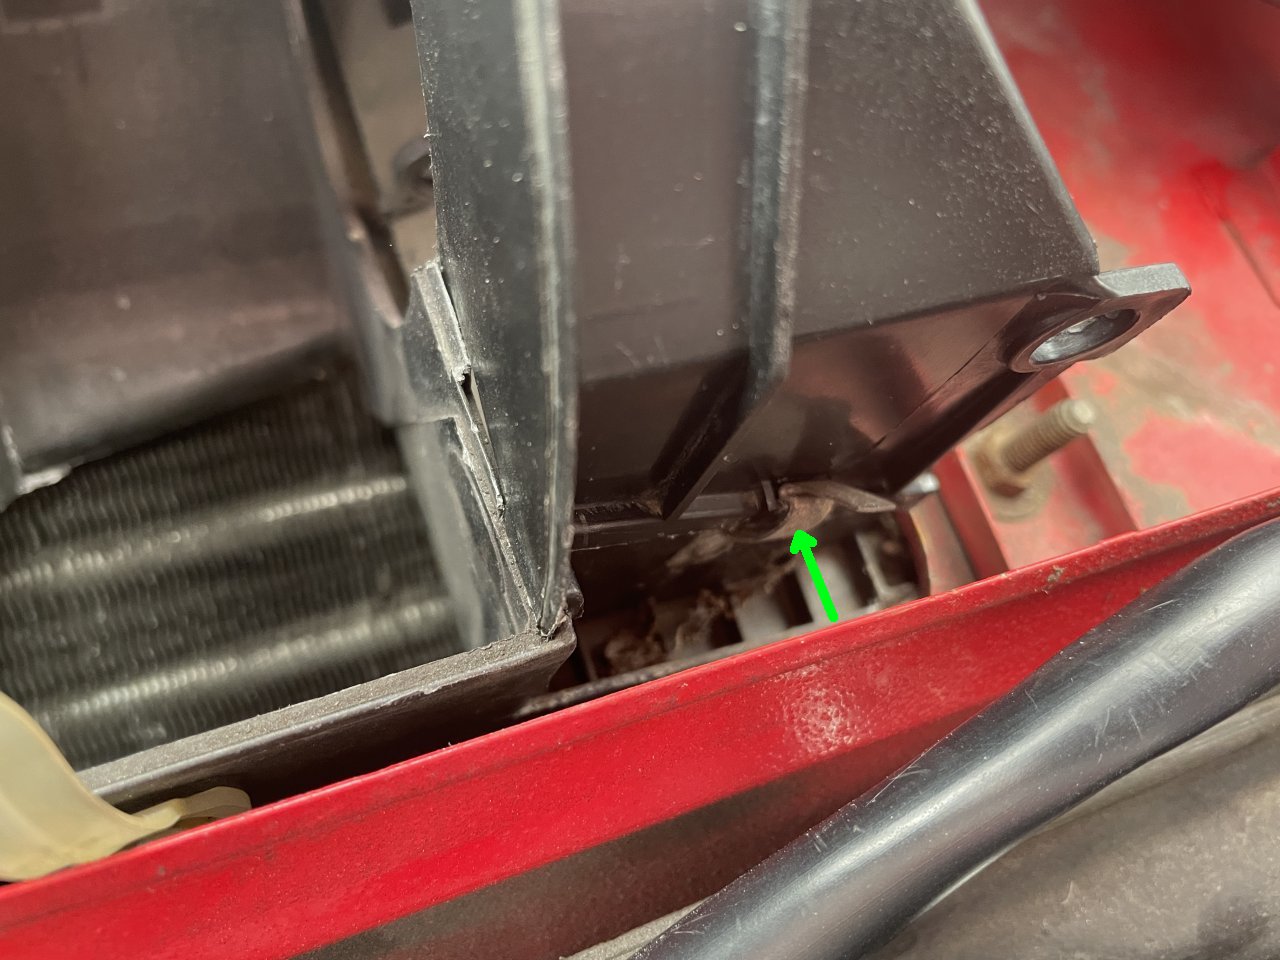
Pushing hard enough can be pretty difficult to do with just a finger, and I found that some angled needle-nosed pliers were a much easier way of applying some force. I was not grabbing anything with them, just using them as a tool to stick back in there (giggity) to apply enough force to the clip.
I have to say that I am glad to be done messing around with that thing, hopefully for a long time!
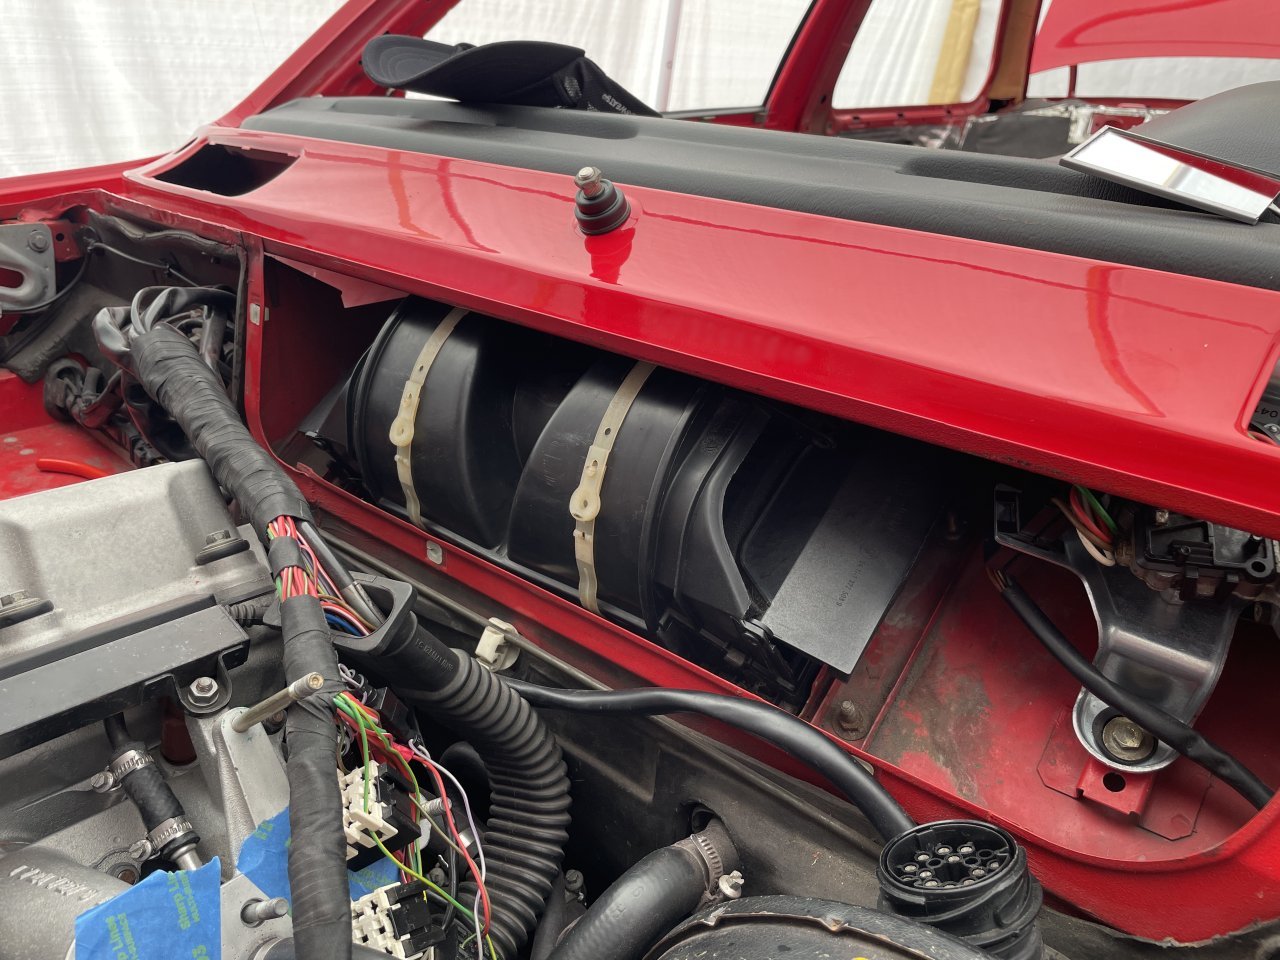
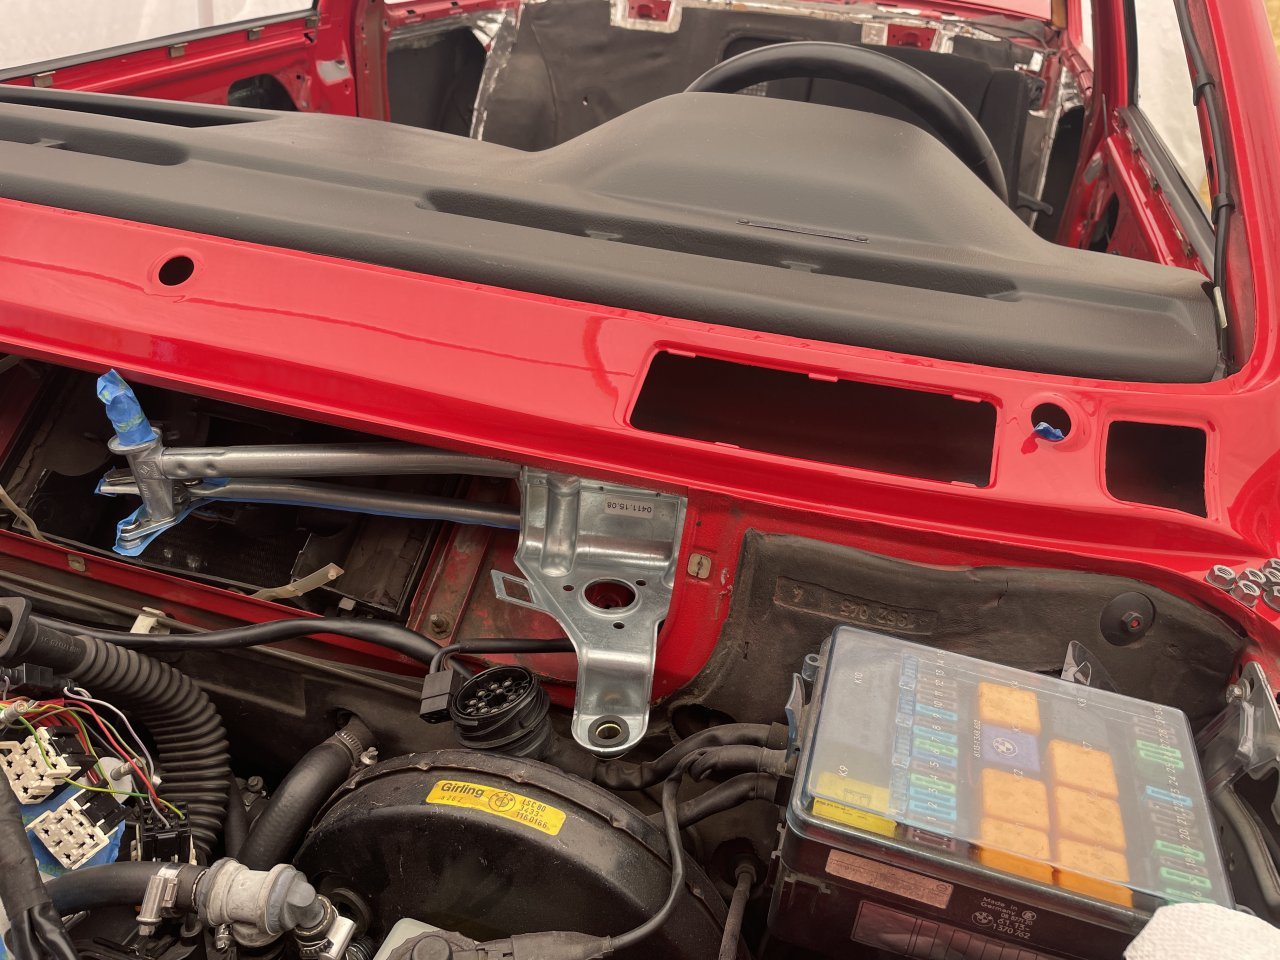
Here's the engine, all nice and stock and ready for that SMOG test!

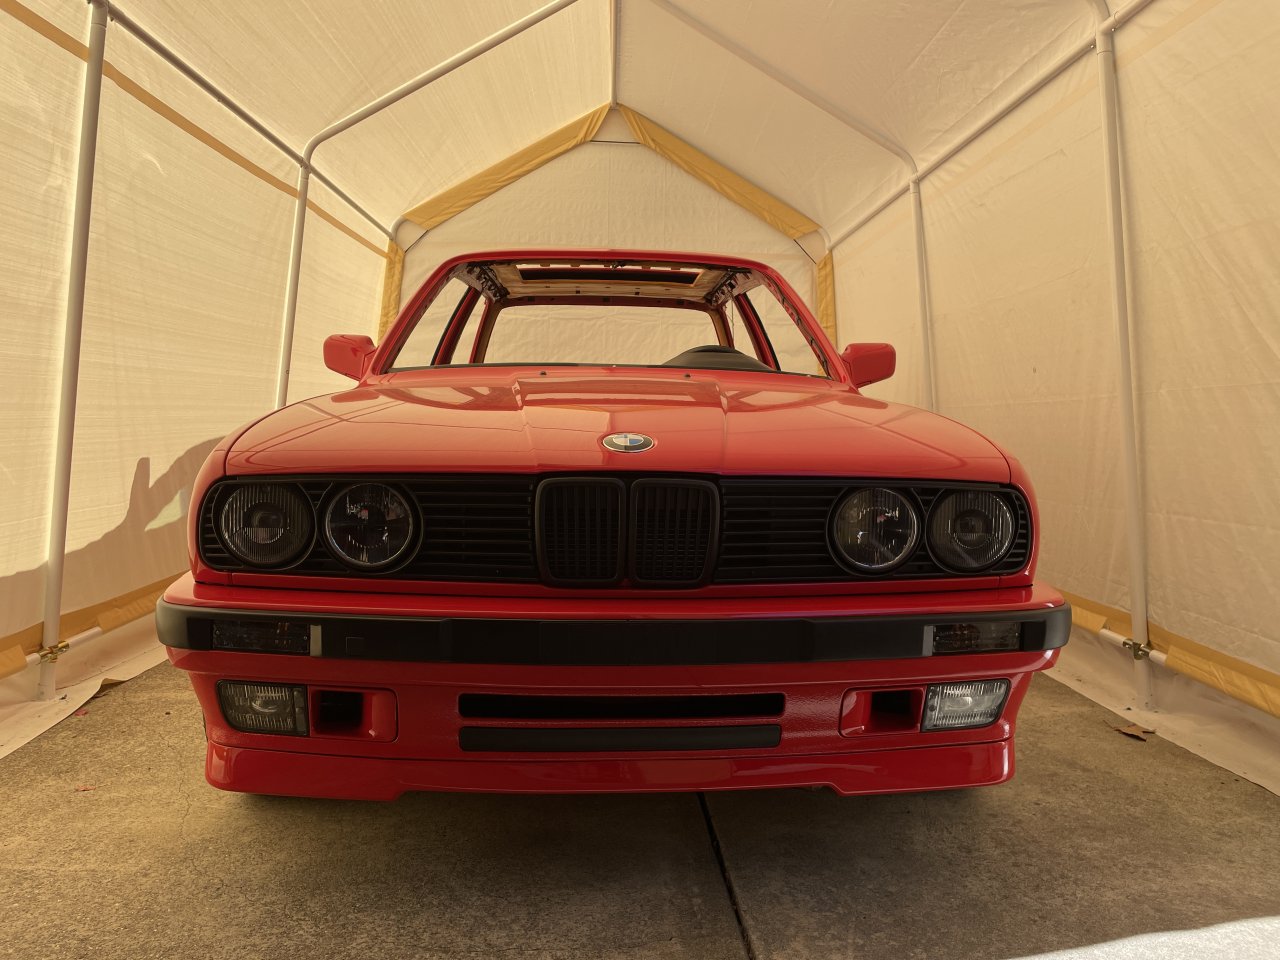
The front end is complete now (minus the missing windshield wiper motor cover), and I have to say that I am starting to get excited about this. The car looks really great, and I am super happy about that. It was looking so shabby for so long!
Comment
-
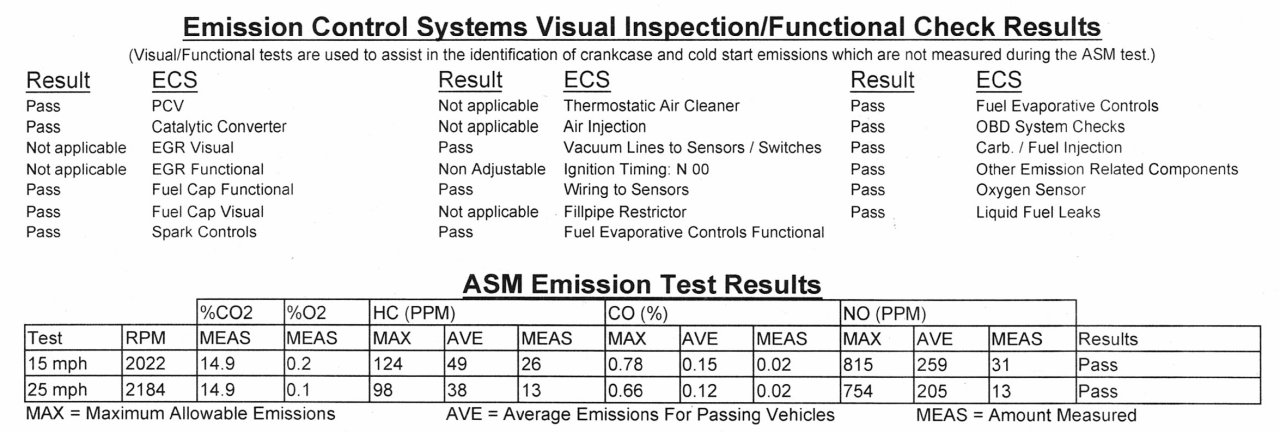
Good news! The car passed SMOG with no issues, burning nice and clean. I drove it around for 4-5 miles to settle the O2 feedback and get it nice and warmed up. It has to be said...driving a car with no glass is a pretty exciting experience lol. Sunglasses required!
I know that a lot of CA guys have a hard time passing SMOG, and it used to be an ordeal for me too. Really though, a reasonably fresh catalytic converter, no vacuum leaks, a proper tune, and good condition fuel + evap soft lines are all anyone needs to pass the technical portion. Obviously the visual part can be a big challenge depending on what you have modified, and I suppose that passing that will depend on how close to OEM things look and how familiar the SMOG technician is with these old cars. Engine swaps are probably tough too, if you don't try to get the referee to sign off on it.
Anyway, with this out of the way I can pop a few more trim pieces on and get the car over to the upholstery shop for some headliner action.
Comment
-
I can if you really want, but the shipping is likely to be more than you would pay for something at the local parts store. Example of something that I think would work:
https://www.oreillyauto.com/detail/c...i0/90305?pos=4
Most auto parts stores should have a small assortment of grommets to choose from. You just need one for a ~1 inch hole diameter.Comment
-
Wow! The car looks fantastic after the respray. Red really pops.
It's coming together now, you'll be driving it before you know it!
I like the attention to detail you're taking replacing the wear parts/clips/fasteners.
'87 BMW E30 325is Turbo
'98 BMW E36 328iComment
-
This obviously is not your first restoration.
Your organizational skills are excellent and order of operation is going to help get this project done in no time.
GlwpComment
-
It's looking very nice. I hate dealing with that blower cover too. Believe it or not it's even worse to deal with in the E34, which also has a terrible wiper linkage. Thanks for posting the part number for the sealing foam tape, I will file that one away for the next time I have to deal with a blower cover.Comment
-
As said, your organization and work is top notch. Love these updates.Comment
-
yeah the red is really great. I am not sure if I have ever seen the paint on this car look so good...even back when there was enough of the original left to polish/wax it lol.
Replacing all of the fasteners and stuff is a pain, but I don't ever want to have to do it again. Most of the original ones made it 30 years (sometimes just barely), so I figure I can get a couple more decades out of some new ones!
Thanks for the kind words. This is in fact my first restoration on this scale, but I guess I have some practice with project management from past efforts!
Yeah the blower cover was not my favorite thing. Now that I have been through there, it is not so bad, but with any luck I will never need to mess with it again.
Thanks! I hope that documenting all of this will be helpful to anyone else who is foolish enough to undertake this kind of project on their E30.Comment
-
It's been a little bit since my last update, but progress has continued. Things were mostly in a holding pattern as I waited for the upholstery shop to have some availability to do the headliner, A-pillar trim, and front upper console.
Prior to the drop-off at the shop, I finally sorted out the new door vapor barriers. This involved some OEM plastic film and 3M butyl rope sealant. The plastic sheet is adhesive backed, but it isn't going to seal well on uneven metal, so I got some of the rope sealant based on a bunch of E34 guys who seemed to have good results with it.
OEM vapor barrier material PN: 51951924961
It comes in a big sheet which is enough to do 3 E30 doors as far as I can tell.
3M rope caulk: https://www.amazon.com/dp/B000CQ4AOO...roduct_details
You might be able to do both doors with one roll if you stretch it out. I bought 2 rolls just to be safe.
I also bought one of these to really get good adhesion between the sealant and film: https://www.amazon.com/dp/B094QRCN9K...roduct_details
Once I had put the rope sealant into place, and applied the film on top of it, I used the roller to really set it all in place firmly.
I started by cleaning off the mating surfaces very thoroughly with some 99% isopropyl alcohol. It will take a little of your paint off, but as long as you don't go nuts it is fine. The sealant will not stick if the surface is dirty or otherwise contaminated.
As far as placement went, I tried to keep the path on the same plane so that there were no dips or bumps. You will see at the bottom that I had some tight turns around some of the openings. This was deliberate. Basically, I wanted all of the lowest points to be at openings so that water would drain out rather than pool up in any sealed pockets. Also, before applying the sealant and after cleaning, I did apply some touch-up paint in a couple of spots where the paint was scraped off down to the metal. Rust is not something I wanted to have forming.
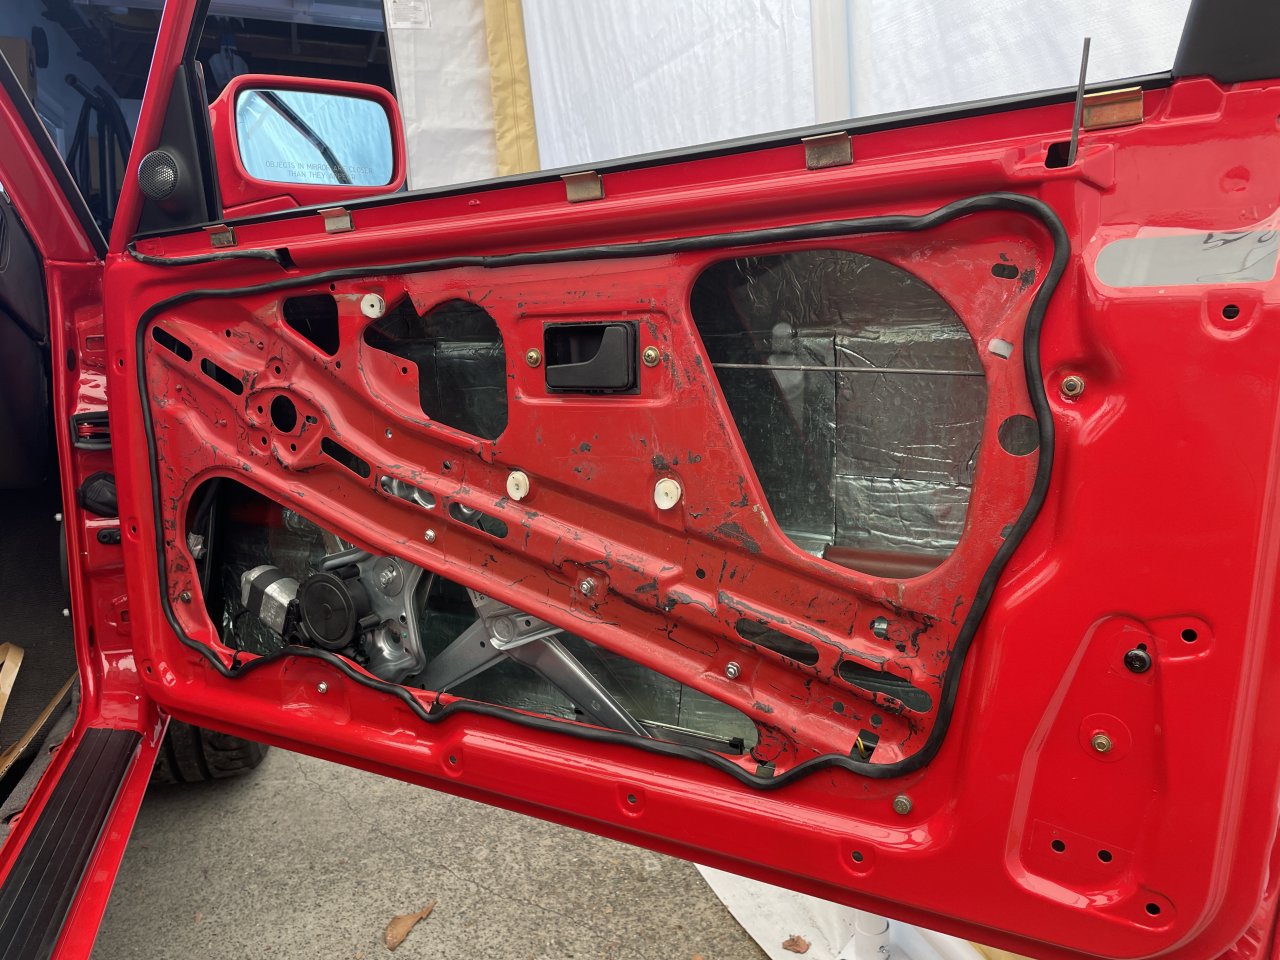
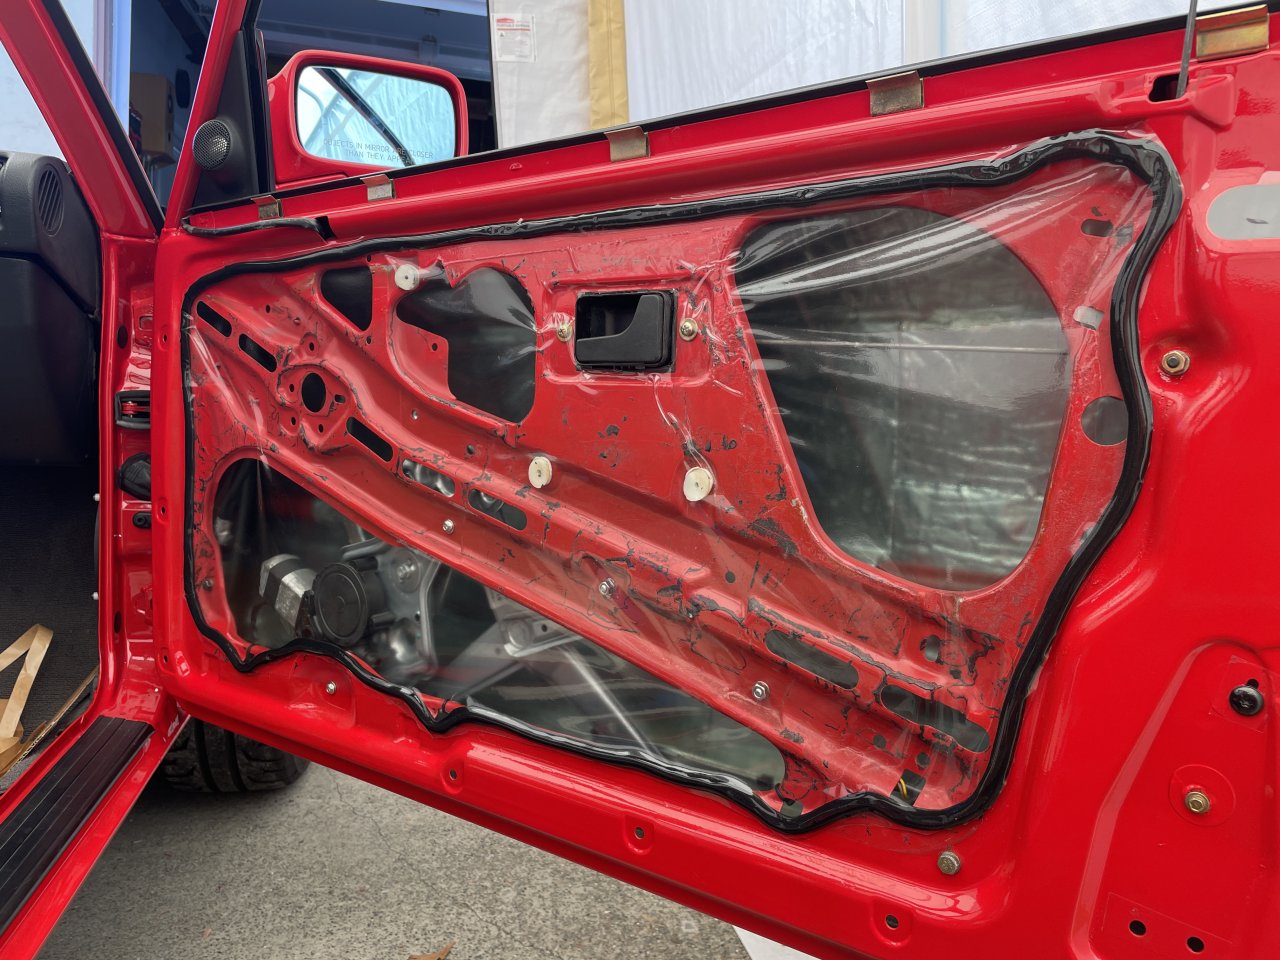
With the sealant installed, I then carefully laid the film onto it. My wife helped to hold the sheet flat so that I did not have any bunching or crowding as I pressed it into the sealant. Once it was mostly in place, I trimmed off the excess around the perimeter and then used the roller to fully seat it all. Last, I trimmed out an opening for the door handle. In the case of the driver's side, I made a small incision for the power mirror harness, and then used some scrap film to patch around the slit. Also, I noticed later that I was missing the 3rd / upper bolt for the window regulator lol. So, I cut a small hole for the bolt, installed it, and then patched over the hole with some of the left over film.
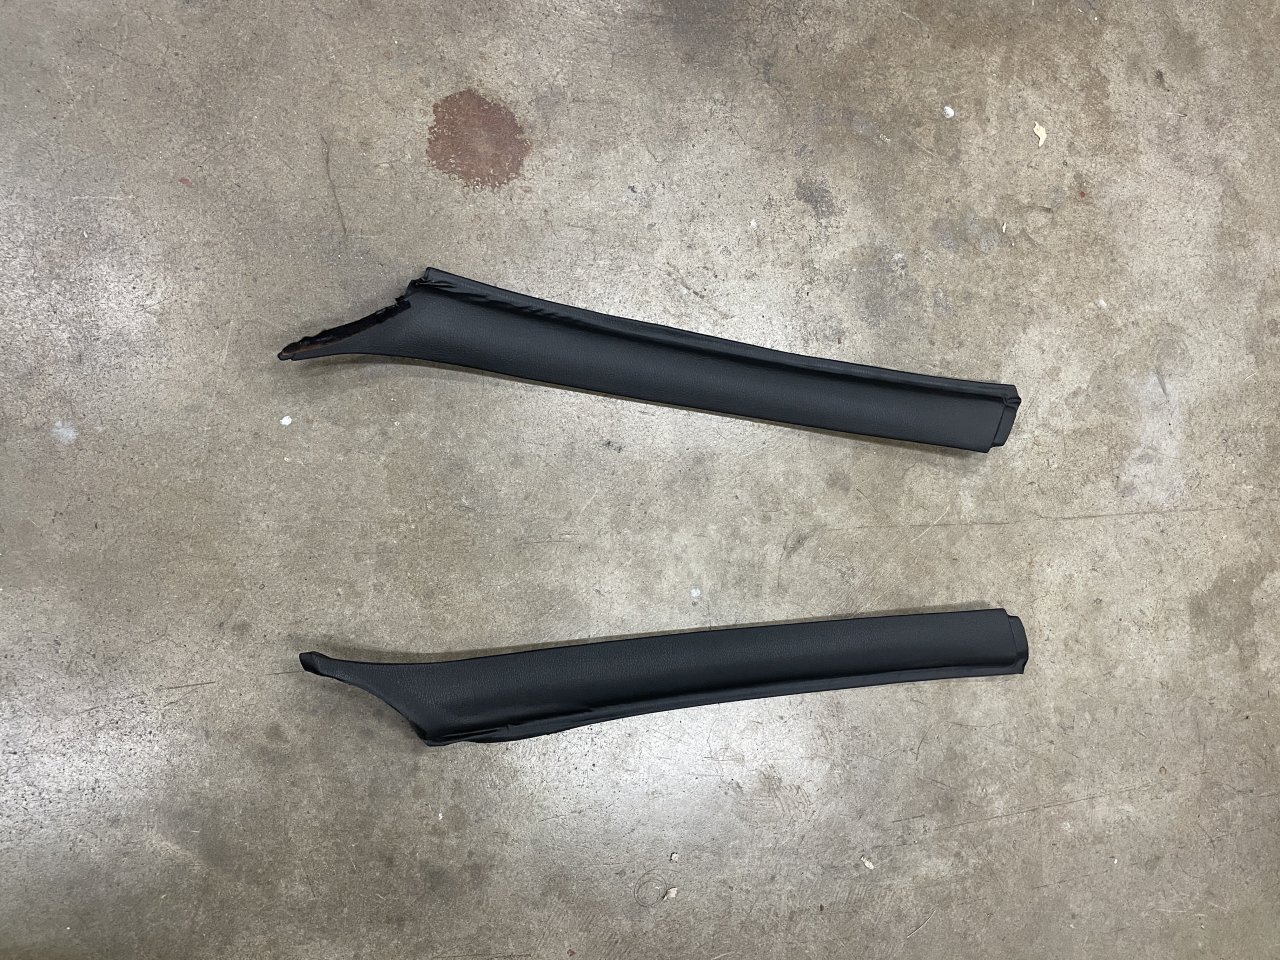
As for the upholstery work, I am having the shop recover the A pillar trim since the old vinyl is coming off and I want it to match whatever is on the new upper console.
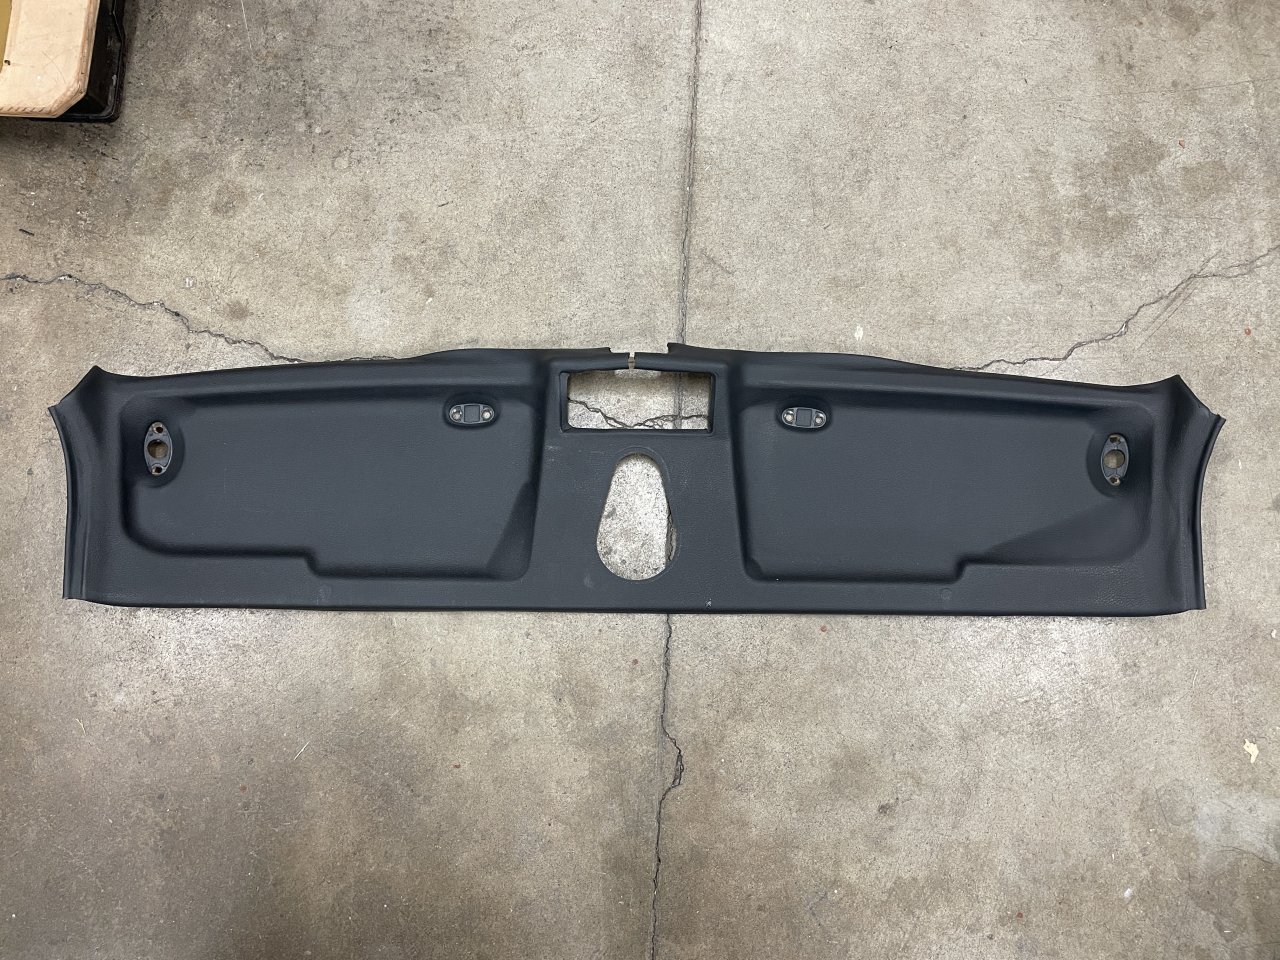
The upper console was not in terrible shape, with only some small-ish bubbles, but I had to mess up the vinyl in order to repair the area around the rear view mirror where the hardboard stuff was broken.
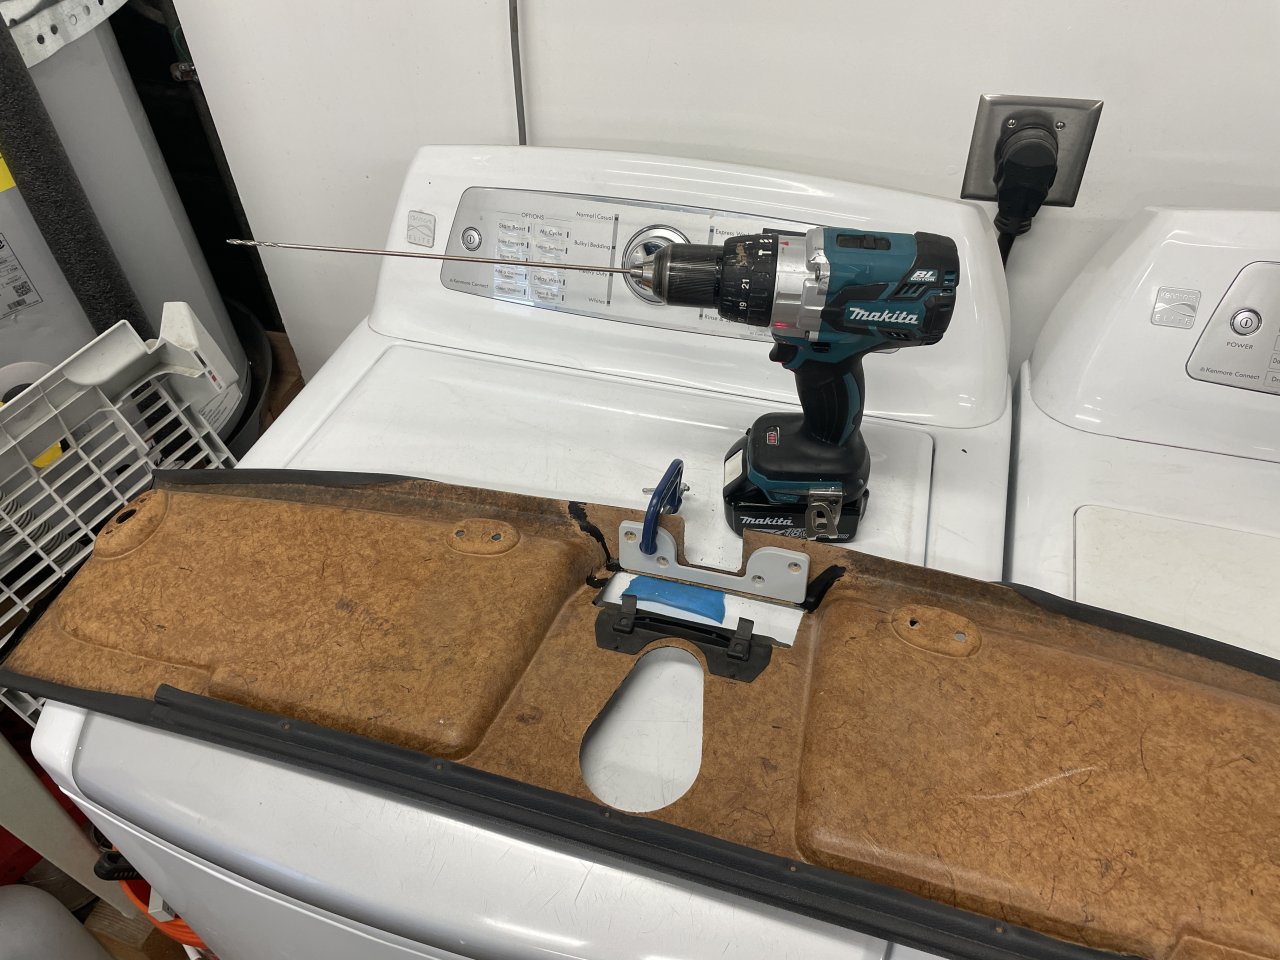
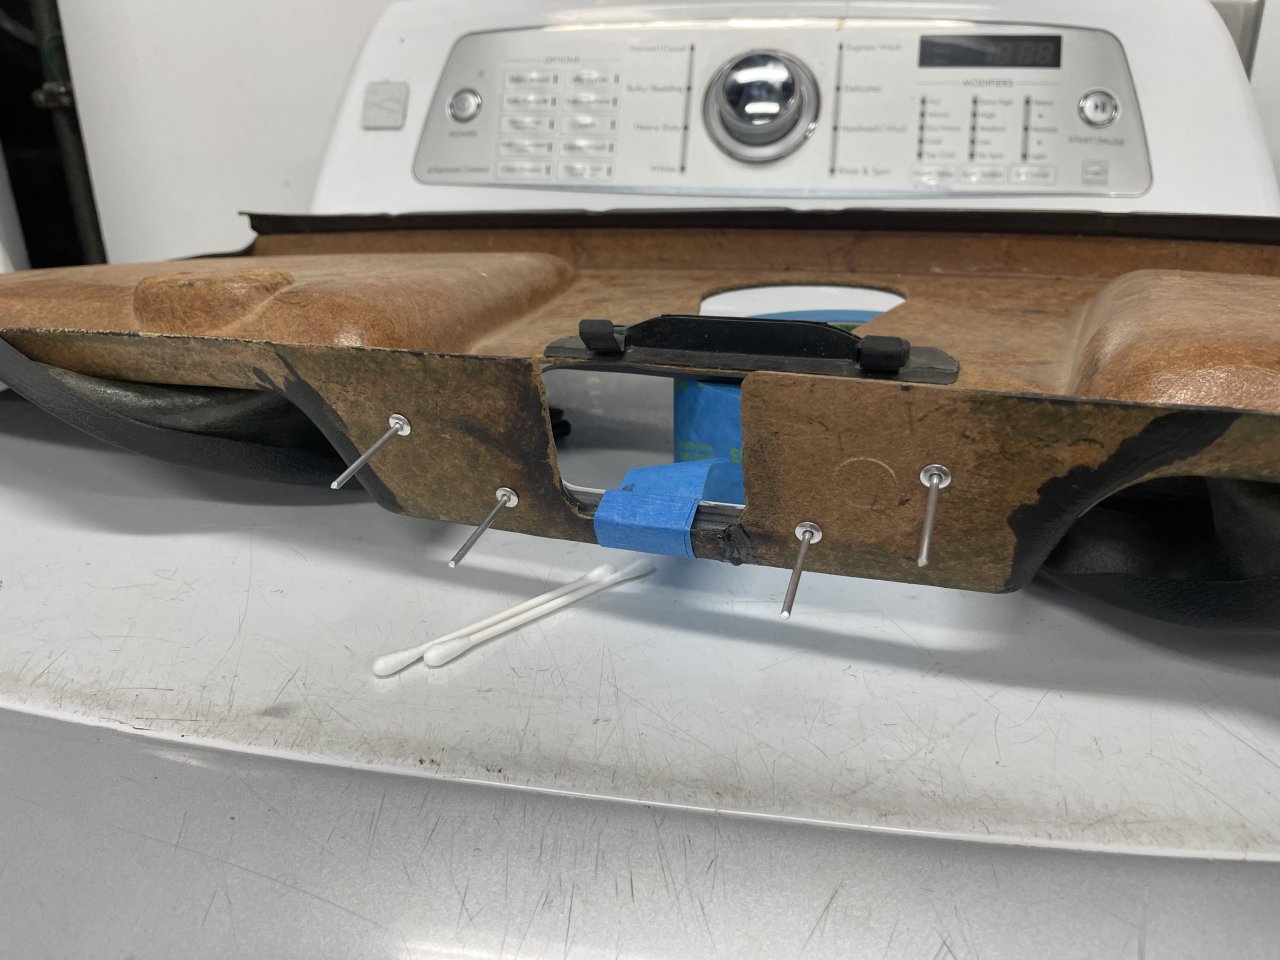
In the middle area around the mirror opening, a few things were wrong. The thin section was fully broken, and cracks were forming in some adjacent corners. The cracking was easy enough to fix with some toughened CA glue which wicked into the cracks. As for the broken middle part, I 3D printed a brace from ASA filament. It was pop-riveted and epoxied (3N DP420NS) in. The middle area should not have any issues ever again lol.
I clamped the brace into place and used a really long 3mm drill bit to match-drill the needed holes for the rivets.
Before applying any epoxy, I have everything a light sanding with some 60 grit and a wipe with alcohol.
The little mount bosses for the rear portion had also both broken off, probably because I had forgotten about them and the 2 screws that hold them. Again, a stiff wire brush and some alcohol were used to prep things before I generously applied some DP420NS epoxy.

Other than that, I just needed to do a little but of prep/repair on the foam headliner backing in the roof. The original contact adhesive was failing in several places around the perimeter, so I applied some fresh cement. The stuff in the link is cheap, readily available, and sticks like crazy. Some of the left over cement even worked really well to stick the vinyl in my door cards and rear quarter cards back onto the chipboard backing.

So that is where things are for now. I dropped the car off at the shop last Friday, and I expect to have it back sometime this week. I'll update you all once I have it back.Comment


Comment