
Yep
-
paint sucks -
Shit that is quick to 120!
SILBER COMBAT UNIT DELTA (M-Technic Marshal)
RTFM:http://www.r3vlimited.com/board/showthread.php?t=56950Comment
-
Finally got through this thread, I was locked in as if reading a great novel. I feel somewhat intimidated and greatly inspired. Although I'm going to keep my 91 318is (my 4th and favorite e30) mostly stock, I plan on doing an M50 swap in in an early 325. Fantastic thread for some reference and ideas. Thanks for sharing..Comment
-
Comment
-
Diff time!
I checked out many videos and writeups before doing this and followed one of the bimmerdiffs writeups. I used a 3-clutch rebuild kit from bimmerdiffs. This is a basic guide only; read the how-to if you're actually gonna do this.
PSA: Yeah I know it's dirty as hell. I didn't have time to clean it and paint it or whatever you sane people like to do.
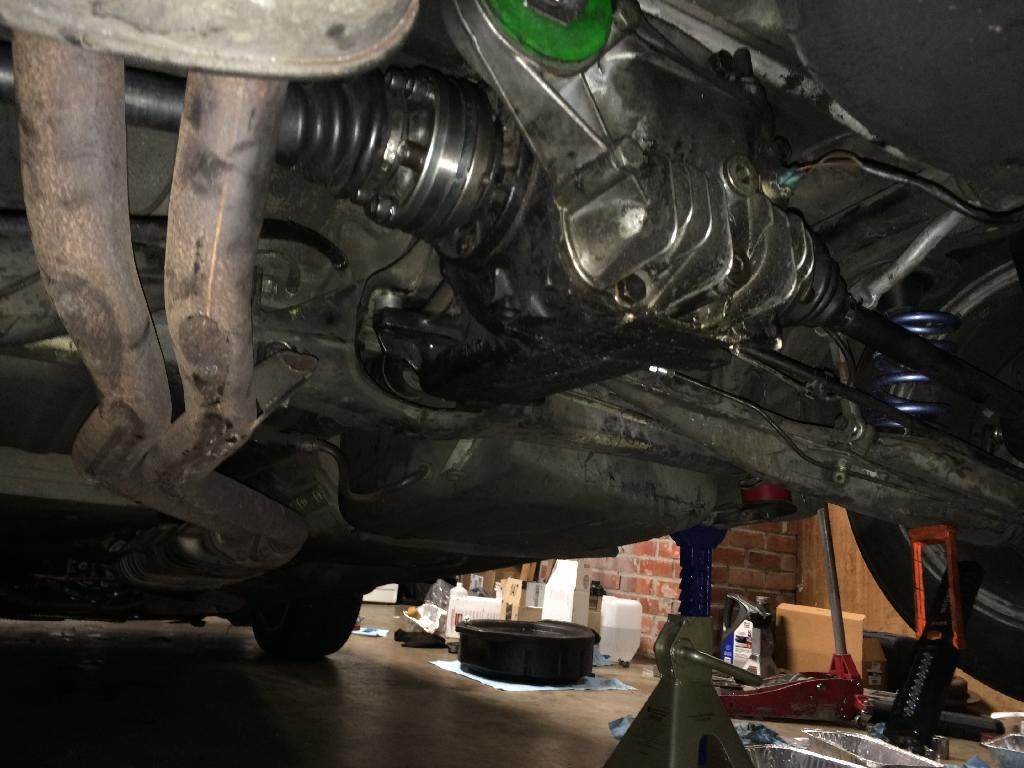
Out of the car
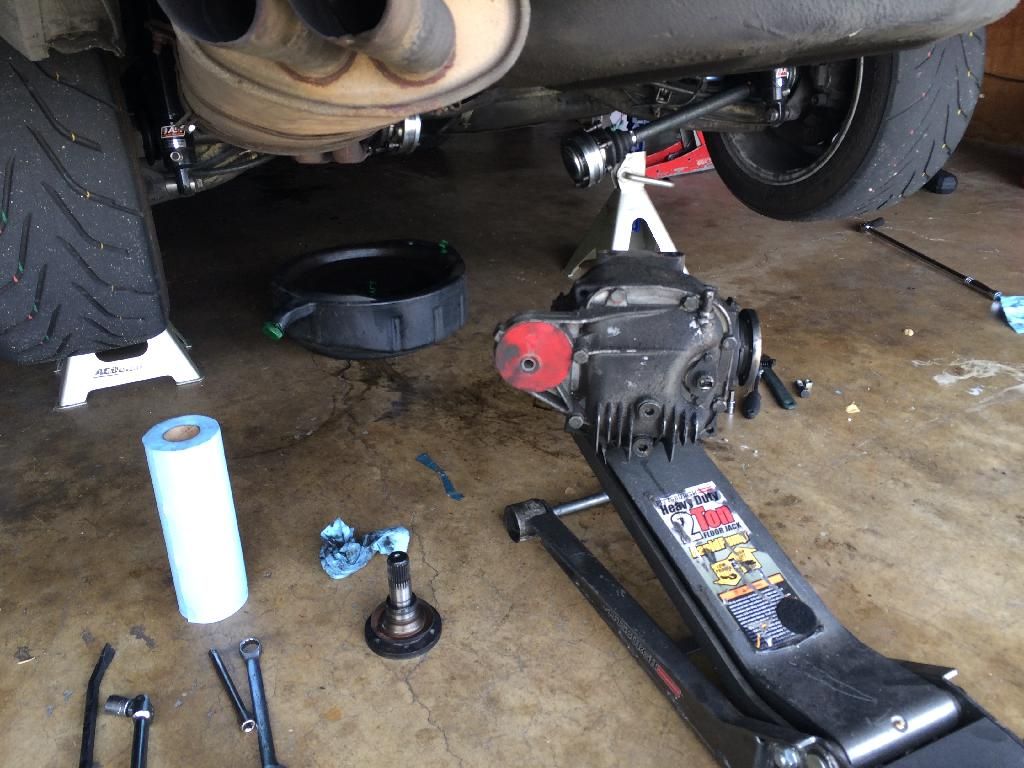
Drain it

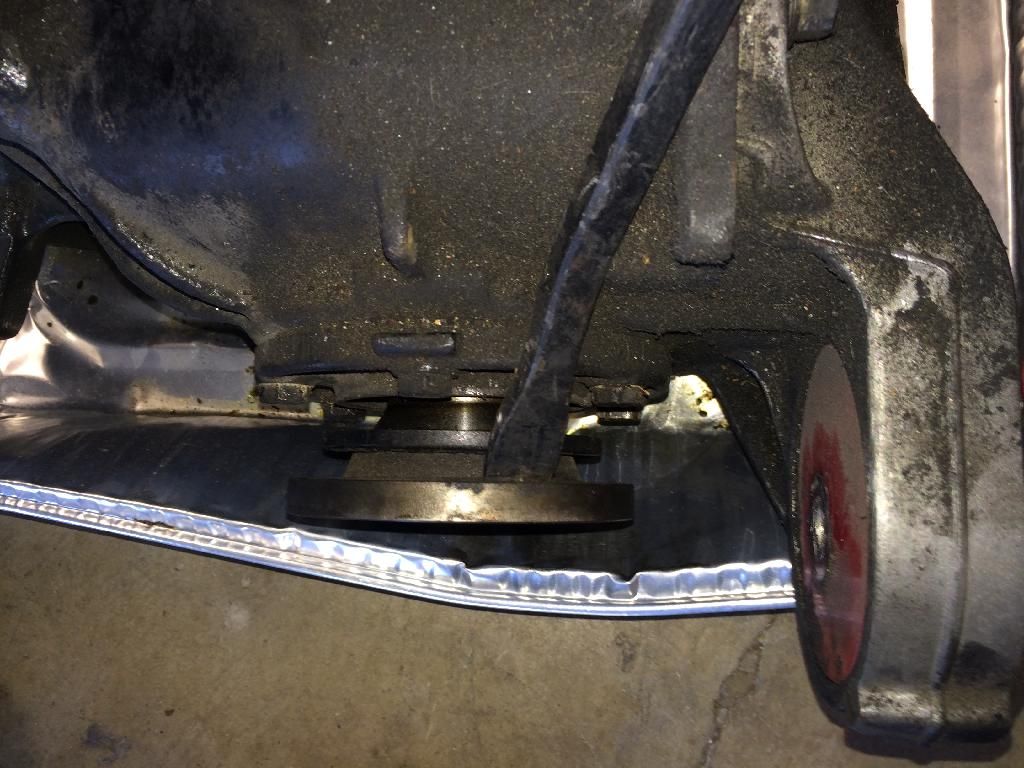
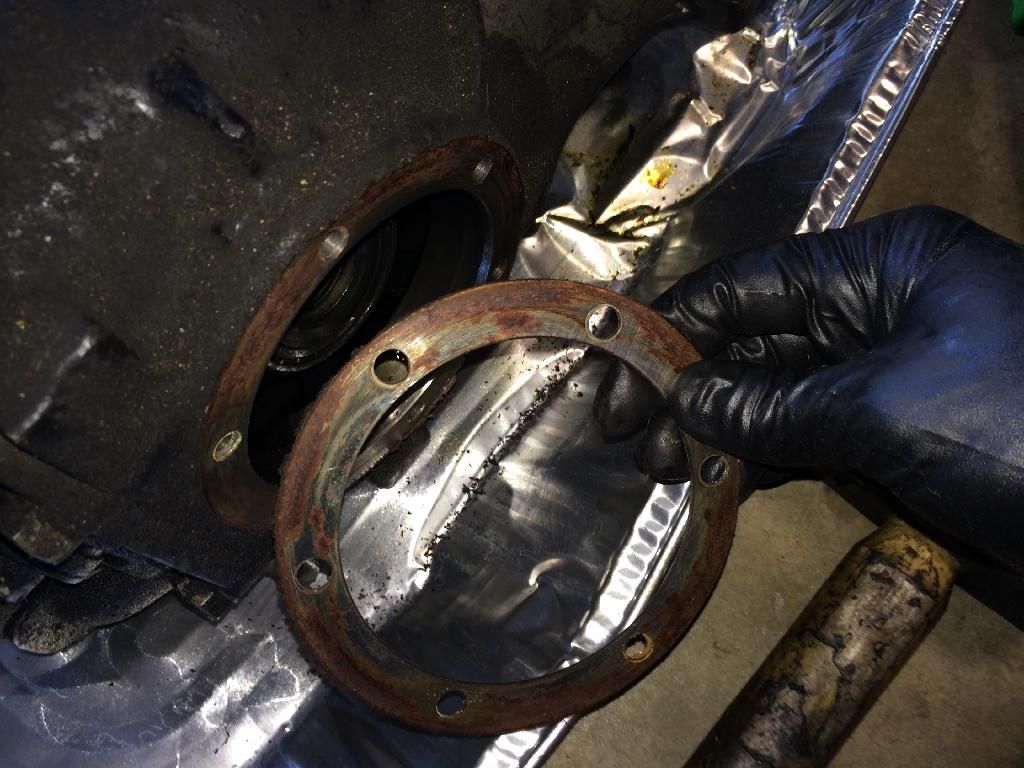
These should pop out pretty easily but try to pry from the flange itself like pictured, and not the axle dust boot as it may bend.
Next, take the side covers off
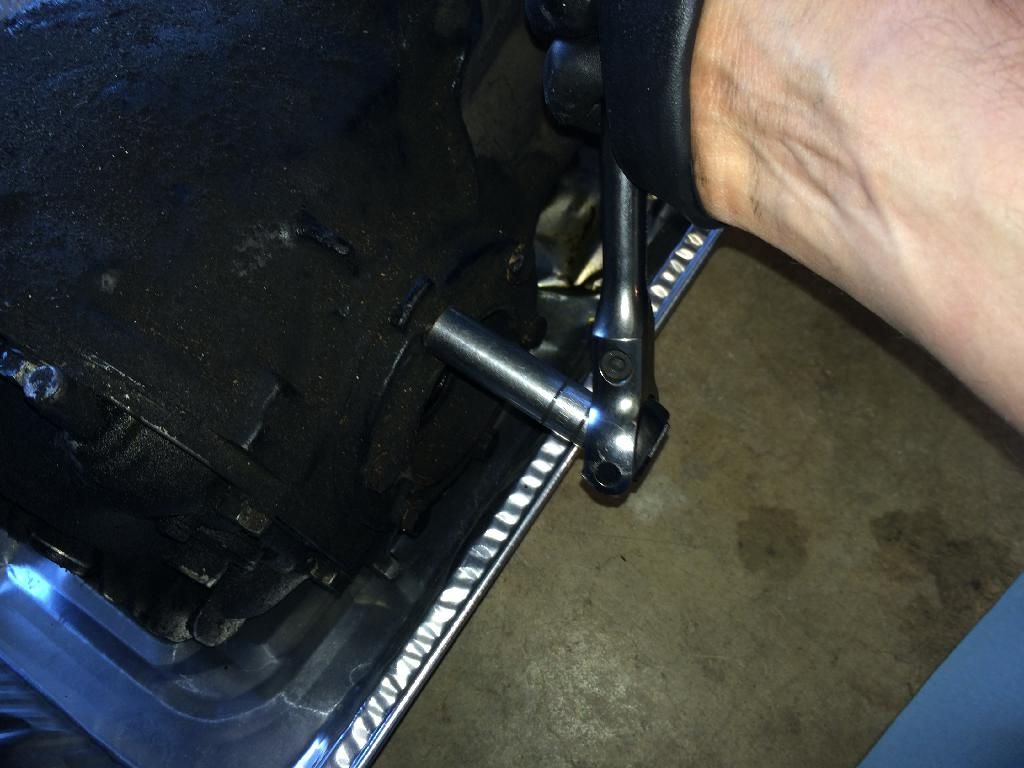
Prying doesn't pull it out effectively, try hammering an extension and driving it to "rotate out" in kind of a helix pattern. Basically angle the extension like this and tap on it with a hammer and it should rotate and come out.

Don't forget the spacer, on this side it stuck to the case.
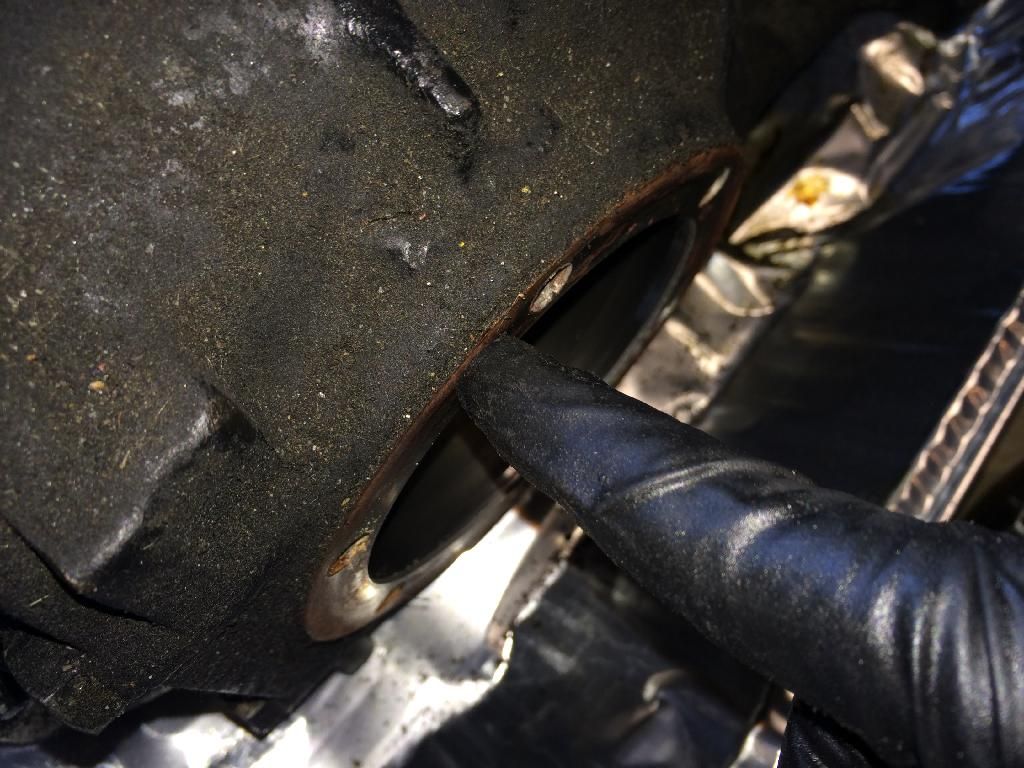
Do not forget this thing and don't mix up which side they go on. This is how they shim the output assembly. It doesn't seal anything so it's not a big deal if it's not clean. Don't go sanding it down too much trying to de-rust it or you could screw with the shim thickness.
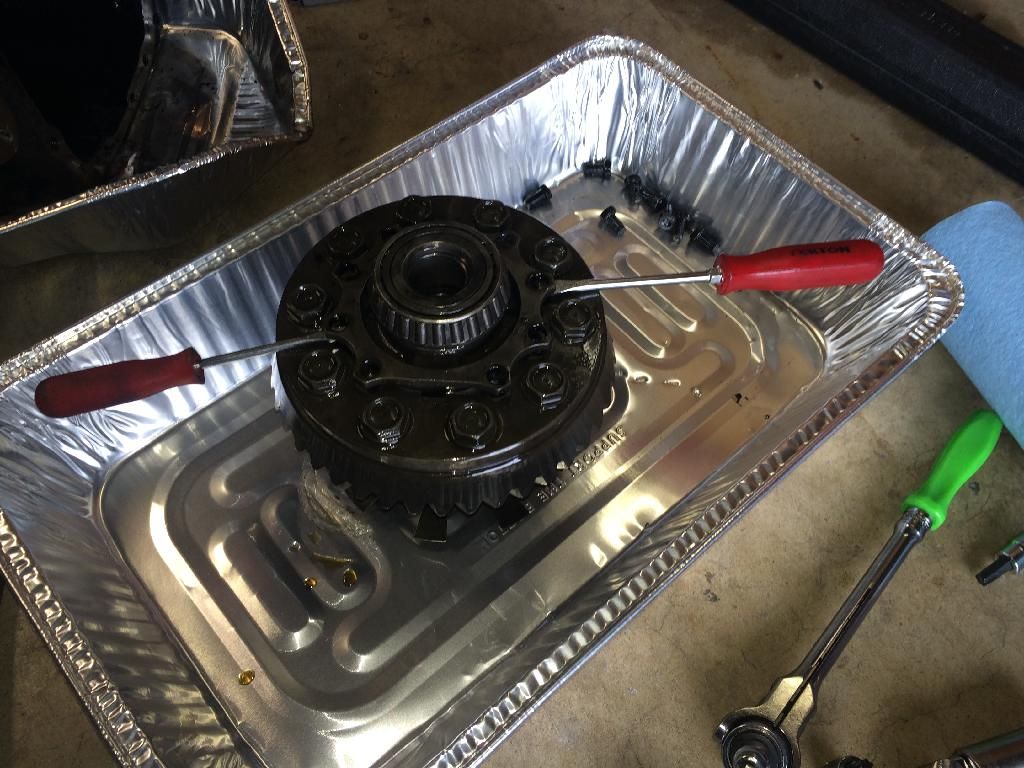
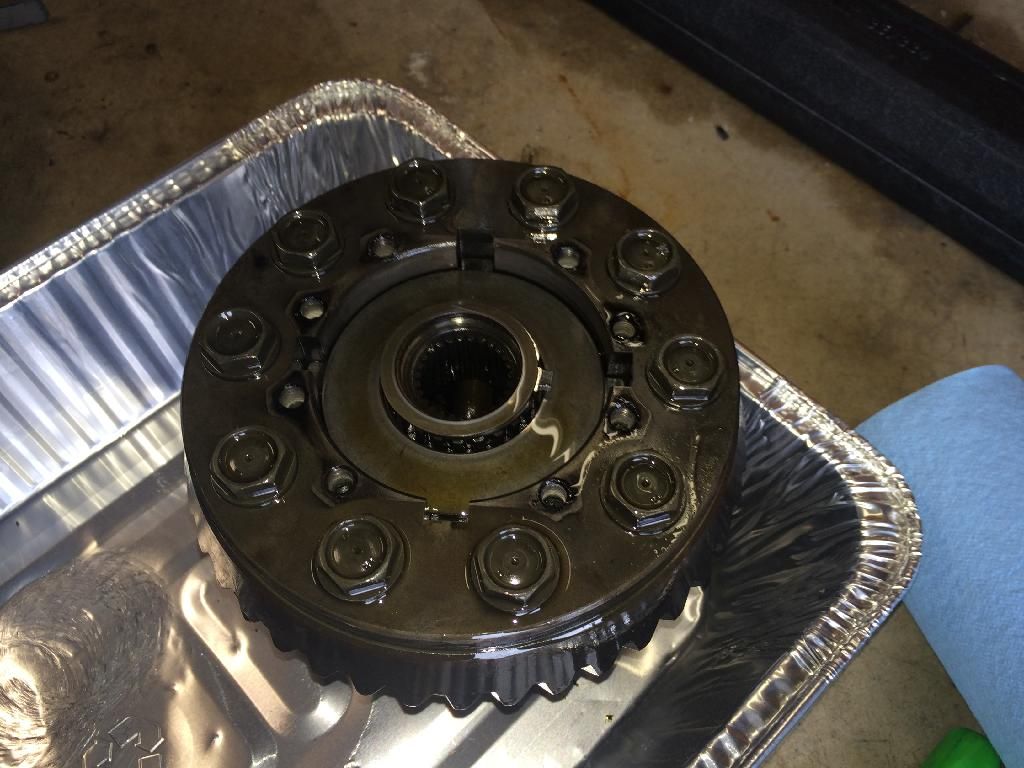
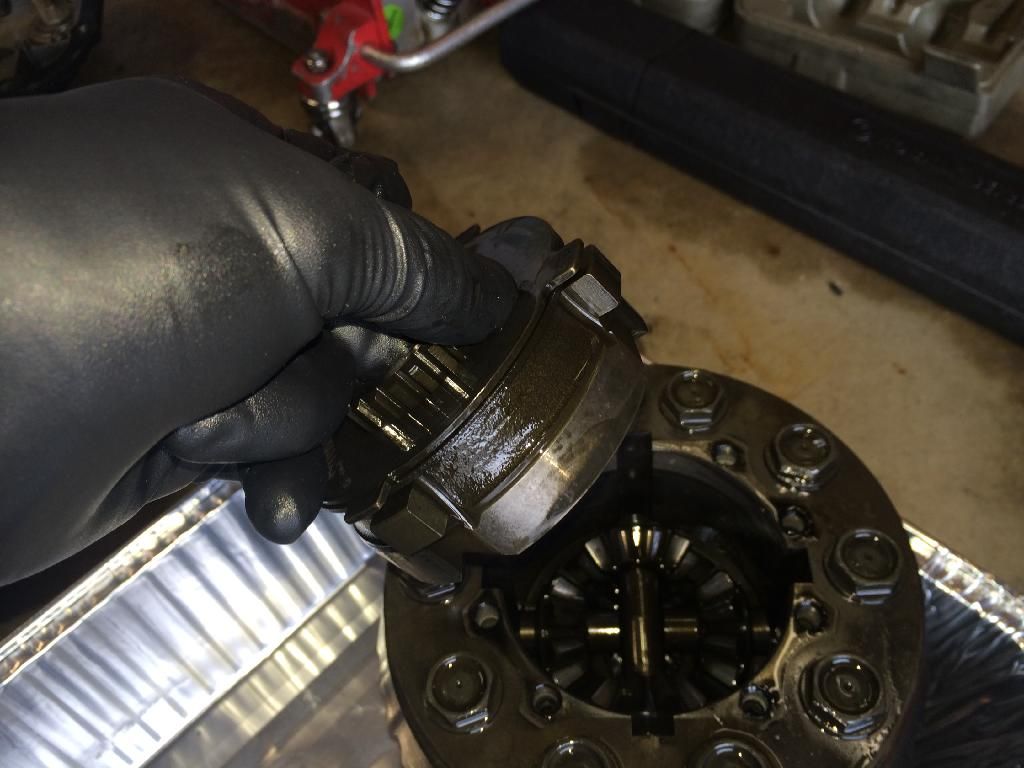
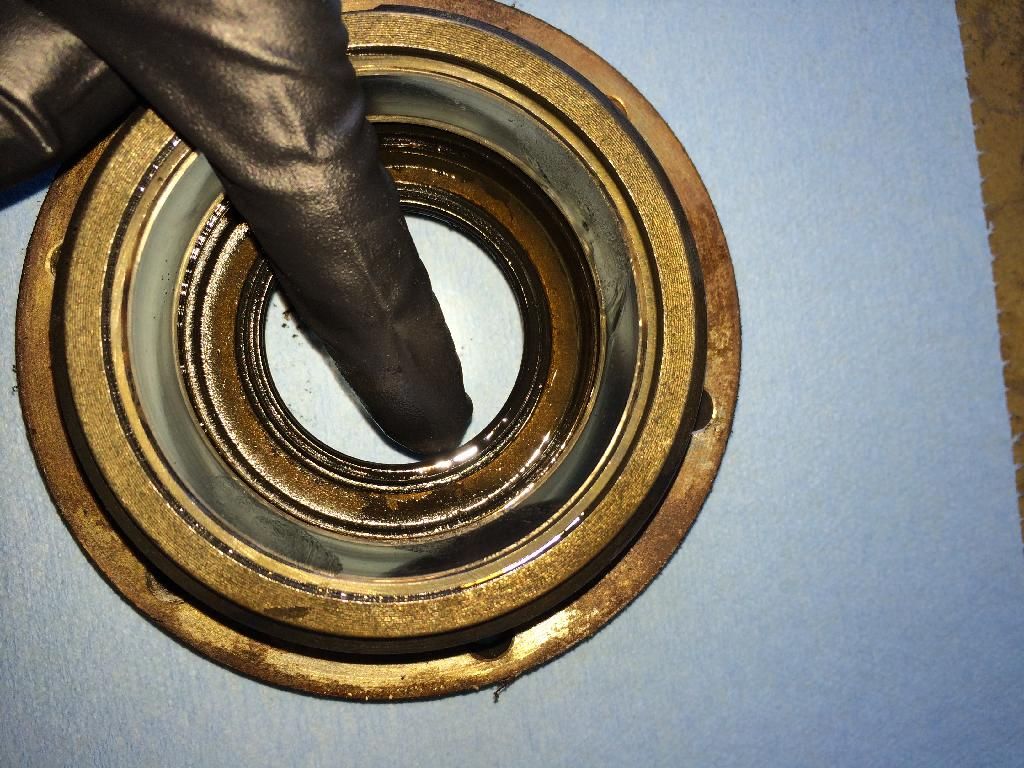
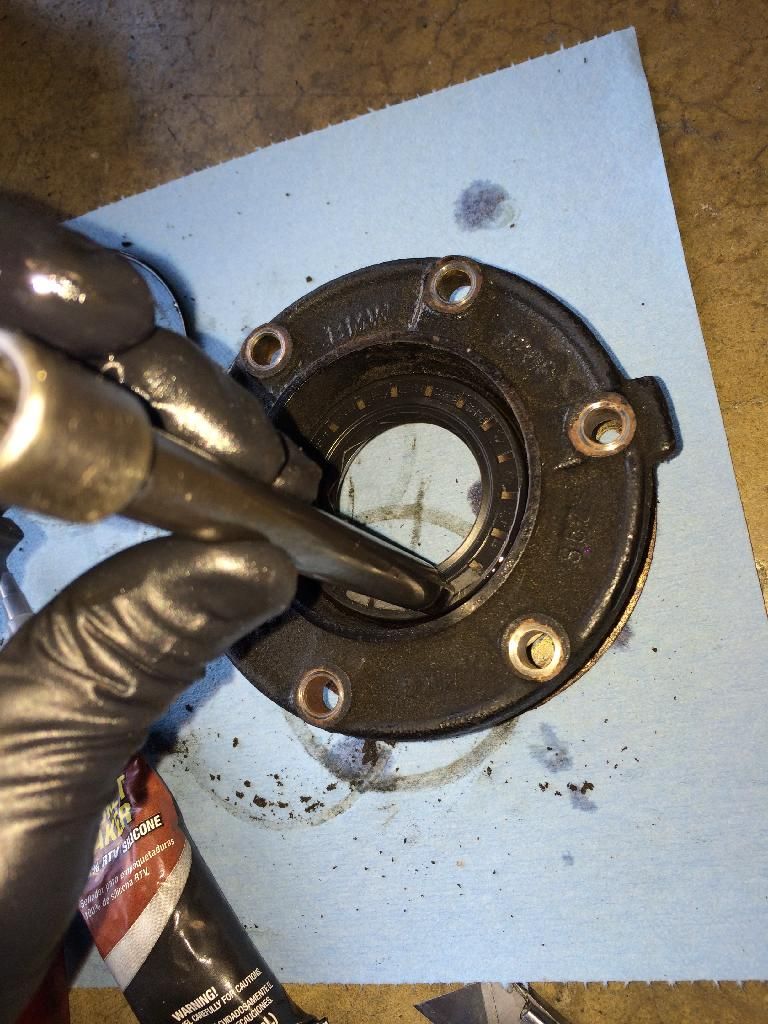
With the sides caps out the output assembly is loose. Put some clean gloves on and take it out.
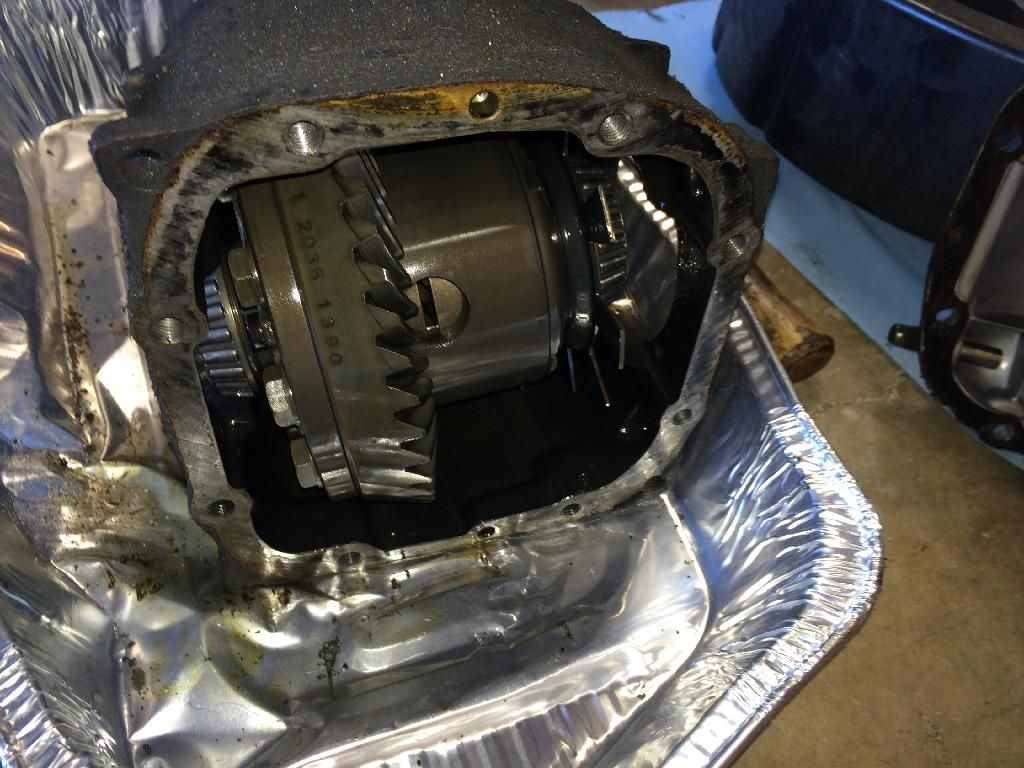
Here we go.
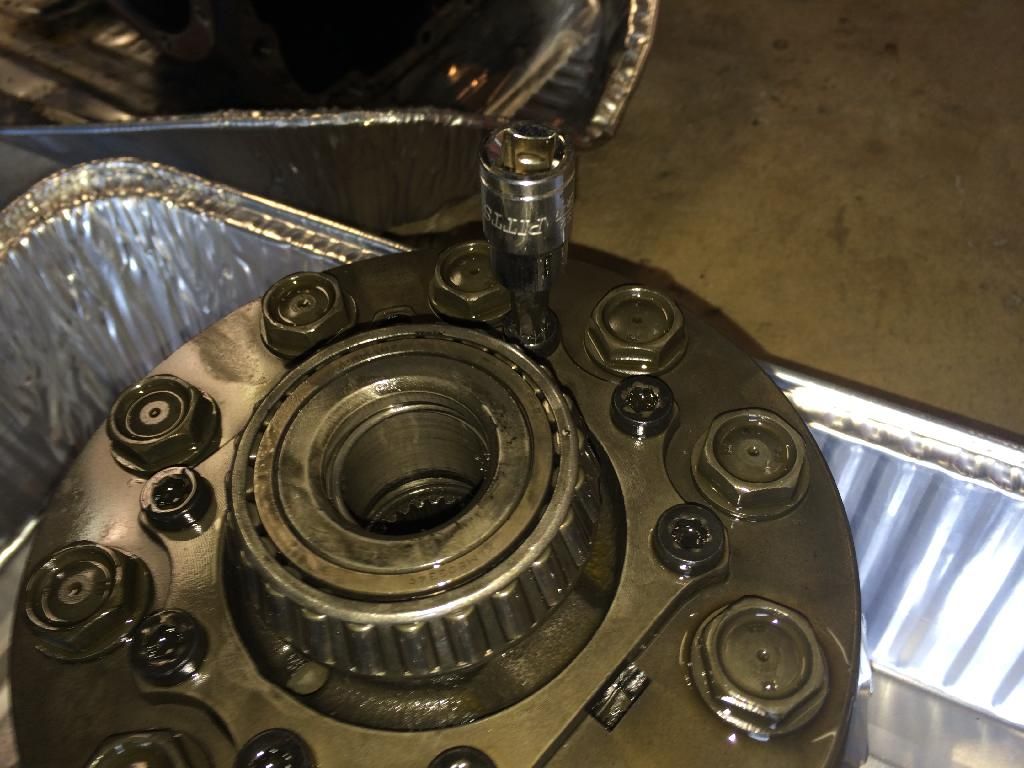
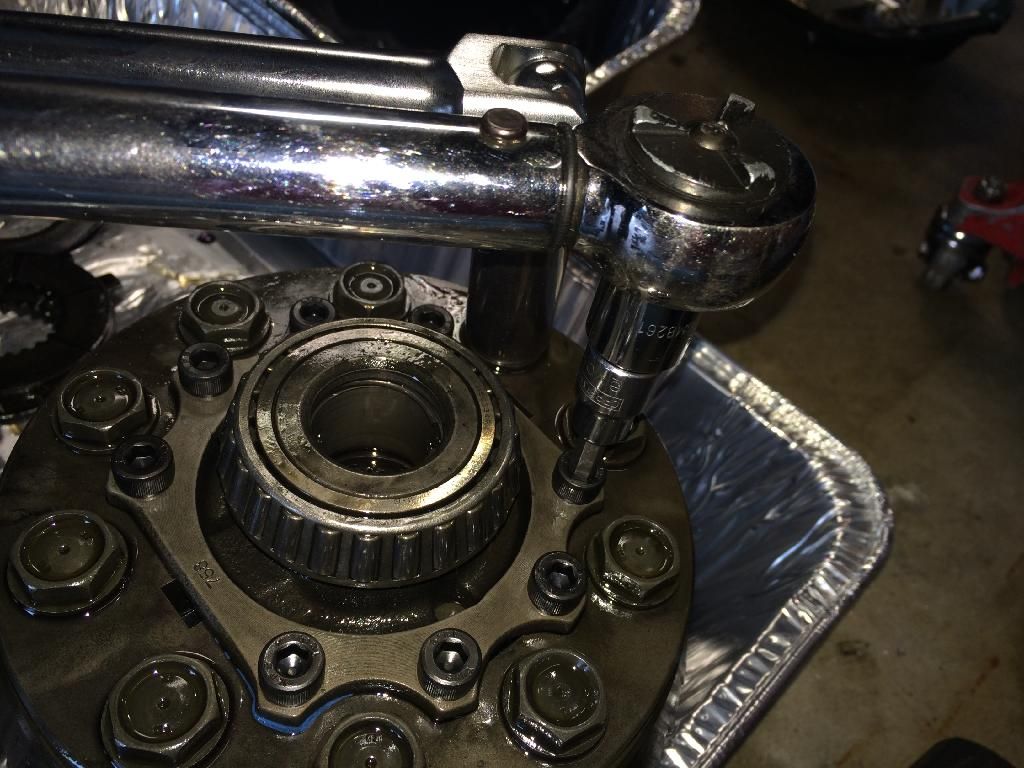
These allen screws are on damn tight. I used a breaker bar with a 19 on one of the ring gear bolts to keep the assembly steady while I cranked off the cap screws. I used a star pattern just in case.

These little suckers will be full of oil so it's tough to get an allen key all the way into the socket. I stripped this one out, so I hammered a T45 torx bit into it and was able to get it out.
The guides say to just keep prying around the cap to get it off like this

But I've always found using equal pressure and prying from both sides simultaneously to be way easier and more effective. Like this:
Came right out when I tried that.
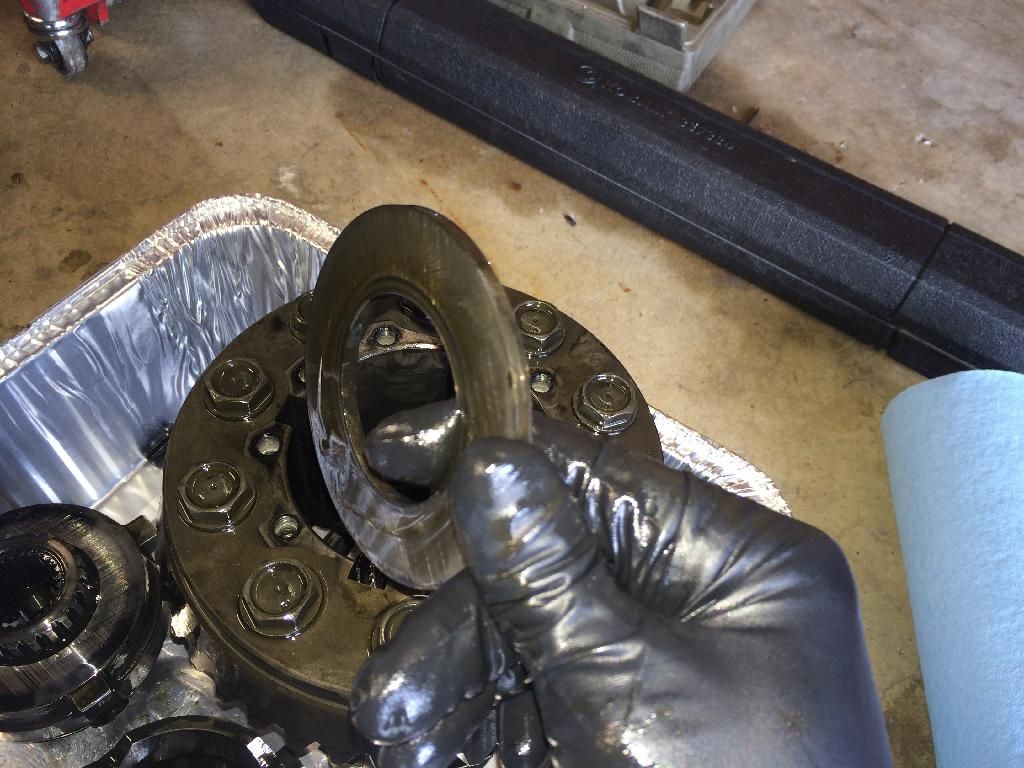
Here's a belleville washer, basically just a conical washer that acts as a spring. It's used to provide preload to the LSD clutches. There are four of them in the diff, two large diameter and two small diameter.
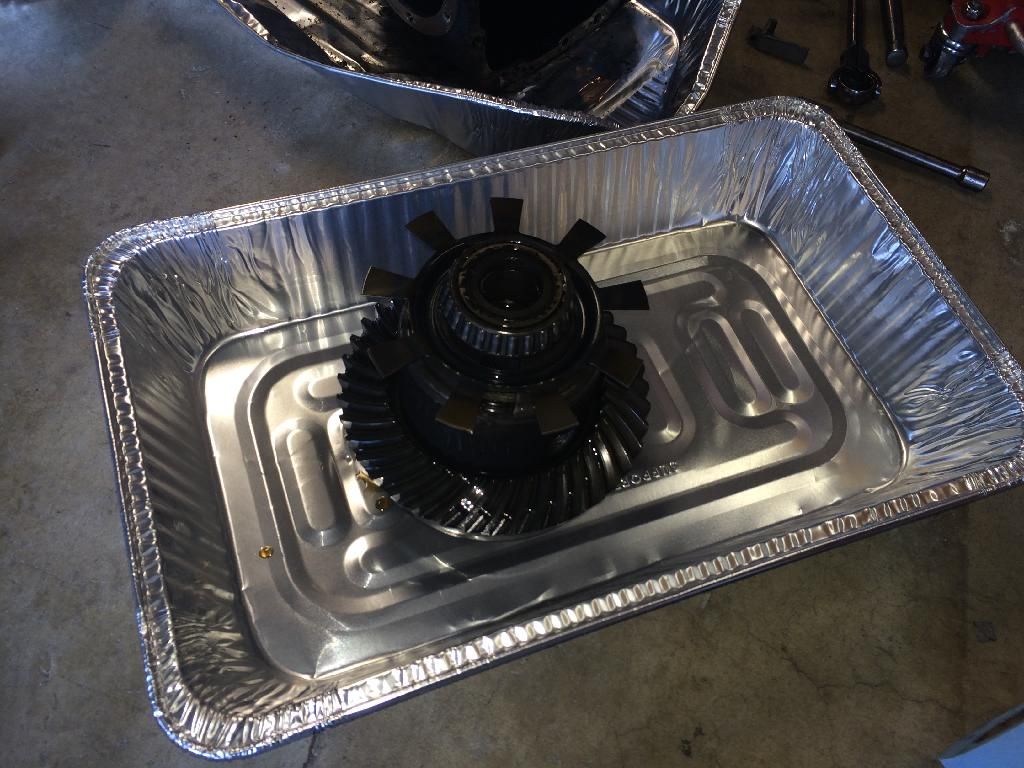
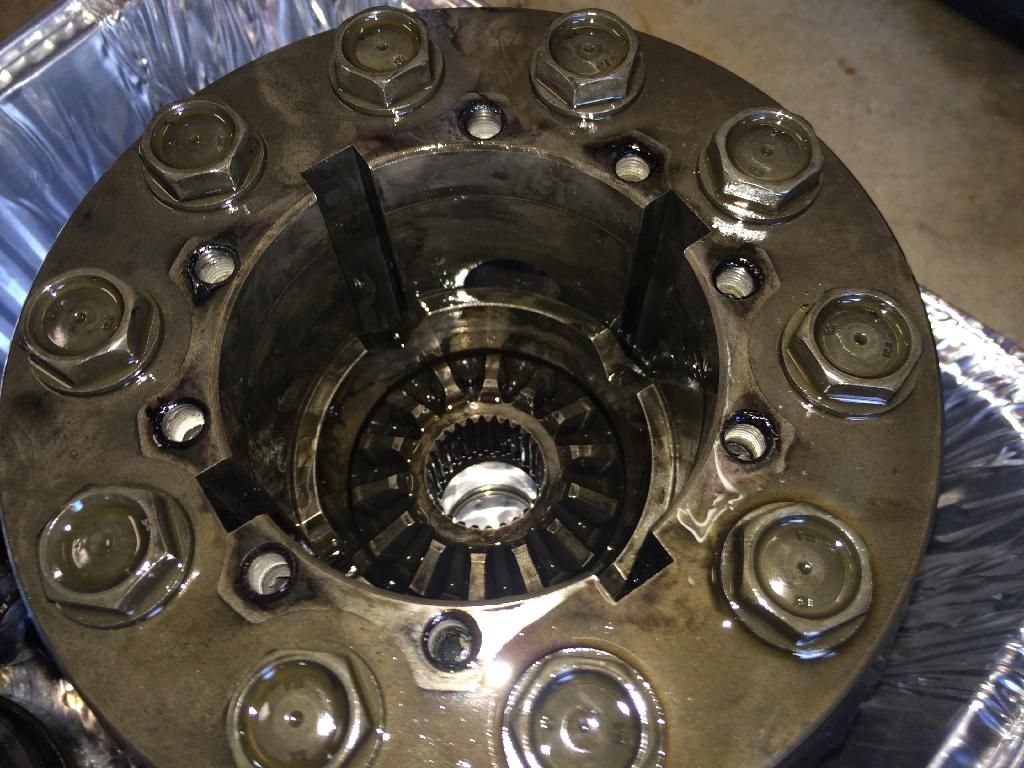
After that instead of picking at each disc one by one it's easier just to pull the center section out.
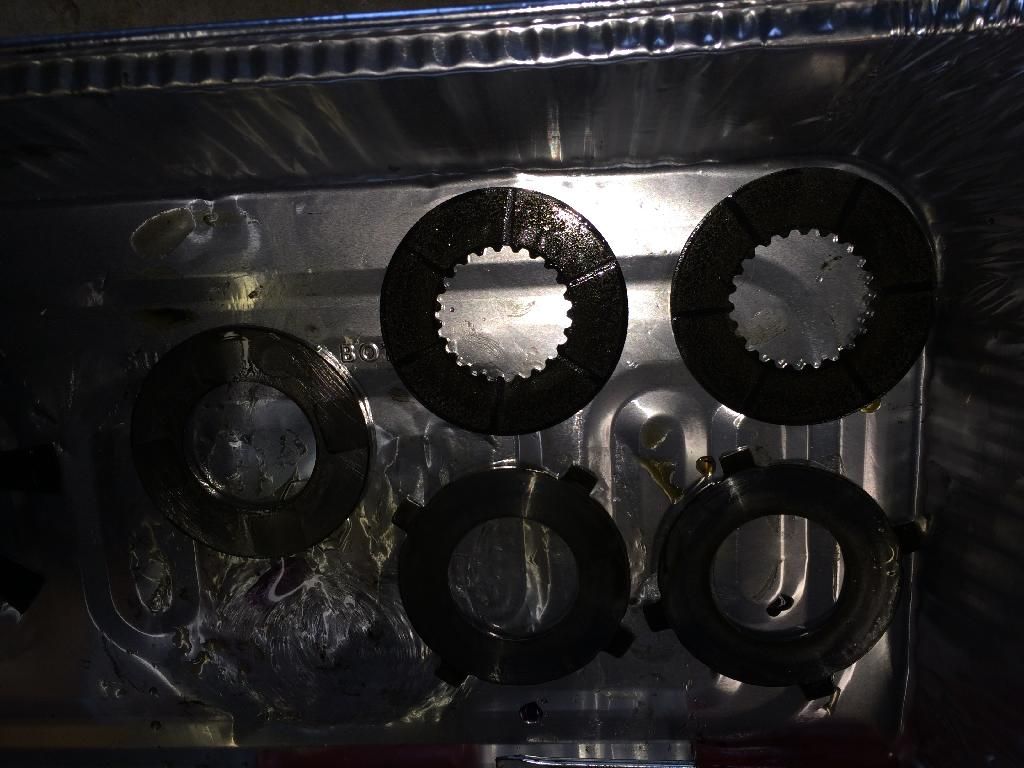
This is a stack of a dog ear, a clutch, and two bits of the spider gear assembly. You can see the "ramps" of the LSD on the bottom item in the stack I'm holding, and if you peer into the diff you can see the spider gears themselves. Cool beans.
Towards the bottom of the stack in the diff there's a 4mm spacer, which is exactly the thickness of a standard clutch/dog plate pair. This is basically ZF's way of being nice and making it really easy for people to add another clutch pack, which is exactly what I'm doing.
Soaking 2 new clutches and steel dog plates in diff oil before they go in. I'm putting 3 clutches and dog plates total into this diff.
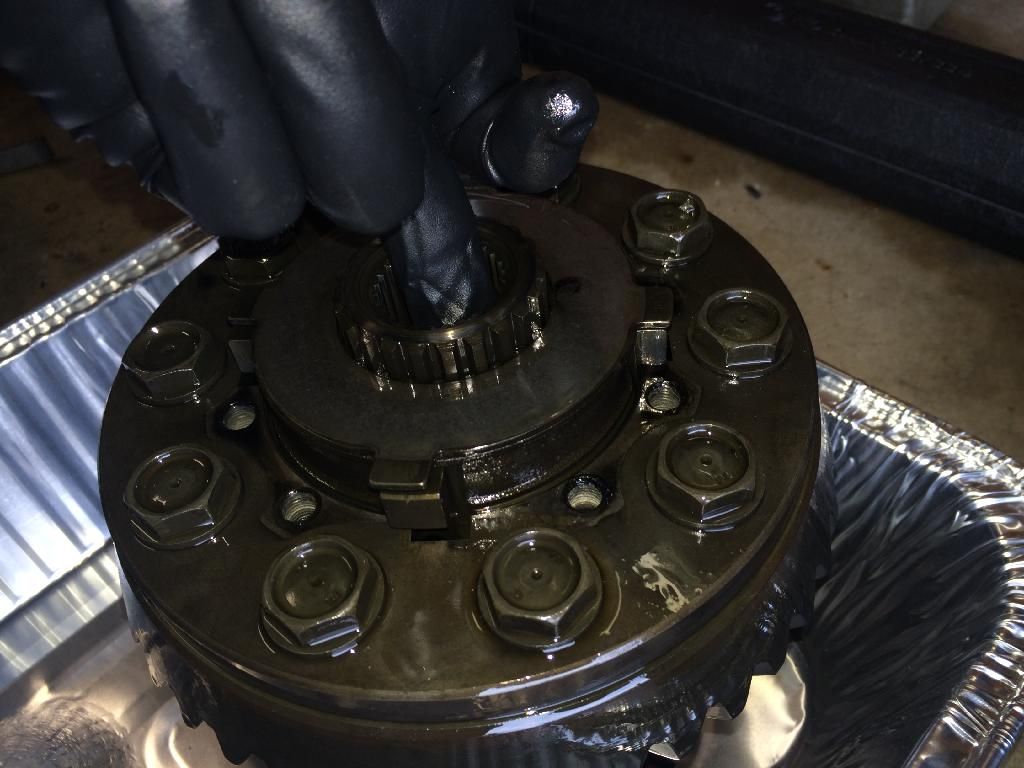
During reassembly, make sure that the "bottom" spider drive gear's splines are fully engaged with both clutches. You may have to rotate it some in order to get it to engage the clutch splines and slide down until it's seated properly. Remember if you did the 3-clutch rebuild the bottom side should have two clutches, so you will have to rotate it until it fits in, twice. Make sure the gear is bottomed out and the spider cross gears sit properly in the ramps before you continue.
Old end cap allen screw on the left, new one on the right. Lots more material on the new one.

Don't forget the loctite
And torque these suckers down to 25ftlbs. That's a lot of torque for a tiny little fastener like this. Probably why they're so easy to strip out. Oh yeah don't forget a star pattern--you have to use the screws to compress the stack by a couple mm so what I did was just use two opposing screws to compress it going back and forth by a quarter or half turn each, and when they were snug and tight I put the rest of the screws in, then torqued them all in a star pattern.
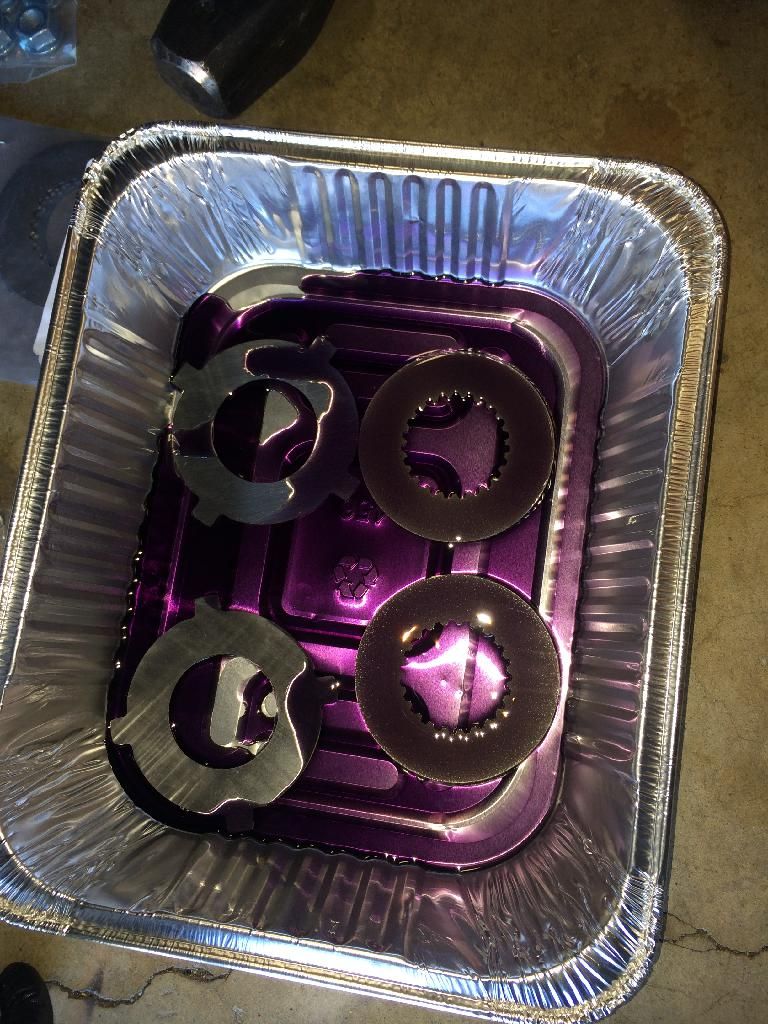
Old clutch plates and spacer. No bonus parts, that's good.
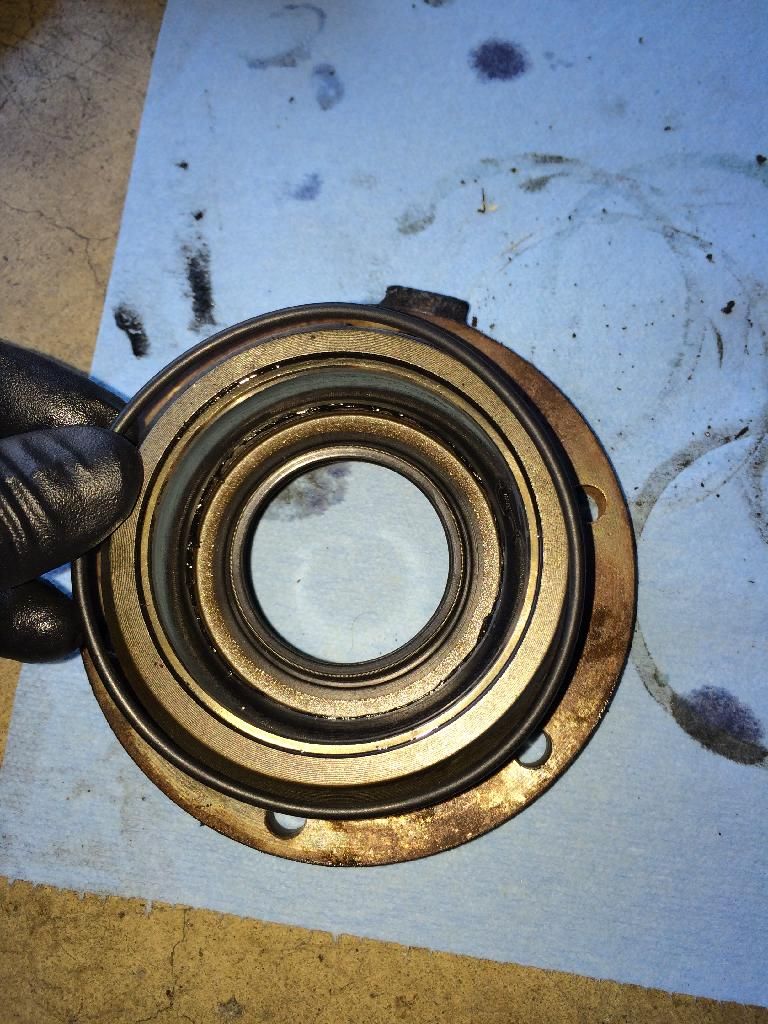
There are two seals on the end caps, first is the o ring that seals to the housing and is super easy to replace
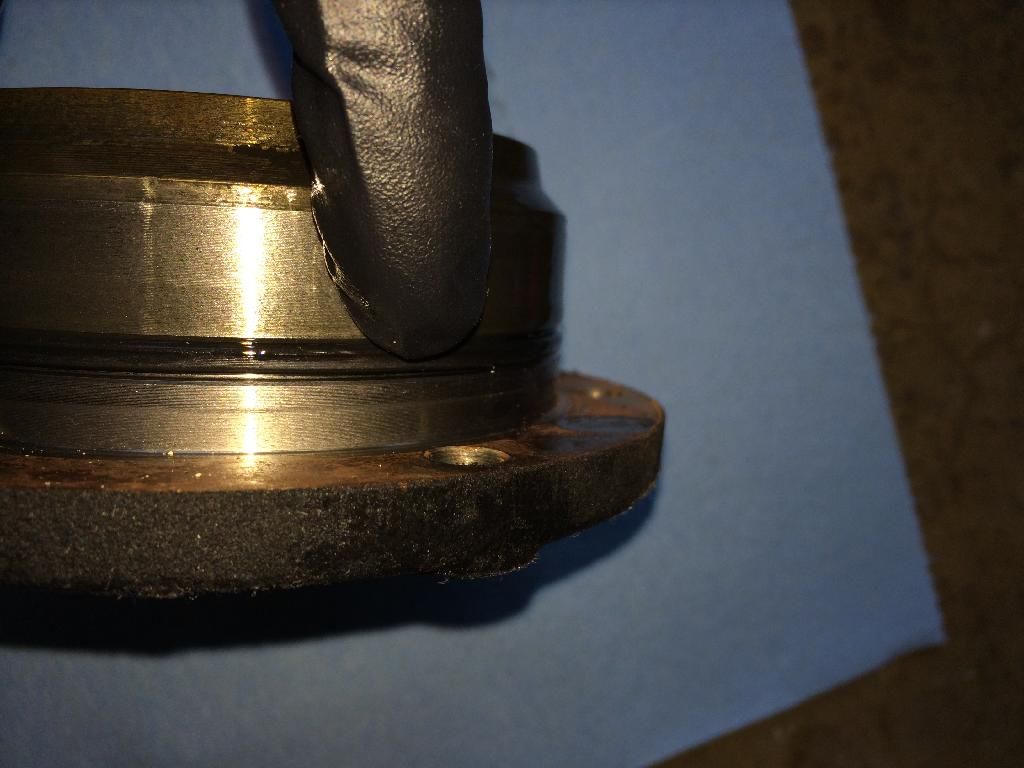
Second is the output shaft seal
Do the o rings first, make sure you have the correct o rings
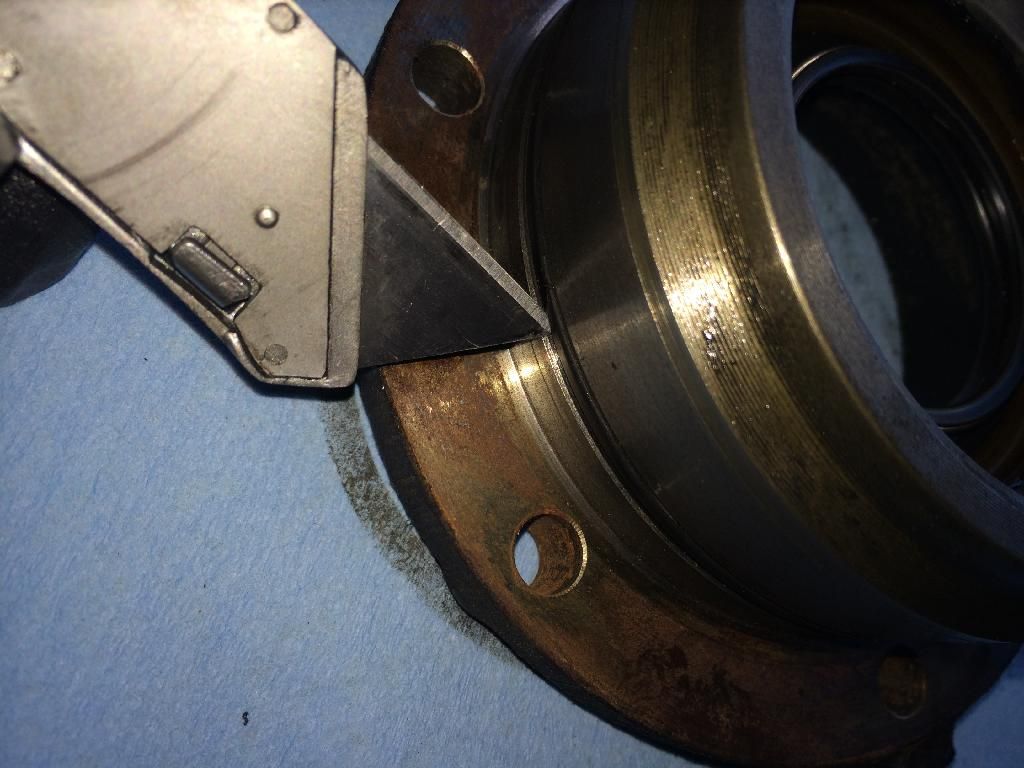
Then you can just cut the old one off.. or use a flathead to get under it and pry it out. I like destroying things so I did it this way
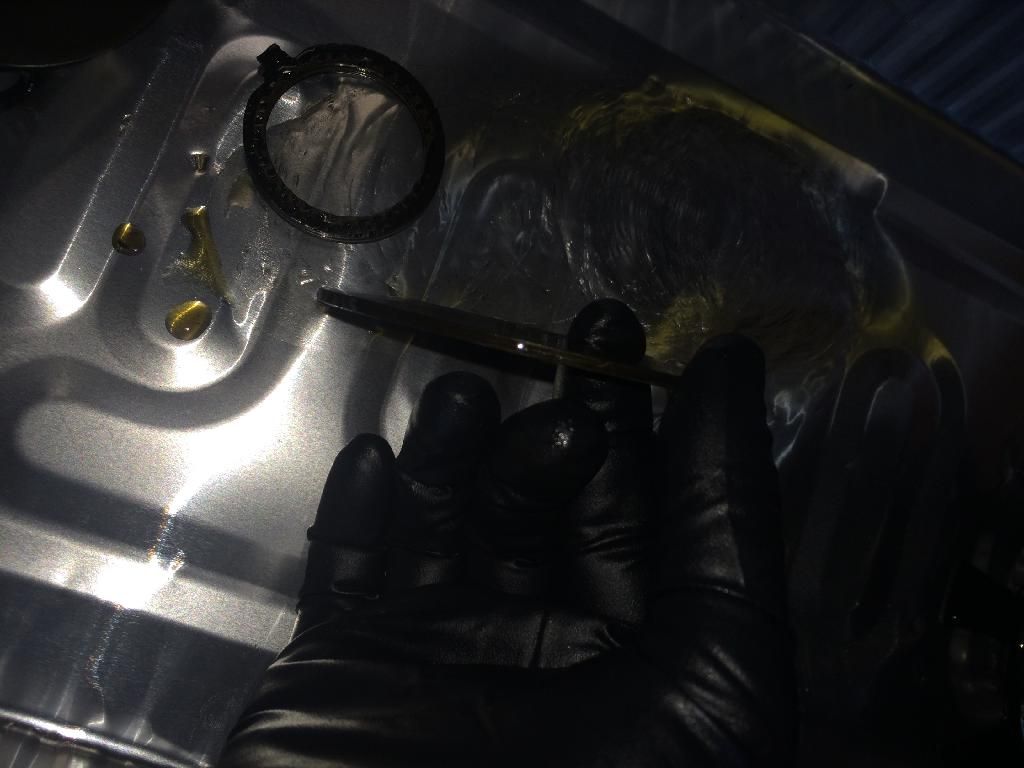
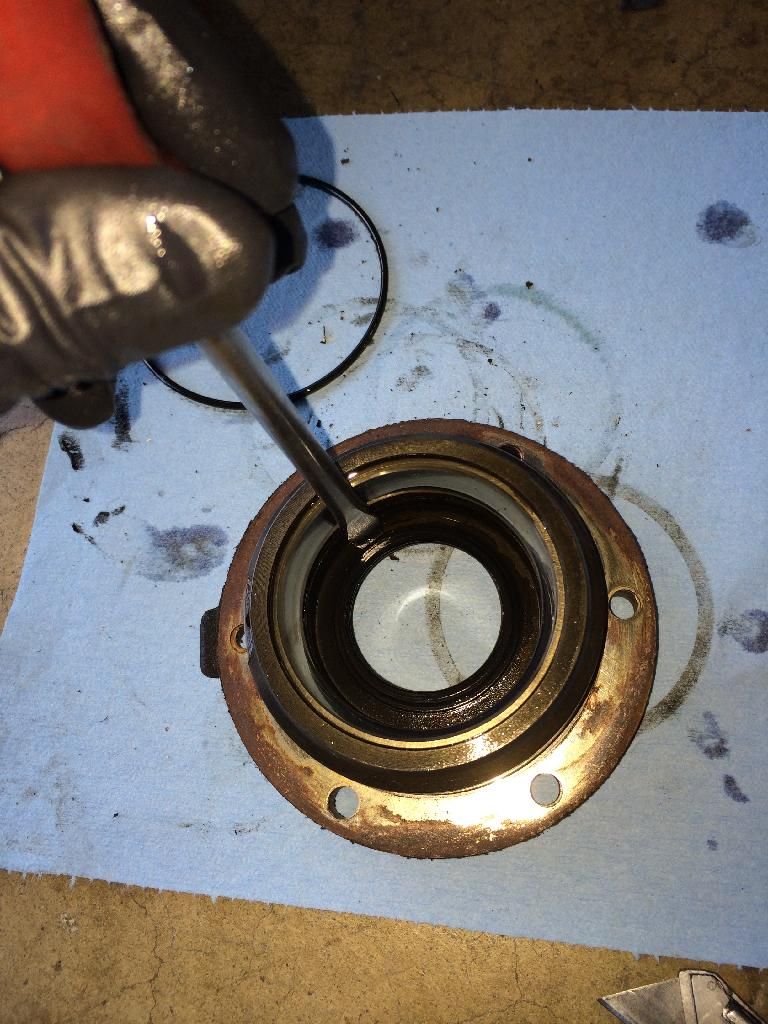
Next, the axle seal. Hammer it out using a flathead on the sturdy part of the seal.
Then, coat both surfaces with trans fluid. I also used a small bead of silicone on the mating surface. Then put the seal in place and tap it in. This will take a few tries but make sure you keep tapping one side, then the other--or go in a circle. Keep going until it bottoms out.
Note: after this you put the output assembly back in the diff, put the end caps and respective spacers back on, check that it rotates well and then put the rear cover on. Didn't show any of this, too beat and strapped for time.
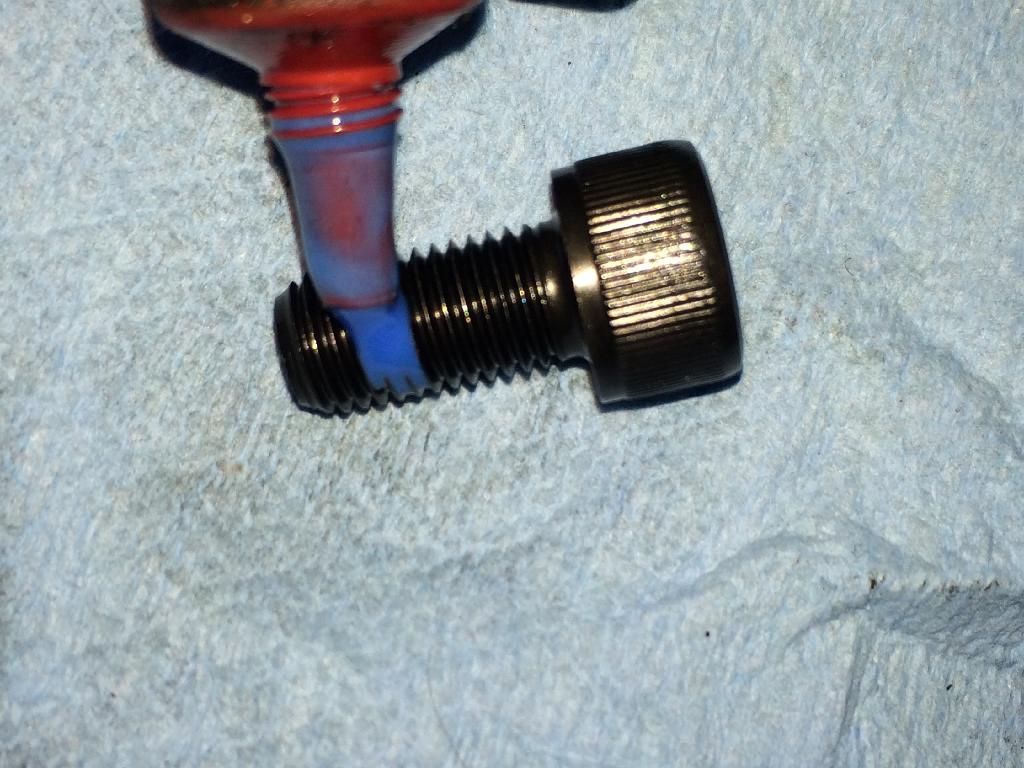
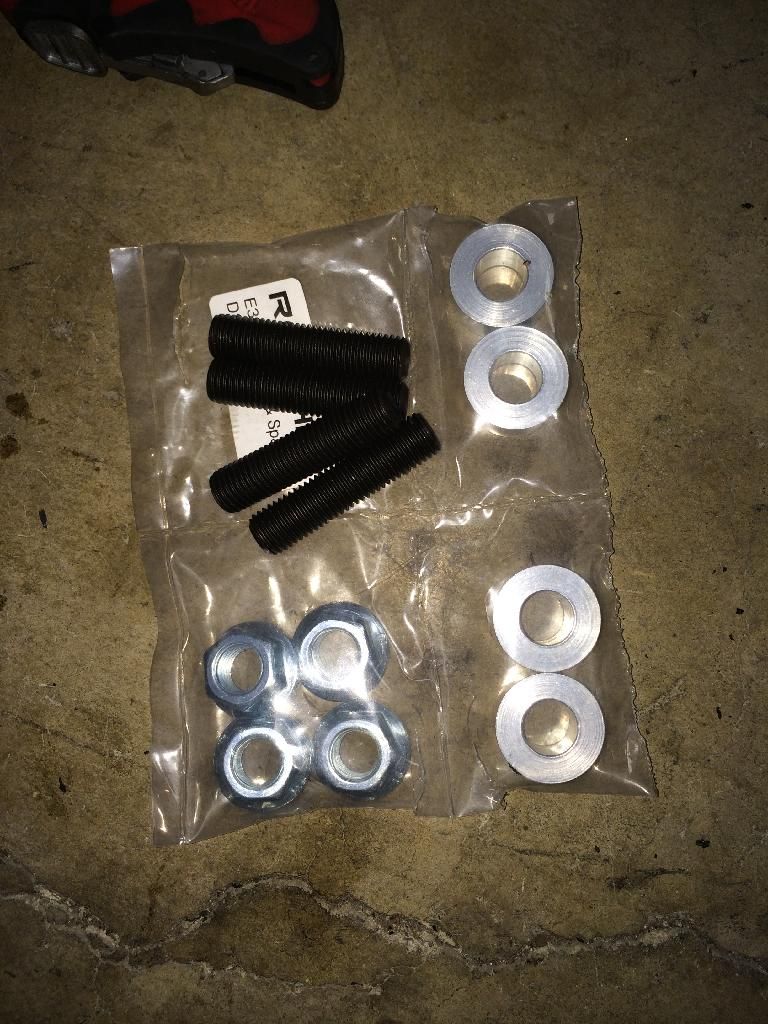
I also got a revshift stud/spacer kit to space the diff down since I'm running a raised subframe. Kind of a cool kit and you don't have to struggle threading bolts into the diff from the top of the subframe.
A word to the wise, don't try to install a diff if the car isn't level. I forgot this time and it wasted like a half hour with me cussing the whole time.
That's it! Break it in however you want, the writeup just says to drive gingerly for 5-10 miles but others insist on using shitty break-in oil and/or even driving figure 8s for awhile... I just went easy on it and didn't make any super tight turns for 10 miles, and then I wailed on it a bit. Locks real nice, though the car still lifts the inside rear coming out of corners sometimes. I'll have to address that later.
Side note: I elected not to change out the bearings this time as this is the only diff I've had that's been completely silent and bearings are another ~$80. I believe if it comes down to it they can be done in the car as well, but I do need to pull the diff again before I track it anyway.
Many thanks to Wanganstyle who I bugged more than once about various diff topics.Last edited by Wh33lhop; 04-28-2014, 08:53 AM.paint sucksComment
-
Why do you say not to install it when its not level?
I did it that way with the car up not even and everythng went fine, all by myself.
I got another diff that is sitting around. Your pictures make it look easy.Comment
-
Great clutch pack replacement write up!
Edit: In your opinion, how does 40% lock up feel like on the streets compared to the stock 25%?Last edited by MyE30; 04-28-2014, 01:17 AM.
Comment
-
It's a little daunting until you understand everything that's in the diff and how it works. It's really not too bad.
I tried it with the rear of the car way in the air and the front on the ground. Putting the diff on a jack means it's going to be level to the ground and you want it to approximately match the angle of the subframe, especially with the stud kit installed as they all have to poke through simultaneously. Terrible with just the ass in the air, worked fine when I jacked the front of the car up to match.
My clutches were a bit worn so I was probably at more like 15% lock. The dog plates that I ordered were machined down a bit so as to reduce preload, so I didn't notice much with normal driving, but now powering out of corners the rear end of the car feels way more solid and predictable, with nice progressive breakaway. The limits of the car feel higher, though it's really just that you can get on the gas earlier and still have it stick.paint sucksComment
-
Nice documentation!
Comment
-
I never knew about that Revshift stud kit.Comment
-
Very nice man.
And holy hell, I think I'd be scared to brake that hard going that fast lol.
1991 325iS turbo

Comment
-
:up: looks good nate! i like the diff write up!
Kevin KleineComment
-
Hah! No that's my friend's machine. :)paint sucksComment


Comment