
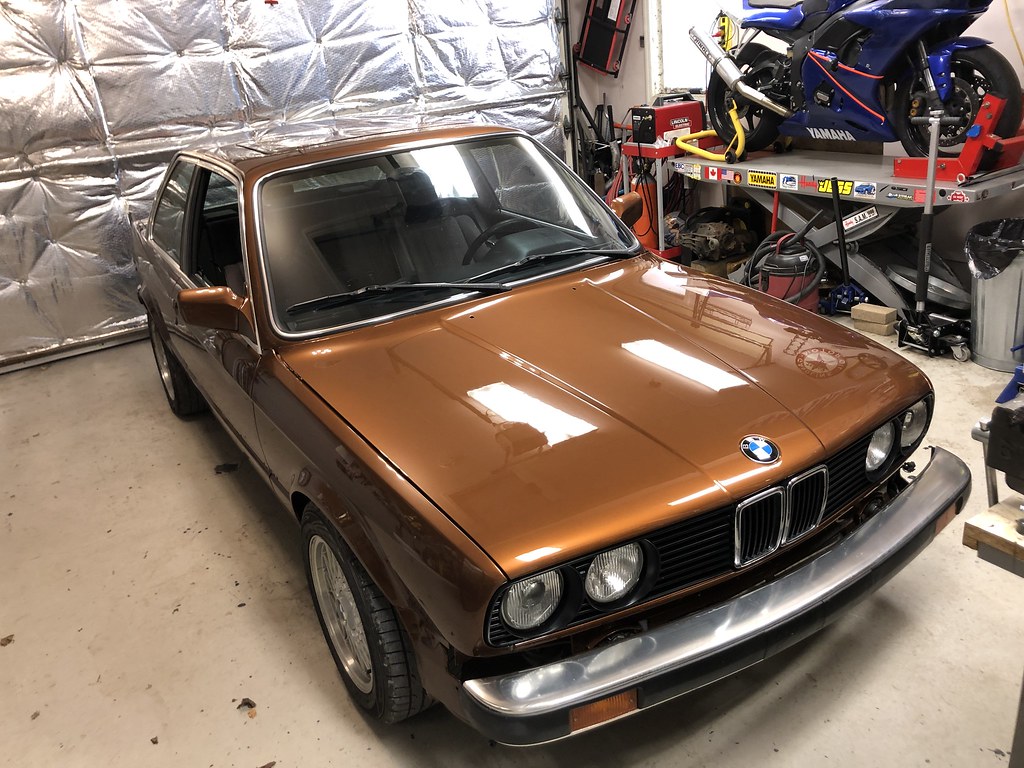
Thanks for the read! I've tried to capture the whole experience as best I can.
Glad you found the washer fluid res useful. It's not stealing in the slightest, I'm happy to contribute to the community wherever I can.
To be honest I never did plumb it up to the washer squirters even when it was installed and wired. But it's on the eventual to-do list as I do want to take the car on some roadtrips.
Chase bays no good? I've used their stuff before without issue.
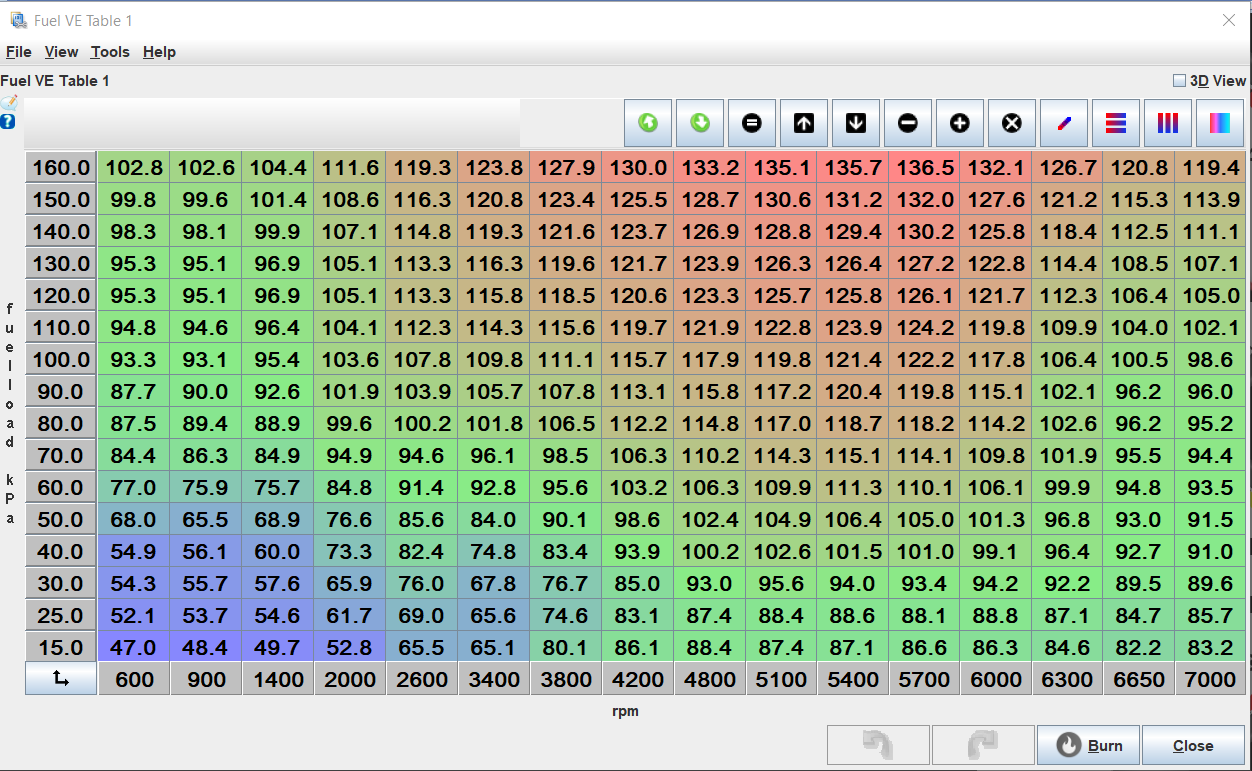
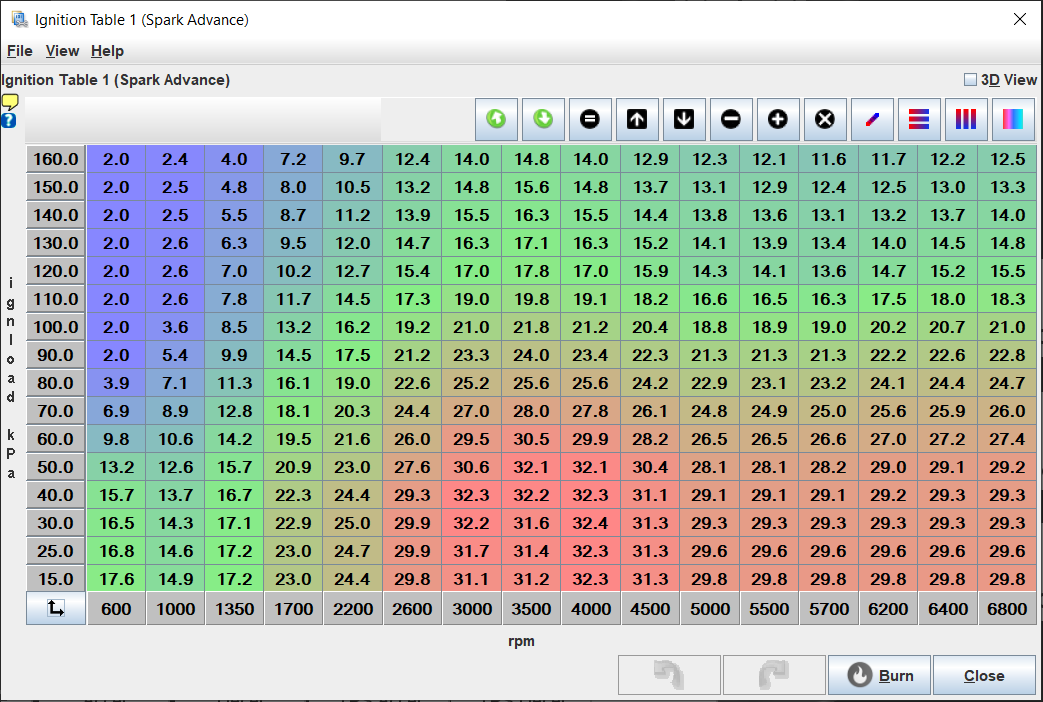
Can't decide what I like doing more, wrenching, driving, or tuning!
 Glad other folks like the nerdy tuning bits too.
My BKR7E are at 0.027" now just for reference.
Curious as to why you've stuck with an OEM ECU for your build. Does sound like it's cracked wide open if you can even adjust dwell tables. Can the ECU be tuned on-the-fly like a standalone?


Leave a comment: