If this is your first visit, be sure to
check out the FAQ by clicking the
link above. You may have to register
before you can post: click the register link above to proceed. To start viewing messages,
select the forum that you want to visit from the selection below.
I've used 3M cavity wax and fluid film. The thing I like best is when you can apply it with compressed air though an applicator gun. You just get a better coating. Fluid film seems more like a maintenance item, where Cavity / cosmoline seems more permanent. So I think its down to quality of application, vs how much till get washed out.
Hmm you've both given me some points to think about.
Thinking I will likely import something to get the best quality possible. The cost is worth it IMO.
I've used 3M cavity wax and fluid film. The thing I like best is when you can apply it with compressed air though an applicator gun. You just get a better coating. Fluid film seems more like a maintenance item, where Cavity / cosmoline seems more permanent. So I think its down to quality of application, vs how much till get washed out.
Backside of all the inaccessible pieces is painted with weld-through primer.
It's probably a good idea to have the cavity wax for extra protection though. I've used the Eastwood internal frame coat before, but it's expensive to get shipped to Canada.
Need to find an alternative, thank you for the reminder!
I think you're fine using pretty much anything that is going to dry into a gel and not wash away immediately
Edit/tangent - I kind of came around on stuff like this when I worked in aviation and saw that everything has a ton of layers to prevent corrosion.
Starting with the base Al alloy being Alclad, it's anodized or alodined, primed with some sort of zinc chromate/phosphate or epoxy, then painted with a quality paint.
So just a basic sheet effectively has 4 layers of corrosion protection, then any joint or fastener is wet installed with essentially seam sealer to eliminate air gaps so the faying surfaces don't have air to corrode themselves like the subframe-to-frame spot, or any of the spot welds on the e30 chassis.
Don't forget rustproofing the back side of the welds with some sort of Cavity wax or equivalent.
Backside of all the inaccessible pieces is painted with weld-through primer.
It's probably a good idea to have the cavity wax for extra protection though. I've used the Eastwood internal frame coat before, but it's expensive to get shipped to Canada.
Need to find an alternative, thank you for the reminder!
I'm curious about welding the replacement pieces in. What welder do you use? Is it different than the welder used to tack pieces in place? I know you the guys on TV always say they tack pieces in because they don't want to distort the metal, but how do you keep that from happening when you lay your beads?
Also, how are you cutting out the rusted areas? Grinder or plasma cutter?
Good questions. I'm using a Lincoln EasyMIG 180. It's a 240v AC welder with a gas bottle. It has adjustable wire speed and power settings.
When butt welding thin sheet metal pieces, you are basically forced to tack weld or you'll blow holes right through the metal. When I have access to both sides of the panel, I tack weld both sides. Usually I can get away with laying small beads on the 2nd side as there is now more metal there to absorb the heat. Then I'm able to grind down the visible side to be smooth.
Of course I could be lap welding the joints to make my life easier, but I want to do the job properly and not leave any area for moisture to be trapped.
Using an angle grinder for the cuts, and sometimes a dremel for the small areas
I actually have three angle grinders set up (cutting wheel, grinder, flap disk) to avoid constantly changing the attachment. They're cheap and it has sped up my workflow quite a bit!
I'm curious about welding the replacement pieces in. What welder do you use? Is it different than the welder used to tack pieces in place? I know you the guys on TV always say they tack pieces in because they don't want to distort the metal, but how do you keep that from happening when you lay your beads?
Also, how are you cutting out the rusted areas? Grinder or plasma cutter?
From my experience repairing old body shop work, make sure they plan to use an appropriate primer on the freshly installed parts prior to using any seam sealer. I have spent far too much time grinding/digging seam sealer out of small gaps to address rust issues that crept in behind repairs. If they would have initially used the appropriate methods I would have never needed to do that work.
Good tip, thank you! I can't remember if I applied primer before seam sealer on the couple rust spots I addressed. I'll keep it in mind for future repairs.
----------------------------------
Front Subframe Restoration - Part 1
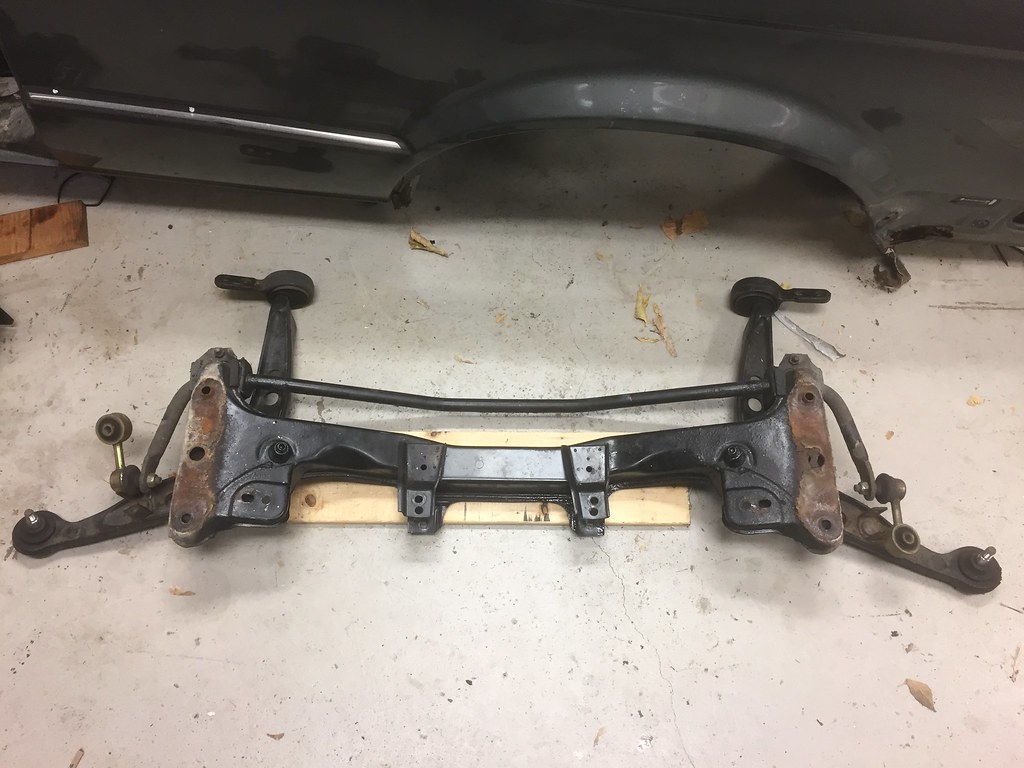
While we're waiting for paint, I decided to take off the front subframe. This (and the dashboard) are the only parts of the car I've never removed.
Once I got the subframe off, I was surprised to find some of it rusted through!
I was lucky, my local E30 facebook group had me a replacement within the same day.
It was quite the process to strip all the old undercoating off the new subframe, but I broke it out over a few days to make the job easier.
I did find one spot on the side of the subframe that was rusted, but the welder made quick work of that.
I welded in reinforcements for the front swaybar and motor mounts. Then I stripped the entire thing to bare metal and prepped for POR15, which subsequently took about a week to cure.
Now I turned my attention to the chassis side of the rust problem. Some cut & weld and the frame rail was fixed!
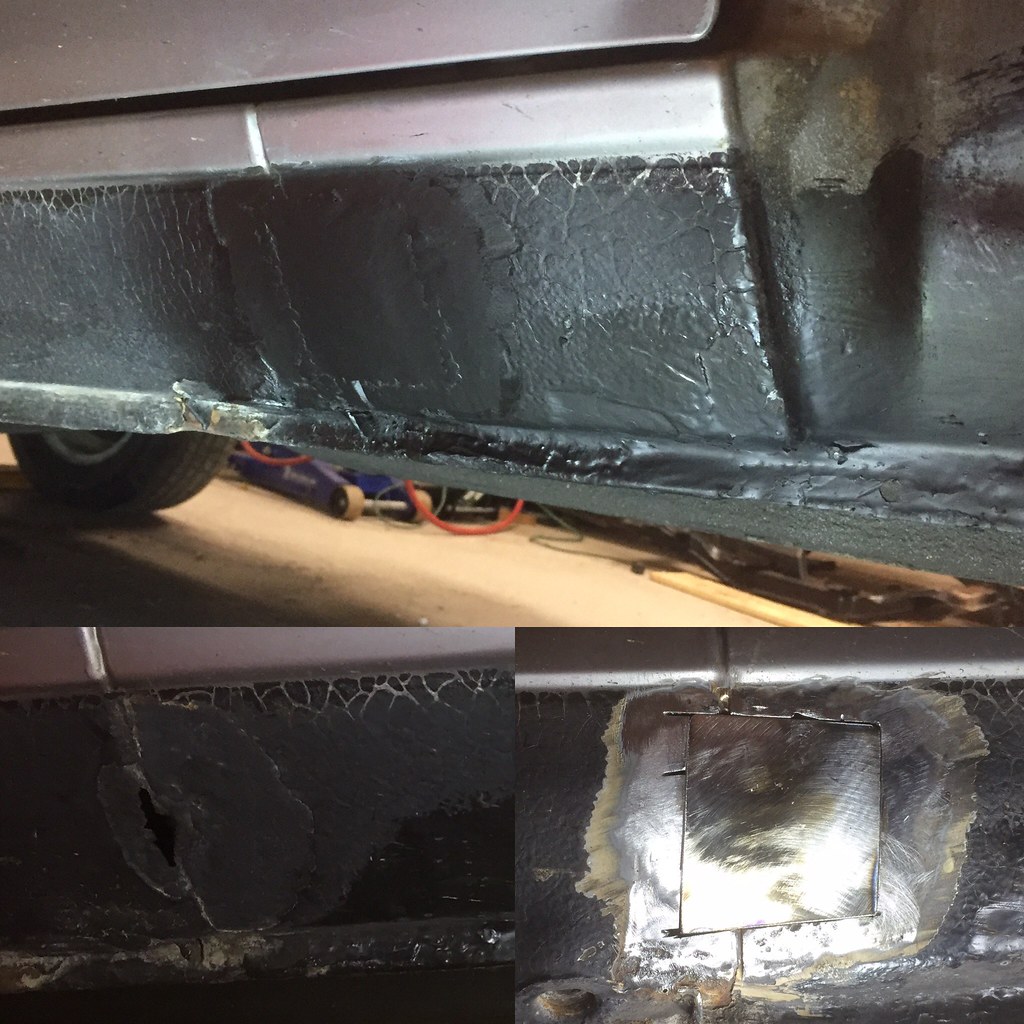
Used my new air hammer to remove what remained of the driver's side jack point, and welded in a patch panel for the holes that were ripped by the air hammer.
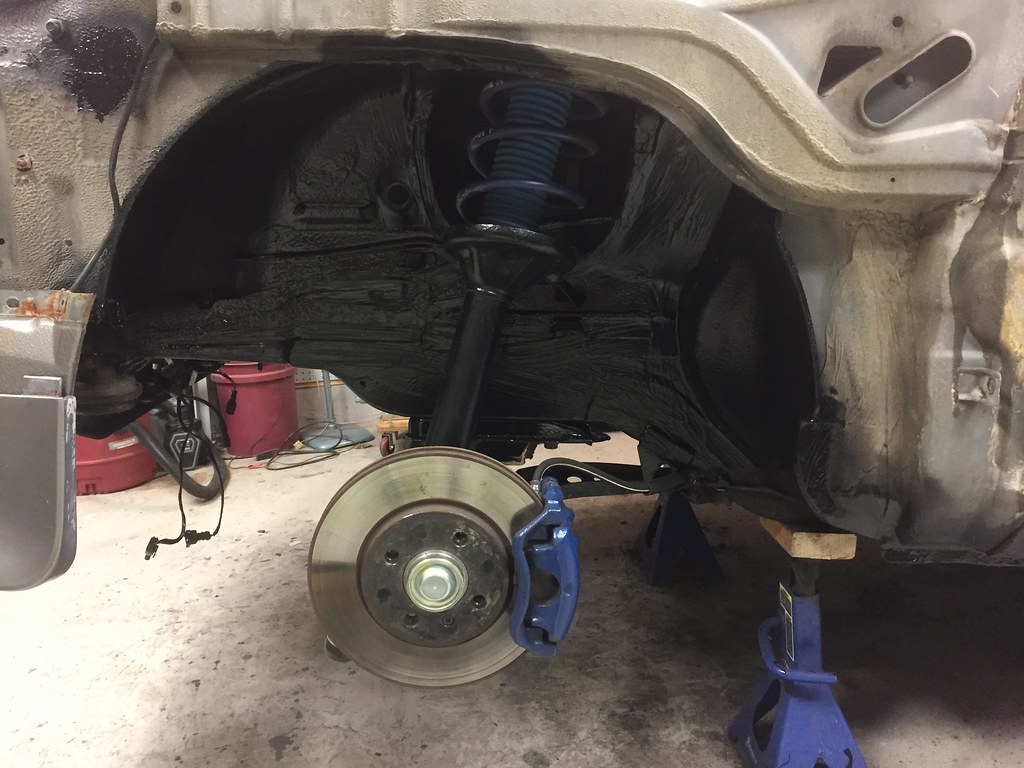
The "while you're in there" bug struck and I spent multiple days stripping the aftermarket undercoating out of the front wheel wells. Check out the PILE of the stuff on the ground (green pen for scale). Would have been nice to have the car outside so I could powerwash the stuff off, but since there is no front suspension, this will have to suffice.
I was pleasantly surprised to find that there was only one rust hole in the wheel wells, on the passenger side where I removed one of the old brackets. The metal was pretty thin, and the factory undercoating had peeled off (i'm assuming from the heat of the grinder). Quick patch and it's good as new.
I started working on this January 4th, and it's the 20th today. Going to let things dry overnight and get to painting the chassis tomorrow.
The POR15 on the subframe came out nicely, pictures of that in the next post!
Making great progress. No doubt the body shop will make easy work of straightening the unibody and affixing the new quarter panel.
From my experience repairing old body shop work, make sure they plan to use an appropriate primer on the freshly installed parts prior to using any seam sealer. I have spent far too much time grinding/digging seam sealer out of small gaps to address rust issues that crept in behind repairs. If they would have initially used the appropriate methods I would have never needed to do that work.
I'm now finished with everything I wanted to do before paint. She's ready for the bodyshop now.
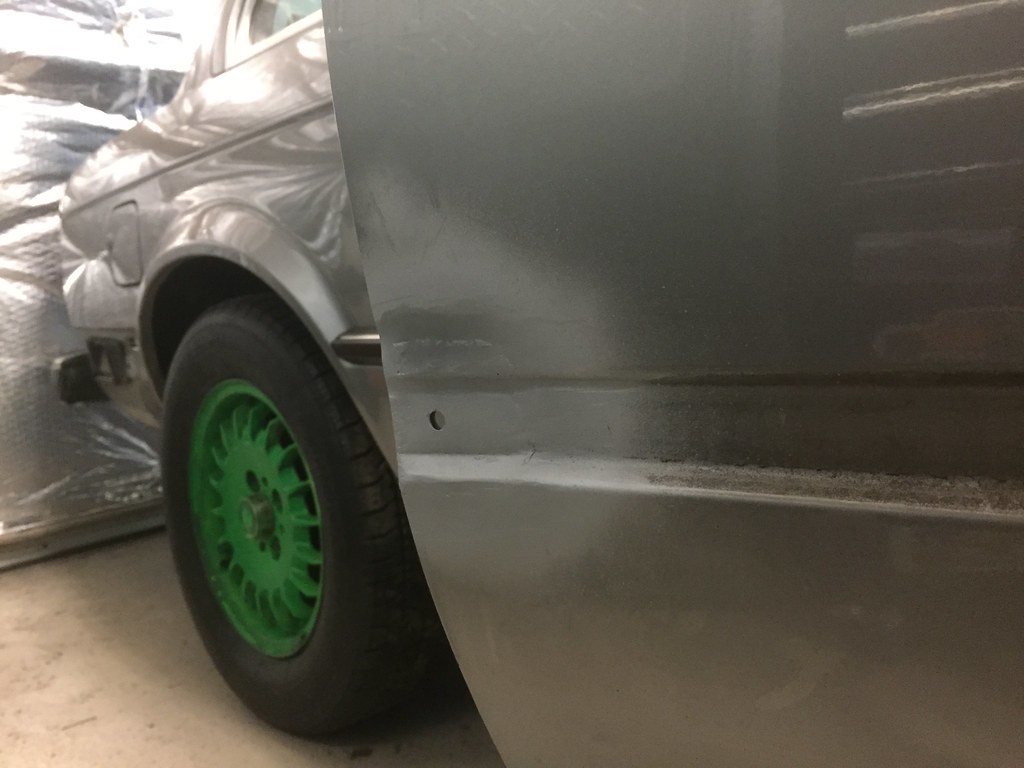
Pretty happy with how the passenger door rust repair turned out!
Although I would like to attempt the rear quarter panel myself, I know a bodyshop will do a better job then I can with my limited bodywork experience.
Finally got a straight rear bumper (which cleaned up pretty nicely after some cutting compound for the clearcoat), trim, and bumper shocks.
The straight pieces show how much that rear corner is still messed up. Driver's side of the bumper sits about 3/4" further in then the passenger side. I am planning on having the same shop (that pulled the quarter out) take care of the quarter replacement and paint, hopefully they can sort it out.
I'll get in touch with them in the new year. I believe they're quite busy, so the car may be down for a little while.
Did a test fit with both sets of painted front diving board trim, decided the darker set fits nicer. I'll have to get some shorter 'vert bumper shocks to finish up the look.
------------------------------------
Since this will be my last post of 2020, I want to thank everyone for following along with my E30 adventures this year. It means a lot to have a place where I can share all the little details of my car, with people who understand the passion that's behind it!
Here's wishing everyone a Merry Christmas and a Happy New Year!
See you in 2021


Leave a comment: