
Well no wonder you were having cooling problems! that stop sign definitely didn't help air flow/heat exchange for you. Hopefully that fan will help things and you'll be good.
-
'91 325i

-
Any updates? How's she running nowadays??
Sent from my Nexus 4 using Tapatalk clutchCTRL!Move with a purpose.- 1991 325iX 4dr/5spd- 1976 2002 SlickTop/2.7i M20/G260- 2000 323i AT2016 Mazda CX3 Sport AWD
Comment
-
I don't drive it much at the moment, I've been caught up with doing the stuff I've posted below. But when I do drive the car, it's exciting.
Exactly John :mrgreen:
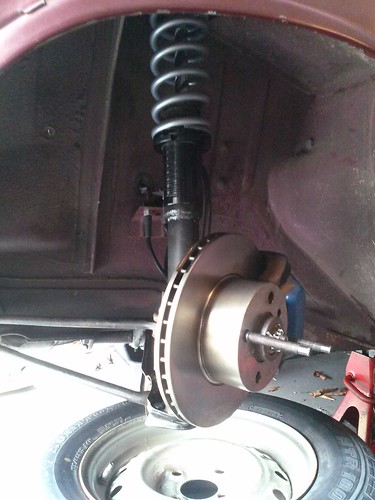
So I've been keeping busy over the past couple weeks. I pulled a set of Volvo calipers at the junkyard to use on the front struts. This allows you to upgrade from a solid rotor to a vented rotor.
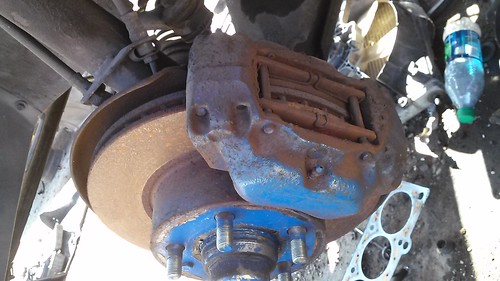 IMG-20150404-WA0003 by jasonbelina, on Flickr
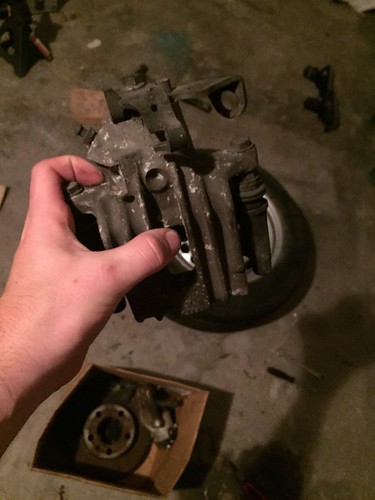
Next my friend found me his old set of vw mk4 calipers. These will be used in the rear to convert from drums to disks!
 IMG-20150404-WA0006 by jasonbelina, on Flickr
 IMG-20150405-WA0028 by jasonbelina, on Flickr
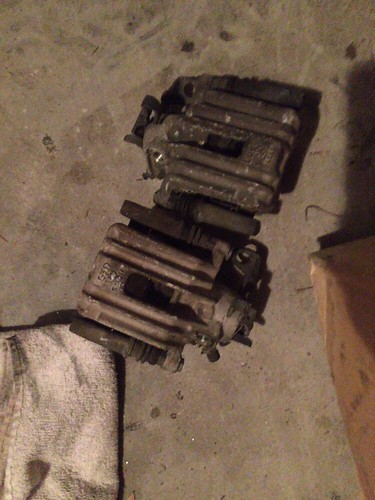 IMG-20150405-WA0029 by jasonbelina, on Flickr
Next I ordered a brake biasing valve
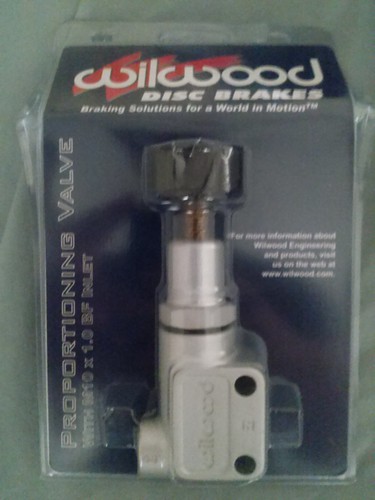 CAM01617 by jasonbelina, on Flickr
 CAM01618 by jasonbelina, on Flickr
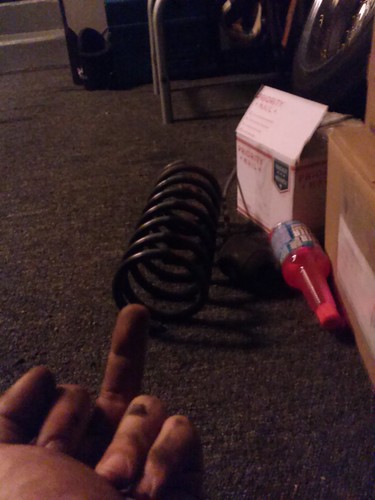
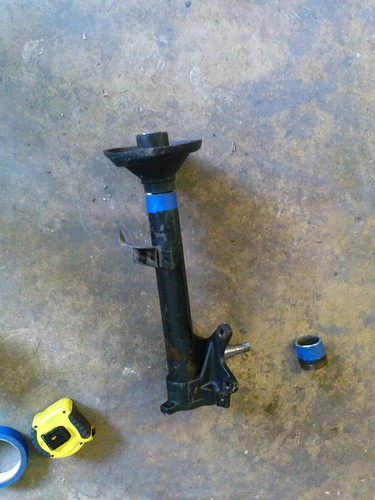
Next I began the process of finding/making coilovers for the car. Most of the options on the market will cost you well over $1000. I managed to do the following for quite less.
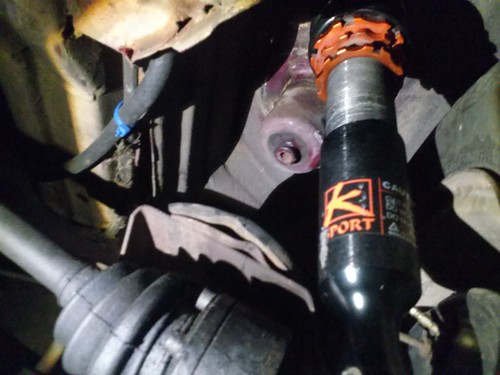
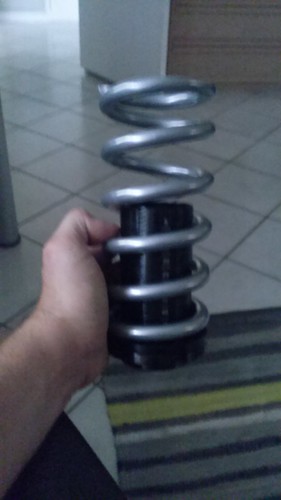
To start, the rears were converted to a true coilover. The stock springs needed to be removed after setting the car up on jack stands.
 CAM01611 by jasonbelina, on Flickr
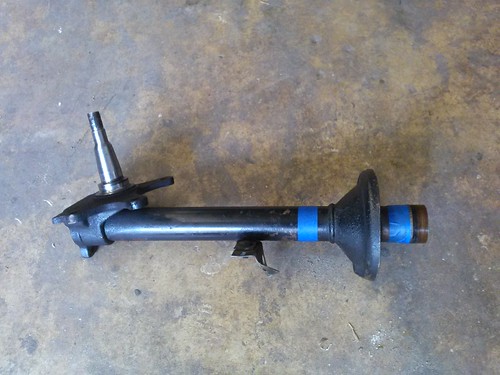
Here's a pic comparing the stock 2002 rear shock mount to the new ones I'll be using.
 CAM01605 by jasonbelina, on Flickr
 CAM01609 by jasonbelina, on Flickr
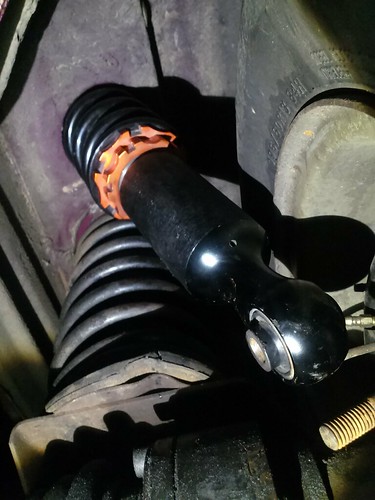
After a quick test fit I saw that I will be reducing my droop considerably with these. They're shock height adj, spring height adj, and dampening adj. Not bad
 CAM01607 by jasonbelina, on Flickr
 CAM01608 by jasonbelina, on Flickr
 CAM01610 by jasonbelina, on Flickr
This is full droop with the shock adjusted all the way down. Looks like I found a good match :D
 CAM01613 by jasonbelina, on Flickr
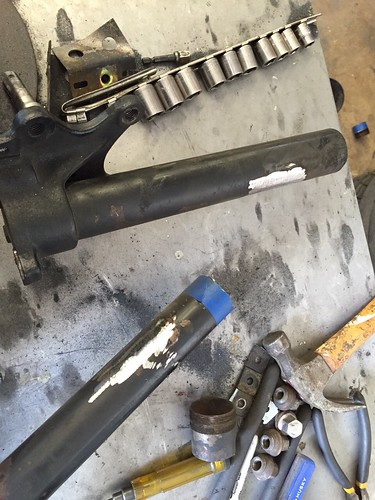
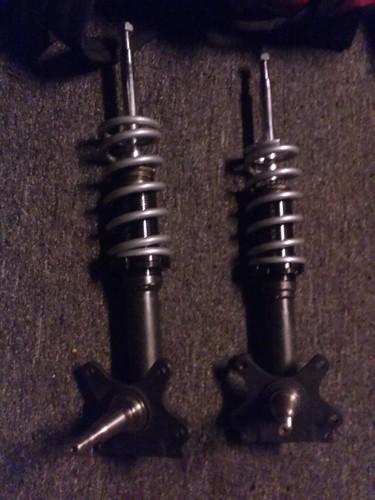
So after wrapping up the rear coils I moved onto the front. Springs and perches
 IMG-20150410-WA0009 by jasonbelina, on Flickr
I decided to use a coilover sleeve/perch for an e30 with a 2.5" spring. Struts were switched out from stock to a vw mk1 rabbit strut & the housings were shortened. Big thanks to Carlos @Condor for helping out with the welding
 CAM01620 by jasonbelina, on Flickr
 CAM01621 by jasonbelina, on Flickr
Next I had to shave the brake line brackets off
 IMG-20150418-WA0012 by jasonbelina, on Flickr
 IMG-20150418-WA0014 by jasonbelina, on Flickr
To align the two tubes, an easy thing to do is use a section of a stock e30 strut housing. Nobody seems to have mentioned/done this before, but the ID of the e30 strut tube is the OD of the 02 strut tube. And coincidentially the coilover perches that everyone says to use(on 2002faq) fit e30s. So the OD of our e30 strut tube works with the sleeves and such.
 IMG-20150418-WA0016 by jasonbelina, on Flickr
 IMG-20150418-WA0015 by jasonbelina, on Flickr
 IMG-20150418-WA0013 by jasonbelina, on Flickr
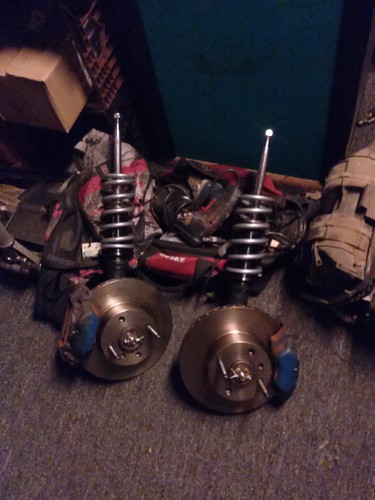
So here's the finished product. One thing that I didn't mention is that when you section the 02 housings you'll also add a spacer underneath the shock. This is so the gland nut can properly tighten the shock down down.
 CAM01626 by jasonbelina, on Flickr
Here they are with the volvo BBK on
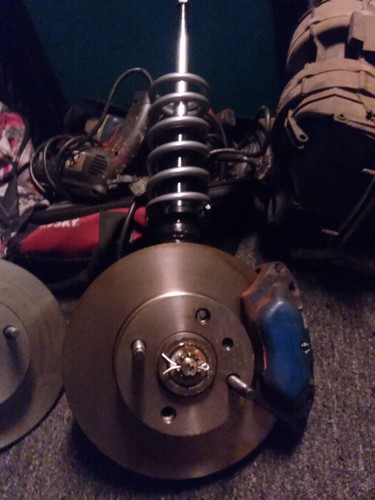 CAM01638 by jasonbelina, on Flickr
 CAM01637 by jasonbelina, on Flickr
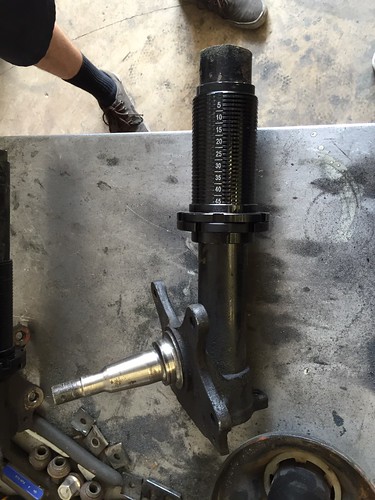
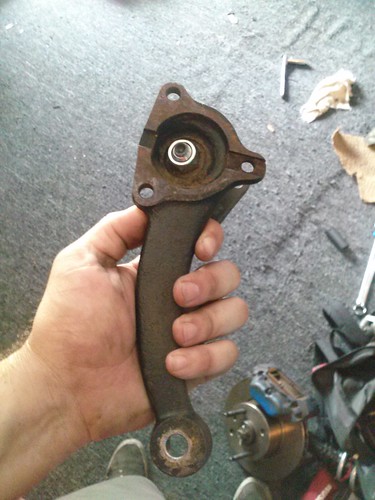
So now I was able to begin to install the front coilovers. First comes the removal of the stock strut assembly. But while I was in there, I replaced the ball joints & did the whole Condor Speed Shop front end bushing kit. I previously saw that someone installed poly swaybar links and that the tie tods were in great shape.
 CAM01644 by jasonbelina, on Flickr
Here's a pic comparing stock to not
 CAM01646 by jasonbelina, on Flickr
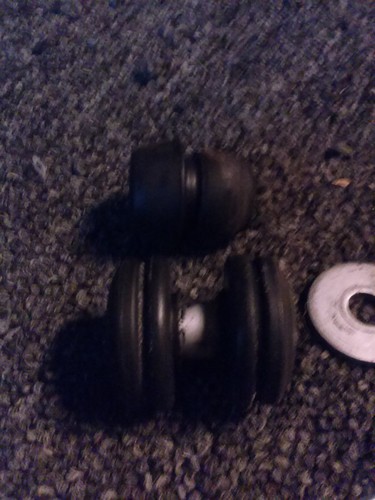
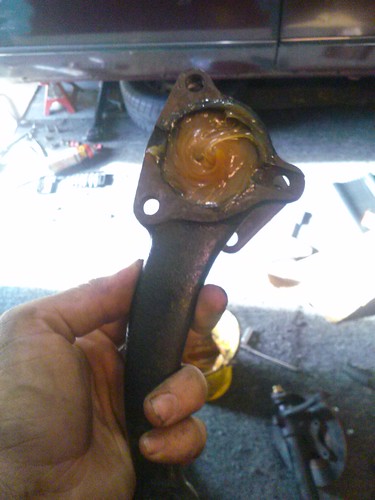
New ball joints were installed and then greased for easy removal in the future
 CAM01643 by jasonbelina, on Flickr
 CAM01647 by jasonbelina, on Flickr
Brought the control arms to the shop to press out the old bushings in preparation for the Condor ones!
 CAM01648 by jasonbelina, on Flickr
Next I saw that I needed spring hats but forgot to order a pair. So to reduce my cost more, I just worked with what I had. I drilled out the spot welds on the stock top hat to get rid of that inner dome.
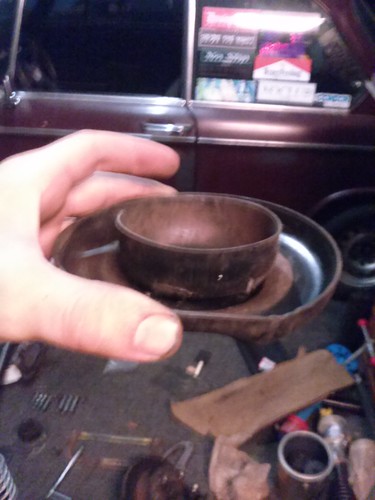 CAM01649 by jasonbelina, on Flickr
 CAM01650 by jasonbelina, on Flickr
 CAM01651 by jasonbelina, on Flickr
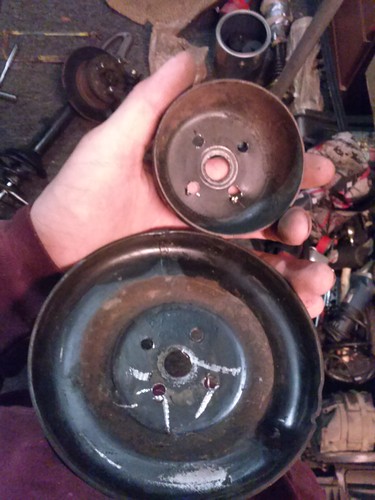
Next I cleaned and greased the top hat bearings. With everything assembled after that I began the install
 CAM01645 by jasonbelina, on Flickr
 CAM01656 by jasonbelina, on Flickr
This is the front droop
 CAM01652 by jasonbelina, on Flickr
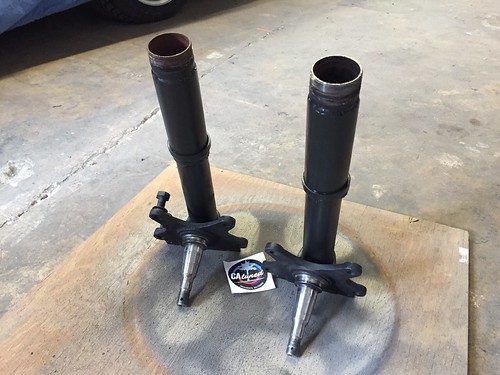
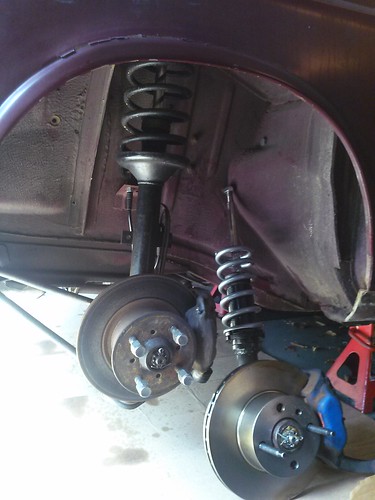
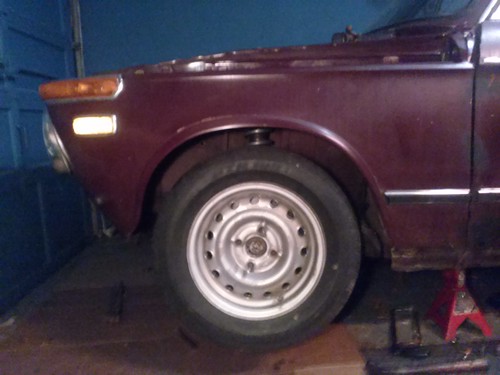
With all the Condor bushings installed, the wheel bearings torqued, and the coils installed, it was time to put the car back on the ground!
 IMG-20150425-WA0001 by jasonbelina, on Flickr
 IMG-20150425-WA0000 by jasonbelina, on Flickr
Last edited by AbsorbantNut; 04-26-2015, 09:16 AM.
IMG-20150425-WA0000 by jasonbelina, on Flickr
Last edited by AbsorbantNut; 04-26-2015, 09:16 AM.
'73 2002 m20 turbo [sold] '87 rat rod 325is [couch modded] '91 vert [daily] '88 325is [spec build v1] '84 325 [spec build v2] '99 323i vert [sold]Comment
-
Wow, awesome update.How to remove, install or convert to pop out windows
http://www.r3vlimited.com/board/showthread.php?t=297611
Could be better, could be worse.Comment
-
It looks like your tire will be next to the spring as opposed to the strut tube like it was originally. Am i seeing that correctly?Lorin

Originally posted by slammin.e28Comment
-
Comment
-
On the original setup, the inside of the tire is very close to the outside of the strut tube. The way your new coil over setup looks with the spring very low is the the tire cannot get very close to the strut tube because it would contact the spring first.
Normally the spring is above the tire, yours appears to have the spring beside the tire.Lorin
Originally posted by slammin.e28Comment
-
Yes, you are seeing this correctly, the spring perch moves downwards when you shorten the strut. So in order to avoid hitting the barrel of the wheel on the perch you have to mind the width of your barrel. If it's too wide you'll need to add a spacer to push it outwards, away from the strut.
If you plan on lowering the car and maintaing a decent amount of strut travel you'll realize that you need to shorten the housing and move everything downwards. Not really a big/tough to fix issue, but it's good to be aware of.
'73 2002 m20 turbo [sold] '87 rat rod 325is [couch modded] '91 vert [daily] '88 325is [spec build v1] '84 325 [spec build v2] '99 323i vert [sold]Comment
-
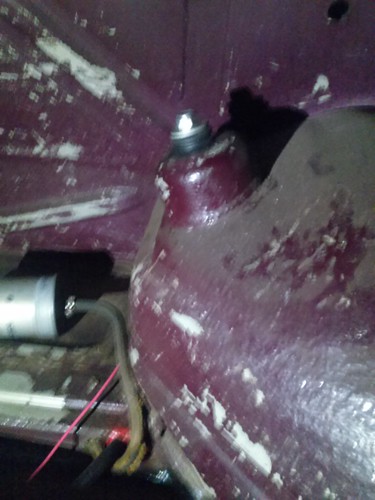
maybe i missed it, but how are you reinforcing the lower stud the rear shock attaches to? it is not designed to support the weight of the car in a coilover configuration.Comment
-
Oh really? I never would've guessed
Don't mind the sarcasm, I get asked this question at least twice a day, so saying the same answer over and over gets old pretty quick. I'll be reinforcing the upper tower by adding material to the top & sides of the tower as well as adding some gussets. Then the stud on the trailing arm will be converted from single shear to dual shear.

'73 2002 m20 turbo [sold] '87 rat rod 325is [couch modded] '91 vert [daily] '88 325is [spec build v1] '84 325 [spec build v2] '99 323i vert [sold]Comment
-
Lorin
Originally posted by slammin.e28Comment
-
This is around what most people on the 02faq shorten. I don't recall many complaints about an increase in scrub radius's, and they've been doing this for decades(shortening housings for shorter struts). Not saying that it doesn't increase it, but if it does I don't hear many negative comments based around scrub radius. Are you basing this "handful to drive" judgement soley on how the strut housing looks or do you actually have empirical evidence that you're matching up to numbers I haven't posted?
I'm just curious to know, because if it's going to be an issue, I'd rather know ahead of time. I hope that I haven't compromised too much! Thank you for the kind words :D
-edit-
also, if it helps, I'm not running the collar at it's lowest position, I actually have it at it's highest. And it sit's further up than the picture below if that was confusing. Finally, I plan on switching to 8" springs in the near future.
'73 2002 m20 turbo [sold] '87 rat rod 325is [couch modded] '91 vert [daily] '88 325is [spec build v1] '84 325 [spec build v2] '99 323i vert [sold]Comment
-
^ I have driven 2002s for the last 25 years of my life with many various offset wheels on them. Scrub radius affects every car, however.
The further you push the centerline of the wheel away from the pivot (steering rotation) of the ball joint, the more force an input applies to rotating the strut. Sometimes called steering kickback.
An example would be hitting a 1 inch deep water puddle at speed with just the right wheels of the car. A car with zero scrub radius would feel basically zero input through the steering wheel and track pretty straight through the puddle. The strut does not want to rotate (steer) because the wheels pivot is at the center of the wheels width. The steering precision and feedback of this setup "feels" great and is easy to control.
The same car with the centerline of the wheel pushed out 2 inches (scrub radius) going through the same puddle will push a significant force through the steering wheel and swerve toward that side. The force is being applied to the center of the wheel same as before, but the wheel is now attached to a 2 inch lever that rotates the strut, which rotates the steering wheel. This force can be strong enough to rip the steering wheel from your hands if you are not holding on tightly. A car with a lot of scrub radius tends to have a lot of steering kickback and be unstable and weave with road irregularities and bumps/impacts to one wheel or heavy braking.
I can't comment on how your setup will feel exactly, but it looks like you are building in a fair amount of scrub radius. I do know that less always feels better.
A lot of production based race cars have a bunch of scrub radius, not because it is desirable, but because the increase in grip with a wider tire/track width is worth the trade off.Lorin
Originally posted by slammin.e28Comment


Comment