-
Man, those seats really turned out great. You want to do another set? :D
It's on my never ending list of things to do on my iS. I just had the M3 seats done by Stitched before they closed up.
The manual swap will transform your car!Leave a comment:
-
Piping?
Did the oem seats have piping? I believe on earlier models they did but I've been sitting on an E36 too long, I forgot!
I would imagine yes. Thinking of re-doing my seats with autoberry as well.
Clearly some of the e30 seats don't.

Leave a comment:
-
Wow, amazing finish. They look professionally done. How's the M-tech 1 kit coming along?Leave a comment:
-
Amazing work on those seats! I'll be over tonight to pick them up. Right color too!
I'm really impressed with your work. I don't think I'd have the patience.
PO replaced my sport seats with vinyl covers and the driver's side bolster is already cracking badly.
Can't wait to eventually replace all the seat covers with fresh leather skins.Leave a comment:
-
So I ended up redoing the covers on the front seat bottoms and backs as well as the rear seats so I could loosen up all the center straps and smooth them out. I then did another few rounds with the heat gun and reconditioned the leather with Griot's garage 3-in-1 conditioner. I'm really happy with how the seats ended up, the final result is about as good as I could have hoped for. Got nearly ALL the wrinkles and creases out, I'm pumped:


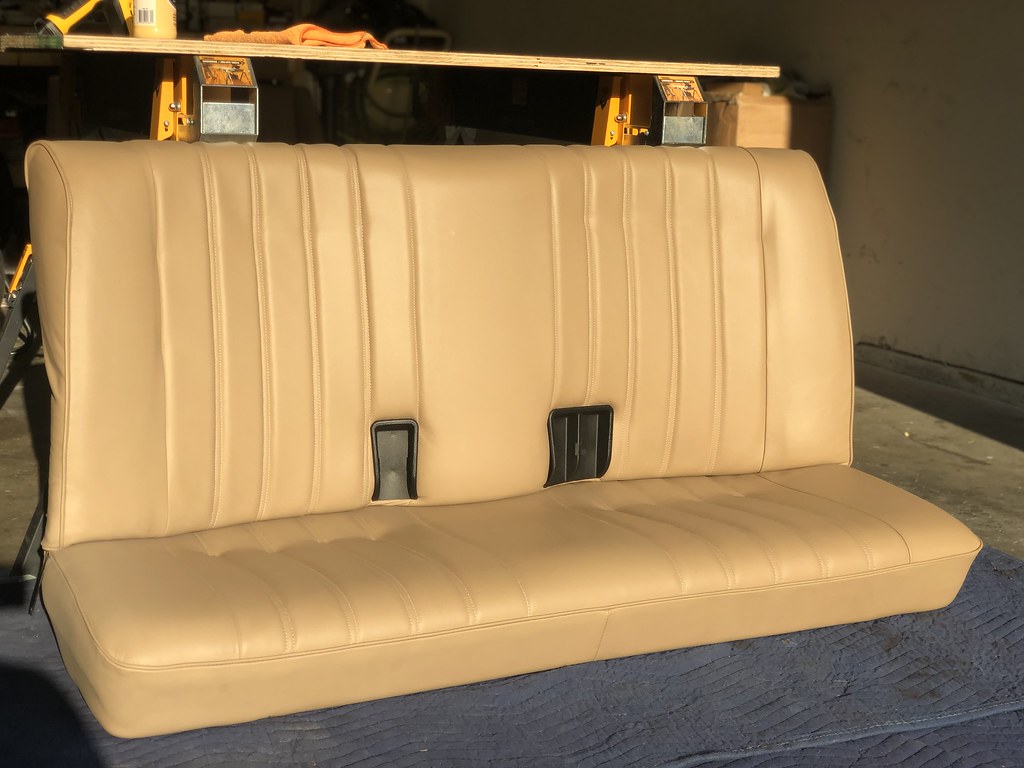

I used the heat gun on the rear seat covers as well, I was really impressed with how well I was able to smooth out the top corners. This was the part of the seats that I thought I did the worst on initially, the results this time were a lot more palatable.
Before:

After:


My OCD got the better of me but I have to say it paid off, night and day difference to how these looked the other day.Last edited by Albie325; 05-30-2019, 03:48 PM.Leave a comment:
-
Thanks guys, it isn't rocket science but it definitely takes some patience and trial-and-error. I have some time tomorrow, I think I'm gonna tinker around with them and see if I can't tighten them up a bit moreLeave a comment:
-
I'm very impressed with how your seats came out! Very informative, bookmarked for future seat maintenance :)Leave a comment:
-
Excellent job on the seats!
A little time in the sun will get rid of those wrinkles.Leave a comment:
-
Those seats look excellent. Nice work! Good to hear the autoberry kit is a good product.Leave a comment:
-
The autoberry kit was great, any shortcomings in the final product (see below) was 100% installer error. The quality of the leather and fitment were excellent.Originally posted by mike.bmw
Was out of town for a bit but ended up getting the seats completely redone. It took a lot longer than anticipated (doesn't everything?) due to my travel as well as it being hot as hell here in NC but overall it took me about 4-5 days, a few hours each day to knock it out. It's been 95+ here all week, redoing the A/C is steadily moving up in rank on the to-do list...
The week before I left, I had the F82 at the dealership getting one of the rims repaired. Took a corner a little tight and scraped it. I was pretty upset about it but it ended up coming out as well as could be expected. I got to drive the newest iteration of the 3 series as a loaner, a turbo 4 banger. I liked the look of it although it wasn't quite my color. I initially wasn't too keen on it but it ended up growing on me by the time I brought it back, was very agile and had some really nice features for base model.

Anyway, on to the seats:
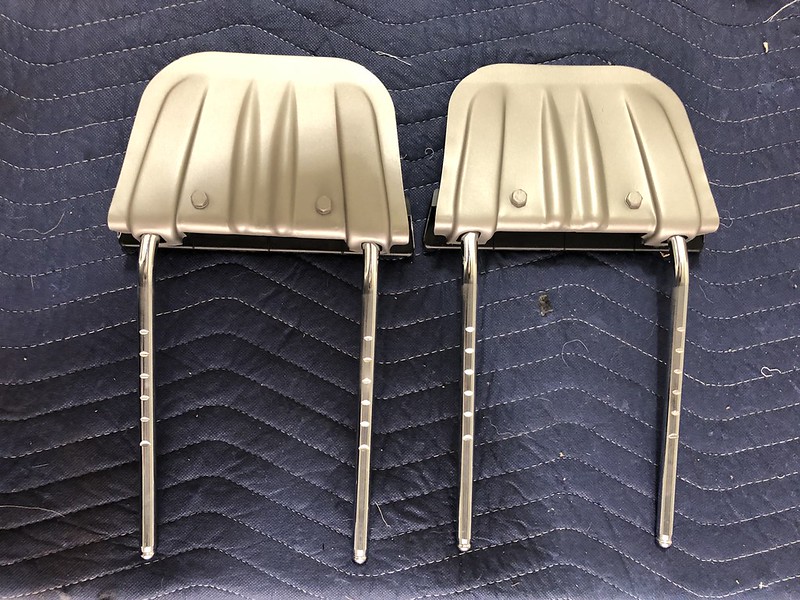
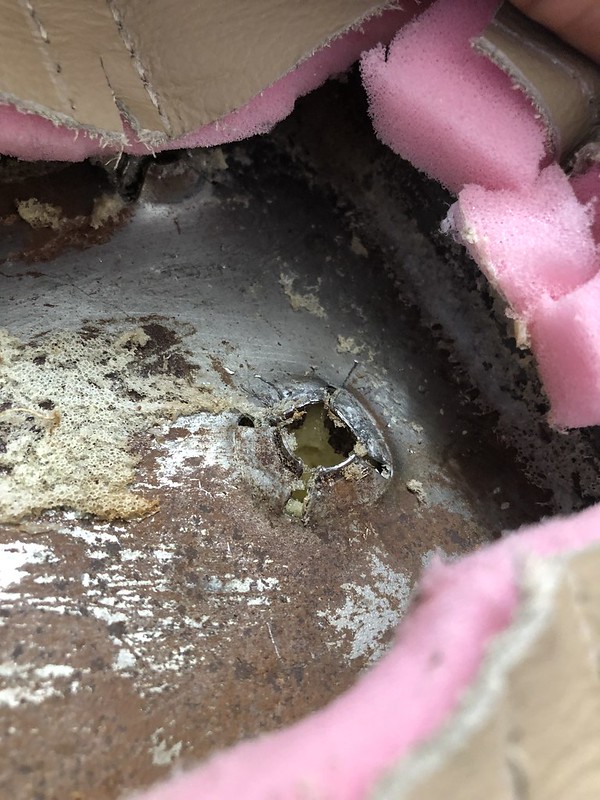
I started by stripping and refinishing the headrest inserts, didn't want to stick these rusty ass things back on my "new" seats:

All stripped and repainted:
I then used a clothes steamer to steam all the foam inserts. Mine were in pretty good shape to start so I didn't notice a huge difference but you could definitely see the foam plump up in a few places.

Then with the center pads out of the way, I replaced all the seat release cables. I also replaced all the hydraulic pistons purchased on ebay through one of the guys here on R3V:

In order to get the little latch to fit through the hole in the handle, it was easiest to slip the cable end up through the space in the foam:

Twist the cable up:

And hold the lever down to give yourself enough space to pull the cable up and through:

Be sure to route the cable under the tab in the side rail to prevent in from binding:

Driver's side (2 cables total, p/n 52101916611 (465mm) and 52101916612 (820mm)):

Passenger side (4 cables total, 2x 52101916611 (465mm) and 2x 52101916613 (315mm)):

The extra criss-crossed cable is for the accessory latch on the driver's side of the passenger seat.
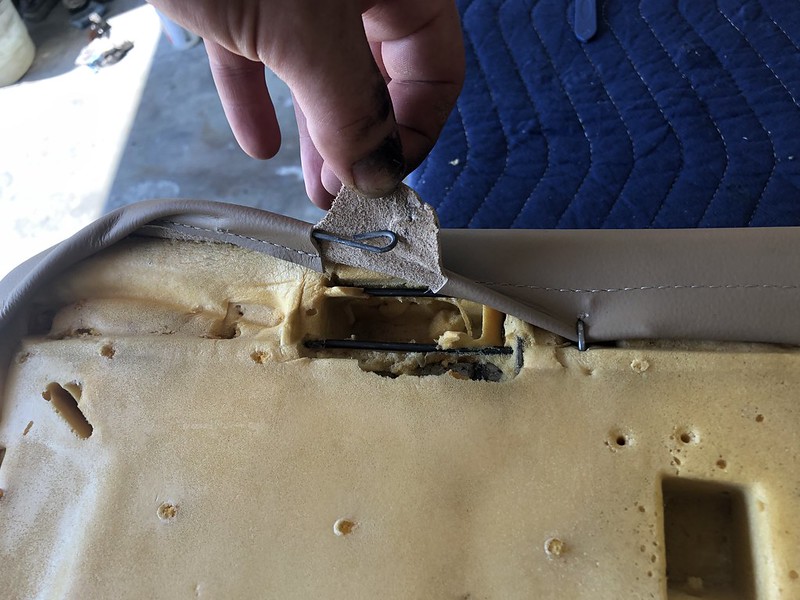
Now for replacing the covers you'll need these:
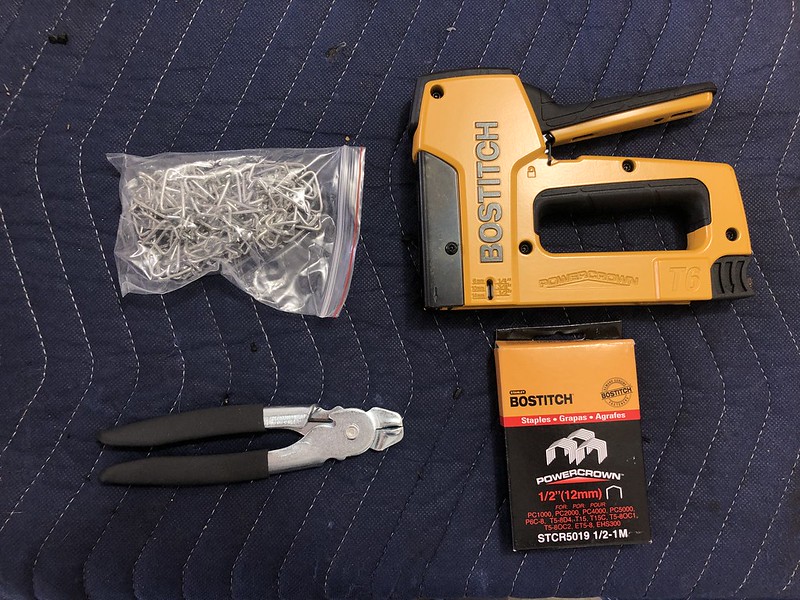
Hog rings with applier as well as a staple gun. The key is the staple gun needs to be an OUTWARD CLINCH stapler (curls the staples out rather than in to allow greater surface area to grip the foam).
Make sure you remember to remove ALL the support wires from your old seat covers. There is one running along the inside edge of each seat bolster cover (4 total per seat) as well as along pretty much the entire perimeter of the rear seat. There's also a couple along the inside of the upper portion of the rear seat that I didn't see initially and the seat back came out pretty wrinkly at first. When i realized there's supposed to be another wire in there I redid it and it came out much better. You'll see what I mean in the pics.

Do the side bolsters first. I found it best to start from the front and work your way back. First clip the inside of the bolster (with your inserted support wire) to the frame, then stretch the leather over the foam and use a sharp knife to poke holes to fit over the metal tabs. You'll need to pull a little tighter than you think otherwise the leather ends up loose. For the hog rings, I could see where they old ones were and tried to replicate that, as well as a few extras here or there for insurance.

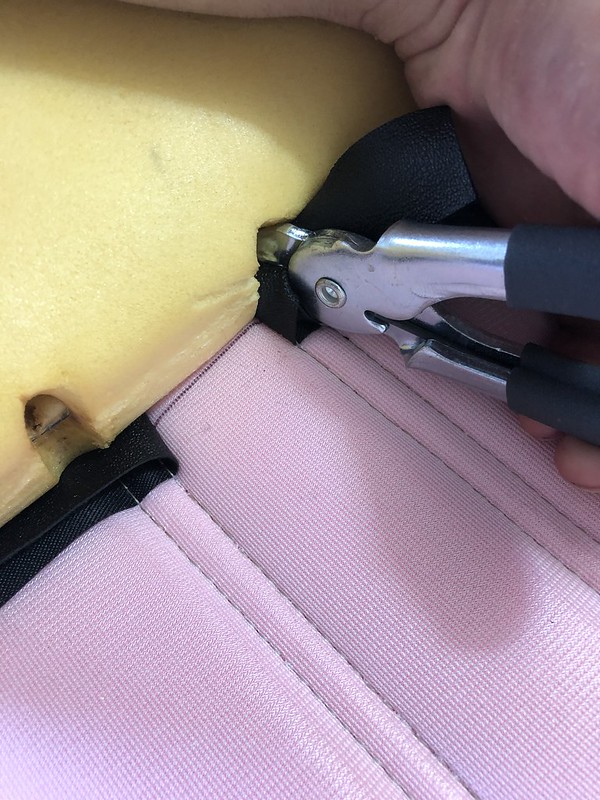
For the center pads, start by securing the straps in the middle of the seat. For these, I recommend making them a little LOOSER than you think. They look good when you first get them in, but once you tighten and tack down the edges you end up creating a pucker because the centers are too tight. I redid most of mine at least once and still ended up with a bit of a pucker.
I found it easier to get your hog ring through the strap first, then load into the applier.


Once the centers are secure, it's basically a matter of stapling around the perimeter. I found that it helped to start at the middle where the straps are and work your way out, stretching the leather to take away the creases. Also remember that there's a slight inward curve to the pad once installed, stretch the leather a bit to accommodate for this. Once the pad is done, line it up and use hog rings to secure to the metal wires in the back. I didn't take a ton of pics of this but it's pretty self-explanatory, or see the links I posted in an earlier post.
Regarding cutting holes for all the hardware to fit through, make sure you have the leather stretched about 90% of the way in place before you even think about cutting the leather. By the time you work and stretch the leather, you'd be surprised how much the place you thought was correct for the cutout has moved. The last thing you want to do is make a cut in the wrong spot that will be visible on the final product. Also, try and avoid cutting the holes on the stitching line (move a little one way or the other if possible) to avoid the thread coming loose over time.
For the front back rest, don't forget to remove the inner white plastic ring for the headrest grommets to snap into, I almost threw mine out by mistake:


Moving right along:

To complete the fronts, I replaced all the pistons, regreased all the mechanisms, and refinished all the plastic parts with plastic resurfacer. For the pistons, I found it easiest to compress them in my soft-jawed vice:

For all 8 pistons I was done in about 15 mins. It's a pretty easy job with the hinges off the seats.
Fresh grease for the thigh rest screw mechanism as well as some teflon lubricant for the plastic rails:


Rough draft done:

The rear seat bottom was very easy and came out the best of all panels in my opinion. Same as above, I started with the middle straps first, then stretched the leather over the pad. Hog rings all around. I started by securing the exact middle of the leather to the exact middle of the pad, then worked my way around from front to back. I did each side evenly (one hog ring on the right, then an identical one on the left, then the next one on the right, followed by its counterpart on the left) rather than doing one side completely first to avoid ending up off-center.

For wires, there's a long wire running almost the length of the seat cushion (one front, one back) as well as a shorter wire that wraps around each corner:
For the rear seat back, there's an additional two wires (one each side) that runs between the outside smooth leather panel and the inside ribbed leather panel. These were what I initially didn't see and the seat back came out like poop until I realized they were there:

Hog ring in place (this helps stretch the center of the leather a bit tighter over the pad):

Here's where it is on the front of the seat back:

Cutting holes for the plastic seatbelt covers was the most nerve-wracking part of the whole operation, I'd check, double check, and triple check before you cut. Use your old cover as a template. And start small towards the middle of where the plastic covers go and extend out as needed:

As tough as the seatbelt holders were to remove, they proved equally difficult to pop back in place. I had to bend the insert tabs out a bit to get them back on:
Rough draft 2.0:

Pretty wrinkly right? The secret weapon is heat. I used a heat gun to then massage the leather out with great results.

Heated on the left, unheated on the right. The difference was more profound in person:

After doing all the seats, I treated with some leather conditioner and left in the sun while I kept working on the seat backs. The heat really helped the leather tighten up:

I got probably 90% of the wrinkles out and I hope it still gets a little better as they sit in the hot car a few times.
Last, I did the seat backs, this was the hardest part of the project. Folding the leather over the top corners of the covers was really challenging, I guess I must be a little rusty with geometry. I recommend investing in a nice sharp Xacto knife with a rounded (#10) blade for this part.
I first used the old covers as a template and cut them a bit bigger for some leeway:
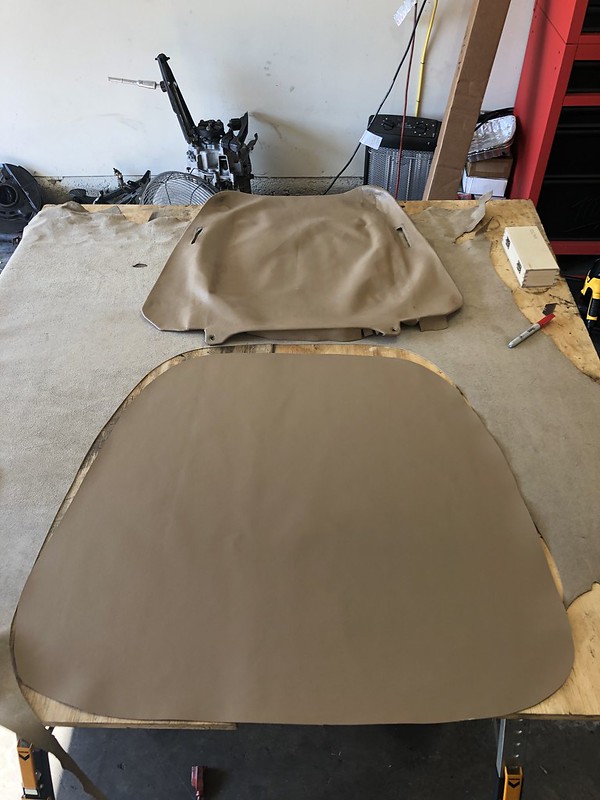
I then roughly marked out where the cutouts would need to be to fold the edges over:

To attach, I used a strong 3M contact adhesive:

Following the YouTube M3 seat video, I started from the center and worked by way out to the edges:

This part came out great. For whatever reason, I had a tough time figuring out how to get the top corners to fold over without any wrinkles. I mirrored the old covers as best I could, but couldn't get it 100% perfect. The key is leaving a little bit of leather material intact to fold over the edge where you make your notches otherwise the underlying board will be visible.

Start at the corner and work your way around in each direction. I found making more frequent, smaller notches worked better than fewer, larger ones. The bottom edge was much easier and came out better. It was hard to take pictures of the process as I had to get things set up before the adhesive got too sticky.
Finished product:

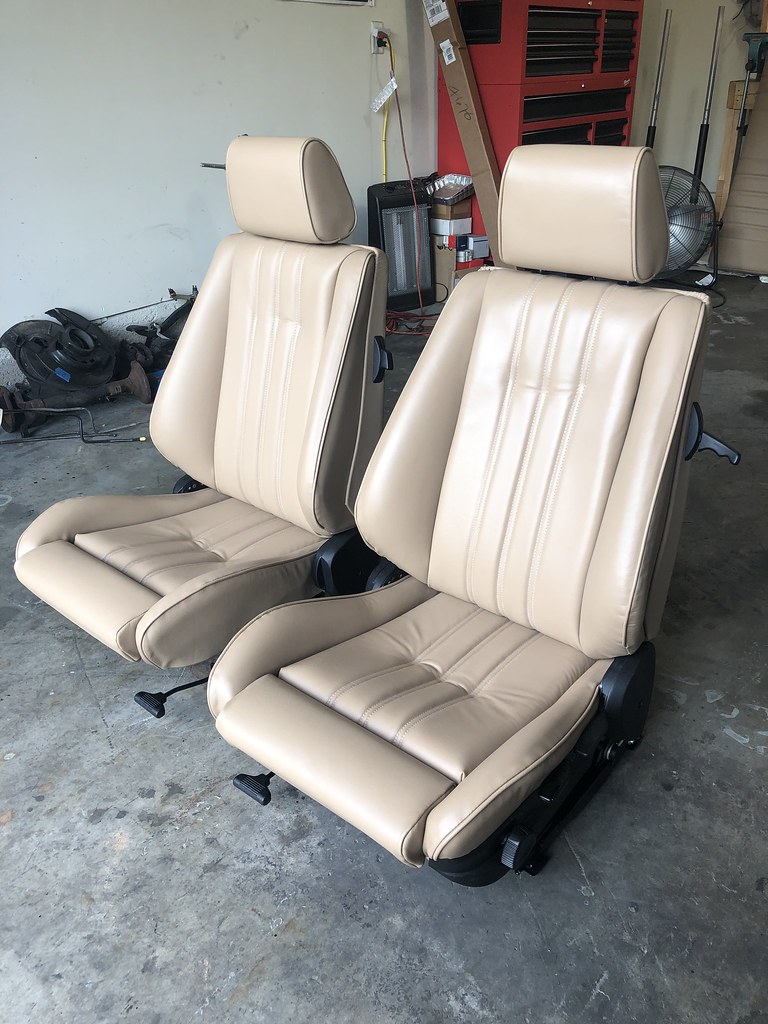
Some wrinkling at the corners but overall not terrible.
I give myself a 10/10 for effort, and a 9/10 for result. I think that once I sit in these a bit and they sit in heat a bit more, creases from the straps being a bit too tight will diminish. I also think that I'm being a little harsh as the seats are standing alone, I think they'll look really good once installed.
Last, I had a bunch of packages to great me while I was away:

My neighbors had already taken in about 4 other boxes.

Finally had some extra cash to splurge on all the parts needed to properly do the manual swap. New Behr manual radiator, Sachs clutch kit, refurbed Bosch starter, new FTE clutch and slave cylinders, a Z3/UUC DSSR short shift kit, as well as all the seals/selector bushings and fixins.
My next task is to get working on removing the interior, cleaning the carpet and replacing the dash, wiring up the premium sound and doing all the prepwork on the Getrag 260 prior to install.Last edited by Albie325; 05-28-2019, 06:08 PM.Leave a comment:
-
Very nice! I've seen a few local E30 guys with the Autoberry kit and it's really nice. I've been thinking about ordering a kit for my front seats just to have on hand with the plan of recovering in the next year.Leave a comment:


Leave a comment: