
This is coming together nicely and also a fantastic future reference for others.
-
E30 320i vert
But daily drive is Volvo V60 Polestar -
-
'86 325e Zinnoberrot /// '02 325ci Schwarz II /// '18 M4 Azurite Black Metallic ///
Albie325 Build Thread | Albie325 COTM Jan 2021Comment
-
This is coming along SO nicely. I love the smaller details that make me say "wish I thought of that" like spray dying the panel in the trunk and those hood stoppers! I know you're moving on bit by bit, but if you ever get a chance to possibly post where you got that nice vinyl for that front headliner cover-- I'd be interested. Tried to re-glue what I have, but the existing material shrunk unevenly and won't fully cover the area :( There's a ton of different grains and degrees of black and grey out there, but yours looks spot on! Sent from my moto g(6) using Tapatalk(OO=[][]=OO) For LifeComment
-
What do the hood stoppers do? Please don't answer 'stop the hood'Comment
-
They just keep the metal hinge "halves" from touching directly when the hood is fully open. Necessary? No. Cool example of the how well the BMW engineers thought through all the details? Yes.
These tend to go missing over the years as they crack and fall out. The hood will still work just fine without them. Albie has done such an amazing job with the details that I had to tell him about these bits.Comment
-
Congratulations on COTM! Well deserved prize for a fantastic job. Just read through the whole topic.
You're an inspiration for me and i also think for many others!
 Belgian E30 Driver
/// 1990 - E30 - 318i Cabriolet Brilliantrot
/// 1988 - E30 - 320i Touring Diamantschwarz (Sold)
/// 1990 - E30 - 318IS Coupé Lazurblau
Check out my Rare BMW Music Edition Cassettes TopicComment
-
Comment
-
So I looked back through my emails and I bought mine through a seller on Etsy, unfortunately that product is no longer for sale from that vendor. I bought 3 yards of it and I doubt I'll ever use the whole thing, would be willing to send you some if you're in the US. PM me if interested, otherwise check out Sailrite Morbern Allsport 360° 4-Way Stretch Black 54" Vinyl Fabric, just plug it into Google and it should come up. Was another product I looked into that was extremely close in appearance but was pricier at the time so opted for what I bought instead.Originally posted by 15Michaeljoseph
Thanks man! Was pleasantly surprised the powers that be reached out, and that I was able to get it done in time. Working on getting the thread up to date as we speak to catch upOriginally posted by PieterVN
'86 325e Zinnoberrot /// '02 325ci Schwarz II /// '18 M4 Azurite Black Metallic ///
Albie325 Build Thread | Albie325 COTM Jan 2021Comment
-
MTech 1 Front Apron Install:
I saved the most complicated for last, although it wasn't all that bad. Again, the OEM install guide is too big a file to attach, but can send it to anyone who needs it.
Here's the parts list:

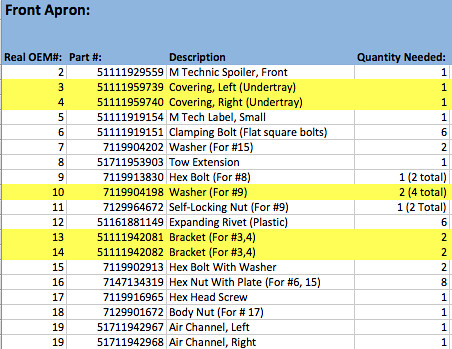
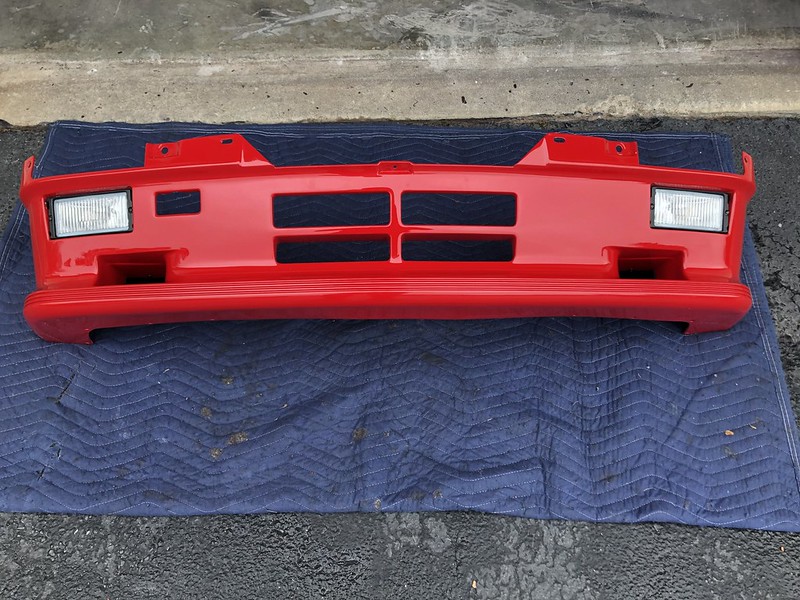
And the parts:

First I got the fogs covered in Lamin-X:

Then got them installed. There's a tab on each side that just pops into the corresponding holes in the apron. I found it easier to remove the adjuster screw first to avoid scratching the paint:


Then once installed, you reinstall the adjuster screw and screw it into the corresponding hole in the apron:
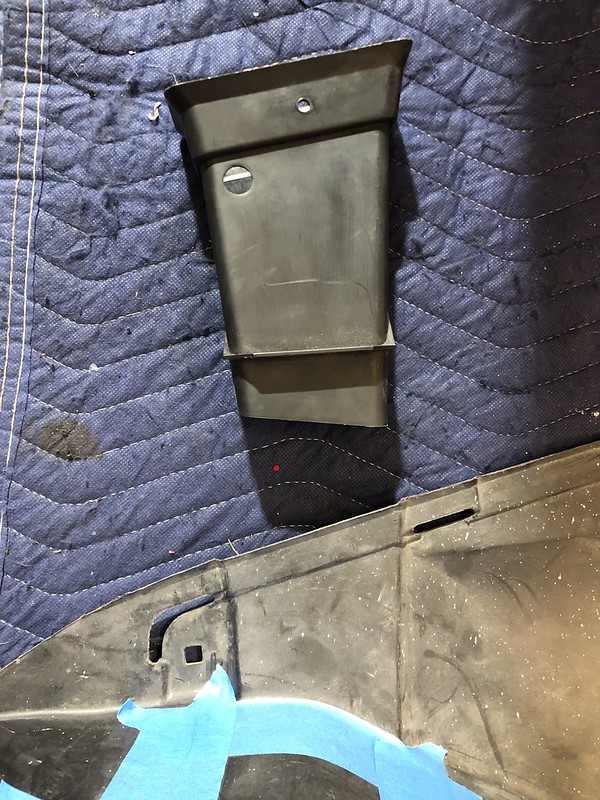
Next, you'll have to cut holes in the belly pan for the brake ducts:

There's grooves in the pan already that show how the ducts should line up, then I just traced the size of the duct opening and marked it with tape:
As per the install manual, the item number on the bottom of the duct should be facing down for it to be angled properly.
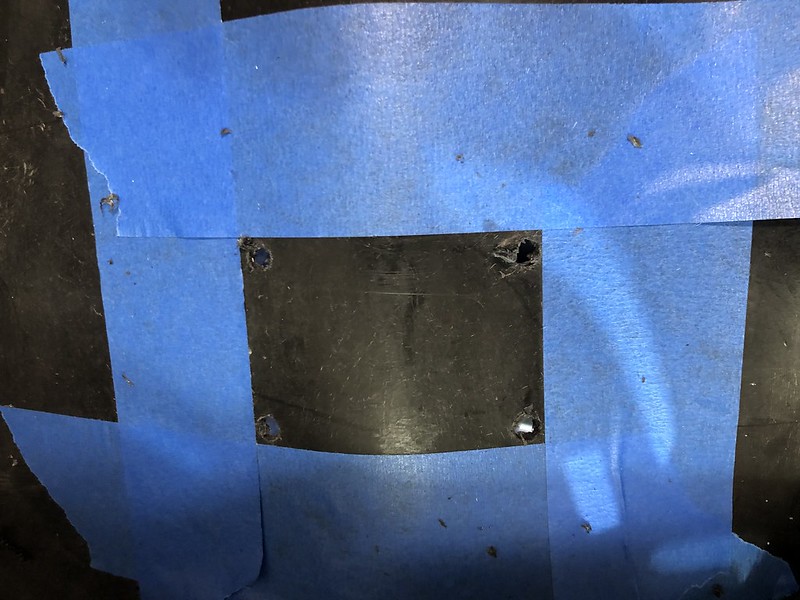
Learning from the mistake I made with cutting out holes in my center console for the heated seat switches, I drilled holes at each corner first followed by cutting with a dremmel to avoid overextending the lines:


Now, you can get the ducts installed onto the front apron, there's 2 plastic push rivets (Part #12 in the above list) per side:


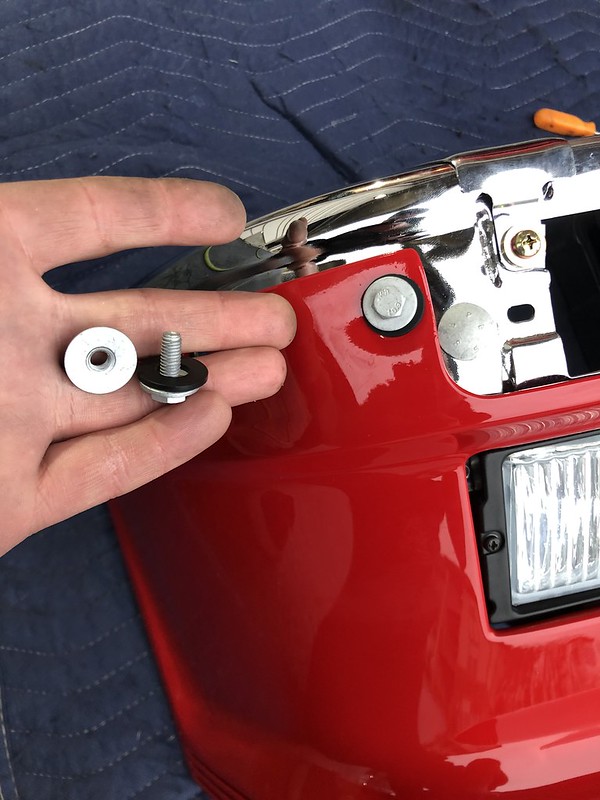
The install of the apron is similar to that for the rear: get the metal bumper put together, installed, and aligned first, then you'll remove the assembled bumper and use various bolts and washer nuts to attach the apron to the bumper along with the trim pieces.
There is a bolt and washer nut (Part's #15 and 16) that secure the corners, these go straight through the apron and into the bumper. I continued using rubber washers anywhere a nut or screw was going to contact fresh paint:
There's also a sheet metal screw and body nut (Parts #17 and 18) that secures the middle. The body nut goes onto a tab located on the inner metal euro valance. I didn't take a pic, but its the screw and body nut on the left side of this picture from the install manual:

You'll have to cut the bottom tab off of the plastic side trim first:

Then install the flat bolts similar to those in the rear apron (Part #6) which will bolt through the apron and into the bumper, holding them all together:


The front license plate holder attaches the same way:

Along with 2 metal clips (Part #13 in the bumper list) in the center:

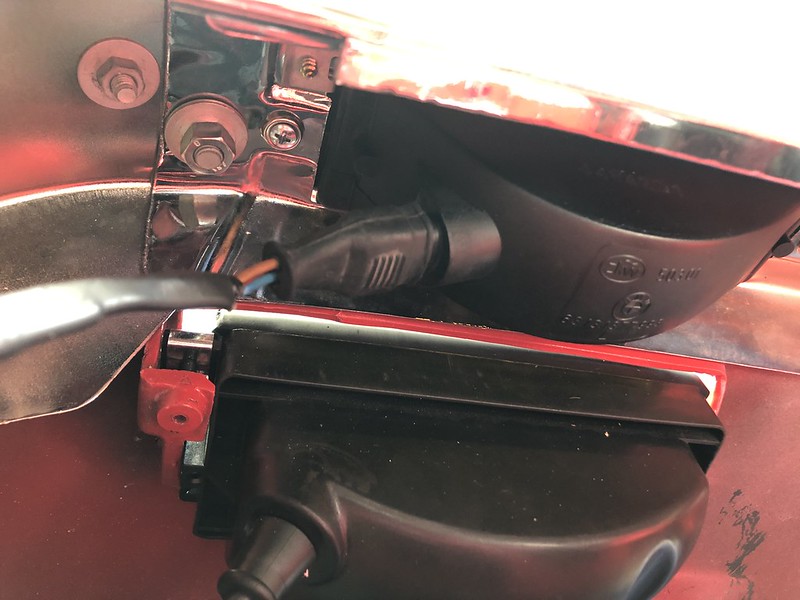
The biggest issue before you can get everything bolted up is that you'll have to modify the pigtail for the euro turn signals. The US front signals acted as turn signals as well as corner running lights, therefore they had a 3-prong pigtail. One wire each for blinker, steady on, and ground. On the euro cars, the city lights in the smiley headlights acted as running lights, and the turn signals were only turn signals. Therefore they will only accept a 2-prong connector with wires for blinker and ground:

I've seen some "solutions" to this issue where people basically just mangled the 3-prong plastic connector until it could fit enough to jam into the turn signal. Not my style. Instead, I decided to remove the 3 wires from the plastic housing:

Then tested the blue/red and gray/yellow to see which was the blinker function and which was steady on. For my car, the blue/red wire was the blinker function, so I covered the steady on with shrink wrap and then shrink wrapped it back rather than cutting it off if for whatever crazy reason I want to return the car to stock:


Then, I found these 2-pin connectors on TEConnectivity.com that fit perfectly:


Last, get your tow hook extension bolted on:

Now you can get the turn signals screwed in and bolt up the whole apron/bumper assembly. Get the plugs for the turn signals plugged in prior to bolting up, there's not enough room to get your hands in there later once the bumper is attached. The fogs will be fine to plug in later, there's plenty of room to run the wires up behind the headlights where the plugs are:


Don't forget the sticker:

Looking good! Obviously ran out of daylight the day I got this done. The install is almost the same as for the rear, except there are no rivets or screws in the edge of the fender into the apron. Took a bit a twisting/pulling to get the edges of the apron to pop over the curved metal edge of the valance/fender, but we got it on and lined up, came out looking awesome and all the lights/turn signals worked as the should. More to post soon!Last edited by Albie325; 01-09-2021, 01:45 PM.'86 325e Zinnoberrot /// '02 325ci Schwarz II /// '18 M4 Azurite Black Metallic ///
Albie325 Build Thread | Albie325 COTM Jan 2021Comment
-
-
Thanks man! Hope to see yours done soon.
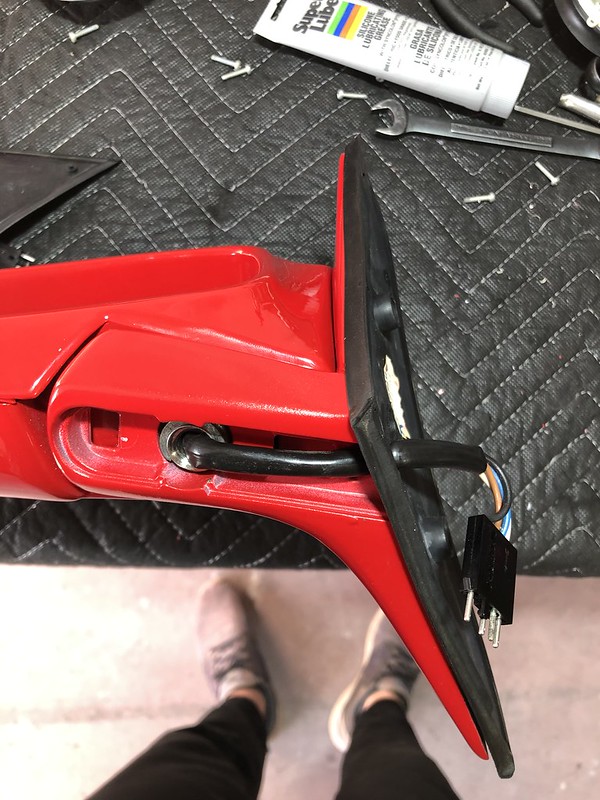
Side mirror assembly:
A bunch of people have asked about it so I figured I'd show a play-by-play on how to get these reassembled. It's not all that complicated as long as you have the proper tool and replacement rivets to crimp the two halves together:
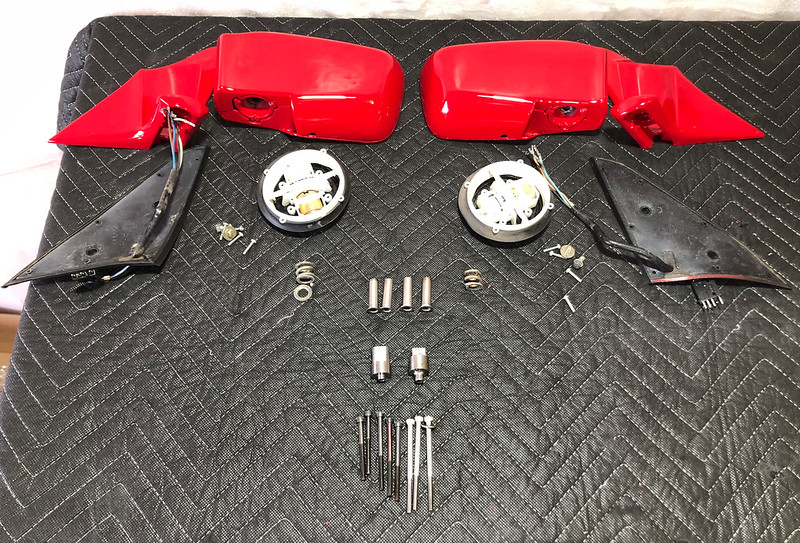
The important aspects of the tool and the replacement rivets. You only need 2 rivets, I had Miguel (the guy who made the tool) send me an extra 2 because I figured it might take me more than one try to get it right (I was correct):

I used some gummi pfledge on the rubber parts, came out good as new:

To start, slide in the new rivet from the inside of the mirror housing out:

Then slide the mounting half of the mirror over the rivet followed by the spring:

In an earlier post when I took the two halves apart, I mentioned that one of the mirrors had a washer in addition to the spring crimped under the rivet. I initially tried to re-install the two halves with the washer, however the rivet didn't want to compress the spring and roll its edge with the washer in place and I ruined one of the rivets as a result. I ended up just putting both mirrors back together with just the spring, and they came out nice and strong, I'm honestly not sure why the washer was there or why only one of the mirrors had it:

To get the rivet to crimp, you install the flat half of the tool against, the inner, already crimped end of the rivet pictured earlier, then put the longest of the pictured bolts through. Then, screw on the rounded half of the tool and tighten, be sure to lube up the contact surfaces of the tool where it touches the new rivet as well as the threads of the bolt:


Once the initial crimp is done, swap the longest bolt out for the middle-length bolt and re-tighten, it will roll the edge a bit more. I didn't have to use the shortest of the 3 bolts. You'll end up like this:

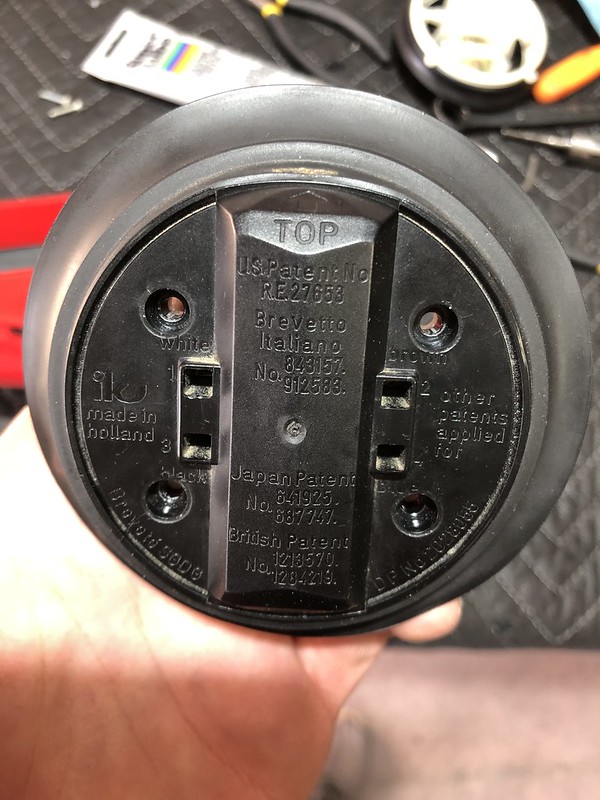
Now that the two halves are together, thread your wiring up through the rivet and get the rubber gasket attached:

Then get the motor installed. Note it is labelled with the proper wiring positions and orientation:


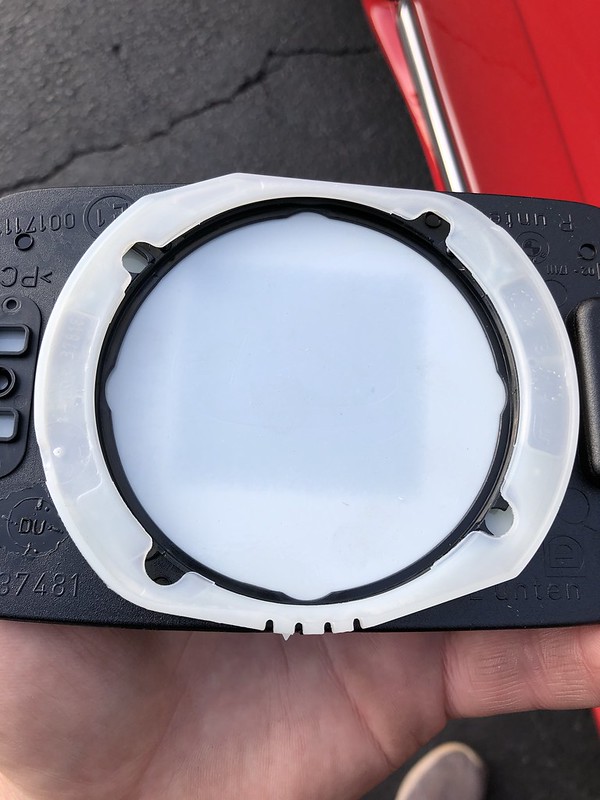
I then got brand new mirror glass installed:

To mount, the 4 holes in the back of the mirror align with the 4 circles on the motor:

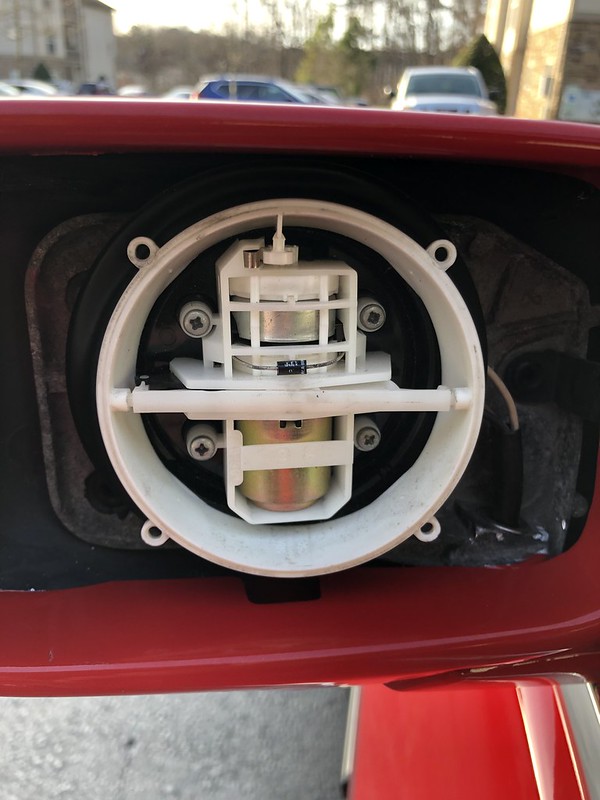
You place the mirror in the "unlocked" position above onto the motor. Then using a small screwdriver inserted through the hole in the bottom of the mirror housing, rotate the locking mechanism using the little teeth on the mirror into the "locked position:
It doesn't rotate much, and you can feel a slight click once it's in place. All done:

Repeat for the other side, and get them both bolted back up. If you need to repaint your mirrors I highly recommend disassembly this way. You can theoretically repaint them with the two halves still connected, however you wont get paint into the hinge points and it will show. This was especially the case with my mirrors since they were the basic black plastic rather than being already painted from the factory. It's kinda scary to take them apart, but with the tool it was actually pretty easy to get them put back together and they're definitely as solid as they were before I took them apart.'86 325e Zinnoberrot /// '02 325ci Schwarz II /// '18 M4 Azurite Black Metallic ///
Albie325 Build Thread | Albie325 COTM Jan 2021Comment
-
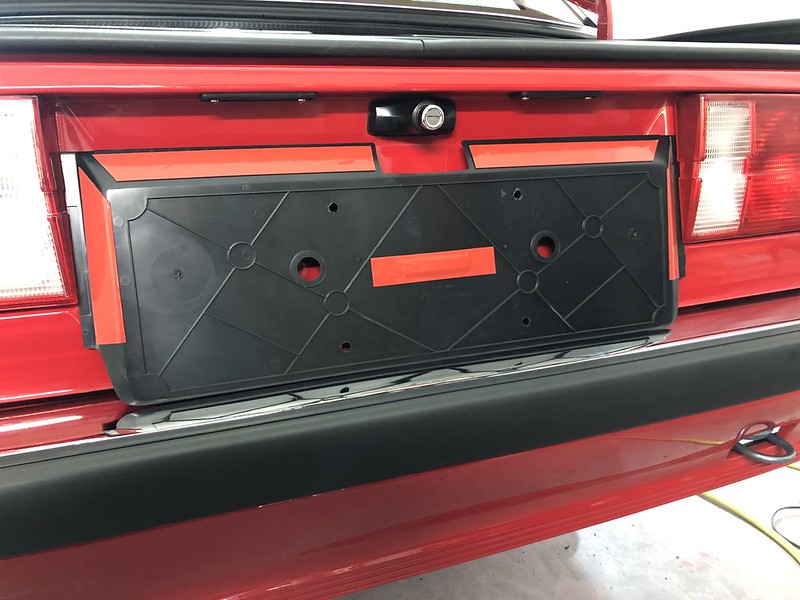
Alright, now that I have all the DIY stuff out of the way, I'll try and get caught up with where I am. Once I got all the MTech bits and mirrors back on the car, I started getting all the smaller details and trim put on. I started with the rear heckblende:

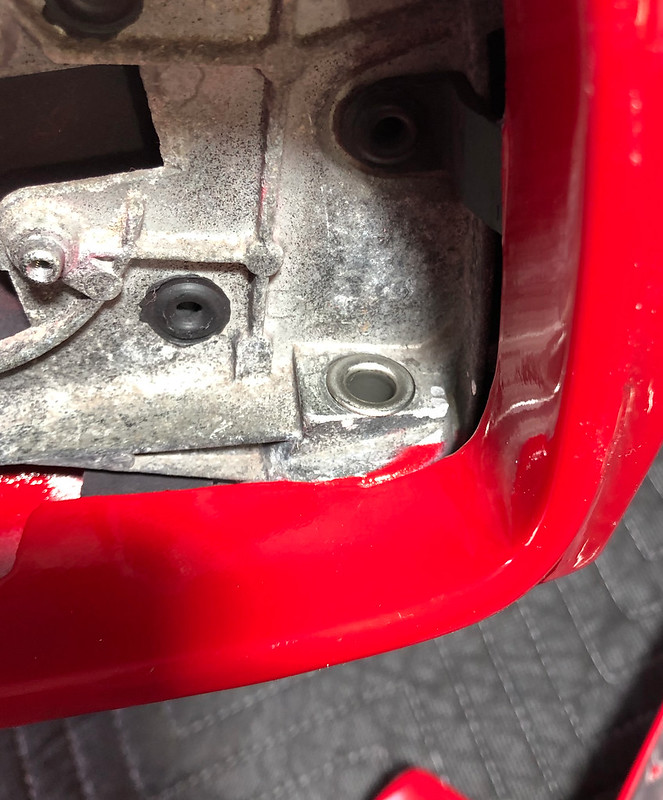
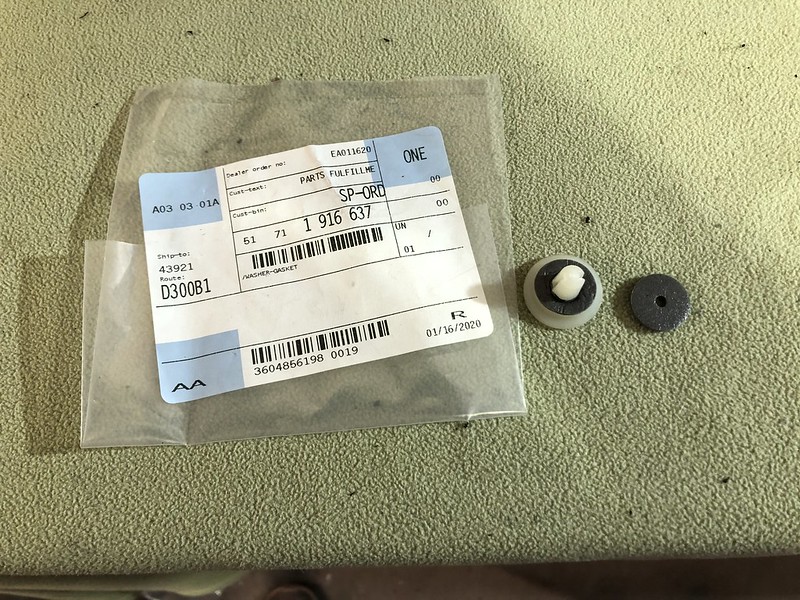
I also installed new license plate grommets with neoprene foam washers to seal out any water from entering the trunk:

I then lined the heckblende up with the license plate holes and drilled them out. I could have made them so that they fit completely over the white grommets but that would have needed 4 huge holes and I didn't like the idea of doing that. I used 3M double-sided weatherproof tape, I originally left the bottom free to avoid any water from potentially getting trapped back there but ended up adding some later as it was a little loose at the bottom for my liking:


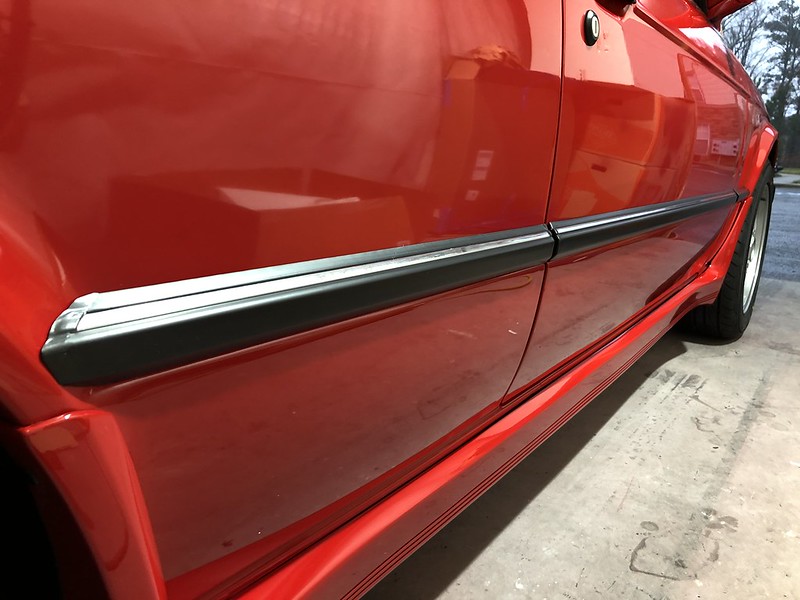
Then I went about getting brand new door mouldings installed. Let me say, it was quite a b**** finding the driver side door piece in brand new condition. After ordering a few NOS examples from overseas that arrived damaged or scratched up, I got lucky one day on Ebay:

All new clips:


A small but glaring upgrade was the button screws for the pop-out windows, the chrome on mine was all pitted and I found some nice fresh examples. Might be hard to tell from the photo, but what a difference:

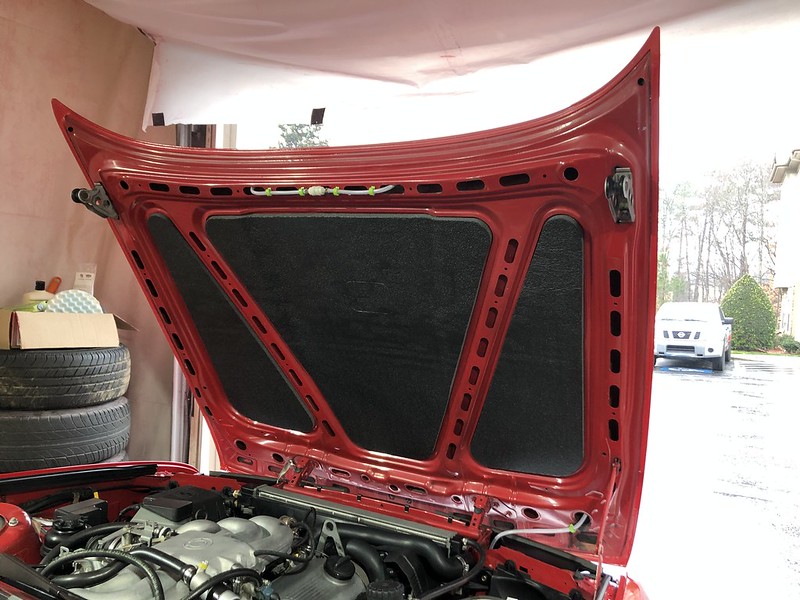
Next I wanted to get the hood insulation placed since I'd be (hopefully) driving the car around soon. I have the OEM nylon one that screws into the hood panel but had the typical sag burn on my intake manifold:

Therefore I decided to go with the 318is adhesive panels instead. Not OEM correct for the car but I don't care, it looks great:

Then I went about getting all the door cards and the rest of the interior panels back in with all new vapor barriers (again). A nice upgrade I've been dying to install are these billet aluminum door pulls, a member on the FB page has made a couple runs of these by now. When he first put them out for sale like a year ago I had just broken ANOTHER plastic door pull and was getting tired of replacing them, they've been sitting in my new parts box ever since just waiting for install day. He's Frank Leogrande, company is Leogrande Racing if you want to search for him online or the R3V Facebook page. I couldn't be happier with the fit/finish, look, and customer service:

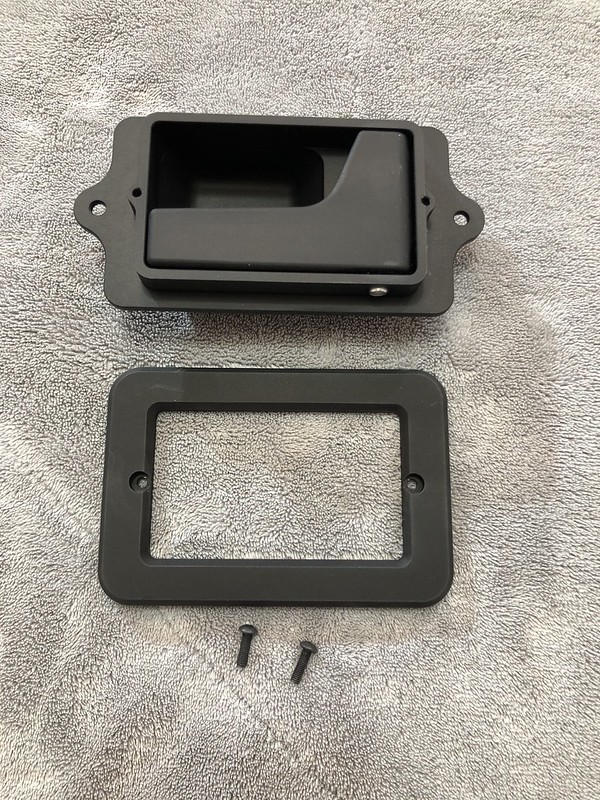
Compared to the OEM plastic ones:

They install the same way the OEM ones do, except the face plate attaches with 2 small hex head screws. The pulls have a nice matte finish on them and they look right at home:

Have a bunch more to add but will save it for a later post to prevent this one from getting too long.'86 325e Zinnoberrot /// '02 325ci Schwarz II /// '18 M4 Azurite Black Metallic ///
Albie325 Build Thread | Albie325 COTM Jan 2021Comment
-
Oooh those doorhandles look the business. I like these small upgrades that keep the original look but improve reliability! Also thumbs up for doing the DIY's for mirrors and M-Tech parts install.Belgian E30 Driver
/// 1990 - E30 - 318i Cabriolet Brilliantrot
/// 1988 - E30 - 320i Touring Diamantschwarz (Sold)
/// 1990 - E30 - 318IS Coupé Lazurblau
Check out my Rare BMW Music Edition Cassettes TopicComment
-


Comment