
Got a bunch of random stuff knocked out last weekend.
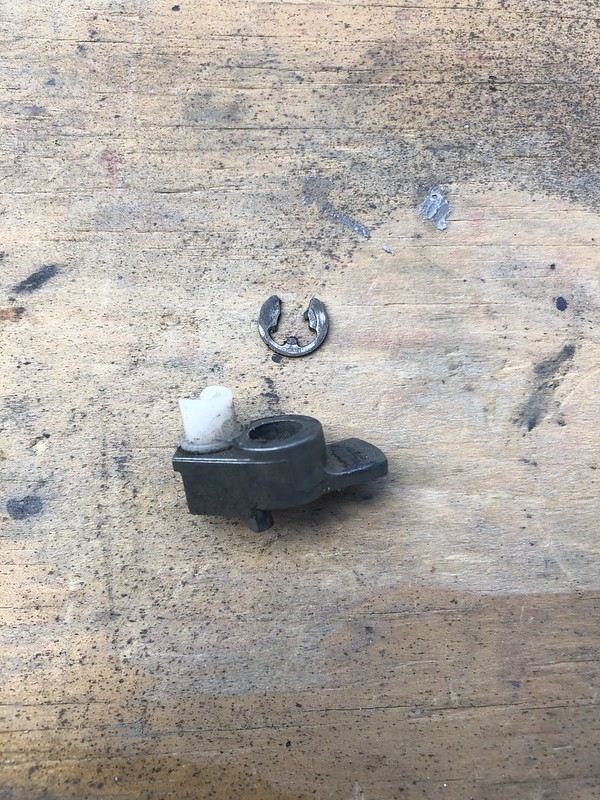
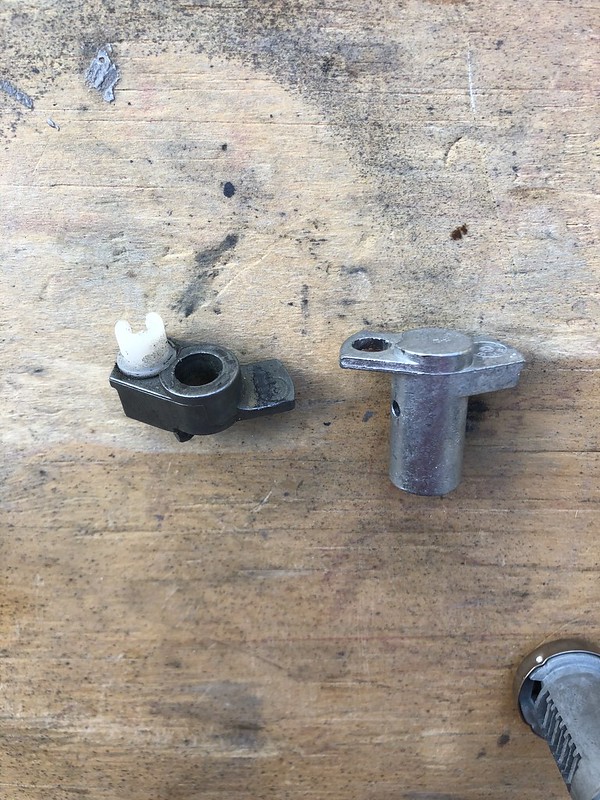
Started by separating my side view mirrors for paint, otherwise there's no way I'd be able to cover them completely without some of the black plastic being visible. They are held together with a long tubular rivet, you need to drill out the rivet to release the spring underneath. To reconnect them, you basically need a new rivet and a special tool to roll the edge back in place:

Inside view:

I found it easiest to drill out the outer end of the rivet with a stepped bit:

The rolled end of the rivet will eventually pop off and you can then pull out the rivet and separate the two halves. For whatever reason, the driver's side had an extra washer in addition to the rivet and spring, while the passenger side had no washer.

The mirror housings had some rock chips so I decided to prime them in high-build so I could sand them out:


These got 4 total coats so I will wait to paint them until they have some time to gas out for a bit, should be ready by this weekend after some sanding. The remainder of the odds and ends I have left to paint were pretty much ready to be scuffed and painted.
For the vent window trim pieces, they had a little rubber pad on the back bottom corner to prevent vibrations against the car, the rubber was completely shot. Luckily, I found an almost identical product on Amazon to replace them:


They were 0.75" sound system pads, here's a link:
https://www.amazon.com/gp/product/B0...?ie=UTF8&psc=1
I also bought MTech specific trunk springs, they're a little beefier than the regular springs to accommodate the larger spoiler:


Scuffed these up and then got everything cleaned, sanded and prepped:


And painted:


So now all I have left to paint is the mirror housings and we're done!
Next, I used some gummi pflege to recondition the windshield gaskets:

They were in overall excellent shape for being 30 years old, but had developed some chalkiness to them:

I got the seals pretty soaked in the liquid and then used a microfiber towel to scrub away the residue. Here's how it comes out:

They look brand new!
Then I reglued the headliner in place so that I could install the windshield gaskets. I used this contact adhesive, it worked great:

I must have deleted the pic of the rear headliner going in, but here's a good link explaining how to go about it:
Start with the rear windshield area from the center out and work your way down the back of the C-pillar. I used some small clips to hold in place for about an hour or so until the cement set enough to hold on its own, then I installed the rear windshield gasket to hold it in place as I continued to the rest of the car:

As the above link explains, the order for gluing the liner in is:


Started by separating my side view mirrors for paint, otherwise there's no way I'd be able to cover them completely without some of the black plastic being visible. They are held together with a long tubular rivet, you need to drill out the rivet to release the spring underneath. To reconnect them, you basically need a new rivet and a special tool to roll the edge back in place:
Inside view:
I found it easiest to drill out the outer end of the rivet with a stepped bit:
The rolled end of the rivet will eventually pop off and you can then pull out the rivet and separate the two halves. For whatever reason, the driver's side had an extra washer in addition to the rivet and spring, while the passenger side had no washer.
The mirror housings had some rock chips so I decided to prime them in high-build so I could sand them out:
These got 4 total coats so I will wait to paint them until they have some time to gas out for a bit, should be ready by this weekend after some sanding. The remainder of the odds and ends I have left to paint were pretty much ready to be scuffed and painted.
For the vent window trim pieces, they had a little rubber pad on the back bottom corner to prevent vibrations against the car, the rubber was completely shot. Luckily, I found an almost identical product on Amazon to replace them:
They were 0.75" sound system pads, here's a link:
https://www.amazon.com/gp/product/B0...?ie=UTF8&psc=1
I also bought MTech specific trunk springs, they're a little beefier than the regular springs to accommodate the larger spoiler:
Scuffed these up and then got everything cleaned, sanded and prepped:
And painted:
So now all I have left to paint is the mirror housings and we're done!
Next, I used some gummi pflege to recondition the windshield gaskets:
They were in overall excellent shape for being 30 years old, but had developed some chalkiness to them:
I got the seals pretty soaked in the liquid and then used a microfiber towel to scrub away the residue. Here's how it comes out:
They look brand new!
Then I reglued the headliner in place so that I could install the windshield gaskets. I used this contact adhesive, it worked great:
I must have deleted the pic of the rear headliner going in, but here's a good link explaining how to go about it:
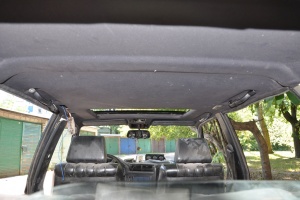
Start with the rear windshield area from the center out and work your way down the back of the C-pillar. I used some small clips to hold in place for about an hour or so until the cement set enough to hold on its own, then I installed the rear windshield gasket to hold it in place as I continued to the rest of the car:
As the above link explains, the order for gluing the liner in is:
- Rear windshield and rear C-pillar
- Front C-pillar and top of the vent windows
- Front windshield
- Sunroof (if present)
- Top of the doors


Comment