Announcement

Collapse
No announcement yet.

Big Al's Revenge: an OEM+, MTech1 325e restoration

Collapse
X
 
  • Filter
  • Time
  • Show
Clear All
new posts

    Originally posted by Melon
    You did what I failed to do.
    There's always time for a cut and buff brother! Makes a world of difference

    Originally posted by LateFan
    Are you sucking in or blowing out
    Well when you put it that way it sounds awful so... neither. I'll call it "venting"

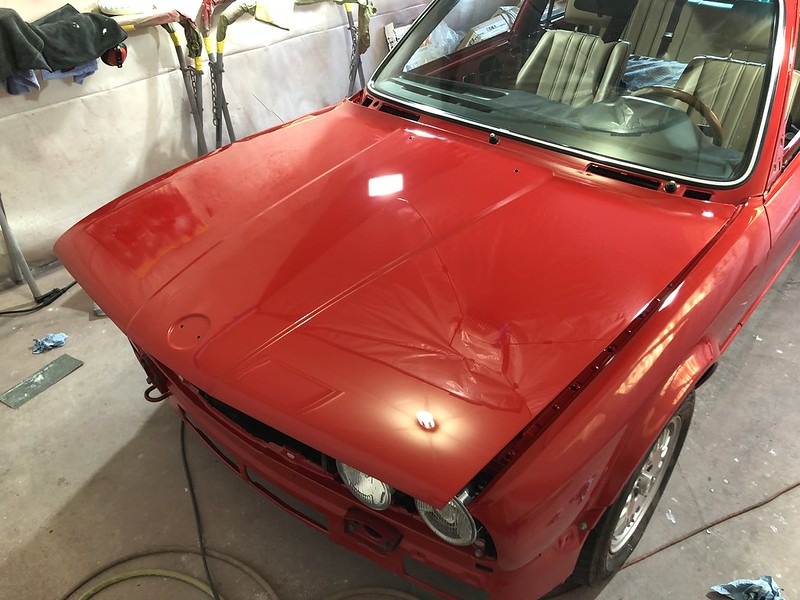
    In all seriousness, as rzerob said they're both exhaust vans blowing out. I know a proper booth should have an intake and exhaust fan for proper flow. but because the garage is only a single car bay I felt like an intake fan was too close to the items I was painting and I didn't want to risk messing up the fan pattern or blowing any debris directly into the fresh paint. I put the filters there more to catch any overspray and prevent getting red paint all over the exterior of the garage, which I rent and would have to fix if I screwed it up.

    Have knocked out a few tedious but yawn worthy items since my return from CT but nothing worthy enough for a post. That should hopefully change this weekend!
    '86 325e Zinnoberrot /// '02 325ci Schwarz II /// '18 M4 Azurite Black Metallic ///

    Albie325 Build Thread | Albie325 COTM Jan 2021

    Comment


      OK, I see, the filters on the exhaust is what had me confused. But yeah, you don't want red paint all over the man's slab! So it's slightly negative pressure in there - is there any danger of sucking dust in through cracks in the building. Some nice sawdust in that new paint, ugh!

      Comment


        Originally posted by Albie325 View Post

        There's always time for a cut and buff brother! Makes a world of difference
        Yeah, I'm wondering if I can sand it down and then spray more clear over it.

        I'm also considering an M54 swap more and more.
        I do things.

        Comment


          Originally posted by LateFan
          is there any danger of sucking dust in through cracks in the building
          There is, I did my best to mitigate this (all edges were taped, all cracks filled with gap filler, the entire garage is covered and taped in thick plastic sheeting, etc). There's only so much I could control with my setup and I did the best I could. There's definitely some dust in the clear but most, if not all, has been coming out with wet sanding/buffing. I never planned for the paint job to be concourse quality as I don't want to be afraid to drive the car and have never painted before, but I've been pleasantly surprised with just how well things have come out. Definitely some learning (read: mistakes) along the way, but all things considered things are looking good!


          Originally posted by Melon
          Yeah, I'm wondering if I can sand it down and then spray more clear over it.

          I'm also considering an M54 swap more and more.
          I'm sure you could, although I'm note sure you're in the mood to de-trim the whole car again. I'd love to see an engine swap on your car, I'd at least wait to address the paint until after an engine swap as I'm sure there will be some dings/scratches along the way.


          '86 325e Zinnoberrot /// '02 325ci Schwarz II /// '18 M4 Azurite Black Metallic ///

          Albie325 Build Thread | Albie325 COTM Jan 2021

          Comment


            Finally getting around to posting last weekend's festivities:

            To start, I wanted to get the windshield wiper linkage and motor back into the car before I finished polishing everything up since I was sure I'd end up scratching something along the way. Getting it out was not easy, I removed it a few months ago prior to the repaint and have waited until now to write it up just to keep everything in the same place.

            I didn't find great writeups on how to remove the linkage other than people saying it can't be done without either removing the IHKS (not gonna be doing that again) or bending the windshield cowl slightly (also not gonna be doing that).

            To start, remove the windshield wipers and unscrew the 22mm nuts that bolt the wiper linkage to the cowl. Inside the cowl, there is also a 10mm bolt just under the wiper motor that bolts the lower part of the linkage to the firewall.

            Then, remove the top blower motor cover, blower motor, and top IHKS cover:


            It's in there super tight, and even after removing the blower motor and top cover of the IHKS it won't fit out of the access panel in the firewall. With the bolts for the linkage completely loose and the linkage/motor just "floating" in there, it gets hung up on the top of the IHKS:


            I torqued and twisted for over an hour and almost gave up, then just decided to separate the windshield wiper motor from the linkage while still inside the cowl. This did the trick, you have just enough room to slide the motor out once detached, and with the motor off of the linkage you have a little more wiggle room to slide it out without too much issue.

            In order to get the motor separated from the linkage, there is 1 10mm nut connecting the motor drive gear to the linkage crank, as well as 3 10mm bolts that attach the motor to the linkage bracket. I took pictures of this after I got everything removed, with everything still in the cowl you can't really see the bolts or nut since they're underneath. You have to go by feel. You do have pretty good access to them though and they weren't that hard to get to.

            Before you loosen anything, the Bentley recommends marking the position of the motor linkage crank arm in relation to the bracket so that you can attach it at the same angle upon reinstall. Here is the motor linkage nut:


            Once the nut is off, the linkage crank is press fit onto the drive gear and you'll have to use a screwdriver to pry it off:


            Then, you can remove the 3 10mm bolts holding the motor to the bracket.

            Then, I separated the 2 halves of the linkage to clean them up and regrease them. To do this, there is a c-clip, a washer, and a small rubber O-ring (in that order) on each side. Be careful not to lose the O-ring:

            Remove the c-clip:


            Then the washer:


            Then the O-ring:


            There's also a small metal ring that fits over the threaded portion, this fits into the rubber gaskets on the windshield cowl to help it seal out moisture:


            All apart:


            All the parts sat in a box until this weekend. I wanted to replace all the rubber components as they were worn, and also wanted to regrease the linkage and inside of the motor itself. I also cleaned and regreased the antenna motor since that was out too:


            Inside of the motor, a little dirty but not too bad:


            And inside the antenna, pretty clean:


            I used some plastic-safe silicone grease similar to what I did with the window motors in an earlier post. I will also be cleaning and regreasing the antenna staff as well, will post that up. For more info on this and for why it's important preventative maintenance to keep the antenna motor from wearing out, check out MercedesSource on YouTube or MercedesSource.com, the Hirschman antennas in our cars are essentially the same as those in the same era Benz's. He's got some other really helpful videos that can be applied to BMW's as well.

            Next I went about replacing all the worn out rubber components:


            To separate the linkage pivot points, there is simply a ball and socket joint that you have to pop off with a screwdriver:


            Old vs new:


            There are 3 total of these gaskets. I cleaned and regreased the ball joints before putting it all back together.

            I also replaced this rubber dampener at the bottom of the bracket, this is where that other 10mm mounting screw I mentioned above attaches the linkage to the firewall:


            Then I regreased the linkage pivot points and got everything put back together:


            New gaskets for the cowl:


            Side the linkage back in and get the wiper bolts and 10mm lower bolt snugged up. Then slide the motor in and get the 3 10mm bolts that attach it to the linkage snugged. Don't forget to put the cover back on the motor first before sliding it into place as the cover wont fit once the motor is installed. You'll be screwing the motor back in blind twice, ask me how I know :


            Then, get the motor linkage crank lined up with your mark and press it onto the motor gear. Snug down the last 10mm nut.

            New plastic covers, and we're done:


            This all took about an hour or two. I then got the doors and strikers reinstalled. Then I cleaned and regreased the door latches and trunk latch:


            I might have forgotten to mention it, but remounted the trunk and the new MTech trunk springs. They were VERY hard to install, really busted my knuckles trying to get those suckers in.

            Next, I installed some new vent window gaskets, trunk seal, as well as OEM door seals, they ain't cheap:


            Fresh:


            Both of the vent window gaskets were actually tough to get it, they both seemed like they were about 1-2cm too long at first:


            The last things I had left to paint were the side mirror covers, knocked that out:


            Then got some plastic trim pieces freshened up:


            Last, I got to work color sanding down the rest of the car. I decided it best to do all the sanding first, then all the cutting/buffing. I got the driver door, both rear quarter panels, and the rear trunk panel all down to 3000 grit:

            Starting out with 1500 grit on the top:


            Then 3000:


            The paint looked good prior to sanding, but what a difference between the unsanded trunk and sanded quarter/rear panels:


            And that's where I finished the weekend, not bad! Should have the rest of the car color sanded and maybe even cut/buffed this weekend, then I need to get to work on the MTech kit
            Last edited by Albie325; 11-05-2020, 08:27 PM.
            '86 325e Zinnoberrot /// '02 325ci Schwarz II /// '18 M4 Azurite Black Metallic ///

            Albie325 Build Thread | Albie325 COTM Jan 2021

            Comment


              Superb work!

              Comment


                so nice to read through! super jealous!

                Comment


                  Quick update from last weekend:

                  When reinstalling my blower motor, I noticed that while testing to make sure it worked it was fine at low speeds, but at level 3-4 it was making a ton of noise as though the fins were hitting something. When I took it out, I found that the outside rim of plastic had cracked, and the higher speeds caused the fins to spread apart and hit the wall of the IHKS. I thought no biggie, I had a spare blower, but of course this had a crack as well.

                  Ended up just ordering a new OEM one, was actually more affordable than I thought (Was $140 shipped and now has a lifetime warranty, was expecting to pay closer to $300)


                  Packaging was superb, even had it's own plastic guard:


                  I also found that one of my recirculation flap doors was not opening and closing, will have to track down the reason why. Either a loose connector, bad relay, or bad motor. Will sort that out another time as there are more important things I care about at the moment.

                  For the rear bumper signal wiring holes in the tail panel, I found these water-tight plugs online as a better option than the metal ones I initially intended to use. I won't need to use any sealant on the new paint and can take them on/off as I please:


                  They looked nice and clean, and the brand was Heyco, not the same company as the one who makes the tool kit tools but I thought it was kinda cool.

                  Next I wanted to get the sunroof sanded, buffed, and installed. Here it is in 3000 grit:


                  Initial cut, can still see some haze:


                  And after final buff:


                  Then got a new gasket installed, I ended up going with the 1-piece:


                  Used some BMW sunroof grease to lube up all the moving parts, could probably do 6 cars with just this one packet:


                  Then got everything installed and the proper heights adjusted. Should be 1mm below the roofline in the front, and 1mm above the roofline in the rear:


                  Looking good!


                  The rest of the weekend was spent color sanding down the rest of the car as well as getting the initial cut on all the panels prior to moving on to the final buff. All was going smoothly until I made a booboo on the hood:


                  A lapse in concentration for a second too long and I burned through. Was just going to touch that area up, but then chipped the edge with the brass coupling on the DA sander:


                  Ugh. I had debated re-clearing the hood anyway as I wasn't 100% happy with the finish, so I guess this was the universe telling me I should just suck it up and do it. Reprepped and got the cutthrough areas re-colored:


                  And added 3 more coats of clear:


                  No more chip:


                  And no more cutthrough:


                  This cost me the better part of a whole day, but at this point I want things to look right.

                  Then got all the other body panels in the initial cut:

                  Uncut fender vs cut door, with some tape to protect the edges:


                  Right half is cut, left is still rough:


                  Got all the body panels done, but was dark by then so couldn't get great pics:


                  I'm working this weekend so am out of the garage. Next weekend, will get the hood re-color sanded, cut, and then do the final buff on all the panels. Once that's done, I'll get the glass and the majority of the trim back on the car. With any luck, I'll at least start getting the MTech kit buffed out and maybe installed, fingers crossed...
                  Last edited by Albie325; 11-13-2020, 05:23 PM.
                  '86 325e Zinnoberrot /// '02 325ci Schwarz II /// '18 M4 Azurite Black Metallic ///

                  Albie325 Build Thread | Albie325 COTM Jan 2021

                  Comment


                    This thread just gets better and better. Well done, that's top notch work!
                    '85 Alpine WeiĂź 2-door with m20b30 ground up build

                    Comment


                      That red colour looks so gorgeous when fully polished. Can't wait see the complete car done.
                      Btw. Those new door seals look beautiful, but damn those are expensive.
                      Belgian E30 Driver
                      /
                      //
                      1990 - E30 - 318i Cabriolet Brilliantrot
                      /// 1988 - E30 - 320i Touring Diamantschwarz (Sold)
                      /// 1990 - E30 - 318IS Coupé Lazurblau

                      Check out my Rare BMW Music Edition Cassettes Topic

                      Comment


                        Originally posted by Albie325 View Post
                        For the rear bumper signal wiring holes in the tail panel, I found these water-tight plugs online as a better option than the metal ones I initially intended to use. I won't need to use any sealant on the new paint and can take them on/off as I please:


                        They looked nice and clean, and the brand was Heyco, not the same company as the one who makes the tool kit tools but I thought it was kinda cool.
                        Do you have they heyco part number?
                        Paynemw
                        1986 Toyota 4Runner SR5 - Sold!
                        the ebb and flow of 325is ownership - In RVA
                        1988 BMW 535is - RIP but my dream BMW

                        Comment


                          Originally posted by paynemw View Post

                          Do you have they heyco part number?
                          It is right on it LTBP 1000. HEYCo-molded™ Liquid Tight Break-Thru Plugs
                          How to remove, install or convert to pop out windows
                          http://www.r3vlimited.com/board/showthread.php?t=297611


                          Could be better, could be worse.

                          Comment


                            Originally posted by gnmzl
                            This thread just gets better and better. Well done, that's top notch work!
                            Thanks man!

                            Originally posted by PieterVN
                            [That red colour looks so gorgeous when fully polished. Can't wait see the complete car done.
                            Btw. Those new door seals look beautiful, but damn those are expensive.
                            You ain't lying brother. There's a thread on here under "Door seals" that I was hoping would provide a cheaper option, however I just wasn't happy with the overall fit and quality of those so decided to just pony up the money to have it look correct. I have to say, the new OEM ones really are nice.

                            paynemw yes, rzerob is correct. they are Heyco Liquid Tight Break-Thru plugs. I bought these in both the 0.875" and 1" sizes as the metric sized hole is not a 100% match for SAE. The sizes are for the OD of the plugs, the diameter of the hole is 21mm I believe and the ID of the plugs falls right in between that.. The 0.875" plugs fit too loosely, the 1" plugs BARELY made it in but are nice and snug.

                            This past weekend I got the hood ironed out, block sanded first in 1500 grit followed by 3000 grit on the DA sander:


                            Even in 3000 grit it's *almost* shiny:


                            Next came the initial cut:


                            And finally the buff, the image quality of the reflection is much clearer, hard to capture in pictures:


                            I then went over the whole car and did the final buff as I left off with the rest of the car just in the heavy cut stage. Once I was happy, I pulled the car out into the sunlight as natural light does a better job of showing you anywhere you missed or any issues that need fixing. Once I went around the car a few times and was satisfied, I took a few pics before the sun went down:


                            There's definitely a few minor imperfections here and there, but none that you'd notice unless I pointed them out. I'm very pleased, and relieved!

                            The rest of the day was spent cleaning out as much of the compound from the trim/cracks/interior as I could, will need to go back and do another once-over as it gets into EVERYTHING. I also got started on buffing the chrome trim pieces and repainting some of the black trim but didn't get it completed enough to post up pics.

                            My plans for this coming weekend are:
                            • Finish buffing the chrome trim pieces and get them all installed
                            • Polish and reinstall the windows
                            • Color sand and buff the MTech pieces, vent trim, gas door, and side mirrors and hopefully get them installed
                            • Install as much of the remaining trim/door locks/etc as I can
                            '86 325e Zinnoberrot /// '02 325ci Schwarz II /// '18 M4 Azurite Black Metallic ///

                            Albie325 Build Thread | Albie325 COTM Jan 2021

                            Comment


                              Stunning. The quality of the paint work is really evident in that shot of the car with the hood open. I'm happy for you and can't wait to see this come together.


                              MJ

                              Comment


                                VERY well done my friend. Super impressed by your work. The car looks stunning. Do you plan on keeping the M20b27 or do you think you'd ever go to an M20b25?
                                Paynemw
                                1986 Toyota 4Runner SR5 - Sold!
                                the ebb and flow of 325is ownership - In RVA
                                1988 BMW 535is - RIP but my dream BMW

                                Comment

                                Working...
                                X