Announcement

Collapse
No announcement yet.

ddm-j's 1989 325ix Alpine Sedan

Collapse
X
 
  • Filter
  • Time
  • Show
Clear All
new posts

    ddm-j's 1989 325ix Alpine Sedan

    New to this board -- been a Jeep enthusiast my entire life but I found a new cult to join a few weeks ago.

    This is my newly purchased 1989 325ix Alpine sedan!
    I rescued this vehicle from the rust ridden state of Indiana and brought it to the Land of Enchantment - New Mexico. Here I can confidently remove rust and know that it won't come back for the next 150 years. Surprisingly, this car has very little rust.

    I'm excited to drive this thing on beautiful mountain passes of Southern Colorado where it will be at home.

    Pros:
    • Excellent mechanical condition
    • New suspension components
    • New steering column
    • Working VC
    • Manual Trans
    • No frame rust
    • No wheel well rust
    Cons:
    • Minor surface rust on underside of hood, door jam, license plate light mount screw holes, rear valence battery rot hole, and sunroof brackets etc..
    • No tint
    • AC blowing warm
    • Need new tires
    • Aftermarket head unit
    • Minor dents
    • Was repainted at some point and a poor job was done
    • Cracked dash
    • Fading paint (minor chipping in some areas)
    Click image for larger version

Name:	PXL_20210328_170040174.jpg
Views:	346
Size:	67.1 KB
ID:	9981368

    I purchased this car because I've always loved the look of them and they turn heads on the road - especially if they're in good shape. Secondarily, I believe this car will be a good store of value over the next 5-10 years. Even though I plan on putting 5-10k in the way of restoration towards this car, I think it'll be worth much more than purchase+upgrades after that time span. Much better in my view than buying a depreciating class... Plus, the car is so fun to drive!

    I believe all e30 stock is on the rise at present and I believe it will continue to move north in the coming decades.

    My immediate roadmap is this:
    • New tires
    • Maximum legal ceramic tint (more thermal energy dissipation for lower % light)
    • Full R134a conversion
      • Condenser
      • New Fan
      • Drier
      • Valves & Seals
    • Paint rear speaker panel from grey to black
    • Acquire and install factory CM5908 Head Unit
      • DIY install Bluetooth upgrade on said unit
    • New dash
    • Service panel replacement
      • Unable to reset service light - suspect batteries have died
    • New knee panel (one that came with car was electrical taped on
    • New shift boot
    • Fix front right signal bulb wiring
    • Remove and replace rusted and stripped front bumper bolts with welder and nuts
    • Trim conditioning/painting

    Longer term roadmap:
    • Repair all rust issues prior to full repaint
    • New driver seat
    • Refresh headliner
      • New dome lights and dome light frames with warm LED bulbs (+ fix PO bang up job on the driver's side dome light wiring)
    • Full repaint
      • Probably do all of the prep work myself and get it down to shell before paint (2-3 year time horizon on this)

    #2
    First fools errand: Refurbing the power antenna:
    Click image for larger version  Name:	PXL_20210403_024638217.MP.jpg Views:	0 Size:	49.4 KB ID:	9981376


    Cleaned all of the parts. Sanded away the rust. And applied a light coat of paint to the bare metal.

    Problem here is was that the PO had tried to fix the antenna by using an o-ring for the belt. Needless to say this did not last. Another problem is identifying the belt replacement!

    Unfortunately the listings for replacement belts do not identify the belt pitch, length, or tooth profile (information we would need to find a cheap and possibly local replacement!).

    For this model antenna (Hirschmann Auta 6000 I believe?) I found several eBay listings for a replacement belt. From the images I saw the lettering on the side as 158-2GT this indicates to me that the belt uses a very common 2GT tooth profile. Furthermore, it is a 6mm face width belt. The only problem here is that it is not a 158mm length belt the actual belt is smaller. This must have been a stock image... So we need to calculate the appropriate belt length with this belt length calculator. From this I estimate the required belt length to be 116-118mm!

    For anybody searching in the future: the e30 power antenna uses a belt with the following characteristics:
    • 2GT Tooth Profile
    • 2mm Tooth Pitch
    • 6mm Width
    • 116-118mm belt length
    • 59 Teeth
    • Likely part number: GBN1182GT-60
      • Could also be 118-2GT-6
      • 2GT-118-6
      • (these are just guesses based on how belts are usually named)
      • If you can find a 6mm wide 2GT belt with 118mm length you'll be good.
    EDIT: Amazon search you can find these belts easy: 118-2GT-6

    But ordering a new belt is too easy. I don't thing the torque on this motor will be high enough to load the belt with approximate yield load of 10lbs for my TPU material on this profile; I'll just 3D print one. Using this website I got the geometric specifications for this belt tooth profile and drafted one up.

    EDIT: I've attached CAD and STL files for anybody that want to print one of these out - just change the file extensions from PDF to the appropriate extension I placed in the filename (SLDPRT, STEP, STL)
    Click image for larger version  Name:	belt.PNG Views:	0 Size:	313.4 KB ID:	9981379
    Click image for larger version  Name:	PXL_20210403_201904594.jpg Views:	0 Size:	52.2 KB ID:	9981377
    (note pictured here is a 158mm belt. This was before I realized that the listing I found was a stock image and before I decided to calculate belt length manually. I later printed a 118mm belt that fits perfectly)


    Click image for larger version  Name:	PXL_20210403_155058152.jpg Views:	0 Size:	96.1 KB ID:	9981378


    But it was all for naught because I got it all wired up in the whip and I got a new problem:

    Antenna only goes up when car is turned on. Will not go back down when turned off.
    I thought this was a head unit wiring problem (aftermarket rubbish) but it wasn't.
    Currently theory is that PO may have busted the motor control board when it was repaired last (with o-ring for belt). Also, the motor is running rather slow so it may need a replacement as well. For now, this project is tabled until I can diagnose the issue properly!

    Going to 3D print an antenna plug for the time being!
    Attached Files
    Last edited by ddm-j; 04-03-2021, 04:38 PM.

    Comment


      #3
      Belt CAD - Edit file extensions.
      Attached Files

      Comment


        #4
        I saved this car from a driveway in Kentucky, and gave it a second life! Glad it's back on the forum. I sold it to a young kid who put a bling steering wheel and s1ck shift boot on it, who then sold it to another guy in Indy, who I assume you bought it from. I wish I had as much luck selling it as the two folks after me.

        I put new tires on and had it aligned- surprised the tires are shot.

        Here is my thread from the rescue:

        1990 Brilliantrot 325iS Build Thread
        1989 Zinnoberrot M3 Build Thread

        Comment


          #5
          AWDBOB great work. Just had a look at your thread. Funny, I had found your listing for the car before I bought it and that is what I used to determine that it was a great deal. Aside from the cosmetic things its in excellent mechanical shape! I wish the guy you sold it to kept as good care of it as you did! The doctor guy that bought it from him told me it was in rough shape even after him owning it for a year or so; he had receipts for $8k worth of parts replacements and maintenance to show me!

          As for the tires, they are just extremely dry and cracking. They still have decent tread. Everyone I know thought I was crazy for driving back on them but I know they aren't even 4 years old yet! ODO has 142k on it but I think its more like 150k. Either way neither of the guys after you put many miles.

          Its got an M3 shifter on it - was that what were referring to?

          Also, I saw that you wanted to do the R134a conversion. Did you end up doing that? The pressure switch doesn't say 134 on the top side so I haven't had time to go look at the expansion valve and other components to check if its been converted. But that's on my top list, this summer is set to be hot as ever!

          Comment


            #6
            Originally posted by ddm-j View Post
            AWDBOB great work. Just had a look at your thread. Funny, I had found your listing for the car before I bought it and that is what I used to determine that it was a great deal. Aside from the cosmetic things its in excellent mechanical shape! I wish the guy you sold it to kept as good care of it as you did! The doctor guy that bought it from him told me it was in rough shape even after him owning it for a year or so; he had receipts for $8k worth of parts replacements and maintenance to show me!

            As for the tires, they are just extremely dry and cracking. They still have decent tread. Everyone I know thought I was crazy for driving back on them but I know they aren't even 4 years old yet! ODO has 142k on it but I think its more like 150k. Either way neither of the guys after you put many miles.

            Its got an M3 shifter on it - was that what were referring to?

            Also, I saw that you wanted to do the R134a conversion. Did you end up doing that? The pressure switch doesn't say 134 on the top side so I haven't had time to go look at the expansion valve and other components to check if its been converted. But that's on my top list, this summer is set to be hot as ever!
            I do not think the kid I sold it to took very good care of it/if any care at all. The doc you bought it from had it serviced at Reggies (where I assume your receipts are from), and they do incredible work!

            When I got the A/C working I replaced the o-rings with r134 pieces (and I believe the expansion valve too) and just vac’d and charged it. It actually worked really well and blew cold for the 6ish months I was cruising around in it. I didn’t change the compressor seals, though, so I wouldn’t be surprised if they gave up the ghost after a while.

            And re: shift boot- no, the kid I sold it to put a shift boot on it that was flashy and didn’t represent the rest of the car. I added a ZHP shift knob- I assume reggies added the shift lever if it has an M3 lever in it.

            I am excited to see where you take the car!
            1990 Brilliantrot 325iS Build Thread
            1989 Zinnoberrot M3 Build Thread

            Comment


              #7
              Going to do the full R134a upgrade. Ordered these new parts:
              • Parallel flow condenser
              • 2000 CFM replacement fan
              • Sanden SD5H14 compressor
              • Expansion valve
              • Pressure sensor
              • Reciever/Dryer
              • O-Ring Kit
              • Vacuum pump
              • Guage set

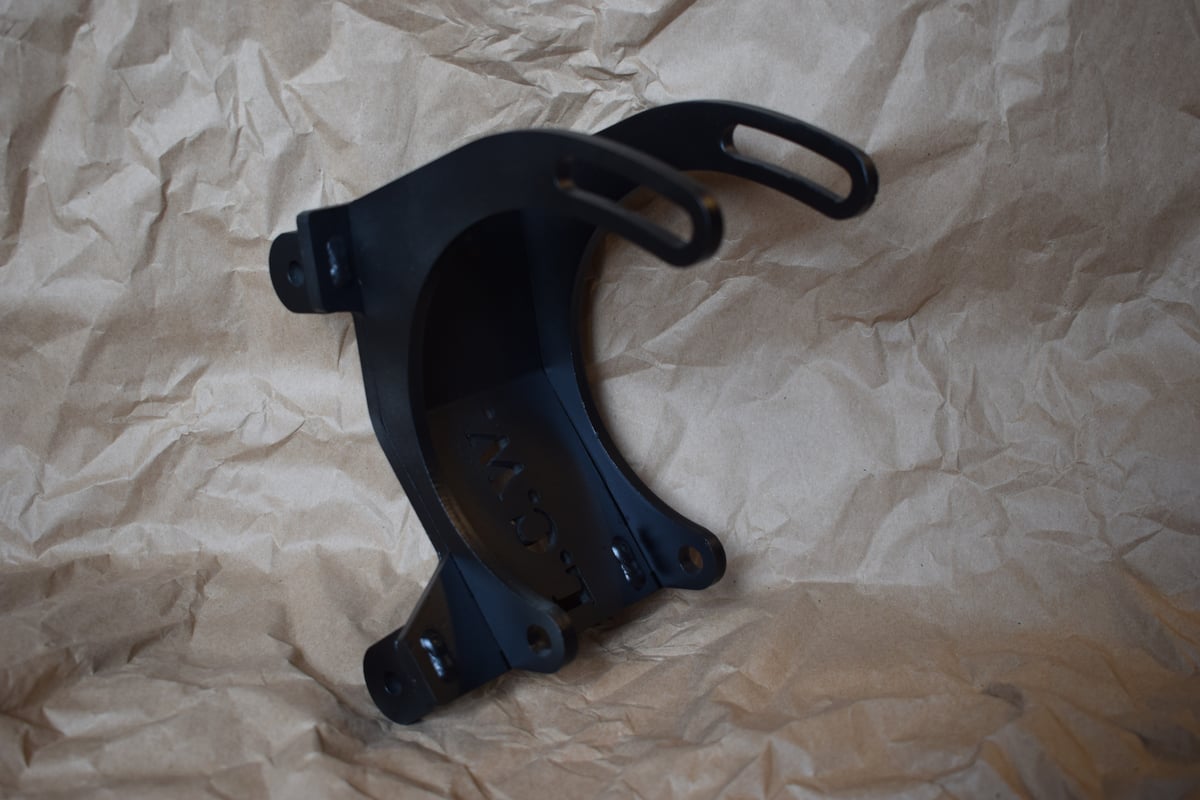
              I've also ordered new hoses and AC fittings to connect all of my new components. Will reroute a couple lines and 3D print (possibly) high HDT photopolymer brackets to mount the lines. The most fun part about this will be manufacturing a compressor mounting bracket. Because they do not sell the APG (air products group) Sanden compressor retrofit kit anymore, it looks like I'll be making one myself. There is a dude selling a universal sanden mounting bracket but I want one that is as minimal jank as possible. Maximum bespoke and maximum challenge.

              My ideal mounting bracket is unique to this compressor (SD5H14 or 508). I plan on doing some CAD/design work, 3D print a test bracket to check alignment, then send to my fab shop for manufacturing. If the economics are right, I may fully 3D print the bracket in 17-4 PH stainless steel on the Desktop Metal printer at work. If all goes well I may sell the drawings or the brackets if there is demand!

              To do this I'll first start by modelling the compressor and the mounting area in the engine bay. This will include the position of all the mounting holes in the block and any objects in the area that may interfere with the bracket and/or compressor. I did some digging on the SD5H14 and I couldn't find any 3D models. So I did some further digging and discovered that the Sanden PN for the SD5H14 is 6664 (this comp. has other part numbers as well, but they have all been replaced by the aftermarket variant which is denoted by 6664). Via the Sanden website, you can find this page:

              Sanden SD5H14

              On that page there is a link to an engineering drawing of the compressor. I've attached the drawing to this post in the chance that the link breaks with time, or the sanden website goes caput. I will use this schematic to generate a low fidelity CAD model.
              Attached Files

              Comment


                #8
                Drew up the SD5H14 compressor. Here is a link to a repo of the CAD models for this. Note that the model is only exact for mounting holes, belt grooves, belt location, hose threads & interior specs. Everything else is an approximate trace from the manufacturer schematic. Mileage may vary.
                Sanden SD5H14 compressor CAD

                Next is to get up under the car and measure the current pully location relative to the block. Then extract the existing compressor mounting bracket and measure the mounting hole locations. From there it should be a straight shot to design a custom bracket for the new compressor.

                Comment


                  #9
                  Working on new compressor mount and tensioning system... Getting center path trace during tensioning of compressor axis as close to OEM as possible.

                  Click image for larger version

Name:	new_mounting_system.PNG
Views:	147
Size:	266.3 KB
ID:	10015308

                  Comment


                    #10
                    welcome!

                    A) All E30s are sedans. *pedantic*
                    B) We were just talking about sharing .stl / 3d printer files for E30 parts in another thread. Man, we should really put something together. Selling E30 parts for profit is nearly impossible, but almost anyone can afford a desktop printer these days. And there's tons of stuff that's NLA or really difficult to find, new or used.
                    C) Well, you have an ix - so we're already friends. ;)
                    Build thread

                    Bimmerlabs

                    Comment


                      #11
                      First prototype design done. Just for fitment here - low detail. Will move to a detailed design once the fit/form is checked with the 3D print running now! New mounting bracket and tensioning bracket in the works.

                      Old Design
                      Click image for larger version

Name:	old.PNG
Views:	169
Size:	304.8 KB
ID:	10015317

                      Low Detail Prototype
                      Click image for larger version

Name:	proto1.PNG
Views:	170
Size:	263.7 KB
ID:	10015318

                      The new design will feature a simple threaded rod end for tensioning the belt. Because the old compressor mounting ears are further from the compressor center axis than the SD5H14's, the path that they trace out while being tensioned will be slightly different. Without adding material to the top ear of the new compressor this is unavoidable. The path is close enough and I think I'll get the same tension capabilities with the new system as with the old.

                      Next is to throw a cheap plastic prototype in there and see what needs to change, then move to manufacture ready design, then out to fab shop!
                      Attached Files

                      Comment


                        #12
                        This is great! I like to head first dive into the shallow end, hope to see you at the deep end where you no longer run the fool's errand, but you now live the fools life! :)


                        Sanden 508 M20 compressor bracket - I've used their M30 bracket with success.

                        Replace your inefficient, expensive, and hard to find OEM air conditioning compressor with a modern Sanden style unit. Shipping prices are accurate...


                        I was up above it, Now I'm down in it ~ Entropy - A Build thread.
                        @Zakspeed_US

                        Comment


                          #13
                          Originally posted by nando View Post
                          welcome!

                          A) All E30s are sedans. *pedantic*
                          B) We were just talking about sharing .stl / 3d printer files for E30 parts in another thread. Man, we should really put something together. Selling E30 parts for profit is nearly impossible, but almost anyone can afford a desktop printer these days. And there's tons of stuff that's NLA or really difficult to find, new or used.
                          C) Well, you have an ix - so we're already friends. ;)
                          Putting together a repo of CAD and Mesh files for e30 would be awesome! I was surprised there wasn't more out there after a quick search! And yeah I actually did some economics on this bracket and it seems like I wouldn't feel comfortable selling them above cost. Most of the other brackets I've found are probably under 20% margin, which for a low volume business isn't quite it.

                          The IX is awesome! I've got 4 wheel drive cars only. Just need to upgrade the AC to an alpine breeze status


                          EDIT: working on acquiring a 3D scanner at work so maybe there'll be an opportunity for reversing some tough-to-measure parts in the near future!
                          Last edited by ddm-j; 04-23-2021, 02:54 PM.

                          Comment


                            #14
                            Originally posted by moatilliatta View Post
                            This is great! I like to head first dive into the shallow end, hope to see you at the deep end where you no longer run the fool's errand, but you now live the fools life! :)


                            Sanden 508 M20 compressor bracket - I've used their M30 bracket with success.

                            Replace your inefficient, expensive, and hard to find OEM air conditioning compressor with a modern Sanden style unit. Shipping prices are accurate...


                            I actually saw those 508 brackets and I think that would work for the SD5H14 (newer version of the 508 I've come to understand). I think the mounting pitch is the same. I just don't like how the tensioning works on that one and other ones I've seen. There's this one posted on the My e28 forum that is just horrible with a ton of washers and spacers! Hahaha

                            Hopefully my idea of using a threaded rod end to tension it will work out well!

                            Comment


                              #15
                              This is actually the second prototype. There were some unforeseen obstructions on the first iteration. I ended up needing to throw some bushings on the back of the bracket so that I can avoid the obstructions on the block. In reality these bushings will probably be welded on to the plate, but These ones are printed. I'm really surprised that the bracket would hold the compressor (its just simple PLA plastic).

                              As you can see it's pretty similar to the OEM tensioning system, just shifted toward the radiator a bit. I did have a little bit of rub on one of the mounting ears but I think it'll be alright.

                              Click image for larger version

Name:	PXL_20210424_022710929_50.jpg
Views:	180
Size:	90.8 KB
ID:	10015464
                              Click image for larger version

Name:	PXL_20210424_022432205_50.jpg
Views:	167
Size:	90.9 KB
ID:	10015465


                              This thing needs a full detail in a bad way, as you can see....


                              I've got some friends of mine reviewing the design for manufacturability so hopefully I can have one fabbed next week and ready to finish this project up. Today I replaced the expansion valve and that was a major PITA. Also have a rusted, stripped, then broken off (using bolt extractor) about 2" deep into the hole on the front bumper. So I'm waiting on some extended carbide burrs so that I can have another whack using a screw extractor instead (internal). If that doesn't work It'll be a long night of drilling. Until I get that sorted I won't be able to replace the condenser!

                              Also got my new hoses and fittings; on monday I'll have those crimped up!

                              Comment

                              Working...
                              X