-
Subscribed! I have a very similar 4 door lachsilber 87 325i and have done alot of similar work to you! as soon as I get a set of wheels I am planning to make a thread. Great work! -
“This was my first time working with thin sheet metal, and I learned a few things in the process:
Don't use a reciprocating saw for fine work.
If I had brought my jigsaw along, I could have removed less good metal on the body and made a smaller patch panel.
Butt welding here was unnecessary, and made things more difficult.
Lap joints would have been preferable.
Don't try to fill in air gaps between your patch panel and the body. It'll just blow through (or you'll have to stack some welds very carefully).
If butt welding, your patch panel must be the exact shape of the missing metal.
Shop rags are flammable
if I could suggest a steel garbage can with a steel lid in your garage/shop.
I always throw out any rag/paper towel that has been used for oil/ spray cleaner/gas clean up in the steel can. I then make sure the lid is on when I leave the shop.
If they self combust, the steel can will hold up and lid will starve it of O2.
This was a tip from a fire fighter friend. Makes perfect sense.
And cheaper than the deductible to rebuild your shop and all the toys within.
Hoping the self immolation of your rags didn’t cause any damage!!Leave a comment:
-
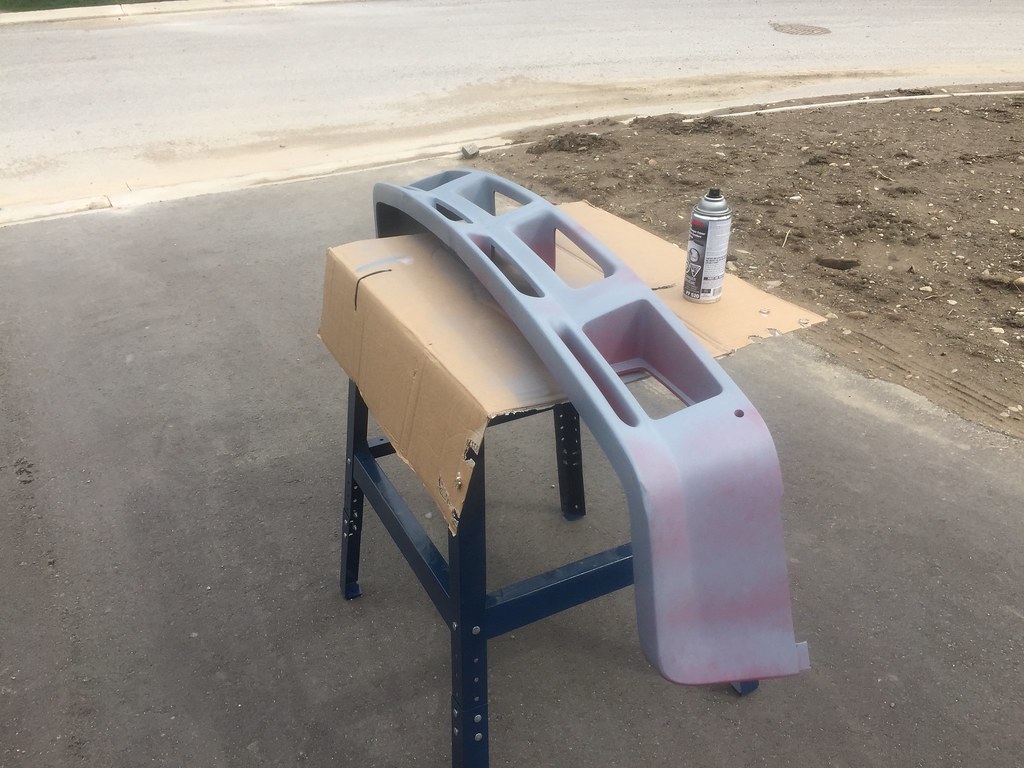
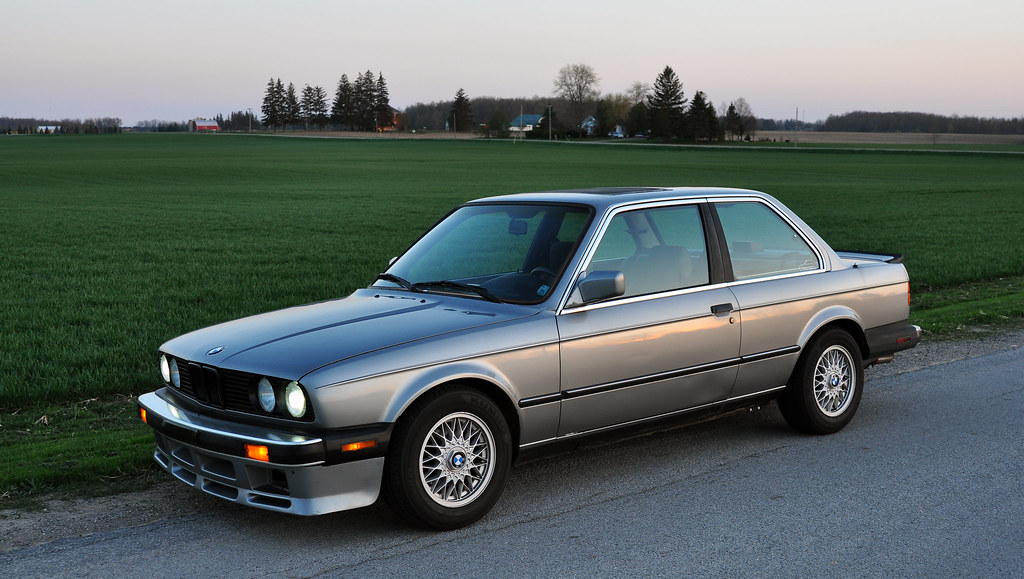
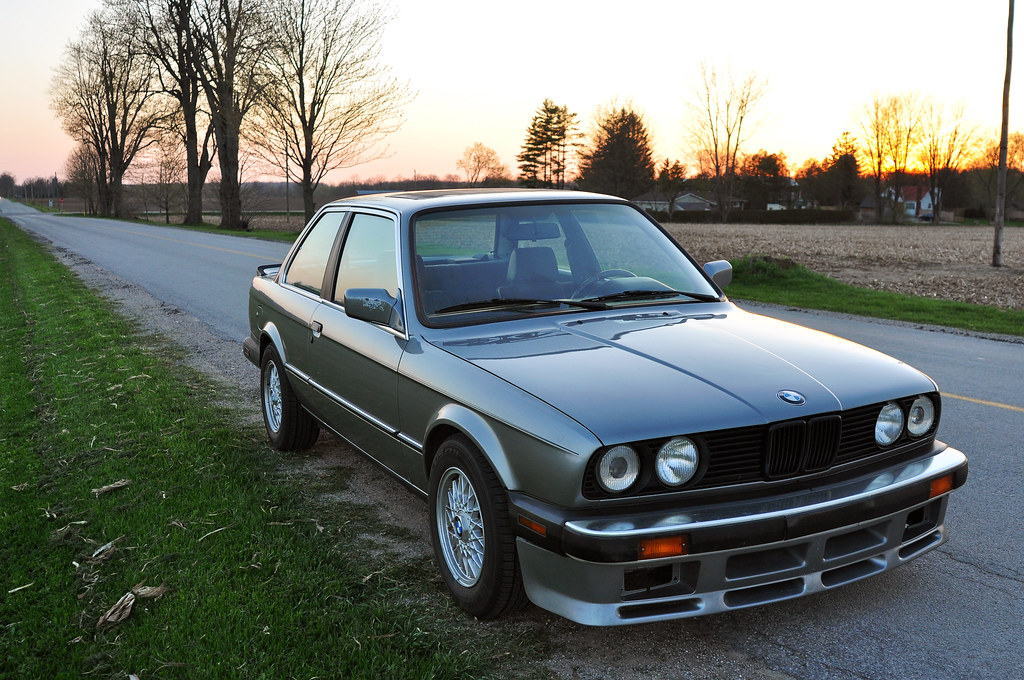
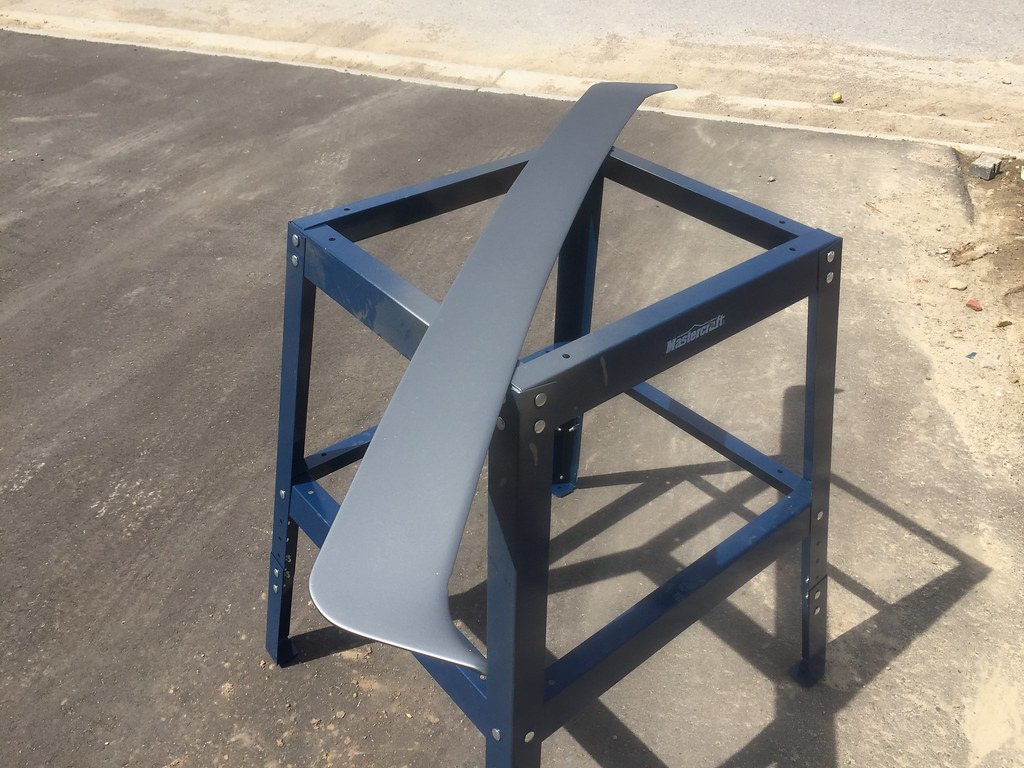
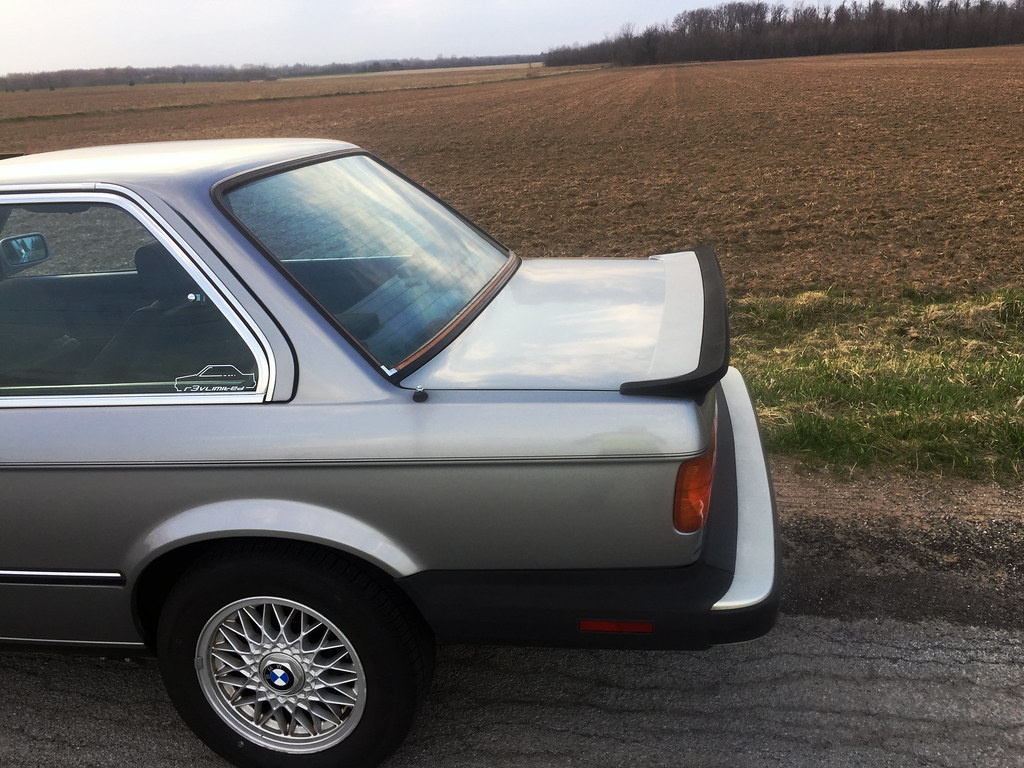
1987 325iS Air Dam
Another item checked off the long-term to-do list!
If you check the first post of this thread (almost 4 years ago!), you can see the previous owner provided a half-original airdam for the car.
The other half was plastic welded on but never finished.
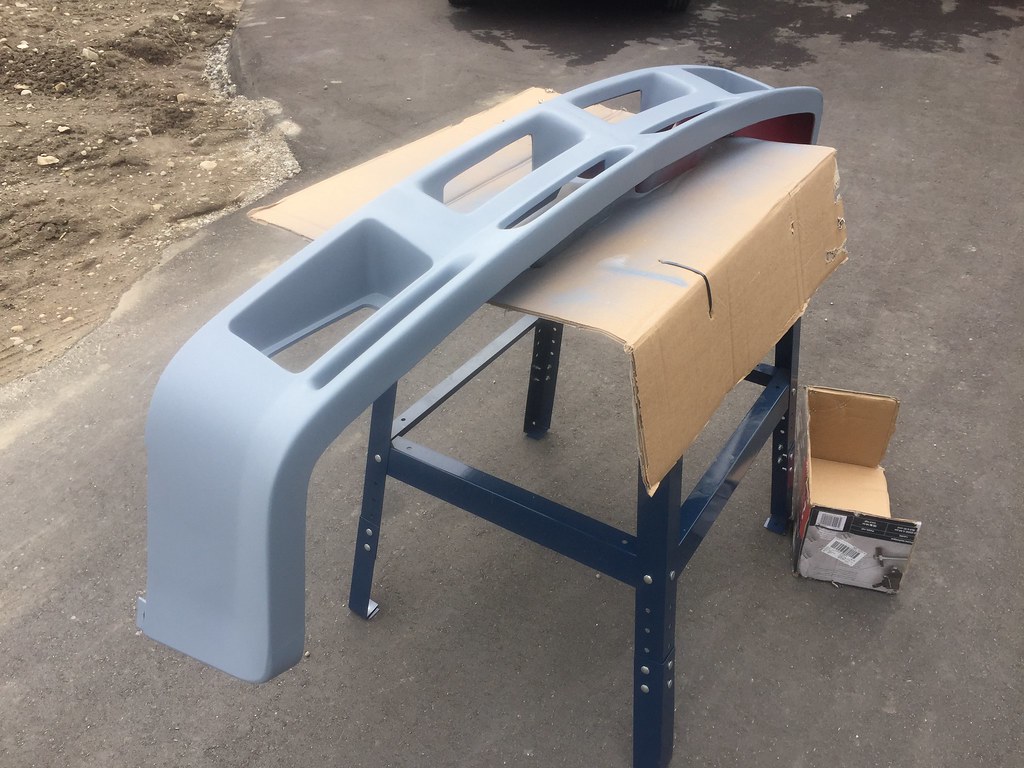
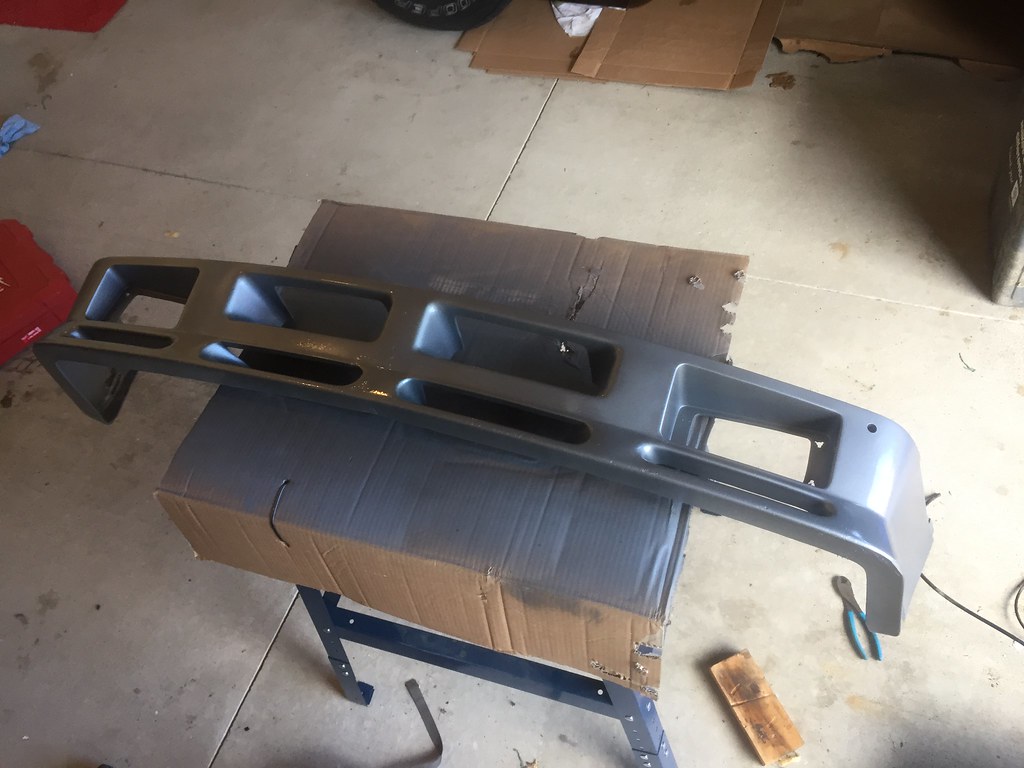
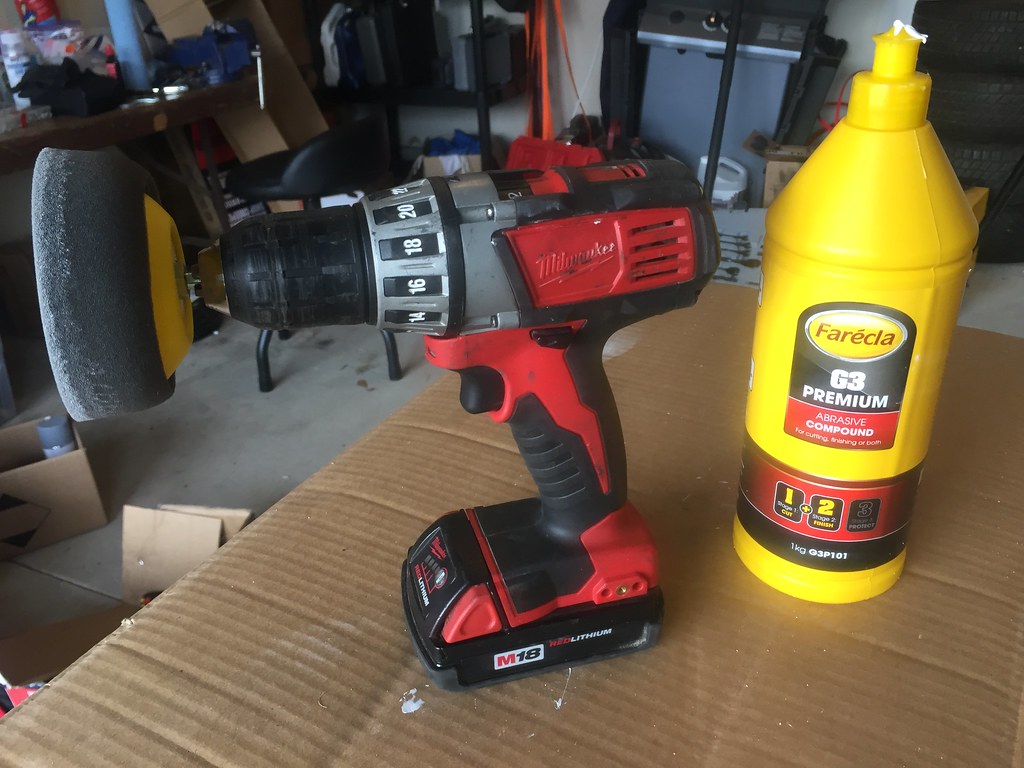
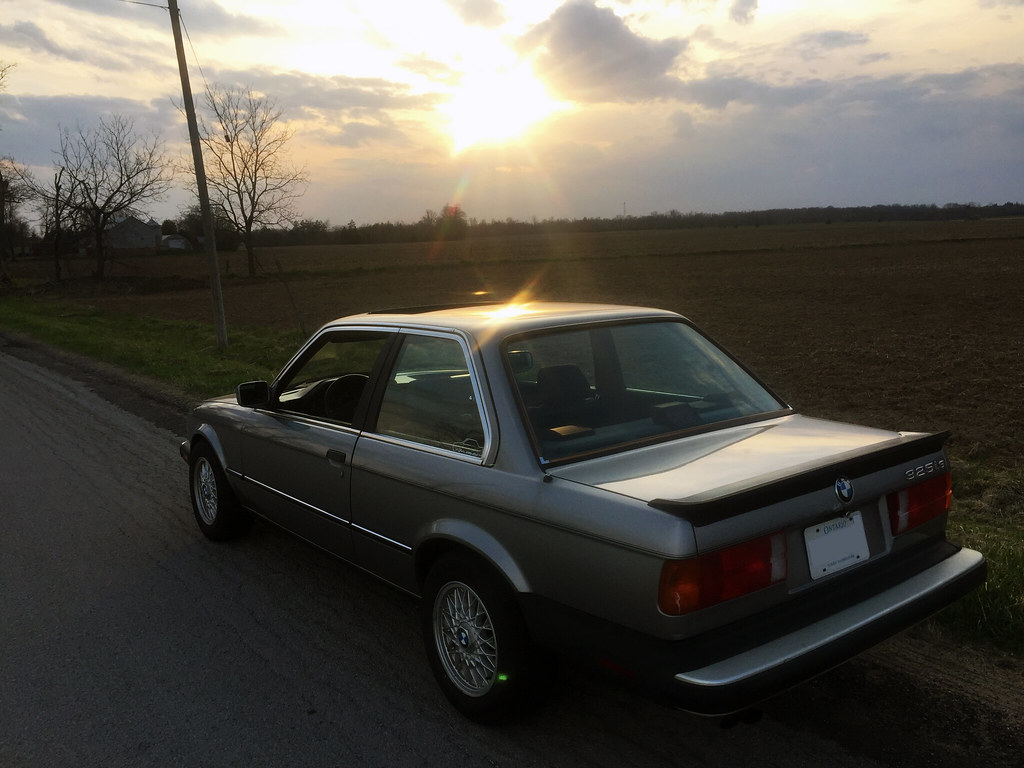
Bent up some brackets out of aluminum (working off a picture of the originals), sprayed an entire can (many coats) each of high-build flexible primer, acrylic colormatched Lachssilber, and 2K clearcoat. Then I cut/finished with the same product I used on the E28 spoiler.
I'd say my paint job is a 7/10 all things considered. I painted outside on the windiest day of the year (there were wind warnings with gusts up to 60mph). When I started painting in the morning it wasn't too windy, but by the time the last coat of 2K clearcoat flashed off, I barely managed to get the air dam and sawhorse into the garage!
I would have benefited from some flexible bondo type material, to fill in some of the rough spots where the bumpers were plastic welded together.
Since the air dam is mounted so low and tucked under the bumper, the imperfections are hard to notice.
I got all of the bolts hand tight and then rushed out to take a few pictures before the sun went down. Tomorrow I will finish up the mounting.
Eventually I will either make some blockoff plates for the foglights, or otherwise black out the metal valance behind the air dam.
-
-


 Last edited by Panici; 05-07-2018, 06:11 PM.
Leave a comment:
-
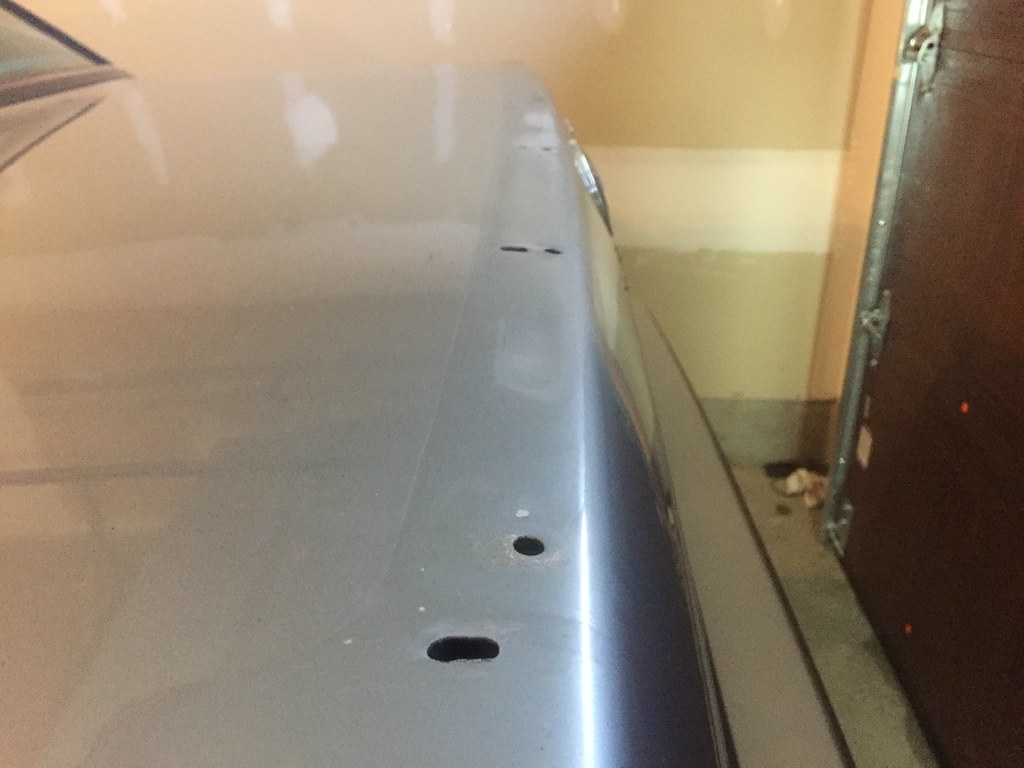
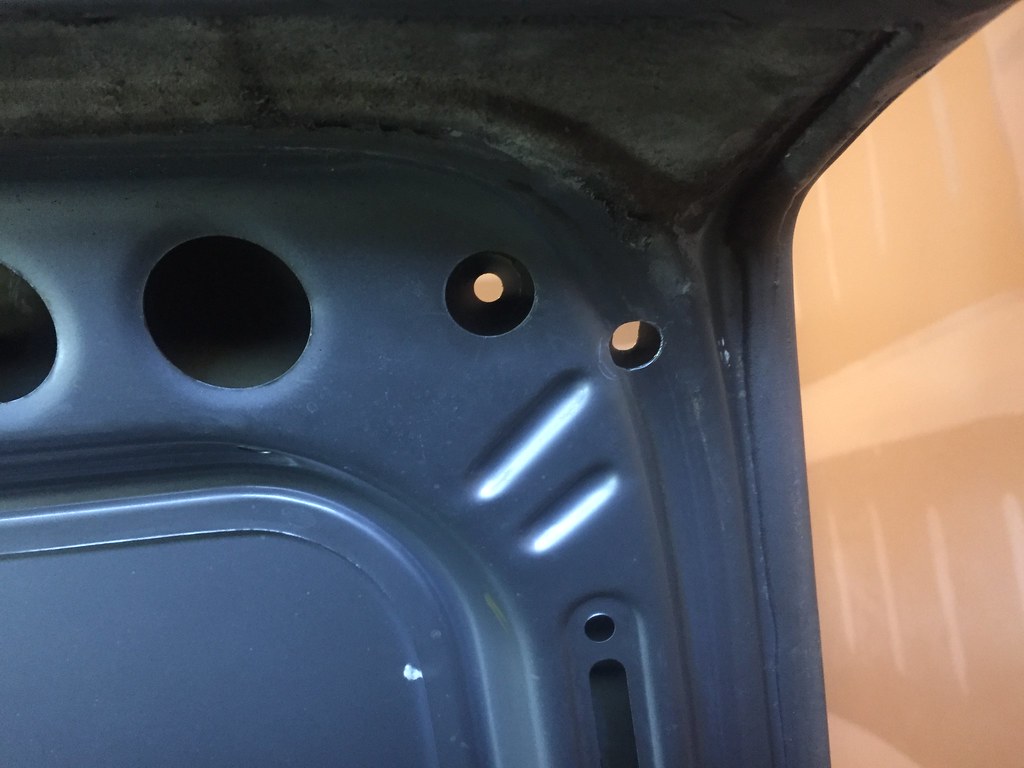
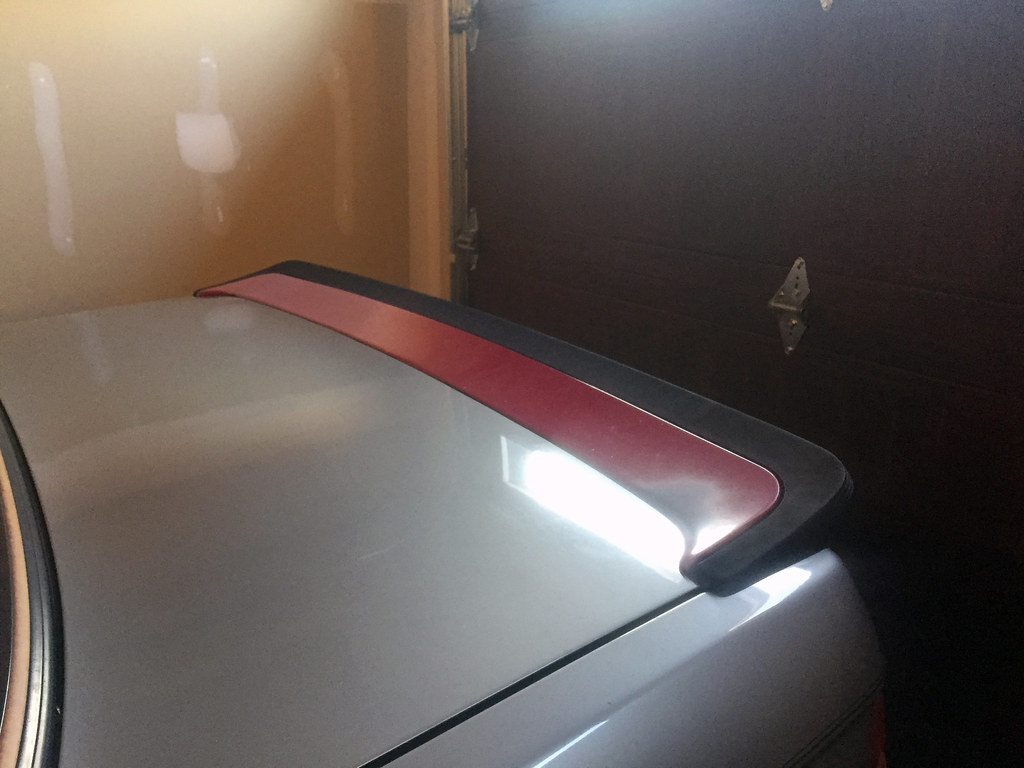
E28 535is Pfeba Heckspoiler
Finally got around to my E28 spoiler that I've had since 2016.
I think you'll agree it's a significant improvement over the factory iS spoiler!
Mounting required a new set of holes, which I ended up slotting to fine-tune the fit (the E28 trunk is a different shape). Seam sealer was used on all the holes (old and new) to waterproof the trunk.
Sanded the old paint, sprayed colormatched acrylic, and then 2K clear. I was pressed for time, so I only applied two coats of the clear. I then lightly cut and finished to remove some of the texture.
I could definitely take another pass to get an improved finish, if I am careful to not burn through the clearcoat.
Rear suspension sitting a little high in these pictures, rear seat is still out until the seam sealer cures.


 Last edited by Panici; 05-03-2018, 10:30 AM.
Leave a comment:
-
Food for thought for mine, though the capacity would definitely be noticed with the smaller tankLeave a comment:
-
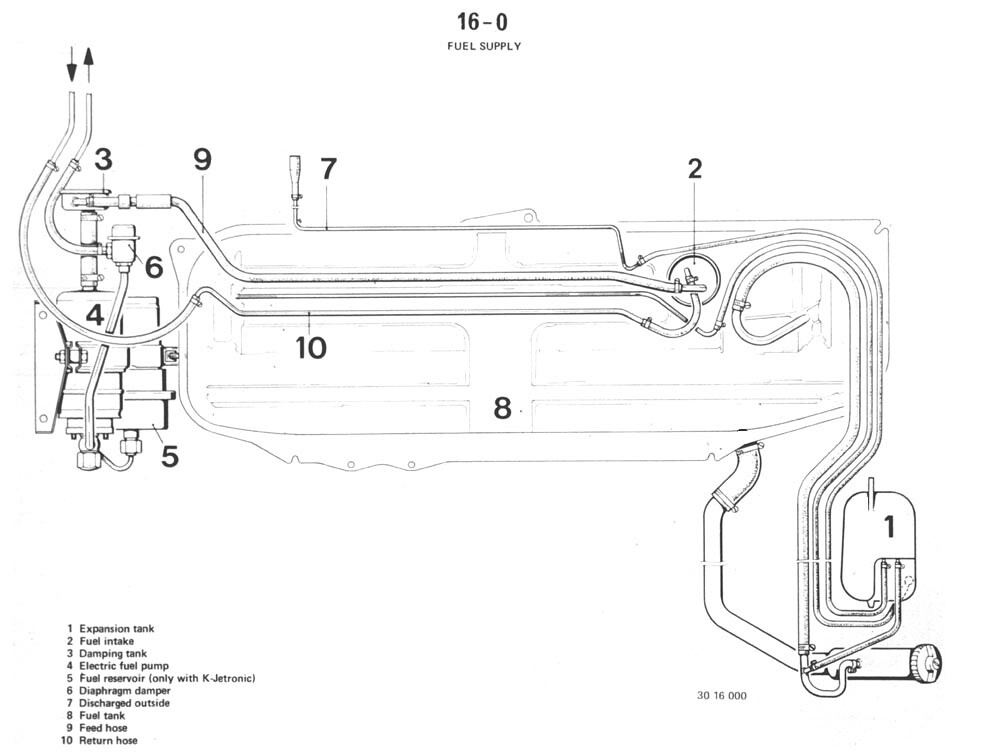
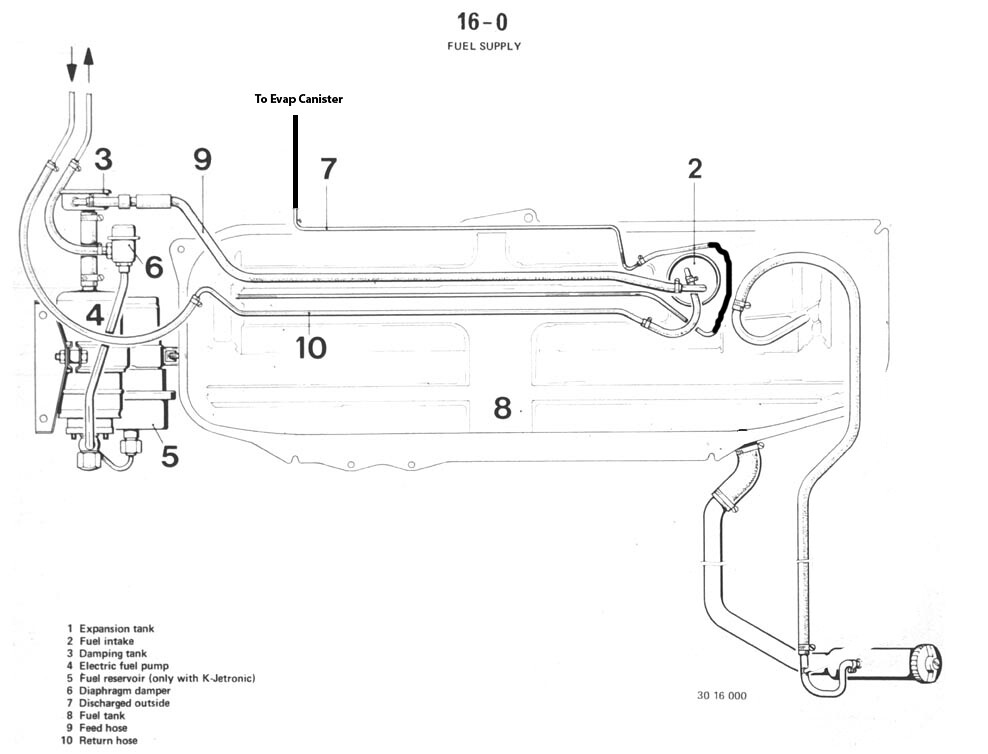
Simplified EVAP System
It's time to explain how I've modified the Expansion tank / EVAP / fuel vapor / fuel overflow system.
The usual route that most folks take is to remove the overflow tank and charcoal canister, and vent any lines to atmosphere.
The main goal of this fuel system refresh was to eliminate the smell of raw fuel from my garage. Obviously venting the gas tank directly wouldn't do the trick.
It's also not possible to cap off the vents for three reasons: Air needs a route to escape when filling the gas tank to prevent "burping", air needs to enter/exit the tank as the system heats and cools, air needs to enter the tank as fuel is consumed to prevent pulling a vacuum on the tank.
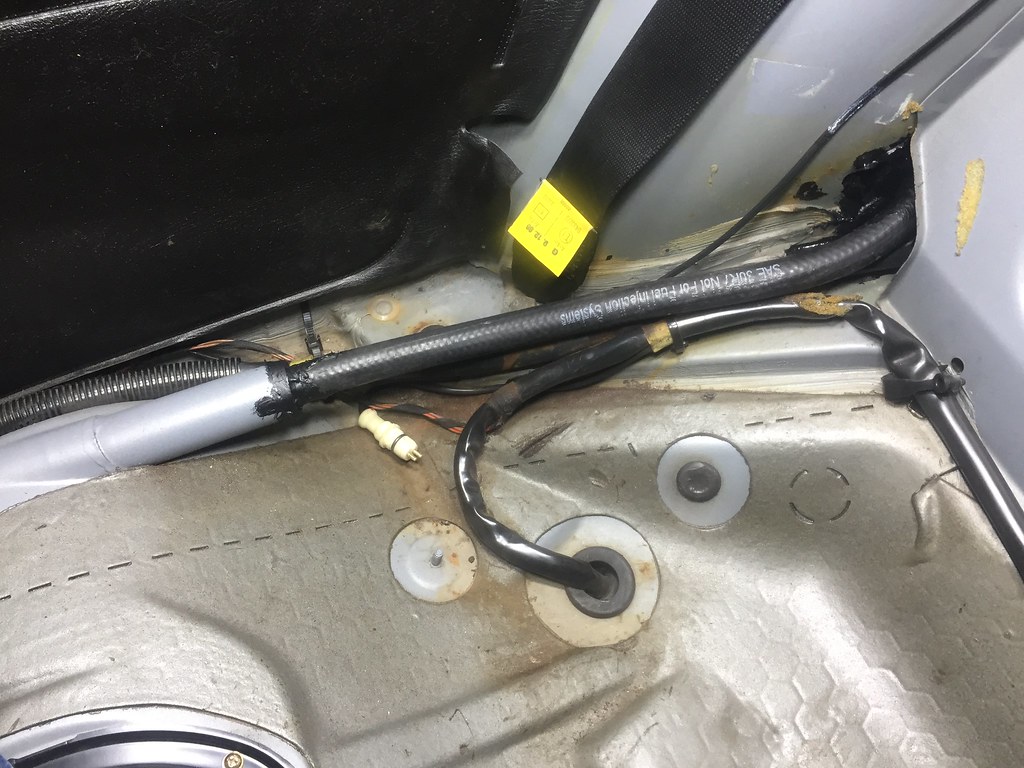
I decided to eliminate the overflow/evap tank above the rear passenger wheel, connect the main tank vent directly to the fuel filler neck, and connect the secondary vent directly to the charcoal canister.
This setup allows the tank to breathe as necessary, without the smell of raw fuel from the vehicle. It also means I only need to run a single hose through the rear wheel well to the filler neck.
The main disadvantage of this approach is that the gas tank can no longer be brimmed (filled to the top), as the liquid fuel will travel up the vent to the charcoal canister. In other words, it's no longer possible to fill the tank until the pump clicks off, and then "top it off" a few times. You loose a few liters of fuel capacity.
The OBC has a hidden function to show a digital display of how much fuel is left.
Here are a couple of helpful diagrams. The original venting system (euro model) VS my modified approach:
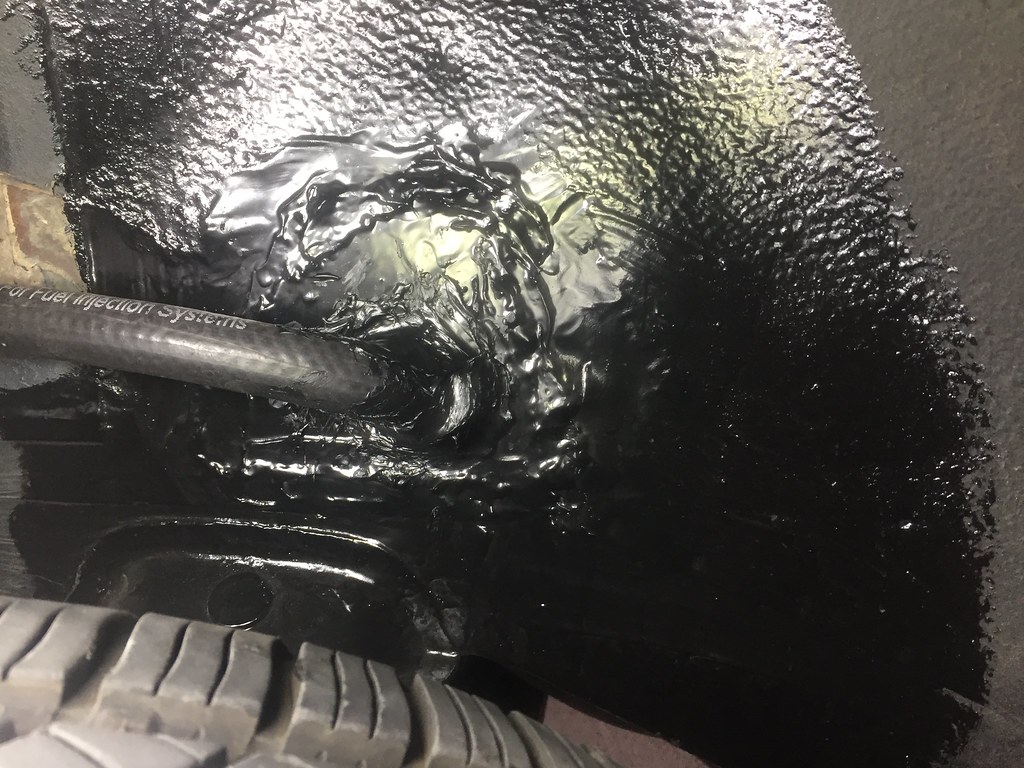
Here is the single vent hose running through the cabin. This is top quality Gates fuel hose, which is actually intended for liquid fuel in a carburated system and thus is more robust then a typical evap hose. The entry/exit points into the car were waterproofed with seam sealer around the hose.
-
EDIT: Seam sealed at both ends. Drove through some rain and it's waterproof on both sides!
-
-
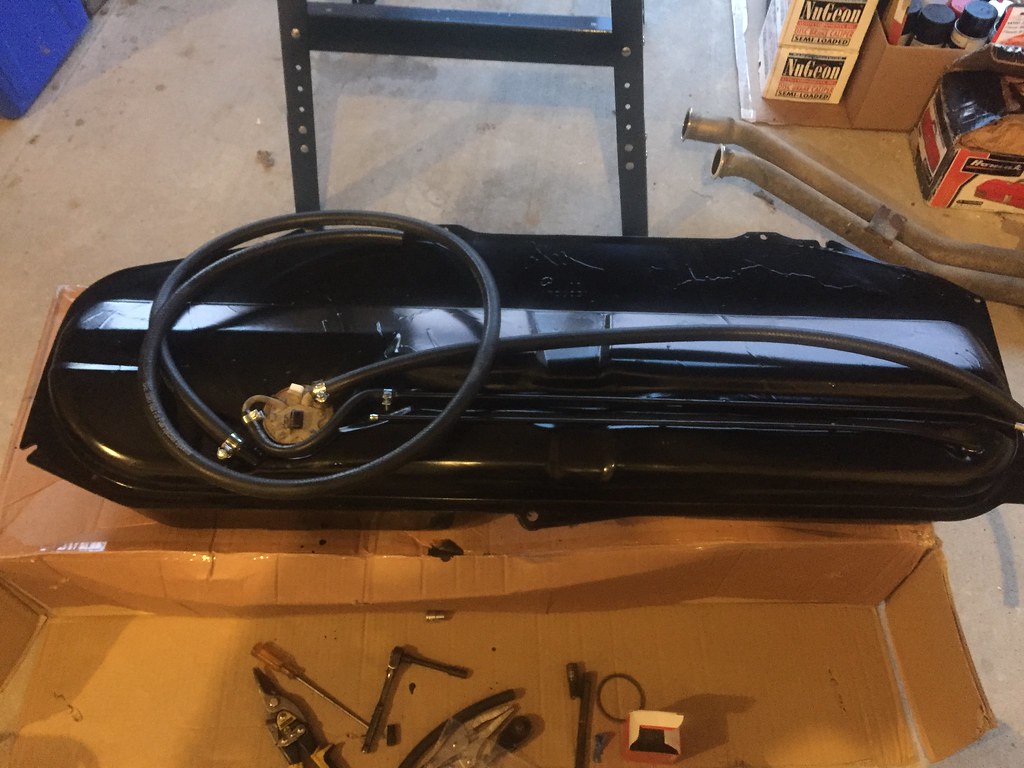
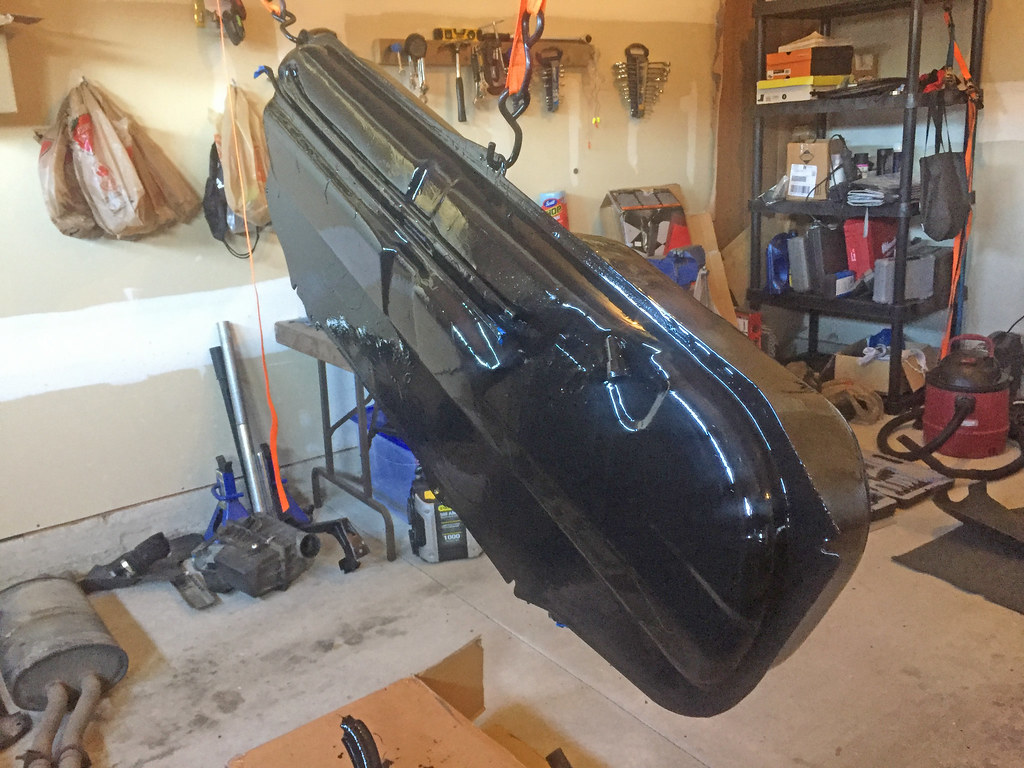
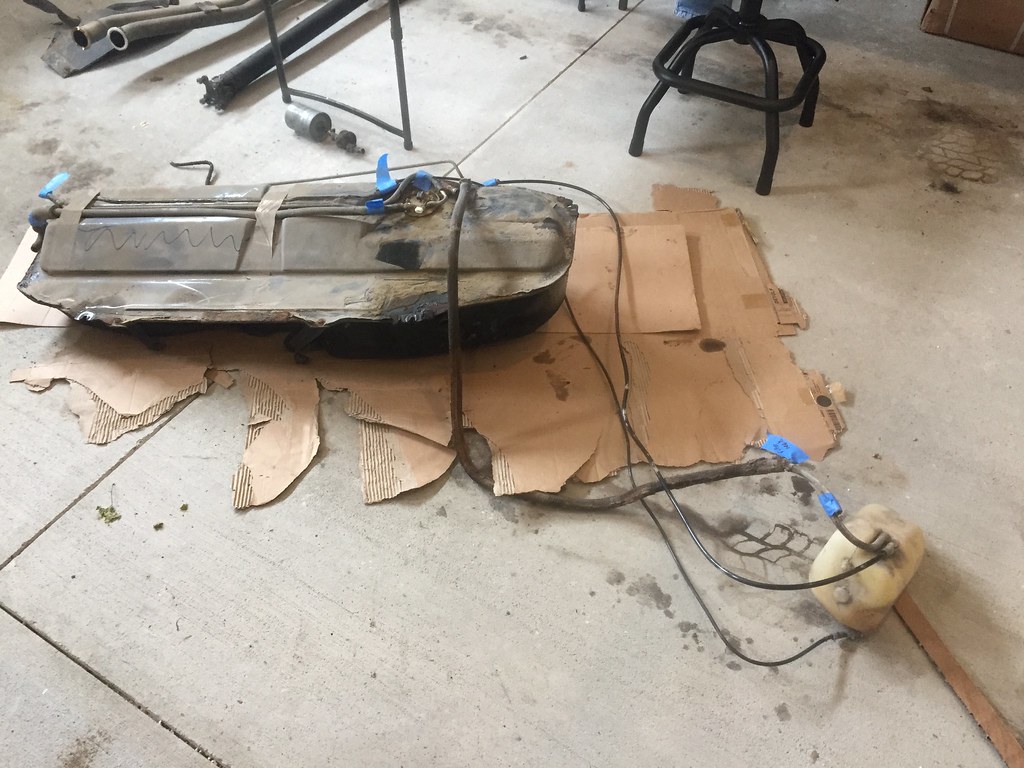
Freshly painted replacement fuel tank with pump installed (new gaskets) and hoses attached, ready for transplant into the car.
-
Fuel tank installed with the help of my fiancée!
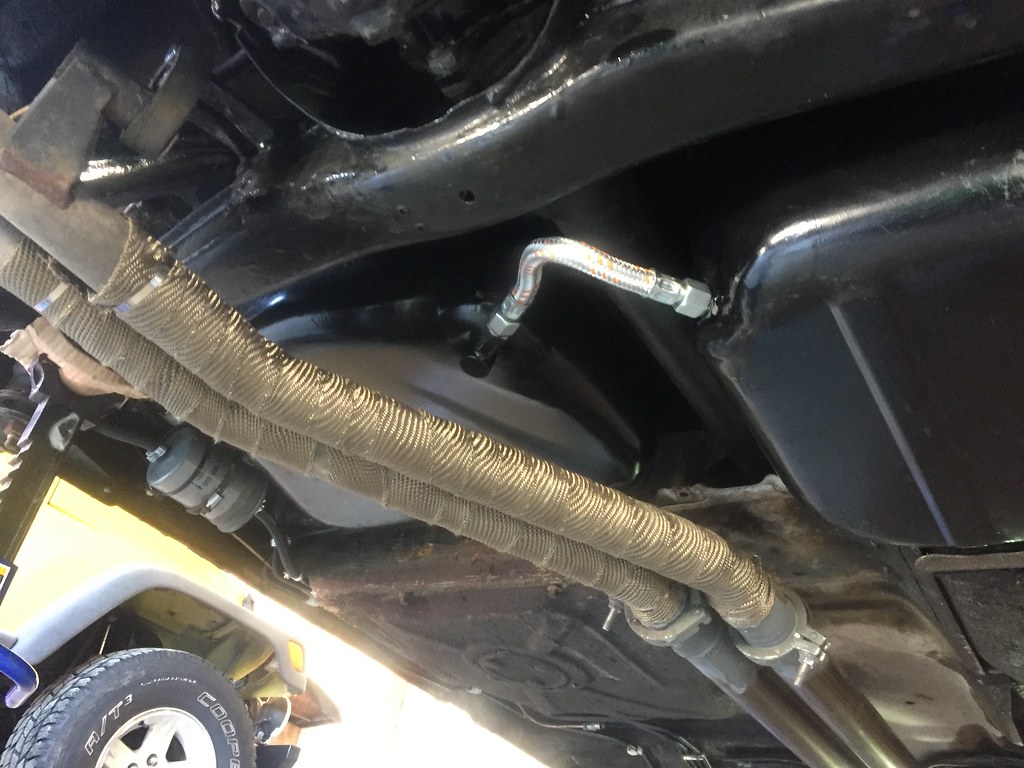
Looped vent hose as shown in the diagrams. Gates liquid fuel hose was also used here, which necessitated a larger bend radius (compared to thinner EVAP hose) to avoid pinching.
-
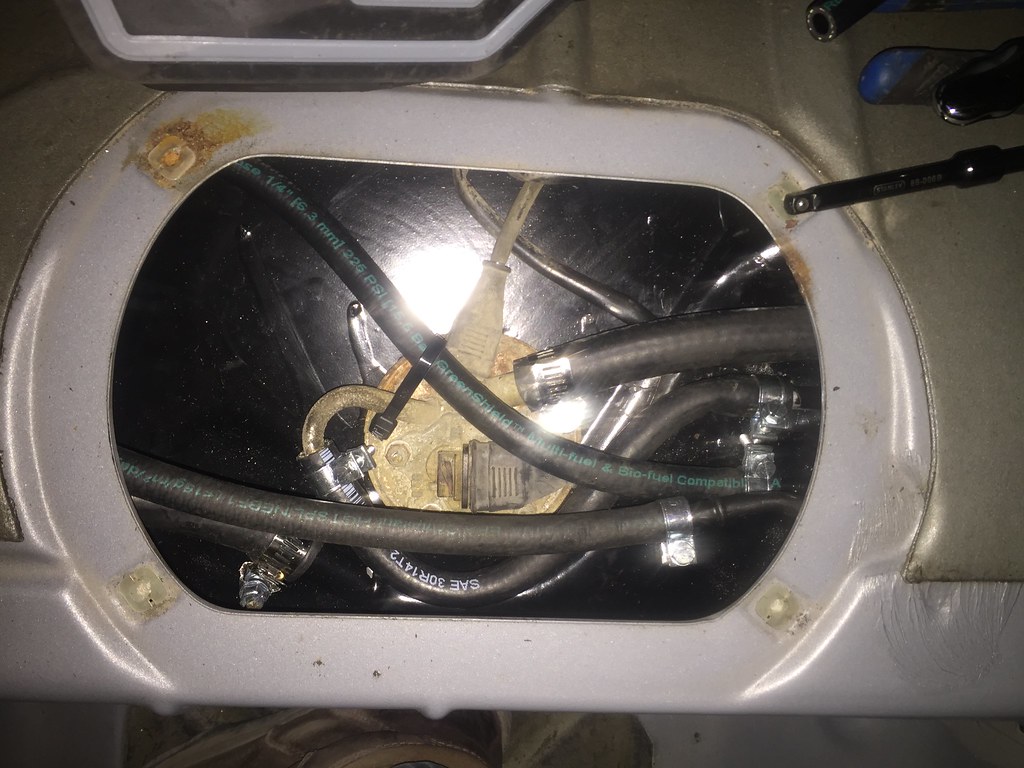
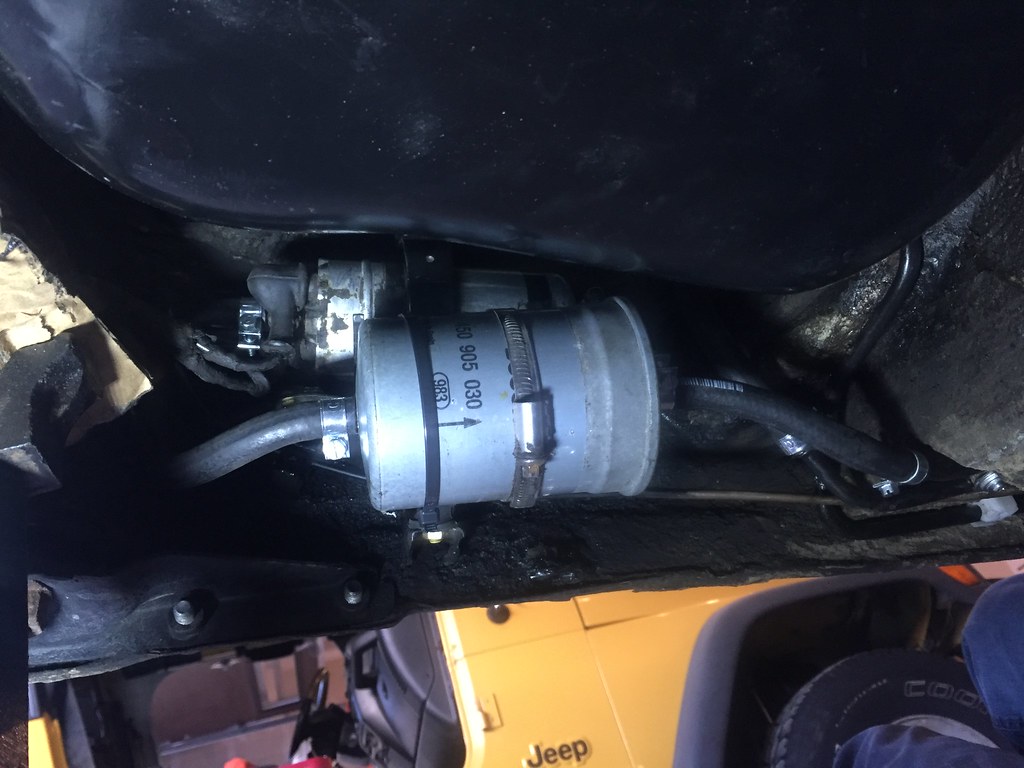
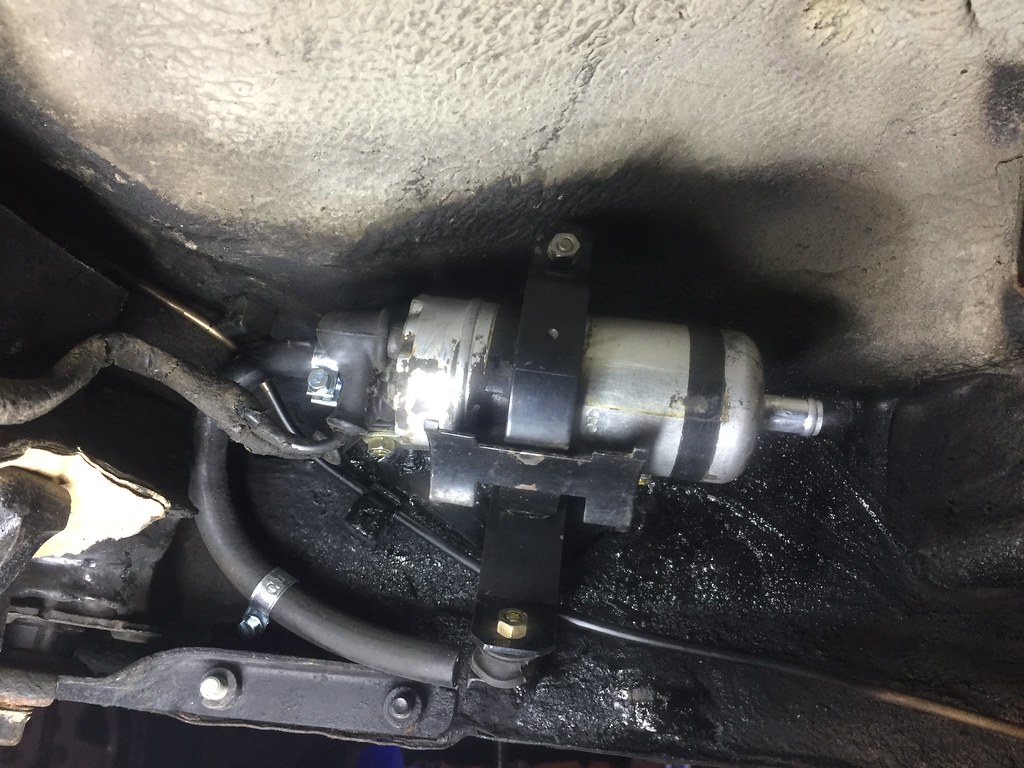
Fuel filter installed, fuel soft lines installed. (Ran out of larger hose clamps)
-
I didn't transfer the rear heatshield hanger mounts from the old gas tank (they were rusty & mangled), so I wrapped the offending section of exhaust to prevent heating the fuel tank.
You can also see the fuel tank joining hose I sourced from http://www.specialclassicparts.de/. After exchange and shipping, it was half the price of the OEM piece.

-
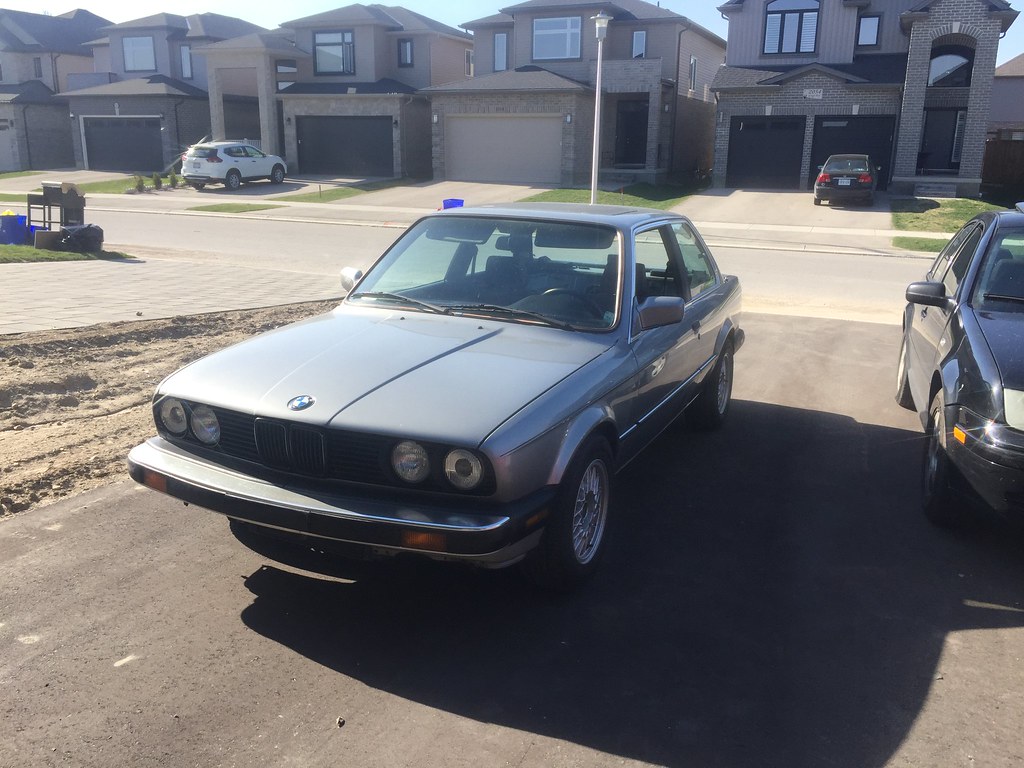
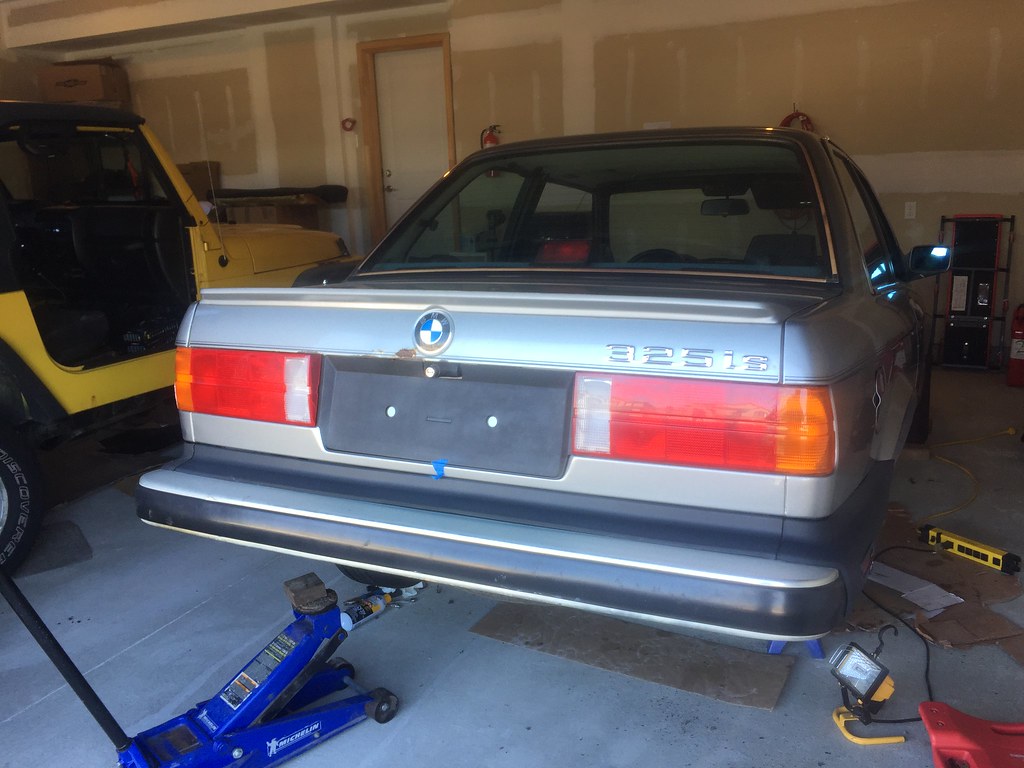
Finally the car is on it's own four wheels for the first time since January! After swapping the supply/return fuel hoses in the engine bay, the car fired up and runs without issue.
-
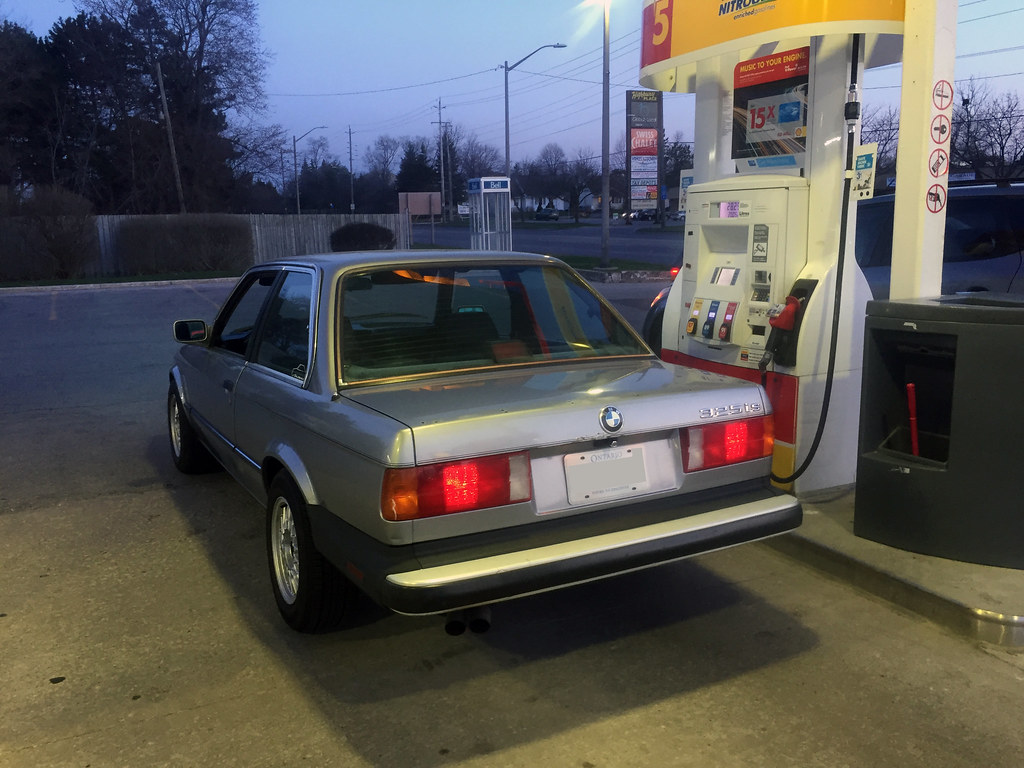
Went for a half tank of Shell 91 (no ethanol) which went perfectly. No fuel smell or leaks to be seen.
-
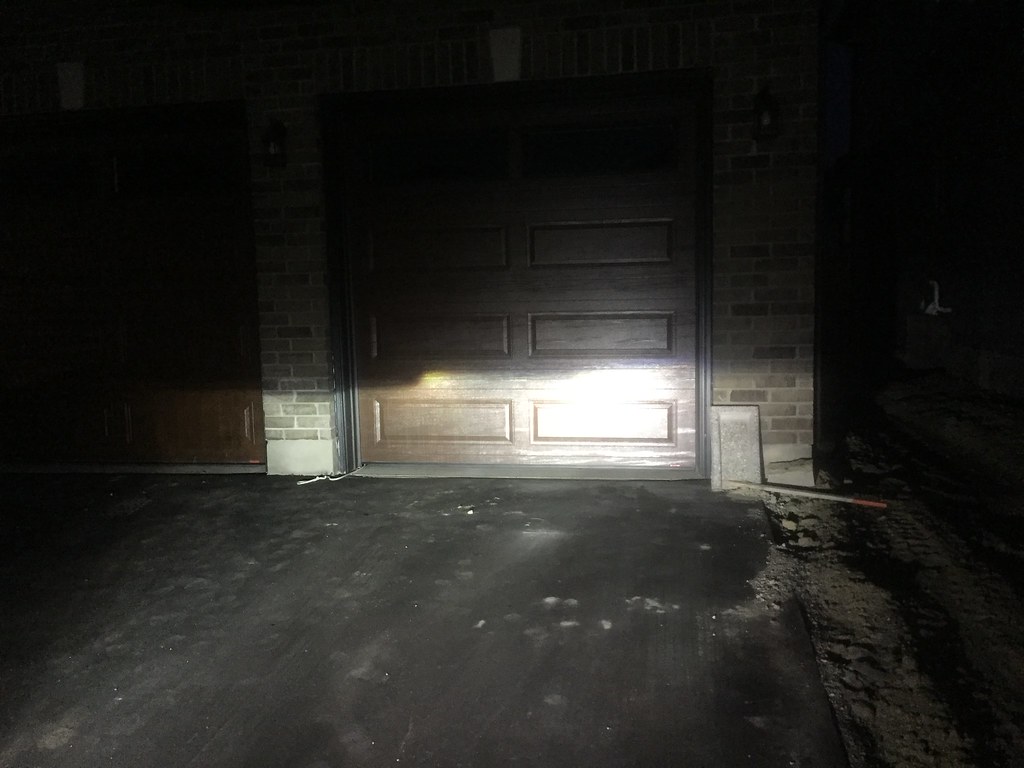
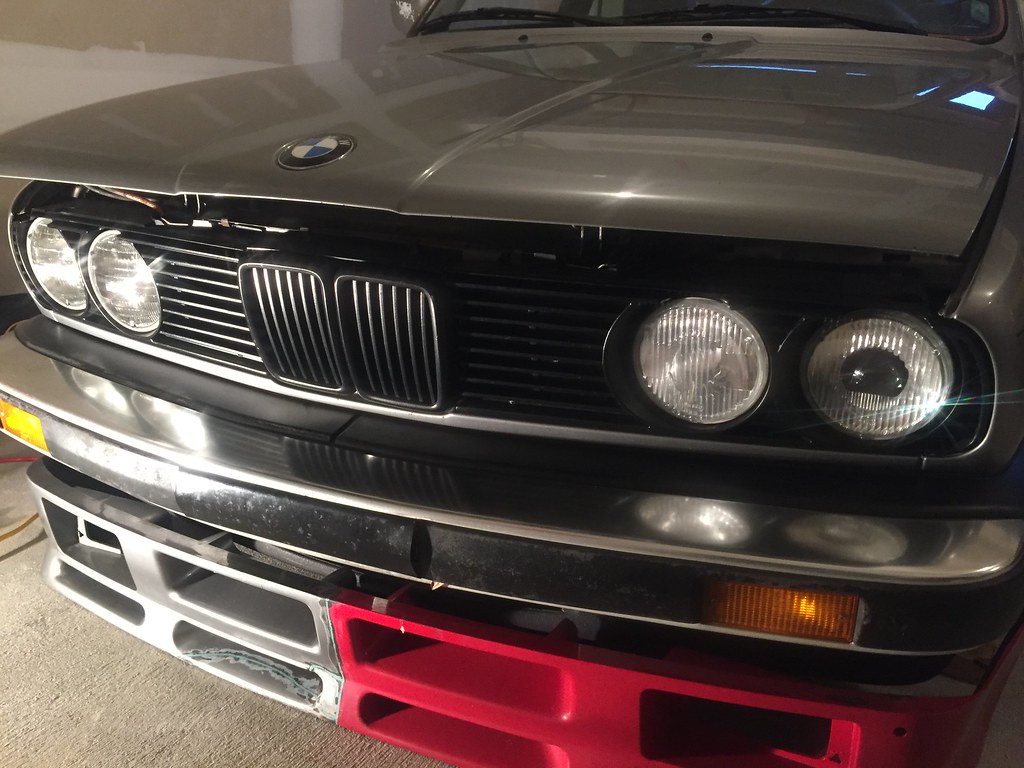
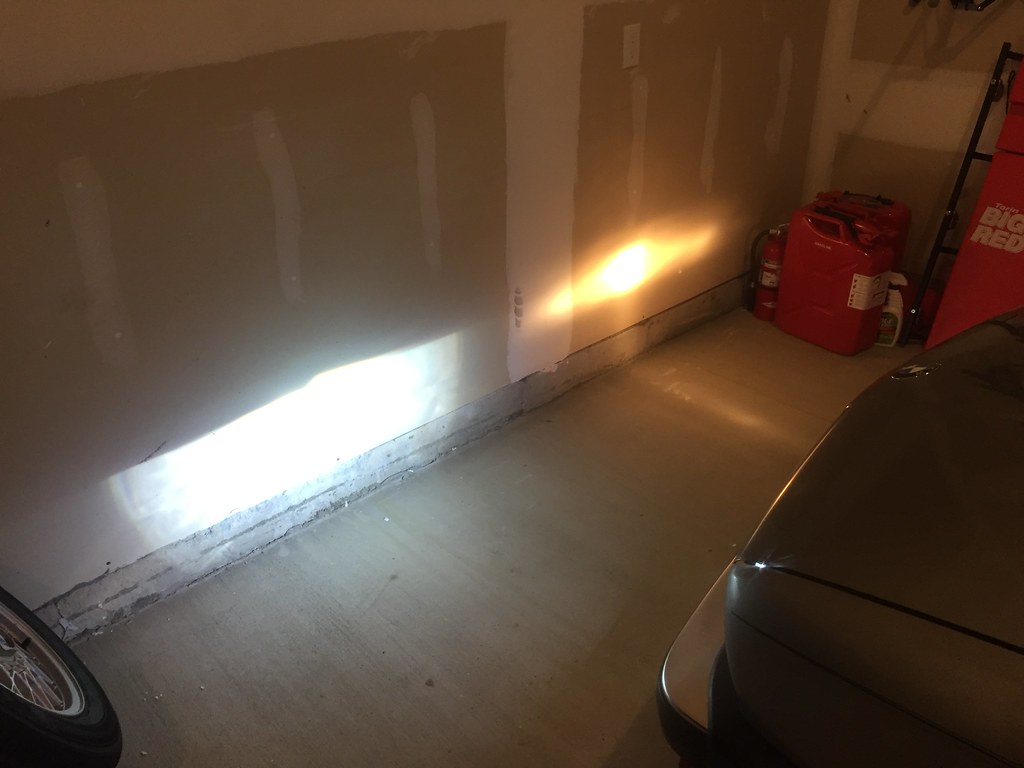
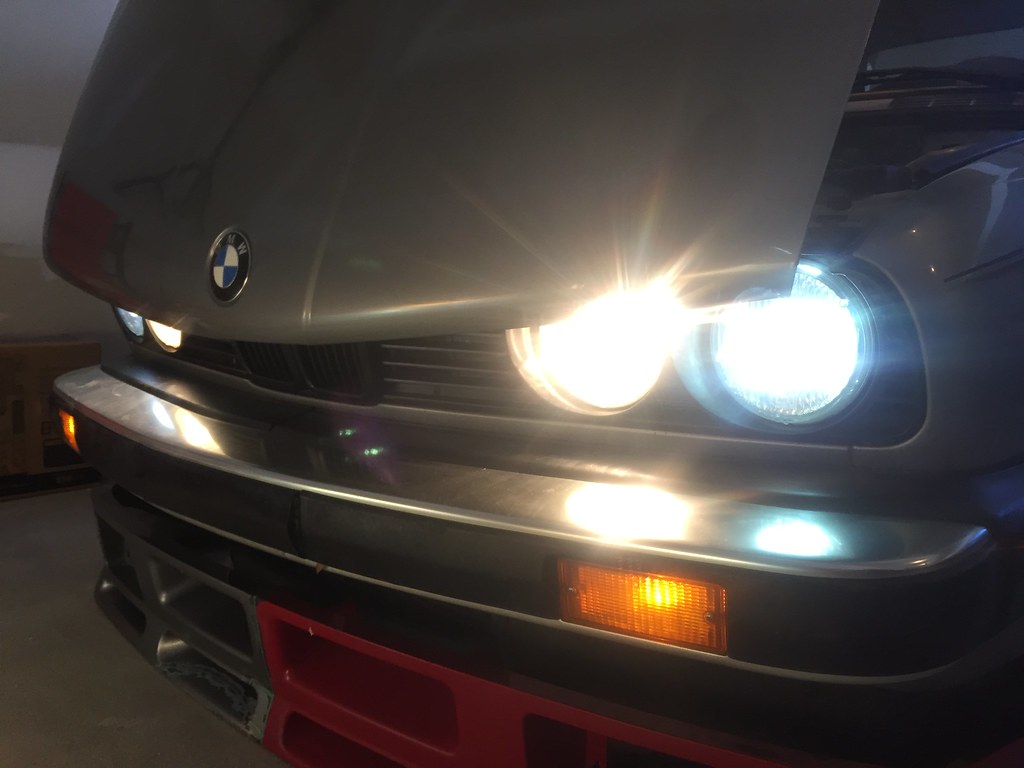
When I got back home, I re-aimed the new headlights. What an amazing improvement over the sealed beams!
 Last edited by Panici; 04-13-2023, 04:20 AM.
Leave a comment:
-
Further progress today on my fuel system.
I started by test mounting my (cleaned & degreased) fuel pump and filter on the new mounting bracket I bought from a r3v member.
With regular fuel line the bend radius of the pump to filter line is on the limit. I will see how this fits on the car, I can buy the BMW spec'd hose if needed.
I then mounted my new bracket and installed the fuel pump.
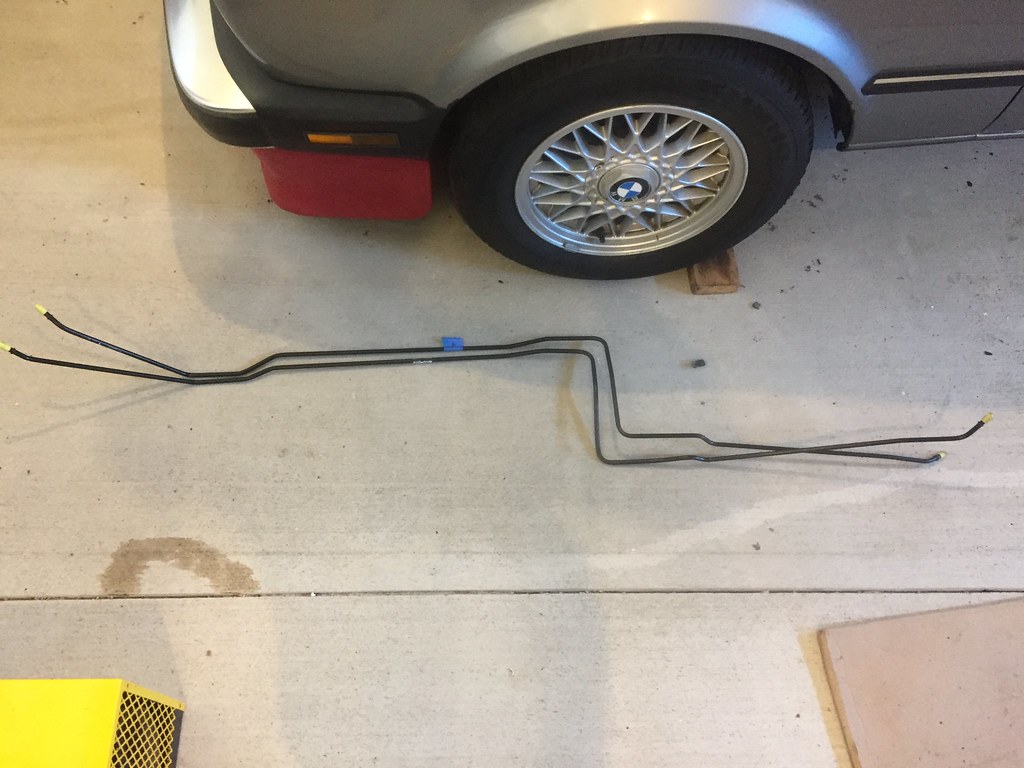
Next, I mounted my three new fuel hardlines, replacing clips where necessary. This task ended up being a lot harder then expected considering they are pre-bent lines.
As they had likely been sitting in storage for years in Germany, they were all slightly out of shape. Combine this with confusion over which pipe is the "top" near the engine bay, and which is the "outside" while traveling down the chassis, and I spent what felt like a few hours bending and test mounting.
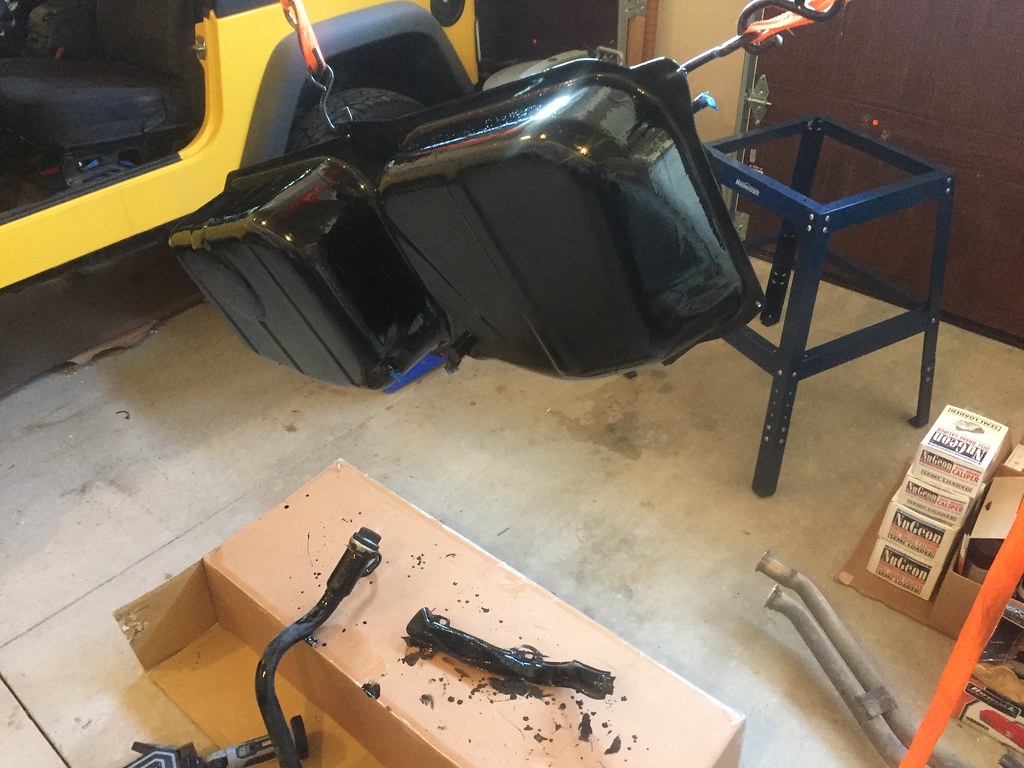
Finally, I strung up my new gas tank and brushed on a coat of black paint. As a new tank was well over $1000 from BMW, I opted for an aftermarket unit. The paint on it was silver in colour and paper thin.
I also put a second coat of paint on my rust repair from yesterday.
To finish up the paint can, I coated the metal cover for the wheel well gas tank vent hose. I don't expect this to last, as it is quite heavily rusted.
 Last edited by Panici; 04-20-2018, 02:54 PM.
Leave a comment:
-
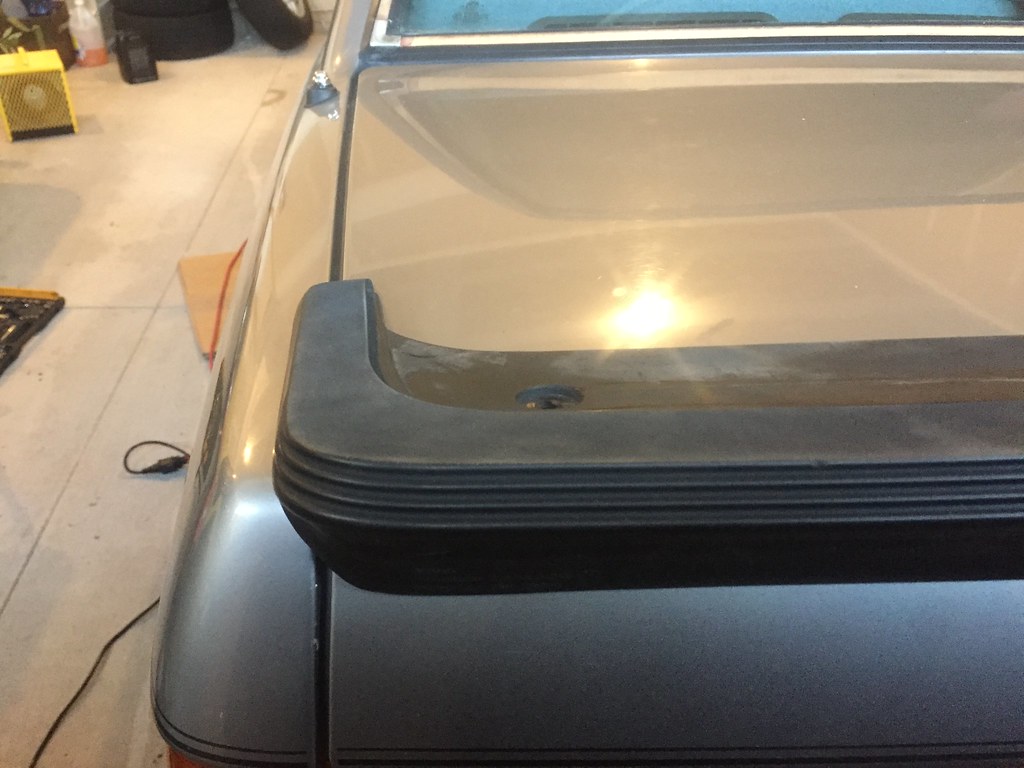
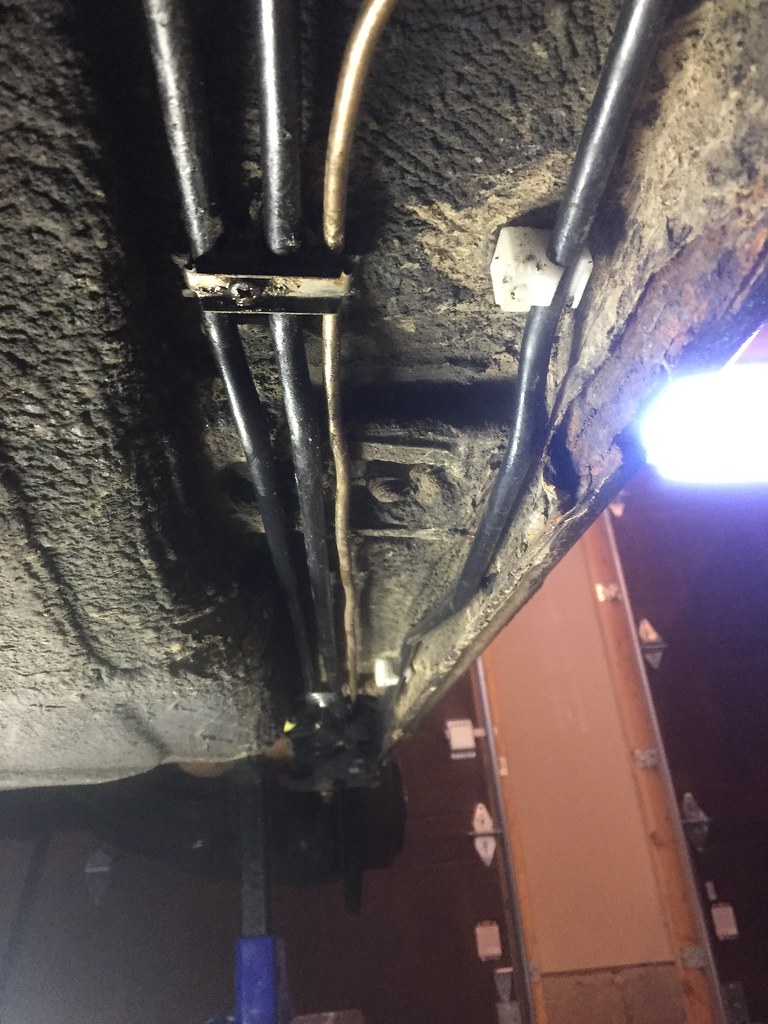
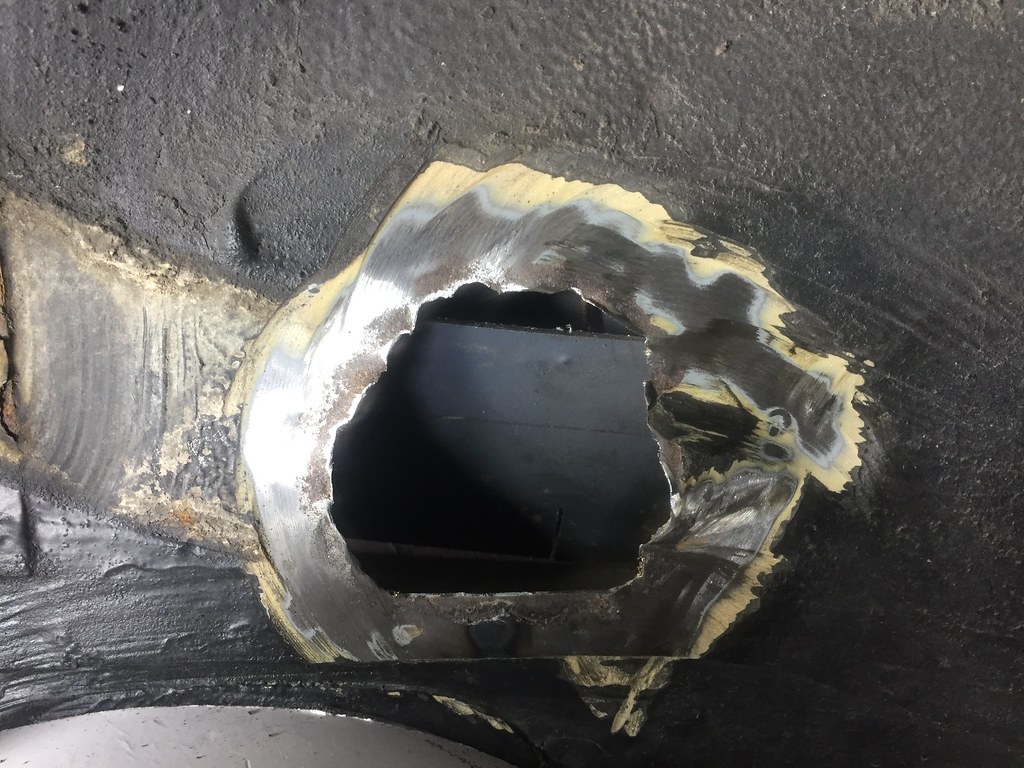
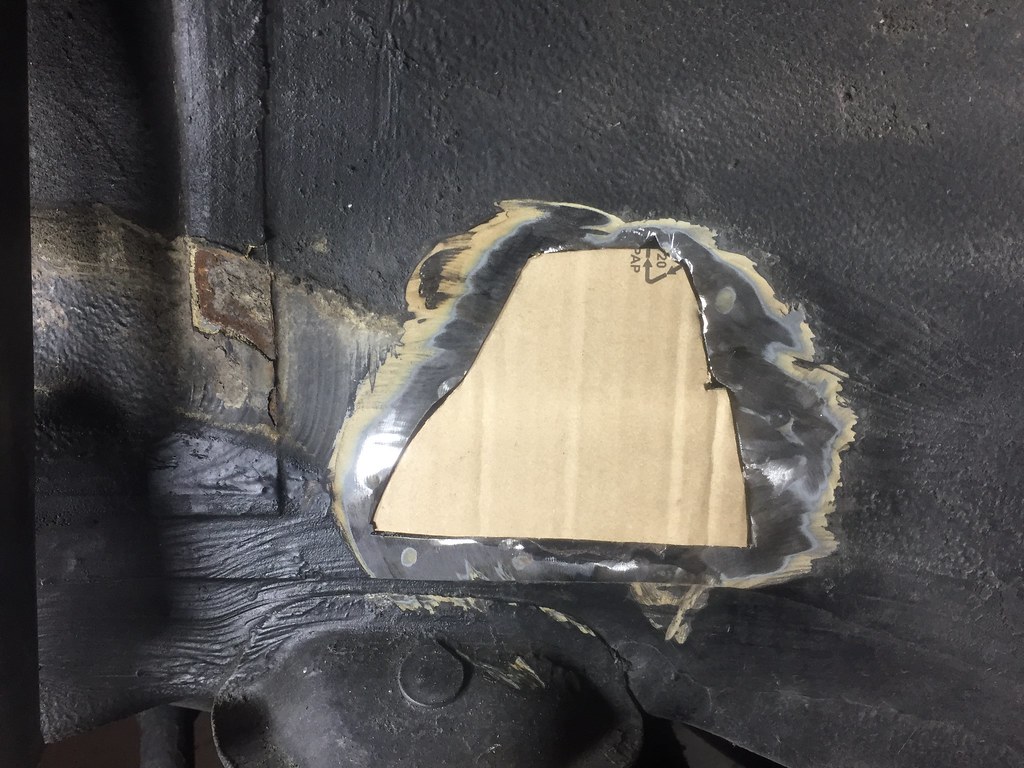
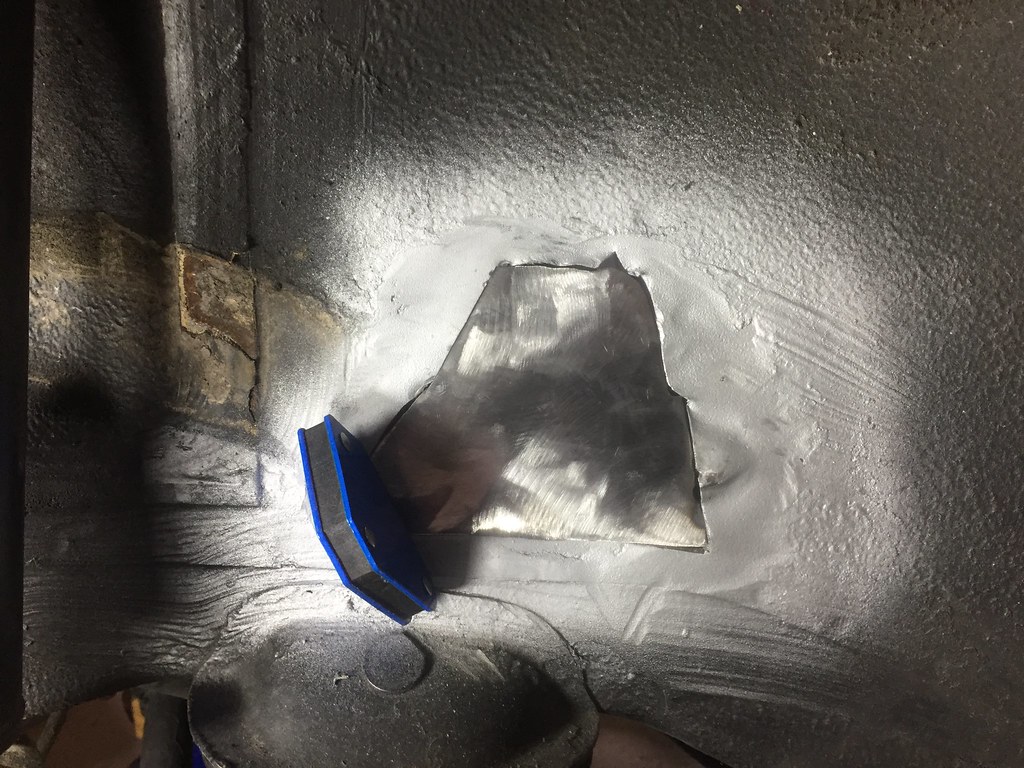
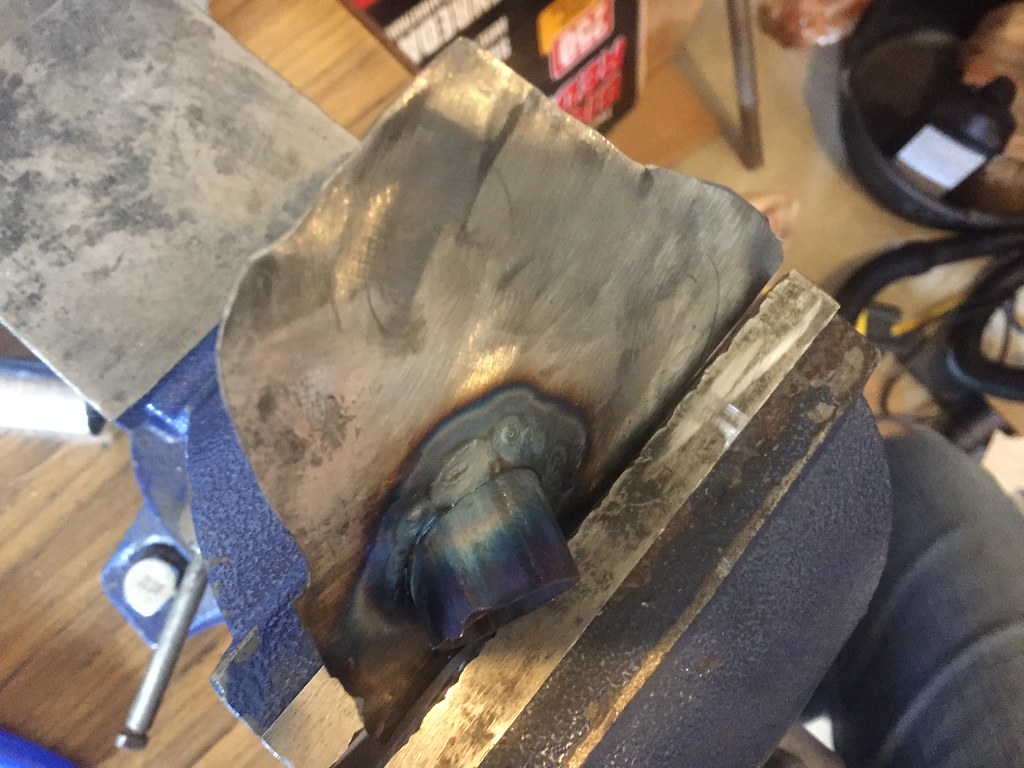
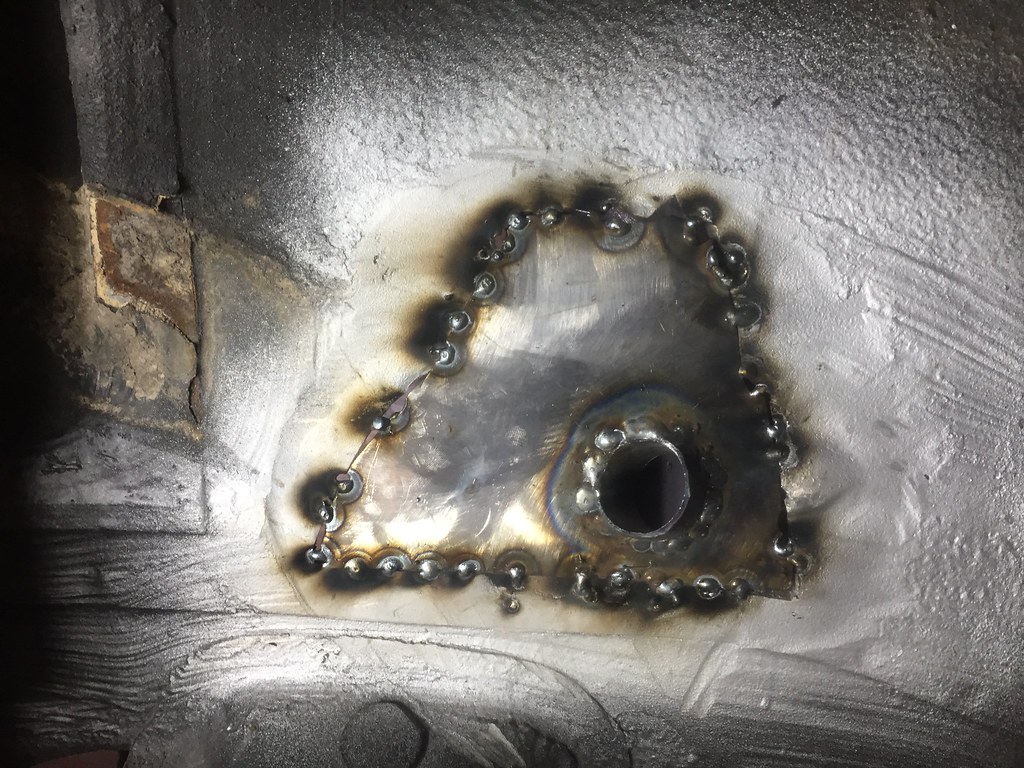
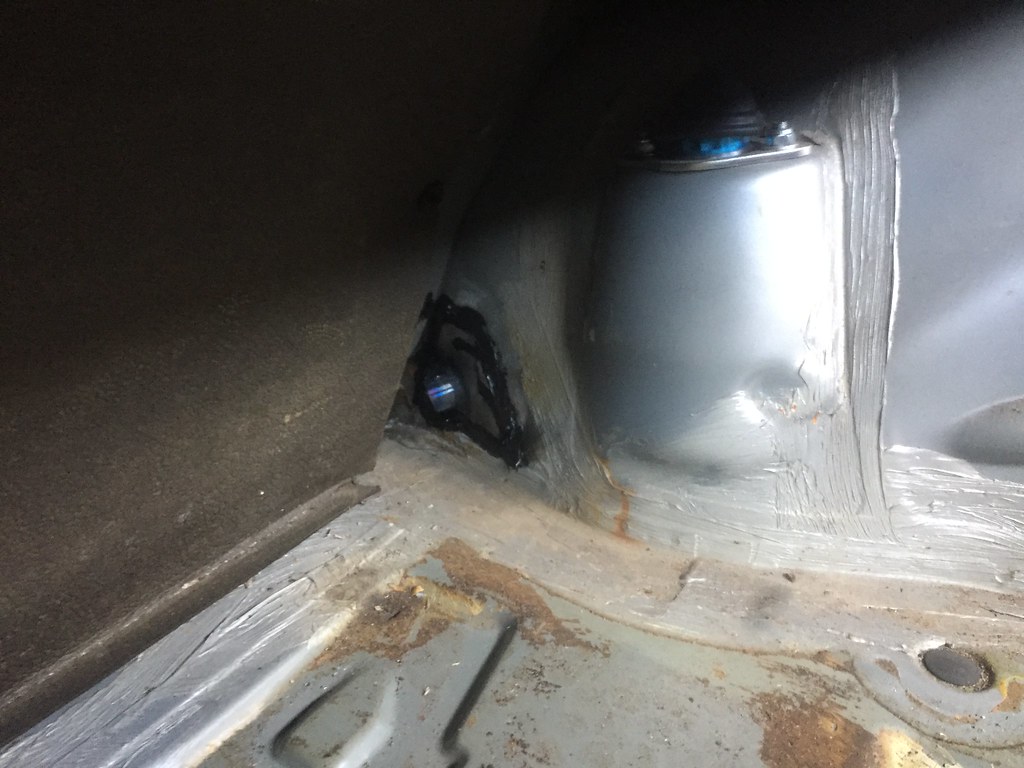
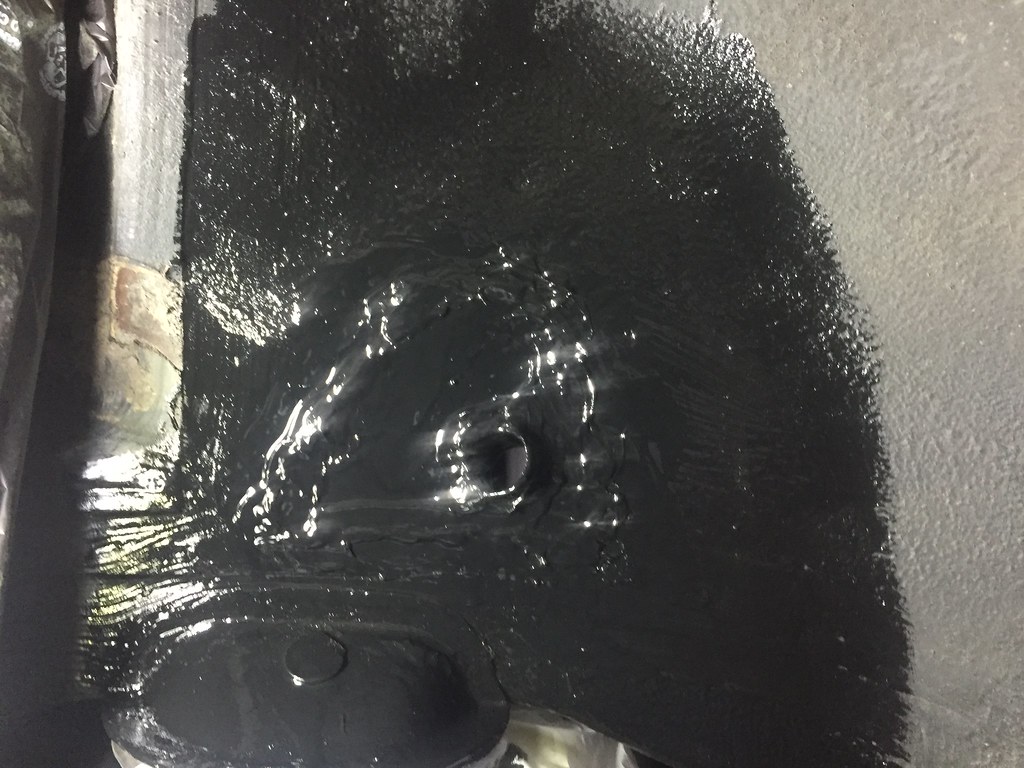
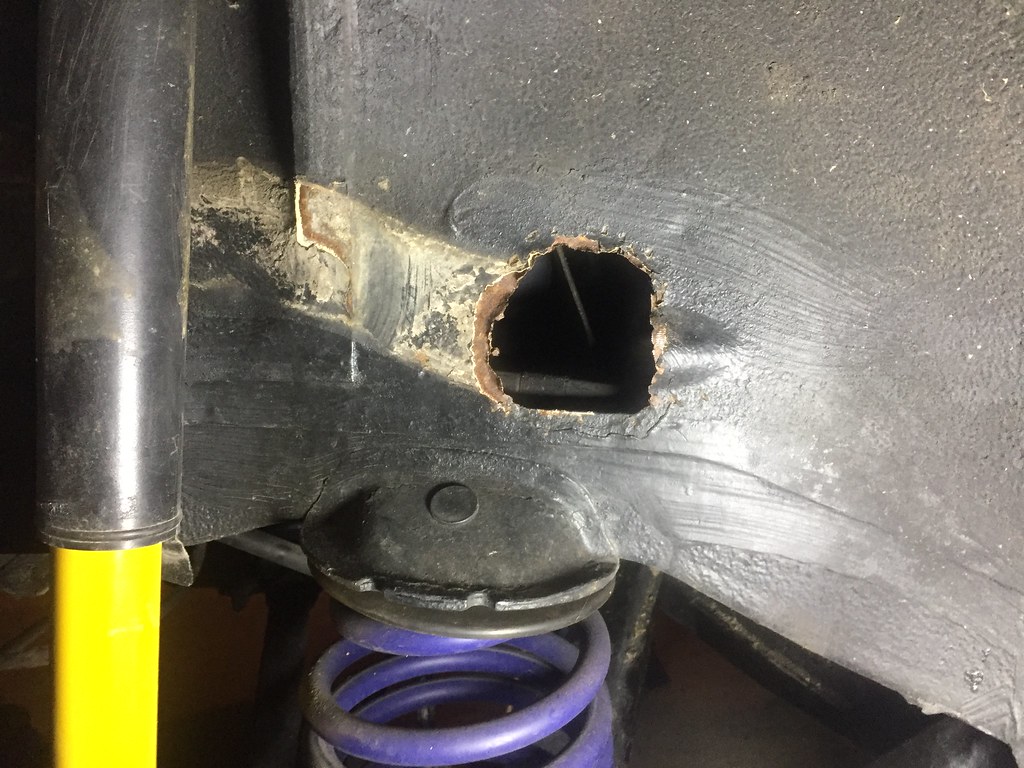
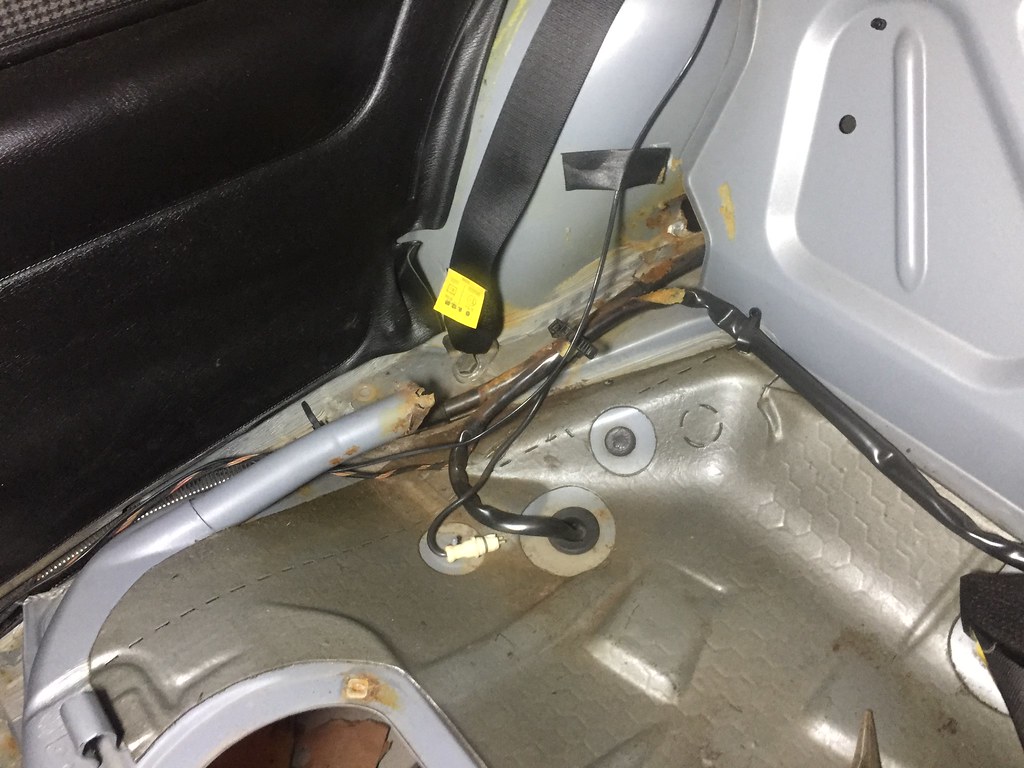
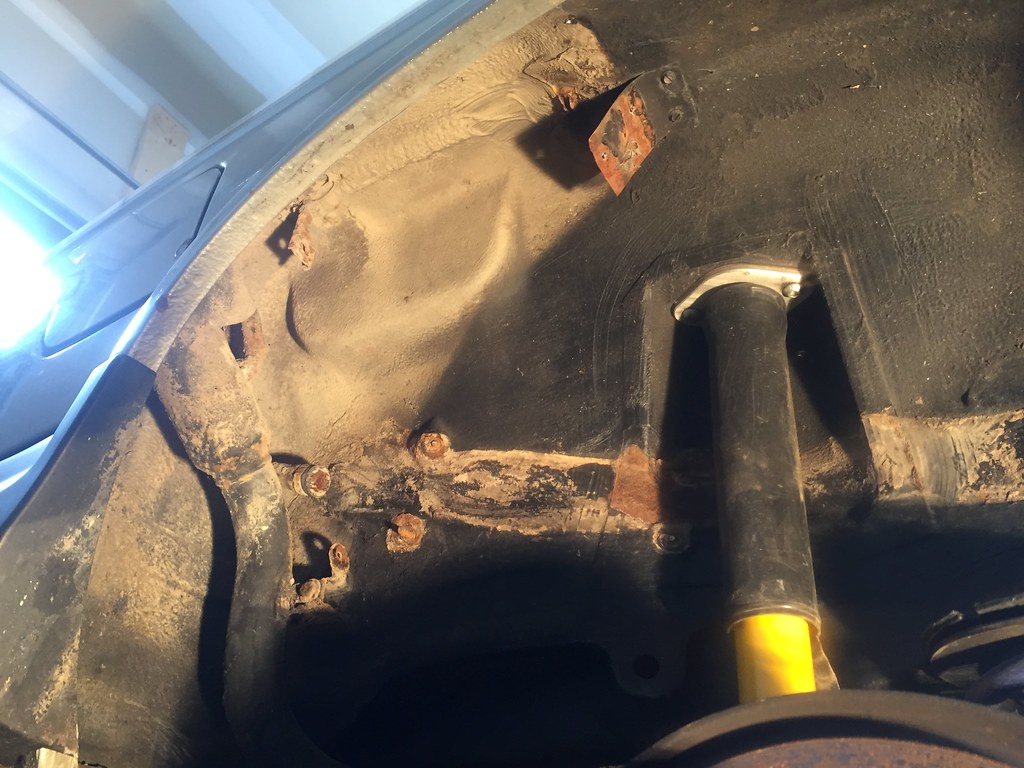
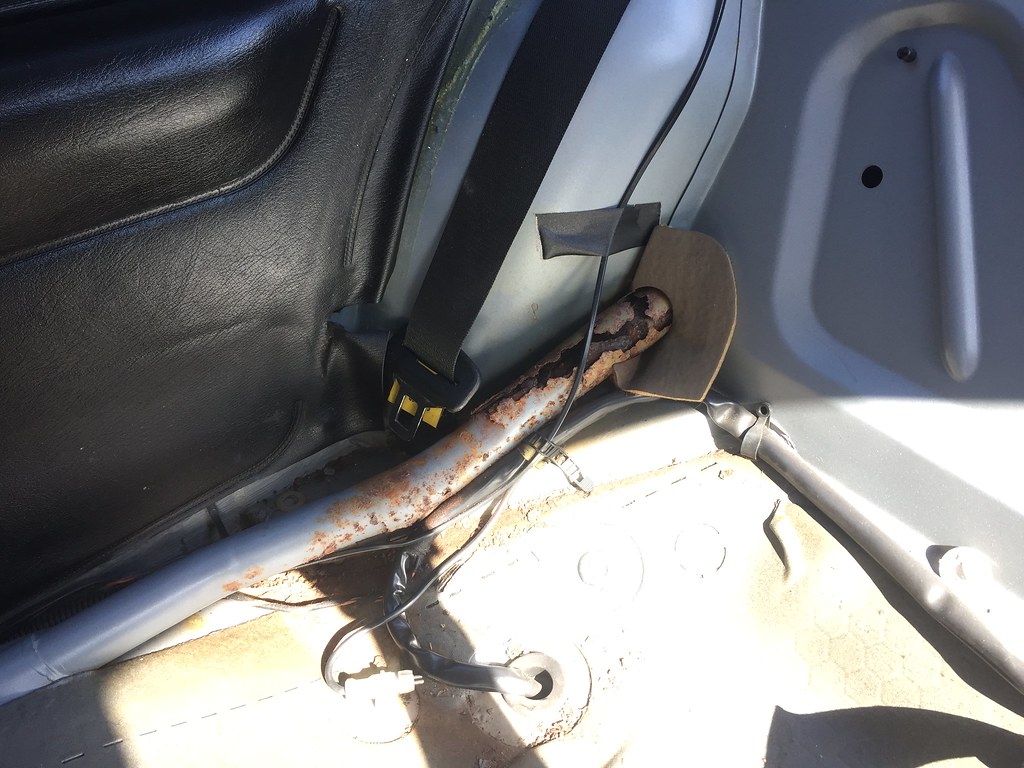
Continuing from the last post, here is today's progress in fixing the fuel vent rust.
This was my first time working with thin sheet metal, and I learned a few things in the process:- Don't use a reciprocating saw for fine work.
- If I had brought my jigsaw along, I could have removed less good metal on the body and made a smaller patch panel.
- Butt welding here was unnecessary, and made things more difficult.
- Lap joints would have been preferable.
- Don't try to fill in air gaps between your patch panel and the body. It'll just blow through (or you'll have to stack some welds very carefully).
- If butt welding, your patch panel must be the exact shape of the missing metal.
- Shop rags are flammable.
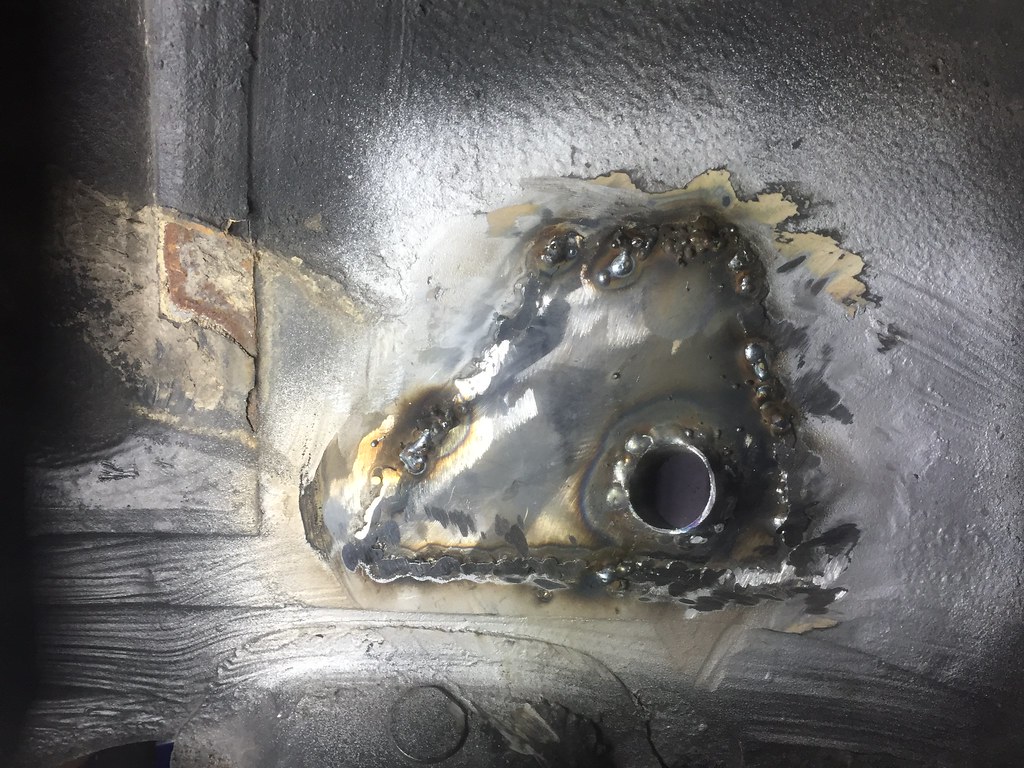
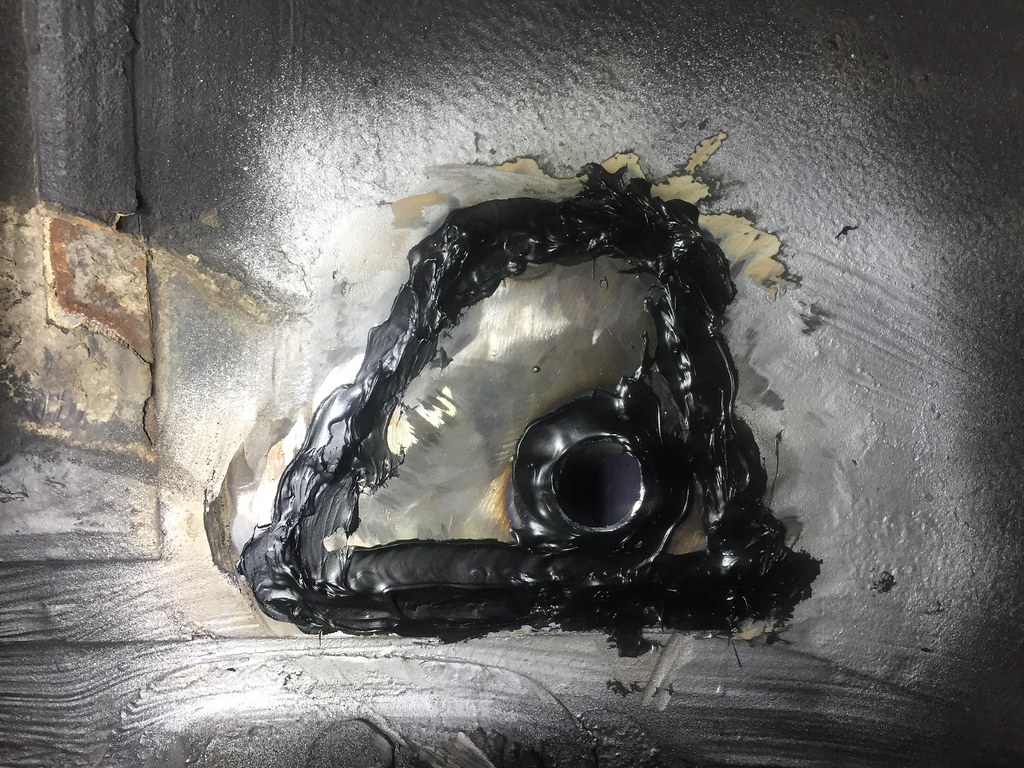
In summary, the situation is almost remedied. Another coat of paint tomorrow evening, and a quick cut of the rusted tube inside the car should see it resolved.
I'll update this post with some better finished/painted pictures tomorrow.

Leave a comment:
- Don't use a reciprocating saw for fine work.
-
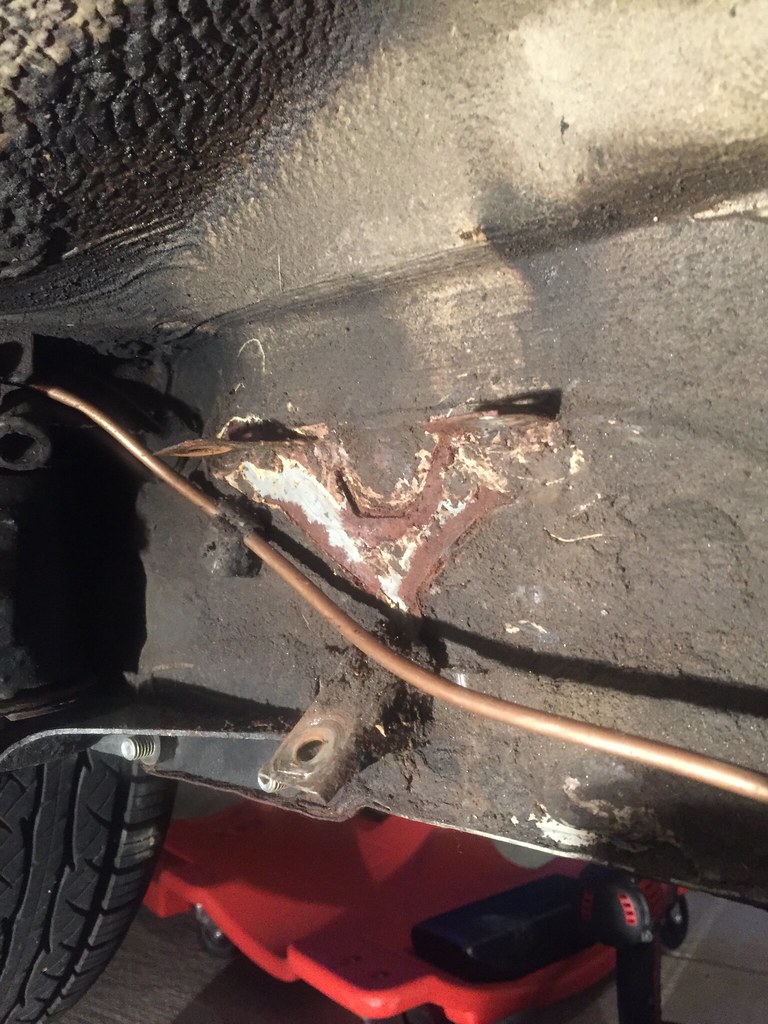
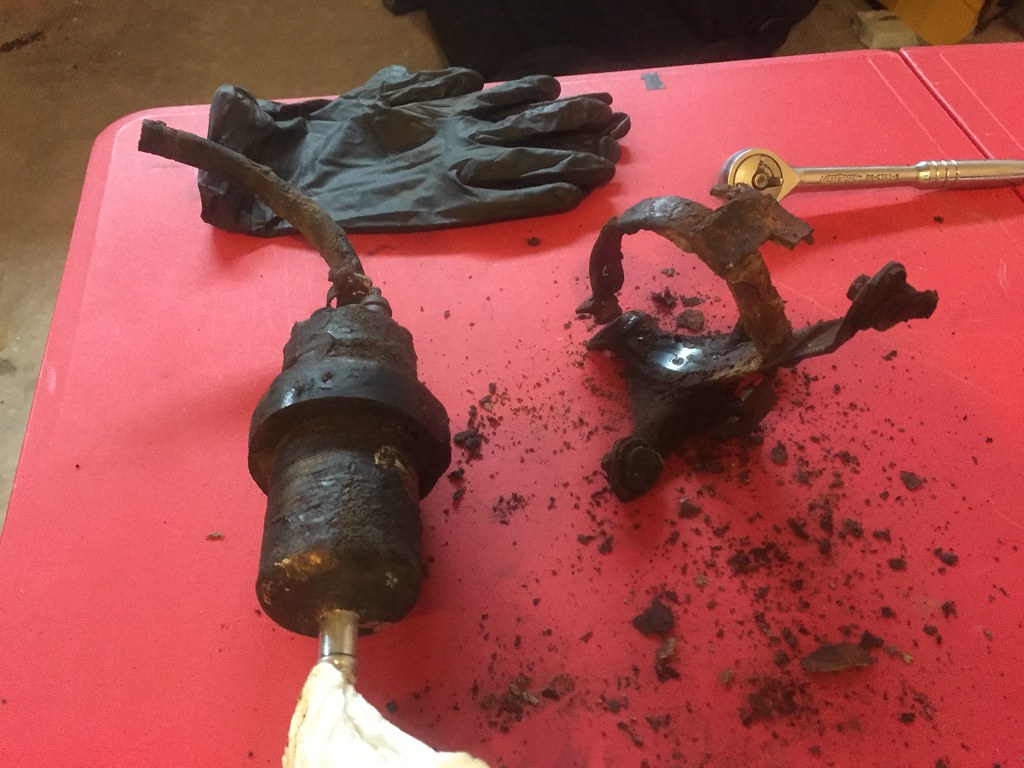
Thank you!
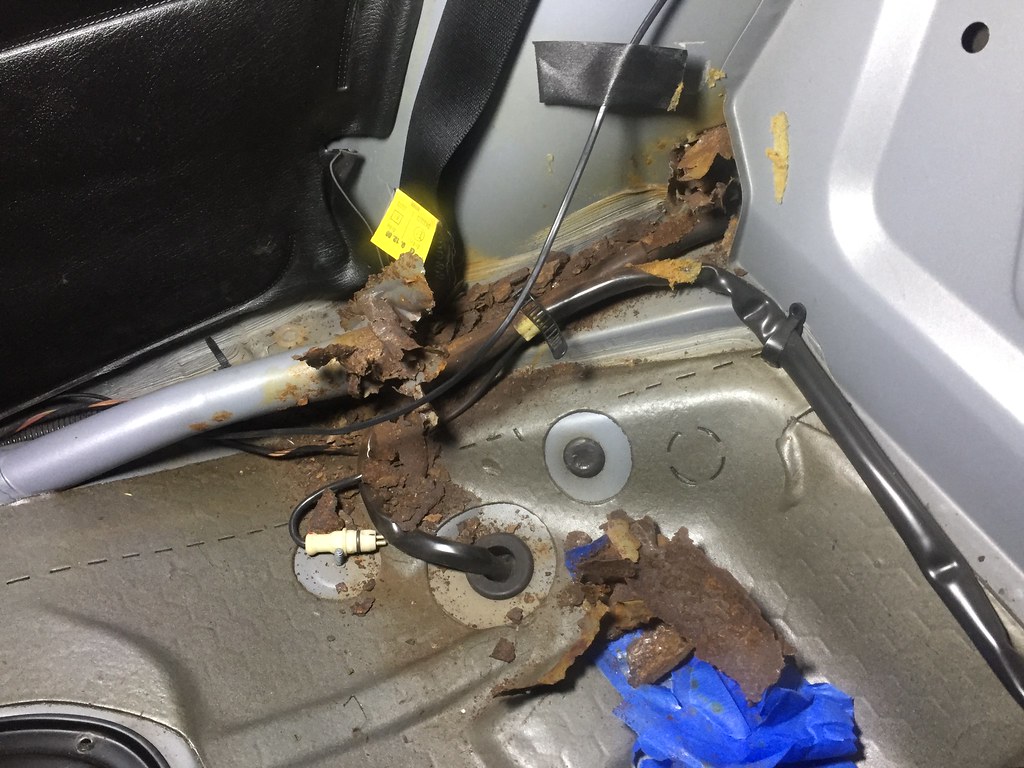
It's actually a freaky coincidence you should ask about that specific issue. I literally just got in from the garage, after tearing that tube apart with a pair of pliers.
I'll likely have to fab up a new piece and weld it in. I also want to make the pass-through to the wheel well waterproof.
Here is what I am left with:
 Last edited by Panici; 04-11-2018, 06:03 AM.
Leave a comment:
-
Great thread! Love your dedication to the build!
How'd you handle this rust? I have a very similiar situation and I want to keep it from spreading much further. Did you just cut it out?
I've been thinking about doing that then replacing this pipe with another and running the fuel evap lines back through the new pipe.Leave a comment:
-
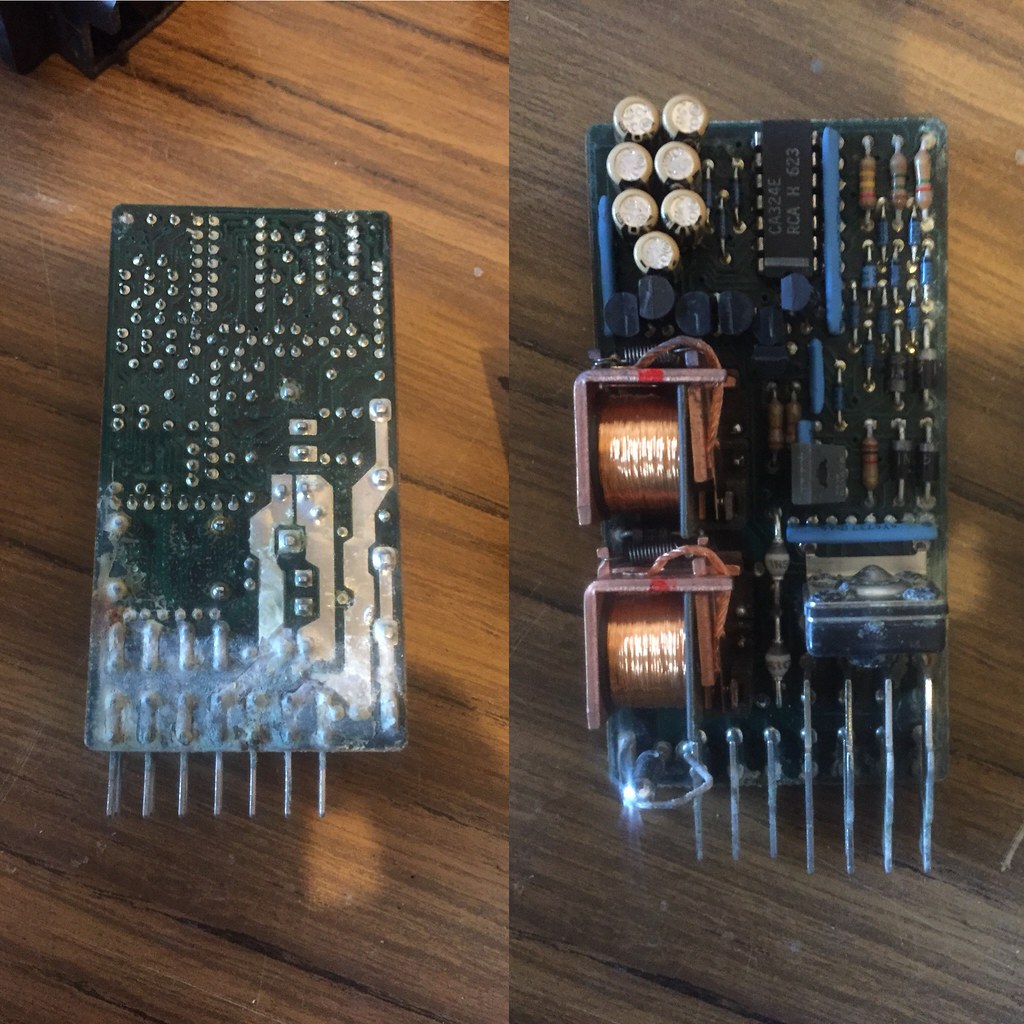
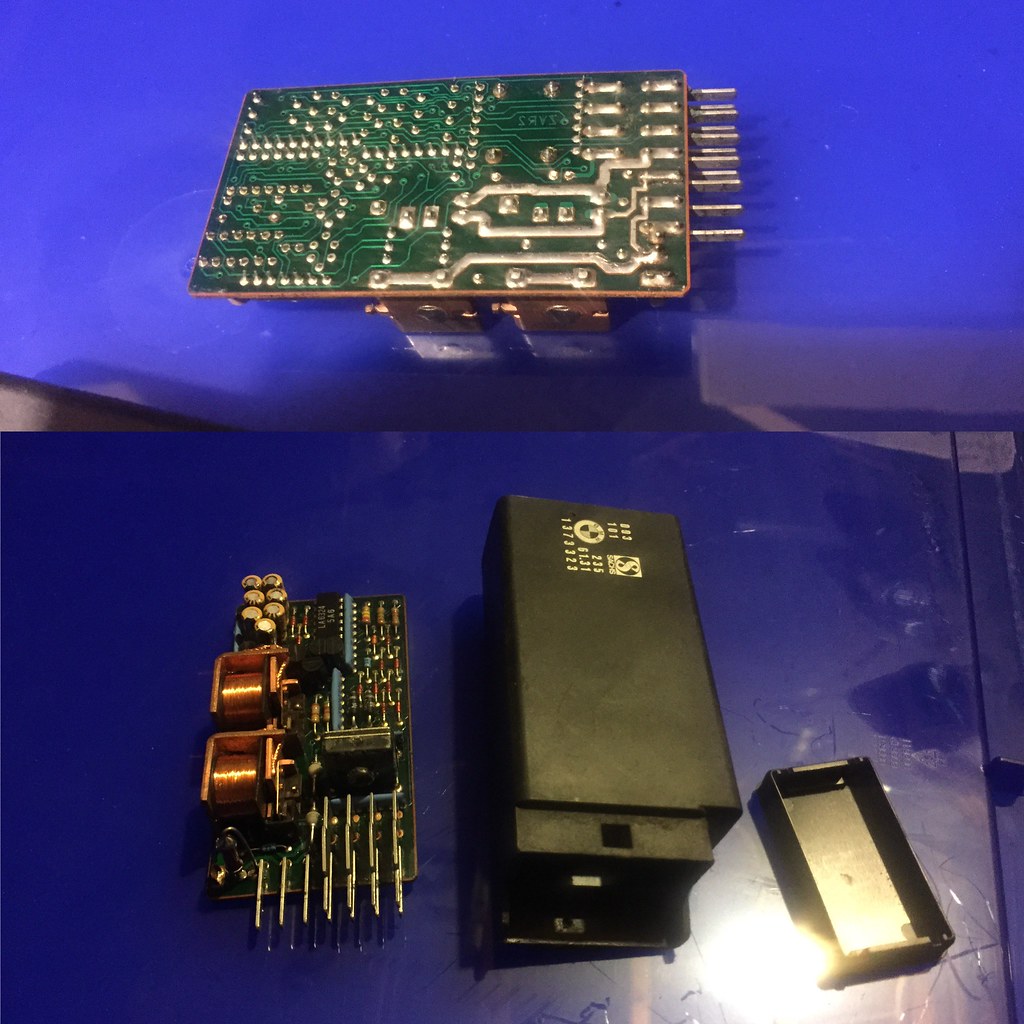
March 2018 - Central Locking Fixed
+Power mirrors
+Interior lights.
After owning the car since June of 2014, I finally got around to fixing my central power locking system!
This was basically an exersize in electrical troubleshooting, something I am comfortable with.
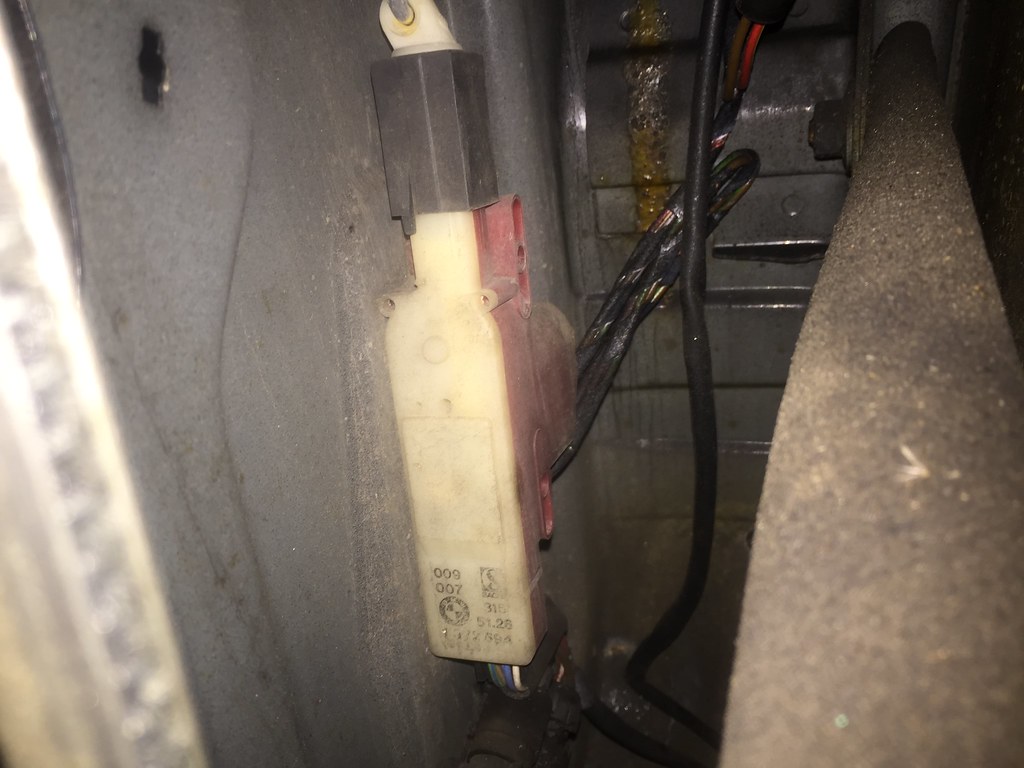
- Found the existing Central Locking Control Module to be damaged and corroded.
- Replaced with the module from my bin of parts car bits.
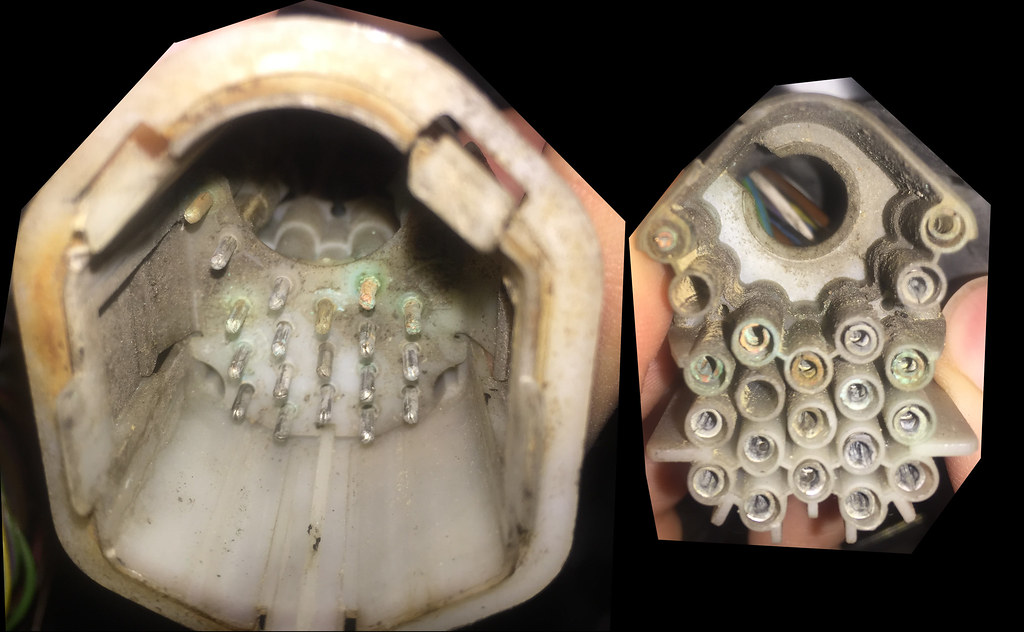
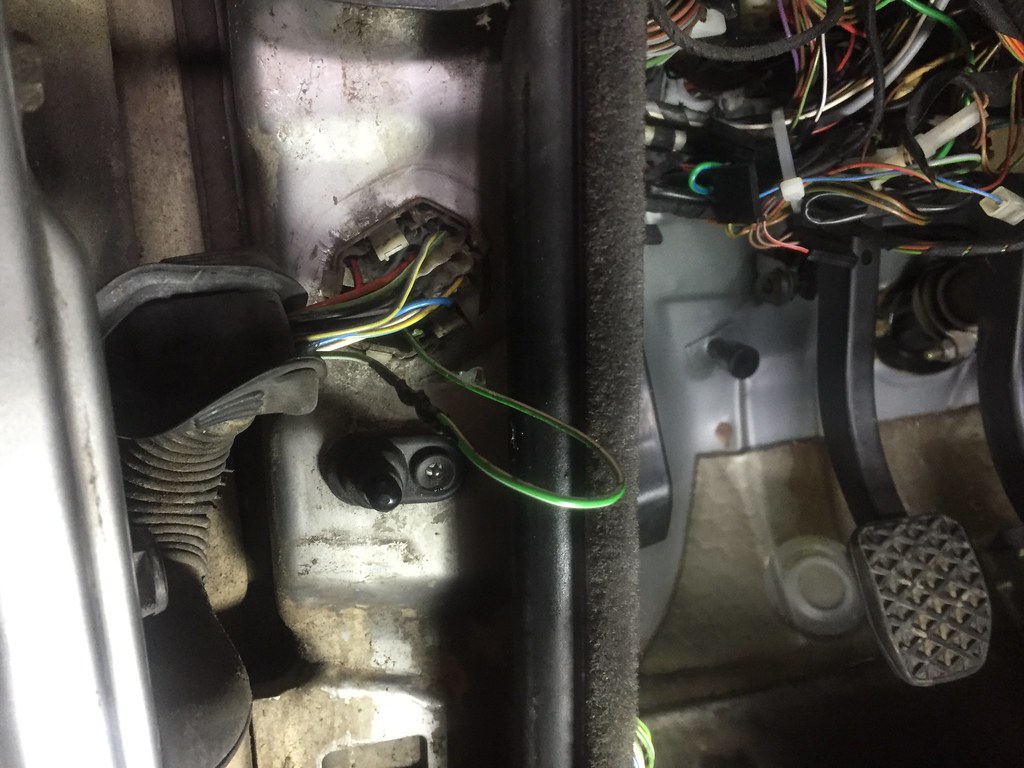
- Removed the Red/Black "door loop", which had corroded badly at both pins. Solder+Liquid Electrical tape to finish the job.
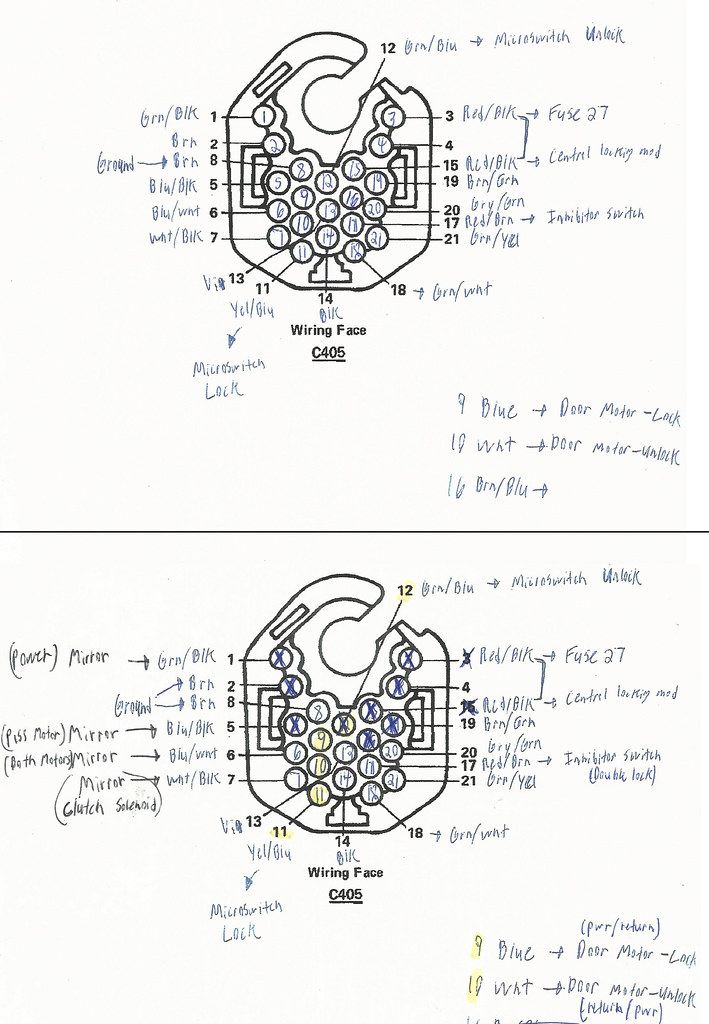
- Cleaned both door connectors (C405) as best I could using elec contact cleaner and some light sanding.
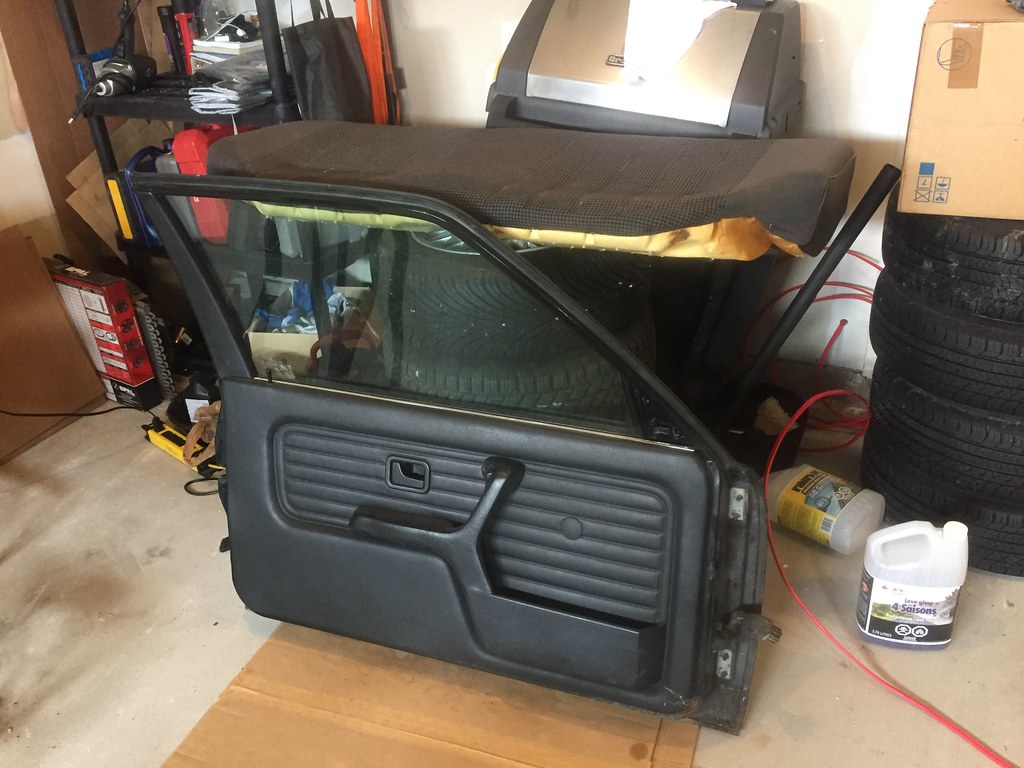
- Replaced the (missing) driver's door actuator.
- Brought home the entire spare driver's door from my parent's house!
- Repaired the driver's door card (glued the seperated vynal, replaced missing clips)
This got my power locks working, but my power mirrors still did not work. (I remember they worked when I first got the car, but I don't think I have used them since.)
Looking through more wiring diagrams from the ETM, I found the likely candidate (Grn/Blk bodyside to Grn/Wht doorside) and verified my hypothesis with some testing.
The problem was the pins in the door connector. I decided to just hardwire the connection, using the properly coloured wire from my spare door.
This got both the power mirrors working.
-
Interestingly enough, this circuit is shared with the interior lights, which lead me to the following:- Replaced the Interior light relay (parts car)
- Replaced/Cleaned passenger side (single terminal) door switch.
Now my interior lights come on when either door is opened!
---------------------
Copy/Paste from my R3V facebook post:
Had an amusing find while working through fixing my central locking.
First I replaced the control module with one from my parts car, and then I eliminated the driver's door wire loop.
This got my passenger side and trunk locks working!
Next I took apart the driver's door connector, cleaned up all the pins, and tested resistance as good on the rough looking pins.
I was dismayed to find my driver's door CL still did not function.
When I put my ohmmeter across the two door lock motor wires (Blue and White), I expected it to ring out through the windings. Instead I was met with silence!
Now I knew something else was up, so I pulled off the door card, found the vapor barrier duct taped in place, and an unplugged wiring harness where the actuator should have been!
Looks like the previous owner just removed the actuator instead of replacing when it failed.
Leave a comment:
- Found the existing Central Locking Control Module to be damaged and corroded.
-
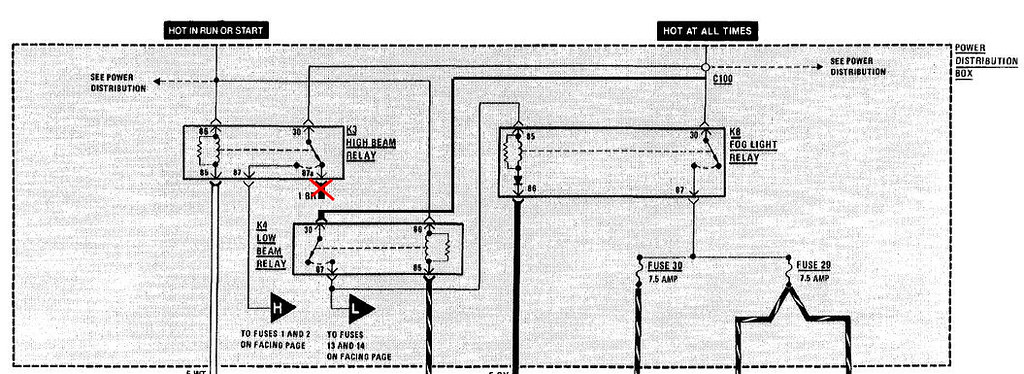
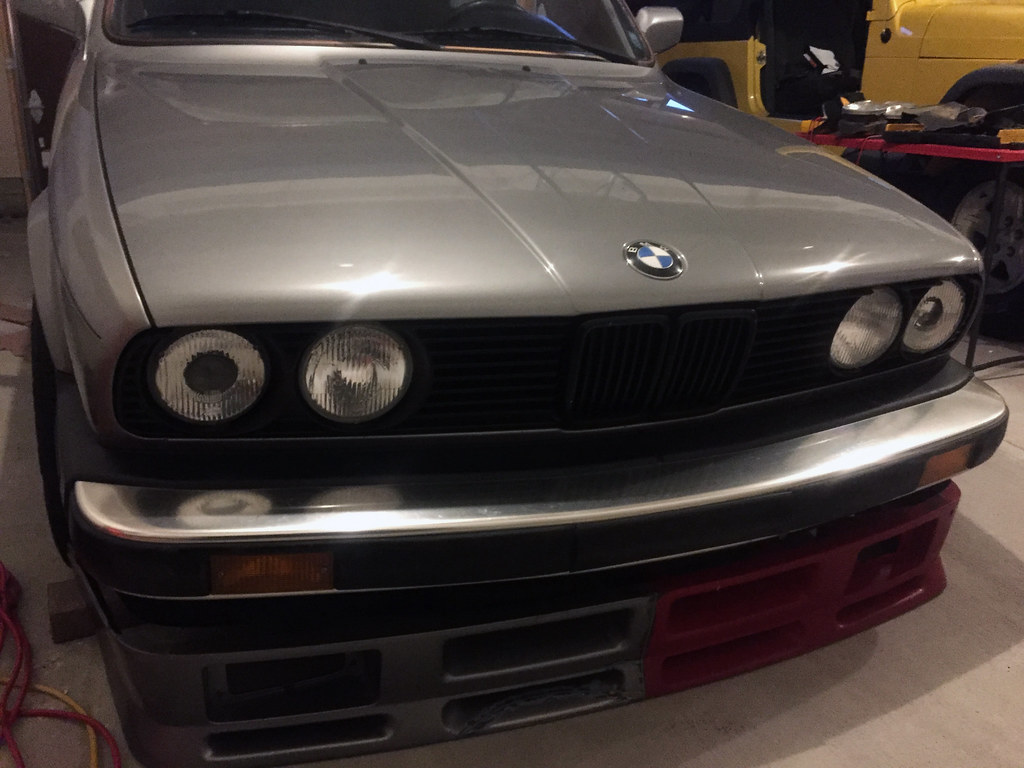
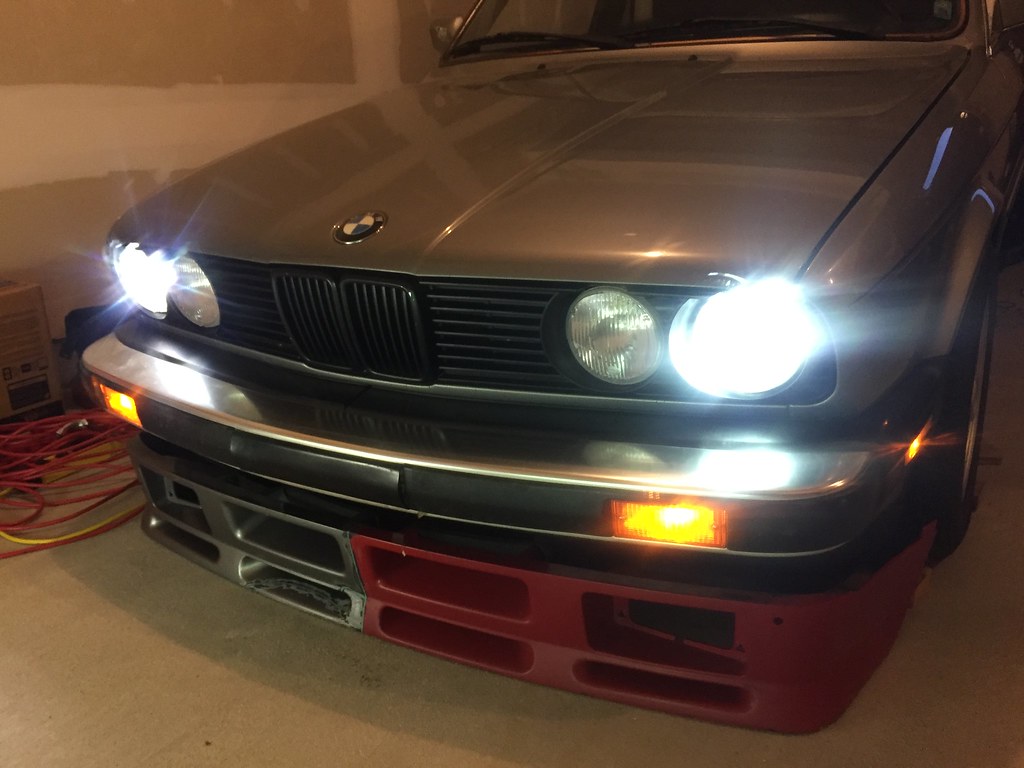
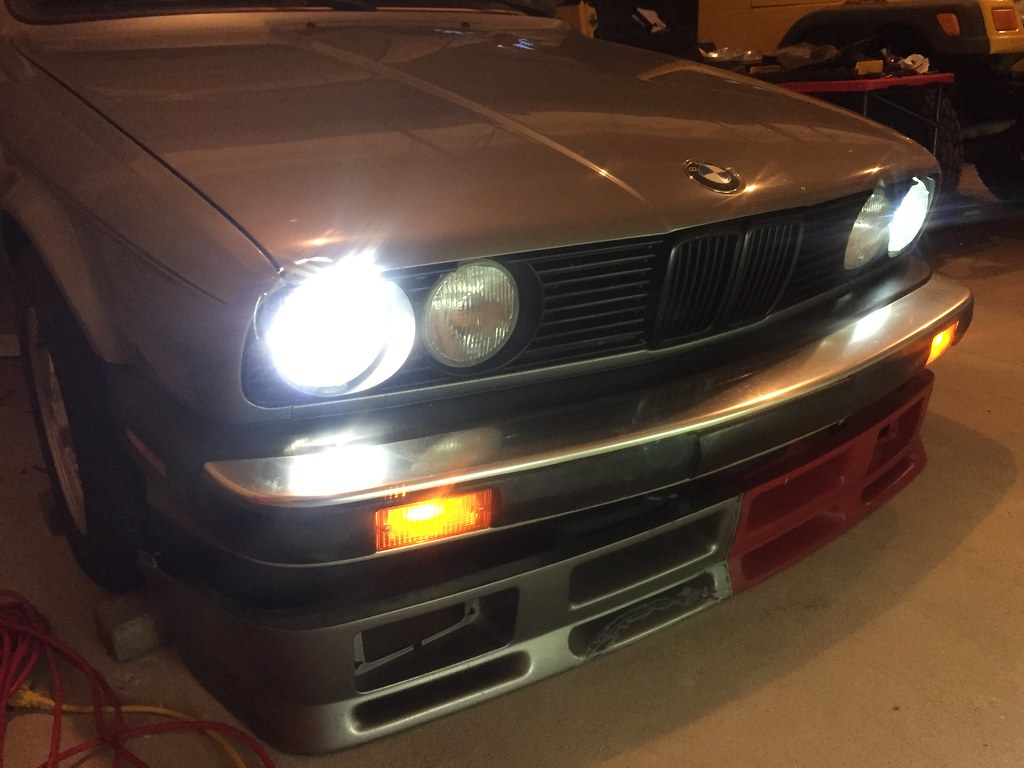
March 2018 - Ellipsoid / Projector Install
Way back in Post 103 (link to post), I bought a used set of ellipsoids and tore them down.
Then in Post 127 (link to post), I rebuilt the lights using new ellipsoid adjusters.
I've finally gotten around to installing the lights, although I still need to install the beauty rings and mount the ballasts.
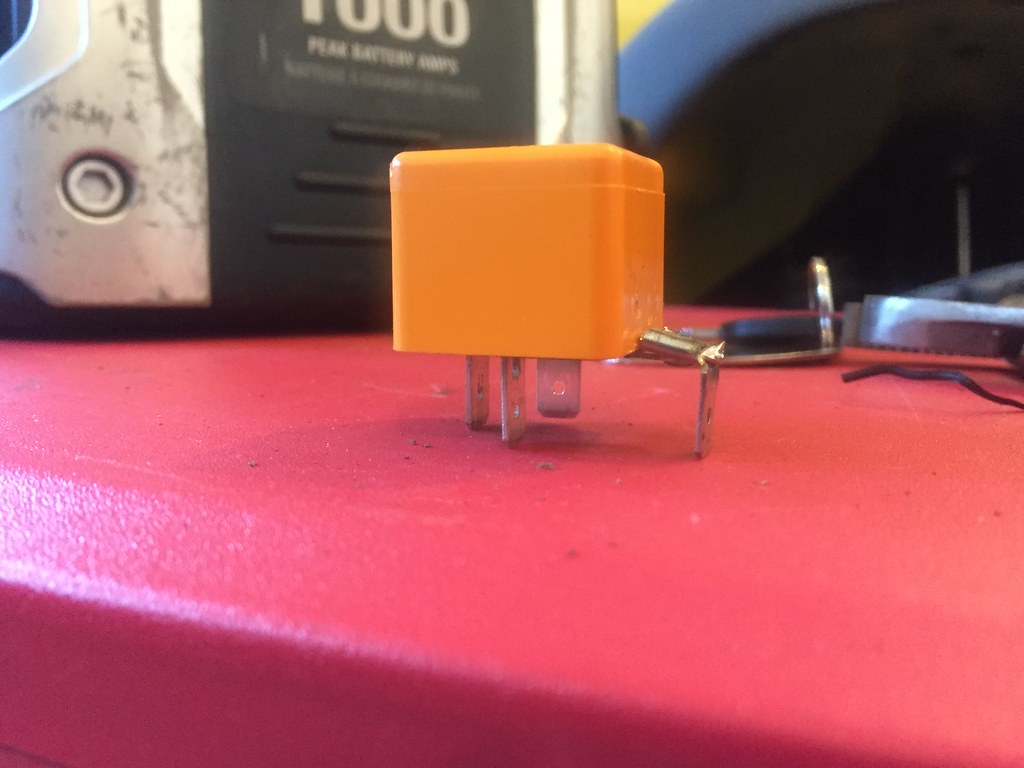
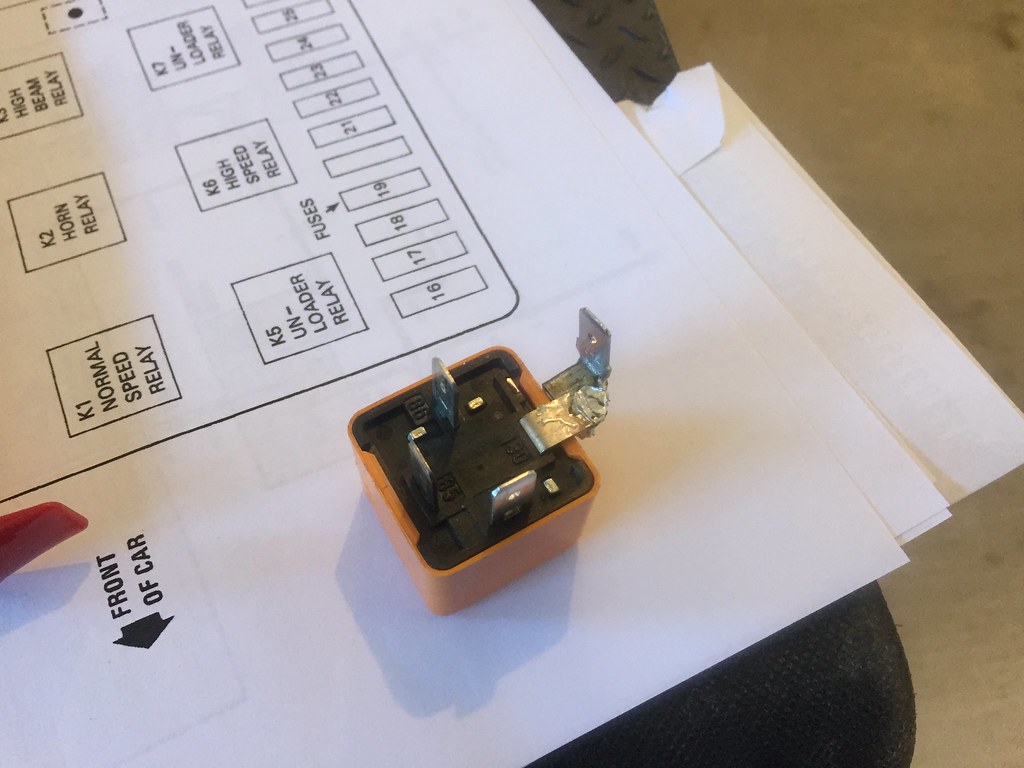
I developed my own method to keep the lowbeams on with the highbeams, namely grabbing lowbeam power from the (currently unused foglight) relay socket.
I modified the low beam relay, which can be easily replaced to reverse the modification.
-
 Last edited by Panici; 10-05-2020, 11:35 AM.
Leave a comment:
-
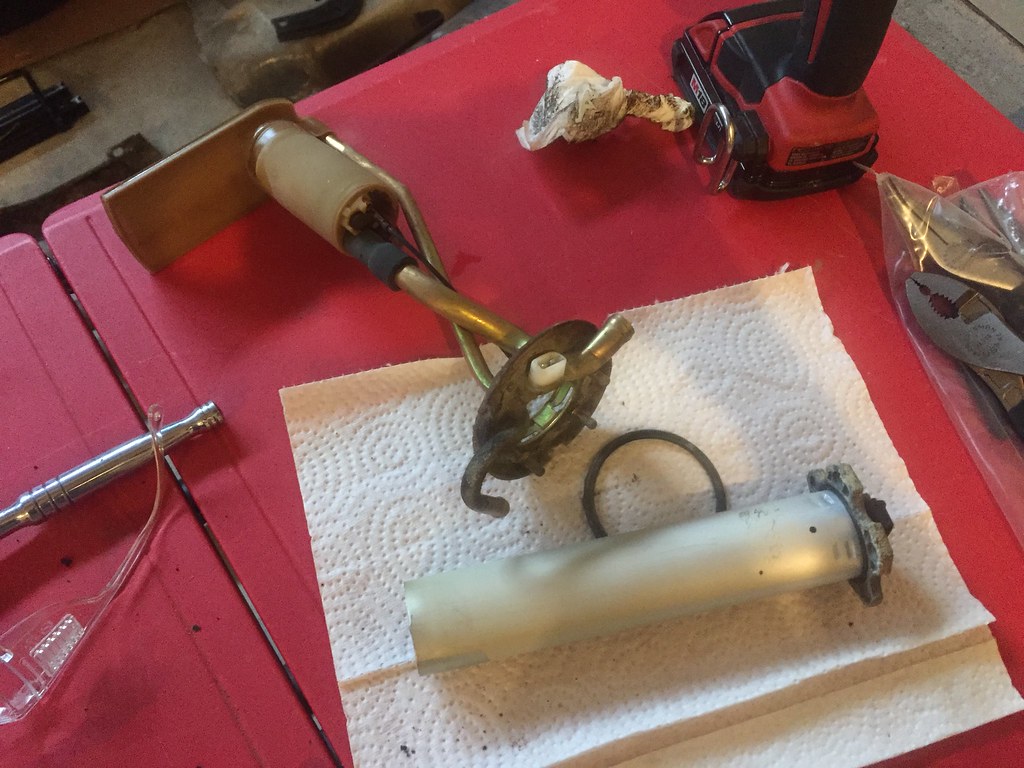
February 2018 - EVAP system removal
- Removed the EVAP canister above the passenger's side wheel and all associated lines.
- Removed the fuel filter and external pump, the rubber bushings put up a fight and were cut off.
- Found a used fuel pump/filter bracket through R3V facebook, as mine is in terrible shape!
- Removed the in-tank fuel pump and level sender.
- Test fit my euro rear plate filler, just for fun.
- Continued setting up a work area in the garage. Now I've got two tables and some wall mounted tools.
Leave a comment:


Leave a comment: