
Looks sweet dude! This past week was awesome for us... now we're back in the typical cold grumpy wet weather, haha.
What page is your HID setup on? I need to go backwards and check that out. Also, related to lighting, have you given any time to another set of smoked taillights? I want to do a set for my 4dr E30, I would like to follow along on your progress the second time around and see if you have any tips to share after having done a set previously.
-
We had about a week of unseasonably-warm weather, so I took the opportunity to get the E30 out of hiding!
Installed the side trim and new windshield washer squinters on Saturday, then filled it up with gas. As a side note the Shell 91 octane that was previously ethanol-free is now E10. Unfortunately that means I can no longer get ethanol-free gasoline locally. 🙁 I've started adding Stabil 360 Marine at every fill-up to neutralize some of the ethanol's effects.
May need to modify the tune for the new gas, we will see.
The new Morimoto XB AMP 5000k 50W HIDs look great in the lowbeams, this was the first time firing them up.
--------
Rinsed all the dust off the car on Sunday and went for a drive!
Car is running great, shifter feels epic now that I've modified it to fit my driving position!
I should note that it needs some throttle blips on a hot-restart to fire up. Will have to work on that portion of the tune. Also the passenger side mirror glass will not stay locked into the housing (clips are broken?)
Seems to be a little more mechanical noise coming into the cabin, noticeable especially at low speeds. Haven't tested it during highway cruising yet. Sounds like it's from the trans but it has to be from the rear diff/subframe/driveshaft because I didn't change from the OEM rubber trans mounts. Not a big deal but worth noting.
It's a great feeling to have the car fully-assembled for the first time since I was rear-ended.
Getting the car PPF coated ASAP as well.
I took some fantastic pictures with the DSLR which I will post soon. Meanwhile here are a couple cellphone shots!

 Last edited by Panici; 04-18-2023, 09:32 AM.
Leave a comment:
-
Man, it's looking SO good! Definitely a bummer about the paint mismatch though. Such a cool E30.Leave a comment:
-
Thanks guys! It's fun to see the body panels finally come together.
I bought that Kamei rear valance/apron from Albie325 in 2019 and this is the first time it's been bolted to the car!
It's actually an E28 535is Pfeba spoiler.
Very similar to the Mtech I E30 unit, but it's a little wider (extends off the trunk), and has "ridges" at the trailing edge.
I'm having trouble finding a dual tip that will accept a single 3" as input. Maybe I'm not looking in the right spot?
------------
One more pic of the rear end. The colour difference doesn't stick out as much if you get the lighting just right.
 Last edited by Panici; 03-29-2023, 07:10 AM.
Leave a comment:
-
The Mtech I wing and rear valance looks great.
i agree with you on dual tip. On mine I did 2 dual 2.5” tips in stainless.Leave a comment:
-
The E30 is ready for the 2023 season!
I still have a few small items to button up, but I can work on them as time allows.
-----------
Finally got the back end together. Pleased with the fitment of the 3-piece Kamei rear valance.
Not in love with the exhaust tip, but it was quick and is functional. Would like to install a straight dual tip in the future.
-----------
Bit of a disappointment was the colourmatch on the rear trim. Possibly the shop sprayed the diving board trim and the rear valance separate from the rest of the car, because the colour is noticeably different.
The rear valance is low enough that you could get away with it, but the bumper trim is right next to the body paint and it's obviously lighter.
It could be the different angles playing tricks on me, but up close with a single source of light and you can see the trim has more gold mixed in the paint. It's not the garage lights as you can see it in the daylight as well.
Front trim also appears to not match, but it's much harder to notice unless you look right at the fender-to-trim transition.
Thankfully I still have the old black diving board surrounds, so if this bothers me enough I will be switching back.
Will run it like this for 2023 and see if I can live with it.
-----------
Some good news, I replaced the throttle cable with the E36 35411163228. It fits well except that I had to take up some slack with an aftermarket cable end. I routed the cable below the brake booster and it looks much cleaner now!
Also started installing the trim, but found that the new clips are different then the original style (that are discontinued). I could only get one style to work. I've ordered some more clips so I can finish up the driver's side and also install the passenger side trim.
Ordered two new washer squirters as well (one of mine is broken). $20 a piece from BMW for the regular (non heated) ones.


 Last edited by Panici; 06-25-2026, 05:25 AM.
Leave a comment:
-
The only direct replacement ujoint I ever found for the E30/E36 driveshaft looked much weaker, and the only person I heard of that used one had the same issue as you.Leave a comment:
-
I replaced it as a maintenance item. Rear u-joint on my old shaft was quite notchy even though it was from a lower mileage vert 328i E36.
A new OEM shaft costs significantly more then this upgrade. It's just a bonus that this aftermarket one is stronger and serviceable.
Previously I paid a shop (that came recommended to me) to change a rear u-joint in the 325e shaft I used with the M20/G260 combo. Whatever they did, it wasn't correct as the u-joint snapped the first time I dumped the clutch on sticky tires.Leave a comment:
-
-
These serviceable driveshafts have caught my eye. Do you feel like it's a worthy upgrade?Leave a comment:
-
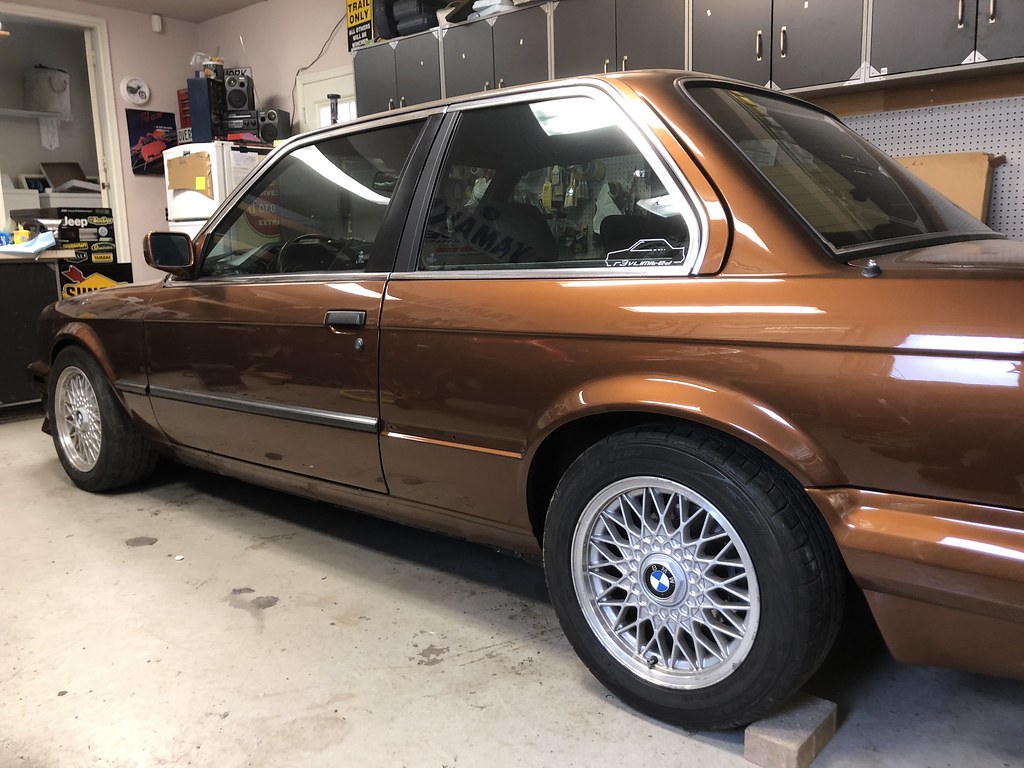
Two months of wrenching every weekend and the E30 is back on the ground!
Still more to do before spring but we are getting close! 🙂
-----------------------------------
Installed an HDT Automotive (Corey Ellis) upgraded driveshaft w/1310 Spicer u-joints.
Swapped out the CSB to an E30 unit. Unfortunately the driveshaft will not fit a bearing cover on the front-facing half of the CSB, and I ordered the wrong cover for the rear half.
Since it sits above the exhaust heatshield I decided to run it without those cover plates.
Also had to grind down both of the u-joint edges for clearance to the rear subframe/chassis.
Second round of smashing on the exhaust for floor clearance and wrapped to match.
Bled the brakes with some fancy DOT4 synthetic while the wheels were off. Changed the oil with some fresh Rotella T5 15w40.
Installed an oldschool set of Morimoto 5000k HIDs in the lowbeams and wired up some halogen highbeam bulbs. Tucked the ballasts into the ends of the radiator support.
Installed the colourmatched front bumper trim and iS airdam. Front end is assembled for the first time since paint, and it looks fantasitc! 😄


 Last edited by Panici; 03-13-2023, 05:08 AM.
Leave a comment:
-
Thank you! It's been a dream of mine to have a track-only R6.
Whenever I put the bike back to street-legal mode, I am itching to get to the track by the end of the season. It's quite a chore to switch from track to street and vice versa for every single trackday. Historically this meant I kept it in track mode, and got very rusty between the times I rode.
------------------------------------
Went hard on the E30 again this weekend. I put in ~15 hours over two days.
Installed the ST Suspensions front swaybar (22mm vs the original 20mm), and the Garagistic Dual Ear Differential Mount.
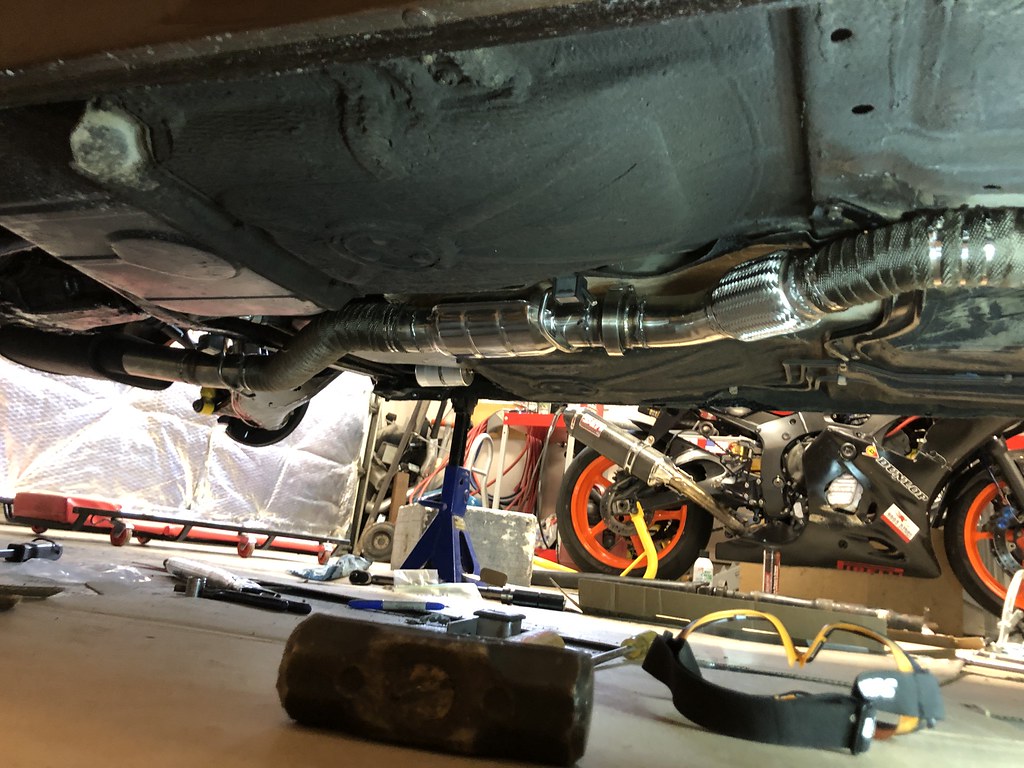
Exhaust fab took the majority of the time. I added in a flex pipe, moved the v-band flanges, added a cat, and an exhaust hanger.
Notched the chassis brace to add clearance (it wasn't even installed last summer, so this is better then nothing).
Tucked everything up to the chassis as best I could for ground clearance.
Think I will add one more hanger during final install (so the rear section is supported from both sides after the flex pipe/v-band.)
Here is a before shot for comparison:

------------------------------------


 Last edited by Panici; 03-06-2023, 03:44 AM.
Leave a comment:


Leave a comment: