
With this amount of detail, I have to ask if your career demands you being so detailed as well? Assuming so, or you're just an anomaly of a human to be this detailed, hah!
-
-
If that would of been done at our labor rate the labor cost would be almost 49k

1989 325is l 1984 euro 320i l 1970 2002 Racecar
1991 318i 4dr slick top
Euro spec 320i/Alpina B6 3.5 project(the never ending saga)
Vintage race car revival (2002 content)
Mtech 2 turbo restoration
Brilliantrot slick top "build"Comment
-
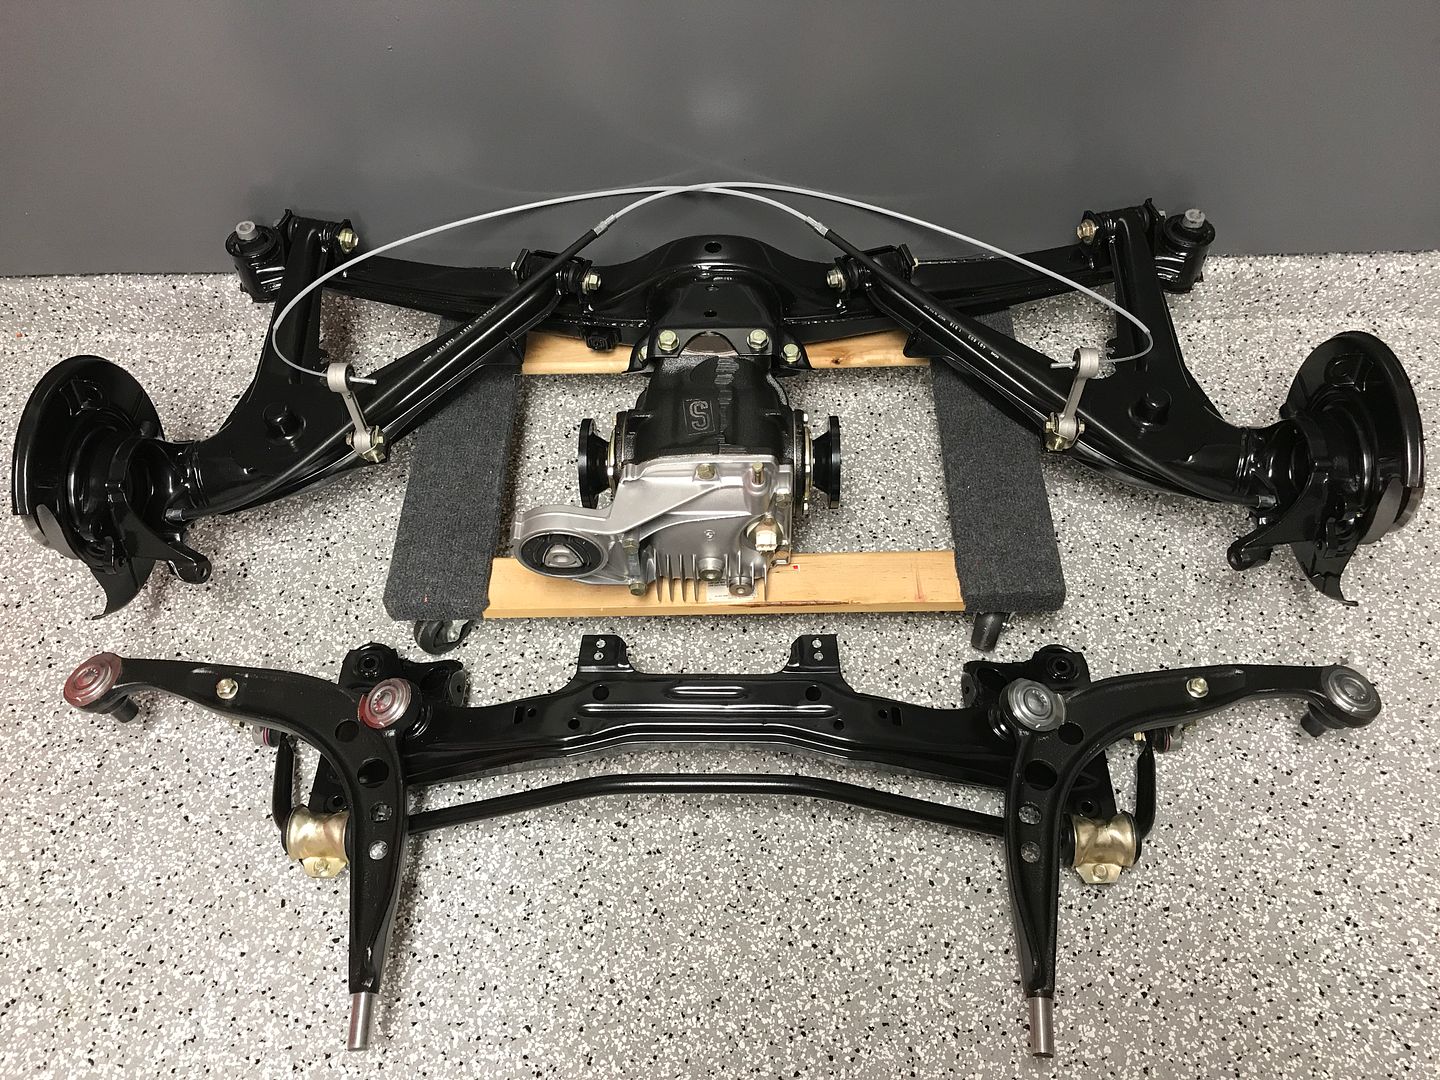
Not much to talk about today, cleaned and reorganized the garage following all of the components that left my care earlier in the week to become one with the chassis mainly.
I did bend and flare both of the likely most complicated lines on the car out of new polycoated brake line. I figured why not start with the worst lines, and then the rest will be cake. I will probably do the ones in the engine bay as well.
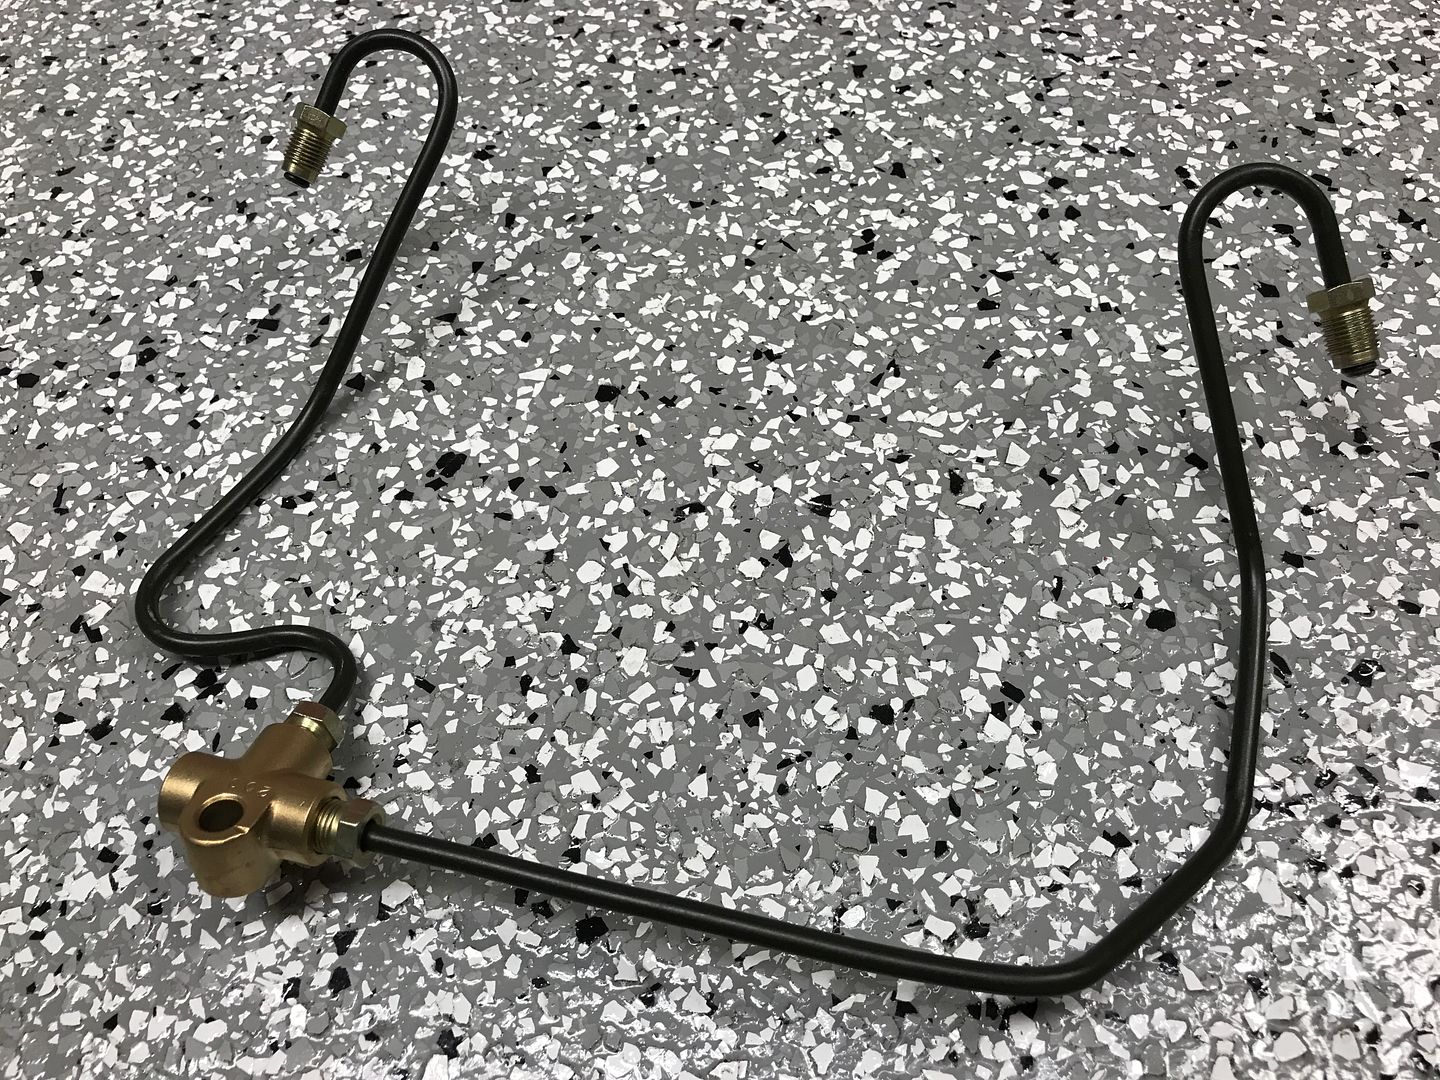
Not that there is anything wrong with the ones in the engine bay, but all the line nuts are tarnished and ugly. Of course due to the nature of the lines its not possible to replace the nuts without cutting the lines, so may as well remake them out of new tubing.Tenured Automotive Service Professional - Avid BMW Enthusiast
Vapor Honing & E30 ABS Pump Refurbishment Service
https://mtechniqueabs.com/Comment
-
Man, you really bring new meaning to the phrase "The devil is in the details." There's as much art in there as mechanical know-how.
Looks better than new.I do things.Comment
-
I commend you for posting your costs... It will certainly help put this kind of build into prospective when someone is thinking about having a shop tackle this level of restoration.IG: deniso_nsi Leave me feedback here
Comment
-
Oh without a doubt this type of build done through a shop that specializes in nut and bolt restorations would be crazy money, and likely... not as detailed or refined. I would expect a build like what I'm undertaking to be north of $80k if commissioned to such a business.
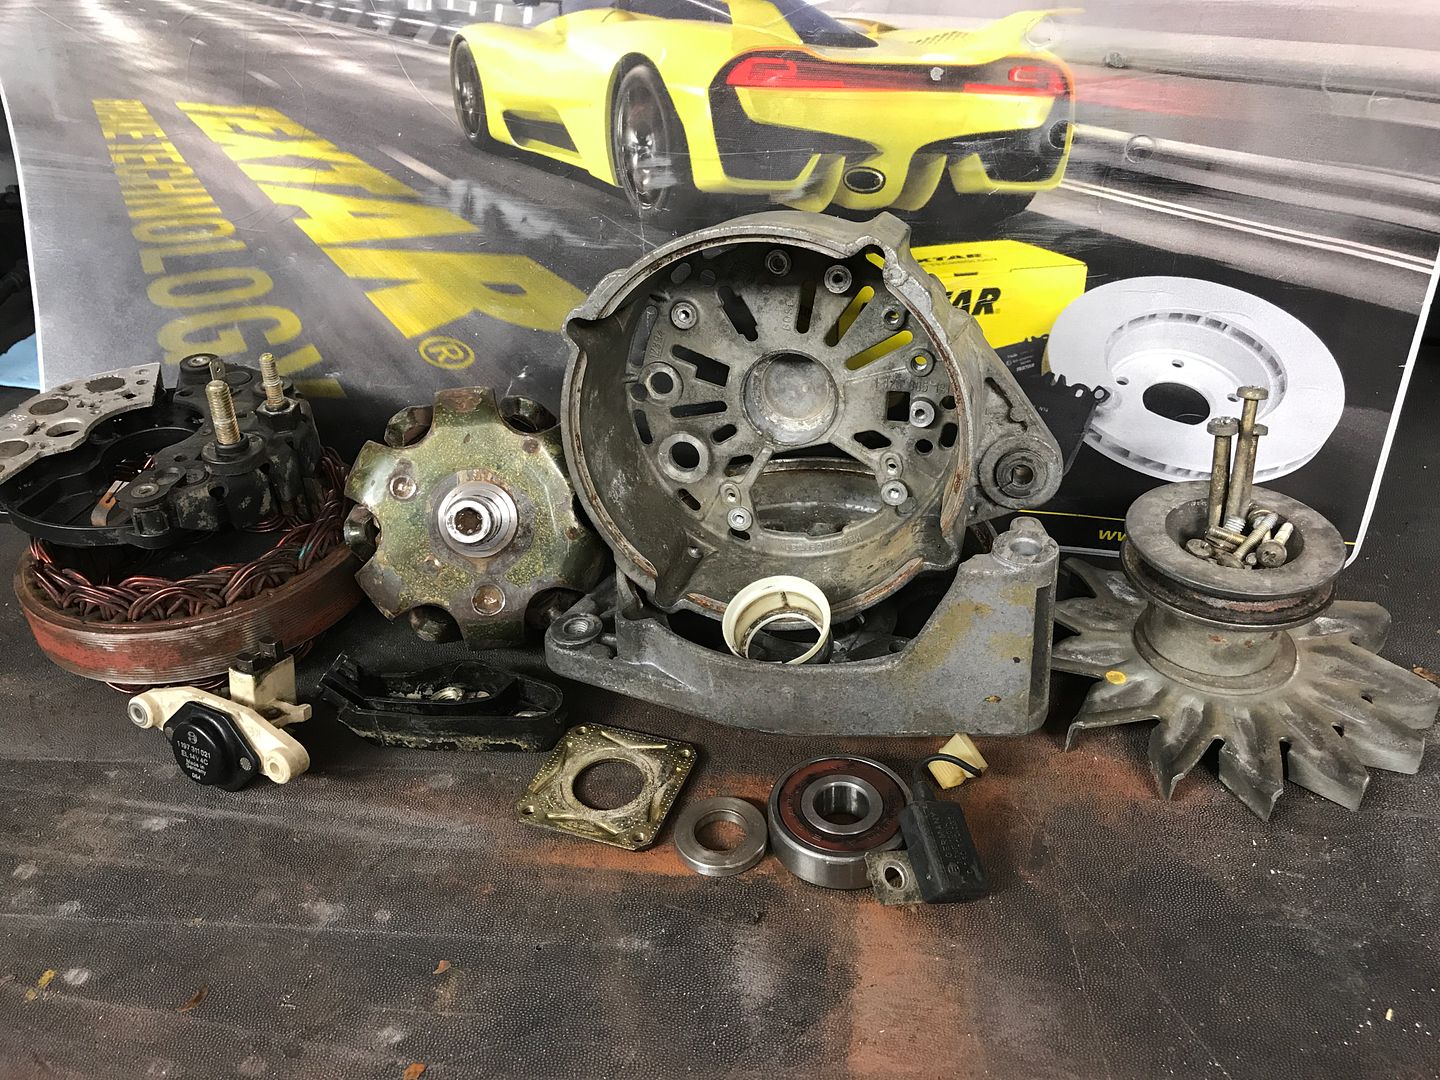
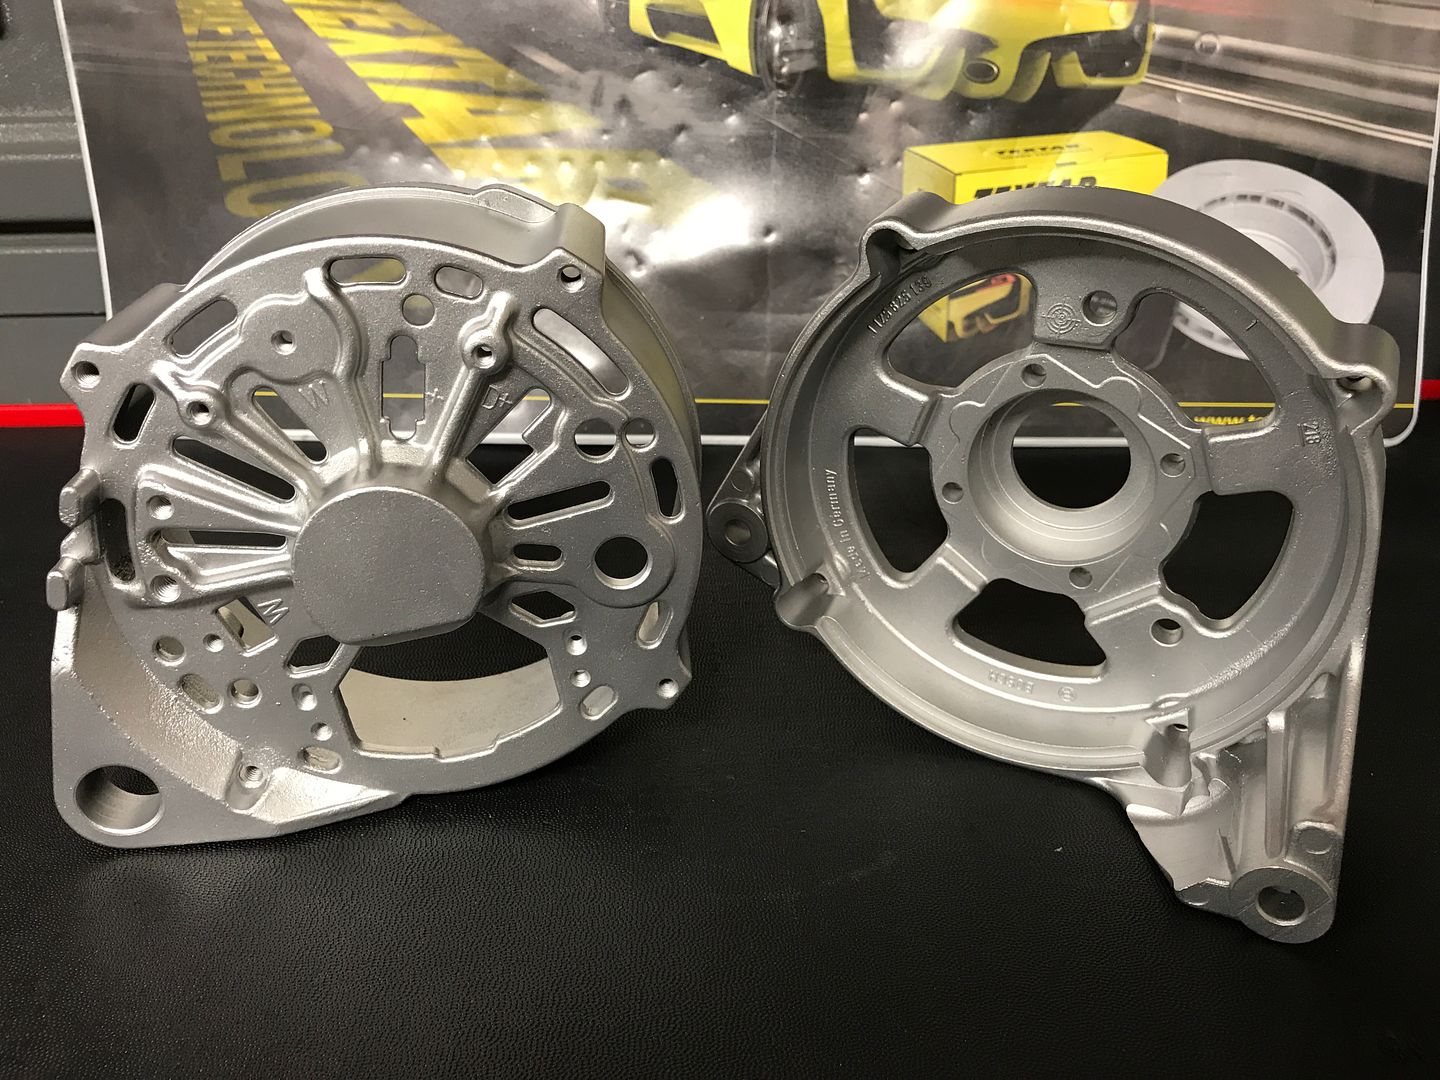
Today was wet, cold and otherwise dreary. I elected to spend most of my time indoors, but did blow apart my alternator for rebuilding. Interesting the castings are dated 1987 inside, guess this alternator sat around in the parts bin for a few years.
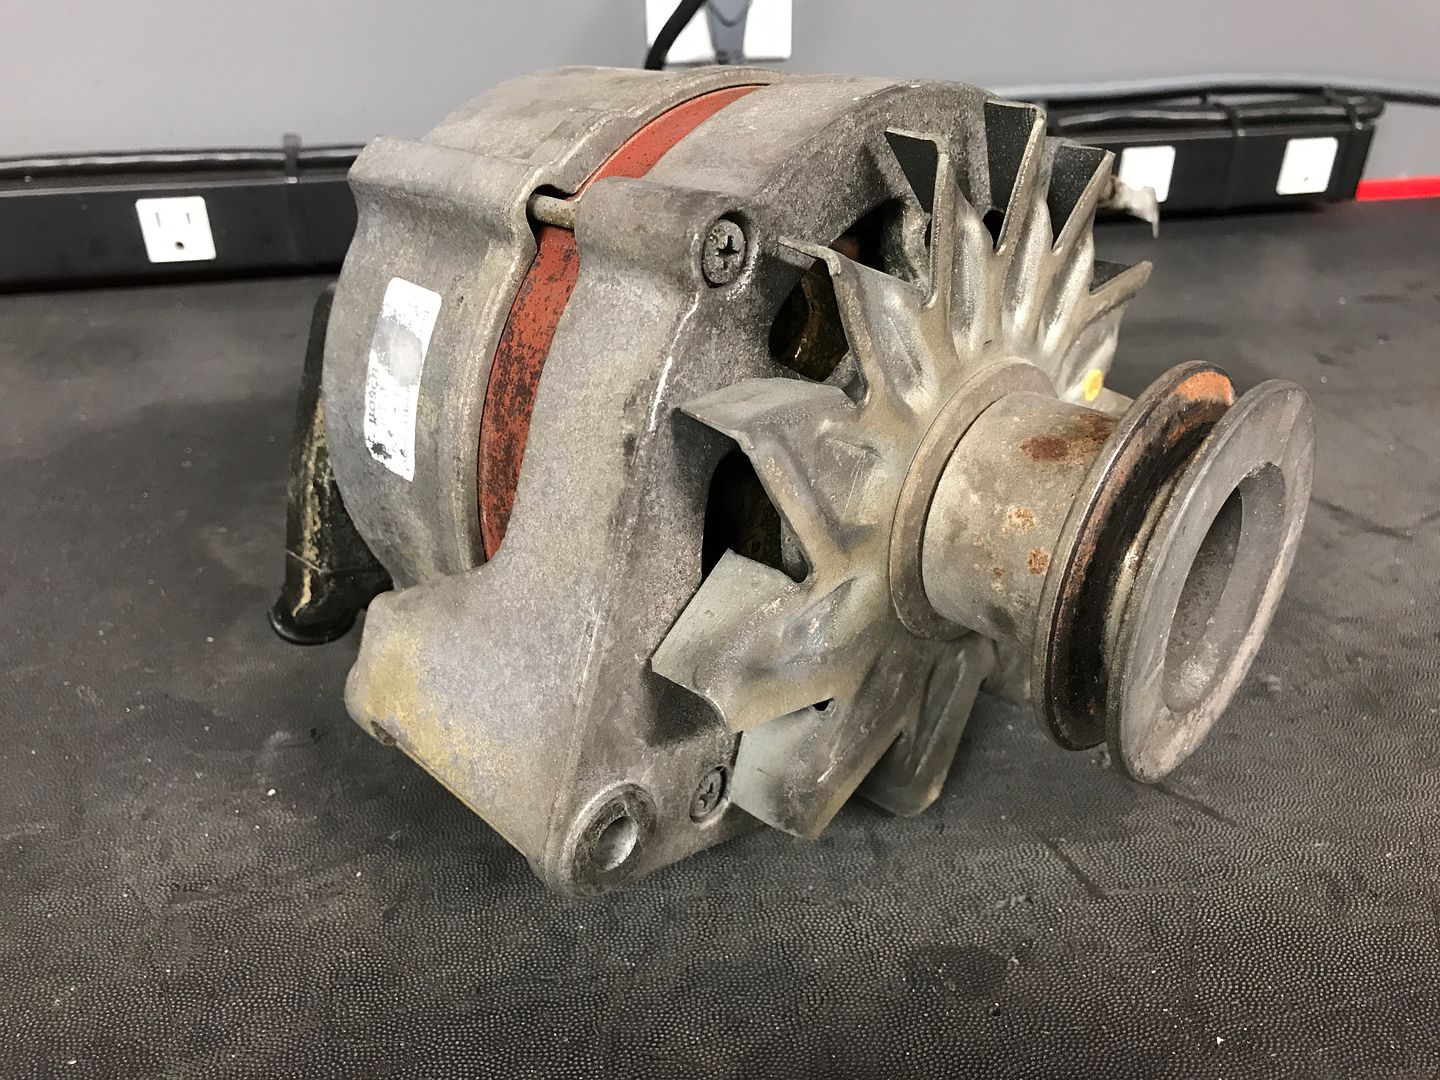
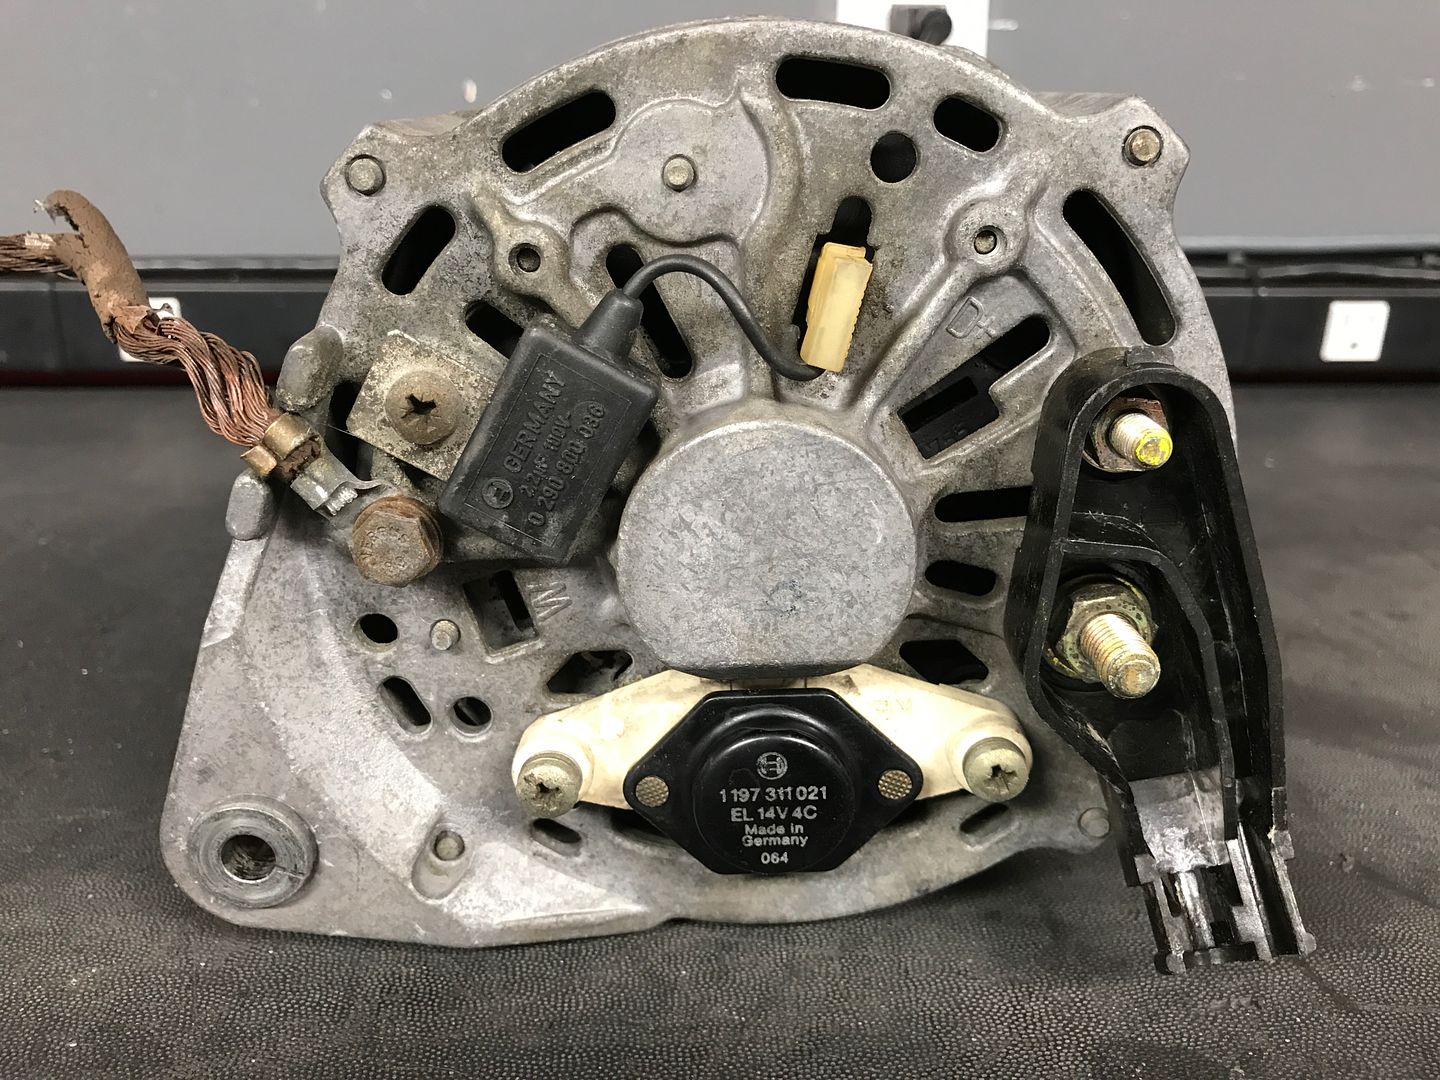
The rotor and stator need to be cleaned and refinished with fresh varnish as they are pretty ugly. The case of course will get vapor honed, and new bearings, brushes, etc are on the way.
 Last edited by Jordan; 12-31-2018, 05:07 PM.Tenured Automotive Service Professional - Avid BMW Enthusiast
Vapor Honing & E30 ABS Pump Refurbishment Service
https://mtechniqueabs.com/Comment
-
Do you have a ballpark for how much you hope to sell the car for when finished?Comment
-
Yeah man, the weather has been terrible. It's 76 here, and humid as fuck. Dafuq winter?
I have a dehumidifier going, but my garage is still all wet.I do things.Comment
-
Can we get some info how to properly clock FCABs? I read somewhere to use BMW special lube (basically mineral spirits), and lower the car to the ground for FCABs to find their spot. Not sure if I 100% buy this... from a practical point of view, theoretically it does make a sense.
E46 FCAB position is fixed by the design, regardless the ride height. Should e30 LCABs bracket bolt area just be set parallel to LCA plane?
How did you do it?Comment
-
Comment
-
The factory lubricant is essentially kerosene. Isopropyl rubbing alcohol also works extremely well. You want something that provides good lubrication and then completely evaporates leaving nothing behind.Can we get some info how to properly clock FCABs? I read somewhere to use BMW special lube (basically mineral spirits), and lower the car to the ground for FCABs to find their spot. Not sure if I 100% buy this... from a practical point of view, theoretically it does make a sense.
I also find it eases installation to heat the rubber center of the bushing with a heat gun from both sides before lubricating it and then you should be able to slide it by hand over the control arm
I have installed enough lower control arm bushings on these cars to have the static position memorized. My best advice is to loosen the one that's on the vehicle and let it dangle. While it's at rest not touching the body of the car observe the angle of the control arm bushing bracket versus the portion of the control arm that goes between the sub frame and the strut. Duplicate this clocking with the new bushing and bracket and you're good to go.
Helped Jon drop the S14 out his M3 today and while I was there I used his vapor honing machine to clean my alternator case.
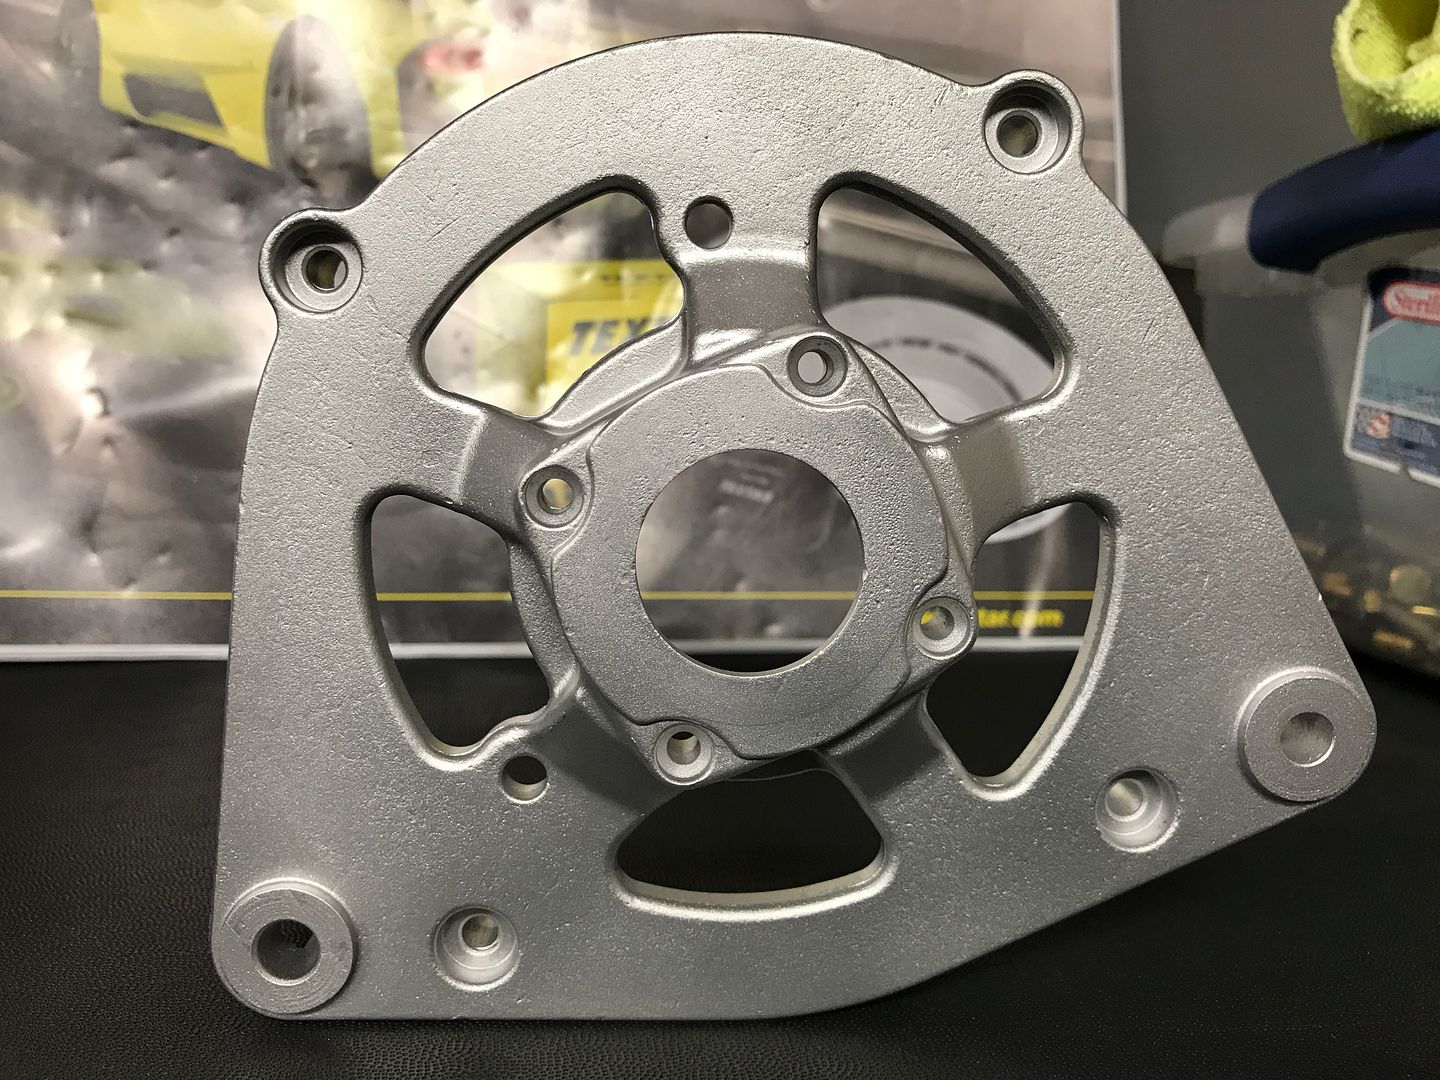
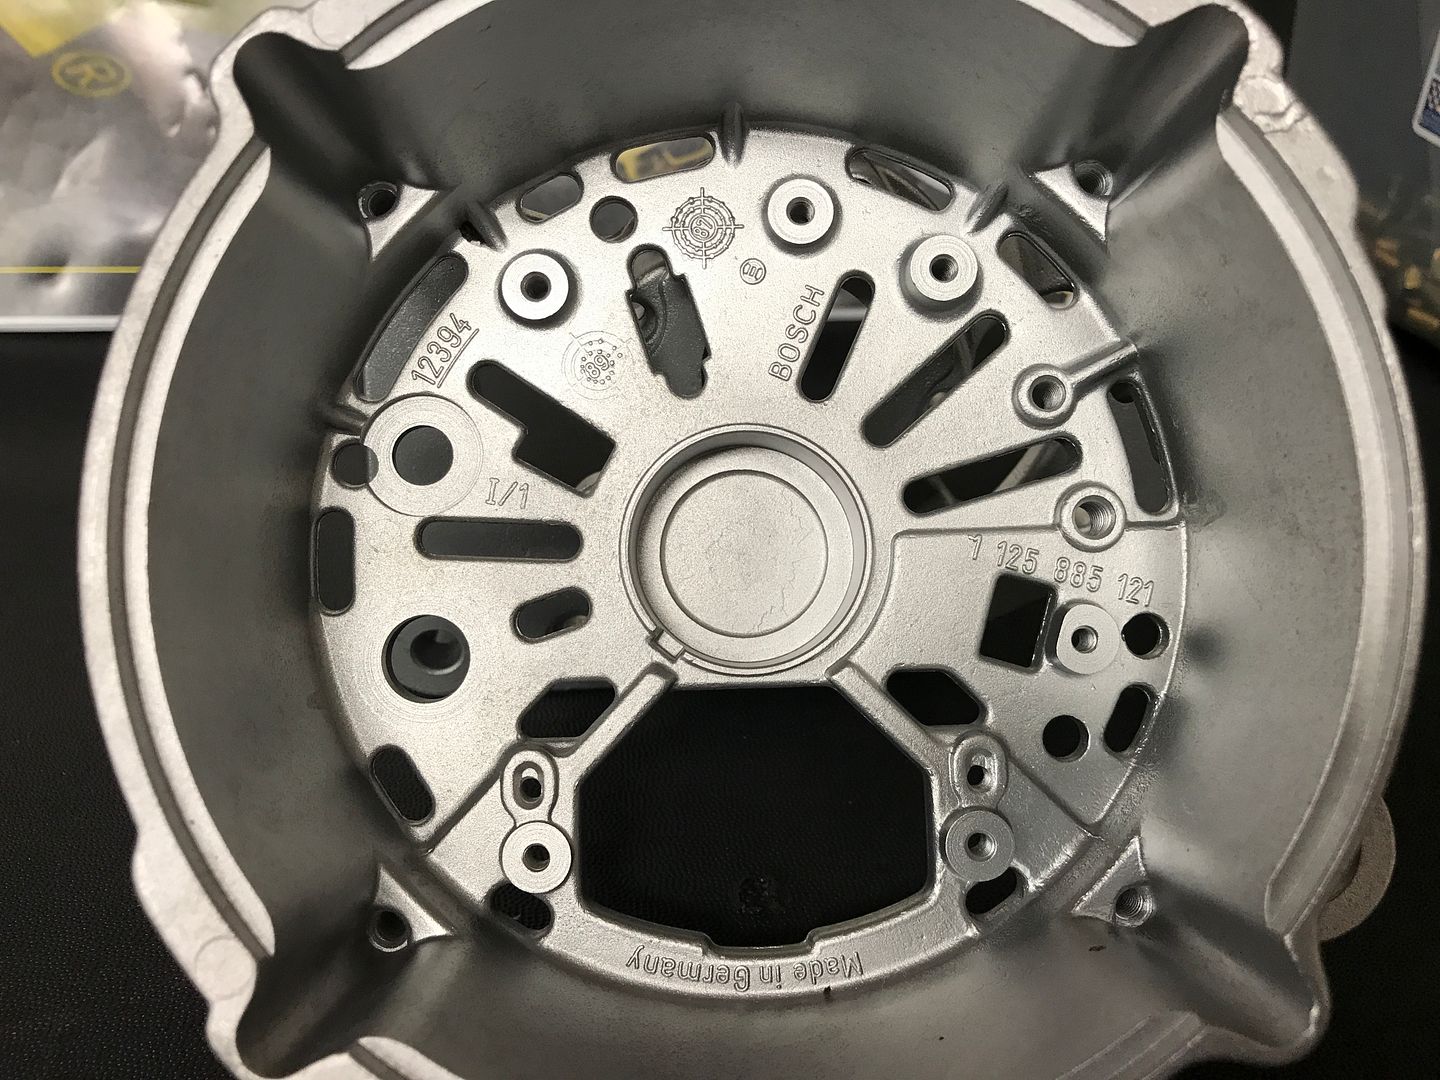
I absolutely never grow tired of the end result of vapor hone processing.Tenured Automotive Service Professional - Avid BMW Enthusiast
Vapor Honing & E30 ABS Pump Refurbishment Service
https://mtechniqueabs.com/Comment
-
Comment
-
Comment


Comment