
Replacing the whole corner will take it from "good enough" to "properly repaired" ... cover that isht in more bondo and call it "good enough" lol I kid I kid
-
Simon
Current Cars:
-1966 Lotus Elan
-1986 German Car
-2006 Volkswagen Jetta TDI

Make R3V Great Again -2020 -
For now it might get a patch where the holes are, but nothing beyond that. I'll keep an eye out for part outs and if I find the right donor, I'll come back to it.
I'm kicking myself for not getting a "before" pic of the wheel tub because it looked like someone had gone at it with a sledge hammer from inside the engine bay. I didn't even think to take a picture until we had the brunt of it popped back out.Originally posted by priapismOriginally posted by shamesonComment
-
Parts arrived for this and the other car.

Most of the clips/trim/diff/misc stuff is for my silver car, everything engine/swap looking is for this one.
I think it's time to update the engine plan again:
M52B28
MS41 OBD2 ECU
Head pressure tested/resurfaced
Valves cleaned, polished, lapped
Lifters cleaned (replaced? They're iffy.)
replace all seals/gaskets
DIY ported intake
M54B30 Intake cam (If I can find one in time)
M54 harmonic balancer
INA VW oil pump chain tensioner
New oil pump chain
Glyco Rod bearings
135mm MaxPeeDingRods w/ ARP bolts
Shaved M52 pistons, need to re-measure and calc CR again with them.
N5x exhaust studs with new M5x copper nuts.
M50 manifold
Primary chain tensioner?
Just realized that somehow I removed my thermostat from my cart before this order, and also somehow ordered an e36 CSB instead of an E30 one...Last edited by Northern; 11-08-2020, 08:43 AM.Originally posted by priapismOriginally posted by shamesonComment
-
An old friend gave some insight into this car's history. I find it very fitting really.
In light of this new information, a thread title change was required...Originally posted by priapismOriginally posted by shamesonComment
-
yikes rough car! There is something appealing about a car that you can totally abuse and not have to worry about though so I understand you pressing forward with progress. Get this thing back on the road!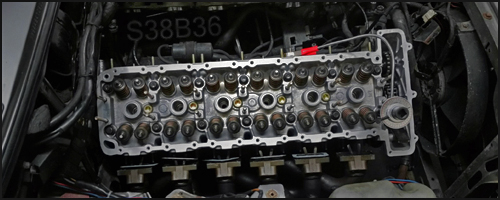 318iS Track Rat :nice: www.drive4corners.com
'86 325iX 3.1 Stroker Turbo '86 S38B36 325
No one makes this car anymore. The government won't allow them, normal people won't buy them. So it's up to us: the freaks, the weirdos, the informed. To buy them, to appreciate them, and most importantly, to drive them.Comment
-
Excellent revised thread title!Comment
-
Have you fit those amazon spring sets yet? I was going to order AFCO perches/collars but if those fit 51mm struts properly I'll just grab those and swift springs. I assume theyre 2.5" collars?Comment
-
They are ~2.5" ID springs/collars.
I haven't fit them yet, struts are off the car but I'm trying to get the engine reassembled and installed in the car before I get hit with any major winter weather.
Here's the jank data I came up with for them:
Thicker pair:
6.4" @ free length
5.8" @ 255lb applied load
~425 lb/in
2.6" ID
3.6" OD
Thinner Pair:
6.05" @ free length
5.2" @ 255lb applied load
~300lb/in
2.6" ID
3.4" OD
Upper Spring Perches:
2.44" Inner
3.3" Outer
Threaded Sleeve:
51.5mm ID (~2.0")
Adjuster Perch:
2.5" ID
I think the split is kind of wack front/rear. If you ran the 300 front and 425 rear it would be a little on the weak side in the rear.
6" is kind of long for a spring in the rear too, but maybe fine without the adjuster.
You could a) cut a coil off the rears to stiffen them up and run the adjusters, or b) run the 425's up front and buy something 600-700lb/in for the rear from eibach, hyperco, etc.
I'm looking to do option b, but will throw them on the car 300f/425r with no adjuster in order to get the car on the road.
I'm planning to run them with full length bilstein sports that I already own (so I can't go that low), and some ebay camber plates that don't have any thrust bearings for the springs, so I bought some 2.5" coilover spring bearings: https://www.amazon.ca/gp/product/B004BTHYSM
As far as suspension goes, I also have some E90 droplinks that I'm planning to modify for an E30, and have some Ground Control e30 M3 drop links to choose between, some rear end poly bushings from that Lencas guy on here like a decade ago, and I might spring for some of garagistic's aluminum CABs and a strut bar if the black friday sale makes it worth it.Originally posted by priapismOriginally posted by shamesonComment
-
I have a backlog of pics, I'm going to try to work through it a bit.
Last week was "reading week" from school so I tried to make up for lost ground (considering it's snowed once already and I wanted to have the engine in the car before snow hit the ground)...
Spent 2 nights cleaning all the carbon off the valves. This wasn't pleasant at all and I would probably buy some sort of nasty chemical to do this in the future lol. Wasn't going for perfection, but this is good enough for the girls I go with.

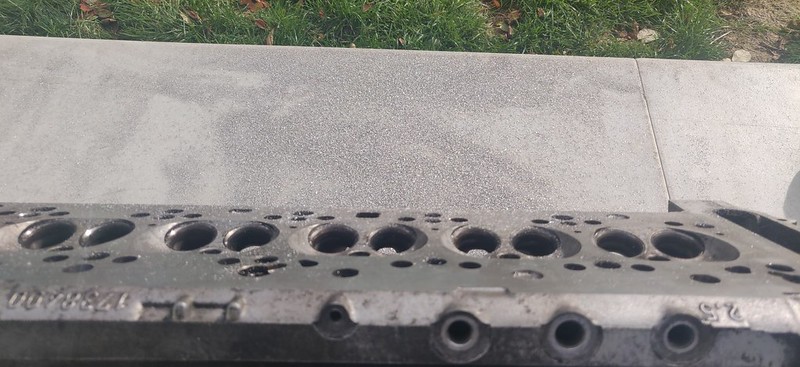
Turning my attention to the intake ports: Lots of spots that could be cleaned up in here, just rough machining/lips. The humps for the valve guides could also have a lot of meat removed before you even get to the guides themselves.


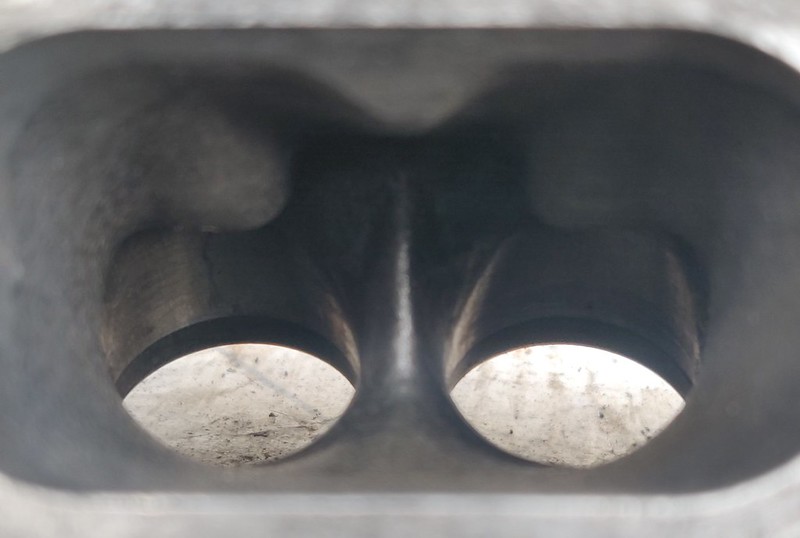
I wondered how well the ports matched the M50 manifold, so I took some lexan and made a template

Better than expected. Template isn't good enough to get any closer than this.

Always wanted to try this, so why not.

Glad I did it outside (also thankful for my full face respirator and a good set of headphones to keep my energy up for how long this took)


I would do a second pass on this, but I was tired and had issues reaching in with the short carbide burr.
Two things about this - 1: the burr catching and jumping was a pain. 2: Doing one small operation to all 6 ports was easier to be consistent with than trying to do one full port at a time.
I did order 6" long carbide burrs but I was too impatient to wait for them to show up. Next time I guess.
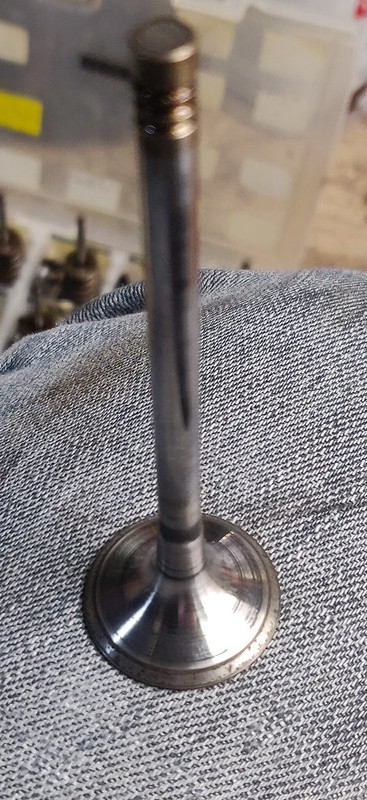
Lapped the valves next.
This tool is garbage. Someone must make a smaller one, because the small cup on this was bigger than the exhaust valves and would not stay on because it kept getting covered in lapping compound.
Also despite three passes at cleaning the lapping shmoo, I still gave myself a heart attack on assembly because I could see light past one of the valves. Turns out the valve was propped open by some grit...

New valve stem seals to finish it off for the night. The old ones were a bit of a bitch to remove. I ended up wiggling them back and forth until they came off. Sometimes prying with a pick or twisting them to get them started.

Originally posted by priapismOriginally posted by shamesonComment
-
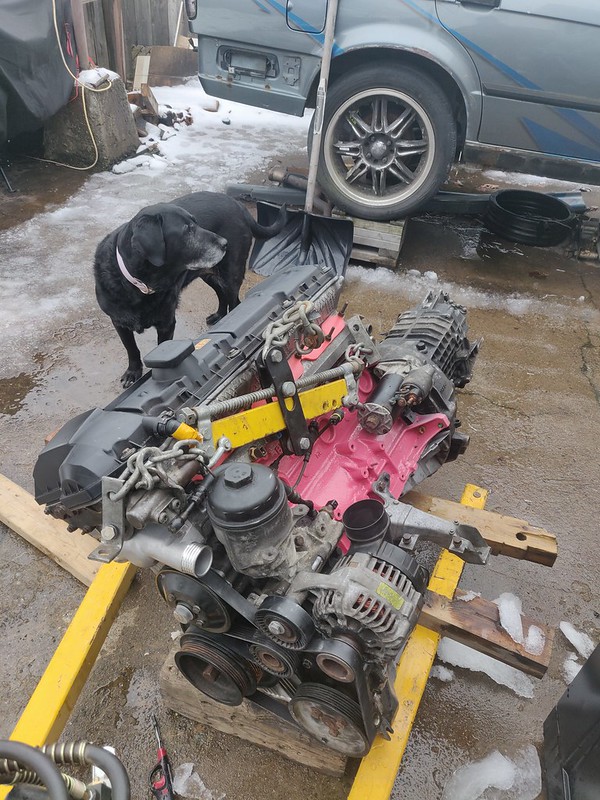
After 3 years of having these style 30's in my yard, I offloaded them onto kijiji for some guy's 1er... I hope they fit.
Also had my pupper supervising

Reassembled valves/springs. Not as finicky as I expected it to be? just used a pick and my finger to position the keepers.

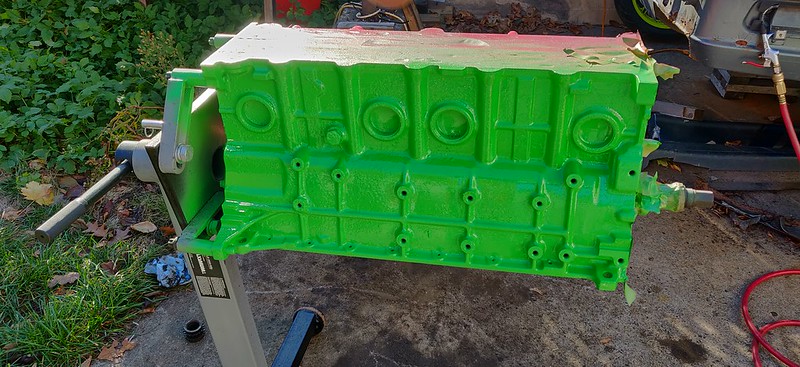
We had a day where it was 20degC, so I figured that was the day to paint the block. I honestly halfassed this so hard. I tried to wire wheel it but I got fed up with how long it was taking.
I emptied a can of brake kleen on each side of the block/scrubbed it, and just primed/painted it.
The colours were left over from Roysneon 's engine swap back in like 2014. I have like a hundred rattlecans of various shit so I figured it was an opportunity to rid myself of two.

Pistons:
Knock is public enemy #1 for my other engine at stock CR, So 99% of people running a 24v will lower the CR to 8.5~9.0:1 either by head spacer or aftermarket pistons.- MLS Gasket used to be popular, and works well on other platforms, but people commonly have leaking issues with them on the 24v so few use them anymore.
- Cutring gasket + spacer is very popular now instead - I don't know if they're all the same or not, but they're typically $500 for the full setup.
Less sensitive to surface finish/install, but the cutrings are loose from the gasket and if they shift even a little, you can have contact with any of the valves.
If they do fail, the cutring does not stretch like the stock fire ring - it drags the opposite side into the combustion chamber and potentially creates more of an issue.
If/When you replace it, you're out another $300 or so for another consumable gasket.
Resurfacing the head is going to have to take off a slightly thicker amount of material to clean up where the gasket bites in. IDK if that's a problem or not. - Other Pistons: IMO this is the only option worth pursuing.
Obvious correct move would be a set of 8.5~9.0:1 from CP/Wiseco/JE/Mahle/etc. All similarly expensive, ~2x the cost of the cutring option.
Slightly less costly are AMP44 pistons, Only ~$200 more than the cutring option, but not really proven. Pasi is running some modified ones in his car and has a video about them.
I spent a few weeks looking for stock options, and found that M42 pistons have a height/dish that seems favorable for boost, but they are an oldschool aluminum piston with a steel strap cast into them, so I don't imagine they're very strong.
So instead of aftermarket pistons, I found someone on a euro forum that had machined their stock 24v pistons to lower CR.
I think people have pushed stock M52 pistons up to like 800whp with the only issues being ringland related from either heat or knock. So I figured I'd try the same.
In ~2016 I asked my stepfather if he would be willing to shave these pistons for me. He only has a hobbyist lathe, but he did a good job of it.

It took so long the first time around that I got them semi-polished and called it good enough. Once I measured the heights they weren't the most consistent... I took the lower numbers and went back to the granite/sandpaper until I had them close to equal. This took a while and by the end of it I wasn't in the mood to take pictures.
Height difference:

Weighed them all, plus the rod small ends (as best I could within the spirit of the build), and paired them up.

I coated the skirts with some dry moly coating. Not sure if this is ok to do but I wanted to see how well it laid down.
Then I started to assemble.


The granite makes an appearance

You can see the fly cutter pass on the block, I guess the factory finish isn't the most precise.

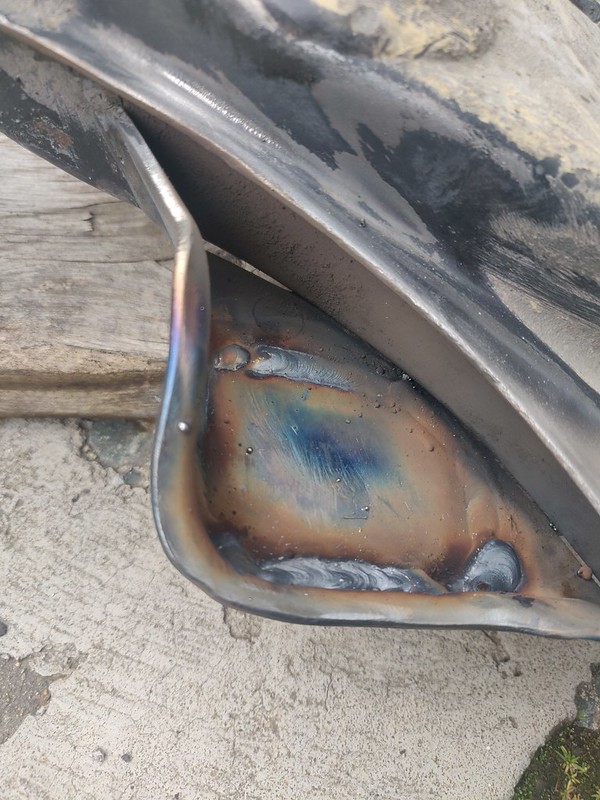
I drilled the block for an oil return in the same spot as my other car, and tapped it for a -10AN.
This fitting was already in my old iX, so it was somewhat modified already. The biggest difference is that I JB welded this to the block to hopefully seal it and prevent rotation when I install the drain, because those were issues after I did this on the other car.

Backside is shaved down almost flush with the block. M52 crank has a lot of clearance here

Rear sump pickup support had to go. I had to retain/flip this bracker on my other car and the bolts are torqued via angle so I assume they're TTY and should be replaced. This time I went the "snap the shit off" route.

You can kind of see the finished result in this pic, along with the maxppdingdongs with new bearings.

I pulled the oil pump apart - it was covered in sludge on the outside and I wasn't sure how the inside would look. Surprisingly not bad.


1.8T oil pump chain tensioner - I guess there's a tan coloured version that's more popular, maybe just a different brand?

Not really hard to locate holes, just don't hit the rib on the inside of the block with the bolt hole, or the oil pump bolt with the spring hole. The spring hole has to be on one side of the bolt hole, and most people put it on the other side for more tension. I don't think it needs that much though?
New chain and pump nut is tacked.

I didn't replace any of this stuff on my car, so I had an almost full Elring gasket kit from blunttech still. Cleaning this timing cover inside and out took me like 90 minutes before I gave up. Every surface inside and out was coated in crud.
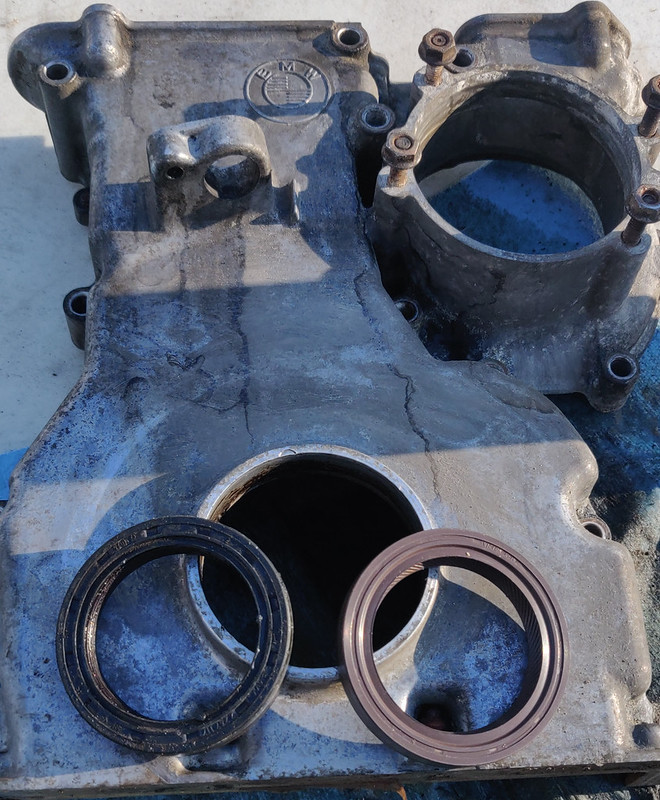

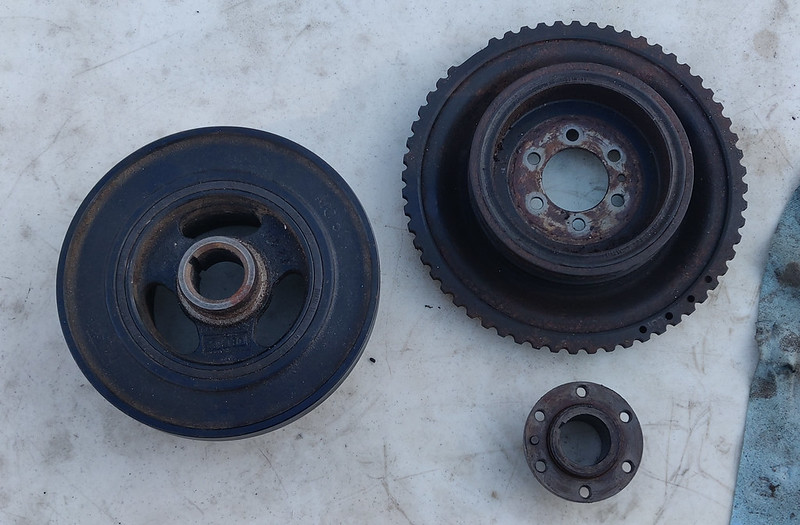
I have beef with the early M5x damper with the built-in trigger wheel. Why? No logical reason, but I found this M54 damper for cheaper. Is it better? idk. Nisse is/was running some form of M54 damper on his white car to 8k RPM so it can't be that bad.
TDC mark was off by like 1-5 degrees though? The "T" of the O|T marking on the M54 damper lined up with the original mark.
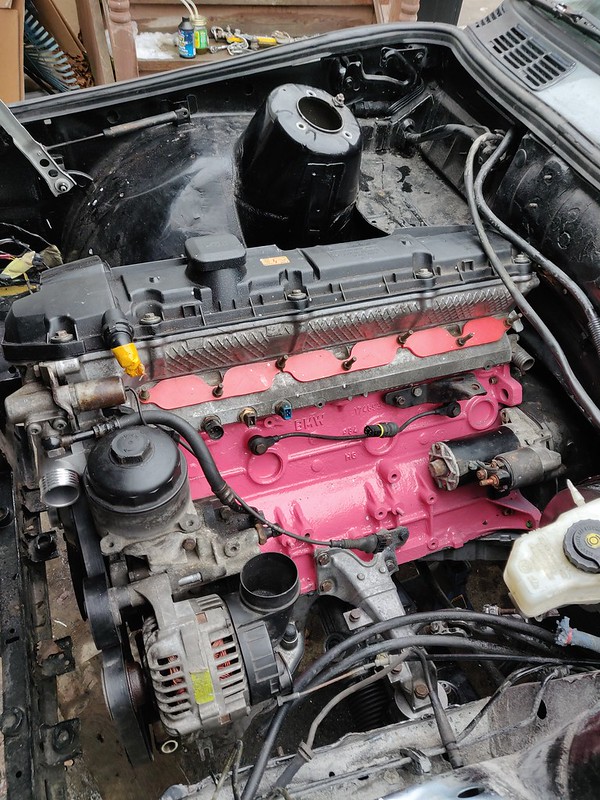
I eventually got the oil check valve out of the head to try to flush anything out of the head. Reinstalled it and cleaned everything up for a new Elring gasket.
(picture taken in the dark)
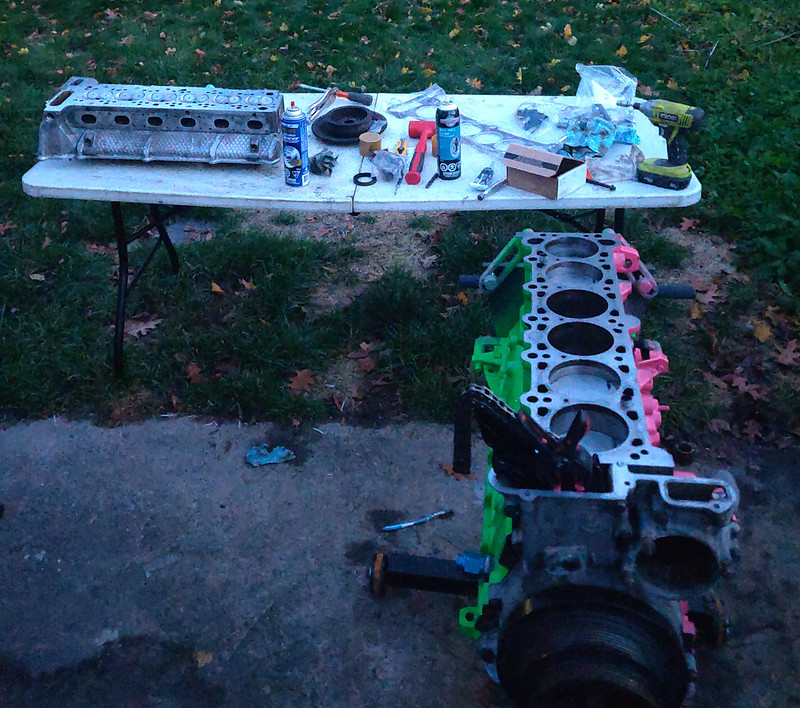
Head installed
 Last edited by Northern; 11-17-2020, 06:21 AM. Reason: Some flickr links immediately stopped working?Originally posted by priapismOriginally posted by shameson
Comment
-
wow the starting point of this build...this is fun as hellComment
-
It doesn't feel like it, but it's been nearly 2 months. I was still picking away at this project through exams, christmas, and the New Year.
Picking up where we left off, I modded the M52 headers to delete the SAP ports. I have delete plates, but why not just weld the channels closed.


Cleaned and copper sprayed the old gaskets. I didn't order new ones because I know I have new ones here somewhere, I just failed to find them in time...

New N54 studs, E36 nuts.
Apparently there's another part number (I think something diesel?) that is a few mm longer, which would be nice for running these on a turbo, because you have to back these ones out a few threads...
EDIT: 11128597830 is the part number I was looking for.
The N54 stud is 39mm, while 11128597830 are 47mm.
The N54 stud works for stock manifolds and probably for a lot of other things, but my RapidSpool manifold's flange is thicker than stock and the nuts do not have safety on the N54 studs.
Application is supposedly across N47, B37, B38, B47, B57, N57 engined cars.

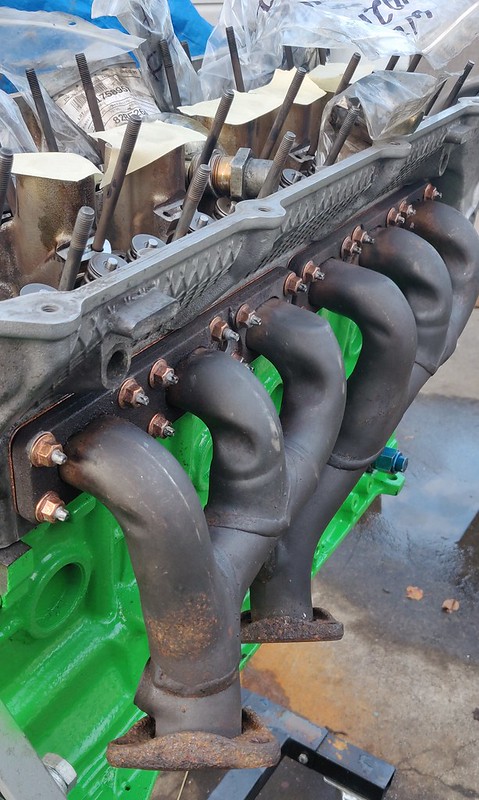
Cleaned this up, new gasket.

Lifters were a massive ordeal.
1. they were different than my other set. Other set are INA and these were some BMW 883.x and are slightly heavier/different piston size.
2. Most of these were seized so I needed to clean them
3. Other set had corroded the wear surface, despite being covered in oil in a sealed plastic container (??????)
4. These ones also had some pitting on top, so I polished the worst ones, which made this take almost twice as long...

One wasn't assembled correctly and I got the ball and small spring out for some pictures. The others, I just cleaned them by hand with Acetone/white scotchbrite/qtips.


I cut up an Innovate LC-1 Gauge to see if I could desolder the 7-segment display to extend into where the CHECK light lives. Looks feasible.
Lots of shmoo before the cams go in, blocks came back just in time from someone I borrowed them to.


Main tensioner springs from a few used M52 tensioners. Kind of just mix&matched the best of 4 tensioners and threw a shim under the best spring.

I wanted to reinforce the front subframe, but every vendor for the plates is in the US and it ends up being >$100 after shipping for a few flat pieces of steel so I just made my own.
I didn't reinforce the sway mounts because I honestly have no idea if it even fits with these downpipes/if I need to shim or what.
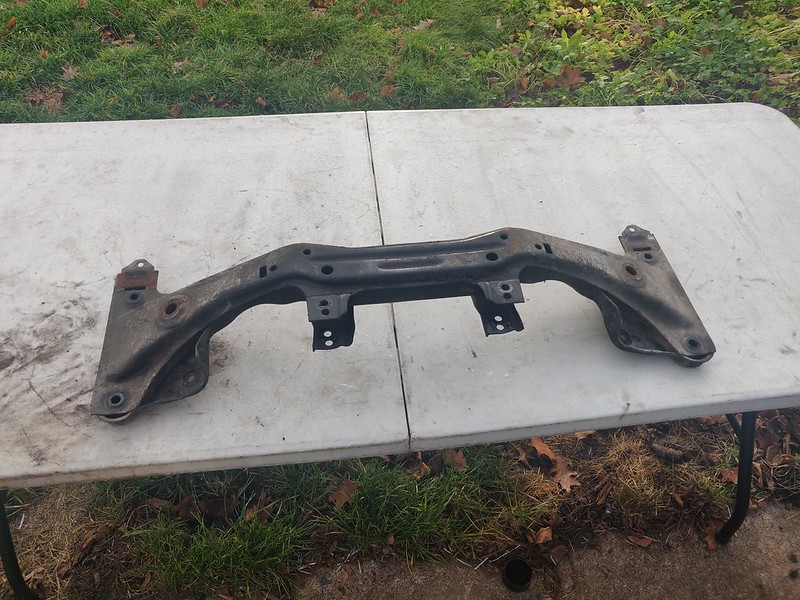


I piloted the middle of this hole from the top hole, with a 1/4" bit, then holesawed the socket clearance hole from this side:

 Originally posted by priapismOriginally posted by shameson
Comment
-
(2/2)
Here's a throwback/r3v reference for you.
Like 10 years ago, I bought a full set of E30 bushings from some dude named Lencas in Lithuania
( https://www.r3vlimited.com/board/for...hined-bushings )
Toward the end of that thread you could see it go south. It's the reason my hood has a big crack in the paint - the engine mounts and trans mounts are too tall, and none of the other bushings are much better.
I removed a section of these mounts for some .120" aluminum sheet and ran them with my m20. Now they serve no purpose, but they seemed easy to modify into 24v swap mounts.
I kind of just eyeballed how my Condor Speed Shop mounts were on my other car and went for it.


I bolted it all up to the engine with the exhaust. Exhaust is too close for comfort, so I gave it some BFI


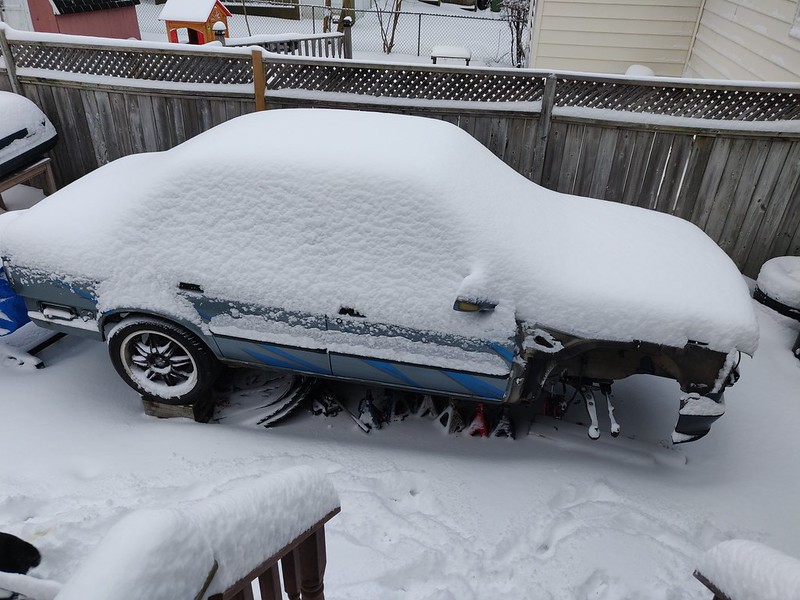
I failed at my goal of having the engine in the car before snow. Hell it snowed again since this picture too.
Pan going on, but neglected to take a picture of the pan installed. Trust me the patch job is not something you want to see. I didn't make a baffle or anything either, as this engine will probably explode long before it encounters an oiling issue.

Found some accessories in the shed, and stopped cleaning things that I installed. We're at the point where I simply cannot be bothered.

Then again, I did clean/paint the back of the block before I changed the RMS.

Factory approved FW torqueing method

Installed the shitty clutch/pp that somehow made the flywheel cheaper than buying the flywheel alone.
My mercedes friend has my alignment tool to manual swap his 190e, so this is some other tool with a hole drilled in it and a socket jammed inside.
Stay classy.

Everyone failed to mention the stainless pin would be 2mm larger diameter than the stock one... That wasn't concerning at all.

Spending the money where it counts... the TOB...

Free oil from Iain. Zero seals replaced, zero cleaning attempted.
There was like 300mL of fluid in here when I drained it lol. At least it wasn't dry I guess. I have a few G260s, but this one is off my iS.

Ready to go in, Maggie approves.
In its home.
Next up is harness. Also bought some stuff from Condor, but mostly shirts...
Trans x-brace seems easy enough to make, but I'm lazy.
 Originally posted by priapismOriginally posted by shameson
Comment
-
COTM worthy thread going on hereSimon
Current Cars:
-1966 Lotus Elan
-1986 German Car
-2006 Volkswagen Jetta TDI
Make R3V Great Again -2020Comment

Comment