
Wish I knew about that 3M product when I had my Corvette.
Talk about a shitty plastic interior with broken tabs all over.
-
I'm pretty sure I have a rust free fender bottom- will check tomorrow.Leave a comment:
-
Yah i think I remember you on posting on FB, once I have the car done and running we'll have to meet up. I won't be moving to Charlotte but working there full time during the week so will definitely be aroundOriginally posted by bradnic
Thanks Mike!Originally posted by mike.bmw
Sh3rpak!ng rzerob that stuff is great, I totally forgot I had it and didn't think to use it, I have a ton more things to fix now that I think about it. There's another faster drying product they make, 3M 04247 but the work time was way too quick (~30 secs) and you end up blowing through a ton of the mixing nozzles, and the consistency ends up more rubbery when dry. The 04240 dries to a hard plastic consistency. What's nicer about this than JB weld is JB weld is nice for reinforcing tabs that are cracked but still there, while this stuff you can literally make a tab or bracket out of nothing. I was skeptical at first but it adheres really well and is stronger than the surrounding plastic
Leave a comment:
-
Wow. Great job on that repair. I have always just done plastic welding and sometimes some reinforcement with some JB Weld. But that stuff looks like it fused with the other plastic so I will have to try it out. 04240 3M added to the list.Leave a comment:
-
nice job on the HVAC panel fix... making a mental note of that repair technique. Pretty sure I've got a handful of broken plastic tabs sprinkled amongst my vehicles
Leave a comment:
-
SUB'D. Can't believe I missed this thread. Wonderful work!
Just move to Charlotte so not that far away. Have some E30 Raleigh buds as well.Leave a comment:
-
Yah I saw that and a couple others and was about to pull the trigger! I ended up posting a WTB ad last night and a guy I've bought from before has a really nice one that I ended up buying, so I have the sunroof panel covered at least. Still on the hunt for a fender unless I can find someone with a welder.Originally posted by Melon
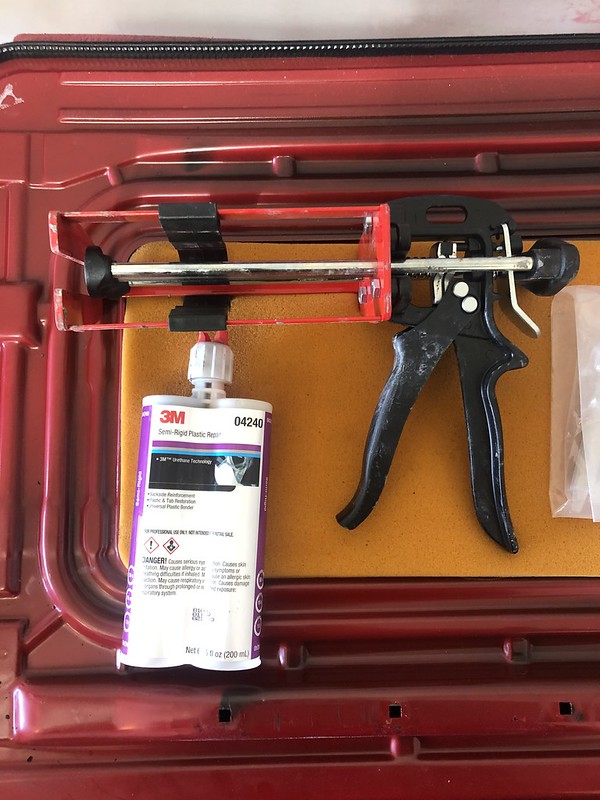
Today's after work project consisted of fixing my HVAC panel. In preparation for a nice upgrade I'll be doing I removed the HVAC to try and track down some wiring. The mounting tabs had been cracked since my dash swap and this time they just fell apart. I bought a replacement panel but mine was cosmetically in better shape. I forgot I still had some plastic parts repair adhesive lying around that I used on the MTech kit and figured I'd try my hand at just repairing the tabs on my original panel:

At least my rusty sunroof was good for a work bench:
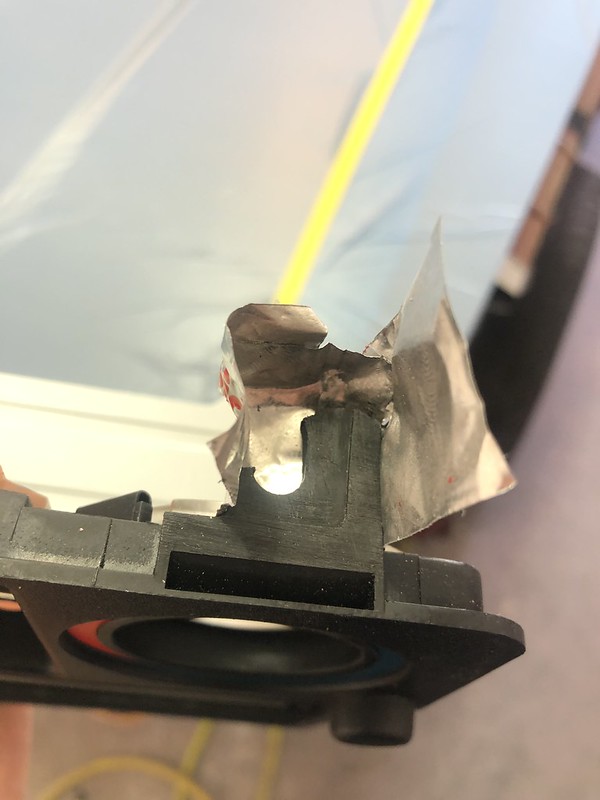
Roughed up the plastic and used some aluminum tape to build up a dam:

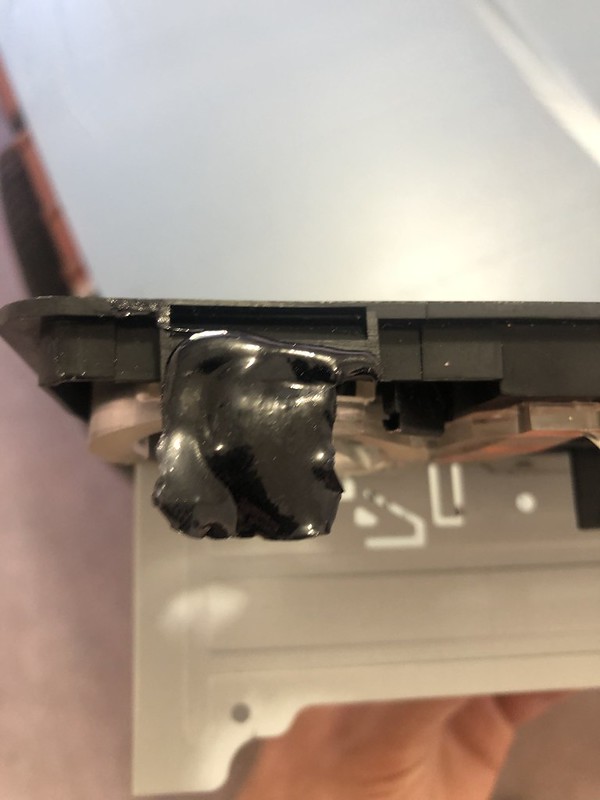
Then filled with the 3M 04240, it has a really fast work time ~ 1-2 mins, ready to sand in 15 mins and fully cured in 1 hour

Removed the tape, then trimmed the excess with a sharp razor blade and sanded down until I was happy:
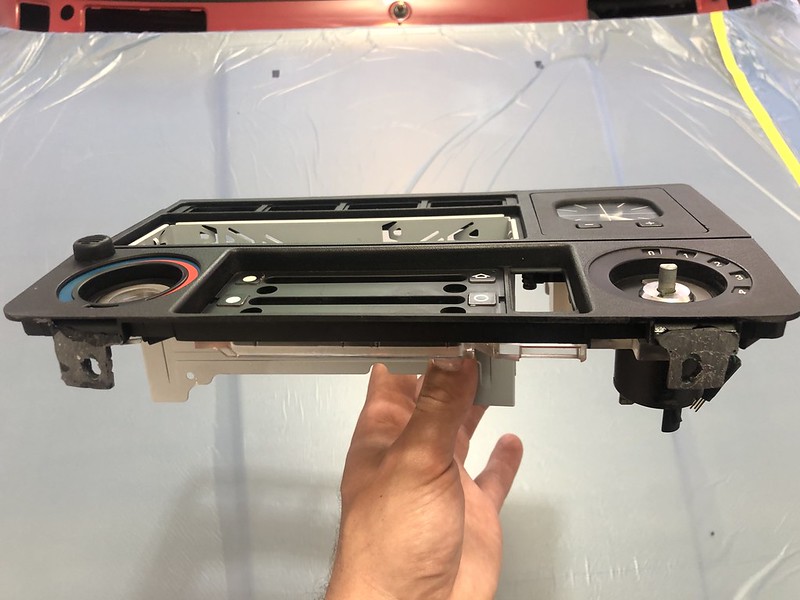

Was way stronger than before, I'd have to snap the whole panel in half before a tab would break.
Good as new, and stronger than ever:
I find that little things like this can be so much more satisfying than some of the bigger fixes since I have to look at that panel every time I drive the car
Leave a comment:
-
Chassis is solid!
There's several roof panels on eBay.
https://www.ebay.com/itm/BMW-E30-Sun...IAAOSwq1Nd~xTn
It's Bronzeit though.Leave a comment:
-
No formal training just lots of YouTube and reading. LOTS.Originally posted by Tzantushka
The Mtech spoiler is just black foam rubber, only the insert is painted so shouldn't have to worry about that thankfully.Originally posted by Melon
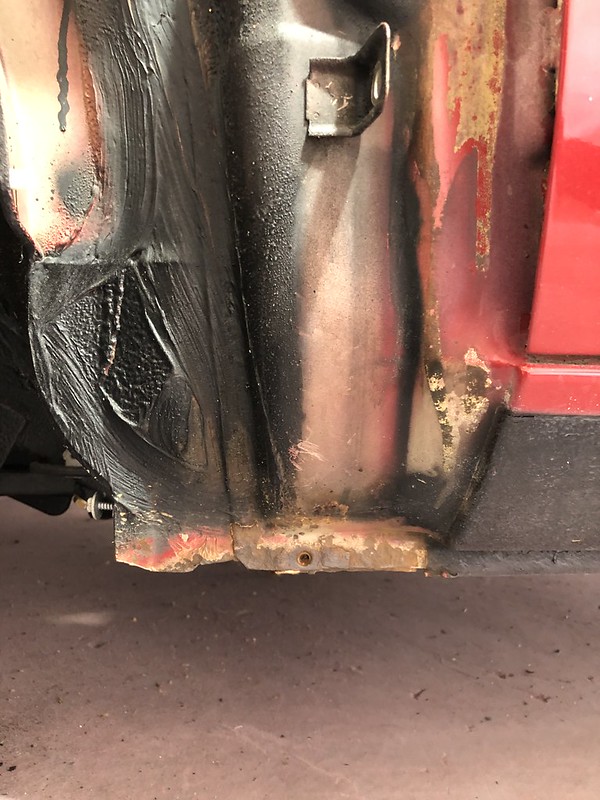
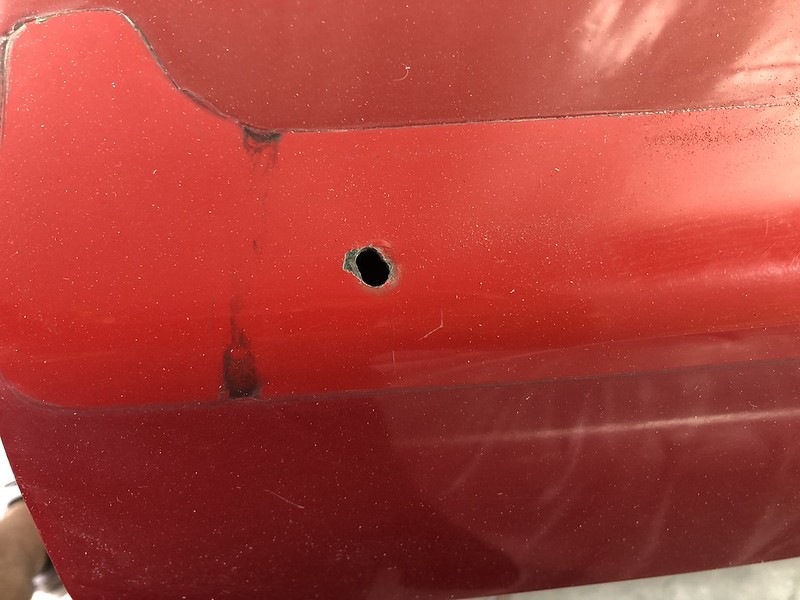
After getting the hood and trunk settled I decided to remove the fenders and assess for any rust/damage:

Other than the hole in the driver fender, there was only a little bit of underlying rust, nothing structural thankfully:

Some surface rust starting on the passenger side:
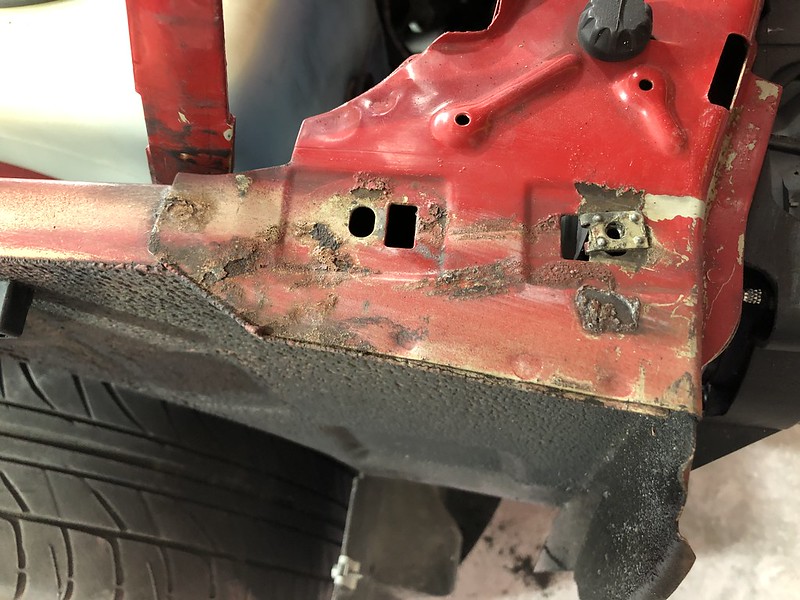
Otherwise pretty clean:


The driver fender was in really great shape other than the hole:
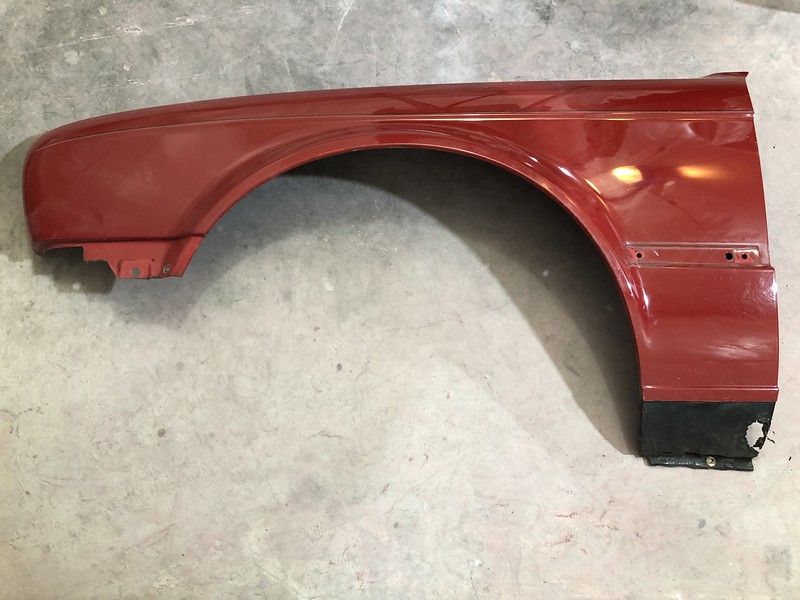
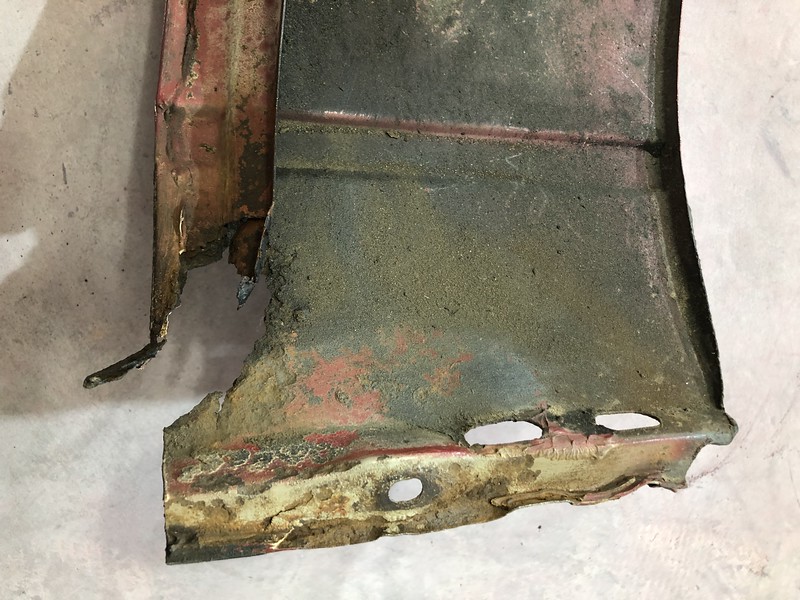
I wish I had a welder as it doesn't look all that hard to create a patch for that area, and I wouldn't even care about cosmetics as the MTech side skirt covers that area anyway. I reached out to the local NCE30 interwebs and everyone seems to say it isn't worth patching it as it'd be cheaper just to replace it with a good used fender. So I guess I'm in the market for a nice clean driver fender if anyone has one?
The passenger side had some rust on the inside, I ended up cleaning that along with the body rust with a wire wheel and coated with rust encapsulator:

Used a hammer and dolly to straighten out the bottom, it was a little warped/wrinkly


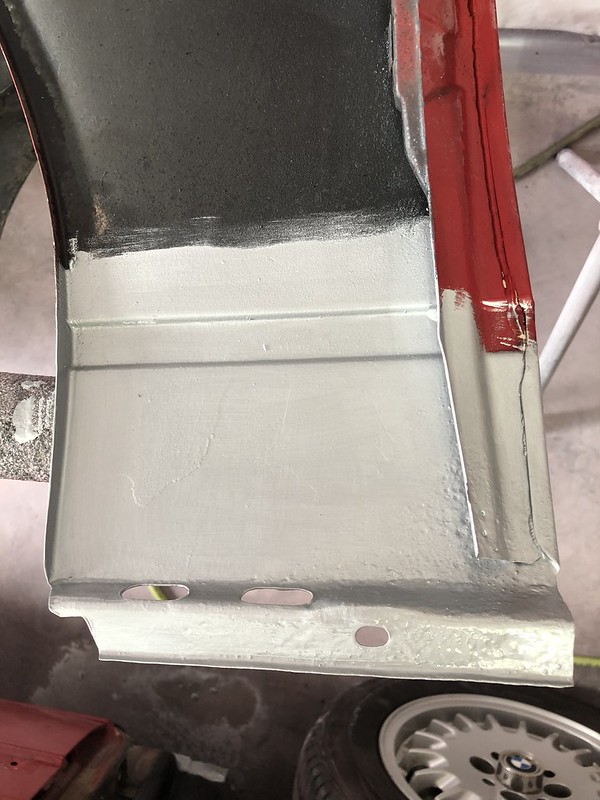


Will end up spraying some underbody coating on the wheel well areas.
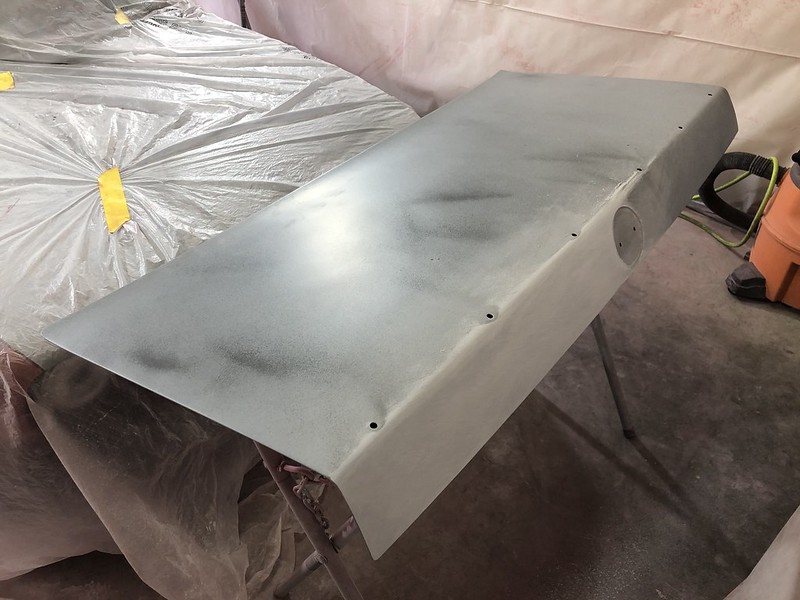
Then I removed the sunroof panel thinking it would be a nice quick sand/primer job. WRONG.
It all looked pretty good, however once I tilted it I could hear all the rust flakes sliding around on the inside:

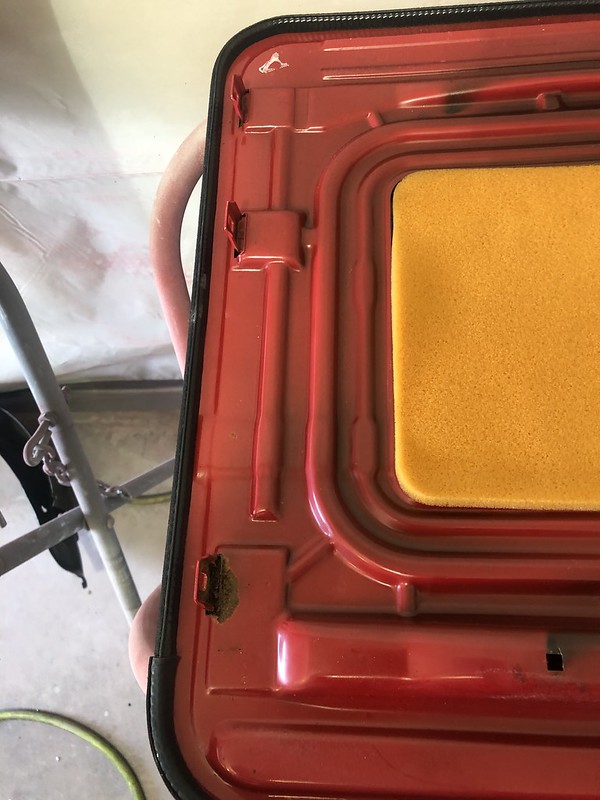
The driver front tab was rusted pretty good and was right under the area on the top surface where the rust bubbles had started, so pretty sure once I sand that down I'll be looking through some pinholes in the metal.
There was some on the other side too:

It's hard to tell through the small holes between the tabs and panel itself, but I'd bet the whole underside of the panel is rusted pretty well. Ugh.
So looks like I'm in the market for a good rust free fender AND sunroof panel. I'm more upset at wasting the time to track down the parts than about the cost at this point. Was cruising along and no telling when I'll be able to locate some good parts. If anyone knows anyone with spares lying around please send them my way!
Last edited by Albie325; 05-27-2020, 03:33 PM.Leave a comment:
-
Nice work man!
If you're putting on a new spoiler I painted mine with the trunk lid because it came out of the box flat, and the lid is slightly curved. I didn't want to paint it, then install it with the curve and have the clear crack.Leave a comment:
-
This is great progress - and you've had no formal training in bodywork?!
I had the same issue as your trunk with the holes for the spoiler.
Ended up caving in and taking it to a body shop.
Props to you.
Leave a comment:
-
Some MDW progress!
Been busy FINALLY getting to work on the actual body work.
No, I'm not just drawing random tiddies on my hood:

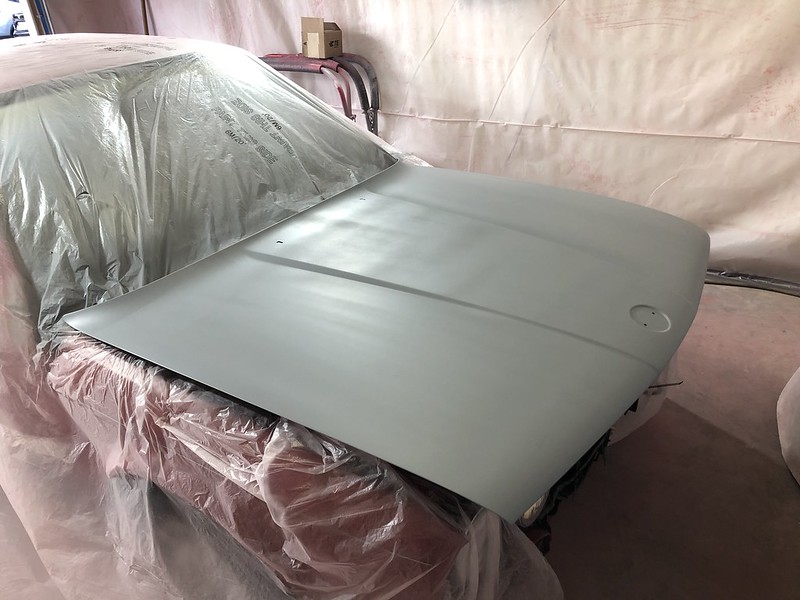
Just popped out a few of the only noticeable dings, there weren't many. Got it all sanded down, started with 80 grit on a block sander followed by DA, then feathered with 180 grit. Found the prior baseball damage and ended up just redoing the filler, only needed to fill 3 small spots on the whole hood:
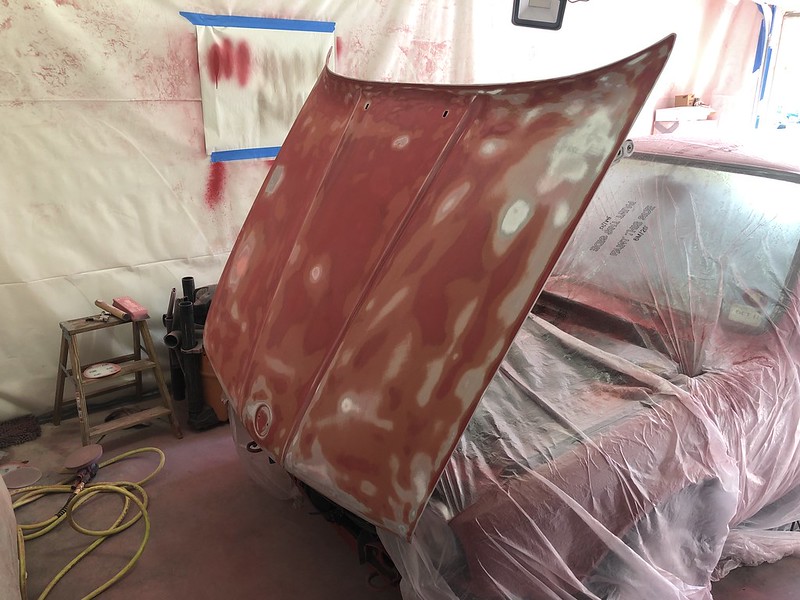
Took me the better part of a day and a half to get to this point. The hood was repainted not once but twice, as the first repaint after the baseball dent repair was way off and my dad had it re-repainted. Took quite awhile to get through 4 layers of paint and down to the original.
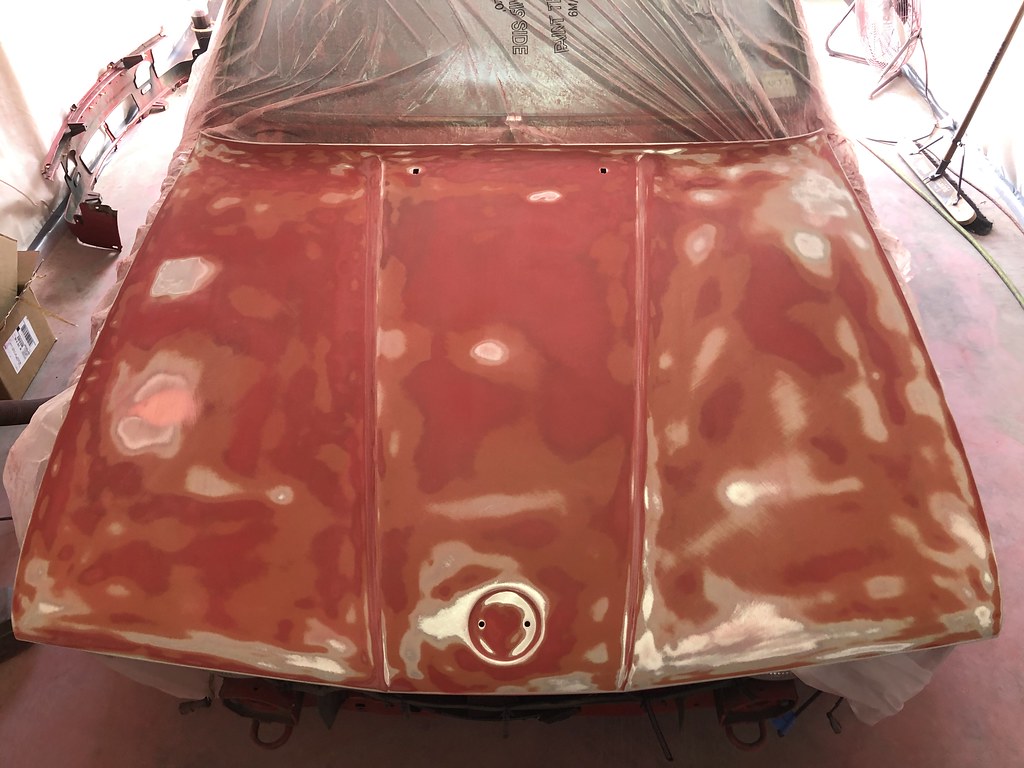
Got everything back masked:

First in epoxy primer to cover all exposed metal, I took the whole perimeter down to metal to ensure the paint would stick to the edges. Didn't intend on coating the whole hood but mixed up more paint than needed so ended up covering everything:
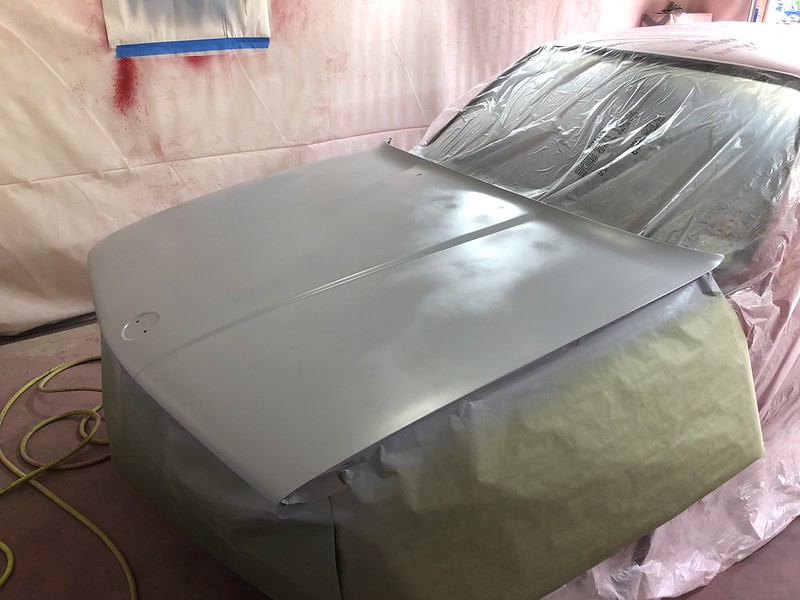
Next up was 3 coats of high-build urethane:
I let that cure overnight, then guide-coat and block sanded in 320 grit:
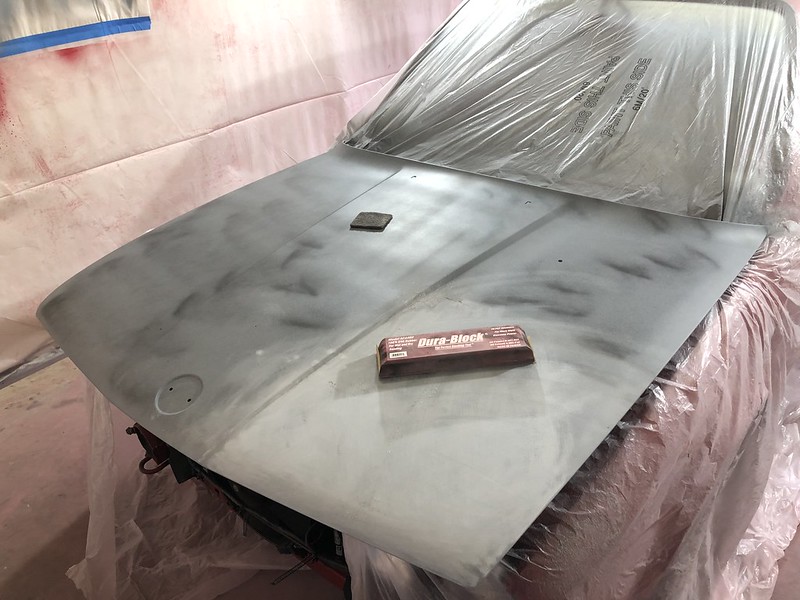
Followed by wet sanding in 600 grit:

Had a couple small cut throughs that I spot primed and re-sanded, final product:

Once I got that done, I moved on to the trunk:

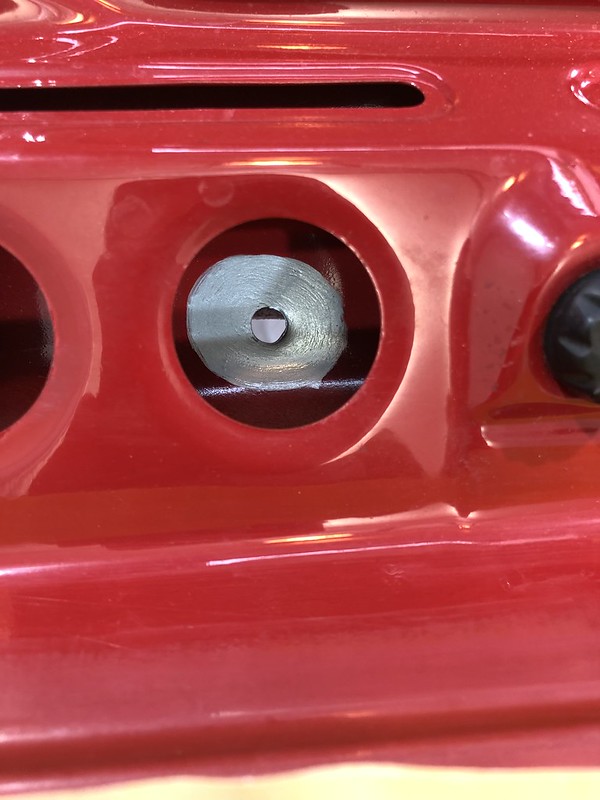
Had the start of some rust around the spoiler holes, and some of them were double-drilled:
Got everything sanded/blended:

And redrilled all the holes, they're a touch larger than spec but they look way better and shouldn't matter for actual fitment, especially since I'll be using some mounting tape to keep the spoiler in place:

There was also the start of some rust on the underside, only a couple of the holes were effected:

Ended up cleaning them up with a wire wheel then coating with some rust-encapsulator:

I tapped down a few dings that had been there since we've owned the car, couldn't really capture them in pictures but the result was really nice. Didn't need any body filler in the trunk. Masked off:

Epoxy primer for the exposed metal:

Then high-build:

Guide-coat and block sand in 320 grit:
Followed by wet sand in 600:

Then remounted the trunk (for now, I have nowhere to store it without dinging it) and covered the finished panels in plastic to protect the primer as is cures:

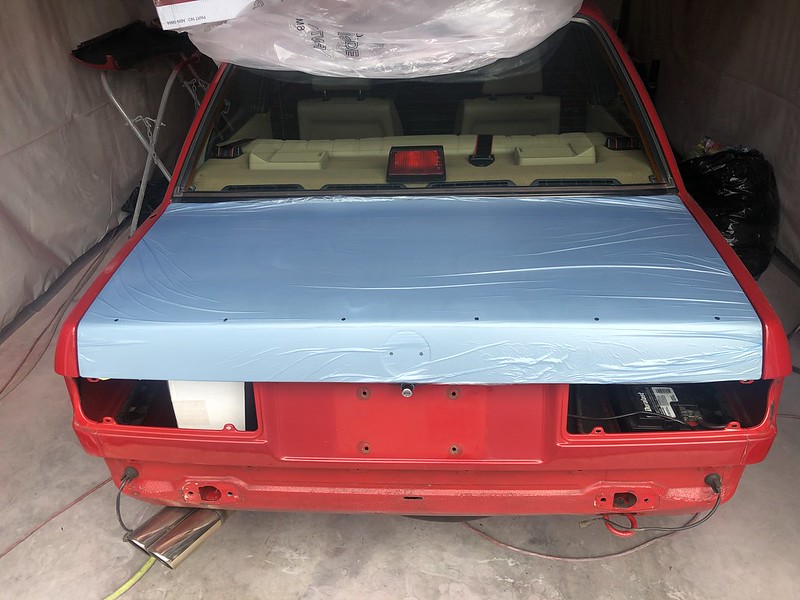
I plan on letting the primer cure for a couple weeks to prevent any shrinkback prior to base/clear. Have done a bunch more, but will save for another post. I need to get better at taking before pics, have been excited to make progress and keep forgetting to properly document the steps/process.Last edited by Albie325; 05-26-2020, 03:03 PM.Leave a comment:
-
Yeah I've been perusing, no luck yet. I don't think I want to buy a whole passenger mirror just for the clip, but it may come down to it and they're cheap enough.Originally posted by Melon
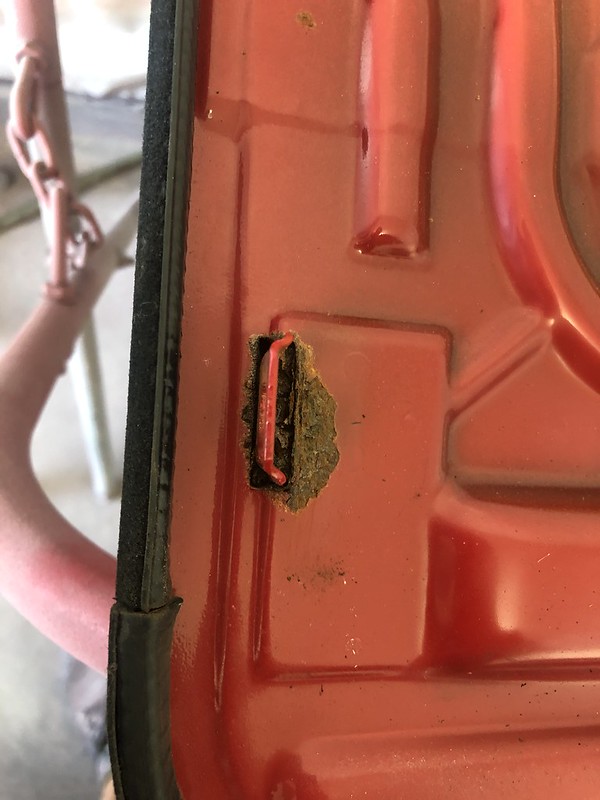
So after fixing the differential I found another nasty surprise. I had noticed over the past 6 months or so that every time I filled up my gas tank completely full, there would be a pretty strong smell of gas in the garage and in the car for the first few days until I drove it a bit. I figured it was the overflow tank plastic being 30 years old and leaking a bit as I saw no signs of a a leak anywhere. Well when I got under the car I could see a trail of dried gas running down the sides of the passenger side gas tank. I lifted the seat to find this:

All the paint around the in-tank fuel pump was bubbled up, and the pump was kindof just floating in space and not sealed. Turns out, the locking rim on the fuel pump broke off:

Very annoying. I was more mad about having to fix the paint and having it not look as nice and pretty as it did before. Oh well, it was an easy enough fix:


Had to brush it on rather than spray it so it was more streaky in appearance.. The tank is coated so could have probably just left it alone, but I didn't want to risk any rust down the road.
The old pump was an aftermarket pump that had been in the car for at least 10 years and still worked great. I have 2 used OEM pumps lying around but wasn't sure if they worked so decided to spring for a Spectra Premium one. I typically prefer to buy better parts but I couldn't justify $400 for a BMW pump.
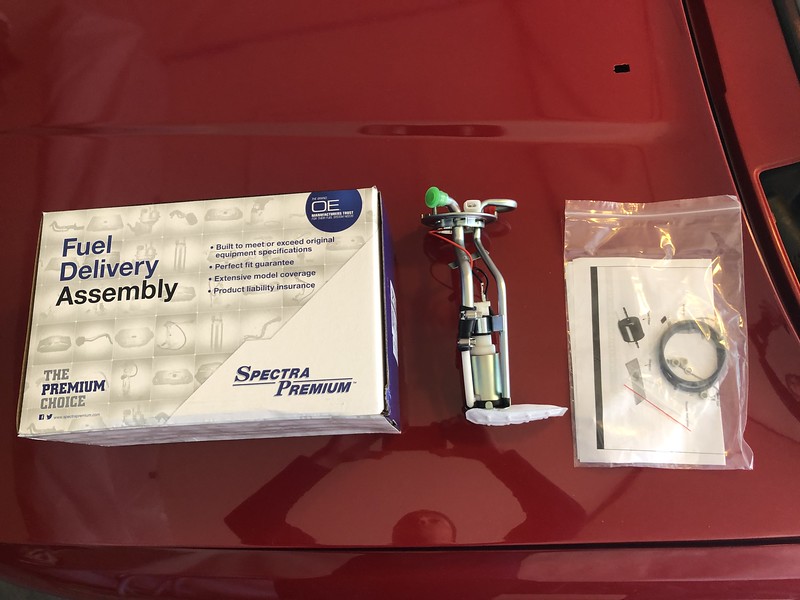
(Almost) good as new:

I've also gotten a little sidetracked with knocking out some other small things that will need to be addressed while the car is disassembled, both some cosmetic repairs as well as some nice little upgrades! Will do some writeups on those when it comes time. For now I can finally get back to the task at hand of sanding/priming this week!
Last edited by Albie325; 05-10-2020, 06:14 AM.Leave a comment:
Leave a comment: