Announcement

Collapse
No announcement yet.

Long Time Dream Fulfillment: E30 Street and Track Car Combo

Collapse
X
 
  • Filter
  • Time
  • Show
Clear All
new posts

    Long Time Dream Fulfillment: E30 Street and Track Car Combo

    What's up everyone! I've always loved making build threads for my projects and thought I'd post up my current one. I recently got the E30 itch again and always regretted selling my '87 325is back in 2017 that I put a ton of work into, you know how it goes. I've been dreaming about doing track days and autocross events for years and have always loved the idea of a well sorted street car that can double as a fun track/autoX toy. I'm just looking to have fun out there, not getting too serious about it.

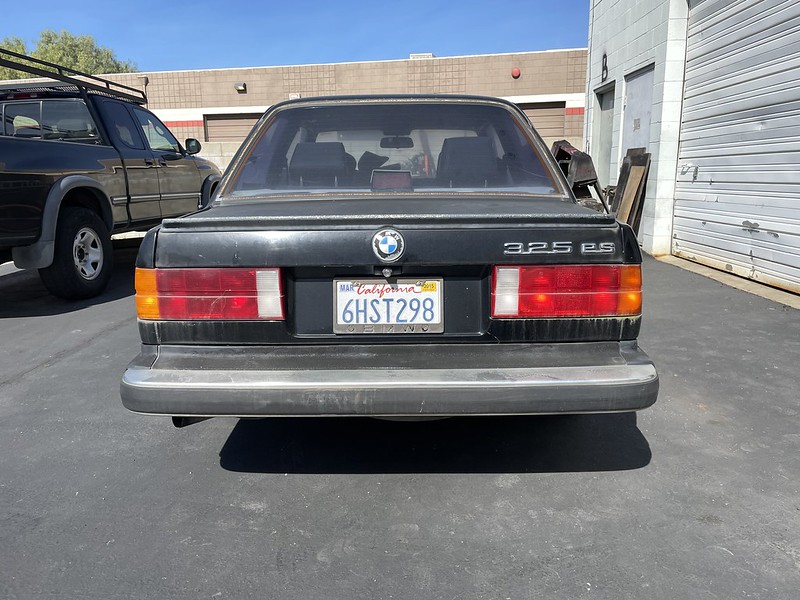
    Anyways, once I got the itch and the gears were turning, I sold off a car and a motorcycle and had some modest funds to work with and the frantic search began. I knew I wanted an early coupe, that was pretty much my only criteria. Since I wanted a project, I had my eyes out for "mechanic special" type deals and eventually came across a 1986 325es on Facebook Marketplace that had been sitting since 2015 with a blown headgasket and the engine was completely disassembled and the kid was in over his head and just wanted it gone. Perfect for me. This was one of the pics from his ad:


    I kept an eye on the ad for a couple weeks and it never sold, so I hit him with an offer and picked it up on Feb 27, 2021 for $700. Towed it 4 hours home and got it back safe and sound, made a pit stop on my way back and bought some parts for it too. It is kind of rough in some ways, but it has a ton of potential:


    It had these bitchin ///M POWER headrest covers. Also the royal purple tint cracks me up:


    And a fully disassembled M20B27 head in the trunk:


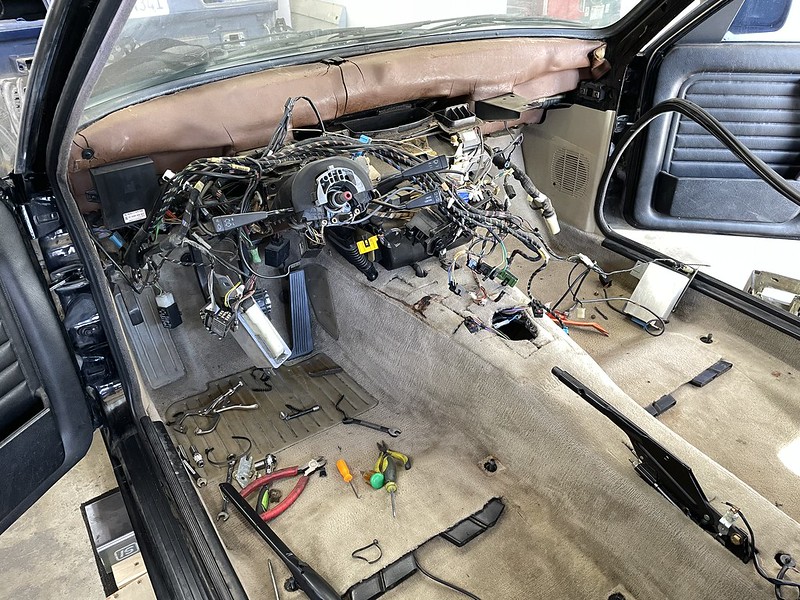
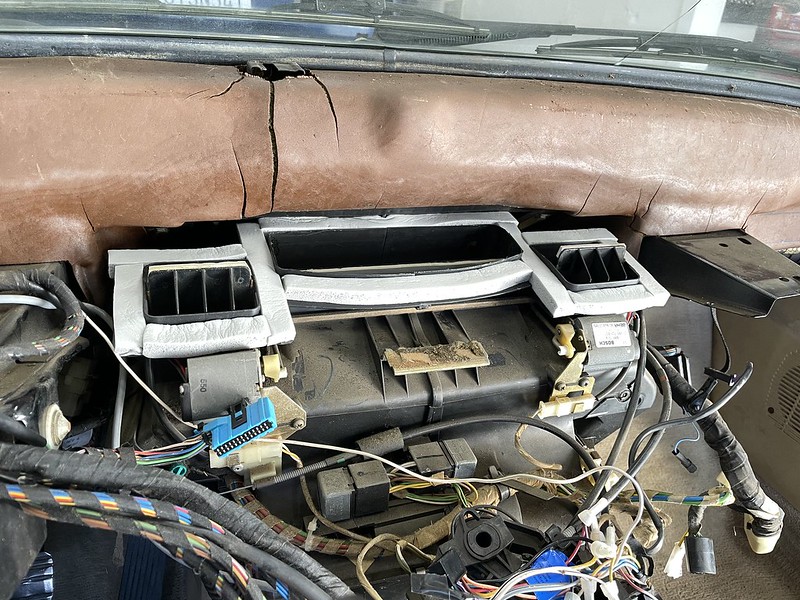
    First order of business was beginning to disassemble the front end and wash the engine bay, it was real dusty and grimey:


    Better!


    I didn't waste any time. Got it up on the lift and inspected everything. It's super dry and clean! No rust whatsoever (it was always a CA car) and everything is straight, just dirty and old:


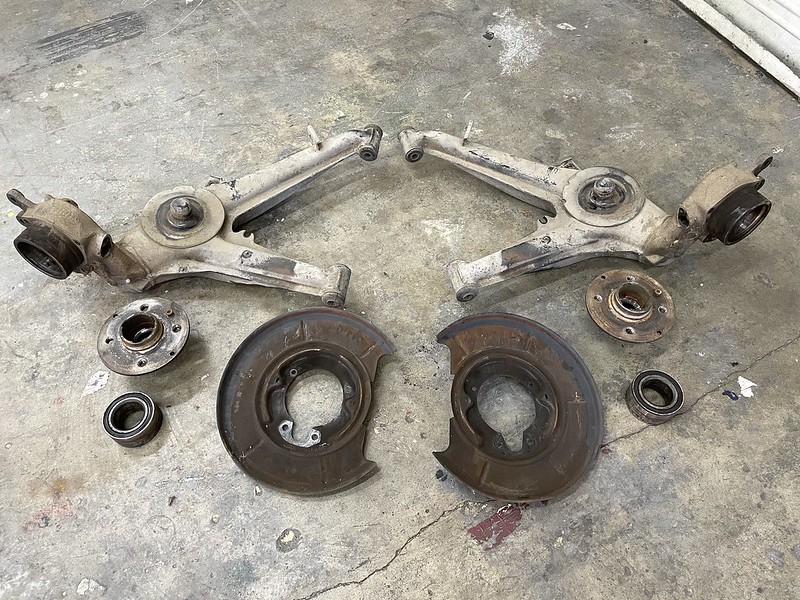
    Then I pulled a couple bolts and out came everything:


    Then disassembled further...


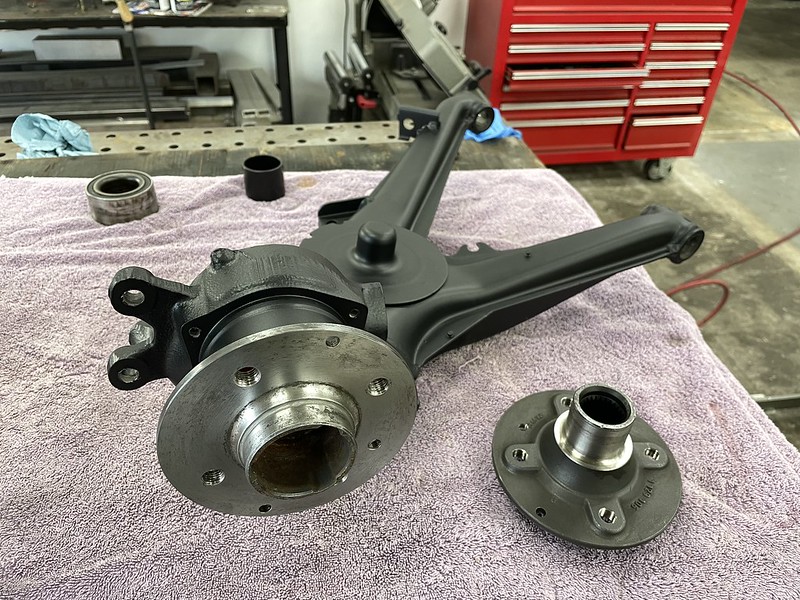
    Reinforced the front subframe with motor mount, sway bar and ball joint weld-in reinforcement plates:


    I didn't get pics but I also reinforced the rear subframe differential mounts. Then added trailing arm sway bar mount reinforcement:


    Buncha goodies are starting to roll in!


    Steering shaft modified for E46 330i purple tag steering rack upgrade:


    Scored a $1000 late model convertible parts/donor car locally. Will be pulling a ton of stuff to put onto the early model like plastic bumper setup, valances, windshield, wheels, hood, dash, etc. Then will part out the rest:


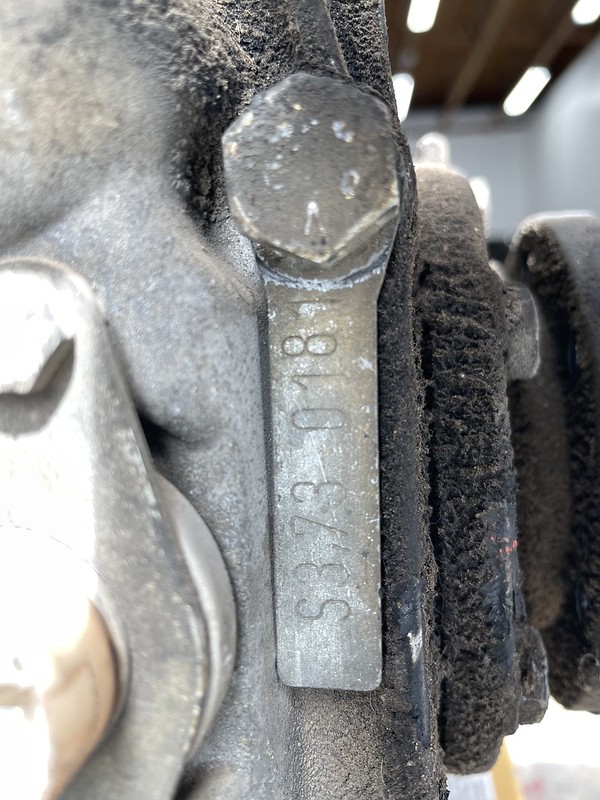
    Also scored a 3.73 LSD diff! This car is getting an M20B25 so the 2.93 LSD that came in the car isn't really a good fit for what I'm after:


    Built a funky dolly setup so I could roll it outside and my Dad went to town on the underbody with the pressure washer:


    So that about gets us up to speed! I bought the car a month ago today, so progress is happening pretty quickly. I just dropped off a bunch of suspension parts at the powder coater yesterday and am still waiting for some parts to show up. Ordered a complete Ground Control coilover setup with Koni reds and I'll be shortening the strut housings, as well as some Revshift poly bushings. I'm prepping an M20B25 to drop in at the same time as the refreshed front/rear subframes. Getting really excited! Will post more updates as they happen. Thanks for checking it out
    Last edited by CubbyChowder; 03-27-2021, 08:09 PM.


    --Roundie Revival 2.0 - 1973 BMW 2002 Build Thread--
    --Golden Boy E30 Build Thread-- (sold)

    #2
    NICE! That's a lot of progress real quick. The vert almost looks too good to just part but I'm sure it has its issues. Always love seeing your threads, can't wait to see more!
    '86 325e Zinnoberrot /// '02 325ci Schwarz II /// '18 M4 Azurite Black Metallic ///

    Albie325 Build Thread | Albie325 COTM Jan 2021

    Comment


      #3
      Originally posted by Albie325 View Post
      NICE! That's a lot of progress real quick. The vert almost looks too good to just part but I'm sure it has its issues. Always love seeing your threads, can't wait to see more!
      I work quickly when I'm excited haha. But yeah I agree, the vert is actually in pretty damn good shape and a part of me feels guilty cutting it up but it definitely has it's issues and is automatic. Interior is pretty rough and smelly. It just has so many parts that I need to fulfill my vision for the coupe that it feels justified to decommission it for the sake of getting another junkyard bound E30 on the road haha at least that's my reasoning. I'd spend thousands sourcing all those parts individually and with this approach I should be able to break even and get everything for "free" essentially.


      --Roundie Revival 2.0 - 1973 BMW 2002 Build Thread--
      --Golden Boy E30 Build Thread-- (sold)

      Comment


        #4
        Always in for some cubby progress- I am excited to follow the build!
        1990 Brilliantrot 325iS Build Thread
        1989 Zinnoberrot M3 Build Thread

        Comment


          #5
          When you part out that cabrio, I'd be interested in the carpet if: it's in decent condition and it's black (or dark grey/slate). And maybe some other stuff too.

          MM

          Comment


            #6
            Minor update, finally back on the E30 project after being pulled away for a few weeks.

            Always one of my favorite days: when parts are back from powder coat! I am a DIY'er to the core, but one task I've grown to absolutely loathe over the years is paint prep and spraying paint. I drive myself crazy in the prep process because I'm anal and meticulous and then I hate overspray and the act of taming and containing it. In this case, powder coat is always my go to and I will gladly pay someone to do it and exert my efforts elsewhere. This was only $200 and looks fucking beautiful. Plus, it's uniform and durable. It's a no brainer for me:


            You might notice the front strut housings weren't included in that run, those will go in on the next batch once my GC coils arrive and I can shorten the housings.

            Pressed the new rear bearings in. The new bearings in the freshly powder coated TA's is just a satisfying and beautiful sight to me:


            Despite all these new parts, I didn't spring on new hubs as I didn't feel like going down that rabbit hole just yet. So I hit them with a scotchbrite spit shine for a few minutes just to somewhat satisfy me:


            Then I fucked up. I was all stoked on how easily my bearing pressed into the TA after putting it in the freezer and figuring out the right formula of spacers and sleeves to press it in that I just moved right into pressing the hub into the bearing:


            Except there's a sequence here, and I quickly realized the brake backing disc had to go on before the hub got pressed in, so I had to get a bit creative with some various sizes of scrap steel working together to safely press the hub back out of the new bearing:


            With the hub back out, I could assemble properly:


            And the hard part of both TA's is done:


            While I wait for some suspension related bits to show up in the mail, I figured I'd shift my focus to the motor and get that rolling. This is an M20B25 that I've actually been prepping for my long time 2002 project but am now borrowing for this project. My priorities are clearly sound.


            I was in the process of refreshing this M20 like 2 years ago when one exhaust stud sheared off in the head. I tried for a few days to get it out but no dice. Then I let it sit and carried on with my life. Then recently I got re-determined to extract this broken stud and I used some new tactics and was able to get it out but not without some carnage, so I opted to helicoil a new thread in there, circled in red:


            This feels like a long time comin with the broken stud fiasco, but I finally got the exhaust manifolds bolted on with new studs, nuts, gaskets, etc. I also deleted the oil cooler by using the B27 fitting that threads into the block:


            Also started piecing together the front of the engine and got the new water pump and tensioner installed but I had to call it quits there. The existing cam seal and o-ring looked pretty new but I didn't want to chance it, so I got one on order and going to hold off on the engine reassembly until those parts come in.


            That concludes this update. Still waiting on a few key suspension related orders to show up before things really start coming together but progress is happening in one way or another wherever it can. Thanks for reading along
            Last edited by CubbyChowder; 04-06-2021, 08:37 AM.


            --Roundie Revival 2.0 - 1973 BMW 2002 Build Thread--
            --Golden Boy E30 Build Thread-- (sold)

            Comment


              #7
              More progress was made this past week. Parts rolled in and I was able to assemble the engine further. Got the cam seal and o-ring replaced so on went the timing belt, timing covers, pulleys, etc. Once all that was on, I checked the valve clearance and only had to make very minor adjustments to a few. Then cap/rotor and spark plugs and wires went on followed by the intake with rebuilt M50 injectors and t-stat housing with all new sensors and what not. So that's exciting seeing that come together:


              In the midst of this, I learned that adding a crank scraper and baffle is pretty essential for a track car so I got some parts on order from IE. With the engine reassembly now halted, I shifted my focus elsewhere, so I pulled the dash from the vert parts car:


              Then pulled the dash out of my car:


              Realized the ducting foam was nonexistent so I took the Home Depot route and made a little makeshift gasket because I didn't plan ahead at all and wanted to get it over with:


              Got the new dash in:


              Here you can see the two main imperfections on this dash. It has a couple very minor cracks, but it also had some jelly rubber dash pad thing sitting on it for who knows how long and it sat in the AZ heat and faded as things naturally do. I removed the rubber pad and cleaned the whole dash and hit it with some 303 which made it way less noticeable but also still entirely noticeable. I'm honestly not gonna sweat it but if you guys have some pointers on addressing this issue I'd appreciate it:


              This is the dash that came out of the car, so either way this is a huge improvement:


              Prepping some odds and ends to go back into the car when the time comes. Got a nice HVAC panel together and I managed to create a decent looking gauge cluster out of a few parts clusters. I was even able to get the original odometer to the car repaired. This car got parked due to a blown head gasket in 2014 with 169k miles (CarFax shows 165k miles in 2013 as last recorded mileage) so chassis mileage is pretty damn accurate in my opinion and it was worth getting this odometer repaired. A friend of mine just so happened to have an extra set of motometer odometer gears around so I scored those for free and saved myself $40 woohoo I love not spending money on things that I don't want to spend money on:


              But now I need to figure out the 7k tach thing since I'm going M20B25 (any advice would be sweet) and I also need to figure out fuel sender wiring as I'm switching to late model tank/pump/filter from vert parts car with dual sender setup (again any advice would be sweet).

              Also, scored some premium front speakers and tweeter pods from the vert:


              Is this a worthwhile upgrade? Or should I just buy some new modern speaker equivalents and sell these off? The wiring bunch in the driver's side speaker zone definitely does not want to accept the new premium speaker.

              Anyways, that's it for now. My shop is currently BMW mayhem and there are car parts scattered everywhere and so many labeled ziploc bags all over the place and tools in every corner it feels like madness but it's also all part of the master plan so it feels calculated and under control. Until next time, will post again soon. Stay tuned.
              Last edited by CubbyChowder; 04-12-2021, 10:02 PM.


              --Roundie Revival 2.0 - 1973 BMW 2002 Build Thread--
              --Golden Boy E30 Build Thread-- (sold)

              Comment


                #8
                The IE windage tray and oil pan baffle showed up so I got those installed today. One thing to note for anyone who might be reading this before they install the IE baffle in their own oil pan: make sure you install this bolt upside down, it makes it WAY easier to clear the oil pickup and fit the pan. When mounted the other way, it was interfering with the oil pickup and making it really tricky to clear. You don't want to wrestle the baffle around the pump when you have a wet bead of black gasket maker sitting on the tray:


                Even though I ordered the 2 green gaskets with the kit just in case, research led me to decide on using Permatex "The Right Stuff" instead. Got the block all cleaned up and laid down a bead. I used the 90 minute formula which comes in a tube (bought at Autozone for $13 FYI), this allowed me to take my time with it. If I did this again, I think I would try to create a slightly smaller bead but this worked out just fine (EDIT: I messed this up, the bead should have gone on the inside of the bolt holes, not outside like pictured below. Big thanks to some fellow forum members for quickly pointing that out. I had to pull everything apart again the next day and redo it.):


                Carefully placed the windage tray on the bead and gave it the same bead treatment. No trimming or grinding needed with this piece by the way, I did a dry fit and rotated the engine and it cleared everything just fine:


                I forgot to snap a pic of the oil pan torqued to spec but I followed the Permatex instructions and got it all torqued down properly after an hour of it sitting "hand tight". Time will tell if it leaks or not, but I feel pretty good about it. Oil pan mods are done and the engine is ready to go in the car now. Hell yes.

                Having a parts car is so sweet. I've been able to utilize so many little odds and ends to making my car cleaner and better and more complete. A good example is this heater core firewall cover thing that was pretty clapped on my car, you can see how cracked and deteriorated it was:


                The parts car provided a clean panel and it was an easy, quick swap. It's likely that no one else will ever notice this but it makes me happy:


                I've been meaning to sand the raised portions of my intake and valve cover and finally did that tonight. It looks sweet and I can't wait to see it in the engine bay:


                Thanks for looking! If anyone even is haha. More updates soon.
                Last edited by CubbyChowder; 04-15-2021, 10:47 PM.


                --Roundie Revival 2.0 - 1973 BMW 2002 Build Thread--
                --Golden Boy E30 Build Thread-- (sold)

                Comment


                  #9
                  I'm looking! lol awesome updates, I really appreciated your last thread and this has been equally satisfying.

                  Comment


                    #10
                    If you want to use gasket sealer, I would go with they Grey right stuff on the oil pan AND make sure you go on the inside of the bolt holes or you'll have oil coming through the hardware.

                    An oil pan gasket on each side of the crank scraper should work best with a dab sealer at the cracks

                    Also a note, I would weld in the baffle if you can, if not be sure to red loctite the hardware holding in the baffle.

                    Broken exhaust studs suck!

                    I was up above it, Now I'm down in it ~ Entropy - A Build thread.
                    @Zakspeed_US

                    Comment


                      #11
                      Originally posted by moatilliatta View Post
                      If you want to use gasket sealer, I would go with they Grey right stuff on the oil pan AND make sure you go on the inside of the bolt holes or you'll have oil coming through the hardware.
                      Came to say this exactly. Looks like you went the wrong way around the bolt holes.

                      Look forward to more progress though. I like reading these with quick big updates coming in frequently!

                      Comment


                        #12
                        Well fuck. Thank you guys for bringing this to my attention, totally makes sense to go inside the bolt holes. Looks like I have today's work cut out for me haha. What is better about the grey stuff over the black? Just curious.

                        The baffle hardware came with lock nuts, so I think I'm good to go there. I don't have a TIG welder anymore unfortunately.

                        Thanks for saving my ass guys! Time to go rip this thing apart again.


                        --Roundie Revival 2.0 - 1973 BMW 2002 Build Thread--
                        --Golden Boy E30 Build Thread-- (sold)

                        Comment


                          #13
                          Grey is for higher torque / compression areas. Oil pans / diff covers.

                          Black is more for valve covers, less compression with thick rubber gasket.

                          But really an Victor Reins oil pan gasket would work best. No left over in the oil pan / pick ups, less clean up when servicing. Ect.

                          Sanded raised areas on the intake and valve cover look good though! :)

                          I was up above it, Now I'm down in it ~ Entropy - A Build thread.
                          @Zakspeed_US

                          Comment


                            #14
                            moatilliatta I'm just now seeing your comment and already performed all the work earlier today. Thank you for your insight, I really appreciate it. Is it possible Permatex changed things up? I went to buy the grey "right stuff" but found that it was labeled more for thermostat housing gaskets (but still higher torque) and the black stuff was specifically labeled for oil pans and even had a picture of one on the label, so I held off on buying the grey and just used up the rest of the black that I already bought.

                            Took a solid hour to carefully clean all the residue off all the mating surfaces. Went on the inside of the bolt holes this time with a smaller bead, had a lot less push out. Went and got all new bolts/washers too for an added refreshing experience:


                            I started taking my axles apart to replace the boots. They weren't torn just yet but had cracks all over the place so it was just a matter of time. Will finish that job tomorrow:


                            Then I remembered I needed to swap output flanges on my transmissions. I have 3 Getrag G260's at this point but only one is the shallow housing style yet it has a big flange. That's the one I need to run because I already have a brand new clutch kit with the shorter throwout bearing, but the only manual driveshaft I have is a small flange shaft. Luckily one of the transmissions had a small flange so I was able to swap it over. Shallow housing G260 on the left, deep housing G260 on the right:


                            Flange size differences:


                            All bolted up and ready to install:


                            I tested out my shifter setup on it and it feels great. It's a Z3 shifter with IE DSSR and delrin bushings for the carrier. Forgot to take pics of that but you'll see that later in this thread. My last E30 had the IE short shifter kit and I recently installed the Garagistic supreme shifter kit in my buddy's E30 which I drive a lot and I gotta say I personally wasn't a fan of either of those setups. Too notchy and felt like it required too much effort to get into gear. This Z3 setup feels tight but effortless, I'm excited to drive it and compare with my friend's car.

                            My last task for this evening was to JB weld the rear carrier bushing into the housing. It's a snug fit but loose enough to push out pretty easily by hand, so I just JB weld these suckers in usually:


                            --Roundie Revival 2.0 - 1973 BMW 2002 Build Thread--
                            --Golden Boy E30 Build Thread-- (sold)

                            Comment


                              #15
                              this is starting to become one of my favourite threads, do love an early model and the detailed work is great. keep up the good work, I'm excited to see this one progress.

                              I drove my e30 from California to London!

                              Comment

                              Working...
                              X