
, hiya,,
oh man wot a beauty !
-
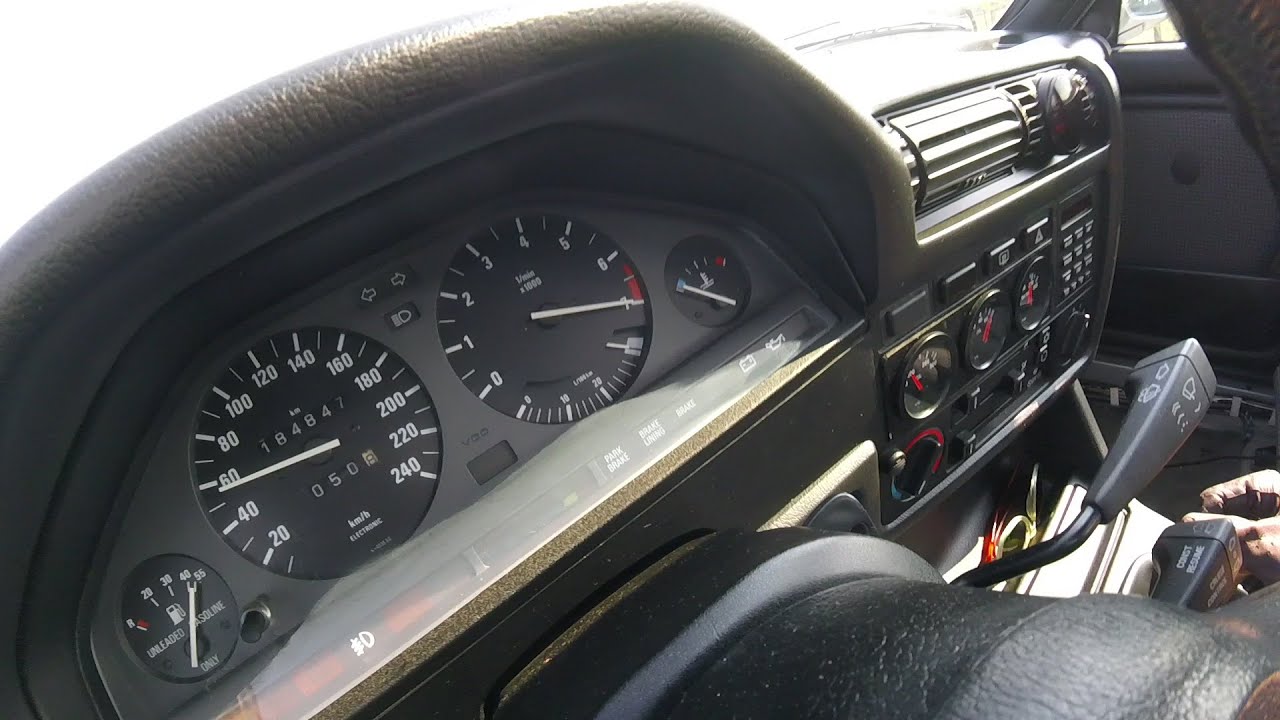
2-Step Launch Control
Learning about 2-Step Launch Control available on the MS3X, and playing with the Advanced Limiter Settings
Video speaks for itself!
Leave a comment:
-
Lighting Upgrades- Added a second trunk light.
- Upgraded the highbeam bulbs to LED
- Aukee 5000lm 6000k (6x CSP Diodes)
- Wired the highbeams so I can turn them on whenever I like.
- Made a DIY Thread here: https://www.r3vlimited.com/board/for...e-used-as-drls
- Upgraded side markers to LED
- Auxito 200lm (24x 3014 Diodes).
- They are bright enough to actually cast light on the ground!
- I played with the exposure to get some pictures which closely resemble the light output. Yes my front amber lights are actually that bright, they've been previously upgraded to LED as well. Can easily pull into a dark garage with the headlights off.
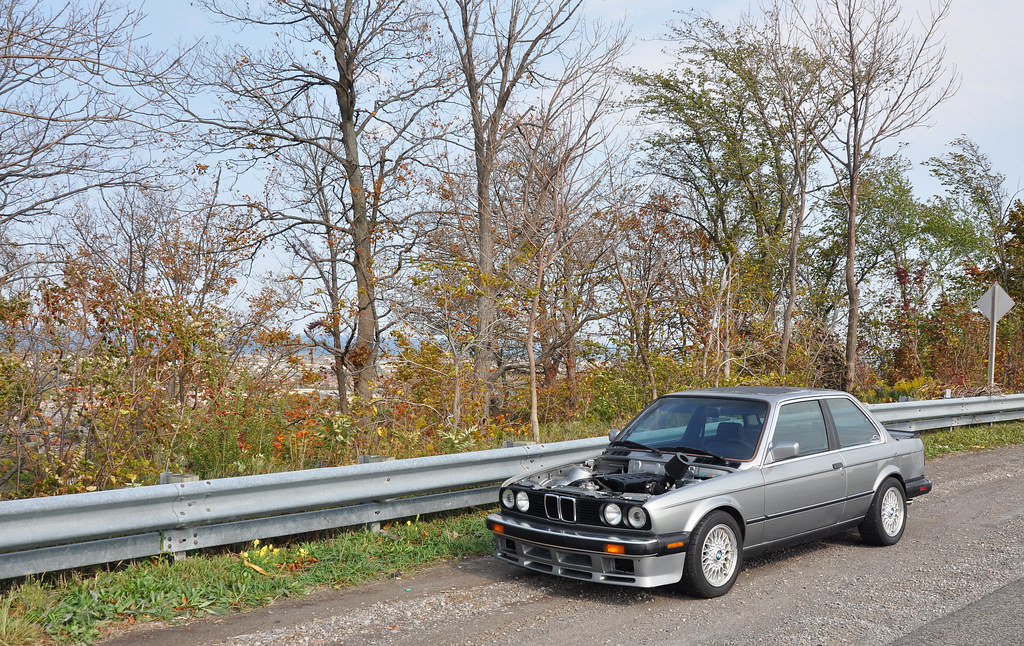
Went for a four hour drive today, enjoying the last of the nice weather.
Don't mind my Fast and Furious underglow.
Had some spare LED strip lighting from redoing my PC, and threw it on the car for a laugh.
Won't be staying on the car, might as well have a big sign saying "Pull me over!".


 Last edited by Panici; 10-06-2020, 06:23 PM.
Leave a comment:
-
Tinted Taillights
Managed to wash the E30 before the rain hit this afternoon.
Also took the hood back off and went to my vertical air filter setup.
I'm going to tune my MAT Compensation Table this week now that we have cooler fall air.
The OEM taillights were driving me crazy even as a temporary setup, so I tinted a spare set.
I only meant to take some of the brightness away, but the VHT Niteshades always goes on heavier then you expect!
The lamps are still very visible with the LED bulbs, and I've switched to an LED third brakelight now as well.
Still happy I switched to 20mm rear spacers. Sitting nicer then the 15mm.


Leave a comment:
-
Me too! Going to put the interior back in tomorrow, and enjoy driving it for a few weeks.
After that I have big plans for this winter to look forward to.
Wait until you guys see what parts I have waiting for me down in the USA. :D
Rest of the car is still mint, wouldn't want to slam it into a wall or anything. And I do plan to fix that quarter properly down the road.
Thanks for the detailed read!
I've done everything myself the past six years, except for two alignments, and now having that rear frame/quarter pulled out.
Yeah the rust is definitely region dependent. I actually bought this car primarily because of the lack of rust. The first E30 I bought had structural rust so bad that I broke it for parts (it was unsafe). For more reading on that car see "The Backstory" section on Post 1 of this page.
It was a real blow what happened to my marriage, but good news is that the divorce is in process, and like you said the E30 kept me grounded and in one piece!
Ask and you shall receive!
---------------------------------------
Window Tints, Sound Deadening/Heat Insulation Round 1
Figured while I had most of the interior removed, might as well take the rest out and get the windows tinted!
I mainly wanted to reduce the heat in the summertime, and also keep the UV away from my houndstooth interior.
I went with 3M Ceramic IR window tint all around. It's supposed to provide "infrared heat rejection", we will see come summer 2021!
Went with their lightest option on the windshield (70% light transmission), and the second lightest on the side and rear windows (50% light transmission).
Brought it to a shop since the whole interior was out, I wasn't worried about them damaging anything (and I don't have the patience to apply large stickers, forget about tint!)
The tint looks much darker in these pictures then it does in person, I'll get some better ones when the car is outside.
The change is subtle! It looks like modern OEM glass that new cars have, instead of the oldschool "fishbowl" blue glass.
----
I've had this HushMat sitting in my basement for a while, so I decided to try it out in a limited quantity. Went with this stuff as it blocks heat, noise, doesn't smell/offgas, and it sticks like crazy (no panel prep needed).
My goal here was to reduce panel resonance (aka oil canning) by adding some deadening to the larger flat surfaces. I also added some inside the doors (not pictured).
The only spot I applied continuous/slightly overlapping HushMat was the driver's side of the trans tunnel, where my aim is primarily heat reduction.
I call this "Round 1", as I may go back and add additional material in the future. For now I wanted to see if I could make any improvements without adding a bunch of weight laying down continuous sheets. Also wanted to keep it off the floor until I've replaced all the seals and I'm sure the car is 100% watertight.
EDIT: Interior reinstalled except for the door cards (tint needs to dry for 3 days).
Hard to get a good shot of the refinished rear cargo shelf, but it looks loads better then before!


-----


Last edited by Panici; 10-02-2020, 10:46 AM.Leave a comment:
-
The frown on my face after taking a few days going through the thread just to find out the deja vu cycle, but now excited to see its being broke. Love seeing the continued hard work to revive the car, and doing most all the work yourself!
Quite interesting how far you've gone with a rusty holes though... As much I used to think those should be chopped up, Its kind of changed my mind recently how far people go to revive these cars. And maybe its just comes with the age of the chassis and the price point they are going.
I have an 87 Lachs with holes in my chassis... the common LR trunk, and front jack points, Trans tunnel passenger... But being that far up north its got to be hard to find one better.
Its like seeing the old school cars and guys weld in every panel of the car and go, SHIT! that is a lot of work... E30's probably headed in similar direction.
I forgot to quote about being alone after marriage.., Psh still got the E30!
I see guys get married all the time and the ones that usually still stay into the cars... remain with the cars, with or without the wife afterwards... Its a passion for insanity. :)
Last edited by moatilliatta; 10-01-2020, 05:23 AM.Leave a comment:
-
It may look like shit, but now you won't be afraid to wheel the car harder than before.
I'm so glad you decided to fix it. These cars are easier to repair than most people think.Leave a comment:
-
Super excited about this, this really is insane
Happy you can enjoy it until bad weather hits.Leave a comment:
-
Dude, so insane, glad it's taking shape again. Keep up the good work.Leave a comment:
-
Thanks everyone! I'm really glad for your support, only other car enthusiasts understand what it feels like to have this happen.
---------------------------------------
The E30 Lives Again!
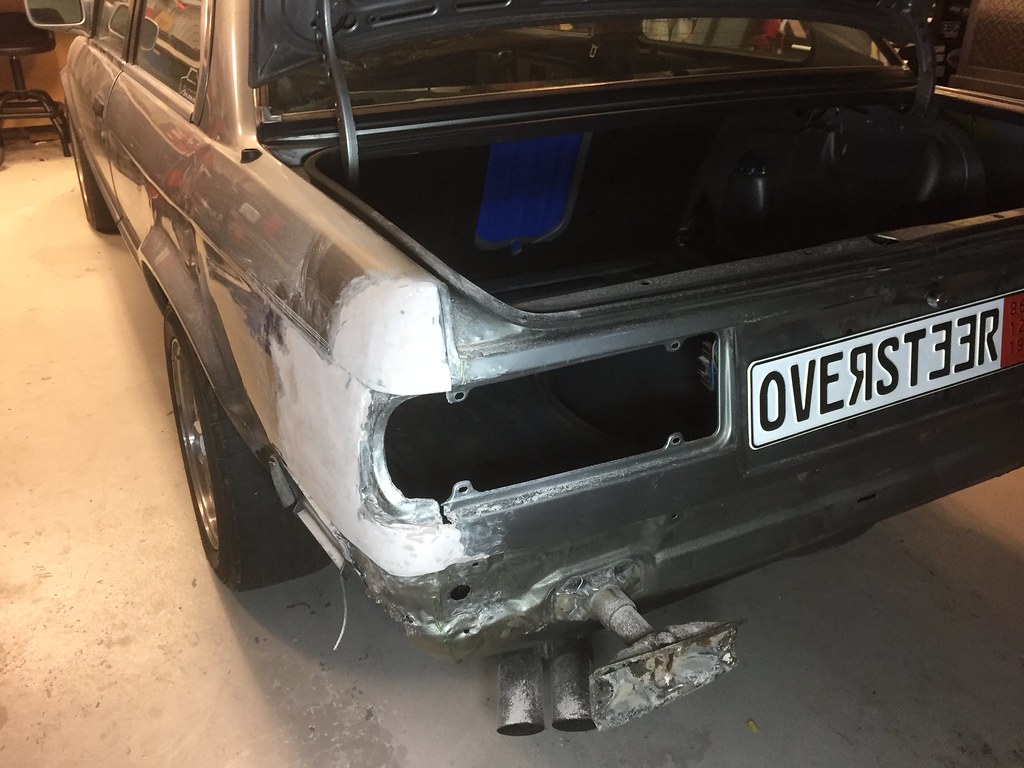
Finished my my "temporary" repairs this afternoon.
I'm pleased with the final result, although as you'll see below my bodywork is ROUGH.
I've never even mixed up a can of bondo before, and I quickly found out bodywork isn't as easy as it appears!
Combine that with a can of not-so-colourmatched paint (my friend Thai said it could be the colour of the primer I used under the colourmatched paint?), the result isn't pretty.
I will say that I plan to source a clean quarter and do the repair properly, so this is a "temporary" state. For now the rear end is back together.
Also have to give a shoutout to Hubert from my local Ontario E30 facebook group. He straight up gave me a rear bumper, trim, and a set of cracked tails (not pictured) which I will turn into Startec reps.
Some cleaning and trim paint later, and it looks good from about 10 feet away!
Side notes:
Fixed the wiring for the side marker, which was ripped off in the crash. Thankfully I still have my '86 325e body harness which provided the correct connector.
Disabled the Brake light check feature, since I'm going full LED rear lighting. Not sold on the "cold" white reverse lights yet though, may switch those back to traditional bulbs.
Swapped my tires front to rear. Car drives perfectly straight on the highway now.
Installed 20mm rear spacers (previously ran the euroweaves with 15mm rear spacers).


 Last edited by Panici; 10-01-2020, 05:42 PM.
Leave a comment:
-
The result looks so good, had to go back to the previous page to make sure I remembered correctly what the damage looked like!
That is a great save indeed! Really happy for youLeave a comment:
-
AWESOME! So happy for you man, great save. Really glad to see you were able to save this thing AND without a salvage titleLeave a comment:


Leave a comment: