
so glad to see updates Jordan. great way to spend Thanksgiving weekend :-)
-
I BUY/SELL REFURBISHED CM5907s & CM5908s
HOWTOs:
DB vert plastic bumpers
OEM Keys
MTech1 docs
88 ix Lach/Card
91 ic Calypso 3.1
86 Cosmo 2.7
OEM+ or bust!

reelizmpro: I will always be an e30 guy.. I still do all of my own labor
TrentW: There's just something so right about a well-built M20 in an E30
e30m3s54turbo: I save my money for tuner parts. -
aww snap we getten some progress!1990 325is
m52b28
3.73lsd
g260 (1987 325is 5spd tranny)Comment
-
Got what I could done today but I'm up against a parts hold as I forgot to order the gasket/oring for the oil filter housing stand, the front crankshaft seal, and the alternator bushings so I can't get quite as far as I'd hoped... oh well. I'll have the stuff I need in hands later this week.
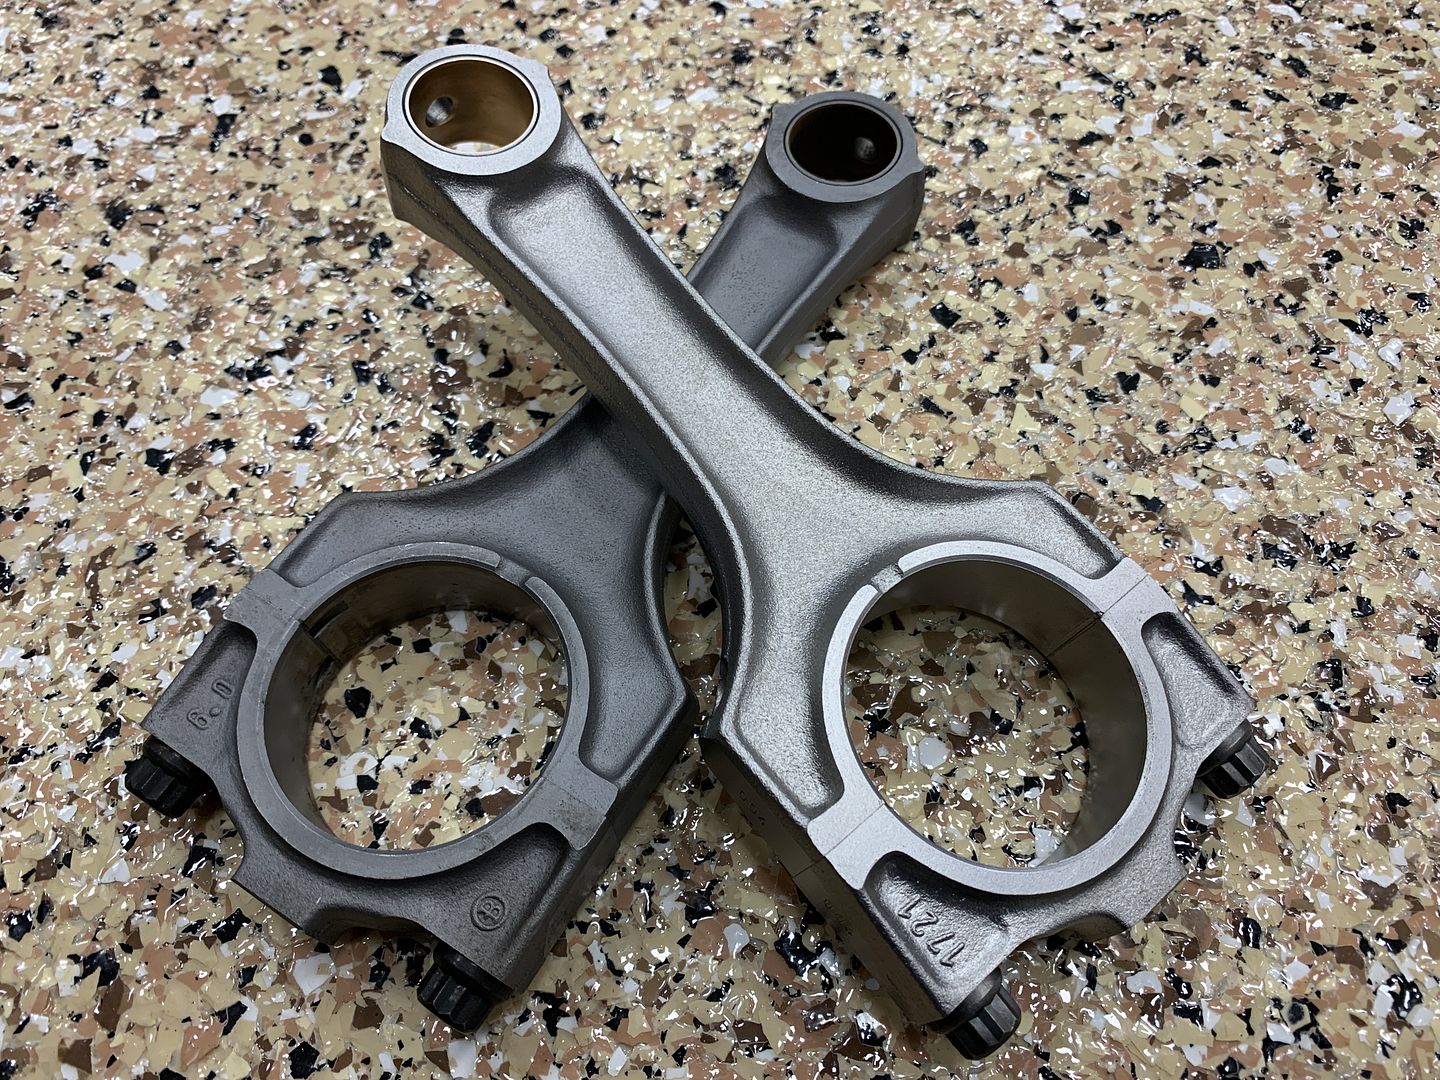
I have the machine shop weight match each connecting rod, and then carefully balance them. The rods were balanced to within 0.5 gram of one another. For reference a single US dollar bill weighs exactly 1 gram. Before they started this process they blasted them in the same cabinet as the engine block. While clean is clean, my standards are a big higher... I took all four rods over to Jon's house and went after them with the vapor blaster. While its chief purpose is aluminum cleaning/brightening it sure does a nice job on steel as well. Just need to immediately dry and oil them (I use WD40 for this) or they will flash rust from the humidity in the air.
Before and after speaks for itself.
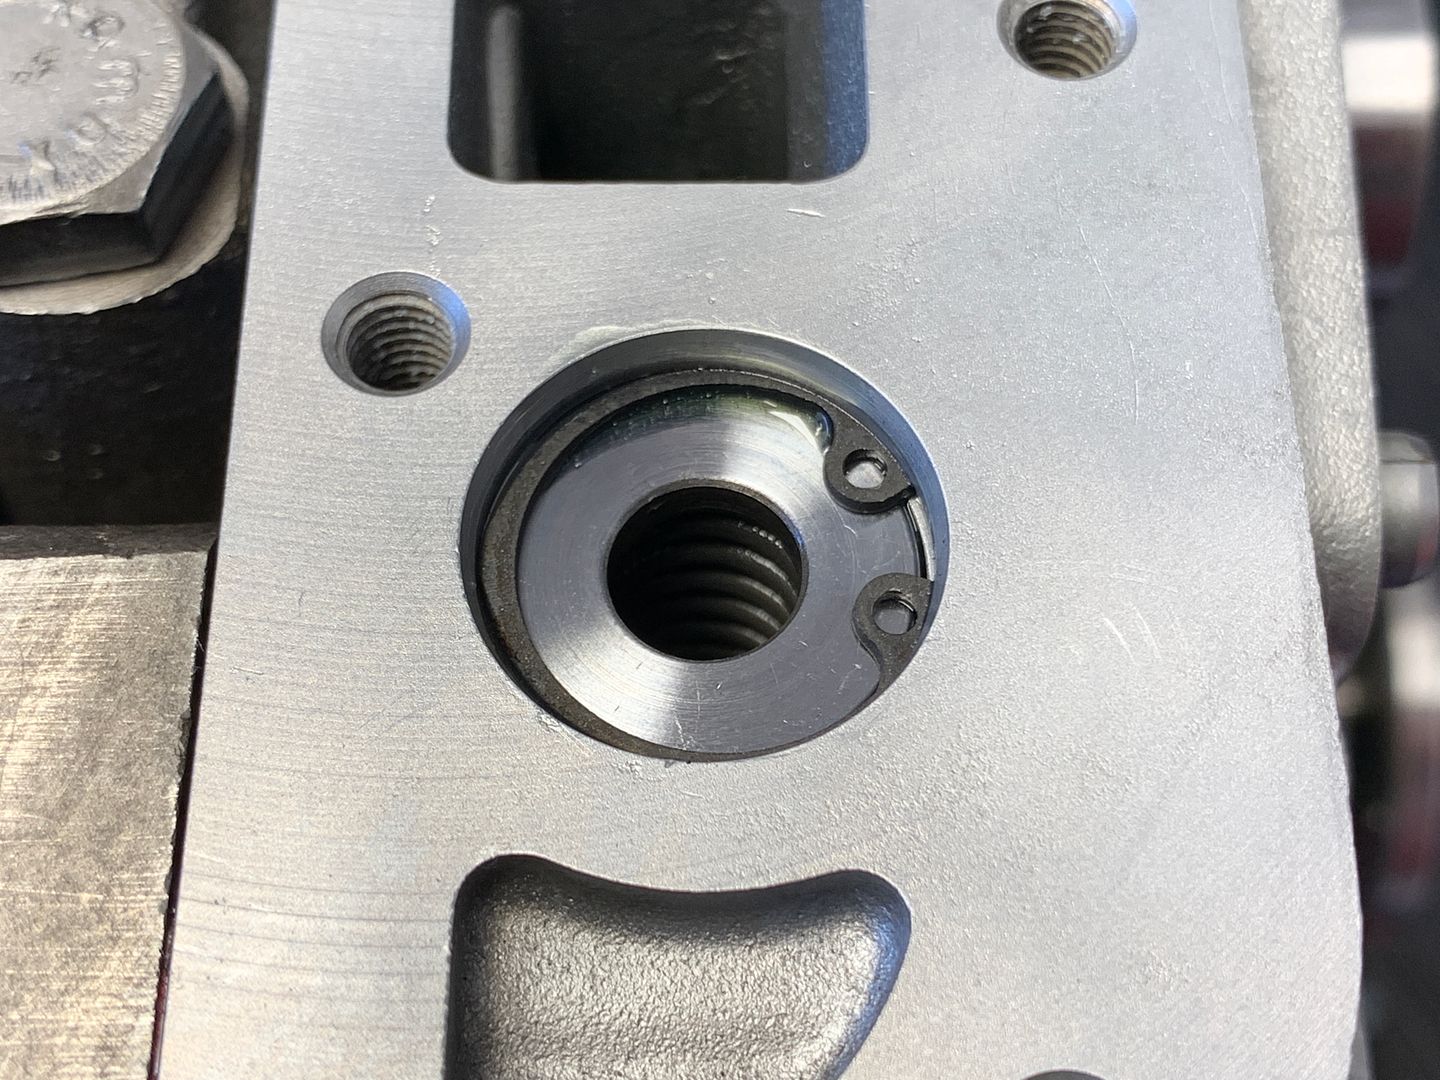
The next task was an unexpected gift from the machine shop. When cleaning the block out they knocked the rear oil galley plug out (and subsequently discarded it) Luckily I noticed it missing, and happened to have a spare on hand. It is a 12.5mm steel pellet about 5mm thick.
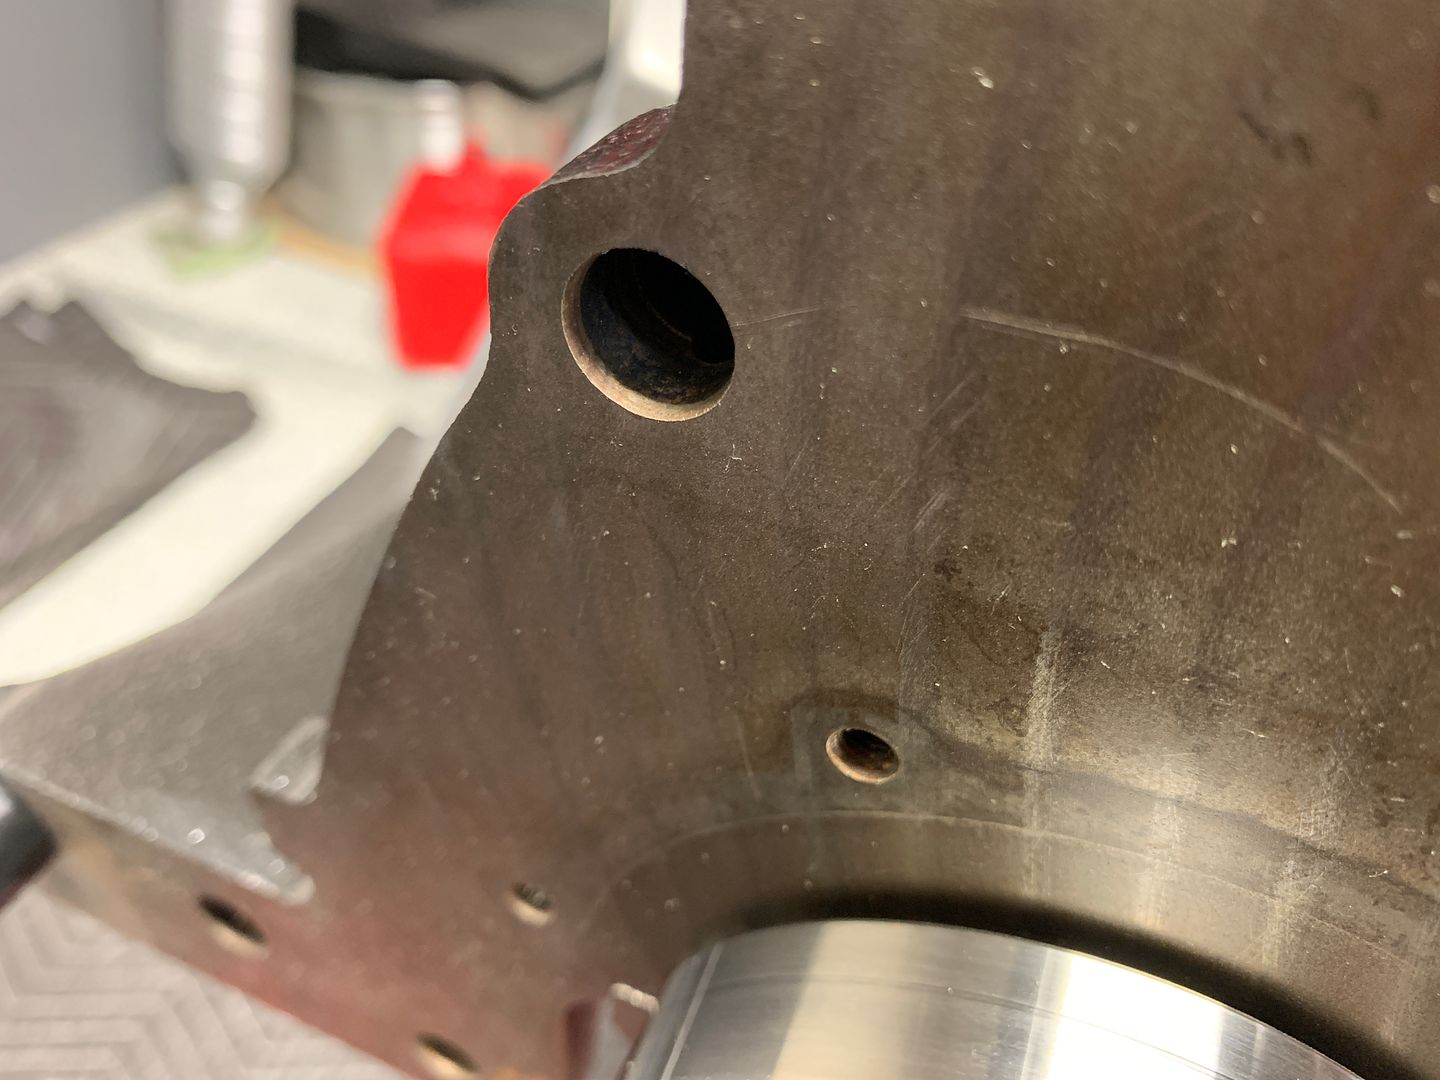
However I had a small issue in that the engine is already on the stand, so driving it in with a drift and a hammer is out of the question.... ah but I came up with a solution...
Tapped into place with a wrench and red loctite applied as sealant.
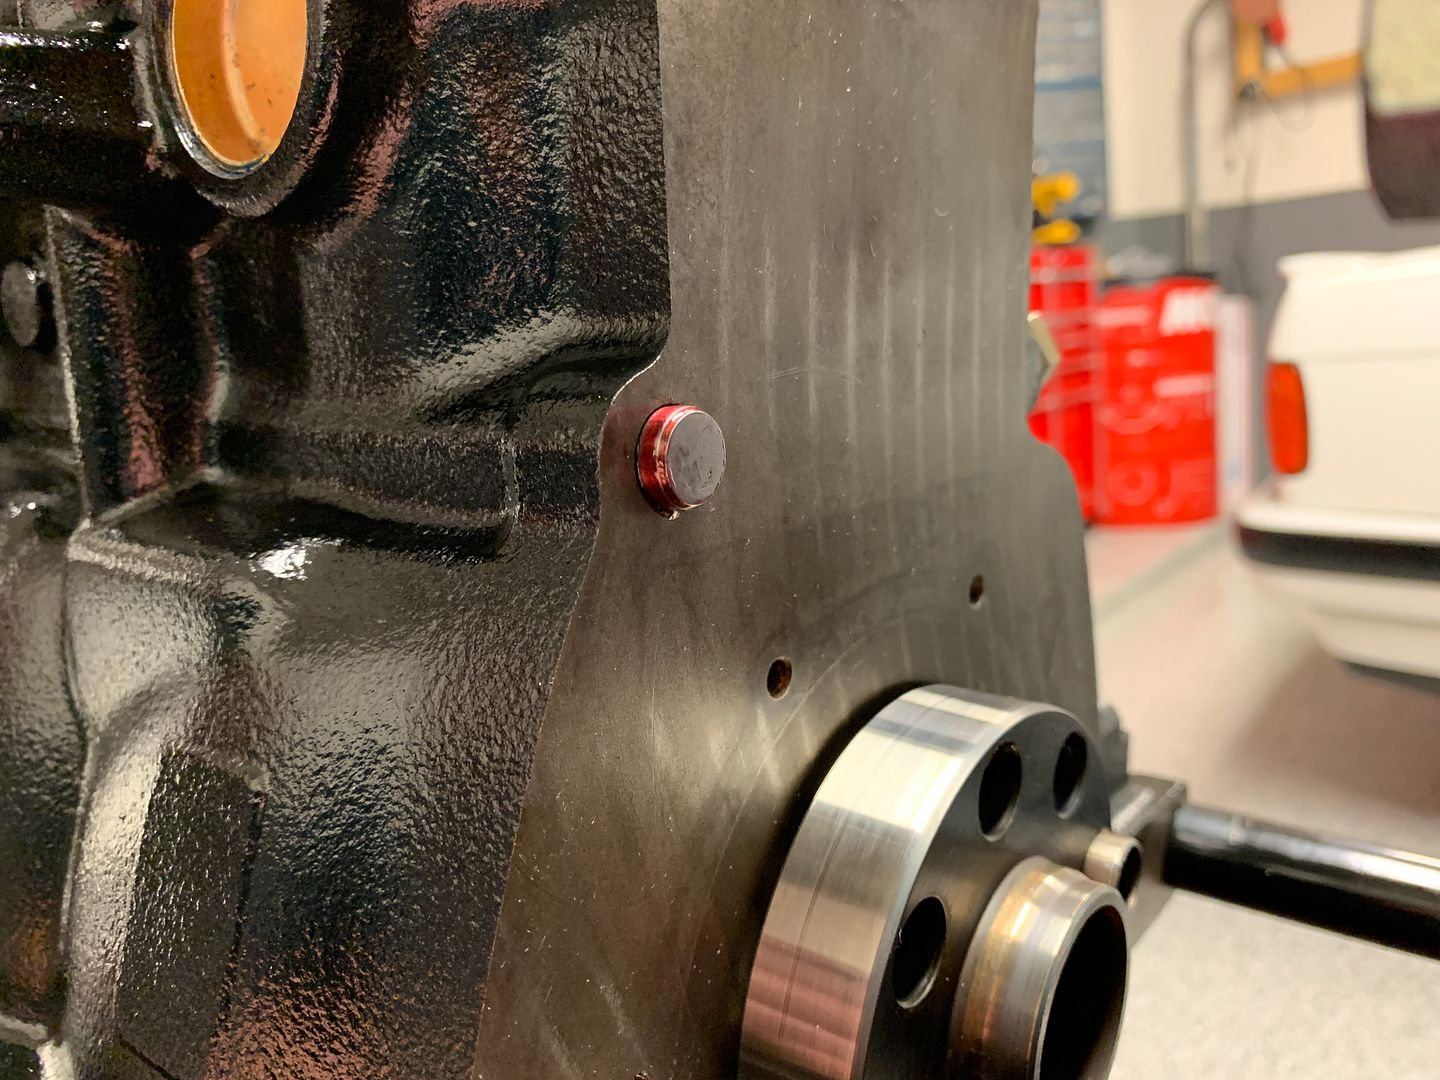
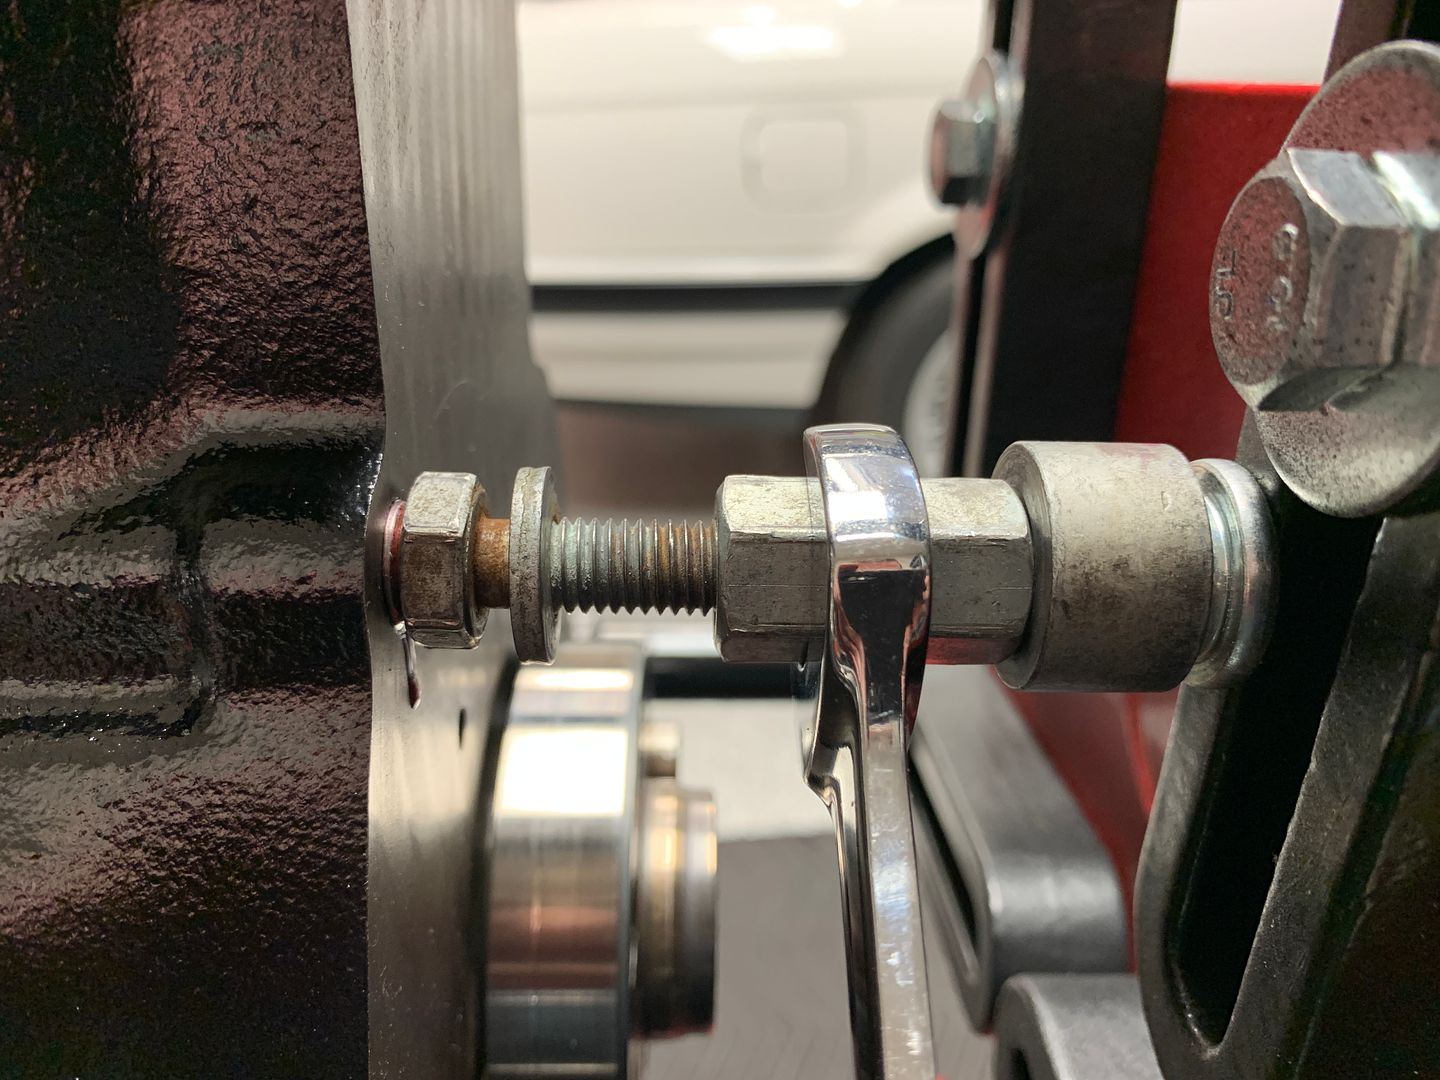
Two bolts threaded into a threaded coupler allowed me to make a press tool to push against the engine stand to drive the oil galley plug in flush, worked perfectly.
Last task back there, install the rear main seal cover
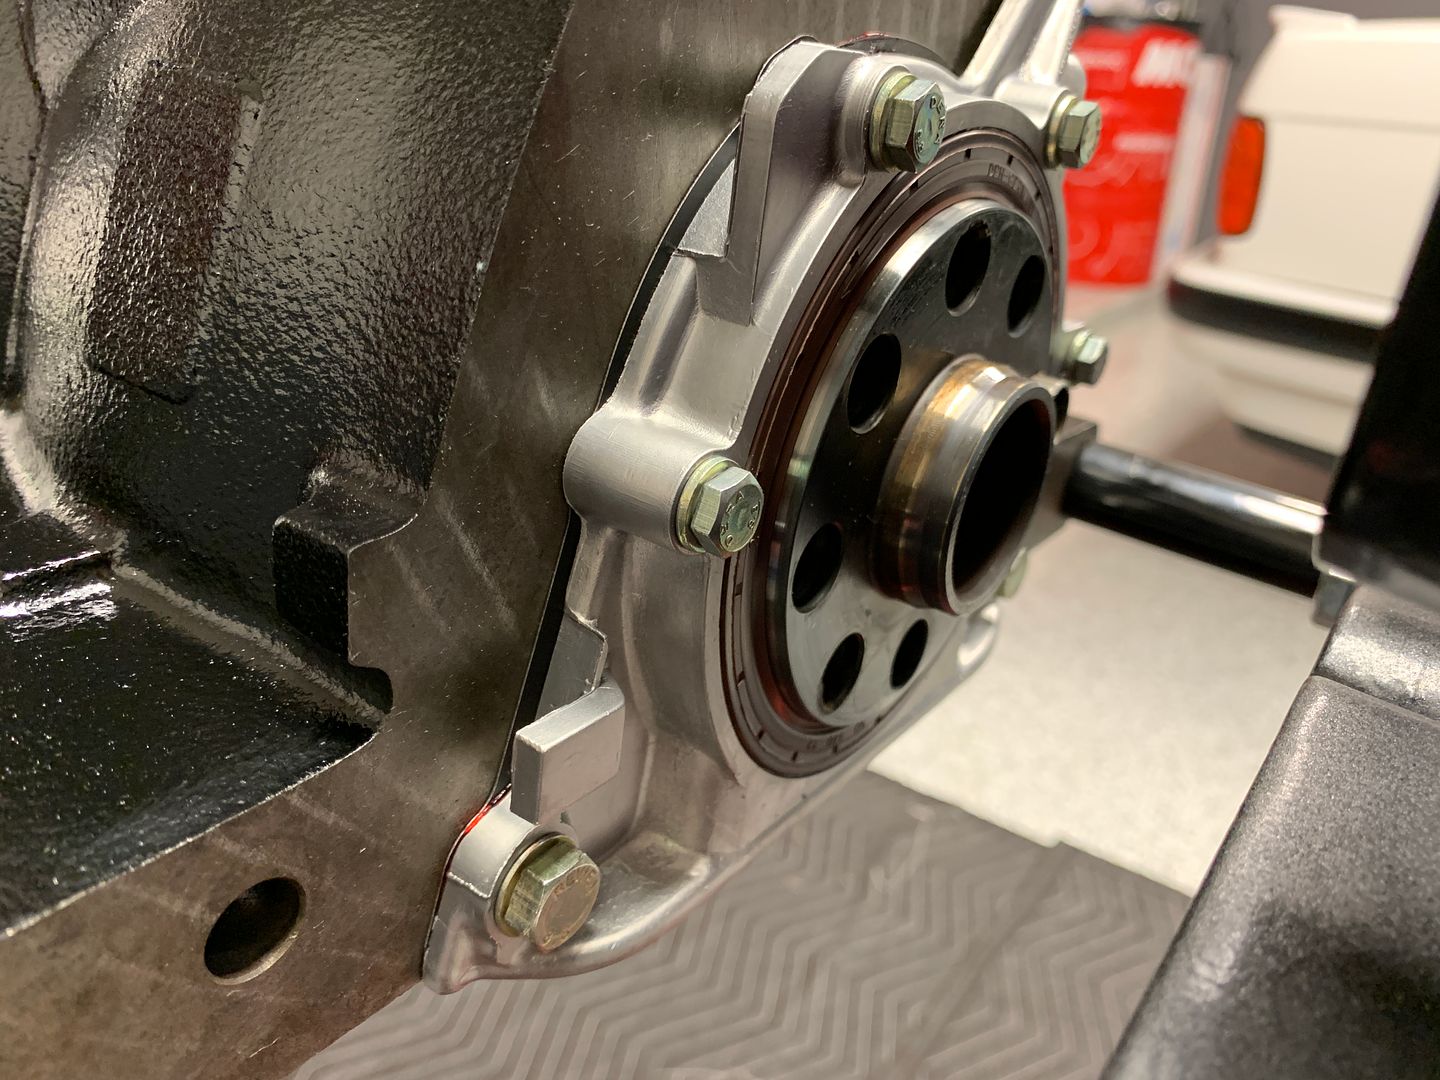
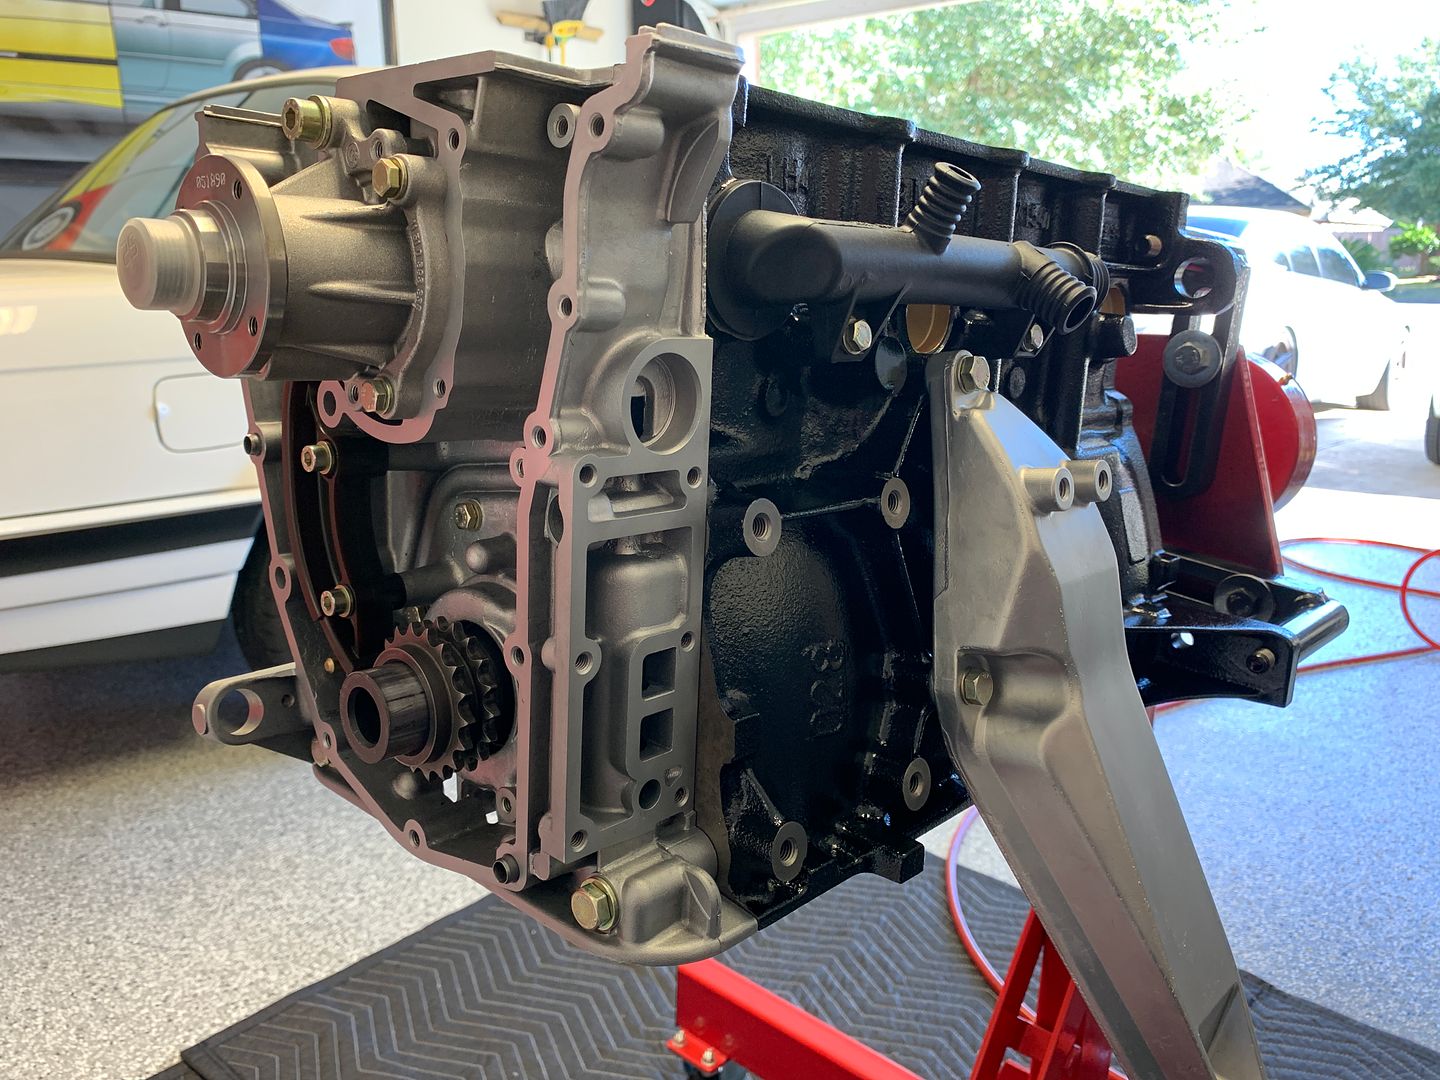
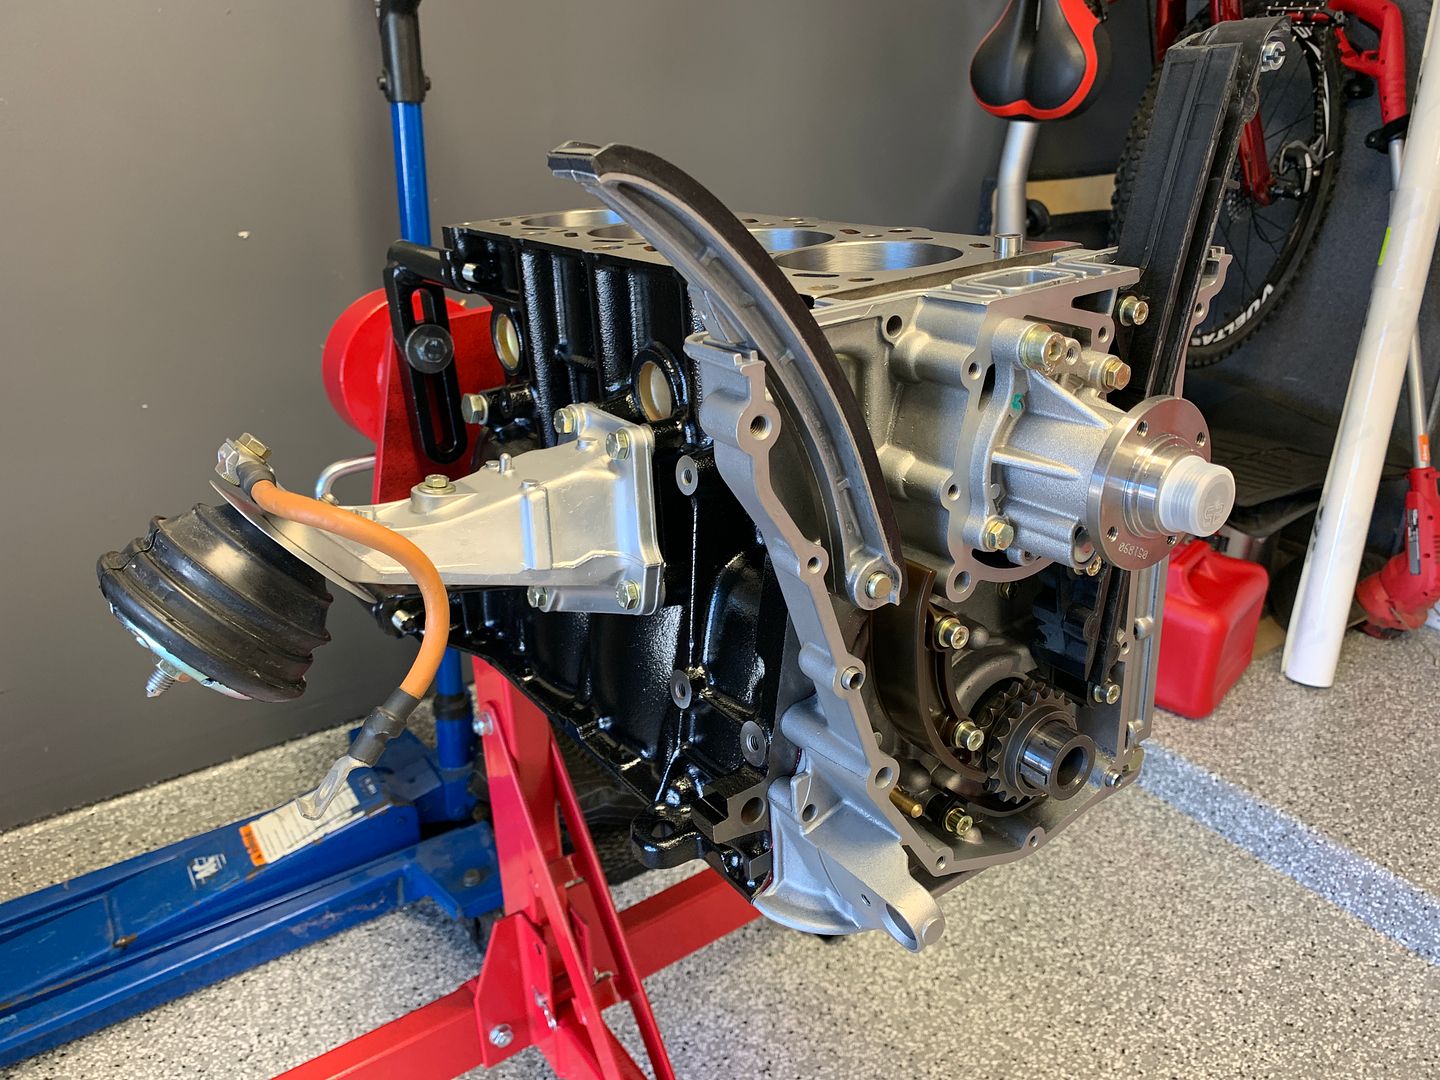
With that done I moved back to the front, I wanted to get the main timing case installed today. Applied ample assembly lube to the oil pump housing and drive before dropping it into its home.

Thoroughly against my want for originality I elected to set the correct early timing case aside and install the late production M42 timing case I had picked up from a 10/93 E36 318i to alleviate my fears of a timing chain idler sprocket failure. Mounted up and looking tasty with a new Genuine water pump
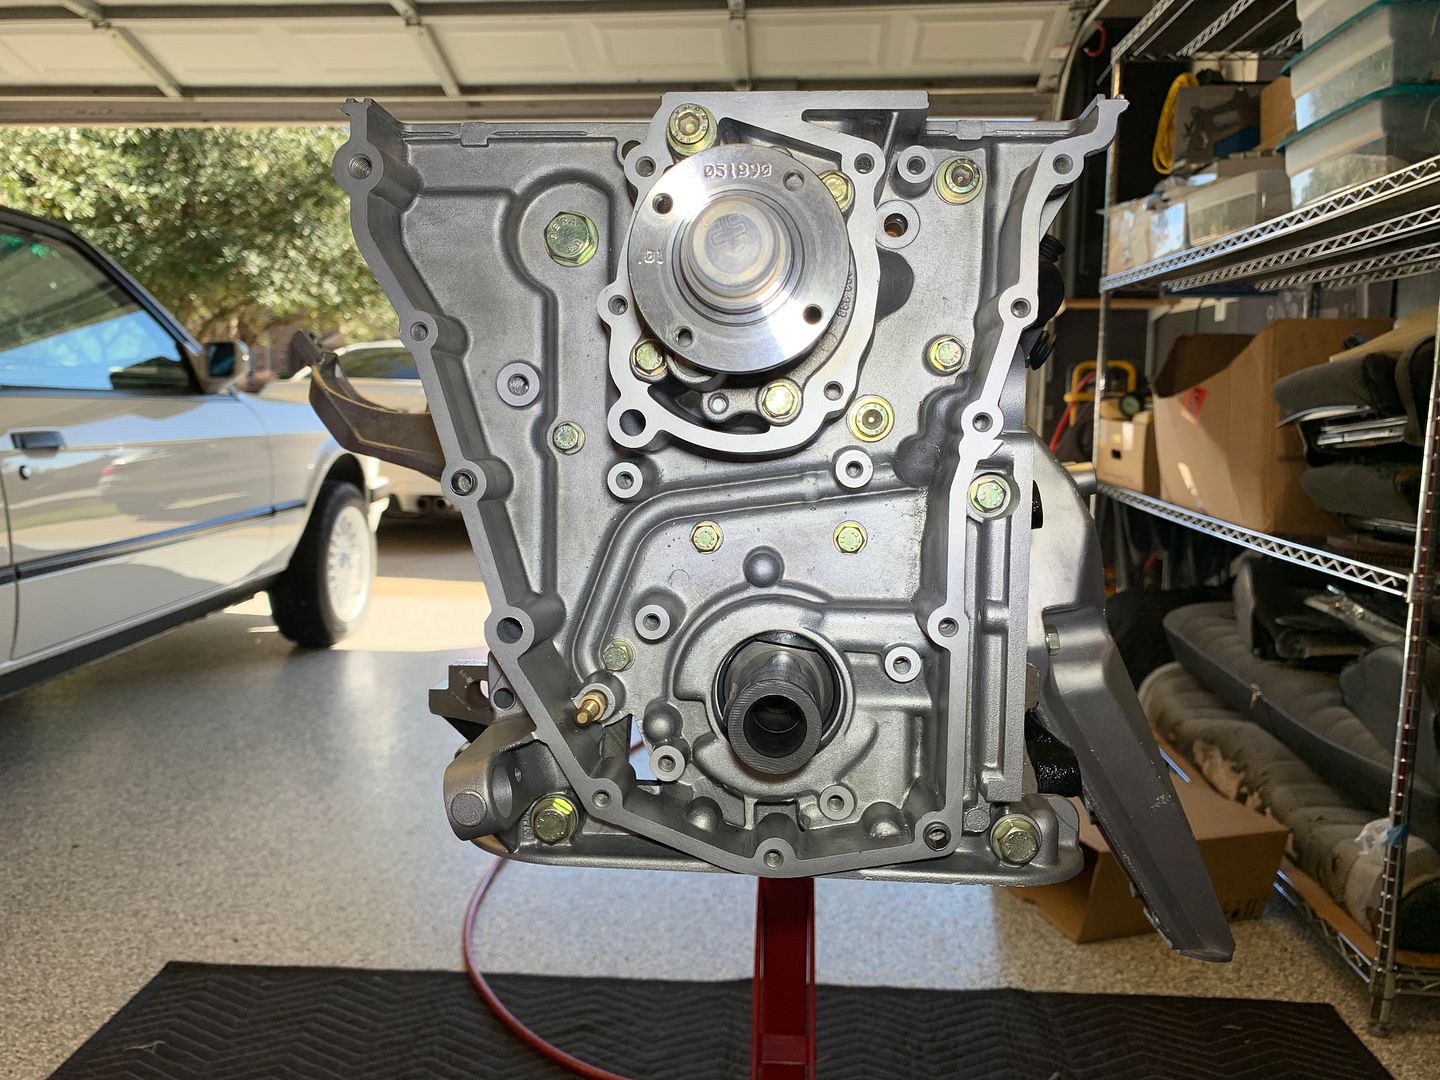
Flip it over and we'll install the polished oil pressure relief valve. Yes I am aware there is an updated valve available that is made out of plastic and not prone to seizure in the timing case bore, but back to that originality thing... I doubled down on premptive measures though by polishing the valve itself and the bore of the timing case it resides in. The end result glides silky smooth.
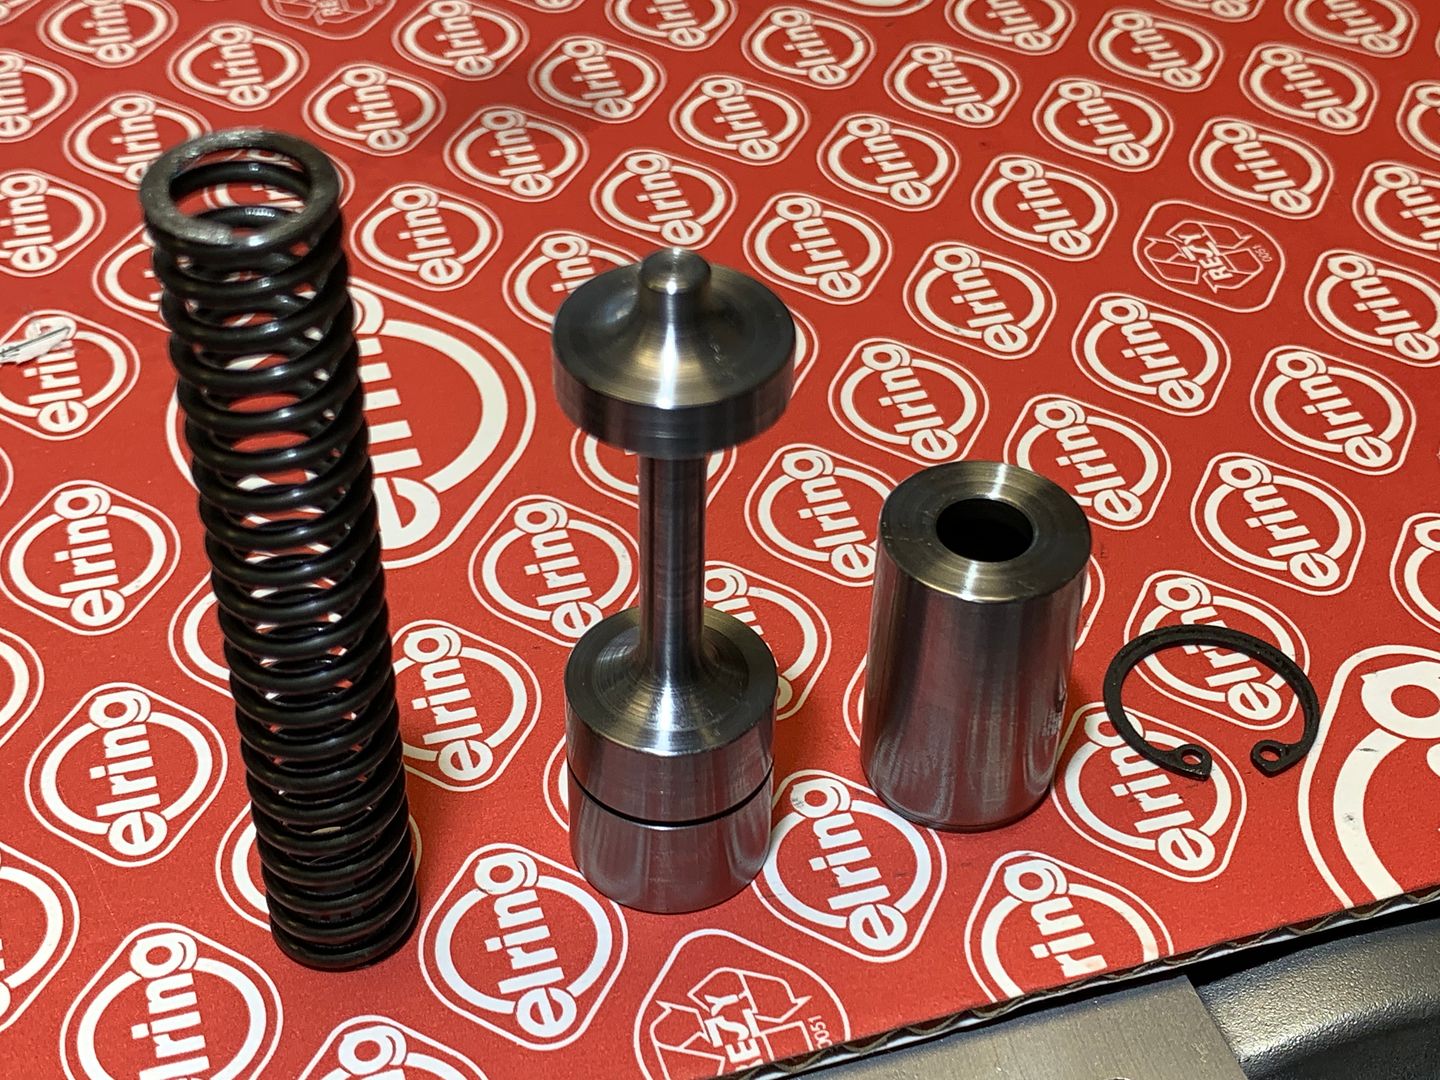
Preloaded and circlipped in place.
Rest of the new timing chain guides in place, along with engine mounts, and the main ground strap.
Tenured Automotive Service Professional - Avid BMW Enthusiast
Vapor Honing & E30 ABS Pump Refurbishment Service
https://mtechniqueabs.com/Comment
-
Wow that looks good.Comment
-
plug usually gets damaged when removed...most just drill/tap/pull it. At let the machine shop had done the right thing and cleaned the block the correct way, plugs out and allComment
-
The rear oil galley plugs on these are perfectly reusable, the one I ended up installing came from the same engine I harvested the timing case from. The front oil galley passage remains open to fee the lower chain oil squirter, and a long rod through the galley easily drives out the plug. I'd rather have it clean clean clean than have the plug, but the it not being mentioned to me is just another item to hold me up. Luckily I had a solution.
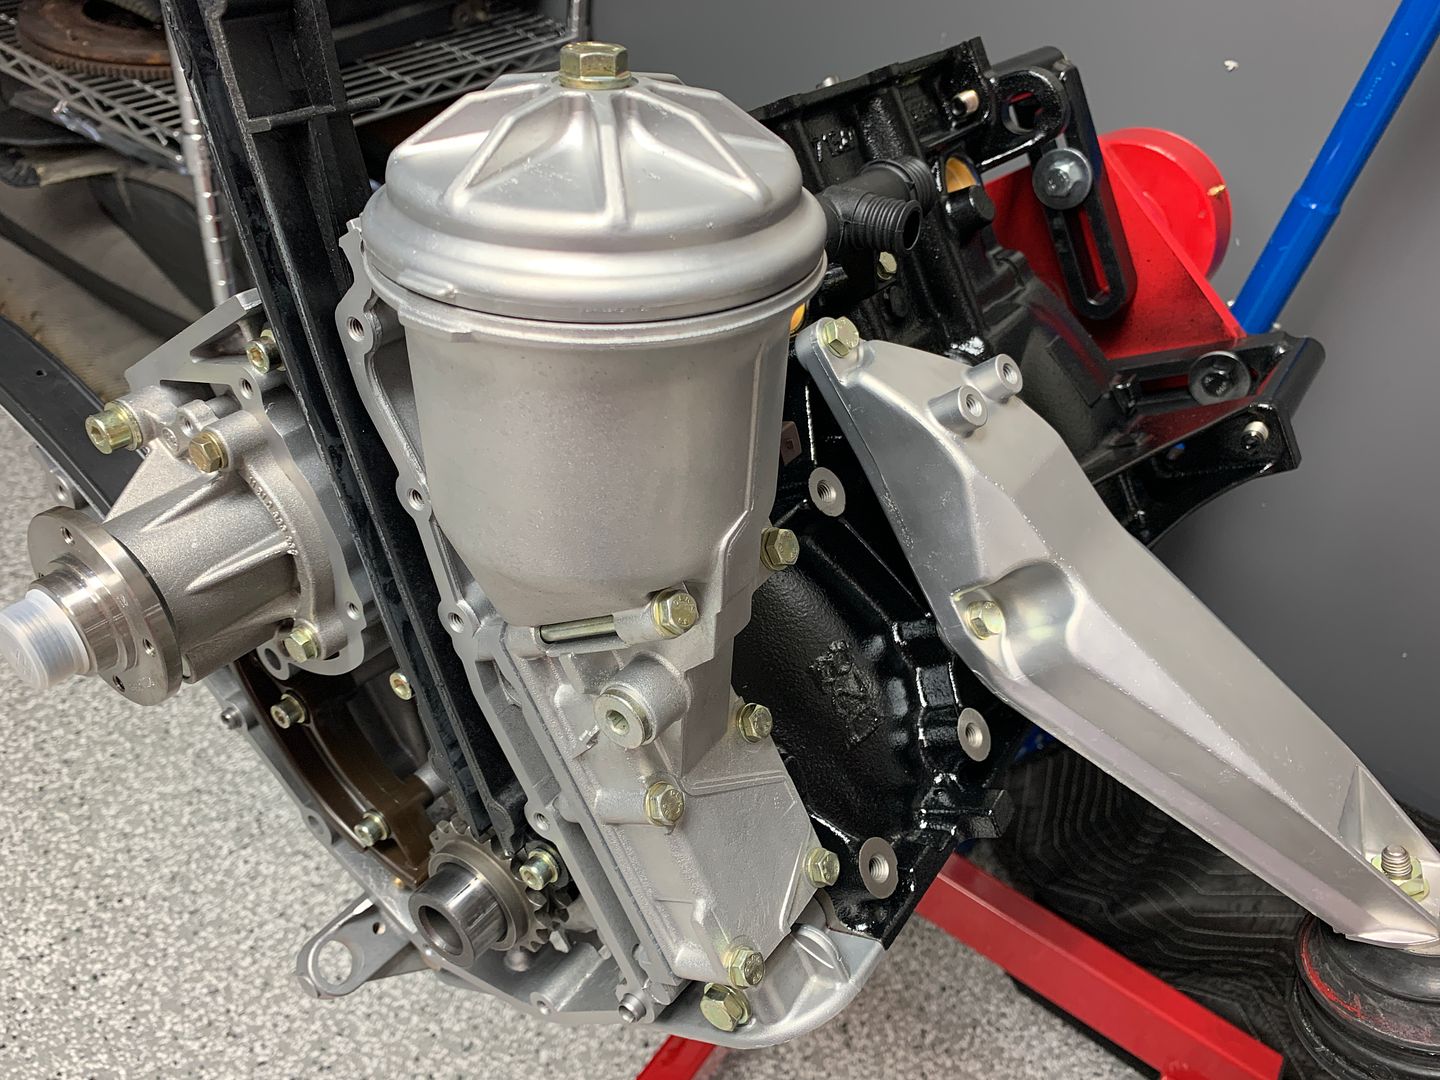
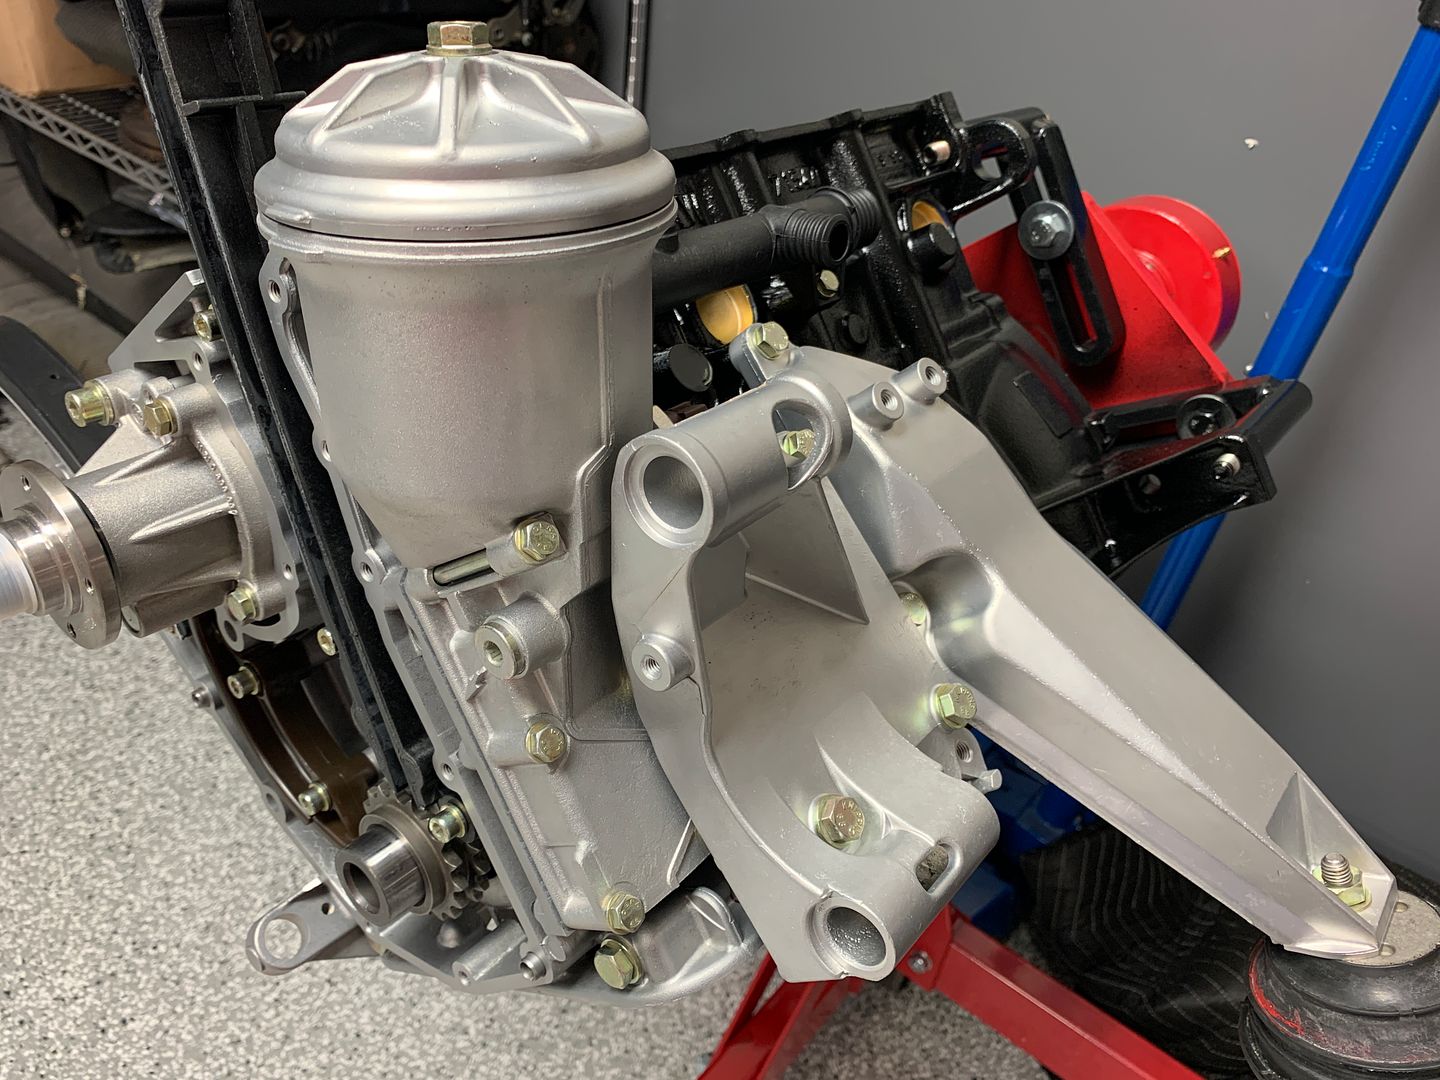
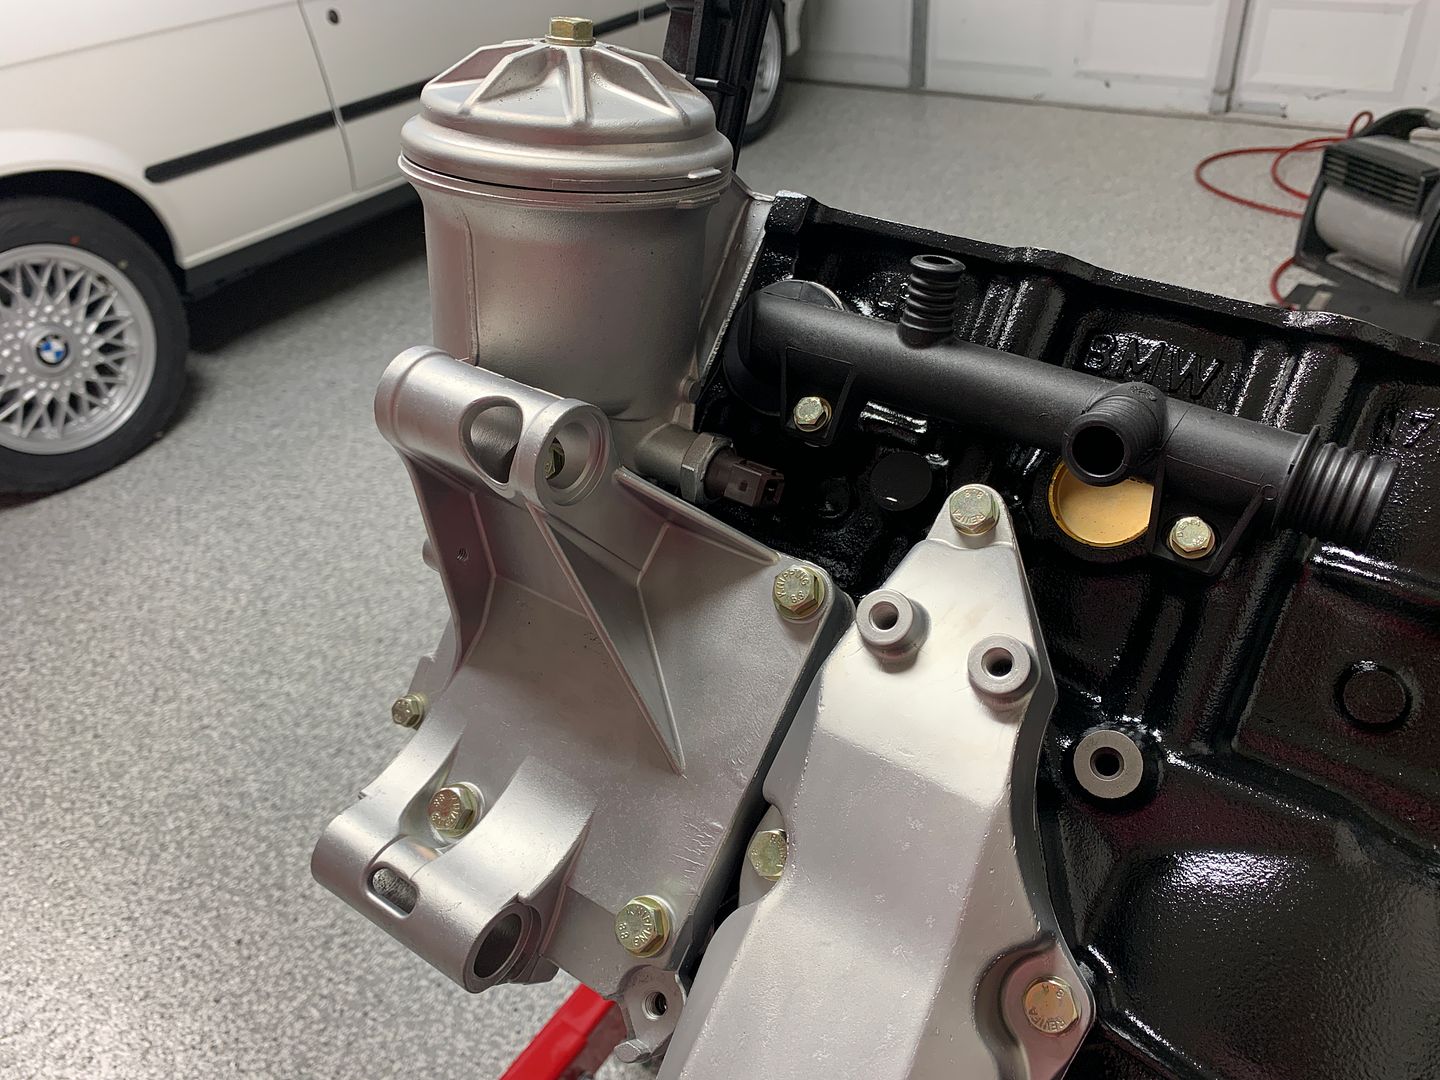
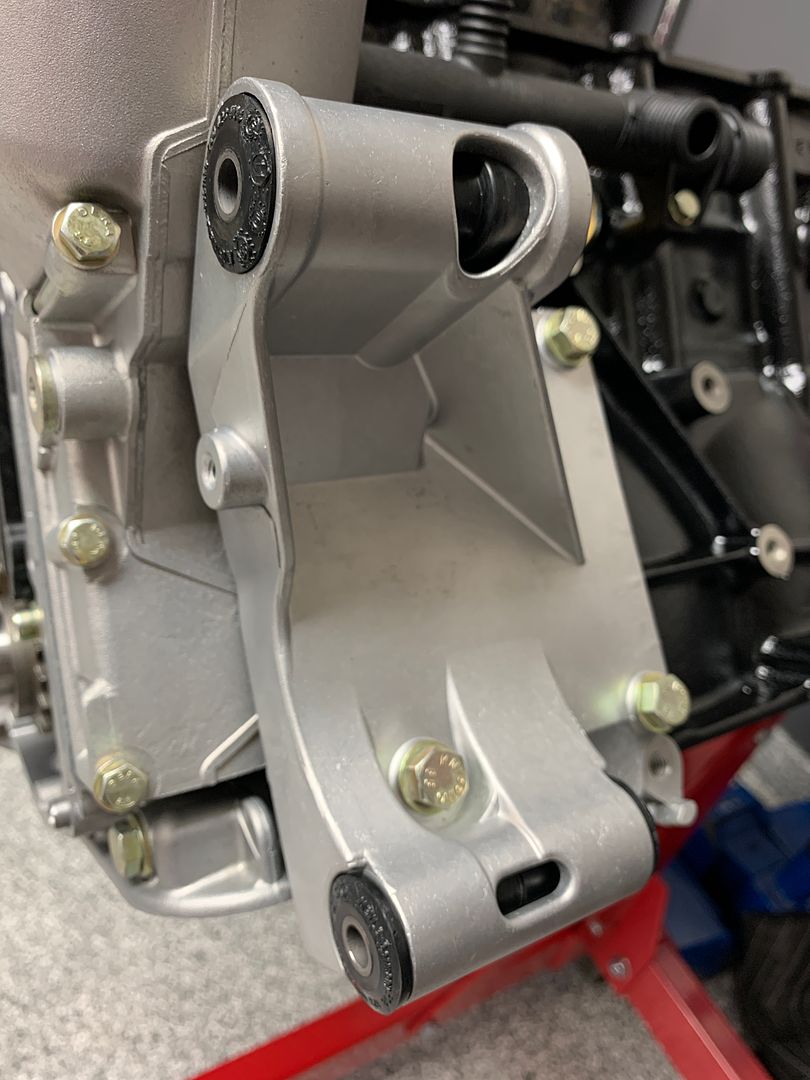
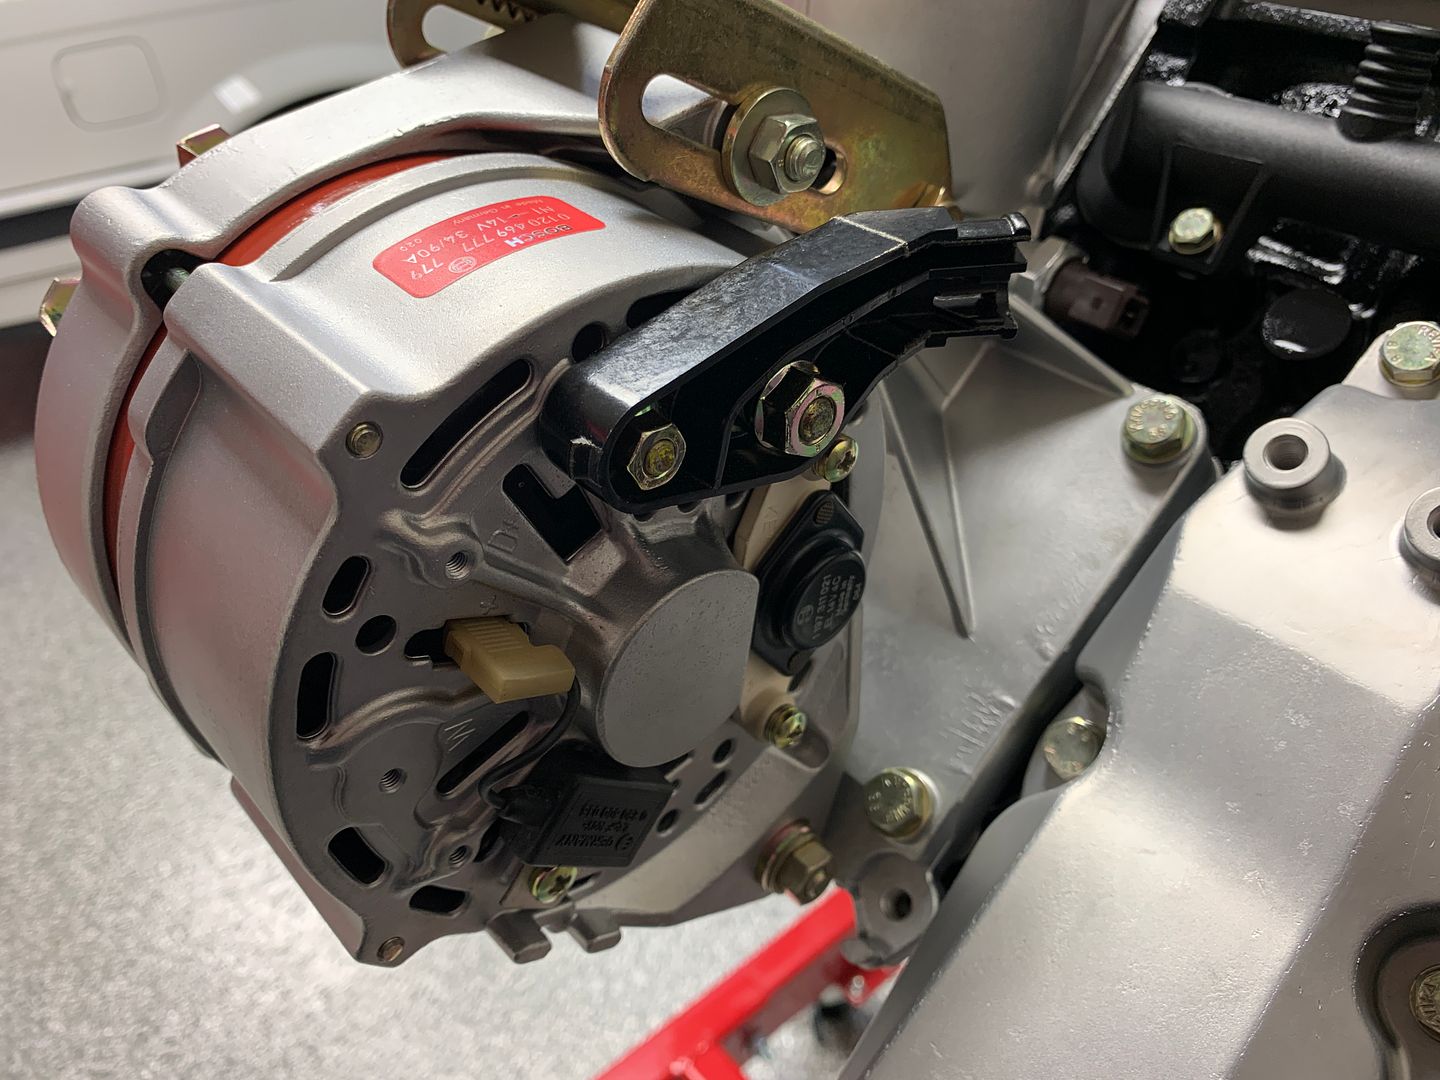
Tonight I got a few seals and gaskets I needed and was able to install the oil filter housing and alternator bracket.
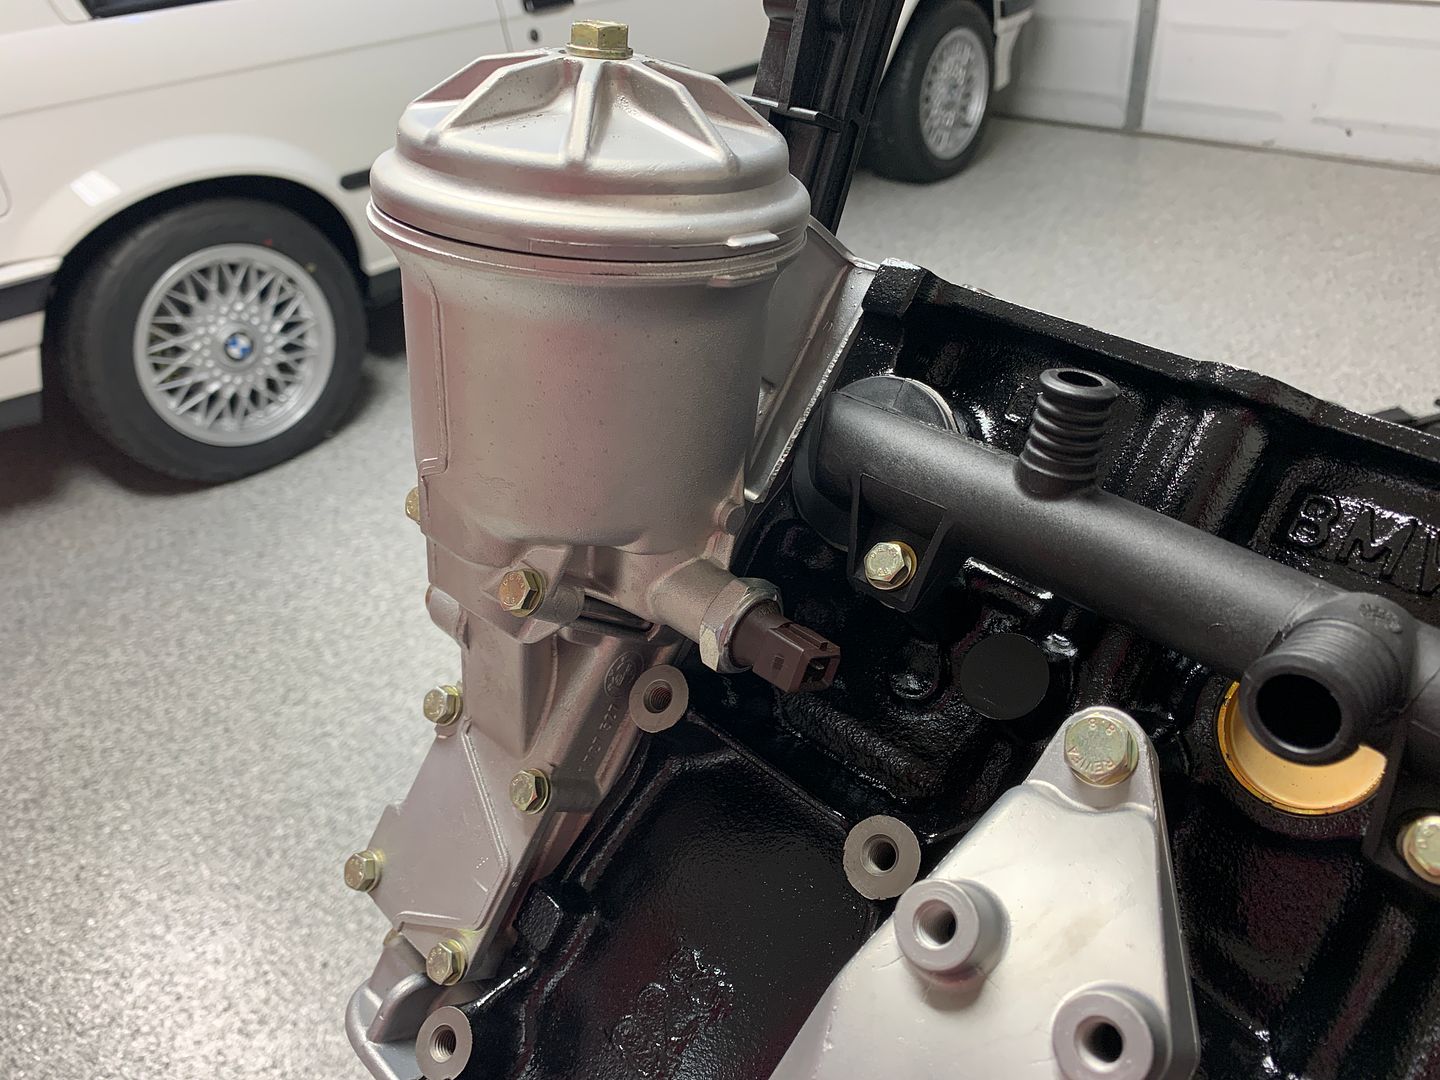
I should have the alternator bushings tomorrow so I can hang the alternator in placeTenured Automotive Service Professional - Avid BMW Enthusiast
Vapor Honing & E30 ABS Pump Refurbishment Service
https://mtechniqueabs.com/Comment
-
As we all know, it's paramount to have very clean conrodsComment
-
Just a small amount of progress this evening, realistically I'm out of work to do until the pistons arrive.
Four new alternator mounting bushings.
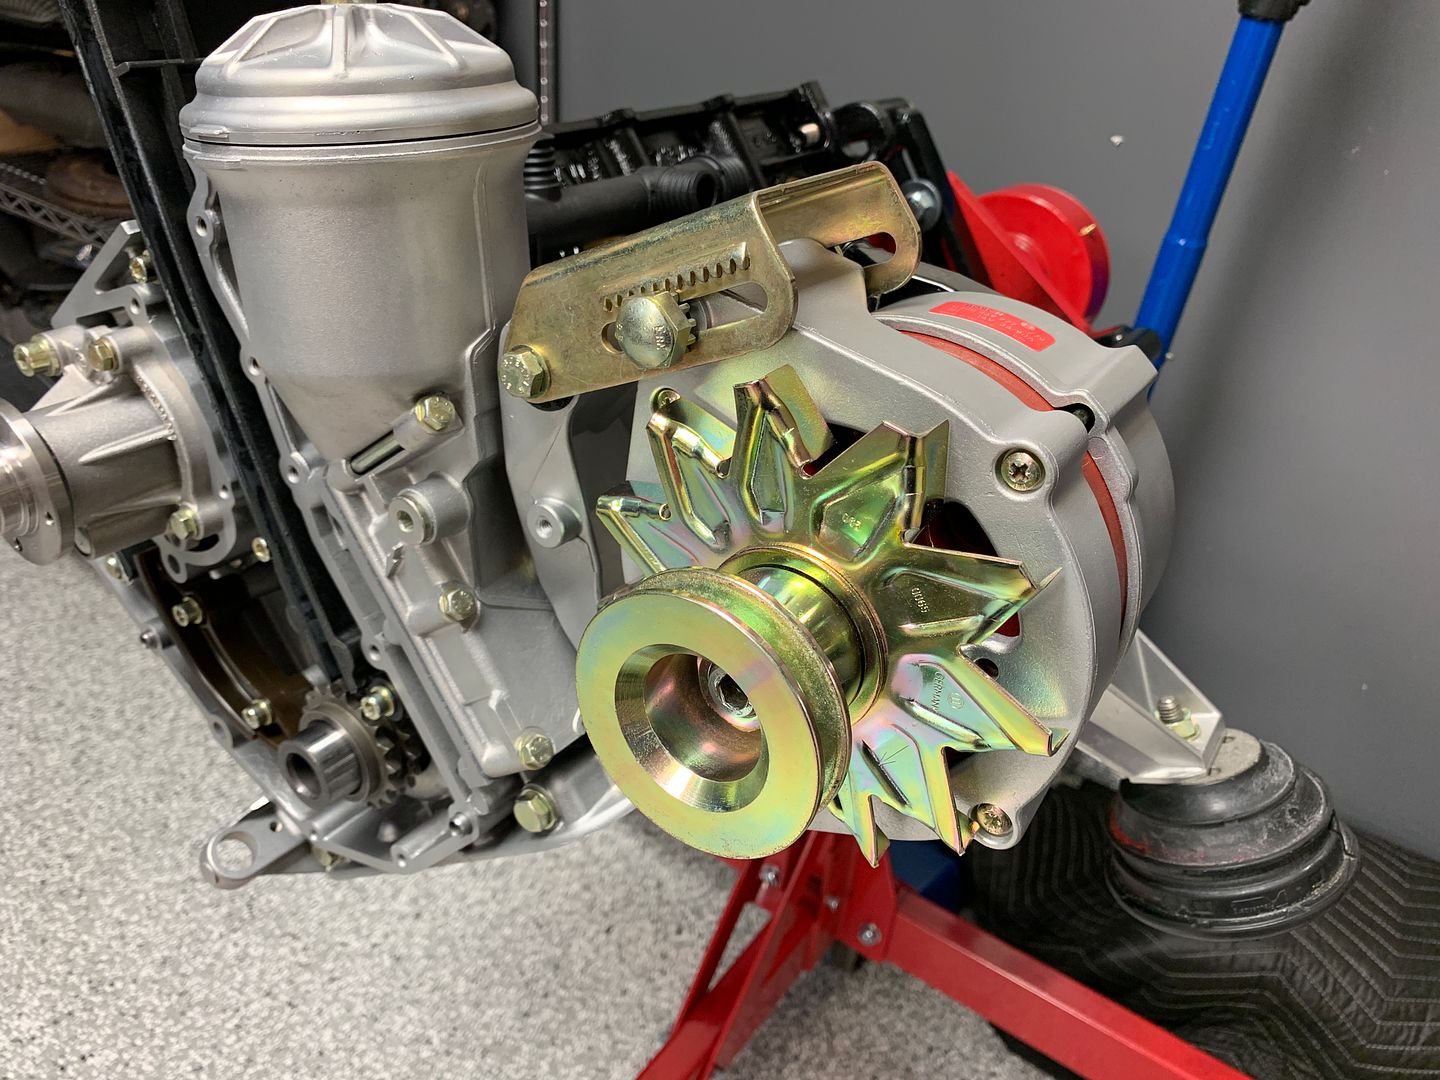
and hello alternator
Tenured Automotive Service Professional - Avid BMW Enthusiast
Vapor Honing & E30 ABS Pump Refurbishment Service
https://mtechniqueabs.com/Comment
-
^ this is my favourite component/part of the build.
The Alternator lovingly rebuilt and better than new - most people wouldn't even know what went into this.E30 320i vert
But daily drive is Volvo V60 PolestarComment
-
Beautiful work. Maybe I missed it, but did you install an upgraded/updated thrust bearing or stick with the original design?Comment
-
Is it bad that I’m way more excited about seeing one of your posts than I am about Christmas.
They’re kinda like mini-Christmas every other day!"In God we trust. All others must bring data." -W. E. Deming
/// 1987 325is /// Project Thread
Past: 87 is, 88ix, 88 i, 87 ic, 89 ix, 17 others.Comment
-
Good thing I have dozens of photos chronicling he alternator rebuild :-)
I used KING for rod and main bearings on this engine, their PMAX bearing line. The thrust bearing is 360 degrees, not just a half shell. Honestly I think all commercially available bearings are full 360 now, not 180 like they left the factory. The caps and block are machined to allow this, for whatever reason BMW elected to not use maximum thrust surface.
Tenured Automotive Service Professional - Avid BMW Enthusiast
Vapor Honing & E30 ABS Pump Refurbishment Service
https://mtechniqueabs.com/Comment
-
Nice job on everything. I just got a vapor setup at my place last week, question myself why did I wait so long to get one.
Half shell thrust is actually common, not just BMW. Even the v10 in my Excursion only has a 180° shell, and like the m42, also has a recess for it, so when replacing the bearings in my truck, I bought a second set of bearings just to make the thrust 360° - and that engine is meant for high stress towing!
Good move on the oil pressure relief. GM's LS motors have the same issue, and I do exactly the same when they are apart.Comment
-
Did Scroggins do your machining?Comment
-
Tenured Automotive Service Professional - Avid BMW Enthusiast
Vapor Honing & E30 ABS Pump Refurbishment Service
https://mtechniqueabs.com/Comment


Comment