Announcement

Collapse
No announcement yet.

Panici's '87 325is E30 - Boosted In Bronze

Collapse
X
 
  • Filter
  • Time
  • Show
Clear All
new posts

    Originally posted by Northern View Post
    I think the real reason I stopped was because I had to buy/ship it and as soon as I opened the can, it seemed to harden within a few weeks.
    Plastic cling wrap under the can lid, hammer the lid on. Then cling wrap over the can lid. Put the whole can in an airtight ziplock bag.
    With that method only the very surface of the can hardens up, and I'm able to reuse it multiple times (3-5?) until the can is empty.

    ---------------

    Made some good progress this weekend, there is light at the end of the tunnel!

    Filled the diff with Royal Purple 75w140, and used a new crush washer on the fill plug.
    Re-flared the hardline and replaced the stripped brake fitting I cut off.

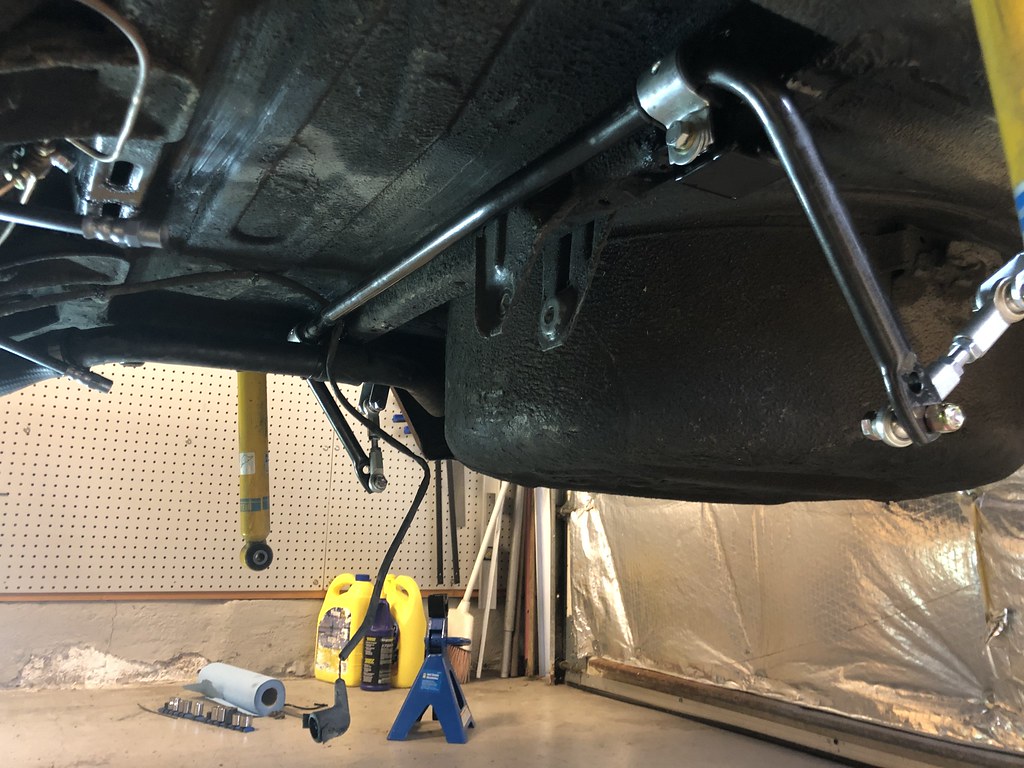
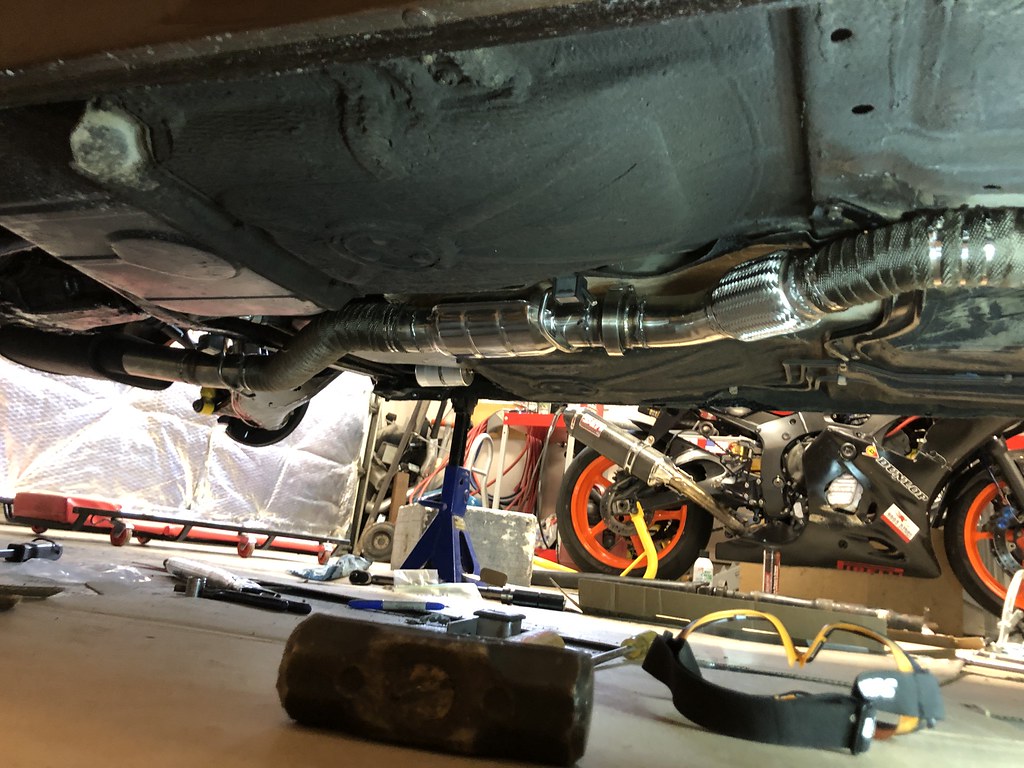
    Rear subframe is reassembled and ready to go into the car!

    Brake pads installed in 2014 still have plenty of meat on them. My driving style is easy on brakes as I rev-match downshift every time i'm slowing down.

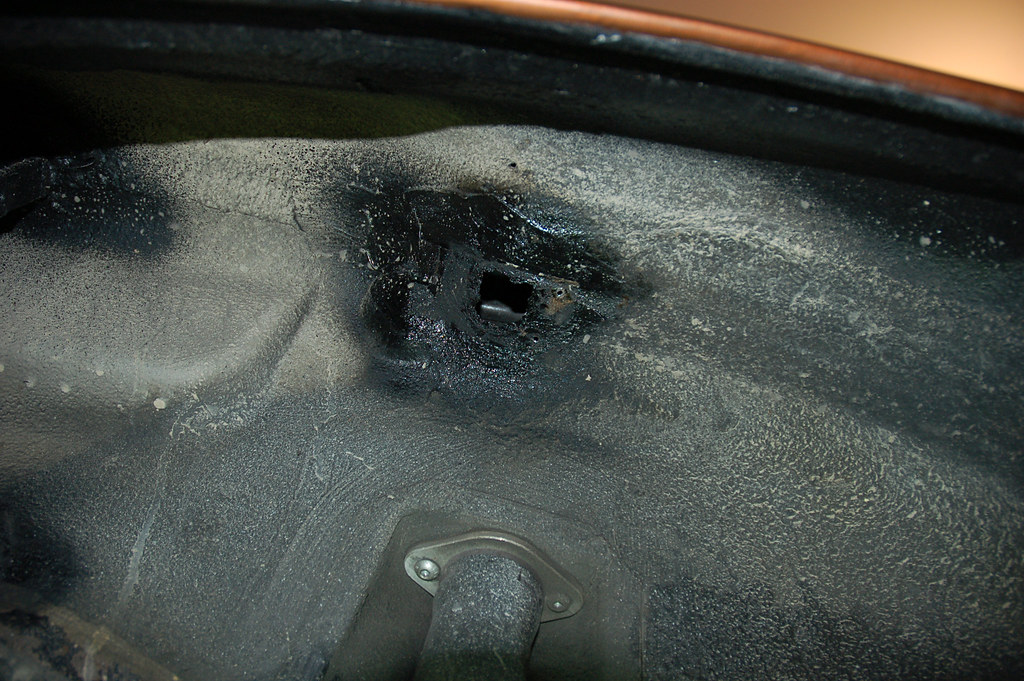
    Also fixed a rust hole in my passenger side rear wheel tub (where the plastic fuel overflow tank was mounted). Other side passed through into the trunk.
    It's in epoxy primer now, will get seam sealer, paint, and undercoating as time allows.

    Woke up at 2am with a painful right eye. Managed to go back to sleep but ended up going to the ER at 5am. Turns out there was a tiny (smaller then a grain of sand) piece of something in my eye.
    Doctor got it out but said the eye is all scratched up. Said it should heal up fine over time though.

    Usually when you get stuff in your eye from grinding etc you can feel it in there and flush out accordingly. This was a new one for me where hours later it starts hurting.
    I'm going to look into some goggles that aren't annoying to wear (don't fog up etc) because obviously safety glasses and a face shield isn't enough sometimes.


    Tried to use an OLD Nikon D50 DSLR for these shots; Pretty sure my iPhone 8 looks better.
    Think the autofocus is damaged on the D50, as I had to sharpen these in photoshop.


    Last edited by Panici; 02-13-2023, 06:10 AM.

    Comment


      That sucks about your eye man, weird that you couldn't feel it until later. Normally you get something stuck in your eye and agonize over it until you can flush it out somehow. Nice to see the subframe all back together ready to provide years of service. So you rerouted the brake line T-fitting near the diff hanger? Was that so that the soft lines don't land right above the subframe for easier future replacement?


      --Roundie Revival 2.0 - 1973 BMW 2002 Build Thread--
      --Golden Boy E30 Build Thread-- (sold)

      Comment


        Originally posted by CubbyChowder View Post
        That sucks about your eye man, weird that you couldn't feel it until later. Normally you get something stuck in your eye and agonize over it until you can flush it out somehow. Nice to see the subframe all back together ready to provide years of service. So you rerouted the brake line T-fitting near the diff hanger? Was that so that the soft lines don't land right above the subframe for easier future replacement?
        Yeah it was strange, I've never had it delayed like that either. Flushed it under the tap and it didn't come out. I went to the eye doctor yesterday and he said it all looks fine, no damage. I could read all the little letters too so that's good.

        Is that not the original location for the T-fitting?
        I did those lines in 2016 when I first had the subframe out. Copied the hardlines as were already installed on the car.

        Post 136 & Post 138 have pictures:
        https://www.r3vlimited.com/board/for...10#post6668687

        Comment


          Oh it's totally possible, I've just never seen it like that. All the E30's I've taken apart have it hidden right above the subframe. So it's super tricky to swap the brake softlines out without removing the subframe.


          --Roundie Revival 2.0 - 1973 BMW 2002 Build Thread--
          --Golden Boy E30 Build Thread-- (sold)

          Comment


            Originally posted by CubbyChowder View Post
            Oh it's totally possible, I've just never seen it like that. All the E30's I've taken apart have it hidden right above the subframe. So it's super tricky to swap the brake softlines out without removing the subframe.
            Now that you mention it, I looked at some pictures on google and the setup doesn't look OEM.

            My car is hard piped from the (relocated) T-piece to the rear subframe.
            Then there are soft lines that go from the rear subframe to the trailing arms.

            I always did think that the washers welded onto the subframe to hold the soft lines looked unoriginal.

            This setup doesn't look like a good idea as any movement between the subframe and chassis will stress those hardlines.
            Not sure when or why it was changed, and I just copied the hardlines with copper lines when I refreshed things in 2016.

            Assumingly the previous owner didn't have problems with this, although the car is driven significantly harder now then when it was an Automatic M20.
            I got away with it plumbed like this using the factory soft bushings with a lot more subframe movement, but it had to be flexing those copper hard lines when it wheel hopped.

            -------

            From what I gather, the car should have soft lines from the chassis directly to each trailing arm?
            Part number 34321159878

            I'll take a good look at things before/when I install the subframe and will re-plumb for piece of mind. Might as well put in some new chassis-to-trailing arm soft lines since you said they're hard to replace with the subframe in place.


            Last edited by Panici; 02-18-2023, 05:14 PM.

            Comment


              Just for reference - here's a pic I found from one of my previous E30 builds, when I had the subframe out and replaced the rubber soft lines with braided steel while I had it out, so you can see how it's routed from factory (this is how every E30 I've had apart looks). You might even still have the factory tabs for the soft lines there.


              It's possible your current configuration will work just fine, but yeah I agree any movement of the subframe seems like it would transfer into the copper hardlines that route into the soft lines on the trailing arms.


              --Roundie Revival 2.0 - 1973 BMW 2002 Build Thread--
              --Golden Boy E30 Build Thread-- (sold)

              Comment


                Originally posted by CubbyChowder View Post
                Just for reference - here's a pic I found from one of my previous E30 builds, when I had the subframe out and replaced the rubber soft lines with braided steel while I had it out, so you can see how it's routed from factory (this is how every E30 I've had apart looks). You might even still have the factory tabs for the soft lines there.
                Saturday Feb 18th
                Thanks for that pic, I printed it out and used for reference!
                New lines aren't perfect, but they're a big improvement over the previous routing. I've ordered a new set of soft lines to connect the chassis hardlines direct to the trailing arms.

                Today I also boxed in the rear swaybar mounting points with weld-in reinforcements from AKG Motorsport.
                That was a bit of an adventure as the full gas tank started pouring everywhere when I removed the filler hose. Ended up catching three drain pans worth of gas and putting it in the E36.


                ----------------------------------------
                Monday Feb 20th (Holiday)


                Started by removing the connector and extra wire for the rear pad wear sensor which was coiled up under the car since 2016.

                Took out the driveshaft and set to making a custom DSSR.
                Used a section of spare steering stabilizer bolt from my jeep as a solid spacer.
                It took three or four attempts of tack welding and testing before I was happy with the position.
                The longer rod puts the knob closer to the dash, and I gave it a slight twist towards the driver's side as well.
                I then made some pins from (starter/trans?) bolts, and installed with double-nuts and red loctite.

                Applied seam sealer inside the trunk and in the rear wheel tub where I repaired that rust previously.
                Painted the swaybar mounts with a couple coats of black fleet/enamel paint.


                Check out the pictures of the shifter in 1st gear. Position and throws are perfect. Feels amazing now that it's all dialed in!


                Last edited by Panici; 02-20-2023, 05:47 PM.

                Comment


                  Rear subframe is finally back in as of Saturday Feb 25th!
                  Was a challenge wrestling it back in there by myself. I was using the custom scissor jack and both floor jacks at one point!

                  Installed some new rear soft lines to match the fresh hardlines and bolted up the ST Suspensions 19mm rear swaybar.
                  Test fit the Garagistic Secondary Diff Mount, and painted the brackets.
                  Painted the rear wheel tub repair and new diff mount holes into the trunk.

                  Still have to button up some things before I can call the rear end complete.
                  Next up will be the exhaust modifications. I have a metal band saw blade on order, going to attempt gearing down my wood band saw to work with metal. Failing that, I bought some fancy Diablo sawzall blades as a backup.


                  In other news, I finally picked up a dedicated trackbike today! Going to put my '05 R6 back to street mode permanently and use this race-prepped '03 R6 as a track rat.
                  Will be some wrenching coming up in my R6 build thread (http://r6.panici.ca) if you're interested, but not before the E30 is back together!


                  Comment


                    I like reading on your progress and pics. 👍
                    Projects Hartge,Alpina & AC Schnitzer Builds.http://www.r3vlimited.com/board/showthread.php?t=280601
                    http://www.r3vlimited.com/board/showthread.php?t=227993
                    http://www.r3vlimited.com/board/showthread.php?t=289362

                    DSC04926 by Raul Salinas, on FlickrDSC03413 by Raul Salinas, on Flickr

                    Comment


                      interior is gorgyus

                      Comment


                        Why the bolts instead of the pin and clips? I had to shorten my DSSR too for the Wagon, hard to get it perfectly straight. I TIG welded mine, butt joint since I didn't have anything to sleeve it with, hope it doesn't break

                        IG @turbovarg
                        '91 318is, M20 turbo
                        [CoTM: 4-18]
                        '94 525iT slicktop, M50B30 + S362SX-E, 600WHP DD or bust
                        - updated 3-17

                        Comment


                          Originally posted by e30m3s54turbo View Post
                          I like reading on your progress and pics. 👍
                          Originally posted by s-thetikz View Post
                          interior is gorgeous
                          Thanks guys! It's starting to come together for sure!

                          Originally posted by varg View Post
                          Why the bolts instead of the pin and clips? I had to shorten my DSSR too for the Wagon, hard to get it perfectly straight. I TIG welded mine, butt joint since I didn't have anything to sleeve it with, hope it doesn't break
                          Bolts helped to snug up the assembly, there was some slop in the pin and clips that came with the original DSSR.

                          In the past I've butt welded a stock selector rod to add a twist (for the G260+M52 combo). Also have butt welded this DSSR originally to take out the twist (for the ZF320+M52). Both held up fine with just a MIG for me, so you should be fine with the TIG.

                          I had to add length to this DSSR which is why I sleeved.
                          Last edited by Panici; 03-01-2023, 04:58 AM.

                          Comment


                            Awesome progress! Also, congrats on the new track bike


                            --Roundie Revival 2.0 - 1973 BMW 2002 Build Thread--
                            --Golden Boy E30 Build Thread-- (sold)

                            Comment


                              Originally posted by CubbyChowder View Post
                              Awesome progress! Also, congrats on the new track bike
                              Thank you! It's been a dream of mine to have a track-only R6.

                              Whenever I put the bike back to street-legal mode, I am itching to get to the track by the end of the season. It's quite a chore to switch from track to street and vice versa for every single trackday. Historically this meant I kept it in track mode, and got very rusty between the times I rode.

                              ------------------------------------

                              Went hard on the E30 again this weekend. I put in ~15 hours over two days.


                              Installed the ST Suspensions front swaybar (22mm vs the original 20mm), and the Garagistic Dual Ear Differential Mount.
                              Exhaust fab took the majority of the time. I added in a flex pipe, moved the v-band flanges, added a cat, and an exhaust hanger.
                              Notched the chassis brace to add clearance (it wasn't even installed last summer, so this is better then nothing).

                              Tucked everything up to the chassis as best I could for ground clearance.
                              Think I will add one more hanger during final install (so the rear section is supported from both sides after the flex pipe/v-band.)


                              Here is a before shot for comparison:


                              ------------------------------------


                              Last edited by Panici; 03-06-2023, 04:44 AM.

                              Comment


                                Two months of wrenching every weekend and the E30 is back on the ground!
                                Still more to do before spring but we are getting close! 🙂

                                -----------------------------------

                                Installed an HDT Automotive (Corey Ellis) upgraded driveshaft w/1310 Spicer u-joints.

                                Swapped out the CSB to an E30 unit. Unfortunately the driveshaft will not fit a bearing cover on the front-facing half of the CSB, and I ordered the wrong cover for the rear half.
                                Since it sits above the exhaust heatshield I decided to run it without those cover plates.

                                Also had to grind down both of the u-joint edges for clearance to the rear subframe/chassis.


                                Second round of smashing on the exhaust for floor clearance and wrapped to match.

                                Bled the brakes with some fancy DOT4 synthetic while the wheels were off. Changed the oil with some fresh Rotella T5 15w40.

                                Installed an oldschool set of Morimoto 5000k HIDs in the lowbeams and wired up some halogen highbeam bulbs. Tucked the ballasts into the ends of the radiator support.

                                Installed the colourmatched front bumper trim and iS airdam. Front end is assembled for the first time since paint, and it looks fantasitc! 😄


                                Last edited by Panici; 03-13-2023, 06:08 AM.

                                Comment

                                Working...
                                X